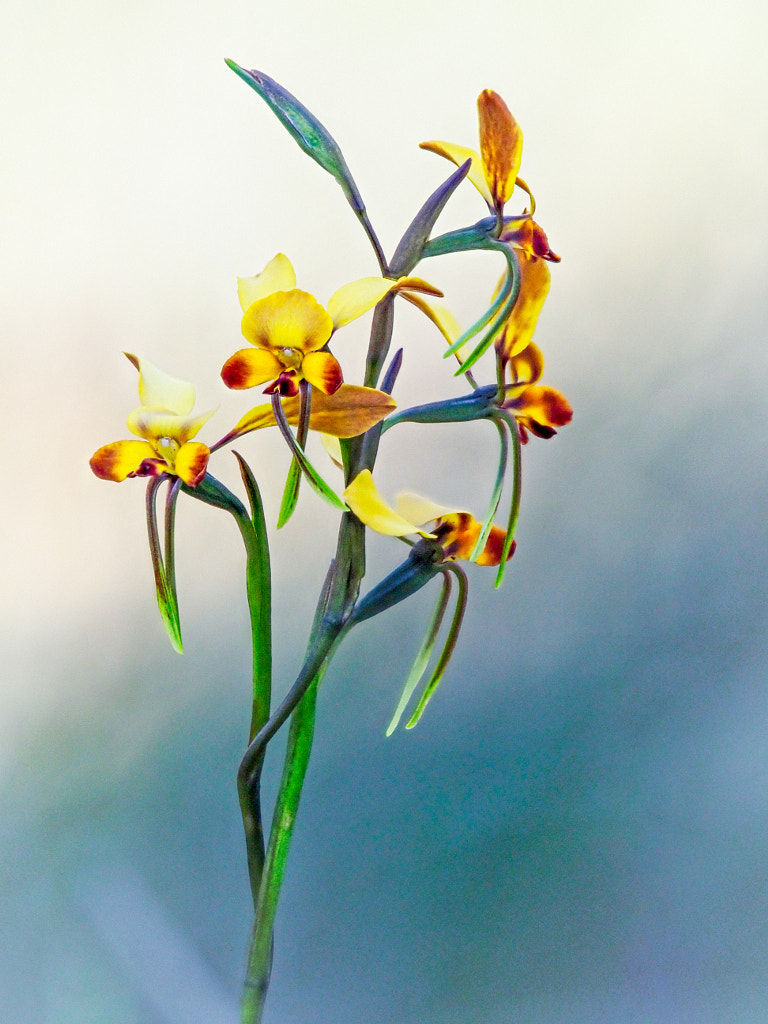
My last wander about the local Wandoo forest didn’t yield anything much. The only plants worth getting the camera out for were some Leopard Orchids. So I did my usual full length portrait using my 40-150mm f2.8 plus MC-14 teleconverter with focus stacking. Then a tighter “head and shoulders” shot with the 60mm f2.8 macro and flash. I finished up with really tight detail shot at close to 1:1 again with the 60mm macro.
Leopard Orchid, Thelymitra benthamiana. A 10 shot focus stack using the Olympus EM1 mk ii, Olympus 40-150mm f28 lens and the the Olympus MC-14 teleconverter. File assembled in Photoshop.
If you look closely at the main flower there is a spider peeping out and the fly on the edge of plant is caught in its web. Leopard Orchid, Thelymitra benthamiana.
In the past I’ve used OM Workspace to do the focus stacks, but after it’s latest update it has become so slow – glaciers move quicker. So I decided to to do the stack using Adobe Lightroom and Photoshop. To say it was much faster would be a massive understatement, but the final result was a lot better as well. For the life of me I can’t work out why camera manufacturers software is so bad. It should be better as they know all the features of the cameras and how to get the best out of them. This isn’t just a whinge directed at OM Systems. Canon’s DPP is absolutely appalling as well. Adobe would’t have such a stranglehold on the market if the camera manufacturers could develop good software.
This week I made the annual pilgrimage to Lake Gwellup reserve to photograph Birinbirin or Rainbow Bee-eaters (Merops ornatus). This is a bit early for me and when I got there I could see that the breeding pairs were still digging their burrows. This meant that both female and males were out and about catching insects, working on their burrows and taking frequent rests on a suitable perch.
A quick bite to eat for breakfast.
Photographically I tried something new. The Olympus EM1x has a feature called “Pro Capture”. On a half press of the shutter the camera buffers frames and when you fully depress the shutter saves them to the memory card. This way in theory you don’t miss a shot. There are two variations of this, a low speed one that allows autofocus with bird tracking and a high speed one that just has single AF on the press of the shutter. To use the low speed pro capture you need to use one of Olympus’ high end ‘Pro’ lenses which I have in shorter focal lengths but not as my birding lens. So I had to make do on this occasion with single AF high speed pro capture. I’ve never bothered with this feature before as I’ve felt that it wouldn’t really suit the conditions I normally work in. But, this time I envisioned taking a shot of a Rainbow Bee-eater taking off from its perch. I could set the camera up on a tripod, focus on the same place on the perch as the birds kept going back to the same spot over and over again. I set the camera to manual and selected a a shutter speed of 1/4000 to freeze the movement and an aperture of f8 to give a bit more depth of field. Then it was a case of just waiting and photographing the birds as they came and went. The down side to this method was that you go through batteries very quickly and the high speed pro capture shoots 60 fps so memory cards are filled up quickly meaning a lot of work at the editing stage. But I was happy with how it went for a first effort.
Coming into land.
Leaving the burrow.
On getting home I fired up Lightroom and looked at the memory cards. I’d taken 1261 photos. Just glancing at them enabled me to winnow them down to 110 photos which I imported into Lightroom. Looking at the imported photos carefully to check critical focus at 100% I was able to select 36. Another look through looking a composition and I further reduced the selected photos down to 21. I then processed the photos and then looked at them carefully. They were then graded on a scale of 1 to 5 stars. Anything higher than 4 stars was selected and that gave me 8 final photos of which 4 are shown here.
William Shakespeare, Act 3, scene 1, Julius Caesar
Mounted archery demonstration. 2023 York Medieval Fayre.
It’s always a bit surreal when the Medieval Fayre is on – things like people in Medieval costume buying drinks in the local supermarket. Even the whole idea of Australians dressing up in Medieval costume and doing re-enactments is a bit of a strange notion when you consider that Australia had no European history prior to the Seventeenth Century. I go most years just for the spectacle, I always like watching the mounted archery demonstration. Amazing skills in hitting a target while at a full gallop. It makes for great photos as well.
Just lately I’ve been on a bit of historical journey – over the last 8 weeks I’ve watched all the Time Team episodes on YouTube. It’s been quite an education and it was a very fun way to find out more about where I’m from. I particularly liked the episodes about the Saxon period just because up to recently very little has been known about that time. Another connection is that I spent part of my childhood in Hastings in East Sussex and growing up there you’re very aware of the fate of the last Saxon King of England – Harold Godwinson – at the Battle of Hastings. So when I walked into the Medieval Fayre I was quite delighted to see the Grey Company putting on a display re-enacting that period.
The Grey Company focuses primarily on the so called “Dark Ages” period of history (600-1100 AD).
A Norman knight waits for the start of the demonstration.
Rushing into the fray with a blood curdling cry.
The clash of swords on shields.
A Saxon shield wall prepares to engage Norman invaders.
A few insults and banging shields with swords gets the blood up.
Engaging the enemy.
A well earned breather.
Photographically it was a case of using my Canon 6d, the EF24-70mm f4 and EF 70-200mm f2.8. Processing was all done in Lightroom and Exposure X7. I felt a black and white treatment would be the most sympathetic.
Teleconverters are an affordable way of getting longer focal lengths, but with the advent of software such as Blow Up 3, Topaz Gigapixel Ai and Adobe Lightroom’s Super resolution do they still have a place in the wildlife photographers kit bag?
TLDR
The Canon Extender EF 2x ii.
A teleconverter is a tube containing a series of lens elements that goes between the camera body and the camera lens. They commonly come in the following strengths; x1.4, x2, and x3. They work by enlarging the centre part of the image. So for a full frame camera (36 x 24mm) a 1.4 teleconverter magnifies a rectangle of 25 x 17mm and a x2 teleconverter magnifies a rectangle of 18 x 12mm. So while the look like they’re increasing your focal length they are really just cropping your image and magnifying it. In photography the old adage “There’s No Such Thing As A Free Lunch” comes into play a lot, and no more so than here. The penalty for doing this is light loss. A x2 teleconverter looses 2 stops of light and a 1.4 teleconverter looses 1 stop. This is usually expressed in the following way:-
A 300mm f4 lens with a x1.4 teleconverter becomes a 420mm f5.6
A 300mm f4 lens with a x2 teleconverter becomes a 600mm f8
This means that to keep your shutter speed high enough to stop the motion of animals you have to use a higher ISO.
A 300mm f4 lens will make it difficult to photograph small shy animals, while adding a x2 teleconverter will make it an attractive proposition so you can see why they are so popular. Indeed if you take into consideration the cost of long lenses then you’ll see how they can look a screaming bargain. Lets look at the current range of Canon EF lenses for an example:-
The Canon EF 600mm f4 lens costs a whopping $21,000 AUD
The Canon EF 300mm f4 costs $2000 AUD
The Canon EF x2 extender mark iii costs $750 AUD
So for for $2750 you can get a combination that gives you a focal length600mm and saves you $18,250 AUD sounds pretty good, but are you getting the same optical performance? The short answer is no. The in depth answer is somewhat more complicated. When photographing birds in flight (BIF) a shutter speed of 1/2000 sec is the minimum I’d consider. So if were shooting with the 600mm f4 shooting wide open at f4 and an ISO of 1600 for the 300mm f4 plus x2 teleconverter I’d have a wide open aperture of f8 which would mean I’d have to use ISO 6400 which would impact on my image quality by having more noise and less dynamic range.
Remember that I said previously that the teleconverter magnifies the image, well in doing this it also magnifies any optical faults in the lens. Chromatic aberration is magnified – the coloured fringing on high contrast edges looks broader and more noticeable. If your lens isn’t tack sharp it will make it look softer. The more magnification a teleconverter has the more impact it has on the image quality. The perceived wisdom is that if you’re going to use one then the x1.4 varieties have the least impact on image quality and just don’t bother with the x3 ones.
Also remember what I said about light loss – it impacts the autofocus performance. In most cases it will just slow the subject acquisition, but in some cases (dependent on your camera and lens) it mean your camera won’t focus at all. When you put a x2 teleconverter on a lens with an aperture of f4 it becomes an f8 and some DSLRs won’t autofocus with an aperture of f8 and slower. So before you commit to this check your camera manufacturer’s website.
The Canon Extender EF 2x ii is a matched teleconverter and is designed to only fit certain Canon L lenses. Note how the lens elements stand proud of the lens mount.
In the case of teleconverters you really get what you pay for. With the camera manufacturers when they design a teleconverter they do so with only certain lenses in mind and they are designed to become part of the host lenses optical formula. You can see this when you look at the teleconverter as the optics protrude from the body and nestle into a space left for it at the back of the lens. The design goal is that the teleconverter should not cause any optical degradation. They are often described as “matched teleconverters” or “matched multipliers” and they won’t fit any other lens from that manufacturer. Cheap teleconverters are designed to work with any lens with that mount. They don’t have as many lens elements or the lens coatings of the more expensive camera marque models.
Model
Lens construction
Weather sealing
Compatability
Price (Australian Dollars)
Canon EF x2 extended iii
9 elements in 5 groups
Yes
All prime L lenses above 135mm, EF 70-200mm f2.8 L, EF 70-200mm f2.8 IS L, EF 70-200mm f4 L, EF 100-400mm f4.5-5.6 IS L.
$750.00
Viltrox C-AF 2x ii AF 2.0 teleconverter for Canon EF
7 elements in 4 groups
No
All EF mount lenses except EF-S
$154.00
Fotodiox Pro Autofocus 2x teleconverter for Canon EF
4 elements in 3 groups
No
All EF mount lenses except EF-S
$100.00
Luckily Canon and Nikon have been making teleconverters for years so there are plenty on the secondhand market. Canon, for example, have since 1987 produced three versions of the x2 teleconverter. Their x1.4 teleconverters have been in production since 1988 and there are also three models. The first versions were pretty lacklustre but the mark ii was considerably better and can be had for around $300 AUD. The mark iii has even better performance and can be had for around $500 AUD. If you have a Sigma or Tamron lens they have also produced matched converters for some of their lenses. My Sigma 150-600mm f5-6.3 DG OS Contemporary is compatible with the Sigma Teleconverter TC-1401, which is weather sealed and will allow autofocus up to f8. So check the website of your lens’ manufacturer to see what is compatible.
I know the mist isn’t helping image quality here and nor is shooting 400ISO film, but the x2 teleconverter had a big impact on image quality. Dal Lake, Kashmir, India.
Working elephant heading off to work in the early morning mist in Chitwan National Park, Nepal.
My own history with teleconverters goes back to the late 1980s. I was heading off to back pack around India and Nepal for a year and wanted to take only two lens – a 35-105mm and a 75-210mm. Virtually couple of days before we were due to head off I went to my local camera store to pick up the 200 rolls of film I’d ordered and I thought I’d get a x2 teleconverter to give me a bit more reach when in the National Parks. So I bought a Vivitar x2 teleconverter for £25 and set off without knowing what I’d actually bought. When I got back and processed the film I was shocked to see how soft the images taken with it were. It was as if someone had used a belt sander on the front lens element. What I’d done is put a bad teleconverter on a mediocre zoom lens. This was the experience of a lot of people at the time and it was why teleconverters got such a bad reputation. In 2004 I started a project photographing the Western Australian rodeo scene and I decided to get a Canon 100-400mm lens to help with this. At the time they were like hens teeth in Australia and my dealer suggested getting a Canon x2 converter for my Canon EF 70-200mm f2.8 IS L lens. I was very skeptical because of my previous experience, but the sales person said if I wasn’t happy with the results I could bring it back and get a refund. When I looked at the first images taken with it I couldn’t believe how sharp they were. This convinced me when I changed to the Olympus micro four thirds system to get the Olympus x1.4 teleconverter to go with the 40-150mm f2.8 lens. I use that combination a lot to photograph wild flowers and I’m extremely happy with it.
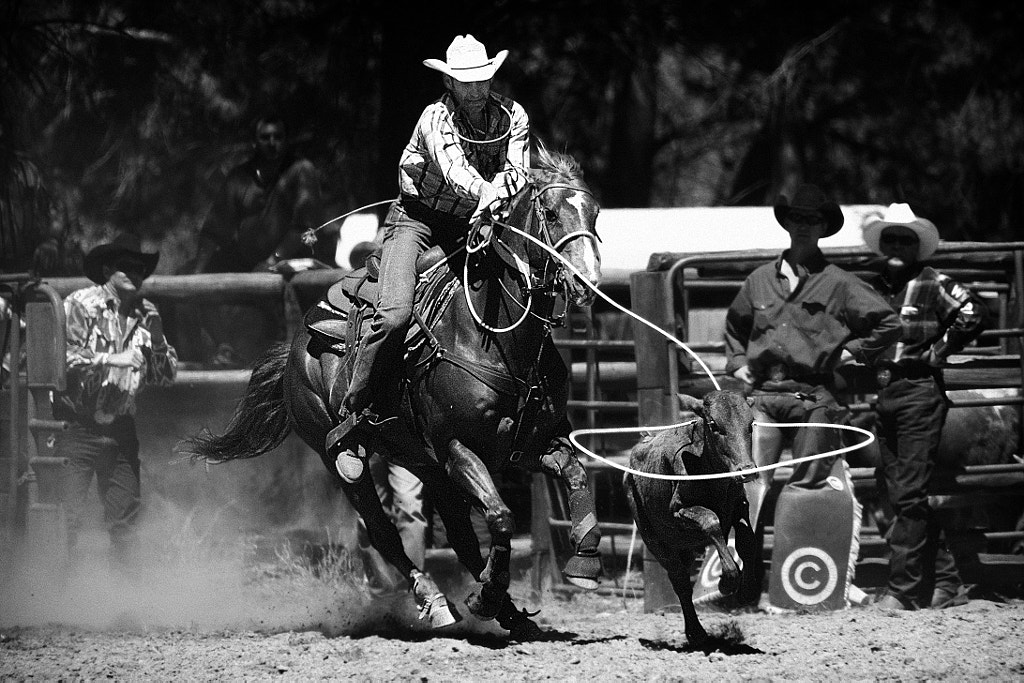
Taken on the Canon 5d with Canon EF 70-200mm f2.8 IS L lens with x 2 teleconverter at 400mm f5.6.Steer roping competition. Boddington Rodeo, Western Australia.
Taken with an Olympus OMD EM 1 mk ii with Olympus m.Zuiko 40-150mm f2.8 and a x 1.4 Olympus teleconverter at 210mm f4. Winter donkey orchid, Diuris brumalis. Woottating, Western Australia.
Since then, however, a new alternative has come up and that is using AI powered software to enlarge images. Exposure Software’s Blow Up was one of the first, Topaz Labs has Gigapixel AI which are plugins for Photoshop and Lightroom. Adobe now has Super Resolution as part of its Enhance function in Lightroom. GigaPixel is $99 USD, Blow Up is $125 AUD and Super Resolution comes with your Lightroom subscription. So do these make teleconverters obsolete? If you want the best image quality should you even use any of these options?
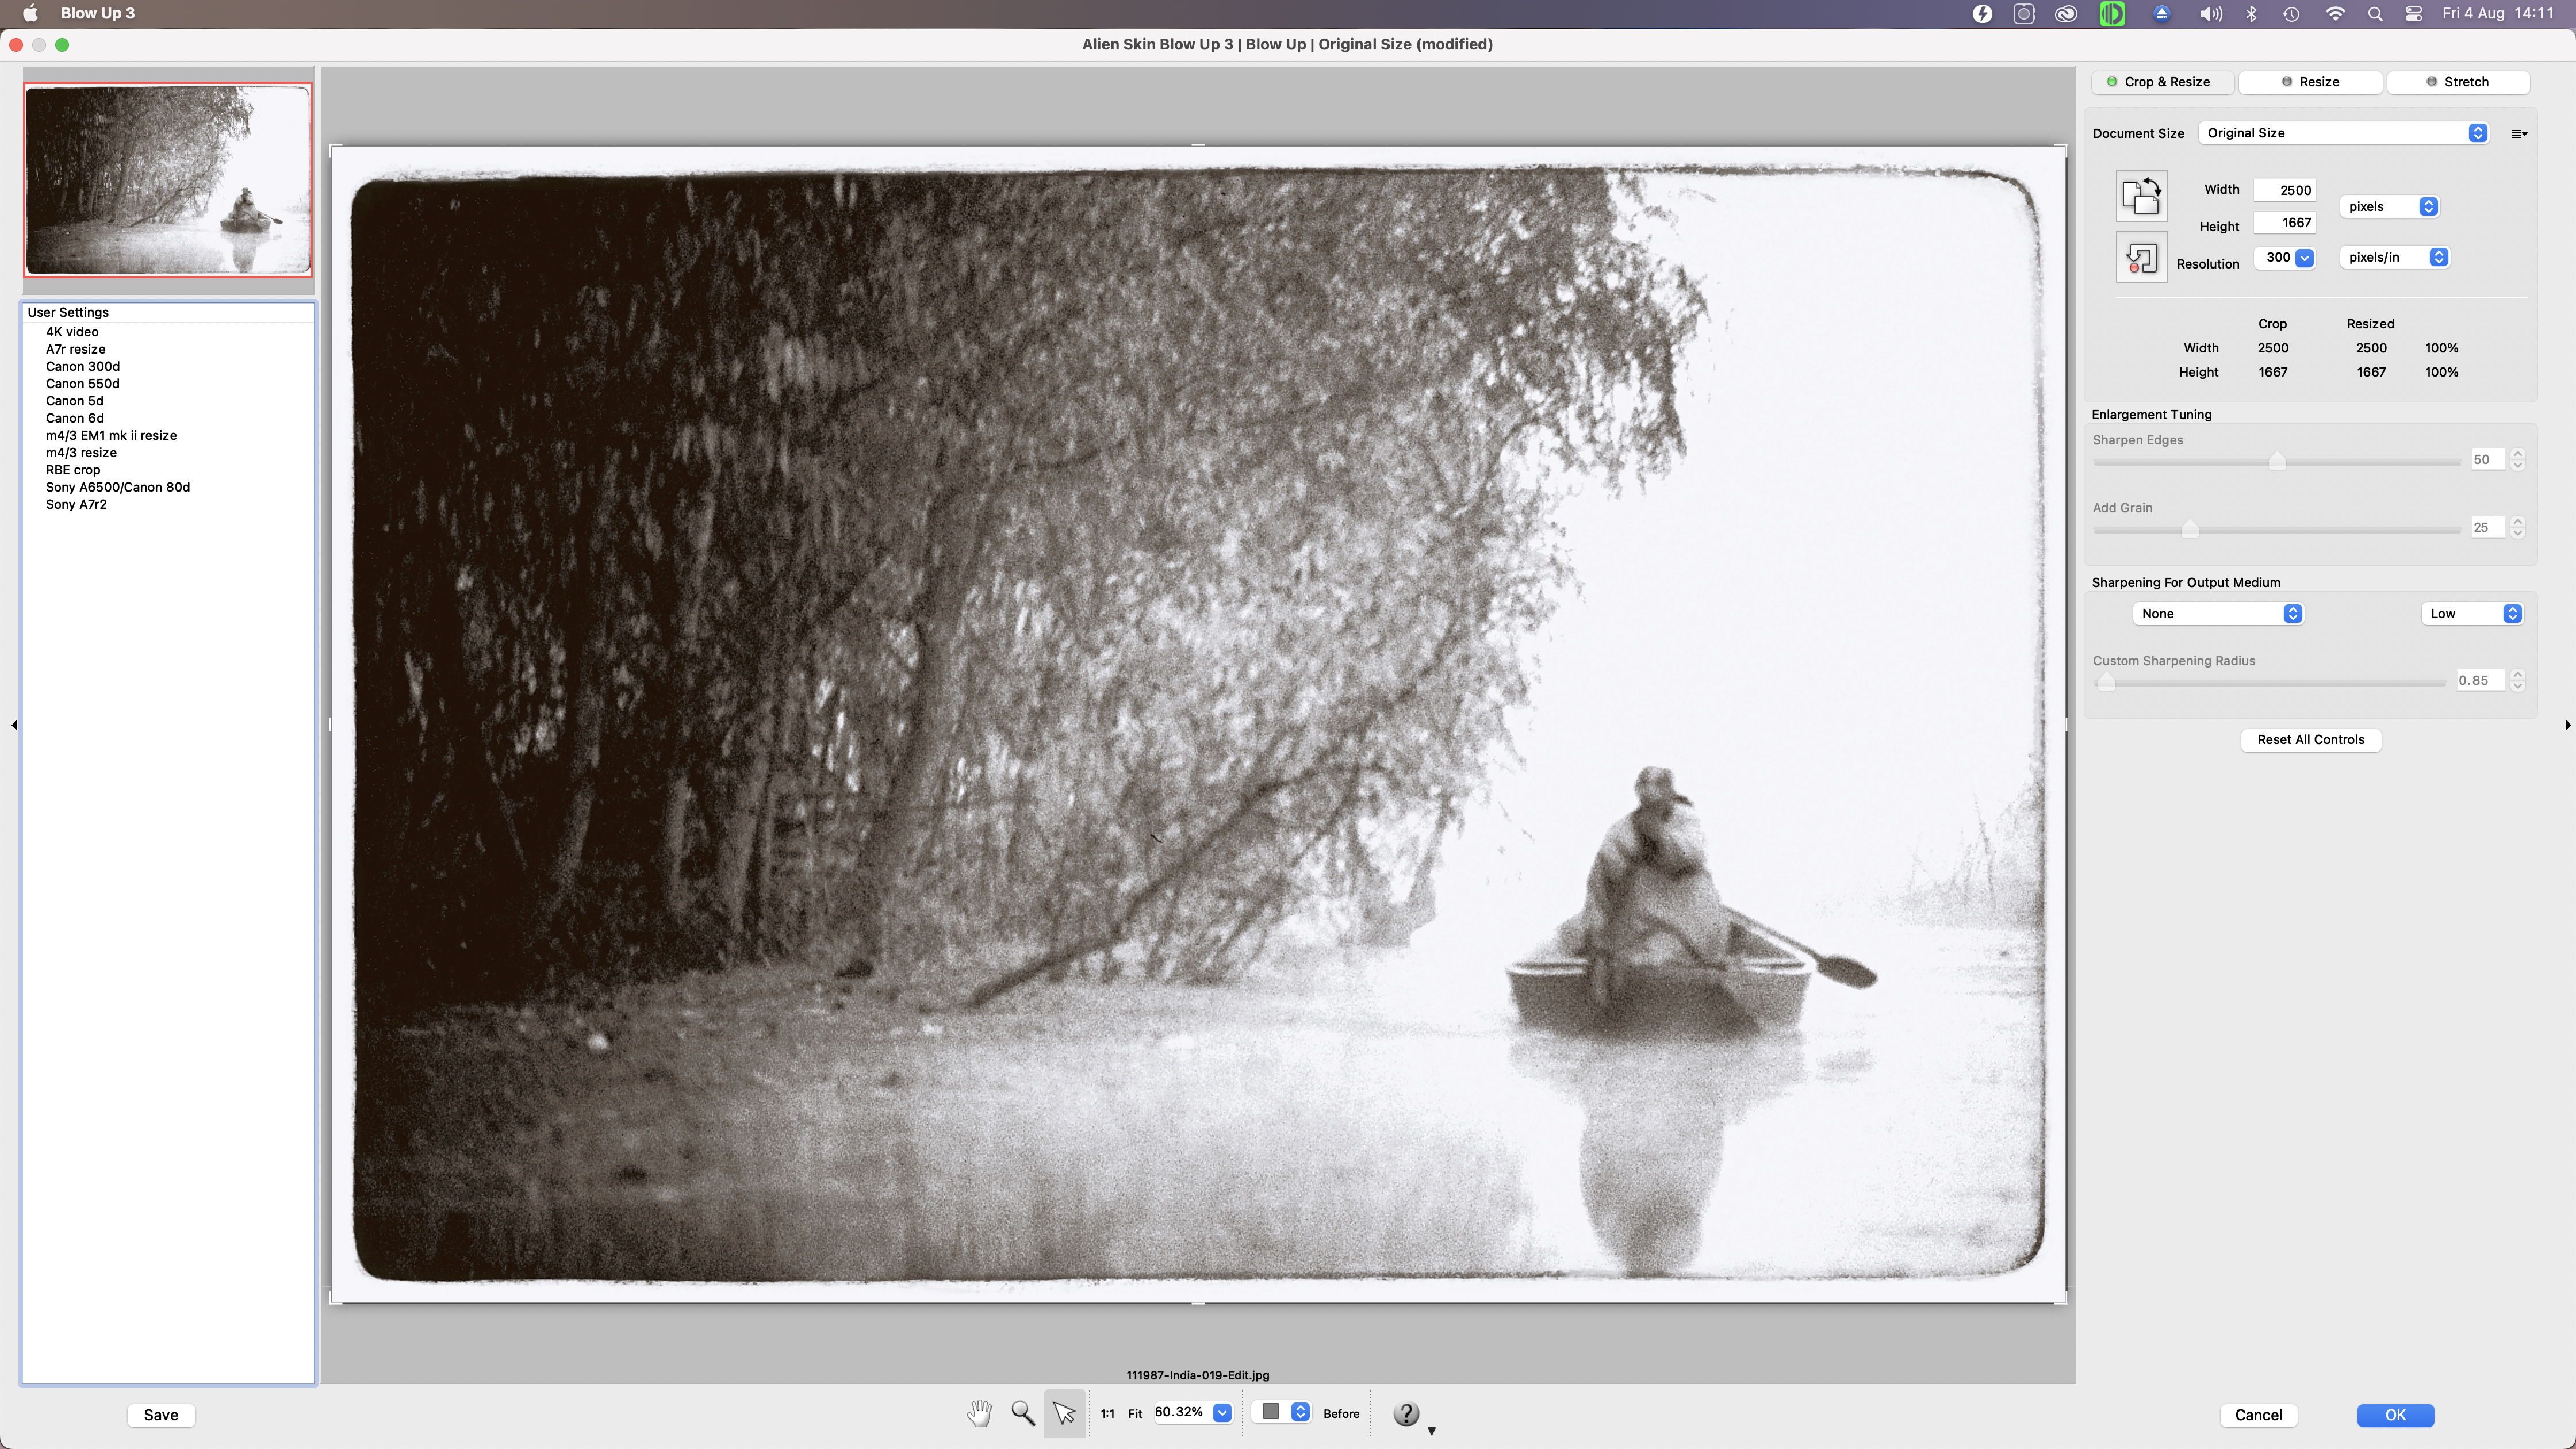
Blow Up 3 is one of several apps that can enlarge, and selectively crop and enlarge images with apparently no loss in image quality.
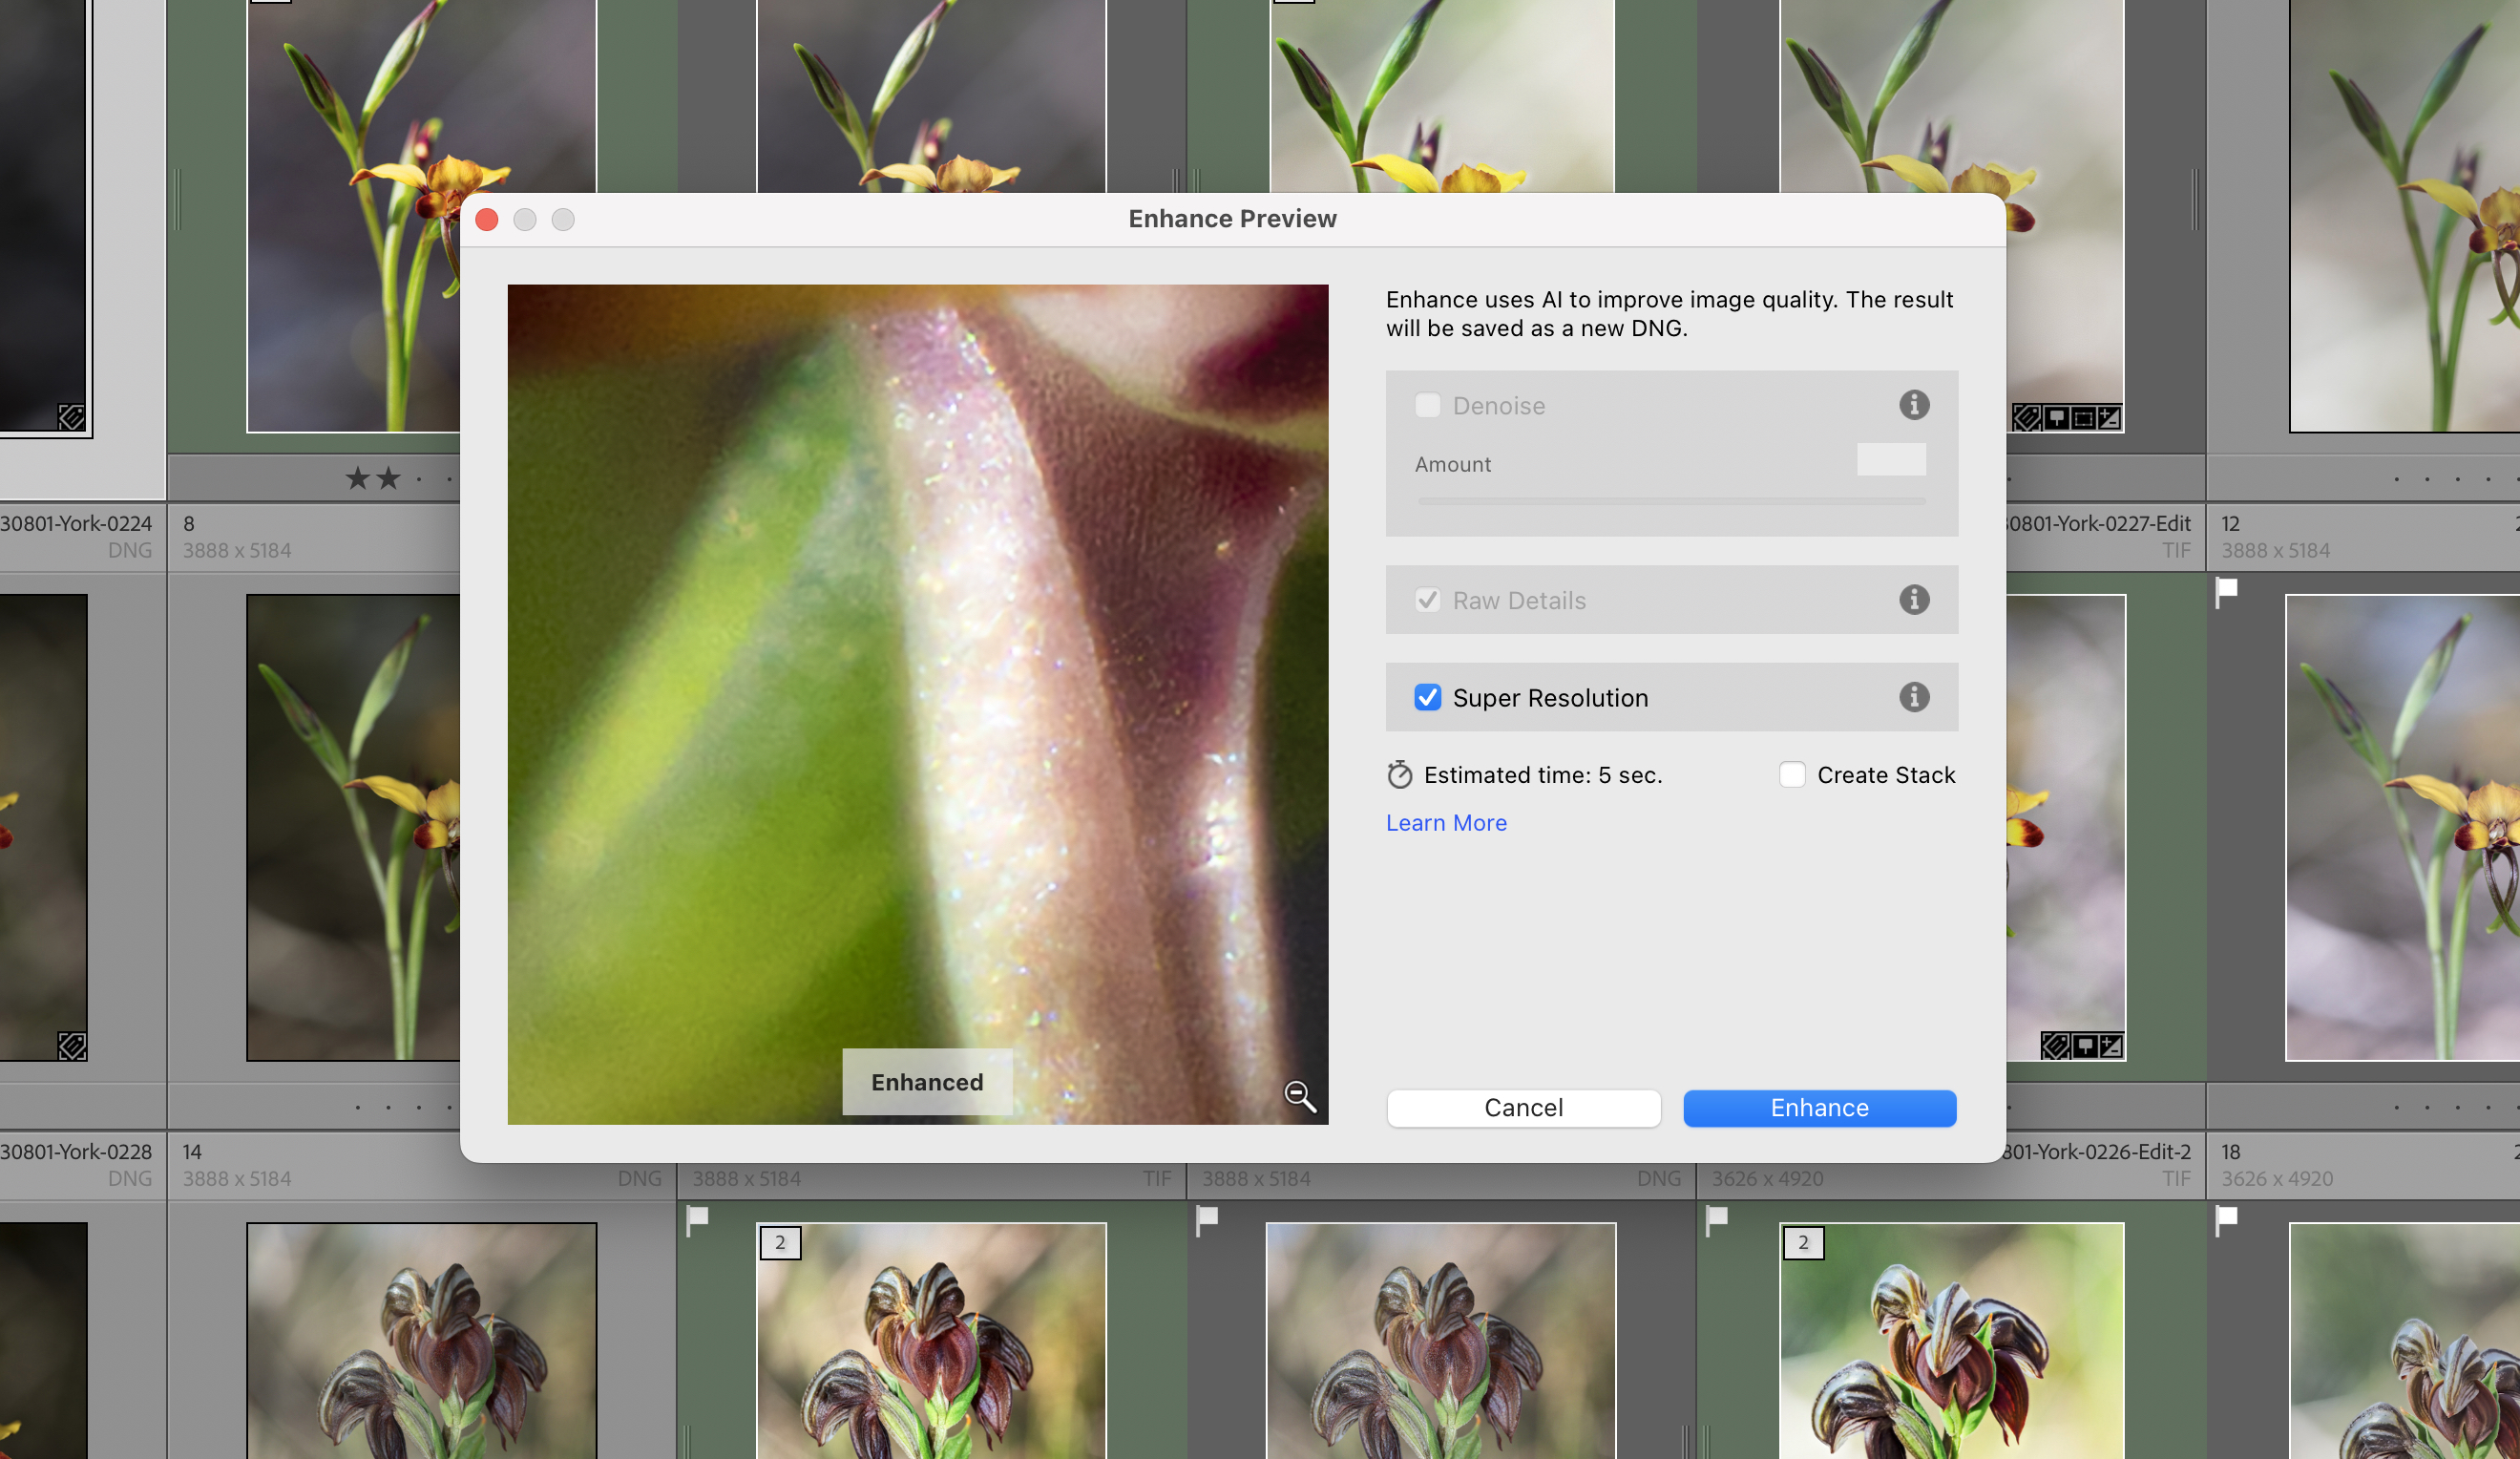
Lightroom Super Resolution is a part of its Enhance function in Lightroom.
The test will take a Canon EF 70-200mm f2.8 IS L lens and test it with the canon EF x2 extender ii and compare it to images taken without the converter, and then without the converter but enlarged using Blow UP and LightRoom Super Resolution. Then I’ll test the Olympus 40-150mm f2.8 Pro lens in the same way but using the Olympus m.Zuiko Digital 1.4 x Teleconverter MC-14.
Canon EF 70-200mm f2.8 IS L and Canon EF x2 Extender ii
The Canon Extender EF 2x ii shown next to the Canon EF 70-200mm f2.8 IS L lens. The extendinded lens leement of the converter are designed to be placed inside the body of the lens.
Canon EF 70-200mm f2.8 IS L with and without a teleconverter comparison using a lens chart wide open.
Canon EF 70-200mm f2.8 IS L with and without a teleconverter comparison using a lens chart f5.6.
First off we’ll look at the lens sharpness chart. Wide open with out the extender the centre of the chart is a little soft and is lacking contrast. When adding the teleconverter the results are a little softer. Stopping the lens down to f4 and f8 (with the extender) the results are better with a bit more sharpness and contrast. The shot without the teleconverter is still sharper than the one with. Finally two stops down from wide open is generally considered to be where optimum performance is found and here we see that f11 the 70-200 and teleconverter have attained their best result, but it is still softer and has less contrast than the 70-200mm on its own.
Comparing images taken with the Canon 70-200mm f2.8 IS L using a teleconverter, Blow Up 3 and Lightroom Super Resolution.
Lens charts don’t really tell the whole story so we’ll look at the results we got with Gazza the Galah. The camera was set to aperture priority at 100 ISO and the aperture was one stop down from wide open (f4 and f8 respectively). The photos were all taken from the same position with the camera on a tripod, and the results are interesting.
Obviously in the shot with the teleconverter Gaza is larger, and that is what we wanted to see.
The bokeh in the shot with the teleconverter looks smoother and more pleasing. All we are seeing is the magnification of the out of focus areas and it makes appear smoother.
The shot without the teleconverter has more fine detail.
The shutter speed without the teleconverter was 1/200 sec and with 1/50 sec so a light loss of exactly 2 stops.
Just as an afterthought I decided to see how this all stacked up against the Sigma 150-600 at 400mm. The Sigma delivers a much better performance that the Canon 70-200mm with teleconverter so no surprise there.
Comparing the image quality from the Canon 70-200mm f2.8 IS L lens with x2 teleconverter against the Sigma 150-600mm Contemporary set at 400mm.
Next I took the shots taken with the 70-200mm without the teleconverter and put them through Blow Up and Super Resolution and in both cases the results from the lens with the teleconverter were better.
Olympus m.Zuiko 40-150mm f2.8 with Olympus 1.4 Teleconverter MC-14
The Olympus MC-14 teleconverter.
Like the Canon Extender x2 the Olympus MC14 is designed to be used by a few of the Olympus Pro lenses, and they have room for that protruding lens assembly of the teleconverter to fit inside the lens body.
I basically ran the same tests as above and found that the Olympus combination was very consistent in that the teleconverter had only a marginal impact on image quality.When compared to a shot taken with Panasonic Leica 100-400mm set to 210mm the 100-400 resolves more fine detail.
Olympus 40-150mm f2.8 Pro with and without a teleconverter comparison using a lens chart with the lens wide open.
Olympus 40-150mm f2.8 Pro with and without a teleconverter comparison using a lens chart with the lens at f5.6.
Comparing the image quality of the Olympus 40-150mm f2.8 pro lens with the results from the Olympus x 1.4 teleconverter, Blow Up2 and Lightroom Super Resolution.
Comparing the image quality from the Olympus 40-150mm f2.8 pro with 1.4 x teleconverter with the Panasonic Leica 100-400mm lens at 210mm.
Looking at the results when run through Blow Up and Super Resolution we see that the results from the teleconverter were a tiny bit better with more micro contrast. The image produced by Lightroom’s Super Resolution look over sharpened withmoirés evident and artefacts in the shadow areas. The shot for the lens and teleconverter looks more pleasing.
Conclusion
The software solution was very disappointing and I would not go out of my way to buy Blow Up or Topaz Labs Gigapixel Ai. The Lightroom Super Resolution comes as part of Lightroom and I would only use it in dire situations.
The results from the teleconverters showed that they are worth having, but they won’t give the best image quality. This really depends upon three things:
The quality of the lens
That you are using a matched teleconverter
The magnification of the teleconverter. 1.4 teleconverters have less impact upon image quality than x2 teleconverters.
The best results were naturally from the lenses without teleconverters.
For the budget conscious photographer who has a good quality lens then it is certainly worth trying a matched teleconverter if you can’t afford a longer lens.
At the Casa del Amyes we’ve gone a bit mad for things Spanish. The Spanglish is flying thick and fast and we’re even thinking of actually going there COVID 19 permitting. What’s brought on all this exuberant celebration of all things Iberian? Well a little while ago I posted about a Spanish inheritance. Well we’ve not inherited anything yet despite it going on for two years now. It’s what you get when your father-in-law played Monopoly in a small Spanish village with real houses and who developed the local aversion to all things to do with property titles, land taxes and capital gains taxes. Throw into the mix a convoluted legal system, dodgy Spanish lawyers weird inter family dynamics and we’ll probably not get our hands on anything for a few decades yet.
Catedral de la Encarnación de Almería.
We’ve been to Spain before. I can’t say it’s my favourite country to visit, but that’s probably due to the fact on my first visit a member of the Spanish Guardia Civil (the ones who wear Micky Mouse ears) was under the misapprehension that I was an English football hooligan and decided to introduce me to his truncheon – repeatedly – when I was really an innocent British InterRail tourist who was having a kip on a bench. I digress. So as I practically go everywhere with a camera I’ve started looking at my Spanish photos. A lot were taken on film (black and white, colour slide, and colour print) and then as technology advanced digitally. Now as the last time we visited was 2004, which was back in the Stone Age as far as digital photography is concerned, a lot has changed especially when it comes to software used to edit photos. So I’ve been re-interpreting those old 6 Mp (which was pretty bloody cutting edge back in 2004) with the latest iterations of Adobe Lightroom, AlienSkin’s Exposure and Topaz DeNoise AI.
Reading in the gardens outside the Charles V Palace – Alhambra, Granada.
The Convento de San Francisco in the gardens of the Alhambra in Granada.
A tourist pauses to study the guidebook in La torre de Comares at the Alhambra. It’s amazing how using up to date applications such as Lightroom can recover highlight and shadow detail.
Tourists and a film crew visit the Court of the Myrtles in the grounds of the Alhambra.
Sitting on the fountain at the Pilar de Carlos V at the Alhambra in Spain.
All the above photos were taken using a Canon EOS 300d which had by today’s standard poor dynamic range and poor high ISO performance. The difference is quite marked. So I’d honestly say it is worth revisiting your picture archive to see the quality you can wring out of those files using modern software.
Todays title is of course from the 1974 hit song Y Viva España, performed in English by Sylvia Vrethammar which was a cover of the Dutch song Eviva España by Belgian singer Samantha (Christiane Bervoets). It became a staple of drunken British tourists on the Costa Del Sol.
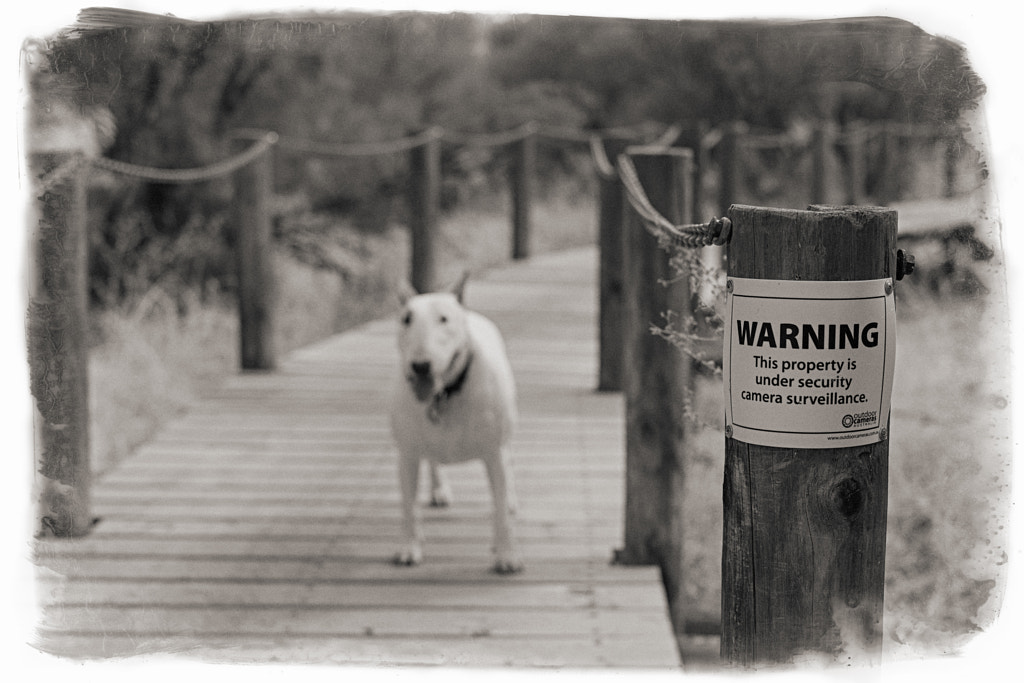
Warning Bull Terrier on guard duty! York, Western Australia. Sony A7r with Sony FE 50mm f/1.8 lens. Exposure: 1/800, f4 at ISO 200.
I’ve had a tremendous change in my workflow of late. Initially when I trained in photography at college we taught to do all our processing in Adobe Photoshop. I think version 4 was the then current one. By the time I started lecturing in photography at the same college things had moved on considerably. Photoshop was no longer the main emphasis, although still taught. The new kid on the block was Lightroom and that is what we focused on. It provided important digital asset management (DAM) as well as allowed a certain amount of non destructive photo processing. Over time its features became more powerful and I rarely opened up Photoshop. Of late I have become dissatisfied with Adobe. One of the main things that started this malaise was Adobe shift away from perpetual licences to “rent ware” or monthly subscriptions. Initially I went along with this, but it seemed that there were a lot of bugs in the software and I spent a lot of time on the phone to Adobe trying to fix niggling little problems. It was almost as if now because they had a cannula into our wallets there was no incentive to do any quality control on their products. So I stopped my subscription and went back to using Lightroom 6 and Photoshop CS5 vowing to find an alternative to Adobe products. Well I’ve now settled on one!!! It is Alienskin Exposure. I’ve just upgraded to version 4 and am really happy with it. The above photo was processed using Exposure and I’m now using it every day. In fact the photos I’ve submitted for my latest book were all processed with it as well. If you’re in the market for new photo processing software what not give it a burl.
This post came about as a response to post on a Google+ group I belong to. The post contained a link to an article at the website Olympus Passion by Chris Corradino (whom I don’t know) called “Full Frame vs Micro 4-3 Revisited with Pro Olympus Lens” where a canon EOS 6d with 17-40mm f4 L lens was compared with an Olympus OMD EM10 with 12-40mm f2.8 Pro lens. Nothing wrong with that, it serves as a potentially useful comparison of two popular cameras and lenses. In the article he posts two pictures of the same scene taken around a year apart, one used a polarizing filter one didn’t and the Canon 17-40L is not the best lens in the line up, and comparing a wide-angle zoom to a standard zoom doesn’t really tell anything. Also Olympus uses in camera software correction of its lenses to the RAW files whereas the Canon doesn’t and one has to manually apply correction when processing in Lightroom or ACR. So I thought about it and decided to do my own test. Now before I start I’d like to say that testing zoom lenses is fraught with difficulty and the reason why is very ably demonstrated by Roger Cicala’s excellent article “Painting Zoom Lenses with a Broad Brush – Roger’s Law of Wide Zoom Relativity” which is enough to make any sane person throw up their hands in horror at the enormity of it all.
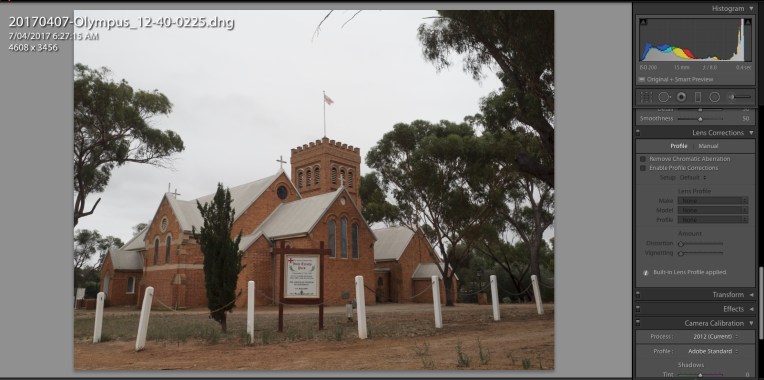
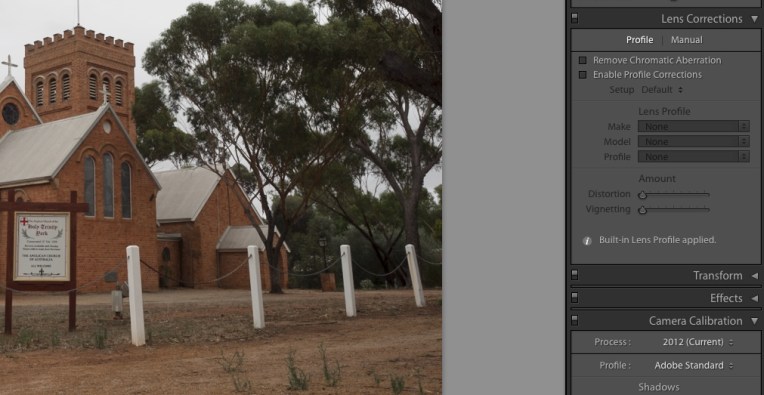
The file from the EM1 with the Olympus 12-40mm f2.8 opened in Lightroom.
If we look at the lens correction box it shows that a built in lens profile has been applied.
I’m not really the scientific type, but I know that to make any form of comparison you have to compare like with like and remove all variables. The cameras and lenses tested were as follows:
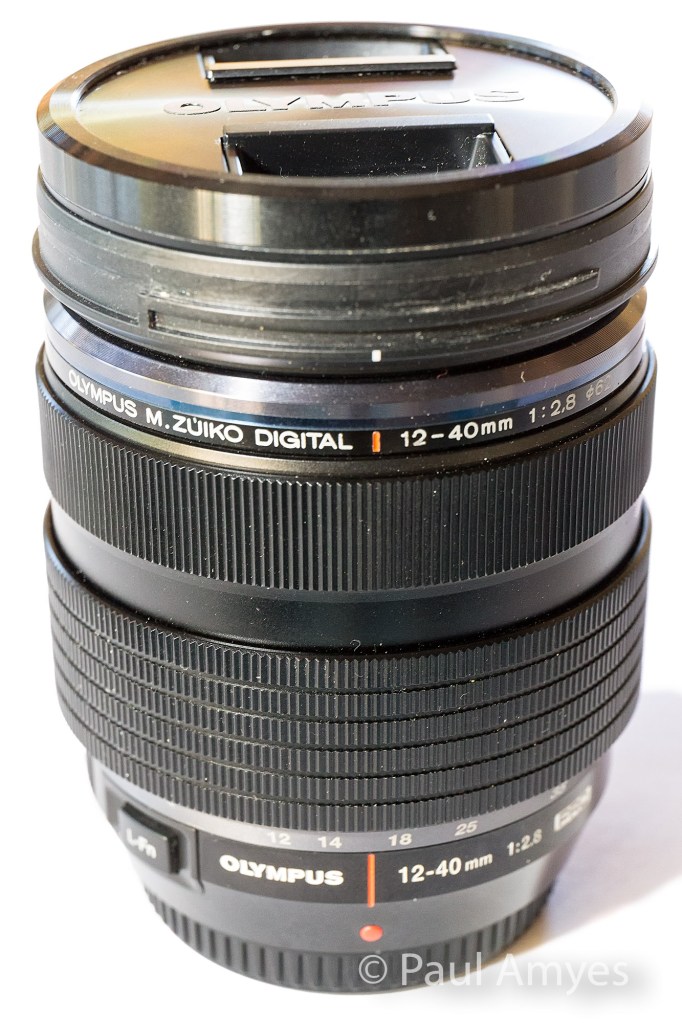
Olympus OMD EM1 mki with Olympus m.Zuiko 12-40mm f2.8 pro
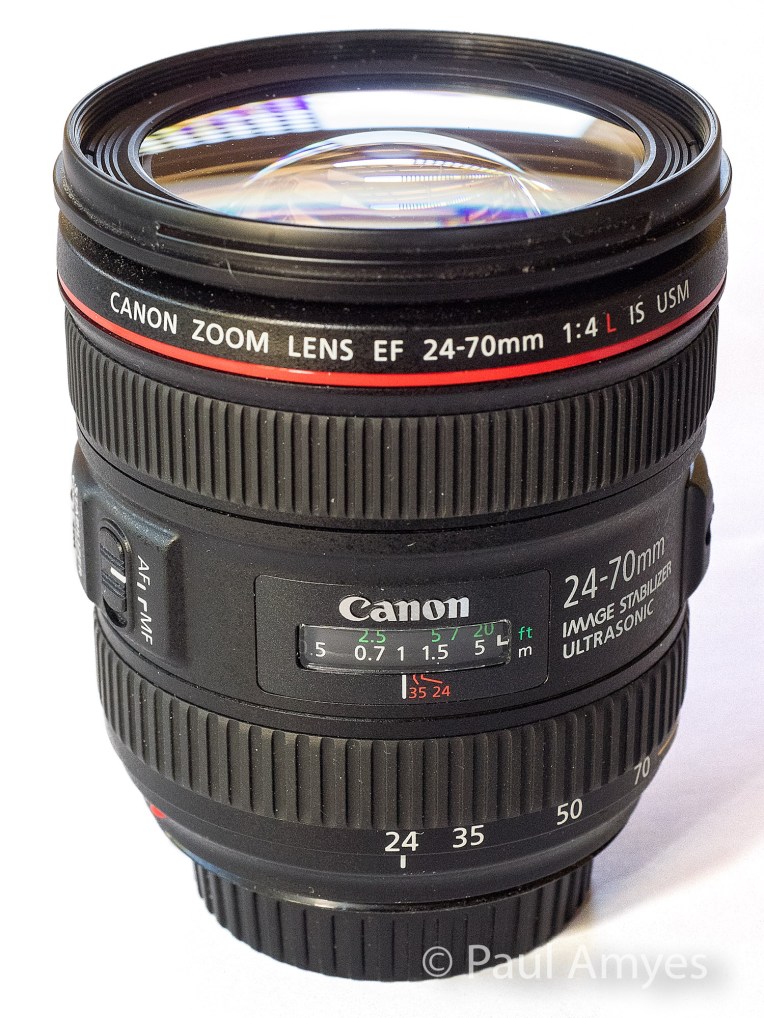
Canon EOS6d with Canon EF 24-70mm f4 IS L
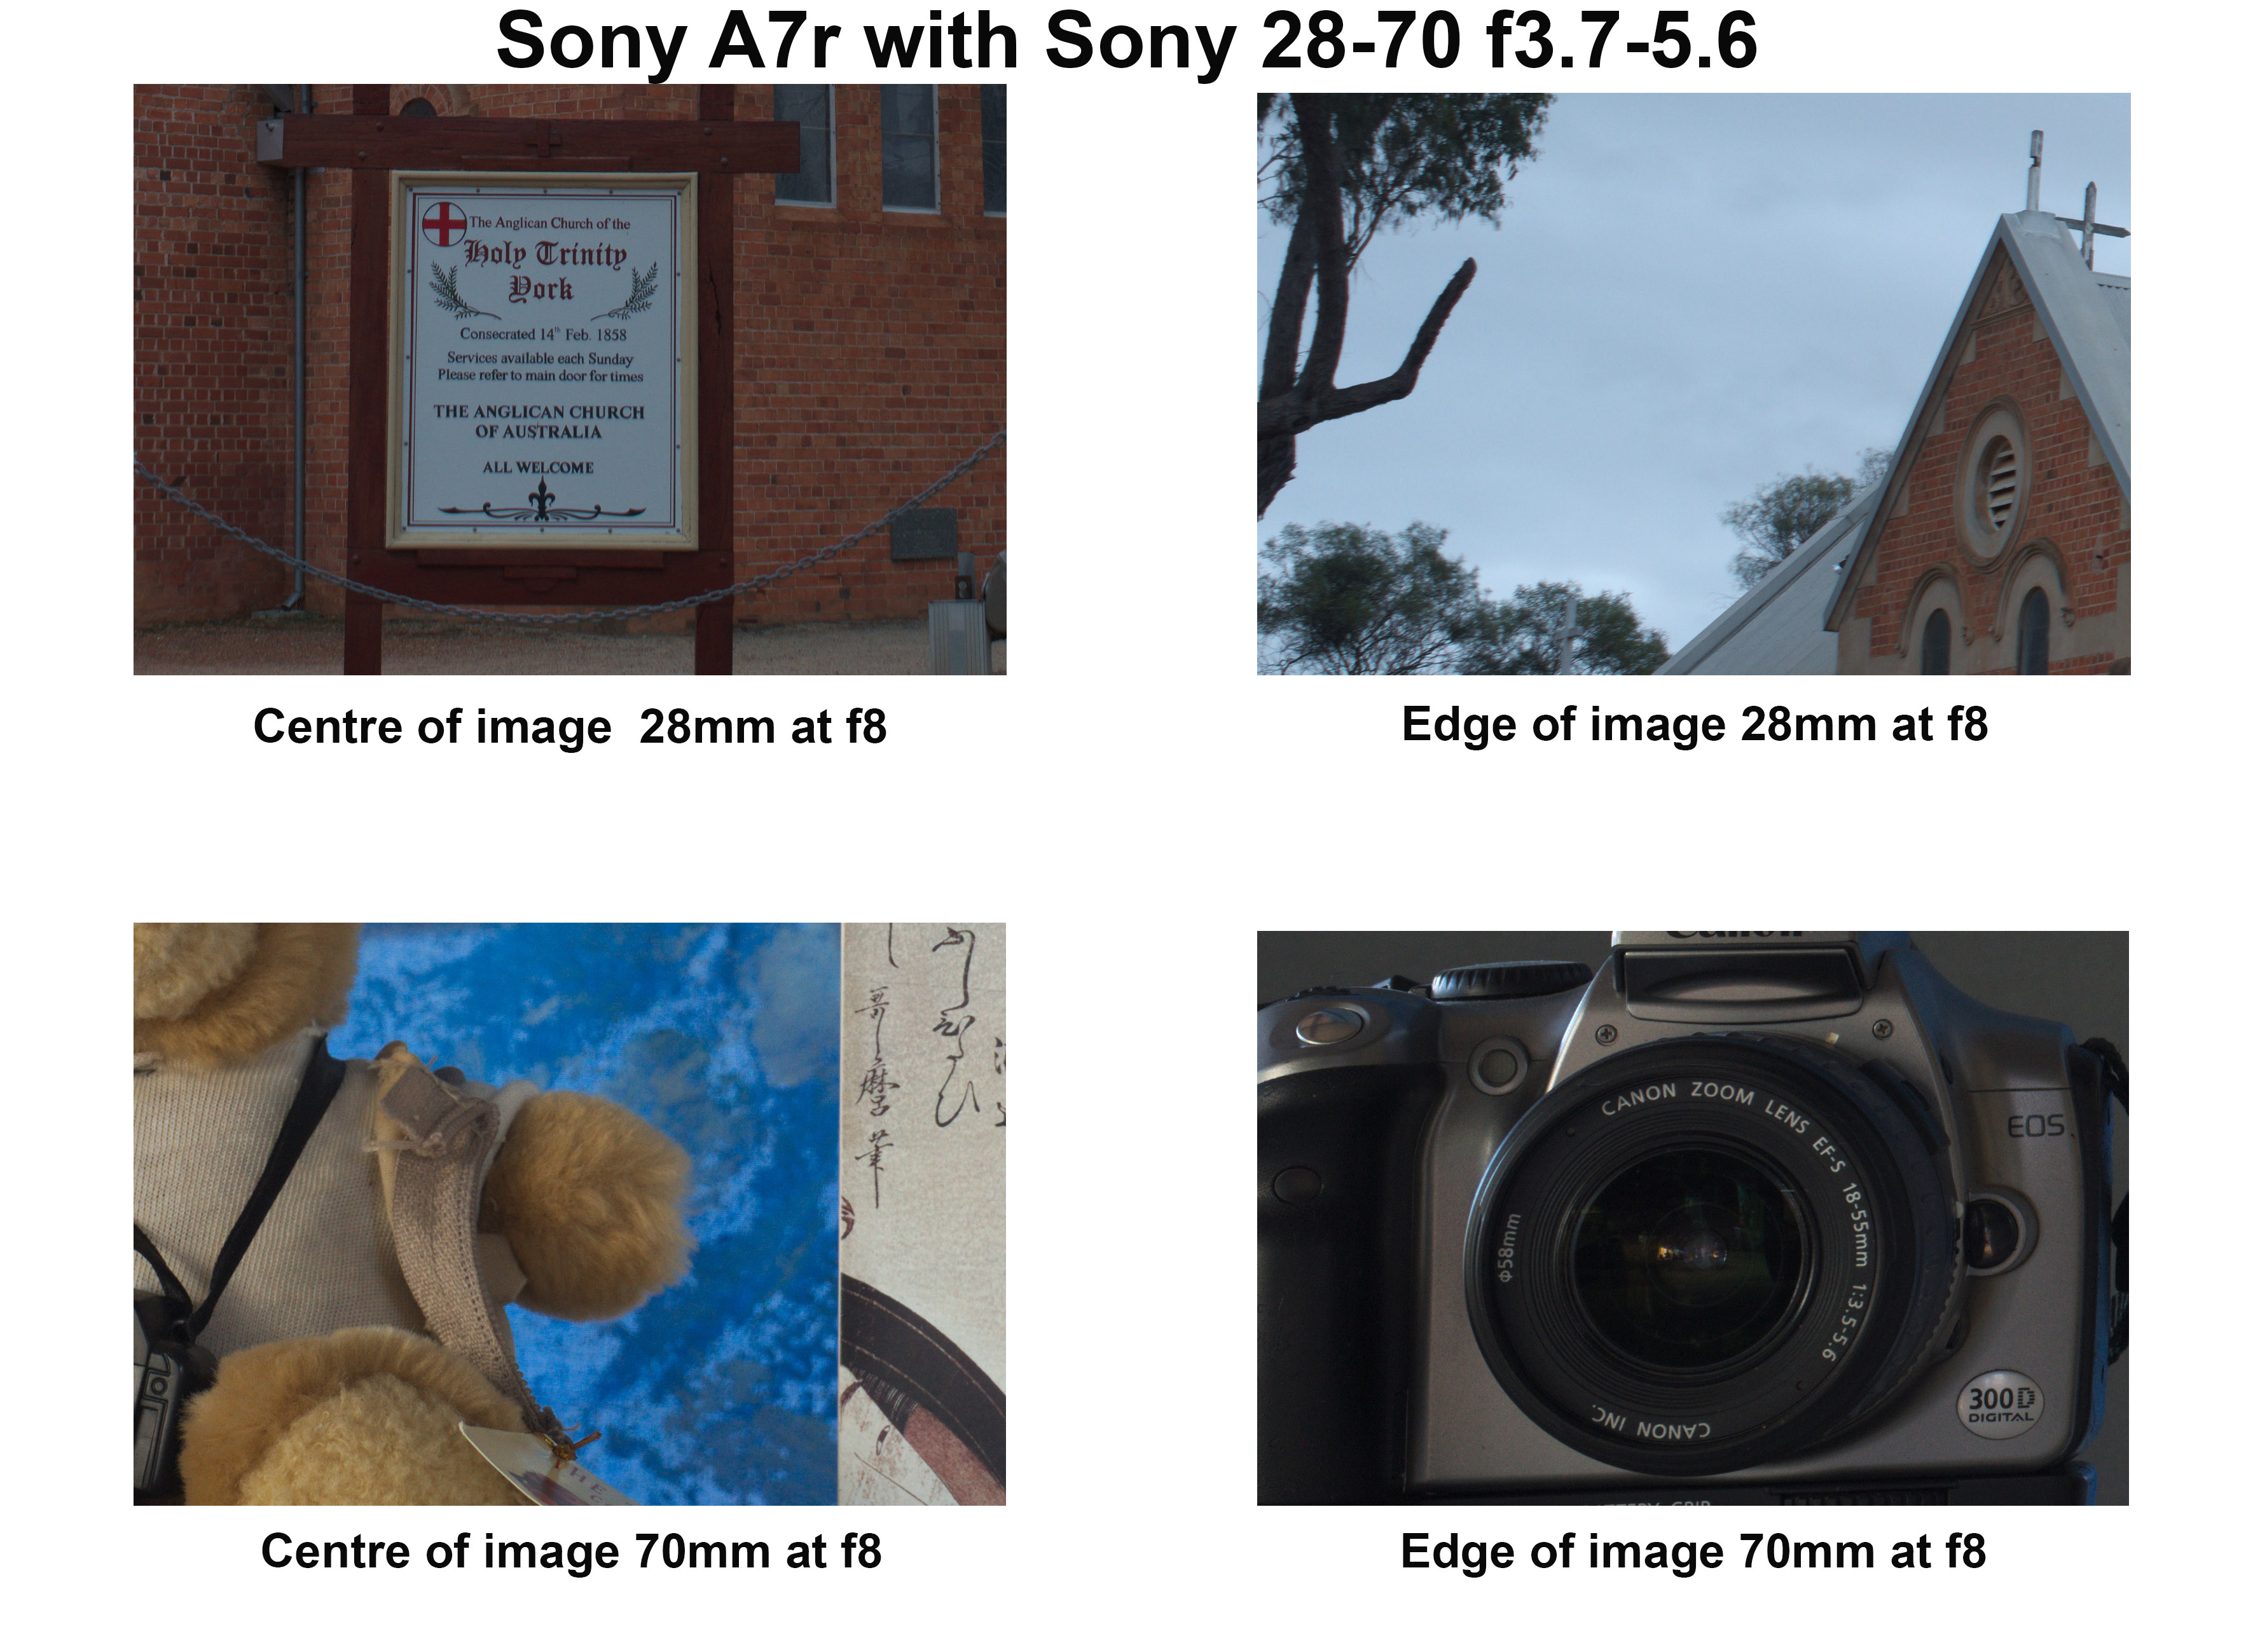
Sony A7r with Sony FE 28-70 f3.5-5.6 OSS
Why three cameras and three lenses, well mainly a case of why not, but also I wanted to see how a budget kit lens performed against the two “pro” lenses, and I was using it as a control as I had previously looked at it. Each lens was shot at the wide end and the long end, with the wide end an architectural shot to look at how the lens behaved at infinity and close-ups at the long end.
Holy Trinity York provided the wide-angle subject.
Typically standard zooms behave best at the wide end and the performance deteriorates as you zoom into the long end. All the lenses were tested at an aperture of f8 for the two shots previously mentioned and wide open to test for vignetting. For each shot the camera was mounted to a tripod, there were no filters on the lenses, any image stabilisation was turned off and the shutter was tripped via the self timer. All metering was done using a handheld incident light meter – Minolta Auto Meter V f. Because the base ISO of the EM1 is 200 all the images on all cameras were shot at value. The only DSLR in the group was used in live view mode to avoid mirror slap. The images were all shot as RAW files and then converted to 8 bit jpgs using RawTherapee (version 4.2.1) which allows you to switch off any embedded lens correction. There was no sharpening, noise reduction or correction for chromatic aberration. Ok that’s the methodology lets look at what happened. Click on the images to see them at full size.
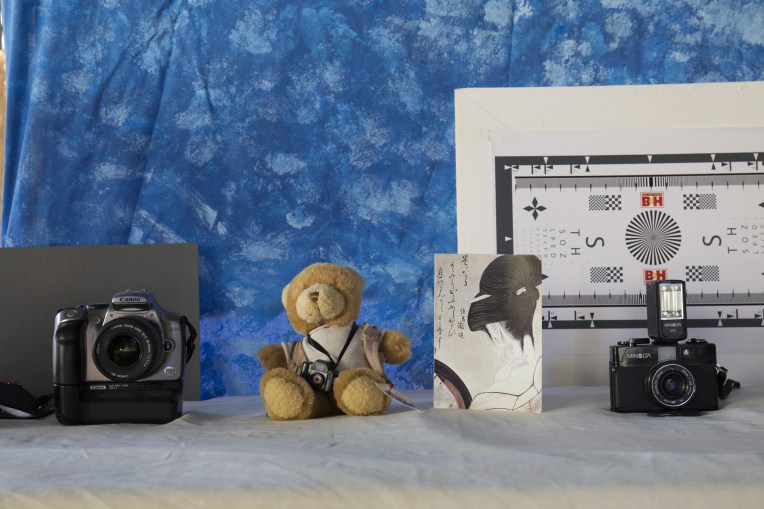
Phillip the photographic bear provided the tele test subject
Olympus OMD EM1 mki with Olympus m.Zuiko 12-40mm f2.8 Pro lens
The Olympus m.Zuiko 12-40mm f2.8 Pro lens was announced as Olympus’ high end standard zoom in 2013 to accompany their then flagship camera the OMD EM1.
Built for the micro four thirds system this lens is equivalent to a 24-80 mm lens and that’s all the talk of equivalency you’ll get out of me, if you want more see this. The lens was launched at the same time as the EM1 in 2013 and it heralded a new line of “Pro” lenses. Of the three lenses here it is the only one with a metal outer construction and it has a splash proof and dust proof design. Its vital statistics are 84mm in length, a diameter of 69.9mm, has a filter thread of 62mm and weighs in at 382g. Not that it counts for much, but it feels nice in the hand and the manual focus clutch (reminiscent of the ones found on Pentax’s 645 range of lenses, is a very nice touch. Optically there are 14 elements in 9 groups – there are 1 aspherical element, 1 dual-sided aspherical element, 2 ED glass elements, 2 HR glass elements, 1 EDA glass element, 1 HD glass element. It is the most optically complex lens of the group. For bokeh aficionados there are 7 rounded aperture blades. The minimum focusing distance is 0.2m.
At the wide end the centre of the image is what you’d expect from a modern zoom, it is sharp and contrasty. At the edges the image is still sharp but the contrast has fallen off a little giving the appearance of softness. The chromatic aberration (CA) is very apparent. At the long end in the centre the image is still sharp but the contrast is lower than what we found on the wide end. The edges exhibit a little softness. The CA virtually non-existent. The results from the long end caused me a little consternation as it was the first time I’d seen images without any in camera correction applied so I repeated them just be sure and got exactly the same result.
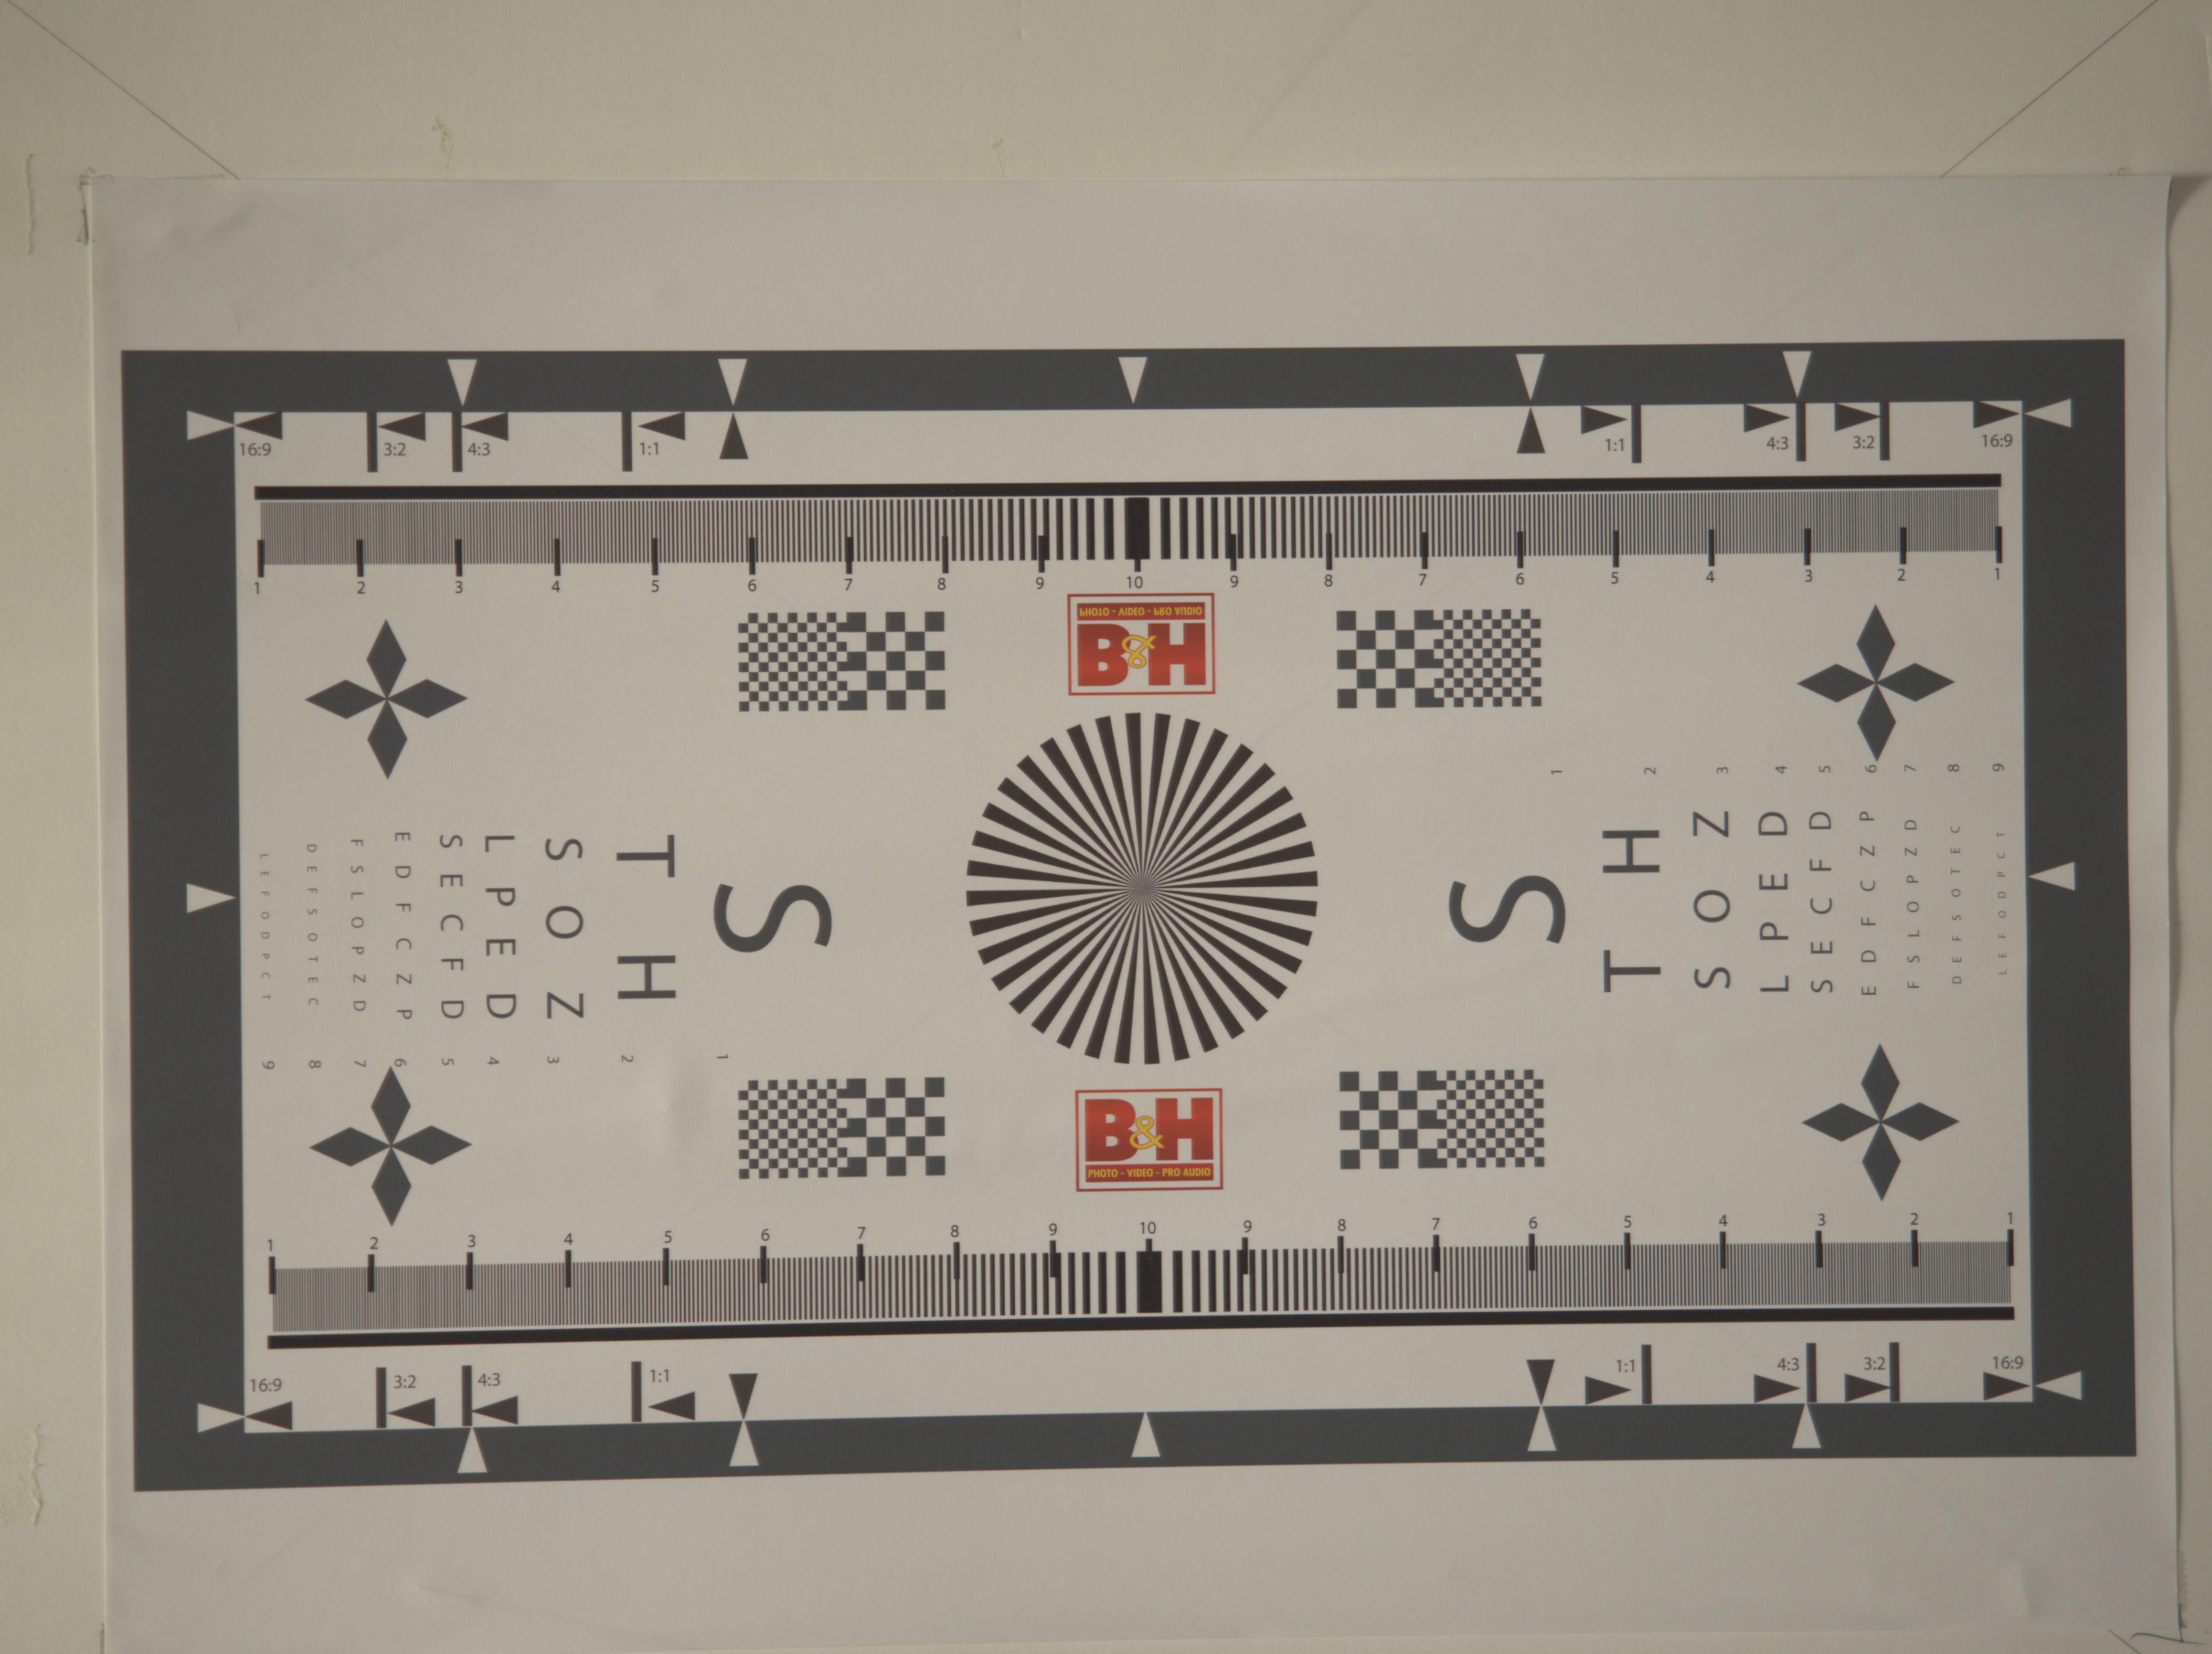
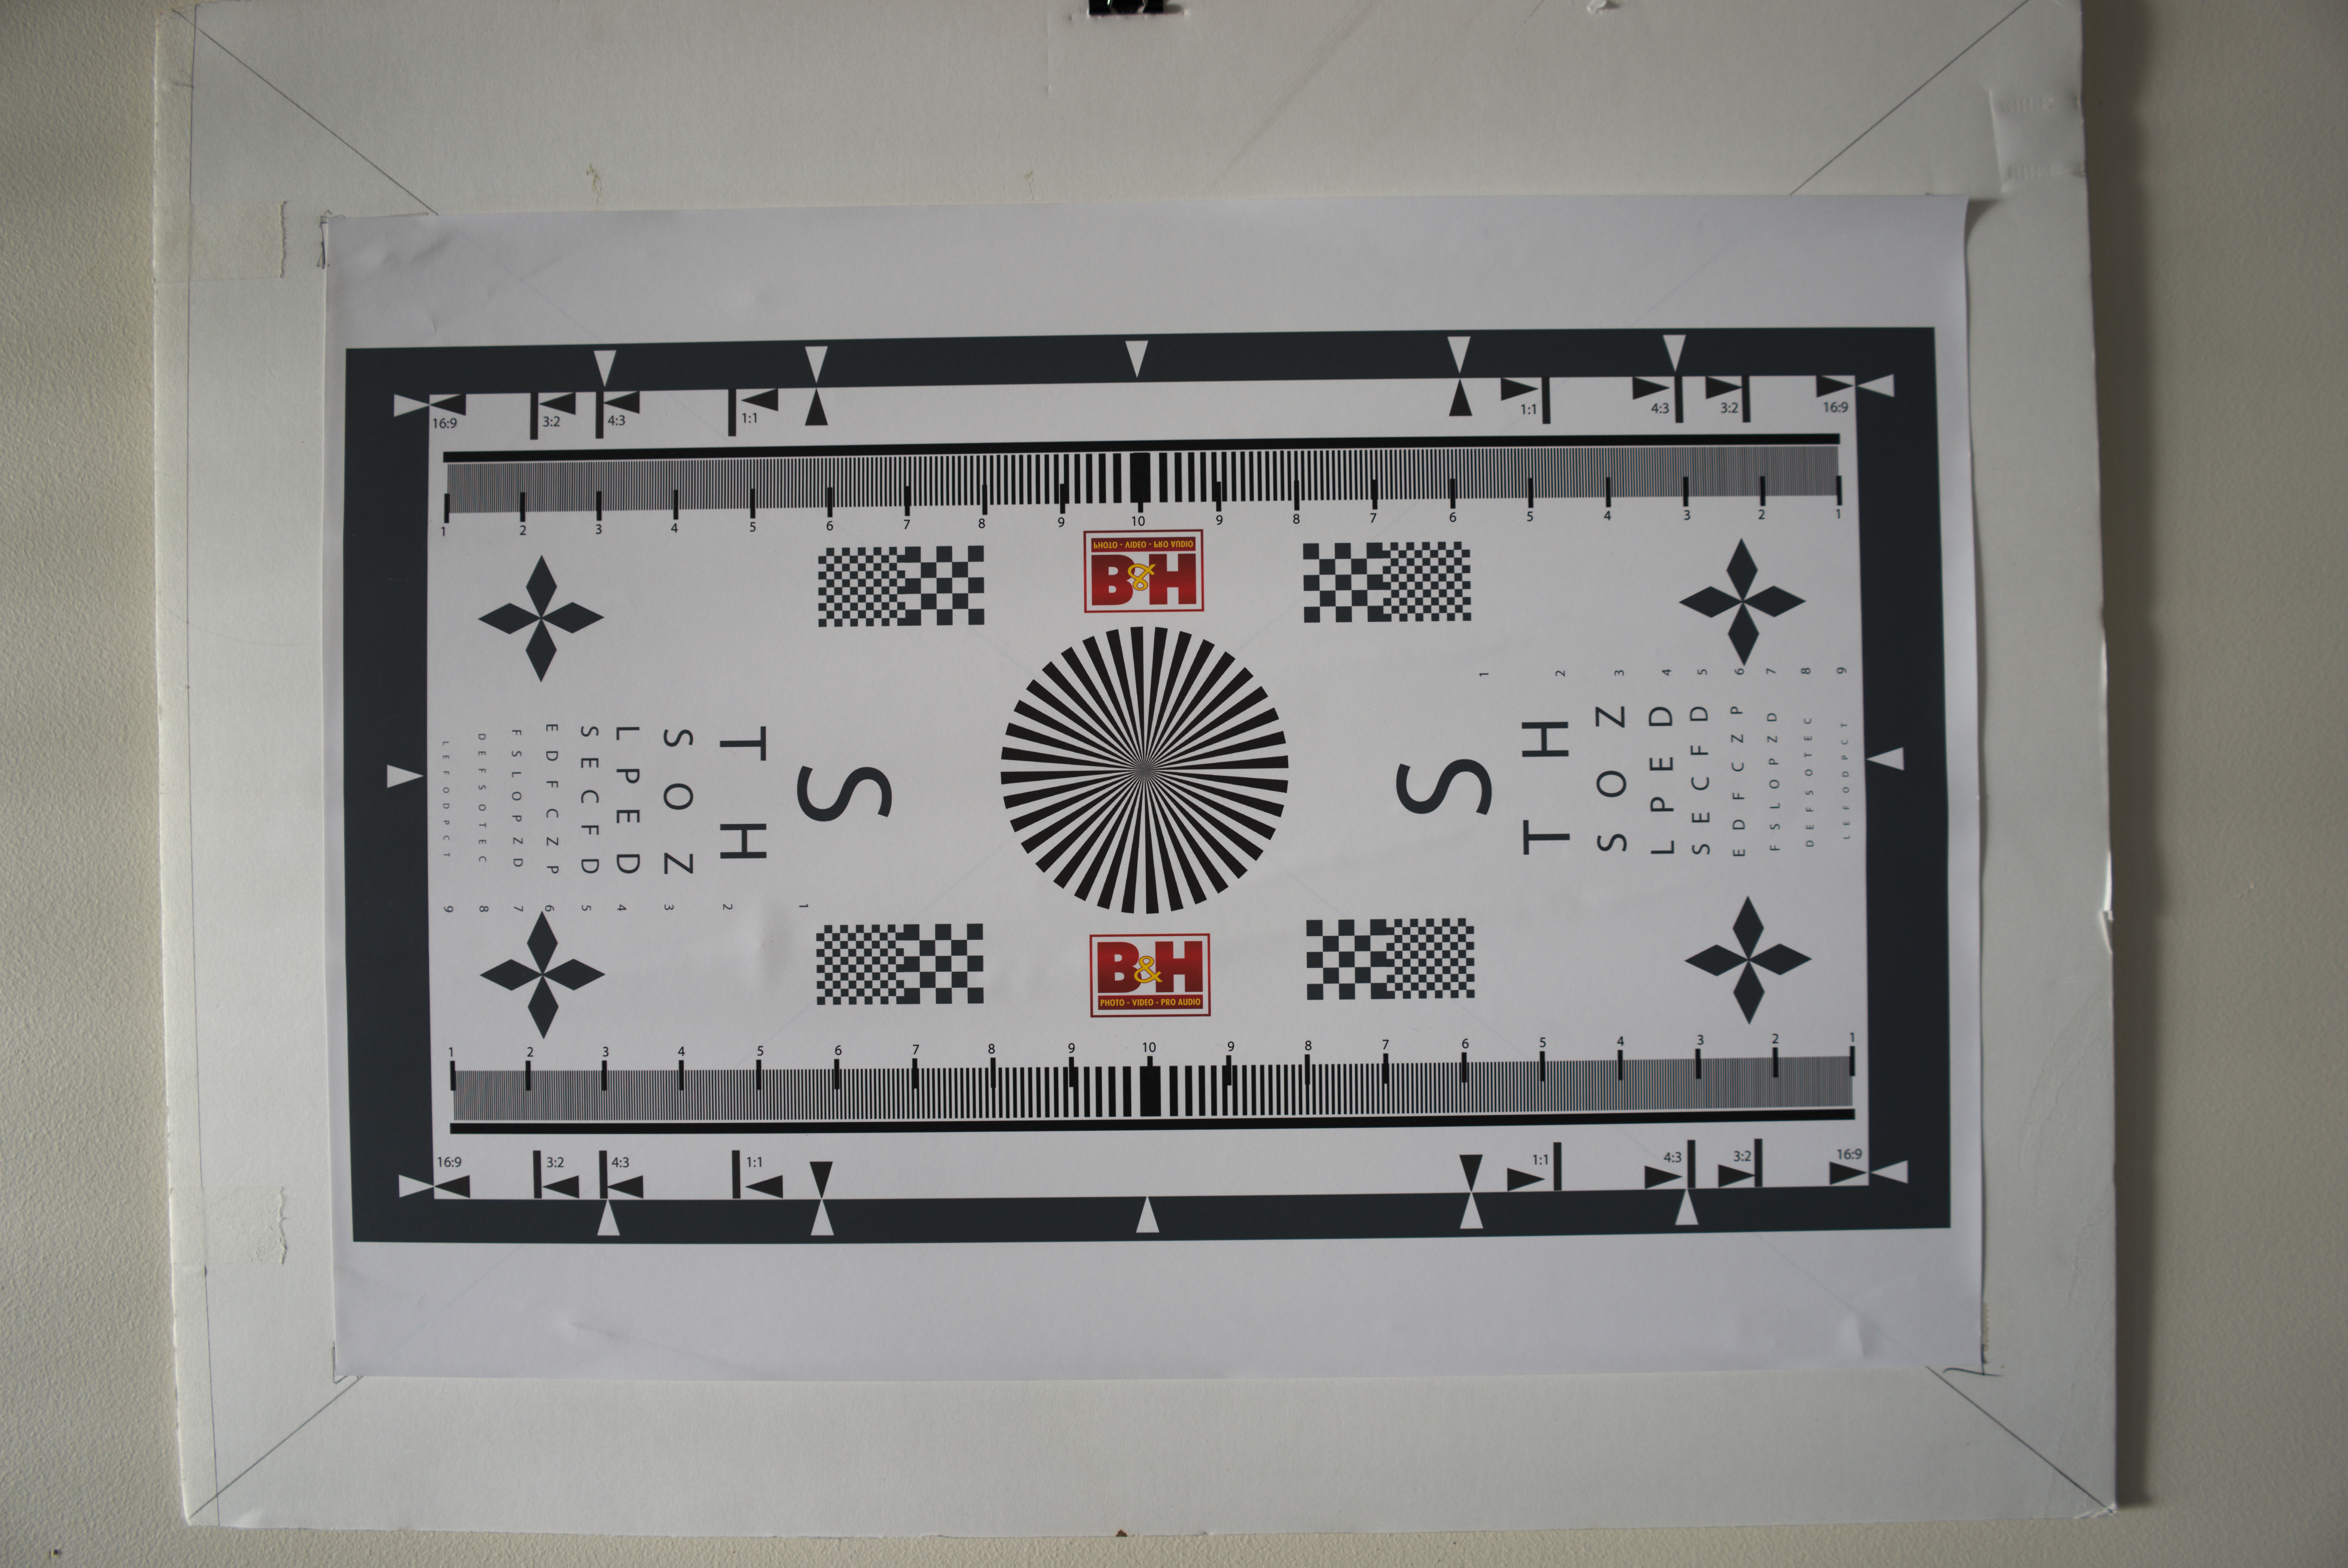
The lens resolution chart shot at 12mm wide open to show any vignetting or lens distortion.
Testing for vignetting and distortion I found that the lens exhibited marked vignetting and barrel distortion at the wide end at f2.8. The vignetting had disappeared on stopping down to f5.6.
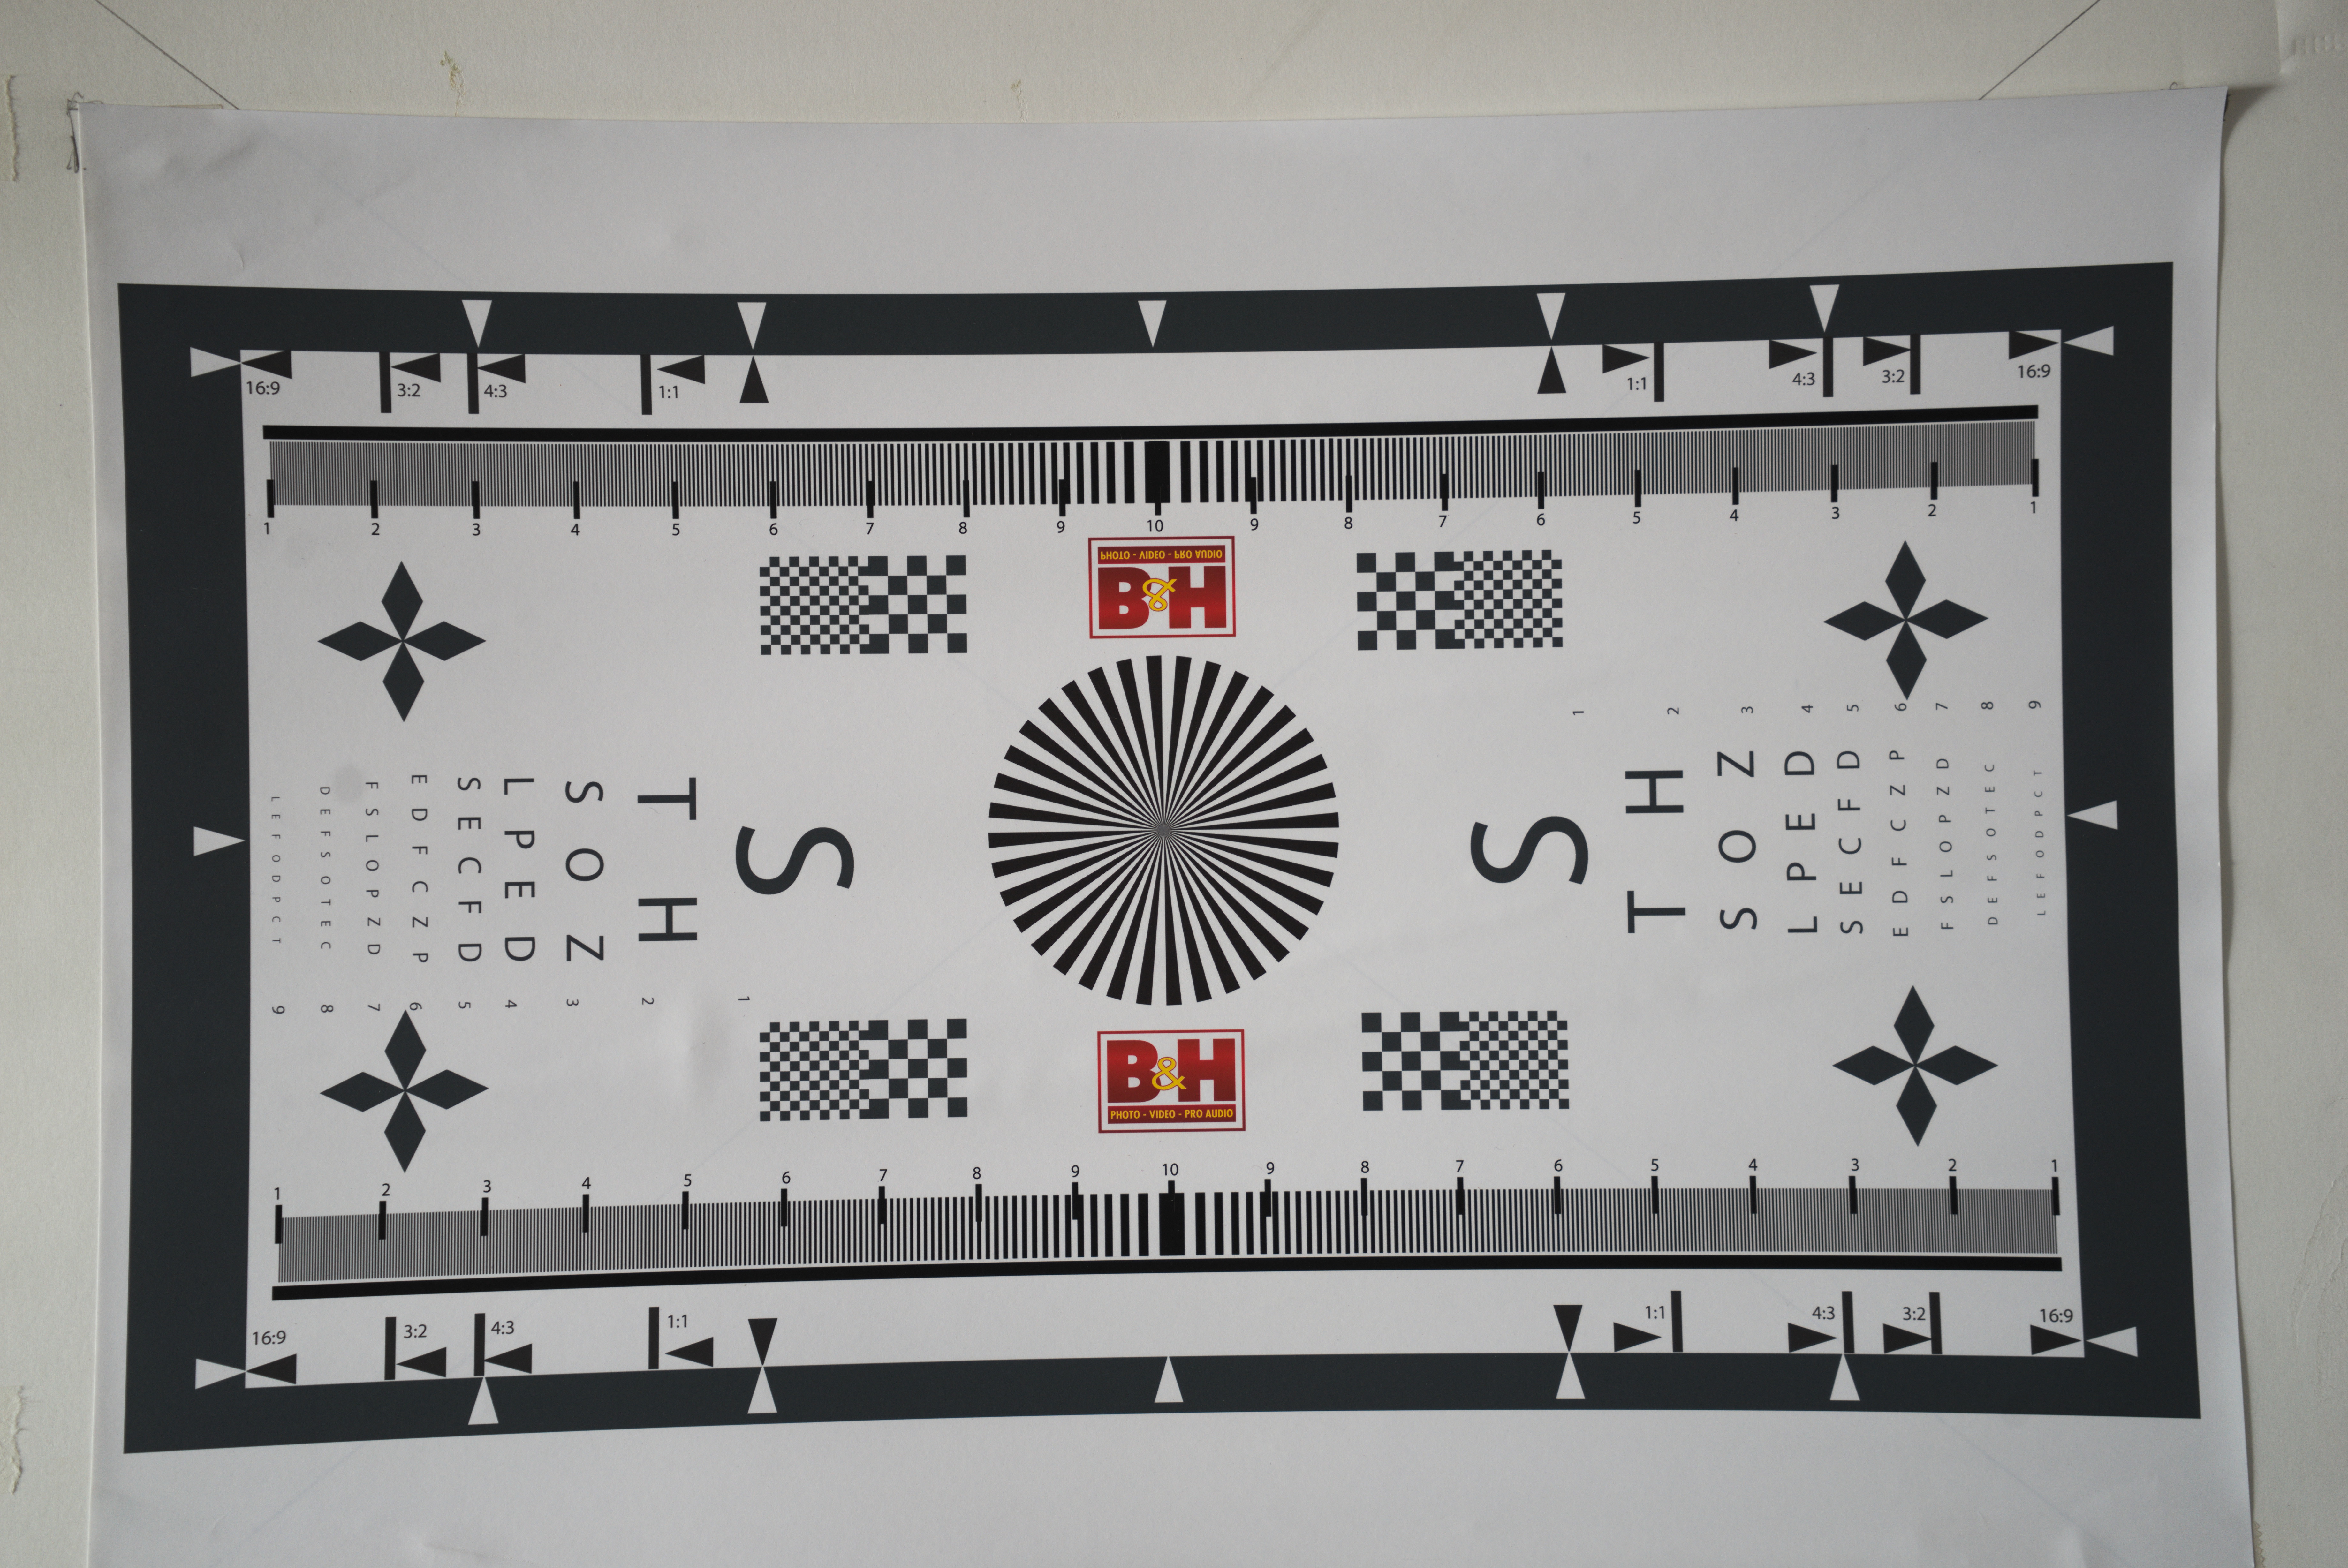
This time at 40mm wide open.
At the long end there is only slight vignetting and very mild pincushion distortion. What is interesting is that there is significant variation in the exposure, remember these were metered using a handheld incident meter. The long end is nearly a whole stop darker than the wide end. This shouldn’t happen with a constant aperture zoom.
Canon EOS6d with Canon EF 24-70mm f4 IS L lens
The Canon EF 24-70mm f4 IS L lens was introduced in 2012 as Canon’s budget (if that term can be used at this price) L series standard zoom lens.
This is the most expensive lens in the group with a retail price of around $1200 AUD. It is also worth pointing out that this is the budget standard zoom in Canon’s L range. This lens was introduced in 2012 and was intended to be a kit lens for then newly announced Canon EOS6d. The body is made of some variant of ABS plastic which is somewhat disappointing considering the price, but with a weight of 600g it has a satisfying heft. The optical construction is 15 lens elements in twelve groups with 2 aspherical and 2 UD elements. The aperture diaphragm is comprised of 9 rounded blades. Unsurprising it is the biggest lens of the trio being 93mm long, 83.4mm in diameter and has a 77mm filter thread. Image stabilisation is built into the lens and is good for four stops. The minimum focus distance is 0.38m, but the lens has a rather nifty macro feature where you press a button and turn the zoom ring and that takes it down to 0.2m and a maximum magnification of 0.7x.
At 24mm the centre of image is extremely sharp and contrasty and the edges are the same. At the tele end it is a repeat. Chromatic aberration is non-existent at both extremes.
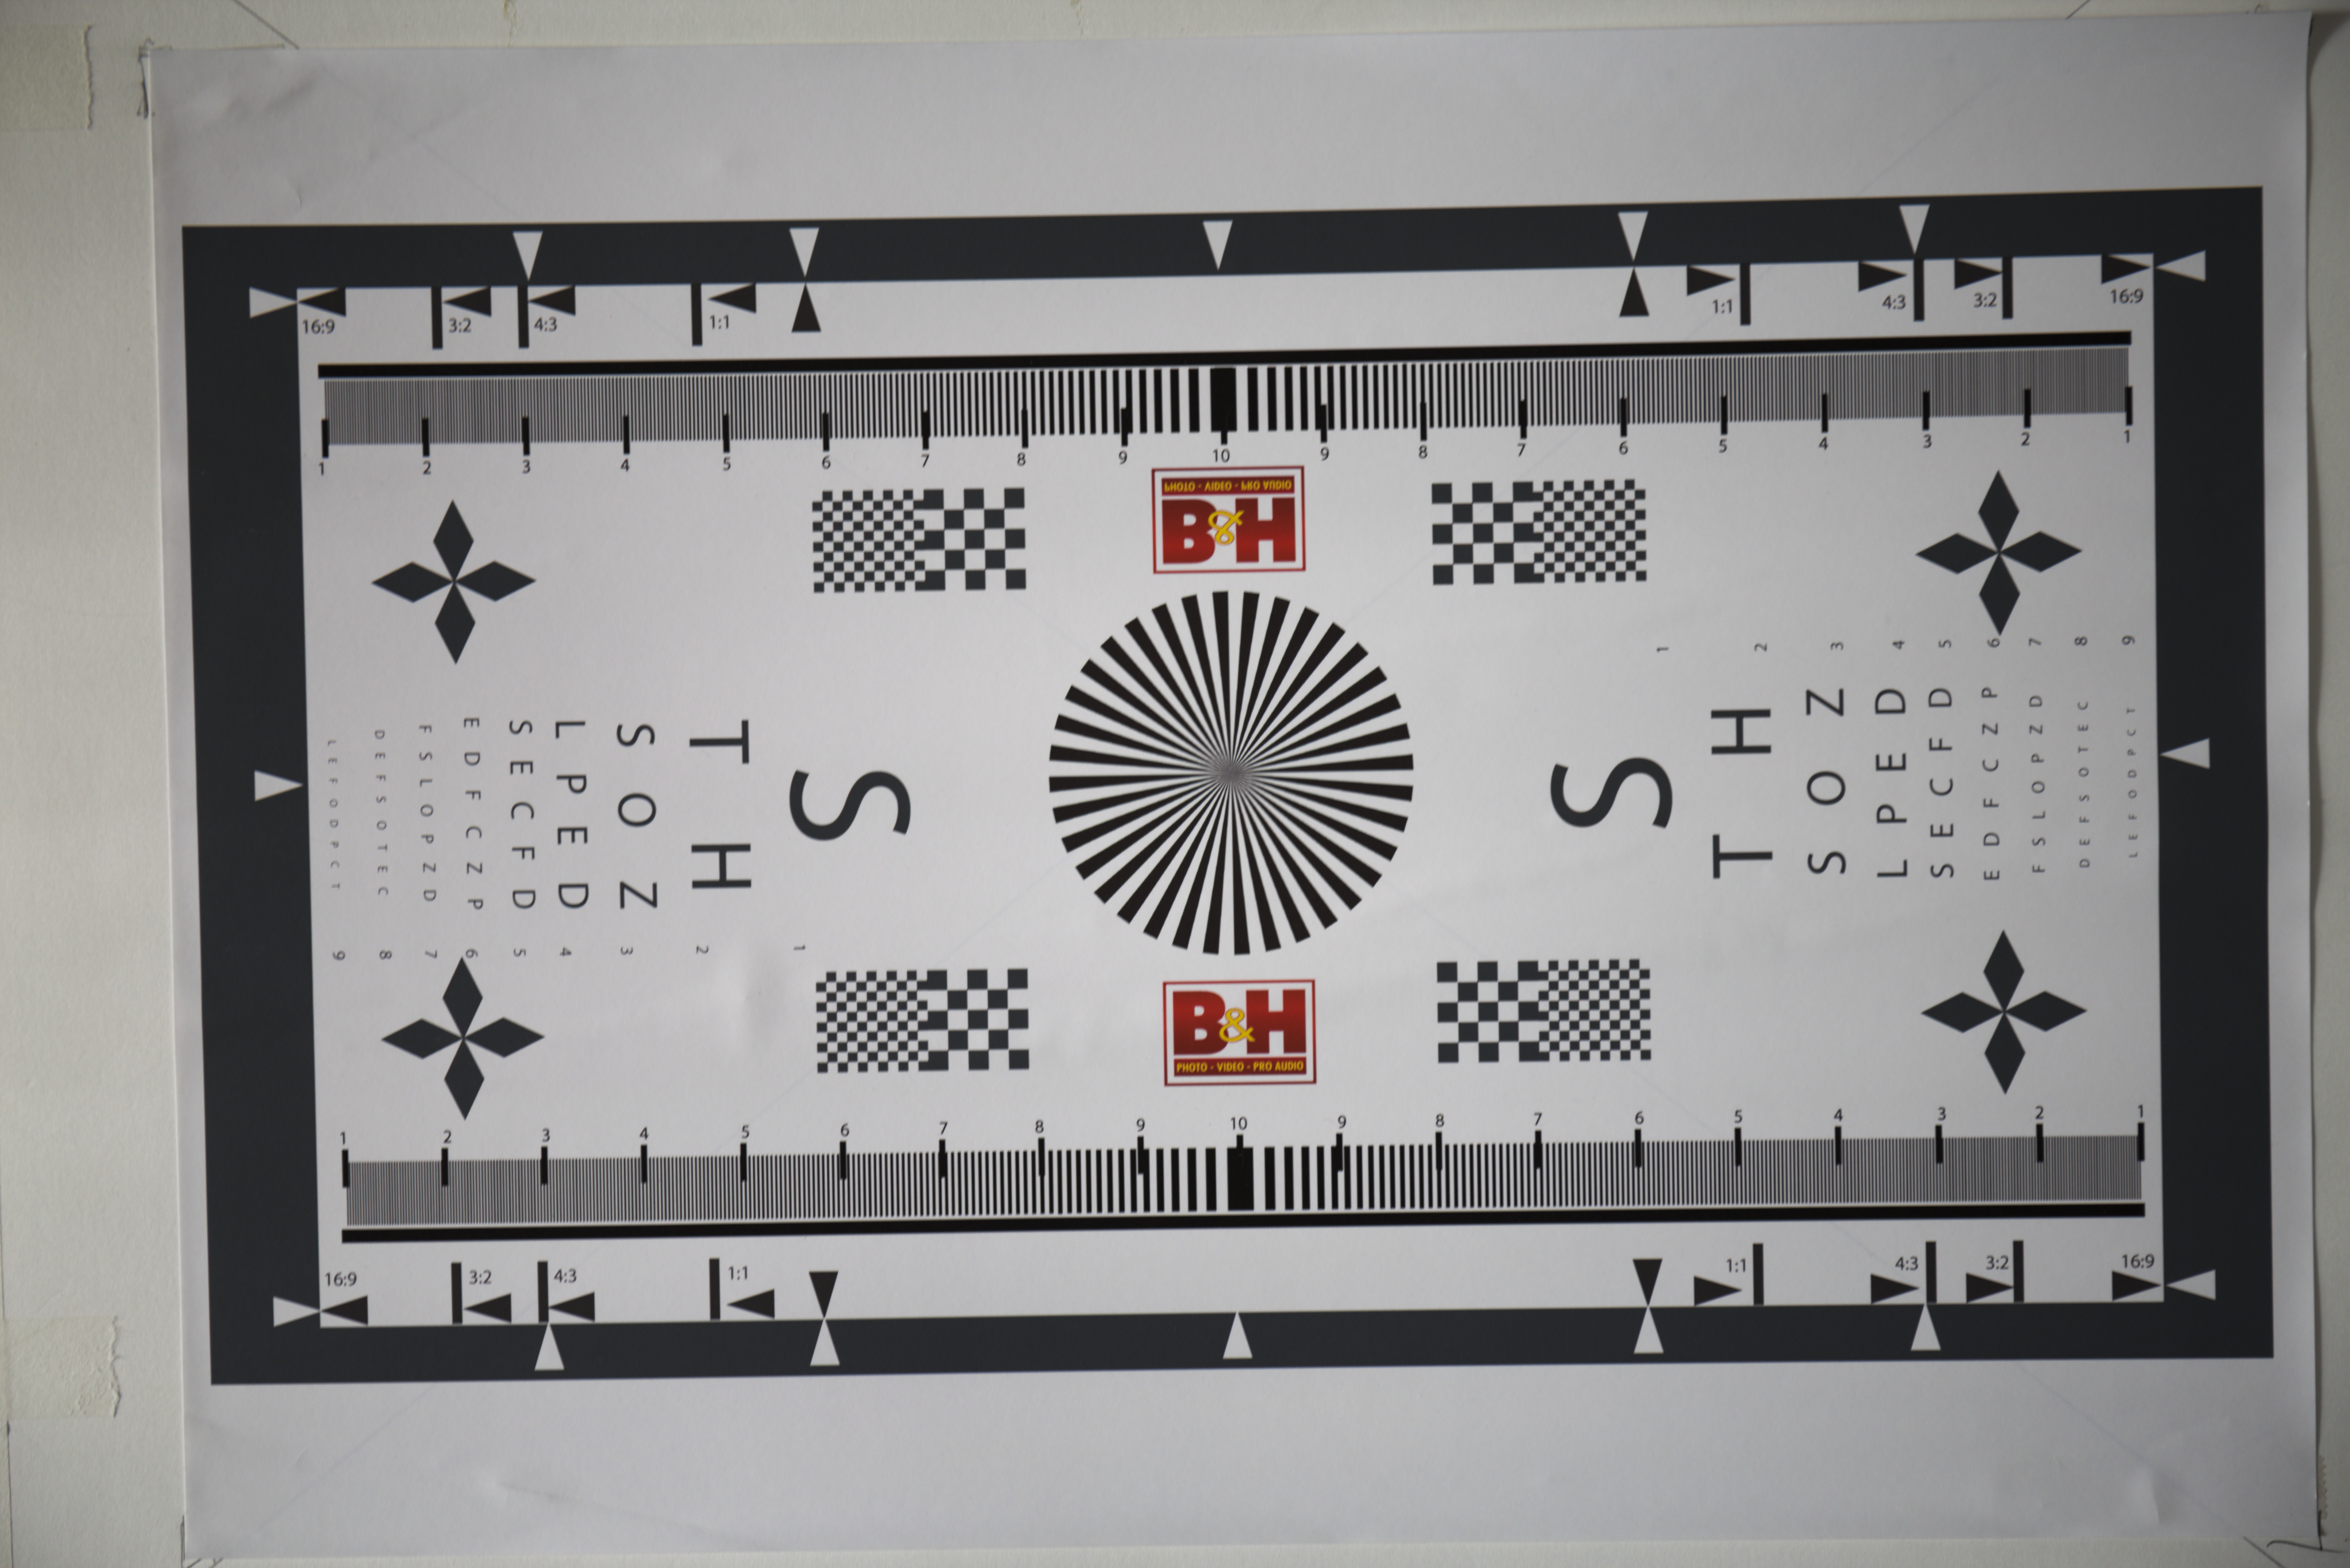
The Canon EF 24-70 f4 IS L at 24mm wide open
Shooting wide open at 24mm vignetting is very apparent, I would say that there’s probably 2 stops difference between the corner and the centre. The barrel distortion is not excessive but is noticeable. At 70mm a small amount of vignetting can be seen and there is some mild pincushion distortion.
The Canon EF 24-70mm f4 IS L at 70mm wide open.
Sony A7r with Sony FE 28-70mm f3.5-5.6 OSS
The Sony 28-70mm f3.5-5.6 OSS was introduced in 2013 as the budget kit zoom to accompany the Sony A7 mirrorless camera.
The joker in the pack and the cheapest on test at just under $350 AUD, and boy when you pick this one up it certainly feels like it. When I originally wrote about it on 3rd July 2016 I was very skeptical of its durability, well nothing adverse has happened to mine, but, Kirk Tuck wrote today that his met a tragic end courtesy of a dog’s tail and a hard floor. Well what do get for your $350? Well unsurprisingly at this price point this is largely made of plastic – the cheap kind – and is very light coming in at 295g. There’s not a lot of glass either just 9 elements in 8 groups made up 1 extra low dispersion and 3 aspherical elements. The simpler optical design and low price makes this the only variable aperture lens in the test group. The aperture diaphragm is made up of 7 blades. Size wise it is a compact 83mm long, has a diameter of 72.5mm and has a filter thread of 55mm. The plus points are that it is dust and moisture resistant, has built in image stabilisation, has a respectable minimum focusing distance of 0.4m and comes with a lens hood. As an aside I believe that every lens should come with a hood.
At 28mm the lens is again just like any other modern lens – sharp and contrasty. At the edges there is a drop off in contrast but they remain sharp. Chromatic aberration is very well controlled and easily fixed in Lightroom. The slow variable aperture means that vignetting is not a problem and there is only slight barrel distortion. At 70mm the centre is sharp and has good levels of contrast, the edges are sharp with a slightly lower contrast. There was also some evidence of coma. Again very little vignetting and a slight trace of pin cushion distortion.
The Sony 28-70mm f3.5-5.6 OSS lens at 28mm wide open.
The Sony 28-70mm f3.5-5.6 OSS lens at 70mm wide open.
Conclusion
So is the Olympus 12-40 the Canon killer that Chris Corroding says? Well without in camera software correction it is only just a bit better than the Sony which is half the price. It is the correction that elevates this lens to very good. Having said that the Canon 24-70 f4 is probably one of their very best zoom lenses and produces very good images straight out of the camera. Apply the Lightroom lens profile and it is even better. Is that surprising? No considering its cost I would hope it be optically very good. This is the rub – for $350 AUD you get a surprisingly good lens with the Sony and most people would be very happy with it. The Olympus at $870 AUD sees some significant improvement. The Canon at $1200 AUD sees only incremental improvement over the Olympus. The law of diminishing returns is very clearly at work here.
When it comes down to sensor performance the Sony A7r rips the head off of the EM1 and EOS6d and spits down the stump. I have been amazed by how well it performs – the dynamic range is very, very good, the lack of an anti-aliasing filter means that with good lenses insane amounts of detail can be rendered, and the high ISO performance is also very good. The Canon EOS6d’s sensor is capable of very nice colour rendition, especially skin tones, but it is not the best when it comes to dynamic range. It is what I’d call workman like. For the Olympus EM1, well the dynamic range is very good, high ISO performance not so. The lack of anti-aliasing filter helps you get the best out of the lenses. I really like my m4/3 Olympus cameras and lenses, I use them more than anything else, but I really feel that the sensors are holding them back. I’ve yet to get any long-term usage out of the new 20Mp sensor that is found in the EM1 Mkii, but I do think that if they got access to the latest BSI sensors from Sony and reduced the base ISO to 100 that there would be quite a sizeable performance boost. But all this is moot as all three are capable of excellent results if I do my part.
It is important to remember that I only have access to one of each lens so I have no idea of what the sample variation is for any of them. What does this all mean in terms of real world usage? Well I’ve used my Olympus 12-40 far more than the Canon 24-70 and I am more than happy with how it performs. I hardly ever use the Sony 28-70 as I only really use the A7r with legacy lenses.
I’m going to preface this entry with the statement that most post processing is a matter of personal taste and that there are a hundred and one different ways of editing an image in Photoshop to get the same result. If this doesn’t appeal to you, or I do things differently to you it doesn’t mean I’m right and you’re wrong, nor does it mean you’re right and I’m wrong.
I have posted this because I got a lot enquiries about how I make my images and whether the colours captured are real or not. So the image below is a straight jpg conversion of the RAW file that came off my memory card. All I’ve done is reduce the size and convert to sRGB. The original exposure was made on an Olympus Pen EP-5 with OLYMPUS M.12-50mm F3.5-6.3 lens. A Cokin 2 stop soft graduated neutral density filter was used to hold back the sky. Exposure: 3.2 s at f/11.0 ISO 200 in manual exposure mode.
Lewisham foreshore at first light. This is a straight conversion of the untouched RAW file converted to jpg sRGB with no processing.
The video below shows how I work on the file in Adobe Lightroom 5.7 , Adobe Photoshop CS5.04, Alien Skin Exposure 3, Nik Soft’s Dfine 2 and Color Efex Pro 4. I use these products because I like them and have paid for them with my own money.
The finished image.
Lewisham foreshore at dawn. Tasmania. Olympus Pen EP-5 with OLYMPUS M.12-50mm F3.5-6.3 lens. Cokin 2 stop soft graduated neutral density filter. Exposure: 3.2 s at f/11.0 ISO 200 in manual exposure mode.
Clicking on the image will take you through to my gallery. I hope that you found this helpful.
The island of Santorini is literally the remains of a volcano that blew up. Much of the settlement lies on the edge of the caldera looking into what would have been the heart of the volcano.
We went to the Greek Island of Santorini in 1987. It was one of the most beautiful places I’ve ever visited with the white buildings contrasting with the incredibly blue sea and sky.
Church Bell Tower, Thira, Santorini.
Going before the start of the tourist season also helped – it meant that most of the island was deserted. Many of the locals would not winter on the island preferring to move to the mainland.
Paradise Video-Music Pub, Thira, Santorini.
It was as though we almost had the island to ourselves and we walked around taking in the scenery and photographing with gay abandon. By the standards of the digital age we didn’t shoot very much, but then shooting twenty rolls of film while on a weeks holiday was a big deal.
Island of Churches
My entry for the Nepal Earthquake made me look closely at my slide and negative archive, and what I found was not pretty. Most of the images from the 1980’s are in pretty bad shape. I’ve been meticulous about storing my images but the dyes used in the E6 and C41 films were not stable and they have faded. The Kodachrome images have fared significantly better. So I’ve embarked on a scanning frenzy. I’m using an old Canon flatbed scanner which allows me to batch scan and gives sufficient quality to make an A3 print. At present I’m only restoring a few of the pictures, the important thing at the moment is to digitize them, and get them into Lightroom with captions and key words. These pictures went through Lightroom and Photoshop, but I still wasn’t able to completely restore them so I thought I’d embrace the “distressed” look so I ran them through the desktop version of Snapseed.















You must be logged in to post a comment.