I first went to Gnomesville in January 2018. It was a fun experience and I used it to experiment with mounting some of my vintage (that makes me feel very old as I bought these lenses new) Olympus OM Zuiko lenses on a Sony A7r2. Well just recently we were in Balingup which isn’t far away and my partner expressed a desire to visit as she had never been. So we duly went.
This time round I was still taking the same OM Zuiko lenses, but they were being used with an Olympus OM40 film camera. The film stock I was using was the new to me Ilford Ilfocolor 400+ Vintage Tone colour negative. I must say I didn’t really understand what I was letting myself in for with this film. It has a very distinct look – muted tones with the reds boosted. More by chance than judgement the film suited the gnomes. Whether I continue to use the film stock is another question. The problem being is that the look is baked in and it doesn’t suit all subjects.
Kadar or Musk Duck (Biziura lobat), Lake Leschenaultia, Western Australia. Canon EOS 30 with Sigma 150-600mm and Ilford Delta 3200.
Can you shoot wildlife using film? Well the obvious answer is yes. People took wildlife photos using film for a lot longer than they have using digital. Cherry Kearton (1871-1927) and his brother Richard (1862-1928) the naturalist and writer were very early pioneers of wildlife photography and they published the first natural history book entirely illustrated with wild photographs in 1895. Their 1898 book “With Nature And A Camera: being the adventures of a field naturalist and an animal photographer” illustrated with 160 photos was a best seller and inspired many people to become wildlife photographers. Other notable wildlife photographers from the film days include Eric Hoskins, Stephen Dalton and Heather Angel. “Hold on” I hear you say “they shot film because that was what available”. It’s a valid point, so can you shoot wildlife on film in 2024? The answer is yes, but it’s not as simple as it once was.
The film stock I’ve chosen for photographing wildlife.
Back in the 1990’s and early 2000’s there were a lot of high speed film emulsions. Kodak had Ektar 1000 in colour negative, Ektachrome 400 slide film which could be pushed to 1600 ISO and TMax P3200 in black and white. Ilford had its Delta 3200 black and white emulsion. Fuji had Fujicolour 1600 colour negative film, FujiChrome Provia 1600 which was a colour reversal film and Neopan 1600 Professional black and white film. Agfa (there’s a blast from the past) had a couple of 1000 ISO C41 film stocks and a 1000 ISO slide film. 3M made an E6 1000 ISO film which was sold under several trade names. Sakura, later Konica, had a 3200 ISO colour negative emulsion. Now in 2024 the situation is very different.There are no E6 films, only 2 colour negative films, but they are 800 ISO, and two black and white emulsions nominally rated at 3200. Camera and lens wise, well the secondhand market is your friend and top of the line cameras such as Nikon’s F4 or F5 can be picked up quite cheaply (although that is a relative term) as can Canon’s EOS1. Lenses aren’t difficult to come by, but their prices haven’t dropped like those of the camera bodies as they can still be used on DSLRs.
The Canon EOS30 is an enthusiast level 35mm SLR that is a very capable camera for shooting wildlife.
The Sigma 150-600mm f5-6.3 DG Contemporary lens is a relatively inexpensive lens that is excellent for photographing wildlife.
The parameters I set for myself with this project was that I had to use stuff that I already had, so while there are camera bodies more suited to shooting wildlife that have better autofocus and higher frame rates I stuck with my Canon EOS 30. Lens wise my Sigma 160-600 was the obvious choice. I did briefly think about using my Olympus OM cameras, but I didn’t have a suitable lens and I didn’t want to have to hunt around for a good copy of the hard to find Olympus OM 600 mm f/6.5. Also I didn’t fancy trying to find focus with my ageing eyes. So the Canon and Sigma combination won out.
The elephant in the room is the cost of film and developing. This is the major consideration. The following prices are for Australia as this is where I live. Kodak Portra 800 is $37 for 36 exp, Ilford Delta 3200 is $18, Kodak TMAX P3200 is $30, and Lomo 800 can cost as much as $48 for a single roll, but multipacks of 3 36 exp rolls can be bought for $140. The cost of processing is $10 for C41 and $18 for D76 (black and white). Those prices are for developing and cutting and sleeving. Now my Canon EOS 30 can shoot at 4 frames per second, so machine gunning birds in flight would see you get through a roll every 9 seconds at a cost of more than $1 per shot. Typically when I go out in the morning for three hours or so I’ll shoot around 3-4000 frames with my digital cameras so when I decided to undertake this project I decided that I’d only shoot a maximum of two rolls on an outing. Using my Canon EOS 30 meant that after finishing the film I could switch the body to my Canon 80d so I could make the most of the morning. I know that by developing your own film you can reduce the costs, and I’m hoping to do this in the future.
All the photos below are the full frame, and you can look at them larger by clicking on the image.
Djindjokoor, Brown Honeyeater, Lichmera indistincta. York, Western Australia.
Djindjokoor or Brown Honeyeater (Lichmera indistincta). York, Western Australia.
Kool-boort or Singing Honeyeater (Gavicalis virescens). York, Western Australia.
Kanyinak or Sacred Kingfisher (Todirmphus sanctus). Kodak Portra 800.
Caspian Tern, Hydrprogne caspia. Heirisson Island, Western Australia.
Bulland or Great Egret, Ardea alba. Heirisson Island, Western Australia.
So after a few months what can I say? Well the first thing that really stuck out was the grain. Many photographers complain bitterly about noise in images, but that ain’t got nothing on the grain in these fast emulsions. Funnily enough I wasn’t too bothered with it in the black and white shots on Ilford Delta 3200 as I quite like the look. I had a Tri-X 400 pushed 2 stops developed in Rodinol phase many years ago which might explain that foible. The shots taken on Kodak Portra 800 were a bit different. I suppose I’d just become used to noise free images up to 1600 ISO on my digital cameras. Having said that I’ve got used to it and I quite like the results.
Digitising the negatives was an interesting experience. To keep costs down I scanned the images myself using a DSLR and a macro lens. The learning curve has been a bit on the steep side, especially for the colour negatives, and I’m still not sure whether I’m happy with the results or not. If I were to continue with this, and I think at this stage I will, I’ll probably get a dedicated film scanner. The reason being that while scanning using a camera was quite quick, about 1/2 an hour for a roll of 36, it was the faffing around in Lightroom and Photoshop that took a lot more time.
Was I happy with the final results? Yes. I think that it is an interesting exercise as it makes you really think. Firstly which film stock to use. The Ilford Delta 3200 is great for low light and misty atmospheric conditions. It’s not a film to use if getting the maximum feather detail is your aim. The Kodak Portra 800 is best suited to brighter conditions with a nice light. When shooting digital I use shutter priority and and auto ISO which means I can just concentrate on the composition. With film the ISO is not a variable, once you’ve loaded the film and start using it at that ISO you’re committed to that for the whole roll. The net result is that I have to be very aware of what my exposure is all the time. This is not a bad thing as it makes me more engaged with whole picture taking process. Were there any downsides beside the expense? Yes. I found that using film made me be a lot more conservative in my photos. I was not so inclined to experiment. Shooting birds in flight I’d only take 2 or 3 frames, whereas on digital I’d think nothing of taking 20 or 30 frames as I’d want to be sure of getting the wings in the perfect position. I’ve just become accustomed to subject tracking and have become quite reliant on it. Going back to an autofocus system developed in the 1990’s was a bit of a shock. It wasn’t as positive or sticky which meant there were a lot of out of focus pictures. I missed having a histogram in my viewfinder and the lack of instant feedback of the LCD screen. This meant I had to remember how much exposure compensation to give for a black bird on a very dark background or a backlit white egret. Having to wait a couple of weeks for the films to come back from the lab was a lesson in deferred gratification.
Would I give up digital and convert solely to film? Is my name Rothschild? No. I don’t see it as a binary choice. In many ways digital is a better medium for wildlife photography. It gives you more freedom – you can shoot in incredibly low light and you don’t have the feeling a meter is running as you take photos. Film does have its place as a creative alternative, if you are after a specific look or mood then it is ideal.
Not The Wild West Show, but the York Show. We’ve lived in York for nearly twenty years and this was the first time I’d been. The York Show is your typical Australian country town agricultural fair. There are displays of livestock, trade stands for agricultural machinery, arts and crafts exhibitions and awards, and most importantly for the kids a bit of a fun fair with a fireworks display in the evening. I didn’t really know what to expect, so I took my Olympus OM40 and two lenses – a 35 and a 135. I loaded up with Ilford XP2 and decided to photograph anything that took my fancy. The show was held in September and it’s taken me this long to get the film developed and scanned. The following are just a few of my favourites from the day.
The York Agricultural Society presents the 2024 York Show.
Laughing clowns sideshow attraction at the York Agricultural Show.
Getting Crazy On The Waltzers. Enjoying the thrills of a fairground ride.
Be-ewe-tiful!
Queuing for a coffee at the York Agricultural Show.
Contestants try their luck on the fairground shooting gallery,
Everyone stopped to admire the ponies. York Agricultural Show.
The queue at the entrance to recreation grounds where the York Agricultural Show is held.
“Now which one shall I have?”. The Plushy Wall at the York Agricultural Show.
Start Them Young. Trying out the latest John Deer. York Agricultural Show.
We both are so excited ’cause we’re reunited, hey, hey
Songwriters: Dino Fekaris / Frederick J. Perren
This is the first part of a two part series.
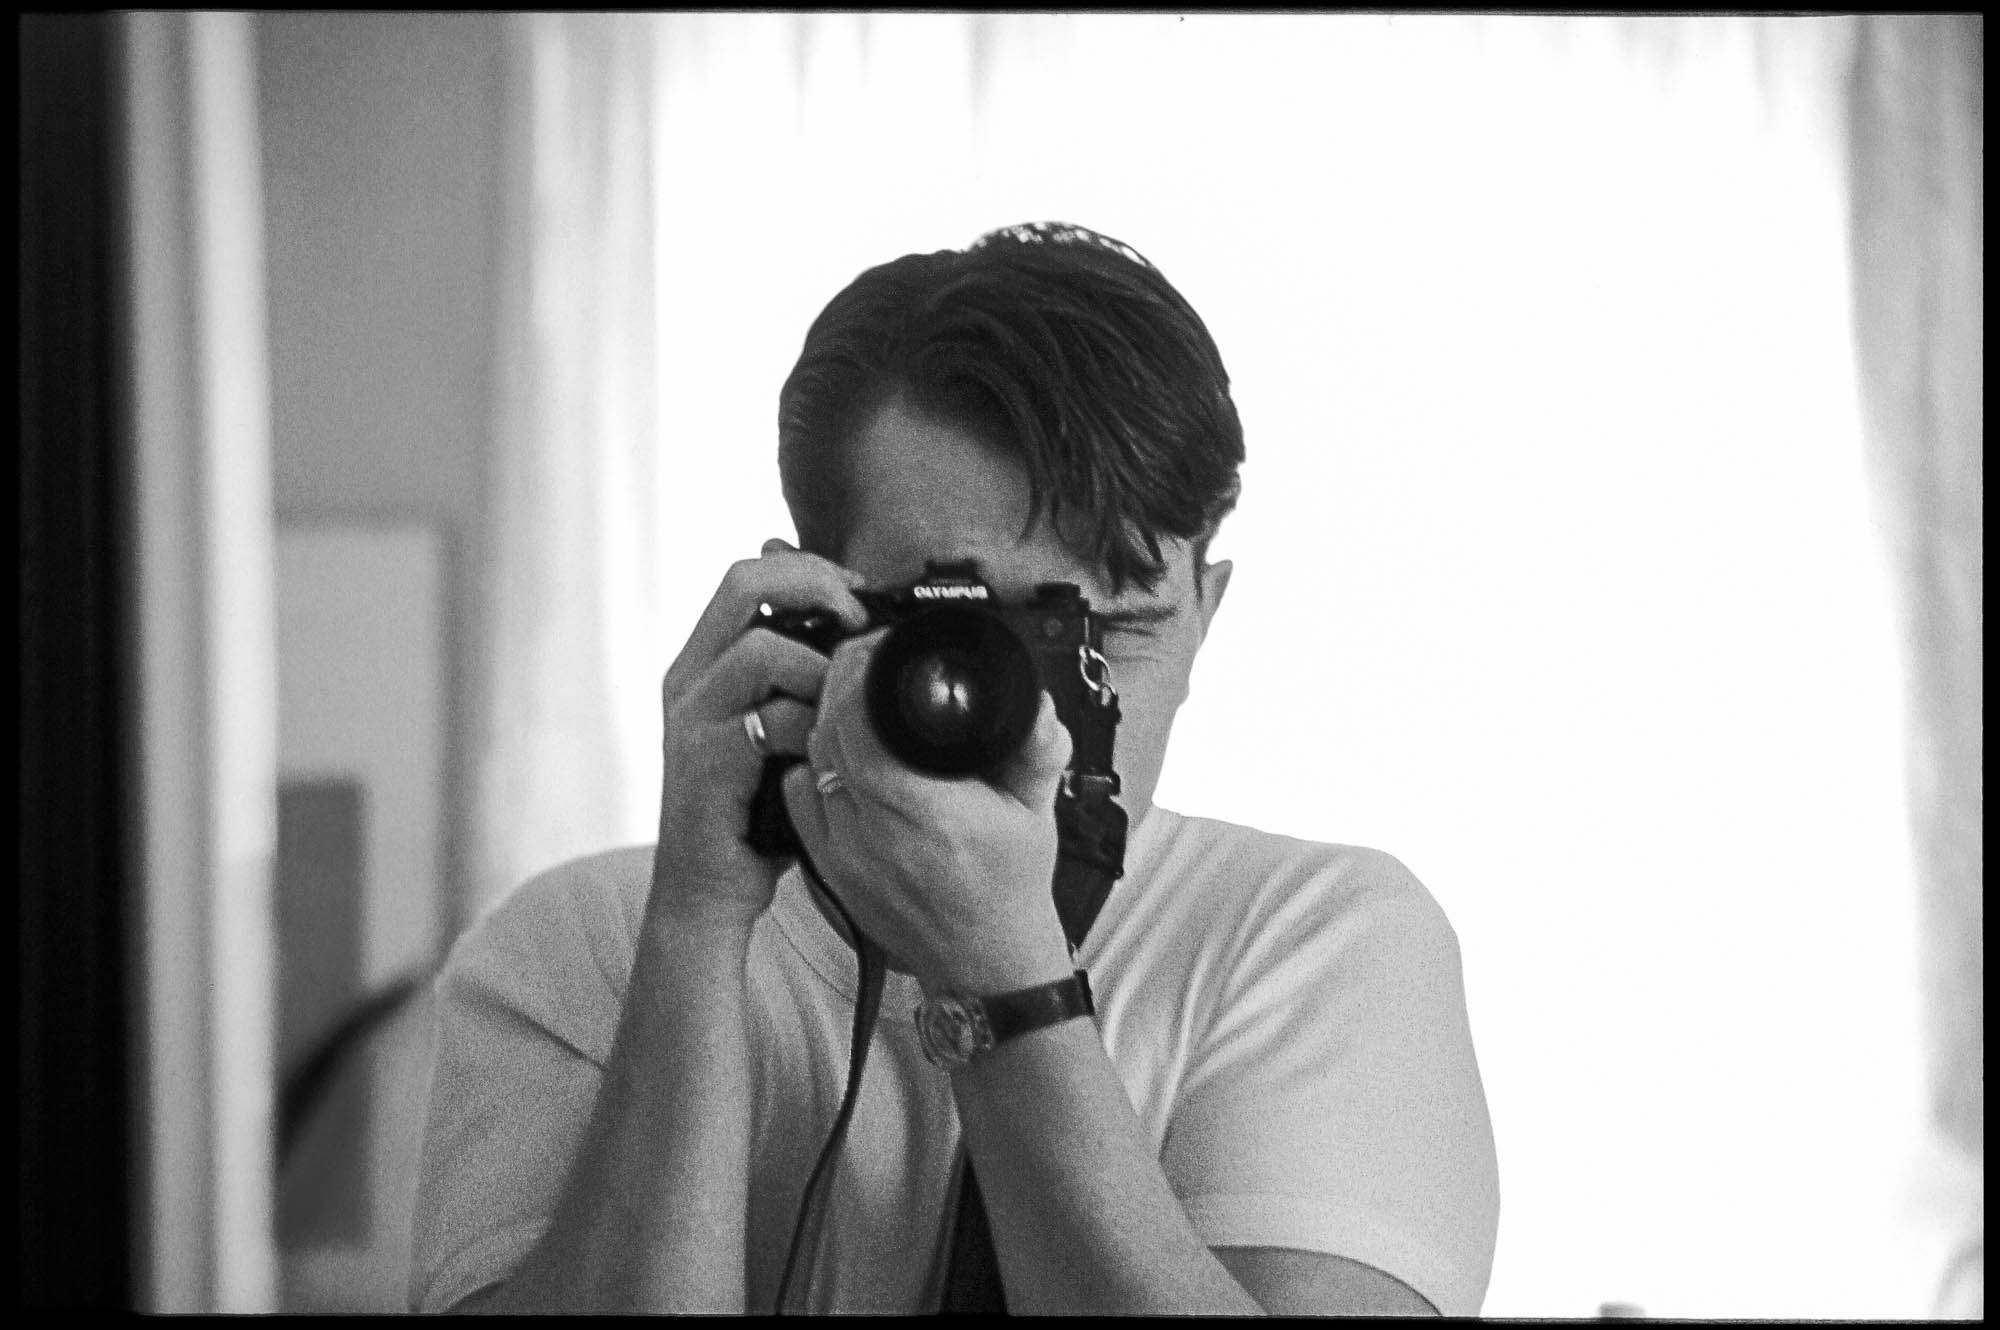
My earliest selfie, taken in 1987 just before we headed off to India. The camera is an Olympus OM4 with 35-105mm lens.
The camera that I have most enjoyed using is not a modern digital mirrorless one, nor is it a DSLR. It is a film SLR from the early 1980’s. What was so special about it? Well it never got in the way of me doing what I wanted. Some devices are designed in such a way that they impose upon you a certain way of working and you have to alter your thinking and behaviour to use them. This means you can’t use it intuitively and you have to take a moment to figure out how to use it. The device literally gets in the way. The best industrial design emphasises a mixture of function and haptics so that the object virtually disappears and you can just concentrate on the matter in hand. So what was this magical camera? It was the Olympus OM4.
The OM4 was the successor to the OM2n as the flagship of the OM system when it was introduced in 1983 and remained so until it was superseded by the improved OM4 Ti in 1986. The OM system itself was the brainchild of Yoshihisa Maitani whose design philosophy was to produce low cost high quality cameras that were Leica like in image quality. They had to be small enough to carry everywhere and also be durable. The system had to be capable of handling any task from microscopy, macro, astronomy, photojournalism and wildlife. Above all he wanted it to be the “kind of camera that inspires increasing satisfaction as the photographer gets to know it better, it will gain a permanent place in his affections as an indispensable photographic tool”. Burrows, P., 2023, The man behind the Olympus OM camera: Yoshihisa Maitani, DigitalCamera World). It worked for me and as far as I was concerned the OM 4 was/is the perfect camera.
Although looking very simple by todays standards this was a very sophisticated camera back in the 1980’s
What made it so good? The strong weatherproof body meant it could be taken anywhere (mine accompanied me to Moscow in winter, -30ºC outside, and to Malaysia, 40ºC and 100% humidity, without missing a beat. The enormous catalogue of high quality Olympus OM Zuiko lenses. The amazing for it’s time TTL flash control system that let you use off camera flash and control it from the camera. It was the first camera with a built in multi-spot exposure meter (2% field of view) which enabled you take take 8 spot readings and average them. This made it ideal for practitioners of Ansel Adams’ Zone System. Only two other manufacturers did this – the Hasselblad 205TCC andthe Rollei 6008. Another unique metering feature was the ability expose for highlights or shadows automatically at the touch of a button. The viewfinder was big and beautiful with a build in diopter correction with a range from +1 to -3 diopters. Then there was the shutter with its enormous range of of 240 seconds to 1/2000. It wasn’t just the specs that made it so good, it was the way it sat in your hand. It is a beautiful thing. Were there any downsides. Well there were actually as no camera is perfect. The first was the flash sync speed of 1/60 sec. It meant using fill in flash outside was nigh on impossible in bright conditions. The second was its insatiable appetite for SR44 batteries. It went through them like a trust fund baby goes through money. Thankfully there was a workaround and it was to switch the shutter speed dial to “B” when you weren’t using it. This would disable the electronics and prevent battery drain. You just have to remember to switch off the B setting when you go to use it again.
It just felt so perfect in my hands.
I bought a second hand OM 4 in 1986 and I used it heavily until 2005 when the shutter gave up the ghost and jammed. I couldn’t get it repaired as there were no parts. I thought about replacing it as I had quite a selection of lenses, but I was transitioning to digital and Canon looked the way to go. I’ve been toying with the idea of shooting film again and I’d still got the use of a couple of film SLRs. The first being my wife’s Olympus OM40 and the second being my Canon EOS30. I didn’t gel with either camera as I didn’t find them enjoyable to use and I didn’t feel as if I had any incentive to try something else. The debate about AI in photography really spurred me on to think about film photography again and it was my 61st birthday coming up so I decided to buy myself a present in the form of an OM4. I searched on line extensively and eventually I found a very nice copy on EBay at Japan Seto Inland Sea Camera with an Olympus OM G.Zuiko 50mm f1.4 lens for a very good price. When it arrived I opened the box and took it out. Even after twenty years I could operate all the controls with my eyes closed. It felt so good – like seeing a long lost friend.
So I’ve now got the camera and lenses and a sizeable stash of film in the freezer. I’ve got a couple of ideas for projects and I’m learning how to scan the negatives using a DSLR and macro lens. I’ll shoot a few rolls of film and get them developed by a lab and if all goes well, which I’m sure it will, I’ll get everything together to process the films at home. I’ve already decided I don’t want to run a full darkroom again so any printing I do will be via my inkjet printer.
The title for this blog and the lyrics come from the 1970’s hit for Peaches and Herb.
I’ve received some inspiration from a couple of sources this week. Firstly it was the 50th Anniversary of the launch of the Olympus OM 1, a hugely innovative camera that inspired much love and devotion. It would be 10 years after its introduction that I would get my own and it propelled me into a life long love affair with Olympus cameras and lenses. The anniversary sent me looking back through my photo archives for images made with it and I decided to write a blog about it.
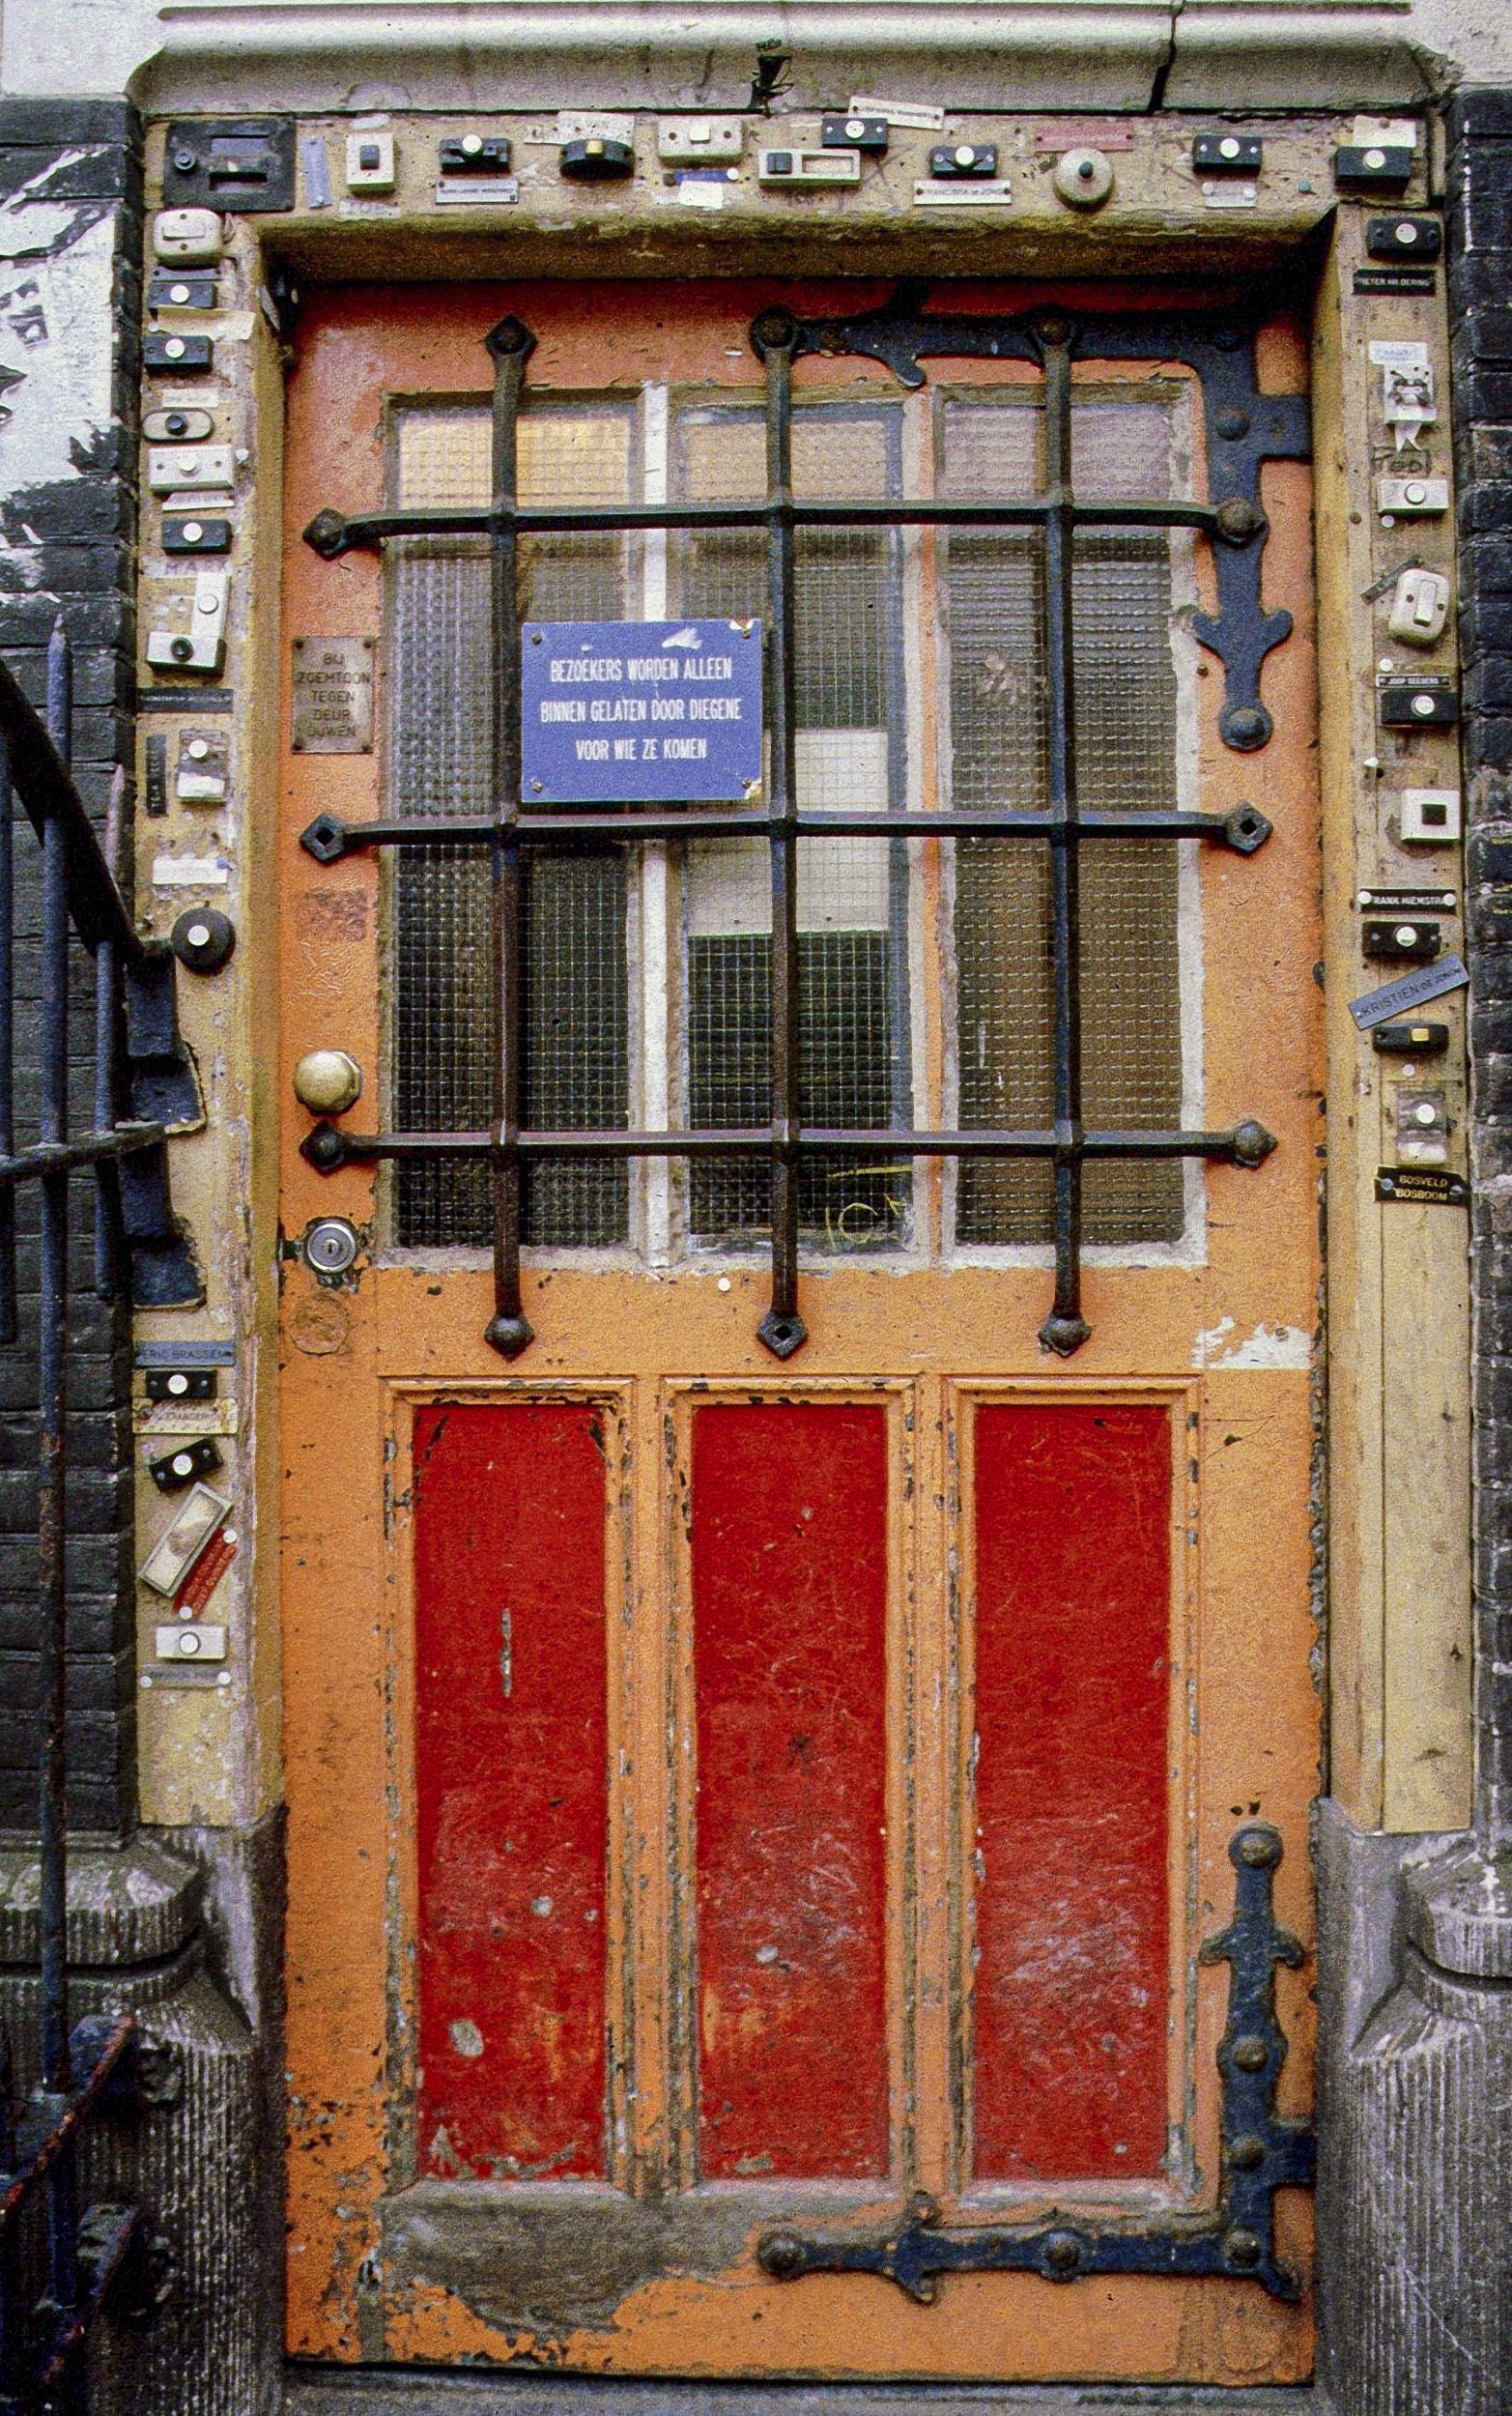
My second source of inspiration for this blog entry comes from a blog I’ve been following for a while – coronet66. Every Thursday he puts up photos he’s taken of doors. Now I’ve got to admit a certain fondness for taking pictures of doors and gates. So I thought I’d put up a few pictures of doors I’ve taken with my OM1.
This was taken in Amsterdam in January 1986. I remember precisely as I was on honeymoon. I was intrigued at the sheer number of doorbells. Olympus OM1n with Sigma 28mm f2.8 lens using Agfachrome CT400.
Friends of mine used to live in this cottage on the Goodwood Estate in West Sussex. Olympus OM1n with Olympus 35-105 lens using Fujichrome RP50 which was the precursor to Velvia.
The Bull Dog Cafe in Amsterdam. January 1986.
Carmelite Nunnery in Palma, Majorca. Originally taken on Fujichrome RP50 but converted to black and white in AlienSkin Exposure 4.
An old abandoned Venetian style house boarded up. Santorini.
Hanuman Dhoka is a complex of structures with the Royal Palace of the Malla kings and also of the Shah dynasty in the Durbar Square of central Kathmandu, Nepal.
Back in April 2016 I wrote an entry on the benefits of printing vis a vis a means of archiving photos. In this post I’m revisiting the subject of photographic prints.
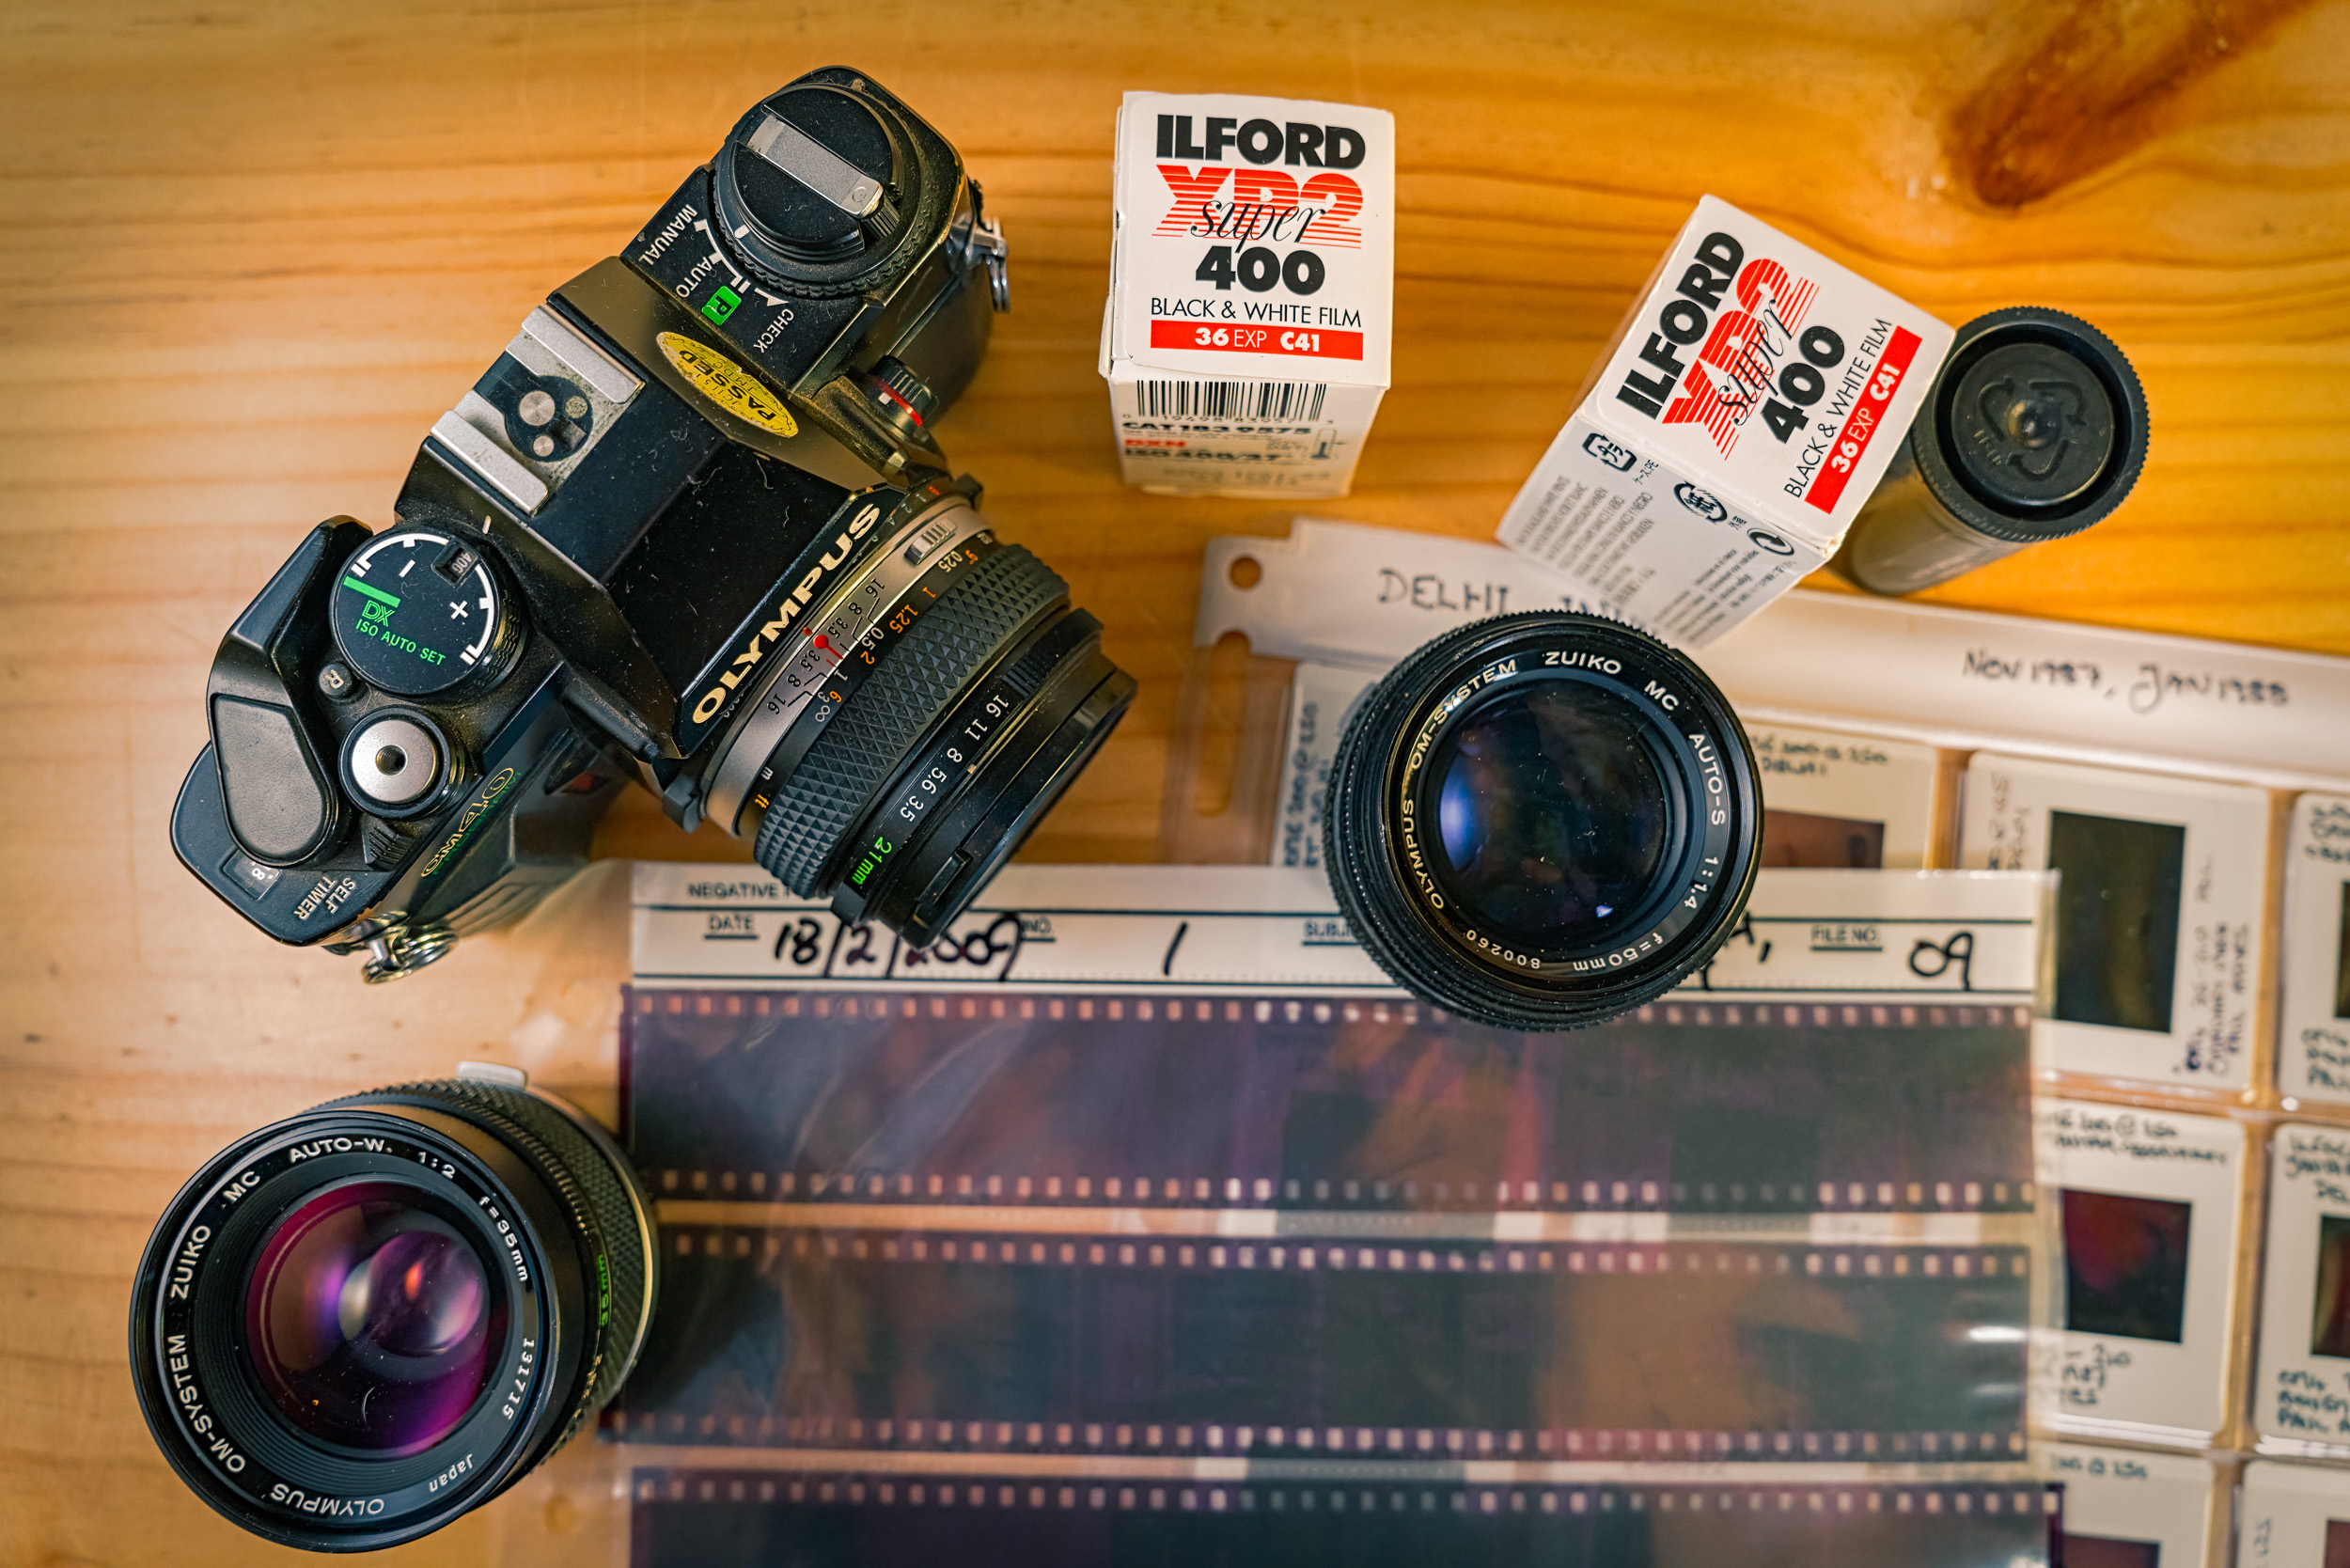
The old days of analogue photography. Film, negatives, slides a camera and a trio of good lenses.
As I said before photographically I grew up in the golden age of film photography. High quality colour prints were cheap and easy to get with the proliferation of 1 hour photo labs. When it came to black and white photography I learned to develop and print in a friends bathroom and the exhilaration of watching that first print appear is still with me after nearly 40 years. Prints were what photography was about. The advent of digital photography, the internet and social media changed that and now a great many people don’t have their photos printed but prefer to view them and share them via screens.
In 2022 why should we bother with the outdated medium of photo prints? Well firstly I think making prints is a great way to improve your photography. Secondly I think that it is nice to have a tangible result from your photographic labours. Lastly I think it is an enjoyable experience – taking the photo and then working through the process to making a good print.
How does making a print improve your photography? Well it would seem that if you want to take good photos you need a 24x36mm sensor (so called full frame) with huge dynamic range, low noise, and super corrected lenses to give you bags of micro contrast. But, the reality is that any digital camera with a four thirds sensor or larger from the last 15 years is capable of producing beautiful prints the equal of any of Sony’s, Canon’s or Nikon’s latest super camera.
Despite being 17 years old and only having 12.8Mp the Canon EOS 5d is perfectly capable of producing gorgeous A1 sized prints.
You can’t make a silk purse out of a sow’s ear the old saying goes. At the picture taking stage you’ll need to ensure you are getting the best out of camera with technique. Learn the sweet spot of your lenses sharpness. Understand Depth of Field. Know when to take over from autofocus and do it manually. Good handholding technique or use of a tripod to get the most resolution. Good exposure. Learn the difference between subject brightness range and dynamic range. Here in Australia a scene’s brightness often exceeds what a camera can render meaning you loose information in the shadows and highlights. So a good exposure is one where you decide what is the most important part of your prospective image and then decide what you want as detail in the shadows and highlights. Use your histogram to help you. When I was teaching photography at art school the most often heard comment from students was “I’ll fix it in Photoshop”. As you boost the exposure or lift the shadows in your editing software you introduce noise and colour casts. Crap in equals crap out! Get it right in camera and you’ll have an easier time.
Now we’ve got the image onto the computer. Edit to taste but be aware that we don’t want to loose any information by blocking up the shadows or blowing out the highlights. This should be relatively straightforward as we got a good exposure. So how do we prepare a picture for printing. Well just as your camera has its dynamic range so does your computer screen and your printing paper. So you’ve taken a photo of a scene where you have reduced the subject brightness range to fit in with your cameras dynamic range. Opening it up on your computer the screen has a greater range because it is backlit. So you can see loads of information in the shadows and the highlights look very bright and detailed. Most people prefer this – lots of contrast and bright colours. One of the reasons why they don’t print is that their photos don’t look like this when printed. So to get the image so it looks right in the print we have to match it to the dynamic range of the printer and paper. This where colour calibration comes into play. We need to have the image on the screen at a known value. When I take an image I shoot in RAW as a means of preserving all the possible information. I calibrate my screen monthly with an x-rite colormunki and have it set to automatically react to changes in the ambient lighting. When I convert the RAW file it is to an uncompressed 16 bit TIFF in ProPhoto RGB this ensures that there is as much colour information as possible. So now the image I got right in my camera is now right on my computer screen.
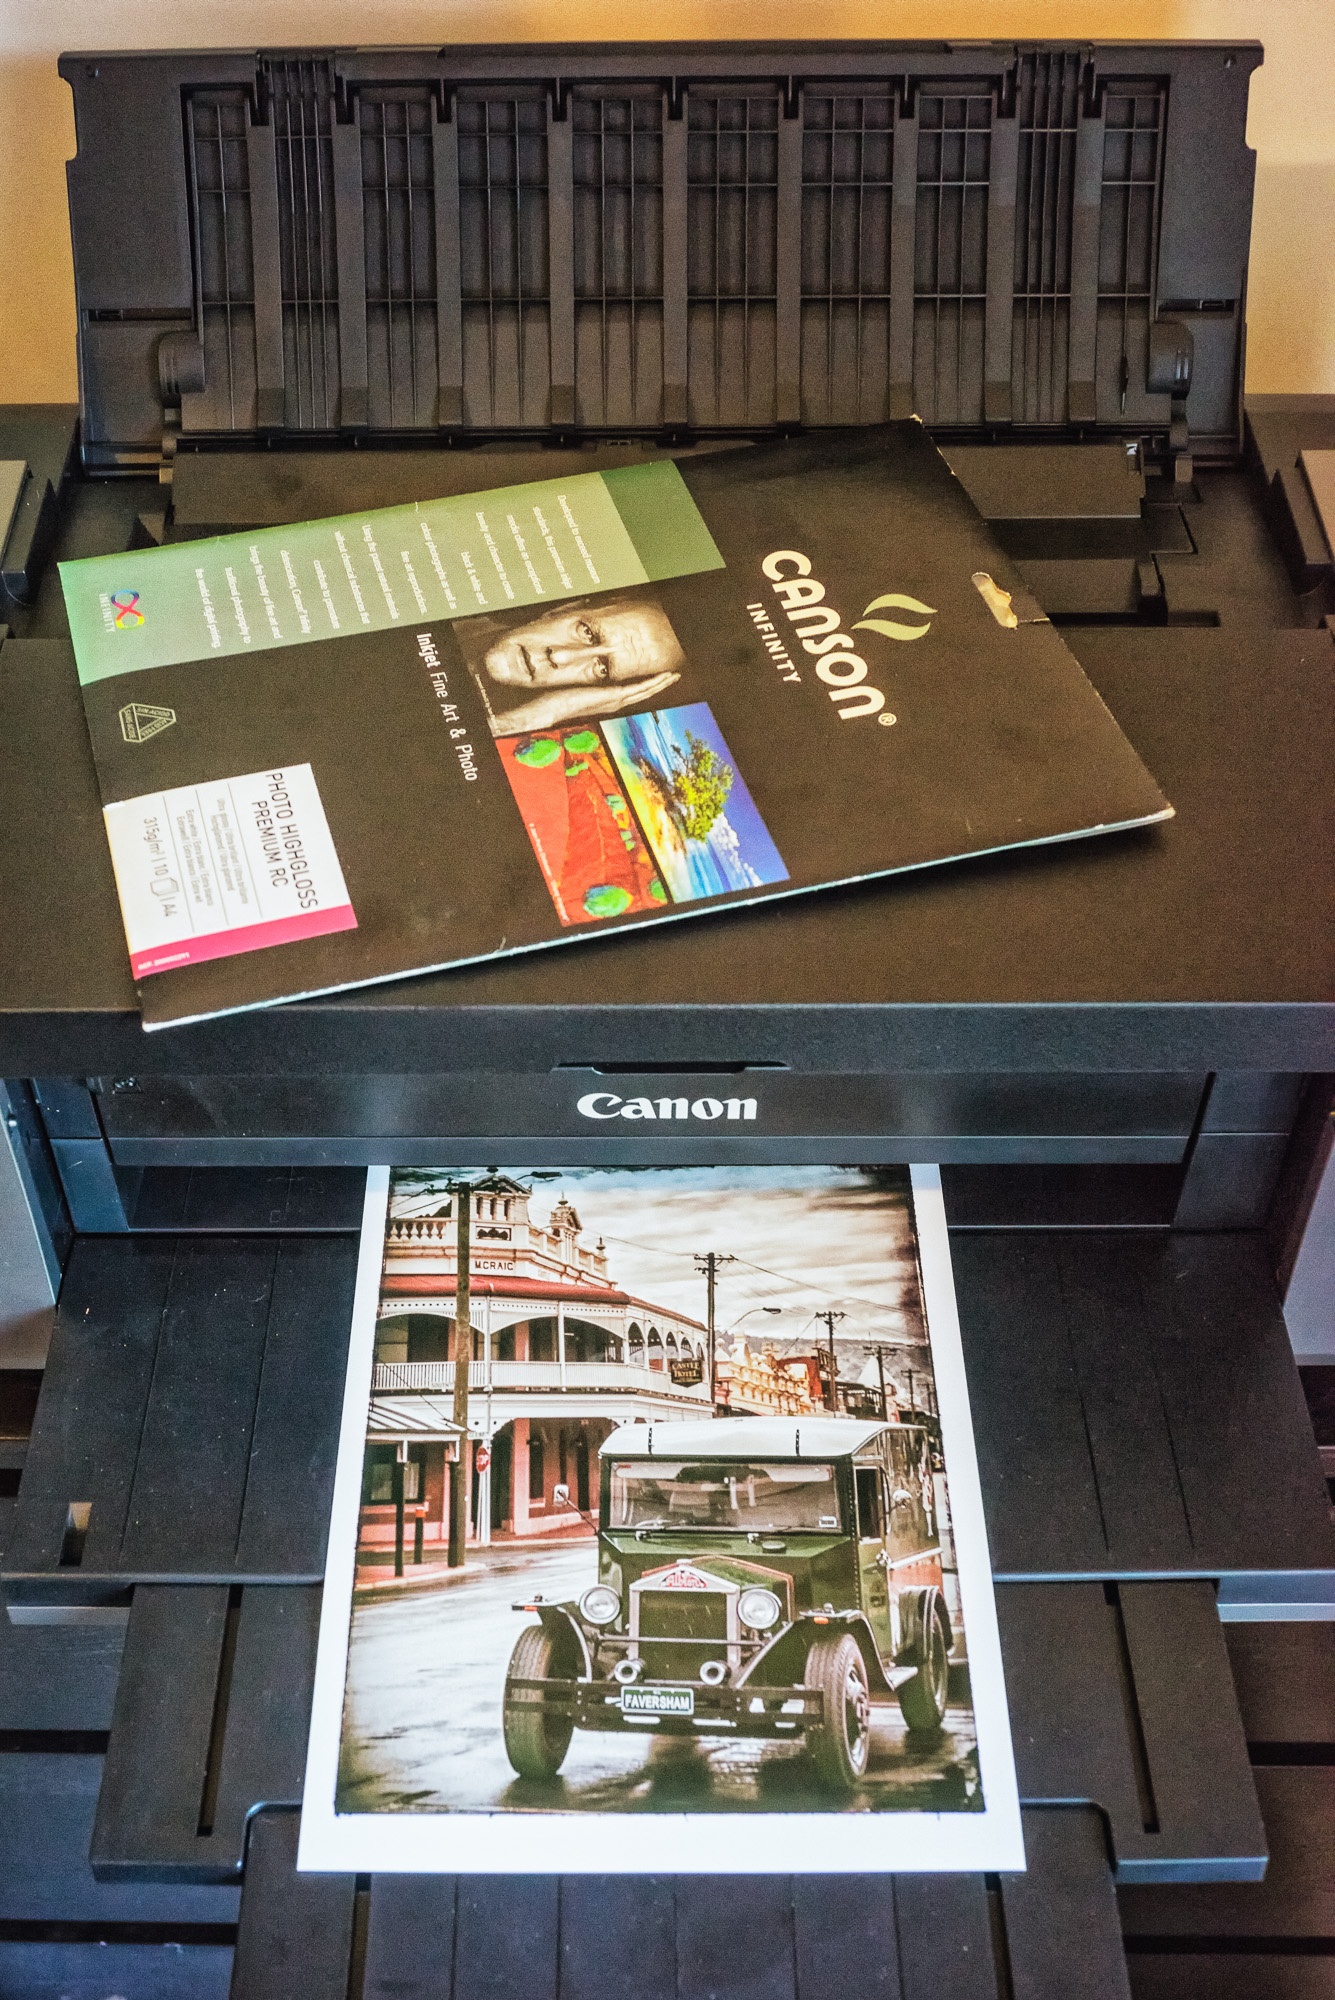
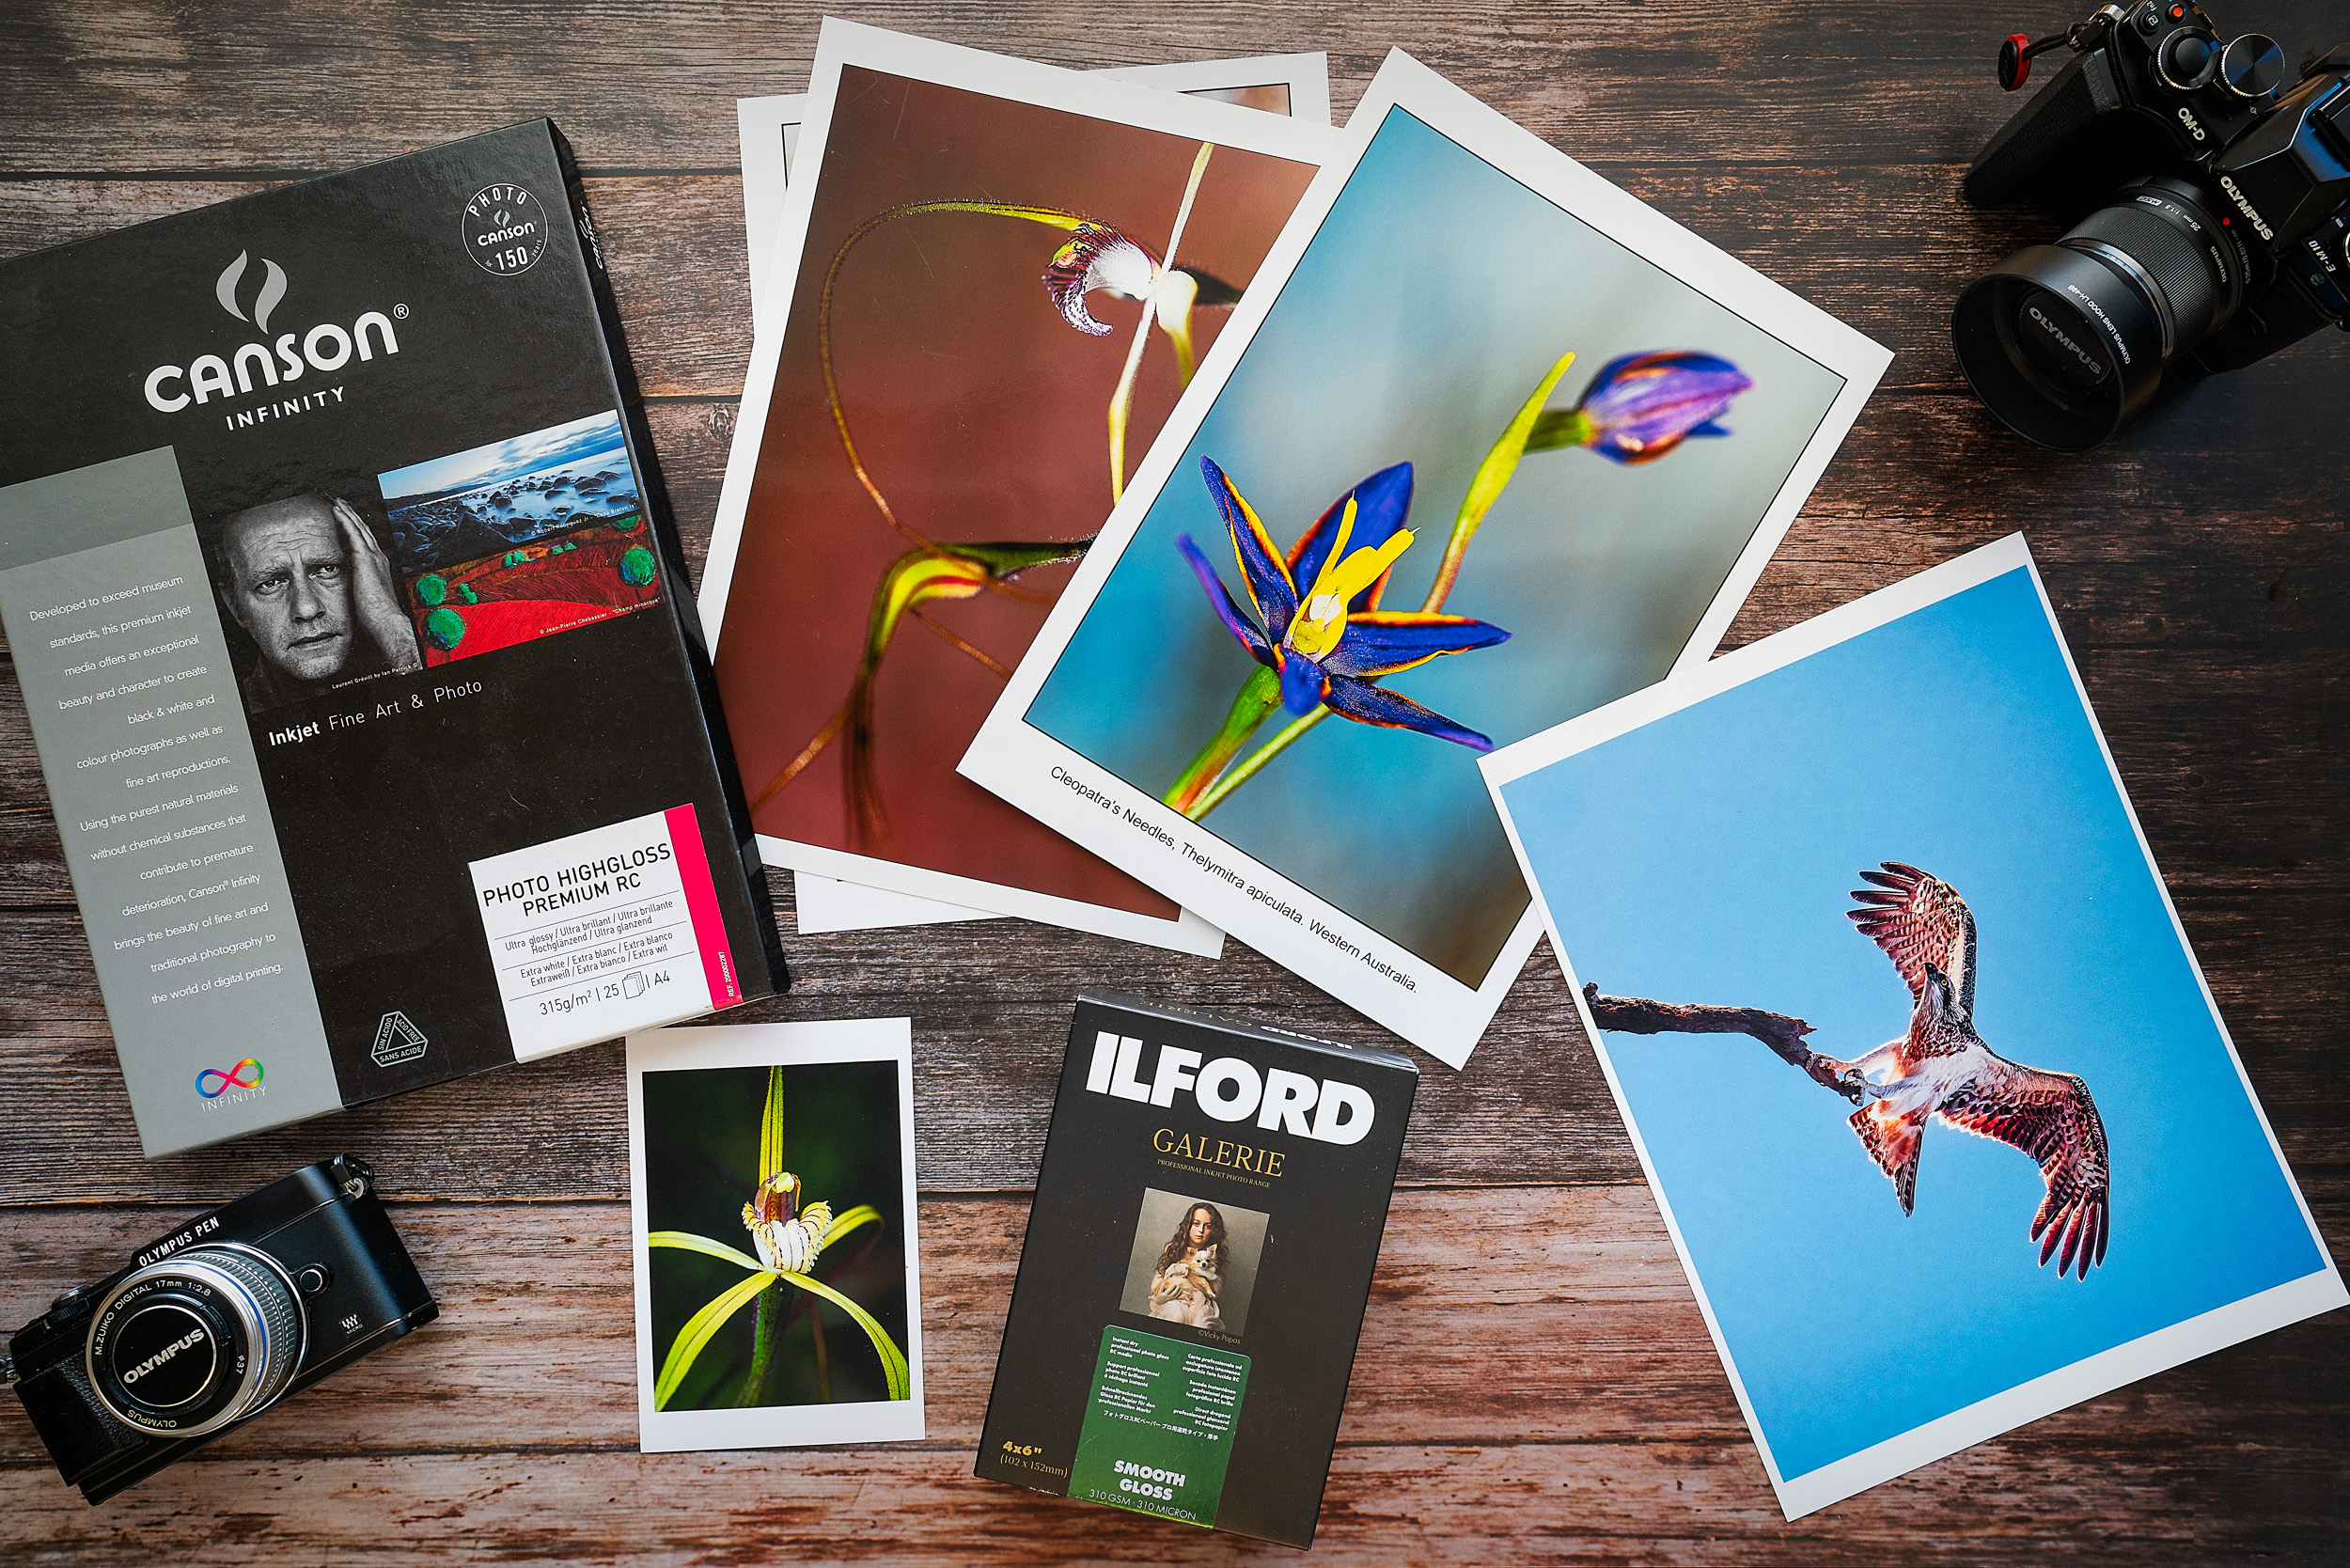
Photographic print on Canson Infinity Photo High Gloss Premium RC by a Canon Pixma Pro 100S printer.
It’s now time to think about printing. Now you can choose to do this yourself on a home printer or you can send it out to a lab. There are pros and cons to each. With a lab somebody else manages the printer and you just pay for the print, but the whole process from editing to test print to final print is slower. Owning your own printer means you have to outlay money upfront for the printer, ink, and paper and then manage all the colour profiling yourself, but the whole process is quicker and the feedback immediate. I have a printer as I like the whole process from beginning to end. But either way there is something you need and that is the ICC profile of the printer and paper you are going to use. If you use a good lab they should be able to supply the profile for you. If are going the DIY route then go to the website of the paper manufacturer and download the the profile of the paper and printer you are using. The ultra keen can do their own test strips and profile their own printer. I choose to use the canned profiles from the makers as I don’t want the faff of creating a new profile every time I open a new box of paper or change an ink cartridge. Once you’ve got the profile follow the makers installation instructions.
Making prints makes your efforts tangible.
Your printer and paper have a dynamic range that is much smaller than that of your camera and computer screen. So the trick is to literally squash all that image information so that it fits within the range of the printer and paper. One of the key tools to this is using the soft proofing feature of Photoshop or Lightroom. To use the soft proofing feature make sure that the profile you’ve just downloaded is selected and then activate it. Immediately you’ll see your beautiful image looks muddy and lacks contrast – in fact it looks horrid! Relax it only looks horrid because that is how your screen is interpreting it. Now’s the time for a test print. I make 6×4 (10x15cm) test prints ‘cause it’s cheaper. If you’re going the photo lab route things get a little protracted as you send out the image file in the format they prefer and then wait for the lab to send the print back. Home printers can feel smug at this stage as you wait for the printer to finish in a matter of seconds. Look at the print under daylight or an artificial light source balanced for daylight (5600K). Is it too dark, too light? Too much contrast, too little? Are the colours how you saw them? Make the necessary changes and test print again. Some advocate taking a break of a couple of days before making the final print while having the test print pinned up somewhere you can keep looking at it. I don’t do that – I’m too impatient I suppose. When you’ve got the final print leave it somewhere clean and flat and let it just dry out thoroughly before you frame it or put in an album.
This image of Little Pink Fairy Orchid aka the dwarf pink fairy orchid (Caladenia reptans subspecies reptans) was quite difficult to print as the flower was render as having a deep purple colour rather than ink. This meant masking the image and doing a colour correction. It didn’t look right on screen, but printed correctly.
This is a learning process. Some photos are harder to work on than others for example pictures of bluebells are notoriously hard to print so that you get a blue flower rather than a violet one. This is because your camera does not see them as you do. But as you go on you learn more and more and this becomes incorporated at the taking stage so your photographs begin to improve.
A surprising thing I’ve found is that when you start looking a prints up to 29x42cm (A3) is that it is very hard to see differences between images from 12Mp full frame, 16Mp m4/3 image, 18Mp APSC or a 42Mp full frame. Printing larger starts to show the deficits both in terms of equipment and technique, but it is possible to take an image from my old Canon EOS5d, which had 12 Mp, and print it at a size of 100x150cm and get a very satisfactory result.
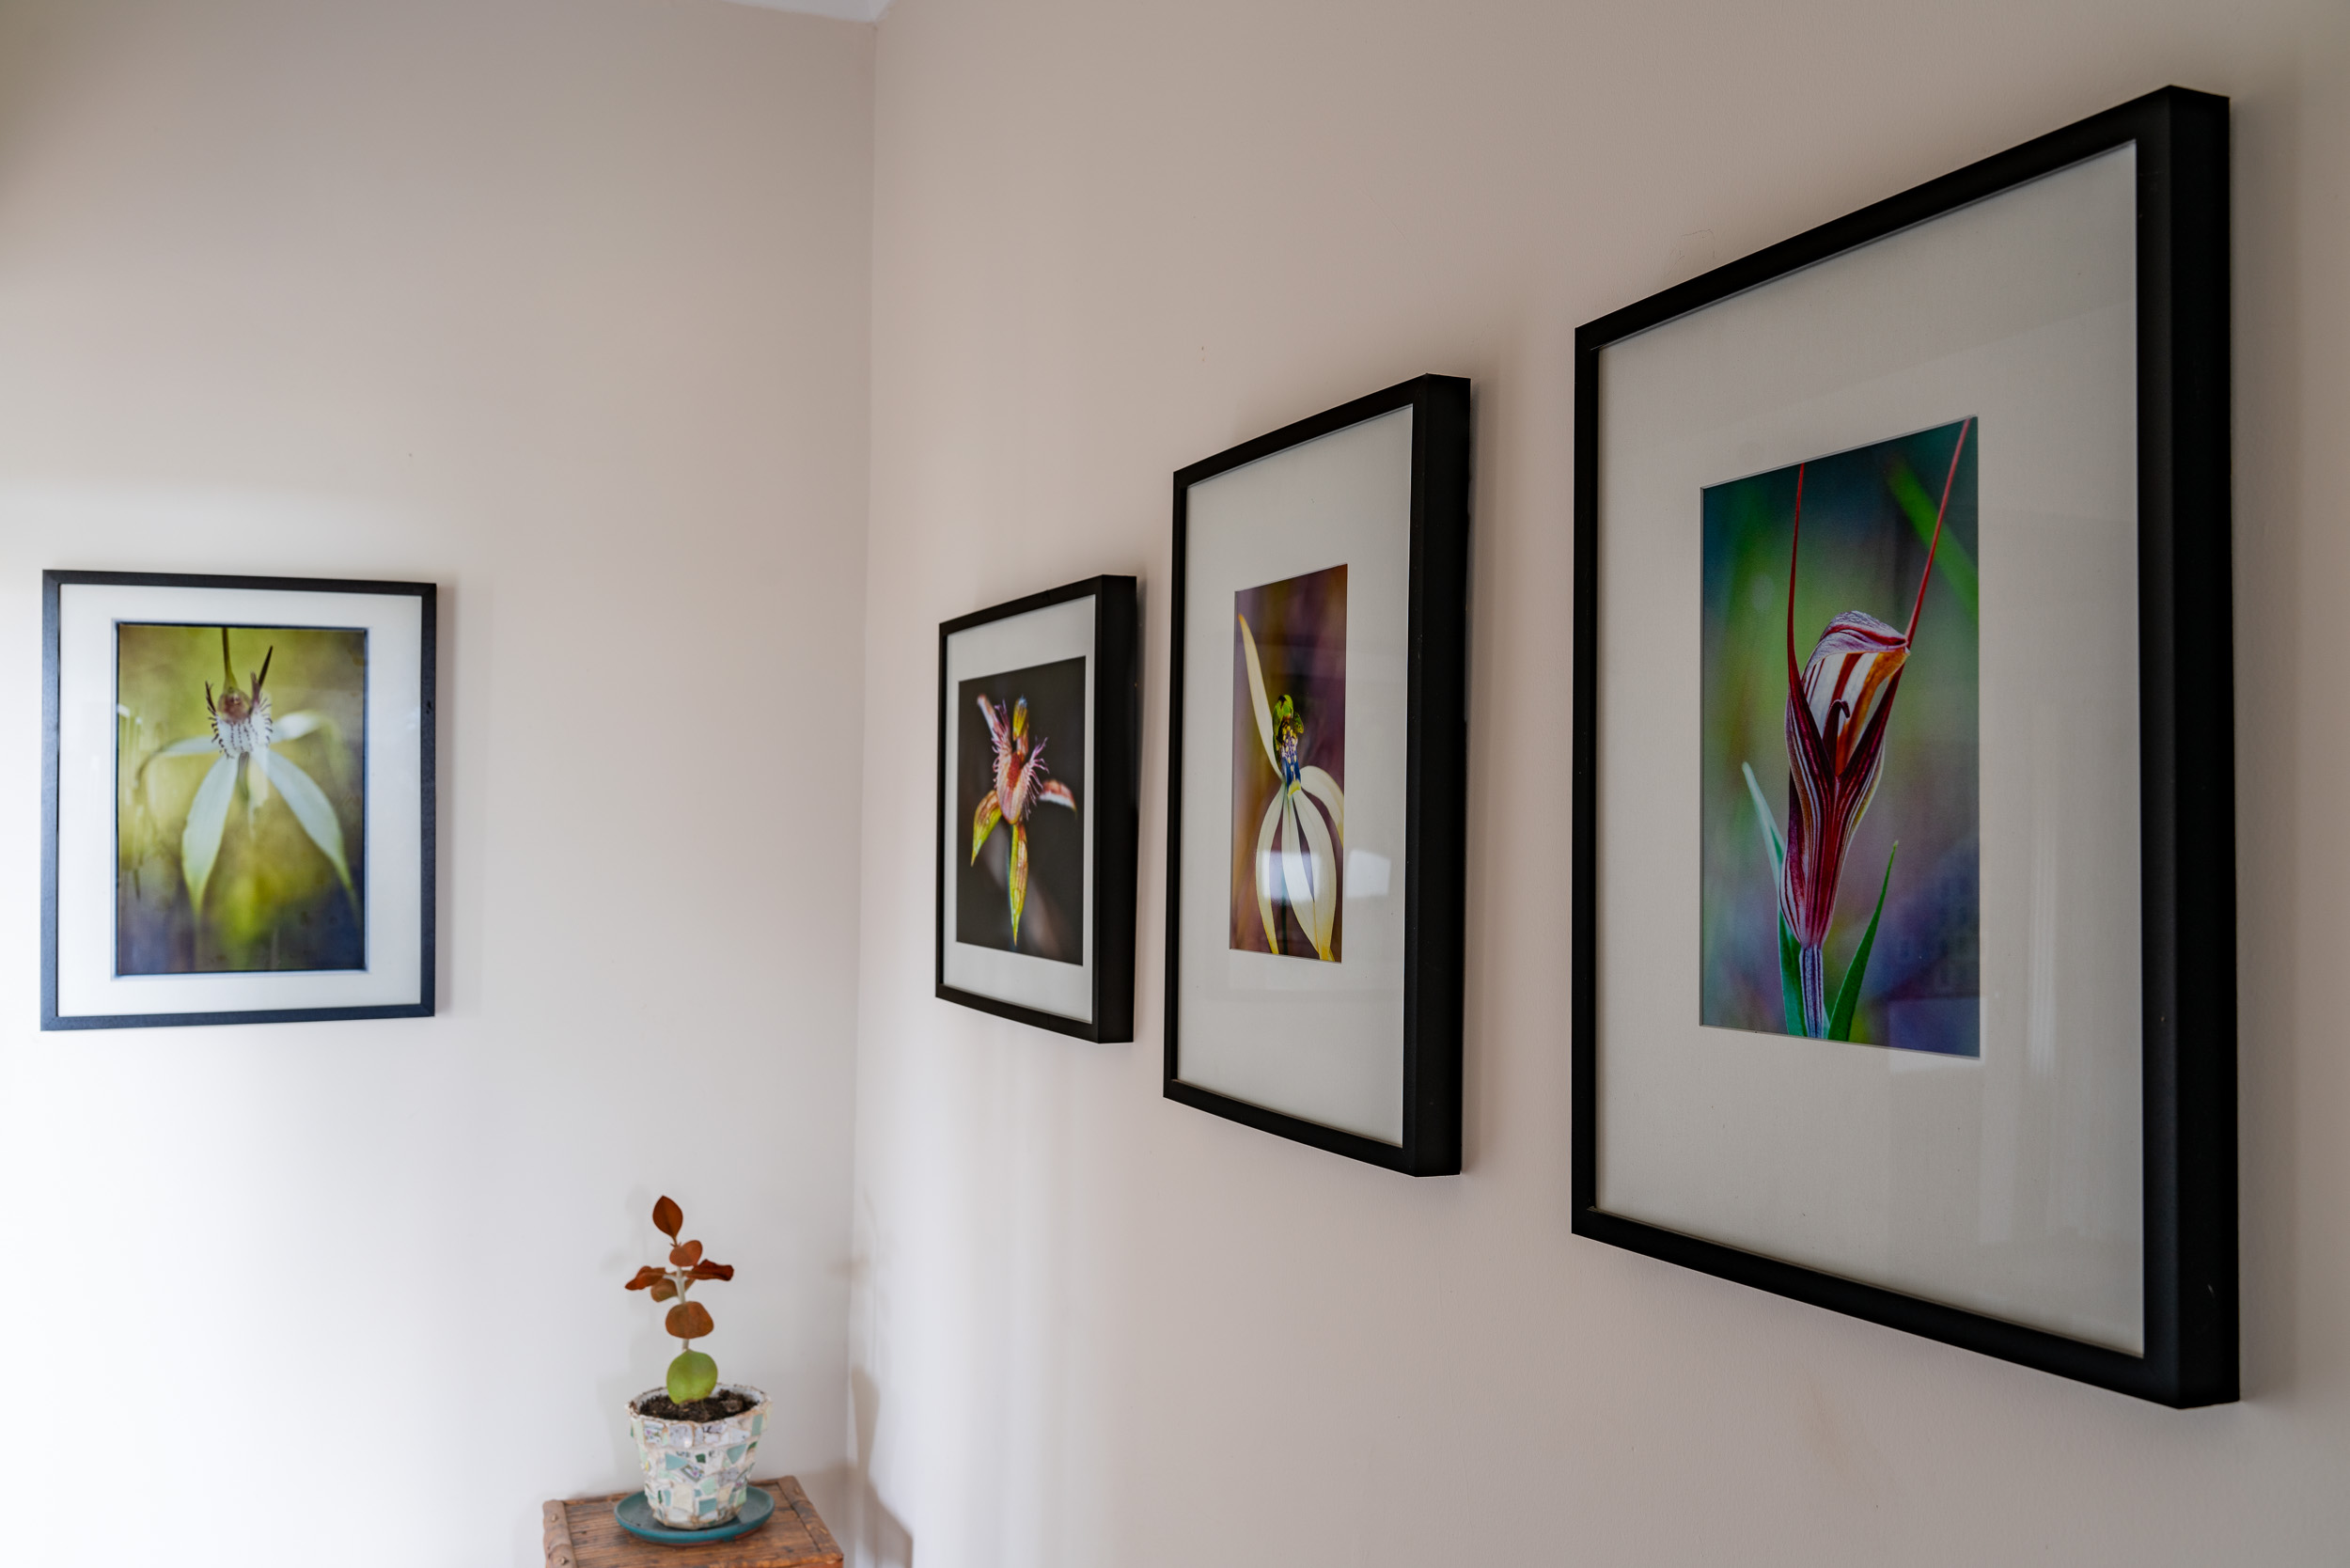
Framed prints of your work make a fine decoration for your home.
I’m a great advocate of putting prints up on the wall and living with. First because of their artistic or aesthetic value. Second because there is nothing like looking at a print day in day out to make you think how the photo works. Is the composition good, is the sharpness good etc etc. This will spur you on as you advance along your photographic journey. Not all the photos you print and display need to be works of art. My partner and I were sitting around one evening talking about when she lived in Stoke Newington in north east London. Out came the shoe box of photos and it was great looking through them and talking about them. We both realised that we had a bit of a gap in our family photos. Nothing after the start of digital photography. So we’ve both committed to making prints of family, friends, trips and holidays with the aim of creating a photo wall.
The whole process is a lot more involved than I’ve written here. To get you going here are a couple of useful websites:
Cambridge In Colour – this is a great site with lots of info and an active forum
Image Science – this is the web site for a business here in Australia, but the educational side has tons of useful information.
“F8 and be there” is the old maxim of press photographers. It means basically turn up and get a picture. An aperture of f8 would be in the sweet spot of the lenses performance and would guarantee a sharp contrasty image if you found the focus. I’ve been thinking quite a bit about focusing and optimum sharpness of late.
A portrait of my BSO (Beloved Significant Other) not taken on the Sony A7 iv.
What is acceptable sharpness? What is an acceptable in focus hit rate with an autofocus camera? Why do some manufacturers have a reputation for excellent AF performance (Canon’s dual pixel technology) and some seem to be the bench mark for woeful autofocus (Panasonic’s DFD contrast based system)? I grew up with manual focus cameras and with them any failings were down to the operator. I remember getting my first AF camera – a Pentax SFX. The AF was slow really slow, glaciers move faster, and the noise of the motor made people stop and stare. I got rid of it quick smart and went back to using my manual focus Olympus SLRs up until 2004. It was the development of autofocus cameras in the 1980’s that saw photography as a hobby become more mainstream as out of focus photos were one of the things that put people off.
This thinking about autofocus came about becauseI’ve been reading and watching reviews about the Sony A7 iv *. There seems to be a vocal few criticising its auto focus performance in a very specific usage scenario. The users are using eye detect auto focus on a moving person with fast lenses such as the Sony 135mm f1.8 wide open at a distance of 2m or more. The complaint being that the camera only hits focus on the iris around 70% of the time and the rest of the time front focuses on the eye lashes. Let’s unpack this. The camera is ONLY achieving a 70% hit rate. Hells bells and buckets of blood! My Canon 5d and 6d couldn’t do that. When I use manual focus I couldn’t do that. I had enough trouble accurately focusing quickly with my Olympus OM Zuiko 135mm f2.8 wide open. Mind you those old 135mm f2.8 lenses were often a bit soft wide open. It is staggering to me that firstly you’ve got a 135mm f1.8 lens that is tack sharp wide open and then you can combine it with a camera that is able to focus on the iris of a moving person at 2m with a 70 % success rate. Let’s look at this problem from another direction. Now according to the DOF calculator on Cambridge in Colour the DOF with that combination is 2cm. That means 1cm in front of the eye and 1 cm behind. That would mean that the eye would be in focus but the nose and ears would be blurred. Even if you used an aperture of f4 which 2 1/3 stops more DOF you still only have 5cm DOF. An aperture of f8 would give a DOF of 11cm which is sufficient to render a human head acceptably sharp. Why would you want to take a portrait where only the iris is in focus? The craze for taking photos with razor this depth of field has been with up for about 20 years now and the only reason I can why it endures is that it signifies status – the photographer has the ability to own very fast and expensive lenses.
Wolf Lane in Perth, Western Australia.
Two of the Twentieth Century’s photographic titans had some things to say about sharpness. In 1998 at age 90 Henri Cartier-Bresson said to Helmut Newton: “sharpness is a bourgeois concept.”** For Bresson content and concept were everything and if you look at his images you can see some of them are a little soft. On the other side of the Atlantic in the United States Ansel Adams famously said “There is nothing worse than a sharp image of a fuzzy concept”. So for Adams who sought technical perfection on every level in his photographs saw that intention and content were more important. So focus and sharpness like many other facets of photography are secondary – they play a supportive role but are not the primary consideration.
The photos accompanying this piece were taken with a camera that does not have a lens. It is a 4×5 pinhole camera with a focal length of 150mm and an aperture of f256 which when using Ilford FP4 developed in Ilfosol 3 gives an amazing amount of detail and clarity considering that no lenses are involved. I like to think that it is my anti technology camera. No lens, no focusing, no shutter mechanism, no film advance, no metering, no viewfinder. A successful picture required a great deal of serendipity and that is part of its charm.
My 4×5 pinhole camera with a focal length of 150mm and an aperture of f256. I like to think that it is my anti technology camera.
* Not getting one and the reason has nothing to do with the autofocus issue and everything to do with the weight of bag with camera, 28-70mm f2.8, 105mm f2.8 macro, 35mm f2.8, 20mm f2.8, 150-600mm f5-6.3 and ring flash.
** I had a student who said that Bresson himself was a bourgeois concept.
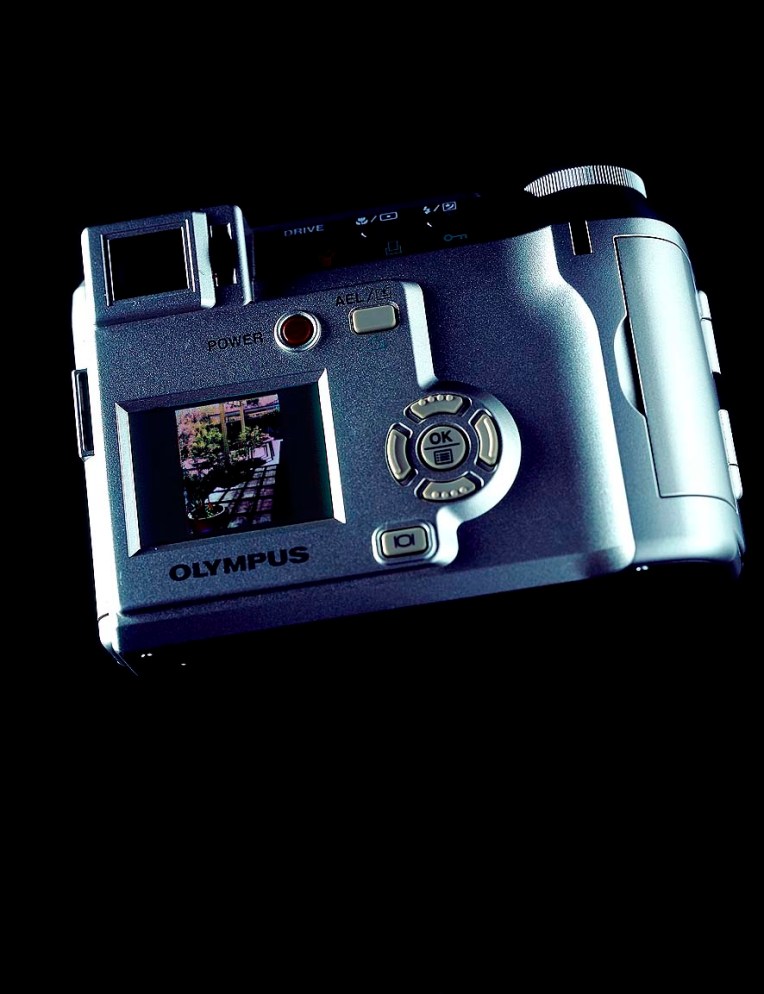
I’ve been missing in action over the last few weeks. Partly due to health reasons (which I won’t bore you with), partly due to computer meltdown when I upgraded to Mac OSX Catalina (what an unmitigated disaster that was and still isn’t solved) and partly because some chump cut through the telephone line while digging a hole. The whole experience has meant that I’ve been seriously considering going retro i.e. reading books, watching DVDs, listening to CDs and shooting film again. So I’ve ordered some books off of Booktopia, dug out the CD collection and loaded some film into an old camera. I’ve even found myself looking at kits to develop film at home. Scary stuff. Don’t know how far I’ll follow through with idea, and I don’t know if it’s still possible to get my favourite film and developer, but I’m certainly keen to give it a go. So I thought todays pic would be appropriate – a photo of a digital camera taken with a large format film 5×4 camera shooting Fuji Provia.
Much is written about “Tasmanian Gothic” – a dark soberness that has its roots in the landscape and the colonial history. Personally I’m not a fan as I feel it colours much of modern-day Tasmania and restricts progress. But, there is no doubt that the weather and the landscape do particularly suit black and white or monochrome photography.
Wooden tender beached at Pirates Bay, Tasmania. Canon EOS 5D with Canon EF20mm f/2.8 USM lens. Exposure: 1/30 s at f/16.0 ISO 100
When I worked with film I loved the whole process for black and white photography. Picking a film and developer combination, then choosing a paper and then finally whether to tone the image or not. The whole process was magical and working in the darkroom, whether it was a commandeered bathroom or a purpose-built one was like a going back to the womb to create something wonderful. Admittedly an awful lot of the time I seemed to turn out a lot of dross, but it was an enjoyable process. To misquote Kilgore’s eulogy in the Coppola classic film Apocalypse Now“I love the smell of fixer in the morning,”.
Kite surfing off Park Beach in Tasmania. Olympus E-M10 and OLYMPUS M.75-300mm F4.8-6.7 II lens. Exposure: 1/1600 s at f/6.3 ISO 200.
I would love to work with black and white film again – but living with a rainwater tank for our supply and with a septic tank for waste water management means that I cannot develop film at home and there are no labs in Tasmania that develop the film. So for now it is the digital option, which is not as magical and mystical as the darkroom, is in its own way just as satisfying. No longer following the Zone Systemlaid down by St Ansel, I now expose to the right (ETTR) to get the maximum amount of tonal information in my RAW file and then process in Lightroom. The final black and white conversion is done in NikSoft’s Silver Efx Pro 2, which is always done the same way and mimics what I used to get with Ilford Delta 400 developed in Rodinol and then printed on Ilford FB Warmtone Multigrade paper. My Canon Pixma Pro9000 does a fantastic job of monochrome printing on Harman Gloss Baryta Warmtone. I’ve done two exhibitions using this combination and been delighted with the results.
Yachts moored on King George Bay Murdunna, Tasmania. Canon EOS 5D with Canon EF28-135mm f/3.5-5.6 IS USM lens. Exposure: 1/640 s at f/11.0 ISO 800.
Thankfully working digitally means that we can work in both colour and black and white at once, just making the decision of which way to go at the time of processing. It is a great time to be a photographer.
As always clicking on an image will take you through to my online gallery.












You must be logged in to post a comment.