It’s quite hard to believe that flowering canola can be a tourist attraction, but judging from the number of people taking selfies of themselves in front of fields of it certainly confirms it. So here are my gratuitous canola themed photos.
Djandjarak or Black-winged Stilt (Himantopus himantopus) with canola reflections.
William Shakespeare, Act 3, scene 1, Julius Caesar
Mounted archery demonstration. 2023 York Medieval Fayre.
It’s always a bit surreal when the Medieval Fayre is on – things like people in Medieval costume buying drinks in the local supermarket. Even the whole idea of Australians dressing up in Medieval costume and doing re-enactments is a bit of a strange notion when you consider that Australia had no European history prior to the Seventeenth Century. I go most years just for the spectacle, I always like watching the mounted archery demonstration. Amazing skills in hitting a target while at a full gallop. It makes for great photos as well.
Just lately I’ve been on a bit of historical journey – over the last 8 weeks I’ve watched all the Time Team episodes on YouTube. It’s been quite an education and it was a very fun way to find out more about where I’m from. I particularly liked the episodes about the Saxon period just because up to recently very little has been known about that time. Another connection is that I spent part of my childhood in Hastings in East Sussex and growing up there you’re very aware of the fate of the last Saxon King of England – Harold Godwinson – at the Battle of Hastings. So when I walked into the Medieval Fayre I was quite delighted to see the Grey Company putting on a display re-enacting that period.
The Grey Company focuses primarily on the so called “Dark Ages” period of history (600-1100 AD).
A Norman knight waits for the start of the demonstration.
Rushing into the fray with a blood curdling cry.
The clash of swords on shields.
A Saxon shield wall prepares to engage Norman invaders.
A few insults and banging shields with swords gets the blood up.
Engaging the enemy.
A well earned breather.
Photographically it was a case of using my Canon 6d, the EF24-70mm f4 and EF 70-200mm f2.8. Processing was all done in Lightroom and Exposure X7. I felt a black and white treatment would be the most sympathetic.
Teleconverters are an affordable way of getting longer focal lengths, but with the advent of software such as Blow Up 3, Topaz Gigapixel Ai and Adobe Lightroom’s Super resolution do they still have a place in the wildlife photographers kit bag?
TLDR
The Canon Extender EF 2x ii.
A teleconverter is a tube containing a series of lens elements that goes between the camera body and the camera lens. They commonly come in the following strengths; x1.4, x2, and x3. They work by enlarging the centre part of the image. So for a full frame camera (36 x 24mm) a 1.4 teleconverter magnifies a rectangle of 25 x 17mm and a x2 teleconverter magnifies a rectangle of 18 x 12mm. So while the look like they’re increasing your focal length they are really just cropping your image and magnifying it. In photography the old adage “There’s No Such Thing As A Free Lunch” comes into play a lot, and no more so than here. The penalty for doing this is light loss. A x2 teleconverter looses 2 stops of light and a 1.4 teleconverter looses 1 stop. This is usually expressed in the following way:-
A 300mm f4 lens with a x1.4 teleconverter becomes a 420mm f5.6
A 300mm f4 lens with a x2 teleconverter becomes a 600mm f8
This means that to keep your shutter speed high enough to stop the motion of animals you have to use a higher ISO.
A 300mm f4 lens will make it difficult to photograph small shy animals, while adding a x2 teleconverter will make it an attractive proposition so you can see why they are so popular. Indeed if you take into consideration the cost of long lenses then you’ll see how they can look a screaming bargain. Lets look at the current range of Canon EF lenses for an example:-
The Canon EF 600mm f4 lens costs a whopping $21,000 AUD
The Canon EF 300mm f4 costs $2000 AUD
The Canon EF x2 extender mark iii costs $750 AUD
So for for $2750 you can get a combination that gives you a focal length600mm and saves you $18,250 AUD sounds pretty good, but are you getting the same optical performance? The short answer is no. The in depth answer is somewhat more complicated. When photographing birds in flight (BIF) a shutter speed of 1/2000 sec is the minimum I’d consider. So if were shooting with the 600mm f4 shooting wide open at f4 and an ISO of 1600 for the 300mm f4 plus x2 teleconverter I’d have a wide open aperture of f8 which would mean I’d have to use ISO 6400 which would impact on my image quality by having more noise and less dynamic range.
Remember that I said previously that the teleconverter magnifies the image, well in doing this it also magnifies any optical faults in the lens. Chromatic aberration is magnified – the coloured fringing on high contrast edges looks broader and more noticeable. If your lens isn’t tack sharp it will make it look softer. The more magnification a teleconverter has the more impact it has on the image quality. The perceived wisdom is that if you’re going to use one then the x1.4 varieties have the least impact on image quality and just don’t bother with the x3 ones.
Also remember what I said about light loss – it impacts the autofocus performance. In most cases it will just slow the subject acquisition, but in some cases (dependent on your camera and lens) it mean your camera won’t focus at all. When you put a x2 teleconverter on a lens with an aperture of f4 it becomes an f8 and some DSLRs won’t autofocus with an aperture of f8 and slower. So before you commit to this check your camera manufacturer’s website.
The Canon Extender EF 2x ii is a matched teleconverter and is designed to only fit certain Canon L lenses. Note how the lens elements stand proud of the lens mount.
In the case of teleconverters you really get what you pay for. With the camera manufacturers when they design a teleconverter they do so with only certain lenses in mind and they are designed to become part of the host lenses optical formula. You can see this when you look at the teleconverter as the optics protrude from the body and nestle into a space left for it at the back of the lens. The design goal is that the teleconverter should not cause any optical degradation. They are often described as “matched teleconverters” or “matched multipliers” and they won’t fit any other lens from that manufacturer. Cheap teleconverters are designed to work with any lens with that mount. They don’t have as many lens elements or the lens coatings of the more expensive camera marque models.
Model
Lens construction
Weather sealing
Compatability
Price (Australian Dollars)
Canon EF x2 extended iii
9 elements in 5 groups
Yes
All prime L lenses above 135mm, EF 70-200mm f2.8 L, EF 70-200mm f2.8 IS L, EF 70-200mm f4 L, EF 100-400mm f4.5-5.6 IS L.
$750.00
Viltrox C-AF 2x ii AF 2.0 teleconverter for Canon EF
7 elements in 4 groups
No
All EF mount lenses except EF-S
$154.00
Fotodiox Pro Autofocus 2x teleconverter for Canon EF
4 elements in 3 groups
No
All EF mount lenses except EF-S
$100.00
Luckily Canon and Nikon have been making teleconverters for years so there are plenty on the secondhand market. Canon, for example, have since 1987 produced three versions of the x2 teleconverter. Their x1.4 teleconverters have been in production since 1988 and there are also three models. The first versions were pretty lacklustre but the mark ii was considerably better and can be had for around $300 AUD. The mark iii has even better performance and can be had for around $500 AUD. If you have a Sigma or Tamron lens they have also produced matched converters for some of their lenses. My Sigma 150-600mm f5-6.3 DG OS Contemporary is compatible with the Sigma Teleconverter TC-1401, which is weather sealed and will allow autofocus up to f8. So check the website of your lens’ manufacturer to see what is compatible.
I know the mist isn’t helping image quality here and nor is shooting 400ISO film, but the x2 teleconverter had a big impact on image quality. Dal Lake, Kashmir, India.
Working elephant heading off to work in the early morning mist in Chitwan National Park, Nepal.
My own history with teleconverters goes back to the late 1980s. I was heading off to back pack around India and Nepal for a year and wanted to take only two lens – a 35-105mm and a 75-210mm. Virtually couple of days before we were due to head off I went to my local camera store to pick up the 200 rolls of film I’d ordered and I thought I’d get a x2 teleconverter to give me a bit more reach when in the National Parks. So I bought a Vivitar x2 teleconverter for £25 and set off without knowing what I’d actually bought. When I got back and processed the film I was shocked to see how soft the images taken with it were. It was as if someone had used a belt sander on the front lens element. What I’d done is put a bad teleconverter on a mediocre zoom lens. This was the experience of a lot of people at the time and it was why teleconverters got such a bad reputation. In 2004 I started a project photographing the Western Australian rodeo scene and I decided to get a Canon 100-400mm lens to help with this. At the time they were like hens teeth in Australia and my dealer suggested getting a Canon x2 converter for my Canon EF 70-200mm f2.8 IS L lens. I was very skeptical because of my previous experience, but the sales person said if I wasn’t happy with the results I could bring it back and get a refund. When I looked at the first images taken with it I couldn’t believe how sharp they were. This convinced me when I changed to the Olympus micro four thirds system to get the Olympus x1.4 teleconverter to go with the 40-150mm f2.8 lens. I use that combination a lot to photograph wild flowers and I’m extremely happy with it.
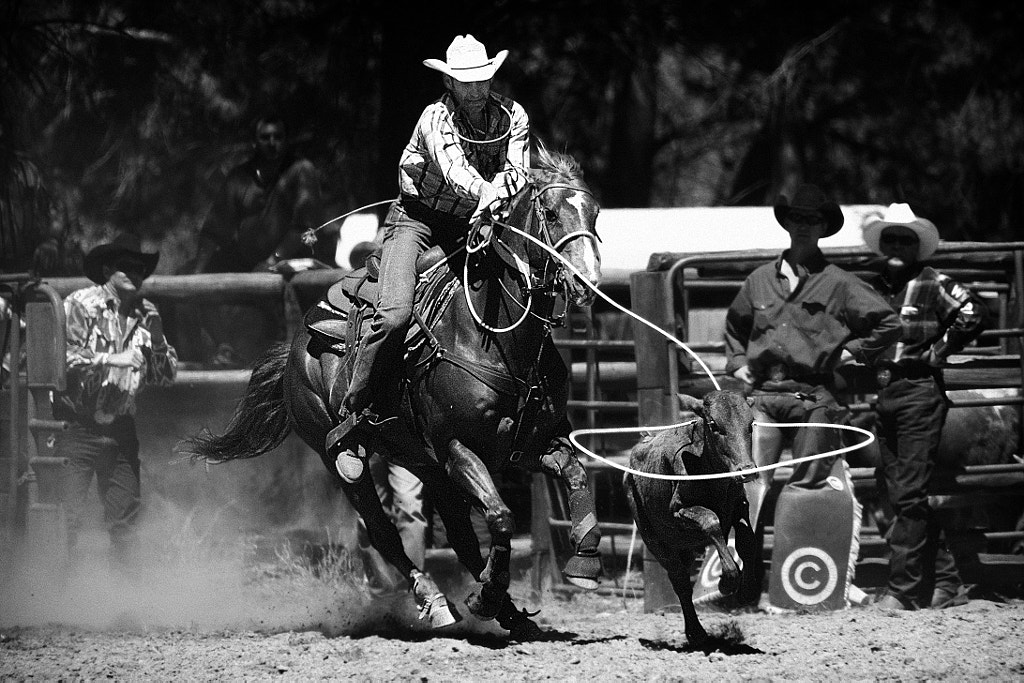
Taken on the Canon 5d with Canon EF 70-200mm f2.8 IS L lens with x 2 teleconverter at 400mm f5.6.Steer roping competition. Boddington Rodeo, Western Australia.
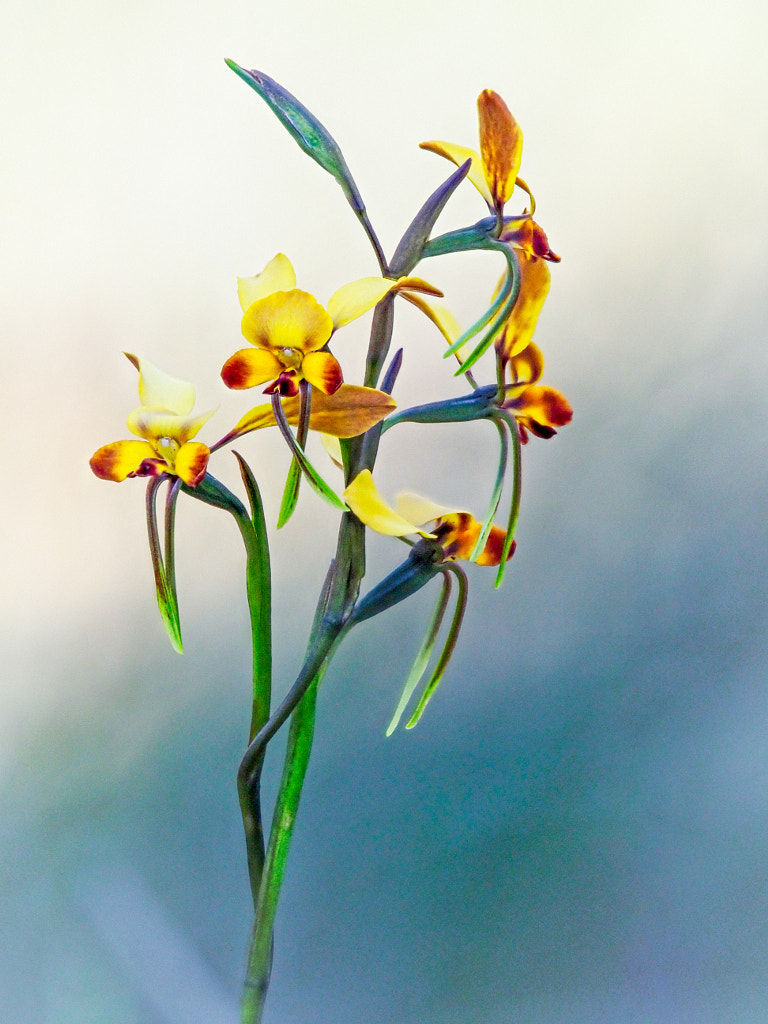
Taken with an Olympus OMD EM 1 mk ii with Olympus m.Zuiko 40-150mm f2.8 and a x 1.4 Olympus teleconverter at 210mm f4. Winter donkey orchid, Diuris brumalis. Woottating, Western Australia.
Since then, however, a new alternative has come up and that is using AI powered software to enlarge images. Exposure Software’s Blow Up was one of the first, Topaz Labs has Gigapixel AI which are plugins for Photoshop and Lightroom. Adobe now has Super Resolution as part of its Enhance function in Lightroom. GigaPixel is $99 USD, Blow Up is $125 AUD and Super Resolution comes with your Lightroom subscription. So do these make teleconverters obsolete? If you want the best image quality should you even use any of these options?
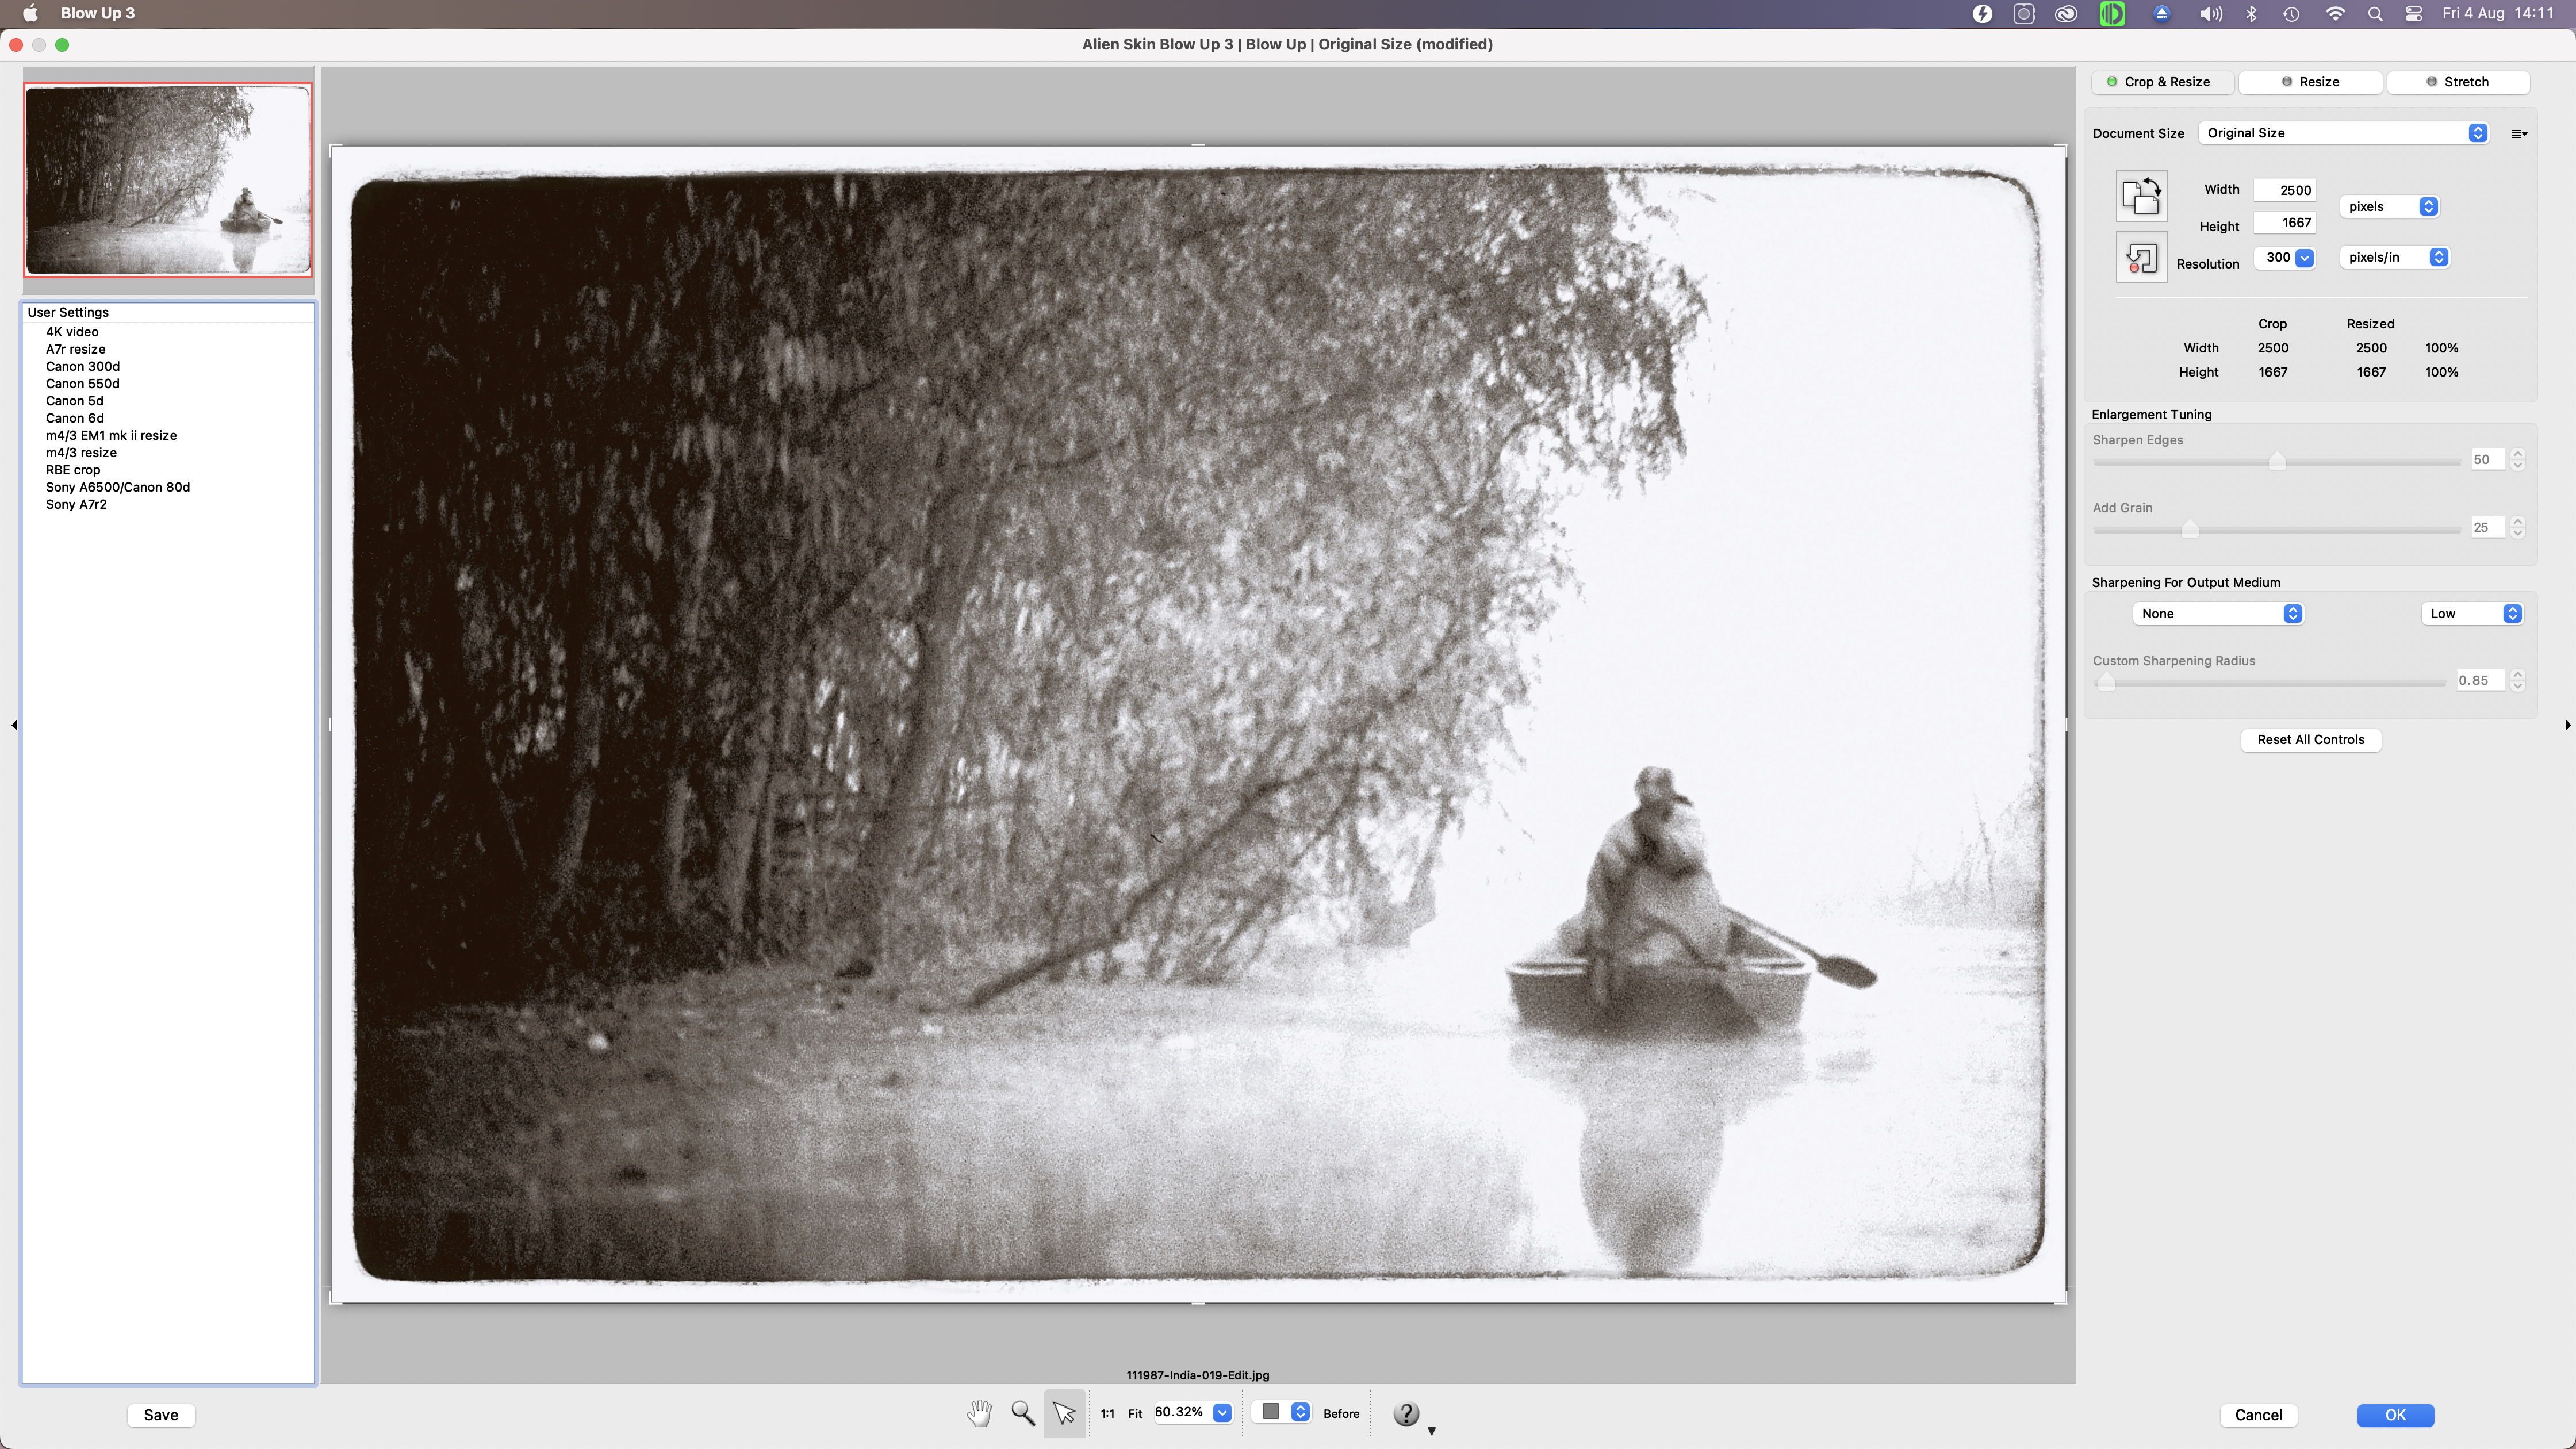
Blow Up 3 is one of several apps that can enlarge, and selectively crop and enlarge images with apparently no loss in image quality.
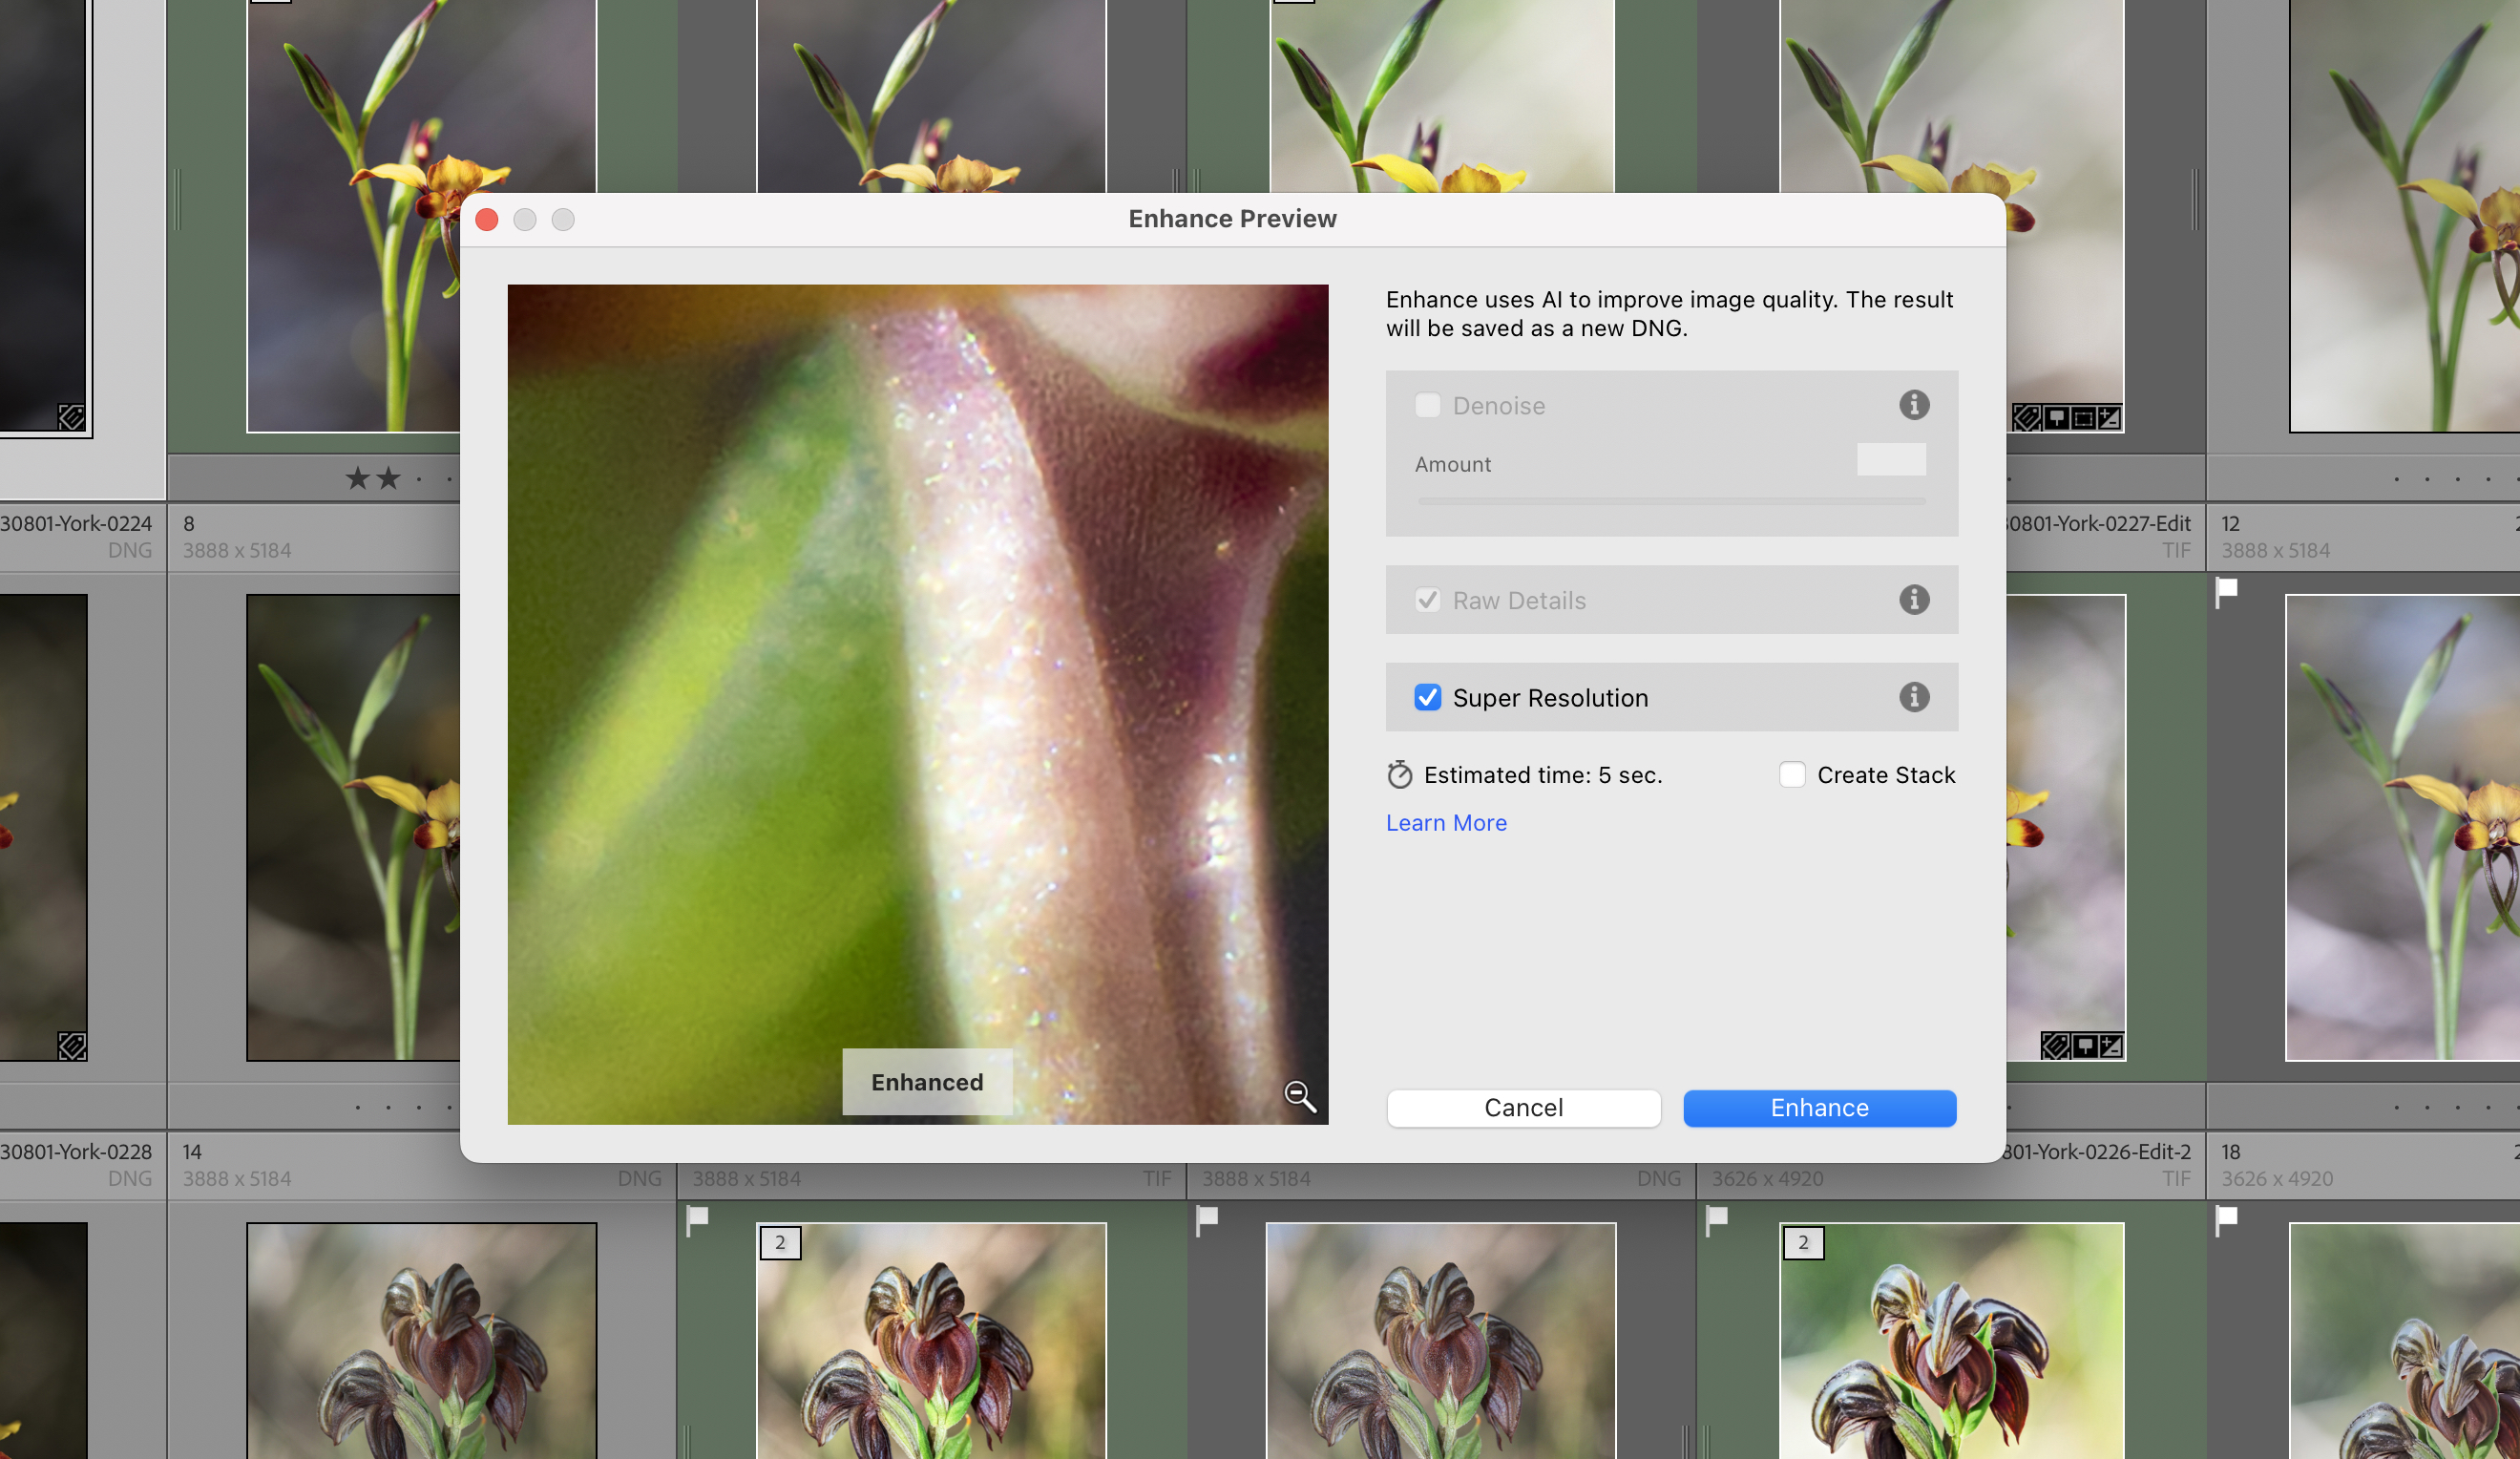
Lightroom Super Resolution is a part of its Enhance function in Lightroom.
The test will take a Canon EF 70-200mm f2.8 IS L lens and test it with the canon EF x2 extender ii and compare it to images taken without the converter, and then without the converter but enlarged using Blow UP and LightRoom Super Resolution. Then I’ll test the Olympus 40-150mm f2.8 Pro lens in the same way but using the Olympus m.Zuiko Digital 1.4 x Teleconverter MC-14.
Canon EF 70-200mm f2.8 IS L and Canon EF x2 Extender ii
The Canon Extender EF 2x ii shown next to the Canon EF 70-200mm f2.8 IS L lens. The extendinded lens leement of the converter are designed to be placed inside the body of the lens.
Canon EF 70-200mm f2.8 IS L with and without a teleconverter comparison using a lens chart wide open.
Canon EF 70-200mm f2.8 IS L with and without a teleconverter comparison using a lens chart f5.6.
First off we’ll look at the lens sharpness chart. Wide open with out the extender the centre of the chart is a little soft and is lacking contrast. When adding the teleconverter the results are a little softer. Stopping the lens down to f4 and f8 (with the extender) the results are better with a bit more sharpness and contrast. The shot without the teleconverter is still sharper than the one with. Finally two stops down from wide open is generally considered to be where optimum performance is found and here we see that f11 the 70-200 and teleconverter have attained their best result, but it is still softer and has less contrast than the 70-200mm on its own.
Comparing images taken with the Canon 70-200mm f2.8 IS L using a teleconverter, Blow Up 3 and Lightroom Super Resolution.
Lens charts don’t really tell the whole story so we’ll look at the results we got with Gazza the Galah. The camera was set to aperture priority at 100 ISO and the aperture was one stop down from wide open (f4 and f8 respectively). The photos were all taken from the same position with the camera on a tripod, and the results are interesting.
Obviously in the shot with the teleconverter Gaza is larger, and that is what we wanted to see.
The bokeh in the shot with the teleconverter looks smoother and more pleasing. All we are seeing is the magnification of the out of focus areas and it makes appear smoother.
The shot without the teleconverter has more fine detail.
The shutter speed without the teleconverter was 1/200 sec and with 1/50 sec so a light loss of exactly 2 stops.
Just as an afterthought I decided to see how this all stacked up against the Sigma 150-600 at 400mm. The Sigma delivers a much better performance that the Canon 70-200mm with teleconverter so no surprise there.
Comparing the image quality from the Canon 70-200mm f2.8 IS L lens with x2 teleconverter against the Sigma 150-600mm Contemporary set at 400mm.
Next I took the shots taken with the 70-200mm without the teleconverter and put them through Blow Up and Super Resolution and in both cases the results from the lens with the teleconverter were better.
Olympus m.Zuiko 40-150mm f2.8 with Olympus 1.4 Teleconverter MC-14
The Olympus MC-14 teleconverter.
Like the Canon Extender x2 the Olympus MC14 is designed to be used by a few of the Olympus Pro lenses, and they have room for that protruding lens assembly of the teleconverter to fit inside the lens body.
I basically ran the same tests as above and found that the Olympus combination was very consistent in that the teleconverter had only a marginal impact on image quality.When compared to a shot taken with Panasonic Leica 100-400mm set to 210mm the 100-400 resolves more fine detail.
Olympus 40-150mm f2.8 Pro with and without a teleconverter comparison using a lens chart with the lens wide open.
Olympus 40-150mm f2.8 Pro with and without a teleconverter comparison using a lens chart with the lens at f5.6.
Comparing the image quality of the Olympus 40-150mm f2.8 pro lens with the results from the Olympus x 1.4 teleconverter, Blow Up2 and Lightroom Super Resolution.
Comparing the image quality from the Olympus 40-150mm f2.8 pro with 1.4 x teleconverter with the Panasonic Leica 100-400mm lens at 210mm.
Looking at the results when run through Blow Up and Super Resolution we see that the results from the teleconverter were a tiny bit better with more micro contrast. The image produced by Lightroom’s Super Resolution look over sharpened withmoirés evident and artefacts in the shadow areas. The shot for the lens and teleconverter looks more pleasing.
Conclusion
The software solution was very disappointing and I would not go out of my way to buy Blow Up or Topaz Labs Gigapixel Ai. The Lightroom Super Resolution comes as part of Lightroom and I would only use it in dire situations.
The results from the teleconverters showed that they are worth having, but they won’t give the best image quality. This really depends upon three things:
The quality of the lens
That you are using a matched teleconverter
The magnification of the teleconverter. 1.4 teleconverters have less impact upon image quality than x2 teleconverters.
The best results were naturally from the lenses without teleconverters.
For the budget conscious photographer who has a good quality lens then it is certainly worth trying a matched teleconverter if you can’t afford a longer lens.
Thursday was my first trip into the Perth Metro in ages – I’d gone to get the car serviced and so had a day to kill. The weather was horrid, lots of rain and not very warm so killing time was not a thrilling prospect. Usually I walk over the Causeway Bridge, around Heirisson Island and then into the Perth CBD. With the rain falling and nearby construction work making a racket I didn’t expect to see much so imagine my surprise when I literally bumped into an Emu. Now people living overseas expect that we have kangaroos running down the high streets koalas hanging out of every tree and sharks and crocodiles waiting to eat people in every small pool of water. Well it’s just not like that, and seeing an emu wandering round the metro area is pretty unusual occurrence. Poor thing didn’t look very well – it had a very large open wound on its left side. Emus can be a little bit intimidating as they’re not adverse to walking right up to you and looking you in the eye and some of the ones I’ve met do this by looking down at me. Well this one played pretty cool and just walked with me for about 500m and every time I stopped to take a picture it stopped and waited. We met up with a couple of kangaroos who were very wary of the emu. They kept a very close eye on it – didn’t pay me any attention at all. Once we got past the lake it decided it had had enough and walked back up the track making that odd sound of theirs which sound like someone has turned a plastic bucket upside down and is banging on it like drum.
My companion for a walk on Heirisson Island.
The girls are too impressed with their new neighbour and were content to remain at a distance and watch.
A willie wagtail hunkered down against the rain.
As I walked back to the Causeway I was joined by a young female kangaroo. She was very curious and wanted to know if I had anything to eat. She did did this by pawing at my hand – obviously other visitor have been feeding them so they can get selfies. She didn’t seemed fussed when no food appeared and she was content to follow me round to the gate and watch me leave.
The title is really an exercise in alliteration. It really should be “Can You Do Wildlife Photography On A Limited Budget?”, but that’s not as catchy or succinct. I used to think it was impossible. I thought to be a wildlife photographer you needed deep pockets to be able to afford the cameras and lenses. The photo review sites would have you believe that you need to drop unto $10K AUD on a camera body and up to $24K AUD on a lens to be in with a chance of taking a decent photo. Then you had to have the wonga to be able to travel to Africa, Antartica etc to actually find animals worthy of being photographed. About twenty years ago my sister tried to encourage me to enter the BBC Wildlife Photographer Of The Year competition my response was that I didn’t have the money for the equipment let alone alone being able to travel to a suitable location.
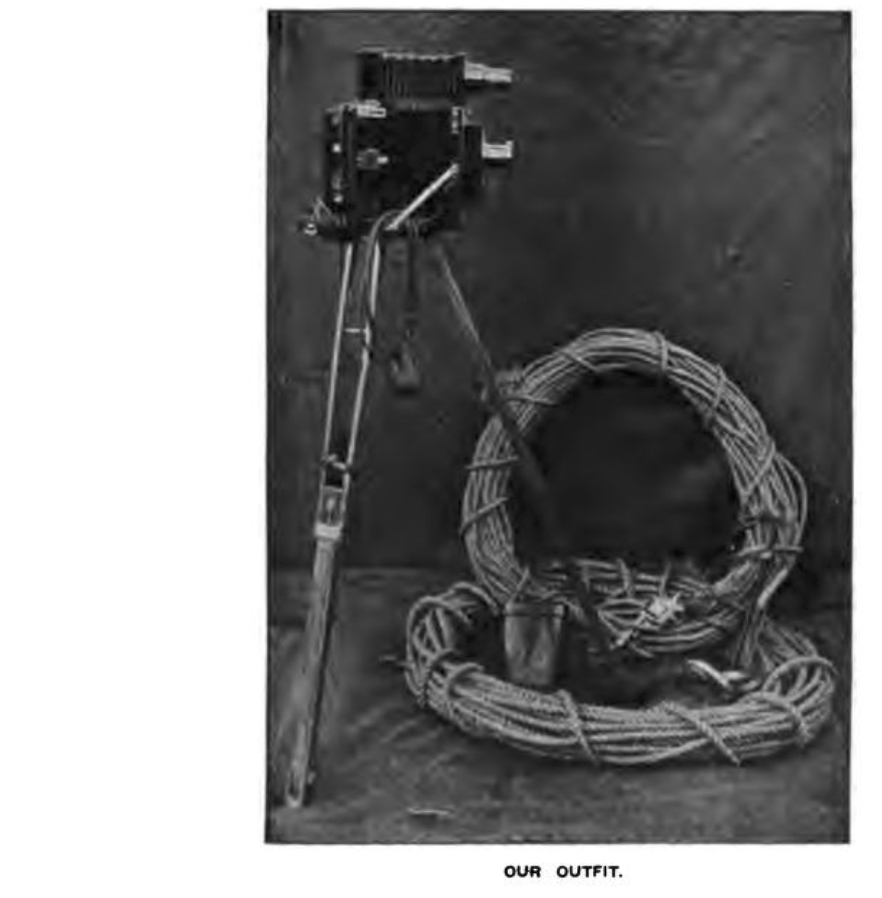
Richard and Cherry Kearton photographing a birds nest.
Twenty years later my views have radically changed. What changed them was the confluence of learning about two of the pioneers of wildlife photography and the digital camera revolution. The photographers were Cherry Kearton (1871-1927) and his brother Richard (1862-1928) the naturalist and writer. They were very early pioneers of wildlife photography and they published the first natural history book entirely illustrated with wild photographs in 1895. Their 1898 book “With Nature And A Camera: being the adventures of a field naturalist and an animal photographer” illustrated with 160 photos was a best seller and inspired many people to become wildlife photographers. A very young David Attenborough attended one of their film lectures and in an interview to The Guardian Newspaper said “It captured my imagination and made me dream of travelling to far-off places to film wild animals.” (Vidal, J; The Guardian 4th December 2021).In their book the two brothers list what it takes to be a wildlife photographer:
“The great points about successful natural history photography are: the possession of suitable apparatus to work with, an aptitude for taking care in stalking timid creatures and plenty of patience and determination to wait for and get what is wanted in spite of obstacles.”
p.334 Kearton, R and Kearton, C; With Nature and a Camera, 1898, Cassel, London.
The “suitable apparatus” was a half plate (4¾ × 6½ in or 120mm × 165mm) Dallmeyer camera with a pneumatically controlled silent shutter for still subjects and a large quantity of hemp rope for scaling cliffs.
The “suitable apparatus” was a half plate (4¾ × 6½ in or 120mm × 165mm) Dallmeyer camera with a pneumatically controlled silent shutter for still subjects and miniature plate camera (probably 3 1/4” x 4 1/4” glass plates with a 5 1/4” f8 lens) for birds in flight. There was no autofocus with bird recognition AI. No 40 fps. Nothing under 4Kg in weight and certainly no endless digital images on a memory card. The plates had a sensitivity of 2 to 25 ISO. They’d be lucky to carry a dozen glass plates and take one picture every 2 minutes. They initially started just photographing the fauna of their native Yorkshire in their days off often sleeping in hedges or barns. No luxury safaris with 5 star accommodation and the convenience of modern jet travel.
No memory cards giving unlimited shooting for the Keaton’s. This is a box of Ilford photographic glass plates.
The digital camera revolution has meant for the last twenty years camera and lens manufactures have brought out new products with amazing technological innovations every year. This has meant that the second hand market has been flooded with equipment as photographers unload their “obsolete” stuff so they can buy the new stuff only to do the same 12 months later. This now means that there is a wealth of extremely capable second hand equipment out there to suit every budget.
Advances in in digital photographic technology has meant that there is a plethora of second hand equipment for sale.
TLDR
Needs Versus Wants
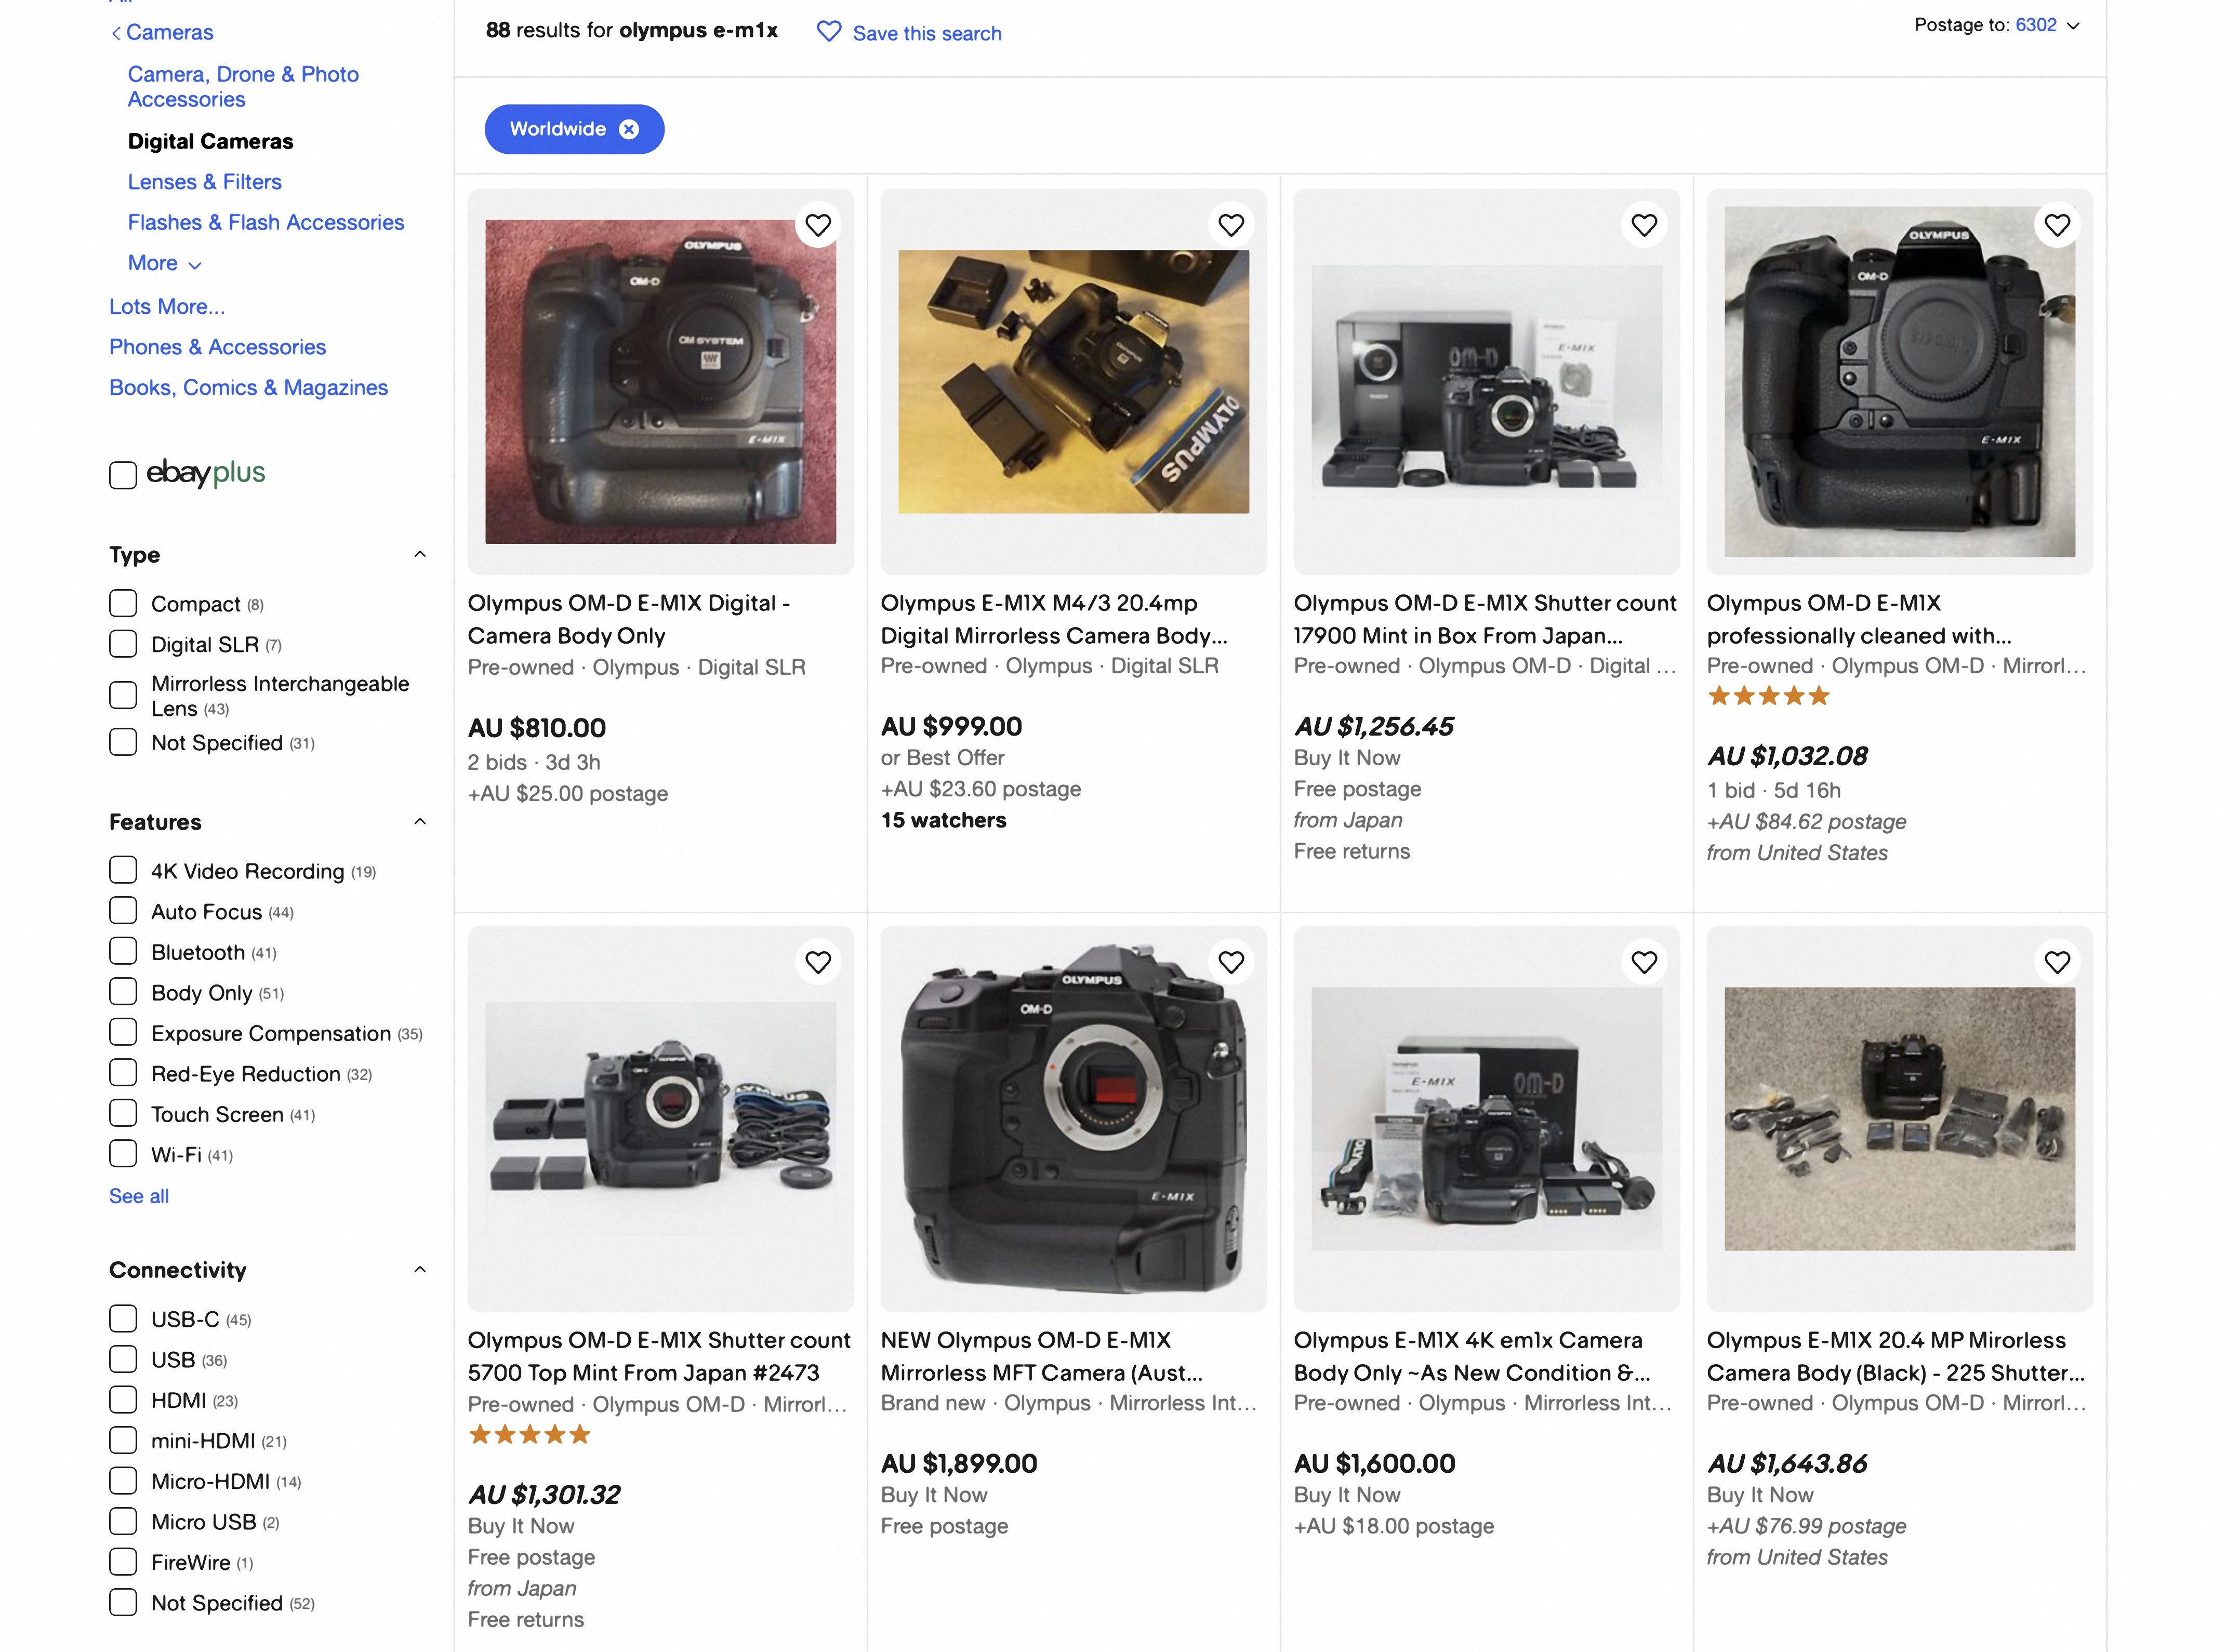
This is quite important as it will help us decide on equipment and set a budget. For instance if all you want to do is post some photos on social media then pretty well any interchangeable lens DSLR or mirrorless camera released in the last 20 years will suffice. If you want to print photos up to A3 in size then a 12Mp camera is adequate. If HD video and 4K video are important then that sets another parameter. It’s nice to day dream about having top of the line equipment such as a Sony A1 and a Sony 600mm f4 lens, but that combination will set you back $27000 AUD new and won’t be had for thrift shop prices second hand. But, say you want to print up to A3 it is possible with a bit of careful shopping on EBay or GumTree to get a DSLR with an APSC sized sensor and a 75-300mm lens for less than $500 AUD second hand.
I basically find that deciding on the lens is the most important part of the exercise and you really should aim to put most of your budget to that. So what are we looking for?
Sensor size
Full frame (36x24mm)
APSC (23.6 x 15.7mm or 22.2 x 14.8mm [Canon cameras only])
Micro Four Thirds (17.3 x 13mm)
Minimum Focal length
400mm
300mm
300mm
Best Case Scenario
600mm
600mm
400mm
The focal length will determine how close you need to get to your subject. The shorter the focal length the closer you will have to get. Having said that a shorter focal length is not a handicap because you’ll have to learn bushcraft so you can approach animals and that is a very good skill to have in this game and it’ll also stand you in good stead if you get a longer lens later on down the track.
You can use zoom lenses or primes. A prime lens is a fixed focal length, whereas a zoom lenscovers a range of focal lengths such as 75-300mm, or 100-400, or 150-600mm. In theory a prime lens will give better image quality and have a larger maximum aperture value which will let more light in. The down sides are that primes are usually more expensive and being a fixed focal length means that if your subject gets too close (it does happen more often that you’d think) you won’t be able to take a picture. Zooms offer flexibility in that you’re not stuck at one focal length, but the trade off is that they’re not as optically good as primes at the cheaper end and the maximum aperture value isn’t as great meaning that you may have to stop shooting as the light goes down.
A comparison of the common camera sensor sizes.
Now as soon as you tell another photographer what you’re planning to do they will inevitably tell you that you should get a camera with a full frame sensor as you’ll get a whole heap of benefits over the other smaller sensors. Now if we just content ourselves with reading spec sheets maybe, but out in the real world other things come into play. You want to photograph a bird that is 20cm long and fill the frame with it, so that’ll mean getting 5m away from it. To do that with a full frame camera you’ll need a focal length of 800mm, with an APSC camera 600mm and with a micro four thirds camera 400mm. There is a magnification factor when comparing the focal lengths on the different sensor sizes. It is x1.5 (or 1.6 for Canon) for APSC and x2 for micro four thirds. We’ll look at this comparing three common focal length ranges for the three sensor sizes.
75-300mm
100-400mm
150-600mm
Full Frame (36x24mm)
75-300mm
100-400mm
150-600mm
APSC (23.6 x 15.7mm)
(22.2 x 14.8mm Canon cameras)
112-450mm full frame equivalent
120-480mm full frame equivalent when used on a Canon APSC camera
150-600mm full frame equivalent
160-640mm full frame equivalent when used on a Canon APSC camera
225-900mm full frame equivalent
240-960mm full frame equivalent when used on a Canon APSC camera
Micro Four Thirds (17.3 x 13mm)
150-600mm full frame equivalent
200-800mm full frame equivalent
300-1200mm full frame equivalent
So a smaller sensor will mean you don’t need very long lenses and that is good because they are expensive. Shorter lenses have the advantage of being lighter which is good when carrying stuff in the bush.
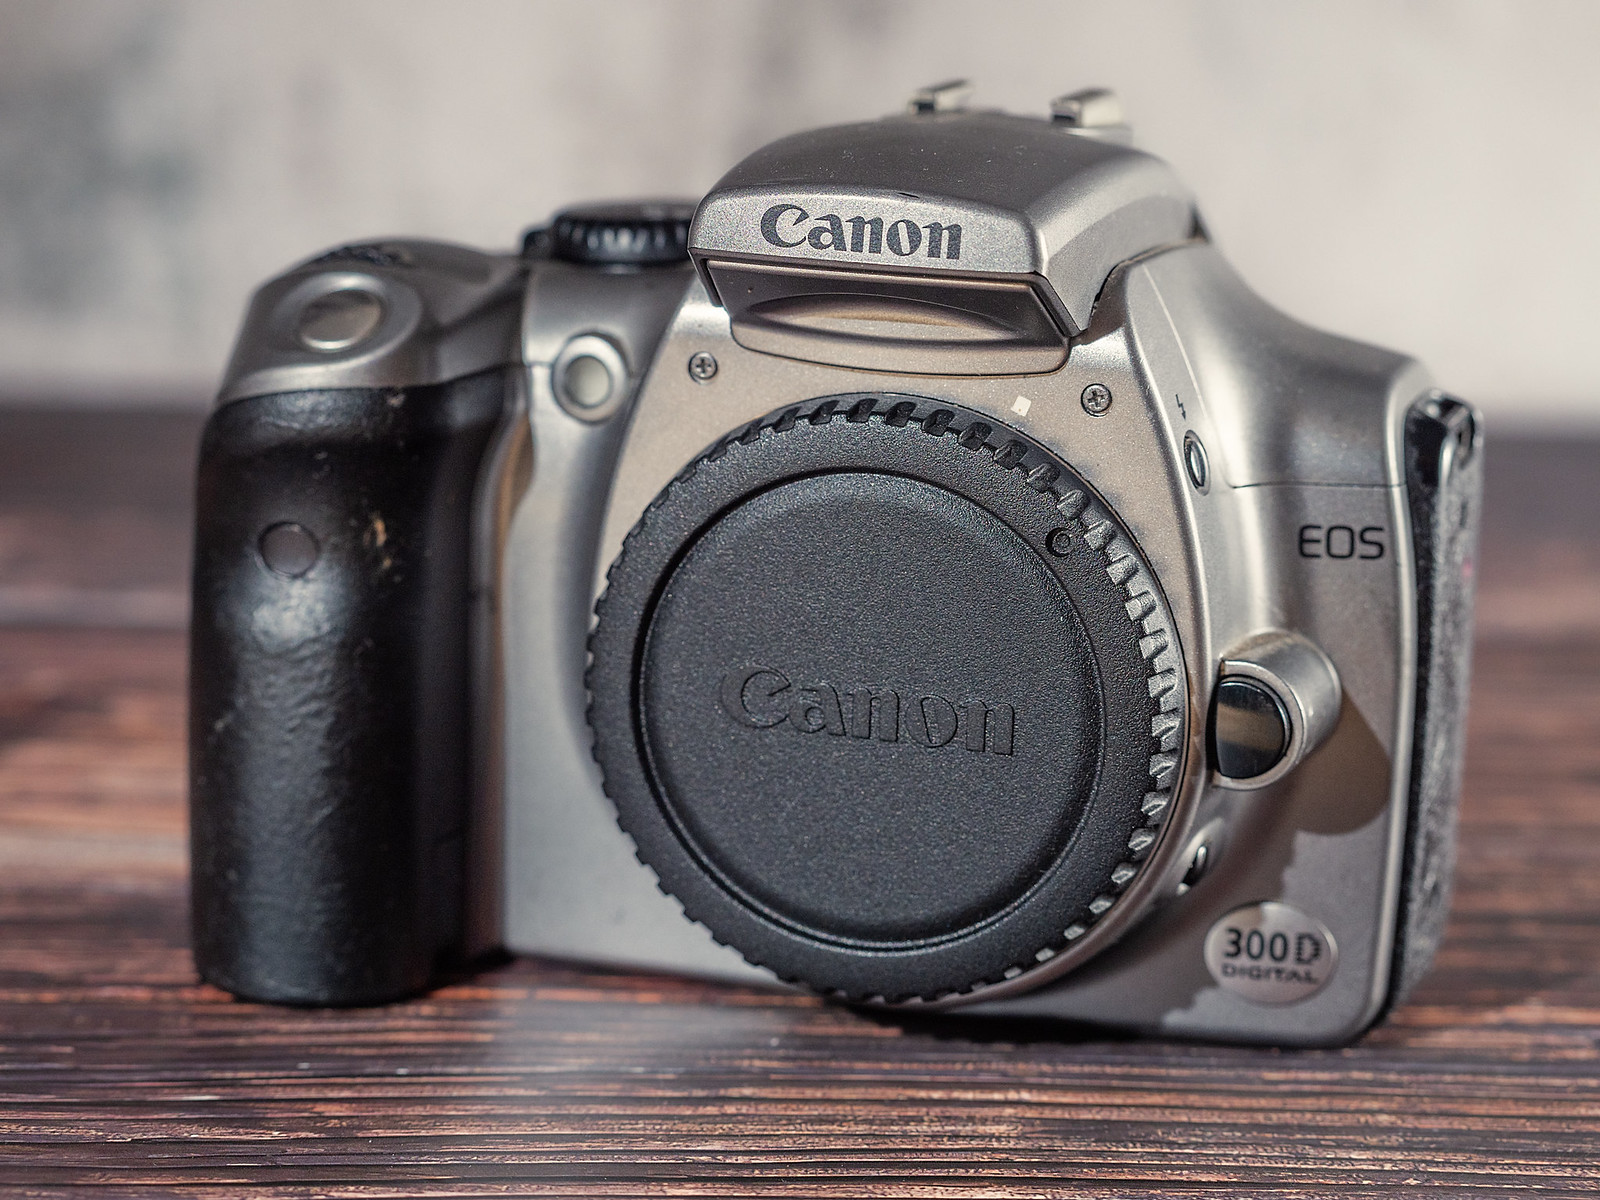
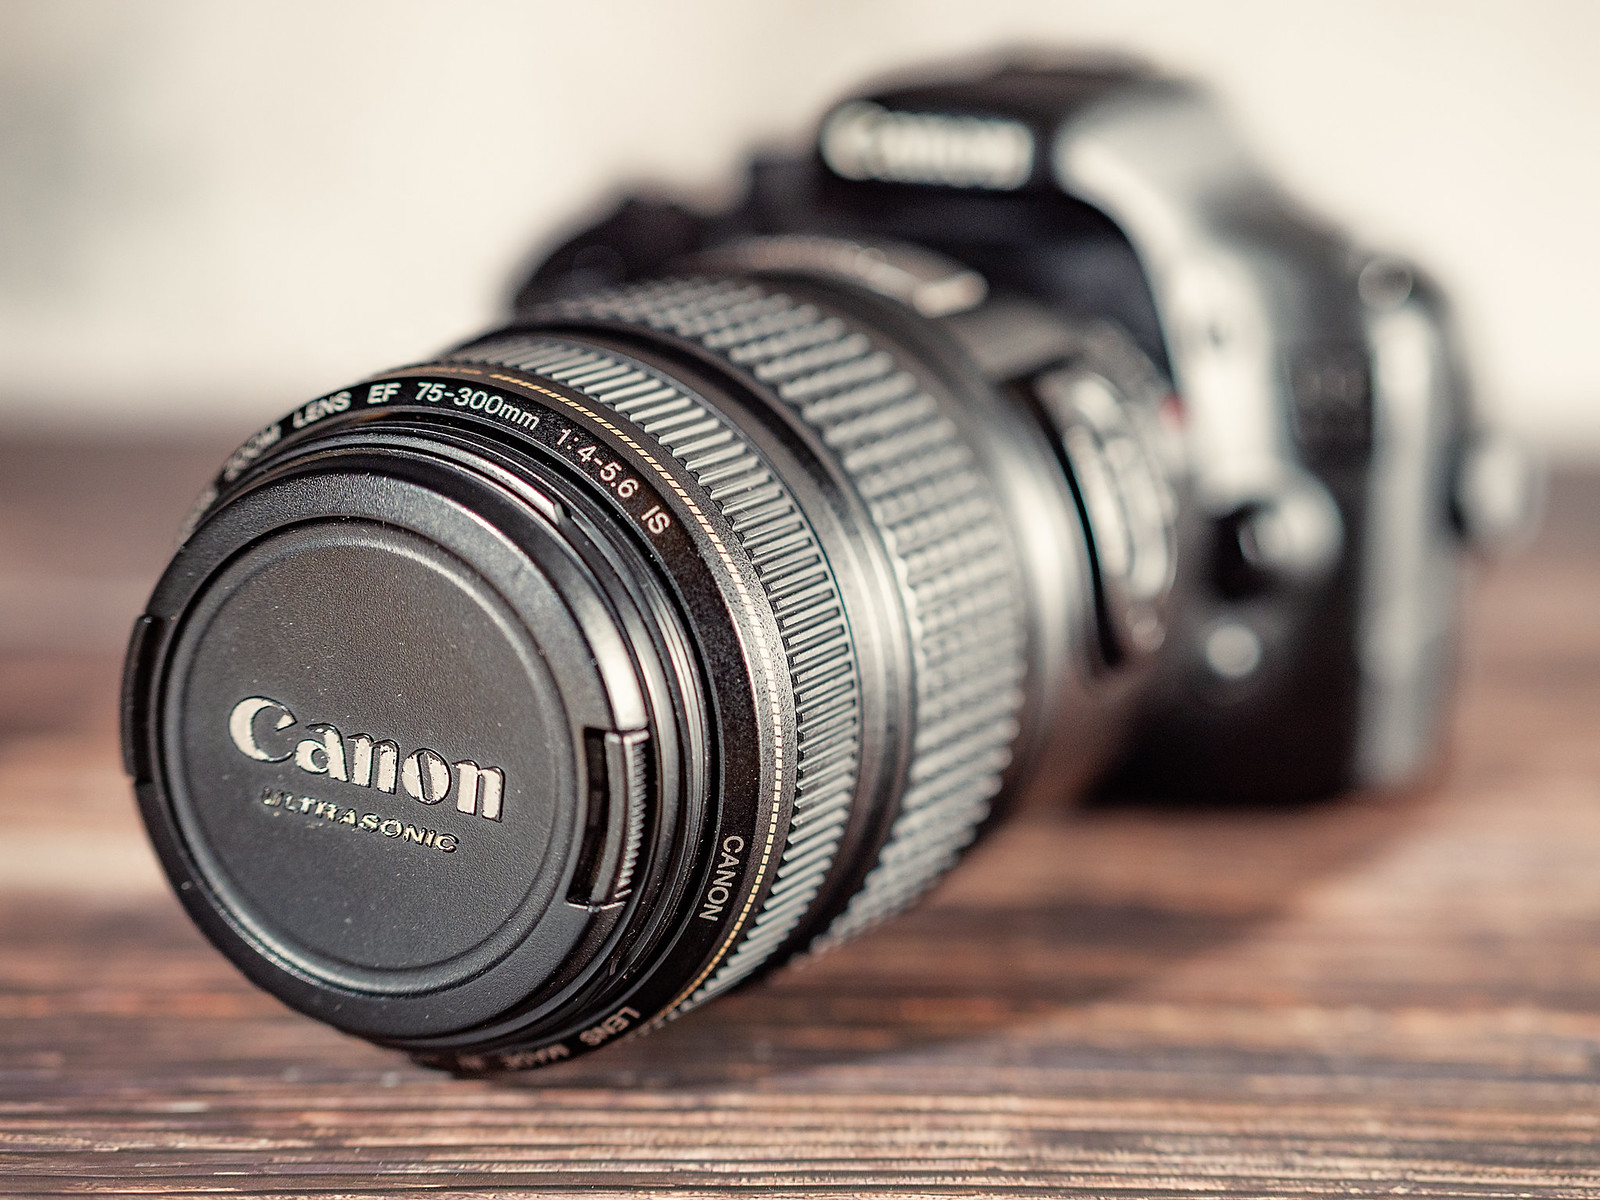
Canon EOS 300d body with Canon EF 75-300mm f4-5.6 IS lens.
I started my nature photography using a Canon EOS 300d with a Canon EF 75-300mm lens. The camera has an APSC sensor so that gave me almost enough reach to fill frame with my 20cm bird at 5m. It did me well until I decided that I wanted to invest more into the hobby. So if your budget is really tight I would recommend getting either a Canon of Nikon APSC camera and a 75-300mm lens as the bare minimum, and we’ll look at what’s available a bit later on.
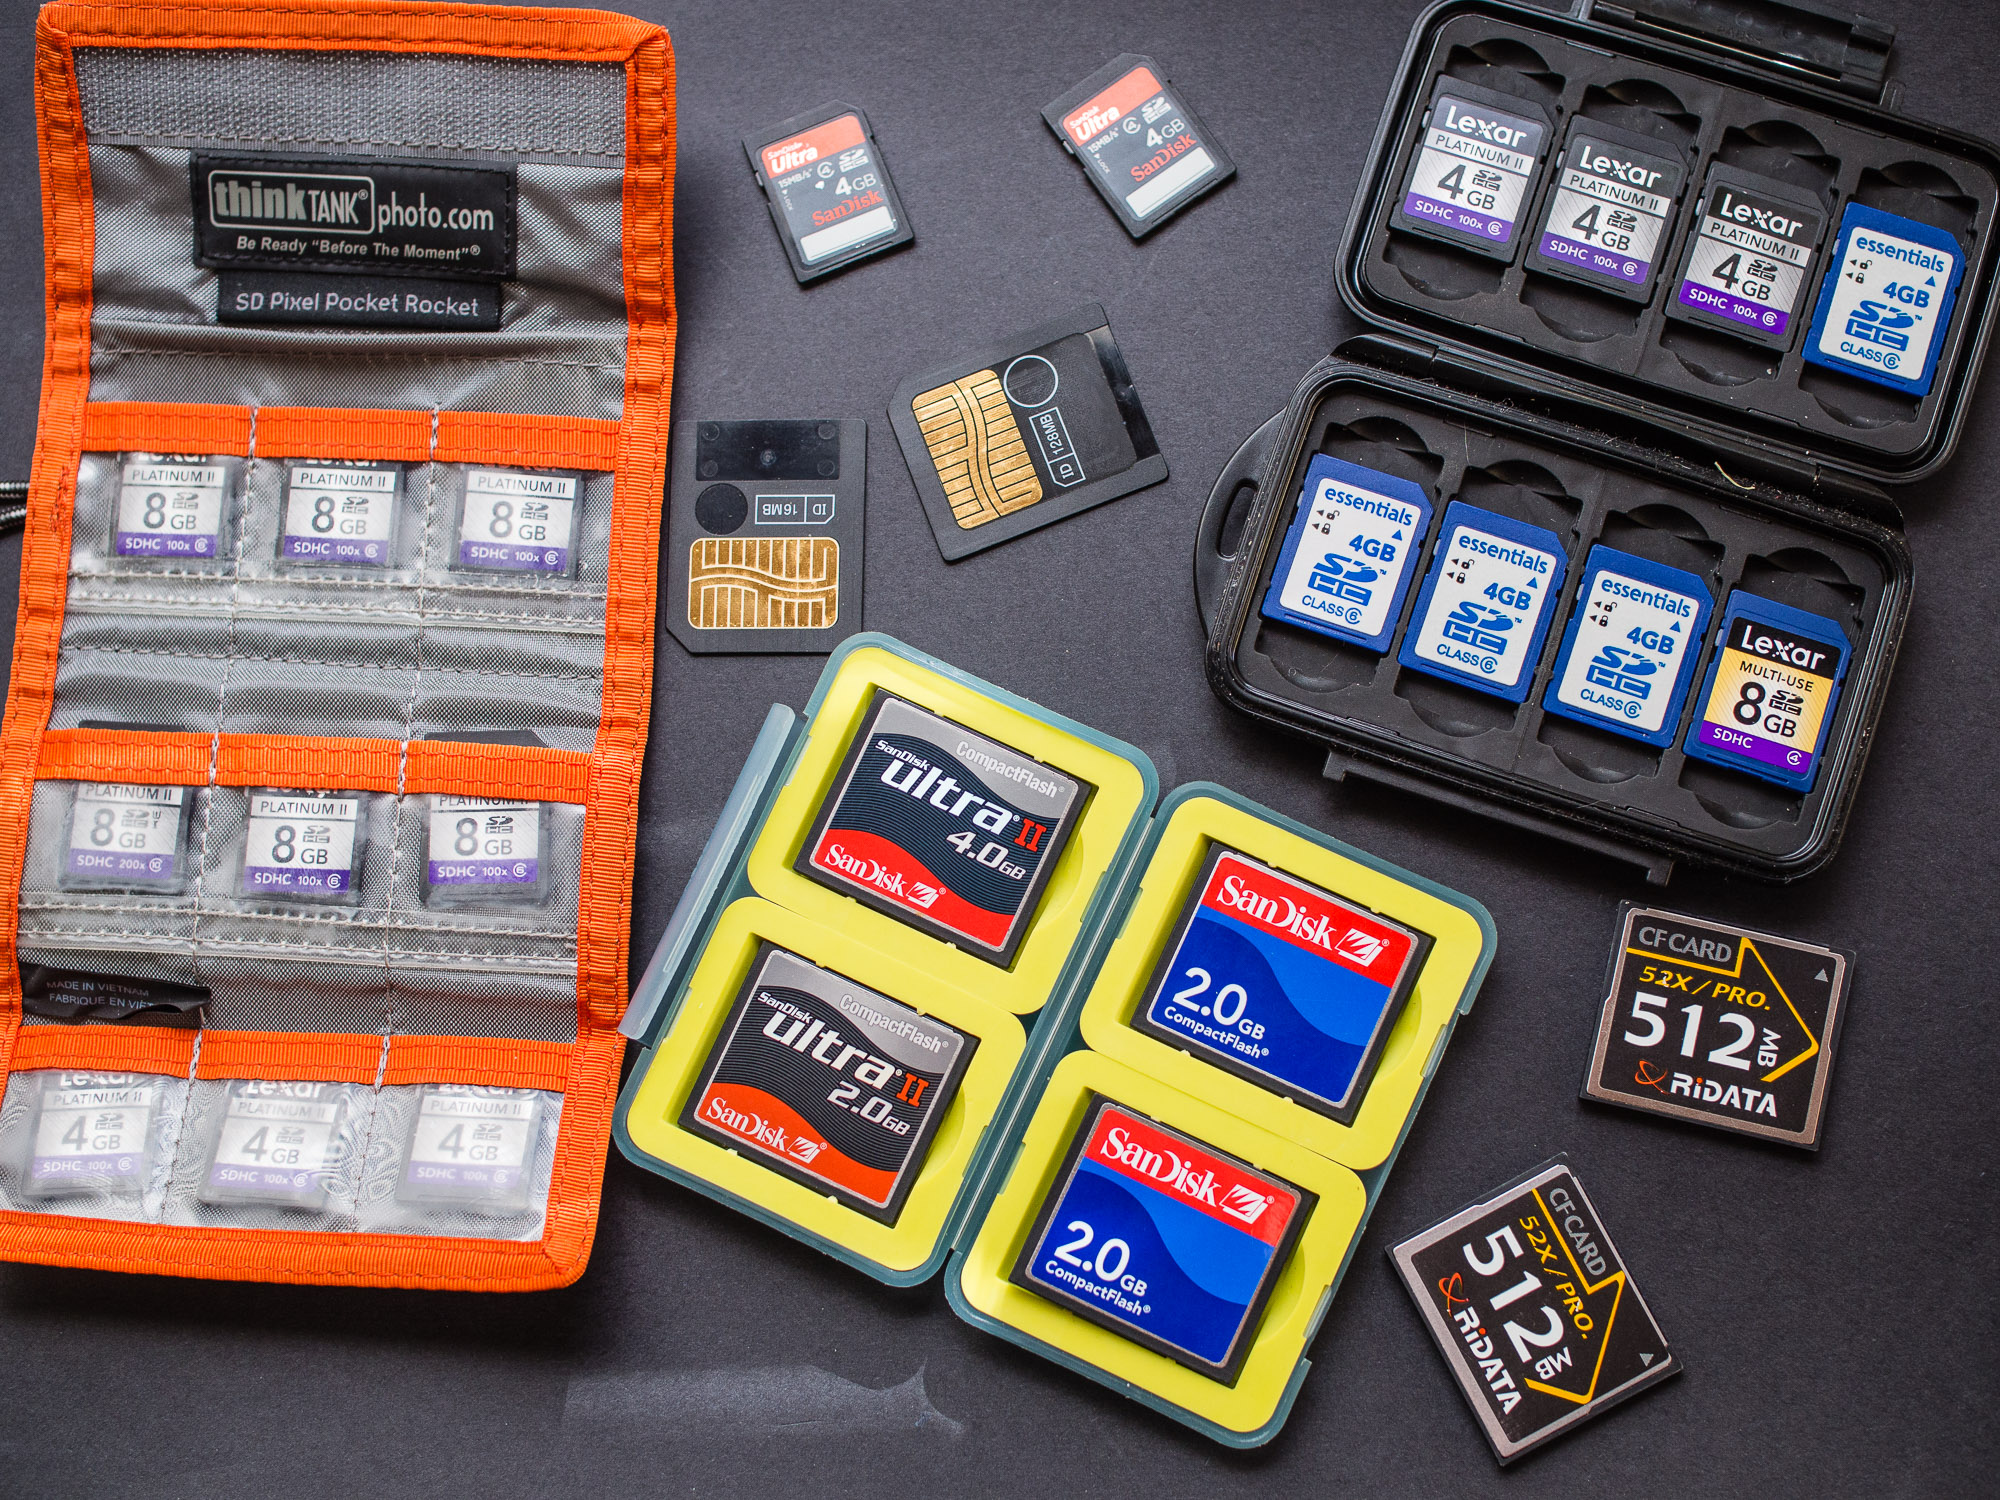
Memory cards are now very cheap. Develop a strategy for keeping them safe while working in the field.
The other thing to consider is that when you buy a camera and lens you also have to budget for batteries and memory cards. First things first; when looking at memory cards over the last 20-25 years there have been roughly ten types of memory card and many of them have gone obsolete so when buying a camera I would suggest that buying one with a commonly available card such as Secure Digital Card or SD Card. Similarly with batteries, make sure batteries are easily obtainable. With both cards and batteries try to buy the best you can afford and I’ll expand on this a bit further later on. Buying second hand also means that there is a chance where you’ll be able to buy the camera with spare batteries, a memory card, strap and possibly some form of bag as a package. Just make sure you’re getting things you actually want and are not paying more than if you to buy each item separately.
All the cameras I’ll be talking about are cameras I’ve owned or used. They’re not recommendations they are to give an idea of what’s about and where possible I’ll suggest equivalent models from other manufacturers.
Bargin Basement
You’ve got next to no money. OK a bit of a draw back, but not insurmountable. Back in the dim dark days of digital photography there existed a class of camera that you don’t hear much about now – the bridge camera. They are a cross between a point and shoot compact and an SLR. You get a wide range zoom lens with a small body. They were popular with enthusiasts in the early noughties as more serious cameras were way way expensive. Every manufacturer offered at least one some several at different price points. Sony and Panasonic still make a few models and they range in price from $500 to $2400 AUD new. But on the second hand market that’s where things get interesting. You can pick up something for less than $50.
What you are looking for is camera models with the terms “UltraZoom“, “superzoom” or “mega zoom” in the model name. Ideally look for something with at least an 8x zoom, better yet 10x or 15x. The more zoom the bigger your subject will be in the final image.
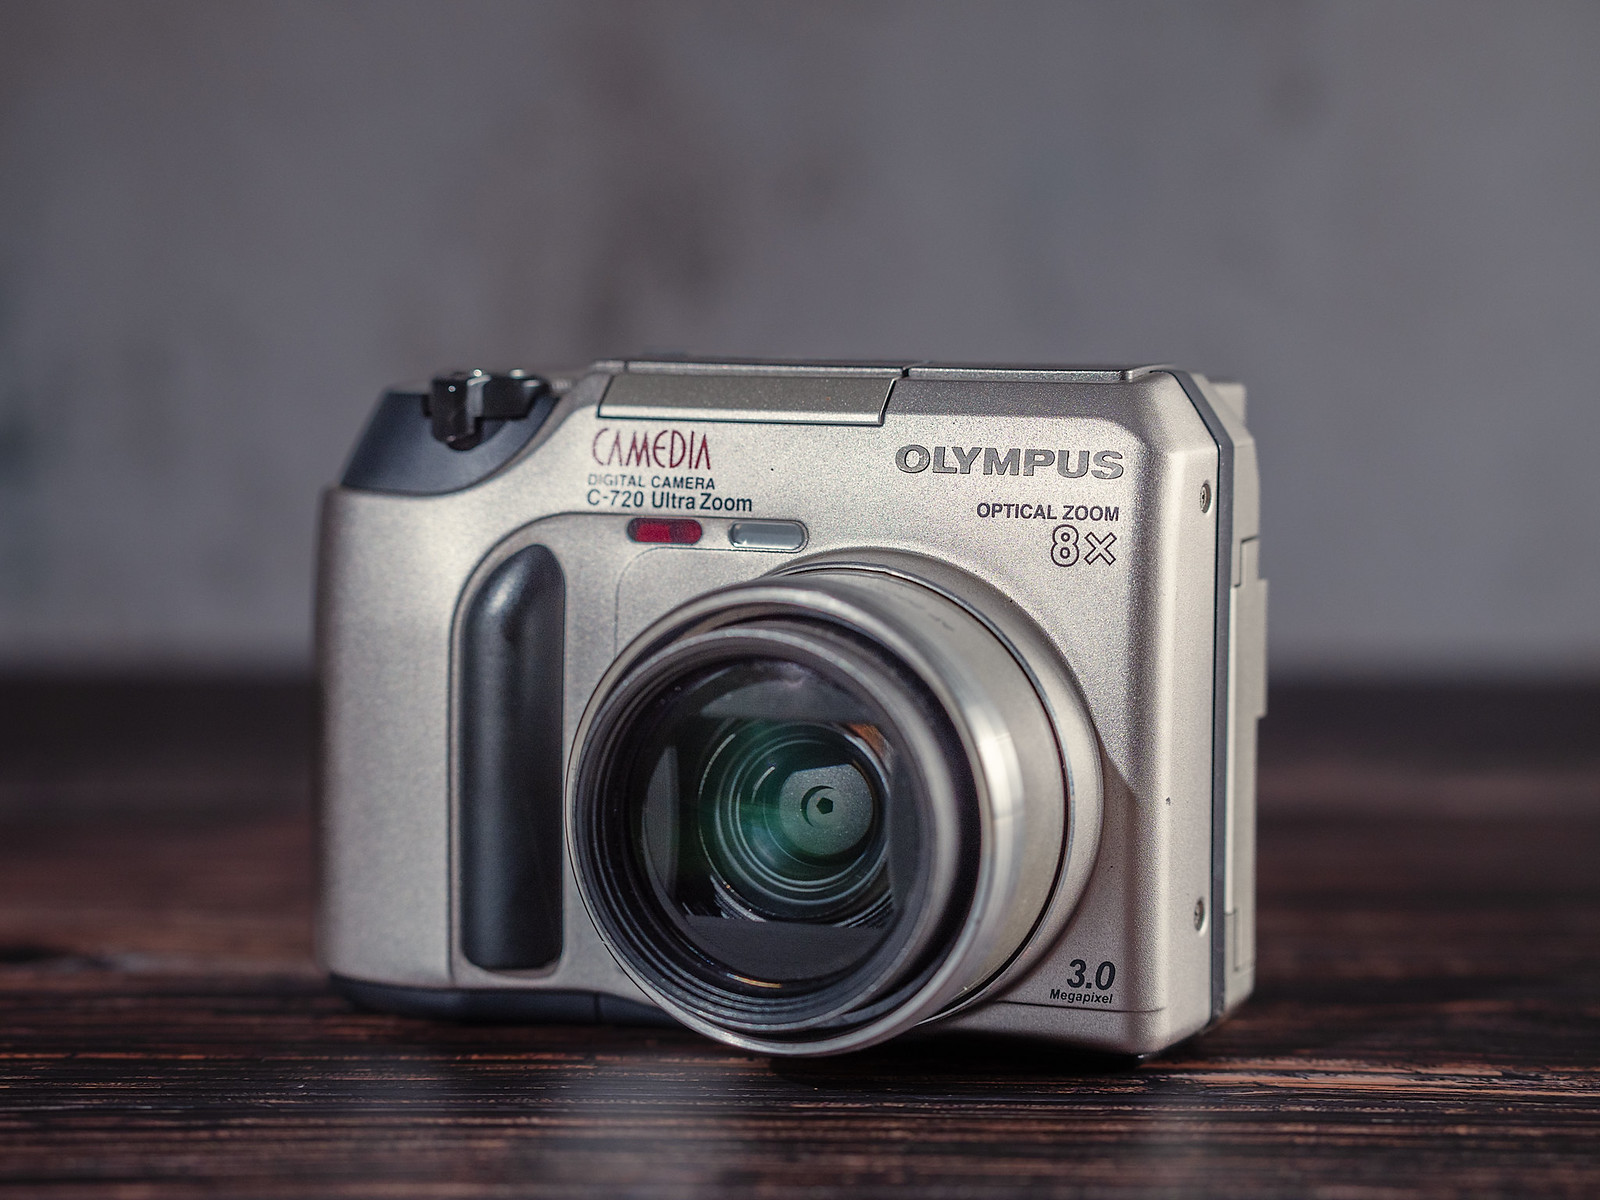
Olympus Camedia C-720 Ultra Zoom
Olympus Camedia C-720 UltraZoom bridge camera.
The Olympus C-720 was introduced in 2002 and is fairly typical of models from that era. It has a whopping 3 Megapixels and an 8x zoom range (24x if digital zoom is switched on but it is crap). It’s small, light, and cheap. Typically expect to pay about $15 to $35 AUD for one. What makes it ideal is that the camera runs off 4x AA batteries which are plentiful and cheap. The downsides are that it takes a SmartMedia memory card which while obsolete can still be bought. The downside is that you will probably spend more on the memory card than the camera. Another problem is that the largest capacity card is 128MB which can hold 14 photos at the best quality TIFF setting, 58 in SHQ jpg, 170 HQ, 196 in SQ1, and 206 in SQ2. The last two come at a smaller resolution. Although 3MP is a bit limiting you can print a postcard sized print comfortably and print an A4 sized print at a stretch.
In use it is not a speed demon, it takes about four seconds to power up. When shooting in sports mode with medium quality jpgs the camera can manage to shoot at 1 fps for a total of 15 frames. The autofocus is slow and very noisy. The top shutter speed is 1/1000 and the maximum ISO, or sensitivity, is 400. At 400 ISO the noise is bad and prevents you from recoding fine details. This is not a camera with which to take pictures of fast moving subjects in low light. But in good light, with a heap of patience and an understanding of the cameras limitations you can get some pictures. Whether you enjoy the process or not will depend upon your outlook.
Little Corellas taken with the Olympus C720UZ camera.
When light levels fall the inadequacies of the C720UZ are quite apparent. The noise patter prevents detailed images.
Canon EOS 300d with a 75-300mm lens
Canon EOS 300d body.
If you can swing to $250-300 AUD there are better alternatives than the very old bridge cameras. The Canon Canon EOS 300D (Canon EOS Digital Rebel in North America and the Canon EOS Kiss Digital in Japan) was the first real consumer budget DSLR when released back in 2003. For $60-100 you should be able to find a body only. I’d look to team this up with a 70-300mm zoom lens. With a bit of careful searching the combo should come in at under $300. Alternatives from that period going for around that are the Canon EOS 10d and the Nikon D100. They’ll be a little bit more money but they have slightly better features. The downside to them is that they were often used professionally and so they might not have much life left in them.
Canon EF 75-300mm f4-5.6 IS lens
So with the 300d what do you get for your money. Well you get a 6MP camera that takes Canon EF mount lenses – one of the biggest ecosystems of lenses in the world which means lots of choice at a variety of prices. Canon themselves have made an assortment of 75-300mm lenses over the last 30 years and you should be able to pick up something for $120 AUD and the one I’m looking at with Image Stabilisation for about $220. Sigma and Tamron are third party lens makers and you can find their versions for around the $100 mark.
The good points of the 300d are that it’s cheap, batteries (Canon BP-511a) and memory card (Compact Flash) are still available. The camera has a 6MP sensor that produces very nice A4 prints and it is very simple to use. The downside is that the camera was built to a budget and it is not possible to shoot in Continuous Autofocus when shooting RAW, the buffer is 2.5 frames per second for 4 frames, and the plastic body looks a bit tacky (but at least it feels solid). On the copy I have the rubber panels have gone a bit soft and sticky. To use Continuous AF you need to shoot in the Sports mode which is jpg only and you cannot adjust the exposure using exposure compensation in this mode. There is no being able to use the rear LCD screen to compose pictures on and there is no video mode. Maximum ISO is 1600 and the quality is ropey, but files can clean up quite well in image processing software.
The 70-300mm lenses at this price point are not going to win any awards for optical performance, but they will suffice to get you started. Irrespective of the manufacturer they all tend to be a little soft at the 300mm end and are not the fastest to find focus especially in low light, but they are capable of giving you a nice image if you don’t shoot wide open and keep the shutter speed up.
If you don’t want to buy Canon then at this price point look at the Nikon D100. Obviously you’ll have to substitute Nikon fit lenses as well.
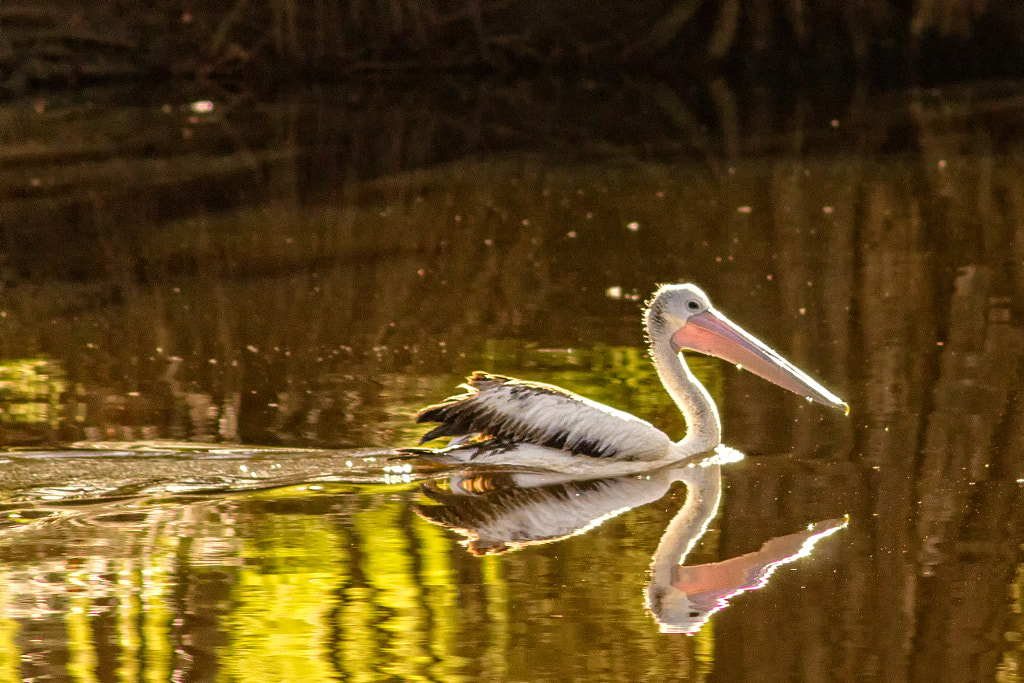
Australian Pelican at Woodman Point, Western Australia. Canon EOS 300d with Canon EF 75-300mm f4-5.6 IS.
Kadjinak or Grey Fantail (Rhipidura albiscapa). York, Western Australia.
Djidi-djidi or Willie Wagtail (Rhipidura leucophrys). York, Western Australia.
Djida or Yellow-rumped Thornbill (Acanthiza chrysorrhoa). York, Western Australia.
Koolbort or Singing Honeyeater (Gavicalis virescens). York, Western Australia.
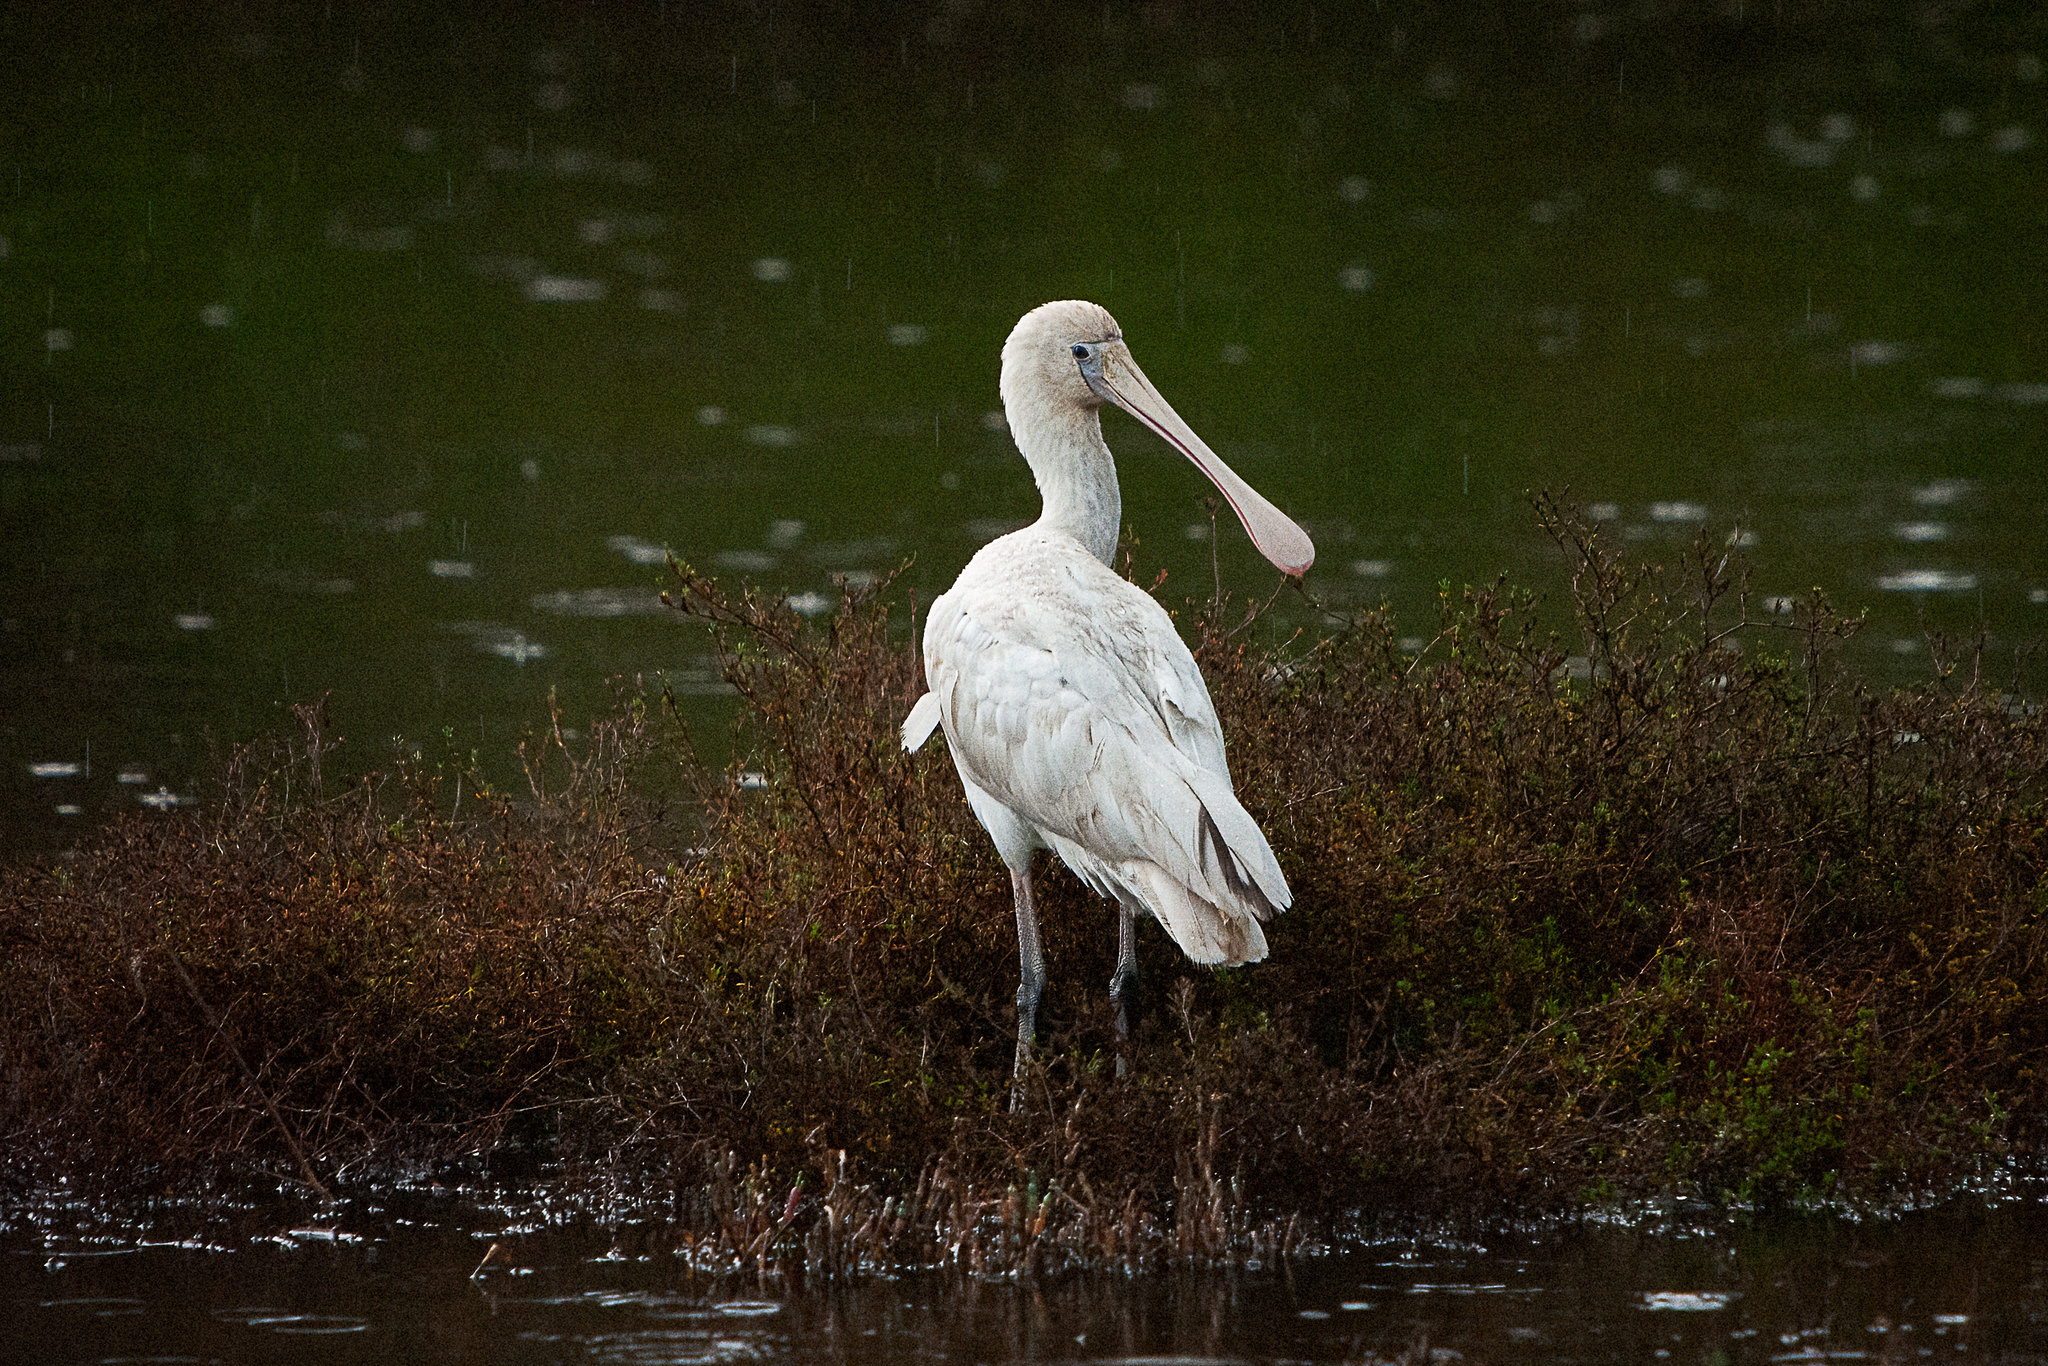
Kaaka-baaka or Yellow-billed Spoonbill (Platalea flavipes) in the rain. York, Western Australia.
Djangkang or Red Wattlebird (Anthochaera carunculata subs woodwardi). York, Western Australia.
Canon Eos 550d with a 75-300mm lens
Canon EOS 550d body.
If you can squeeze another $50-100 then a good option would be to go for something like the Canon EOS 550d. You have a substantial increase in resolution with an 18Mp sensor with better high ISO performance – now up to 6400 natively or 12800 by expansion. Continuous auto focusing in all shooting modes and the frame rate is increased to 3.7 frames per second with a buffer of 34 frames shooting jpg and 6 frames shooting RAW. The AF system has been beefed up a little and while still only having 9 centrally arranged focus points it has a cross type sensor in the centre with extra sensitivity. The camera uses SD cards which are cheap and easily found. The battery, the Canon LP-E8 is a bit of a down grade in terms of performance compared to BP-511a used in the 300d, but it is readily available and affordable. While being able to shoot 1080 video it is only really suitable for still subjects as the contrast based autofocus is is too slow to lock onto moving subjects. My first videos were shot with this camera and it is capable of producing a good result if you are prepared to manually focus. Other downsides are the limited buffer and the slow frame rate, the lack of a second control dial also makes using exposure compensation a little fiddly. I try and keep my ISO below 3200 as the chroma noise is quite intrusive and difficult to clean up without destroying fine details. But, having said all that this is a camera which is capable of producing very good results. Even though I now have other better cameras I still like to get the 550d out and use it because it is just fun to use.
Canon EOS 550d with Canon EF 75-300mm f4-5.6 IS lens.
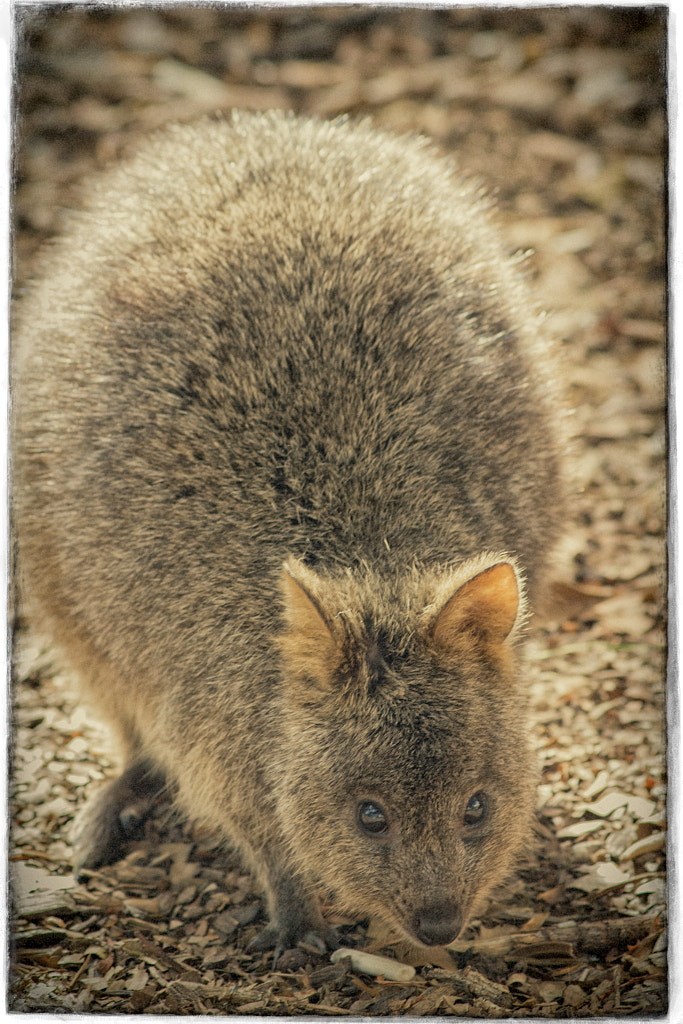
Quokkas are a small marsupial that inhabit Rottnest Island. Canon EOS 550d with Canon 75-300mm f4-5.6 IS lens.
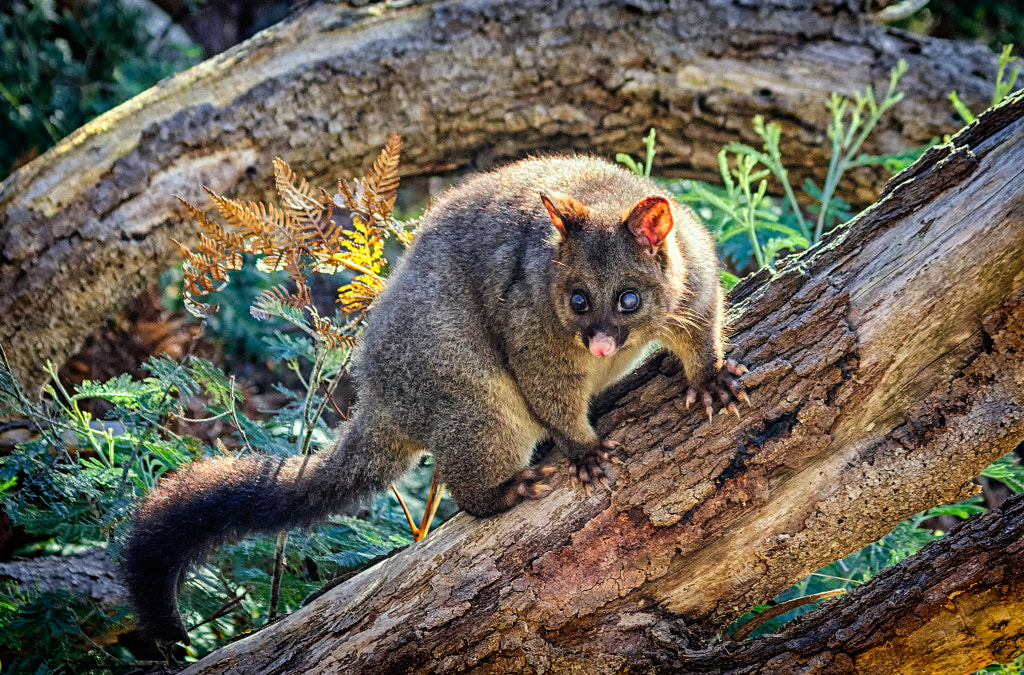
Brushtail Possum (Trichosurus vulpecula) at the Coal Mines Historic in Tasmania. Canon 550d with Canon 75-300mm f4-5.6 IS lens.
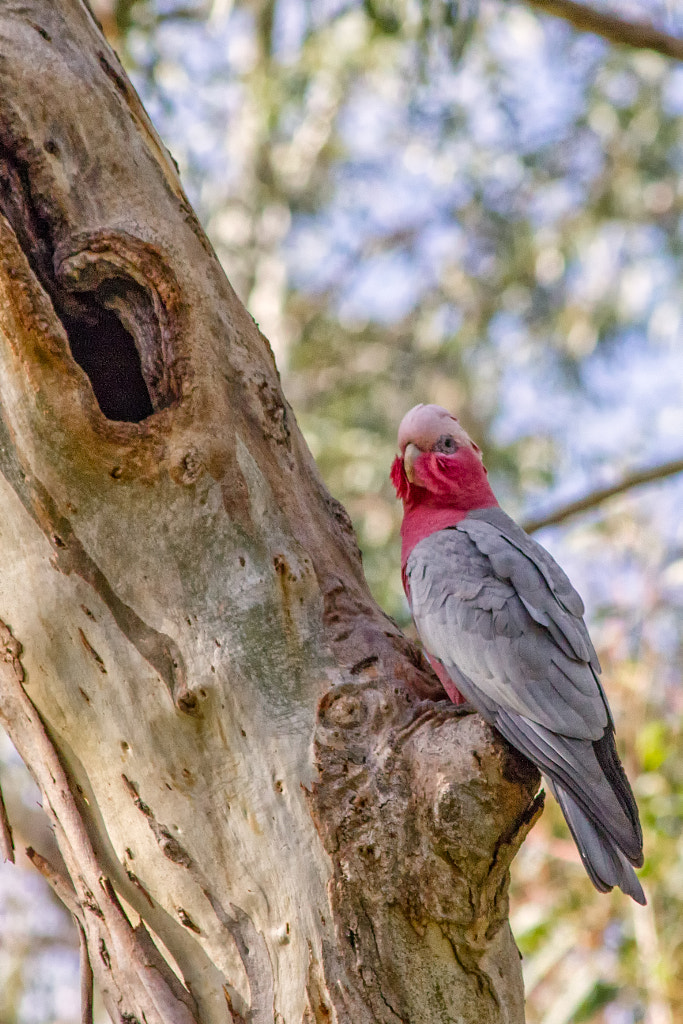
Like many cockatoos Galahs, Eolophus roseicapilla, nest in hollows in eucalypt trees. Woodbridge Riverside Park. Canon EOS 550d with Canon 75-300mm f4-5.6 IS lens
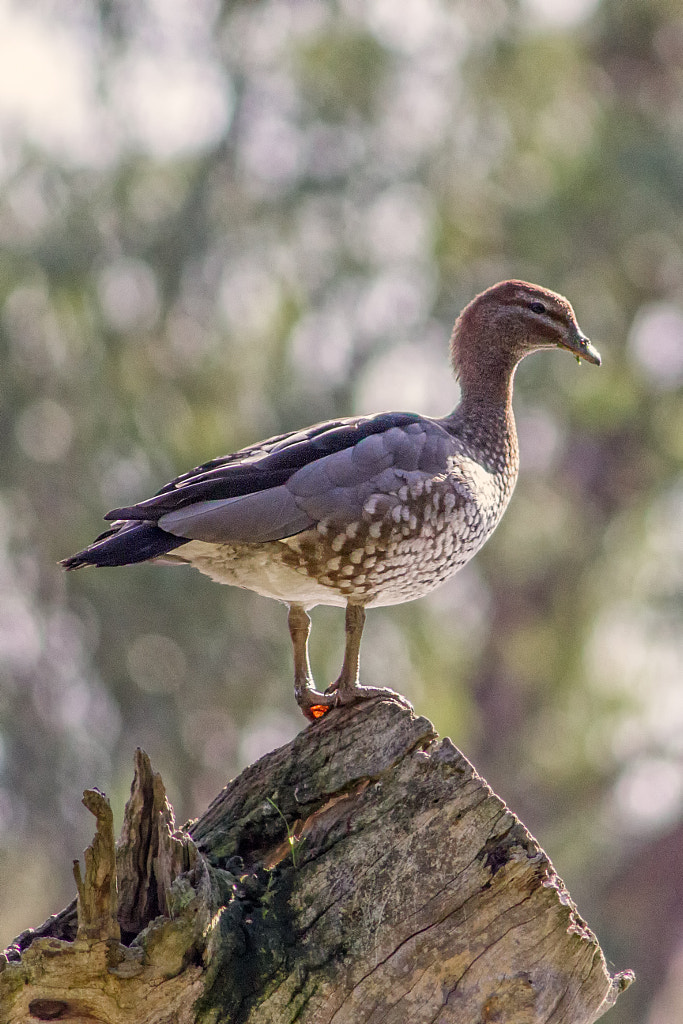
Maned Duck (Chenonetta jubata) also known as the Australian Wood Duck, Swan River, Woodbridge. Canon 550d with Canon EF 75-300mm f4-5.6 IS lens.
Australian pelican (Pelecanus conspicillatus), Swan River, Woodbridge. Canon EOS 550d with Canon 75-300mm f4-5.6 IS lens.
This would be a camera which would benefit with a better lens if you can afford it. Something like a Canon EF 300mm f4 (approx $500 on EBay) or a 400mm f5.6 (approx $600 on EBay). This would be a nice nimble set up that would give great results.
The Nikon equivalent to this camera would be the Nikon D5000 for about the same amount of money.
Summary
It is quite possible to put together a competent kit to photograph wildlife for less than $500 AUD. It won’t have all the bells and whistles of more modern high end cameras but you will be able to make it work. The limitations mainly are speed of operation and picture quality. Learning how to make up for the short comings will inevitably make you a far better photographer in the long run than having the latest and greatest camera will.
Golden hour light illuminates the canola. York, Western Australia.
It’s the time of year again when I post a gratuitous canola photograph. But the yellow of the canola and the blue of the sky are hard to resist. It’s really strange – York is a wildflower hot spot with an incredible number of spectacular species, yet I see more tourists pull up to photograph canola than the wildflowers.
The Autumn burn off in the fields of the Western Australian Wheatbelt has left its distinctive stripes on the landscape.
Thought I’d put up a couple more pictures of the stripes fields we’ve got round our way. They won’t be around for much longer as we have had the first real rains and there will soon be a green flush that will change the colour of the landscape.
I must say it’s been quite nice to do some landscape photography again. I decided to go all retro and pull out the Cokin filters and a couple of older cameras. The top photo was taken with a Canon 6d and the Canon EF 70-200mm f2.8 IS L Mk I which completed the old school experience. The photo below was shot on the Olympus EM1 Mk i. They may not be the latest and greatest cameras and lenses but they still deliver
I like the changes in the seasons and particularly look forward to the arrival of autumn. In fact spring and autumn are what living here are all about – fantastic weather with near perfect temperatures.
The Autumn burn off in the fields of the Western Australian Wheatbelt has left its distinctive stripes on the landscape.
The farmers have launched into a frenzy of activity – the fields are being burnt in preparation for the next crop. They are hoping that the war in the Ukraine and the sanctions against Russia will bring about record wheat prices. That optimism is being tempered by rising costs of fuel, fertiliser and pesticides. As usual for this time of year the valley fills with palls of smoke leading to some spectacular sunsets.
In the garden the bob tailed lizards are nowhere to be seen. While they don’t exactly hibernate they go into torpid state where they hide up and live off the fat reserves in their tails. The white browed babblers have upped sticks and moved to another garden and the only real activity is coming from the white-cheeked honeyeaters. They had a bit of a population explosion over summer so there are lots of adolescents chasing one another around the garden. This has led to some spectacular demonstrations of flying with some very close calls with windows and near misses while dodging around the rear veranda. Just as dawn breaks lots of them sit on the fence outside my bedroom window and make a tuneless racket. What they lack in musical ability they make up for with enthusiasm.
White-cheeked Honeyeater (Phylidonyris niger).
Yes I like autumn it marks the start of more activity out in nature.
BIF or bird in flight. White faced heron, Egretta novaehollandiae, Wilson Inlet, Denmark, Western Australia. Olympus EM1 mk I with Panasonic 100-400mm lens.
I’m not talking about the Oscars but Birds In Flight. I’m finding this a very troublesome aspect of nature photography.
If you listen to bird photographers talk this is the holy grail and if you take a picture of a bird in a tree it is derisively called a bird on a stick and is seen to have no merit at all. In fact BIF is now considered such an important part of photography that with each new camera launch the manufacturers herald its new bird tracking autofocus capabilities. These cameras are now capable of shooting incredibly high frame rates in excess of 20 frames per second which encourages photographers to just machine gun the subject – the so called spray and pray – in the hope of capturing something interesting. So why do I feel this troublesome. Well this technology doesn’t come cheap and the fact is that you have to be seriously minted and committed to bird photography to afford the equipment. The Sony A1, the Nikon Z9 and the Canon R3 are all around $9-10,000 AUD. Slap on a suitable long fast prime lens like a 600mm f4 and you have a package that will set you back a cool $30,000 AUD. Predominantly I shoot with Olympus’ cameras and their newly released camera plus their top wildlife lens will set you back around $15,000. So as you can see it’s not for the faint hearted or the financially embarrassed.
A Yellow-billed Spoonbill (Platalea flavipes) flying back to its nest on the Avon River. Canon EOS 550d with a Canon EF 70-200mm f2.8 IS L lens.
So does this state of affairs mean that unless you are wealthy you shouldn’t take up nature/wildlife photography? No because I happen to believe that it is the skill of the photographer that makes great photos and not the size of their bank account. Nothing beats going out into the field and spending time getting to know your subject and the environment they live in. The more time you spend out there the more picture taking opportunities you will have.
The Eastern Osprey (Pandion cristatus) is known to the Nyoongar people of the south west of Western Australia as yoondoordo. Oyster Bay, Lower King, Western Australia. Olympus OMD EM1 mk ii with Panasonic 100-400mm lens.
Secondly don’t obsess about equipment. Get what you can afford. Any camera with interchangeable lenses with a long lens is capable of excellent results. What matters is that you spend time with your camera and learn how it works. Eric Hoskins, 1908-91, was a pioneer in bird photography. He worked with what would now be considered very primitive – large format single shot cameras with no metering, no auto focusing and slow film emulsions (10 ISO) – yet he changed the face of bird photography with his use of flash and he enabled people to see birds in a way that they’d never seen before. Buy stuff second hand. Take advantage of the well heeled enthusiasts who have to have the latest and greatest. They change their equipment like I change my socks and often sell off perfectly good equipment for far less than they paid for it.
Blue sky. Check. Bird in flight. Check. A great egret (Ardea alba modesta) flying over the Creery Wetlands Nature Reserve in Western Australia. Olympus OMD EM1 mk ii with Panasonic 100-400mm lens.
Thirdly there is more to nature/wildlife photography than birds in flight. I find endless pictures of birds flying across a blue sky boring. I like to see animal’s behaviour – feeding, building nests, rearing young, mating rituals etc. Show the animal in its environment.
Kooljak is the Nyoongar name for the Black swan (Cygnus atratus), Toodyay, Western Australia.
Fourthly you don’t have to go on expensive safaris to take pictures of animals. Thanks to the power of the internet what can be found in your backyard is interesting to people in different countries so capitalise on what you have close to home because the skills you learn will pay off in spades if you are able to go on a trip of a life time to somewhere exotic.
A Western Corella flies amongst the tree tops along the Avon River in York.
The shots below were taken at Tomato Lake which is in a park in one of Perth’s suburbs. The camera used was second hand with an older adapted lens with adequate autofocus. A few hours of being prepared to sit in mosquito ridden undergrowth by a lake gave me the chance to take some photos that I’m happy with and enjoy myself.
An immature Nankeen Night Heron, , Nycticorax caledonicus subsp mannillenis.
Australian Darter, often called Snake Bird, Anhinga melanogaster subsp. novaehollandiae.
















You must be logged in to post a comment.