Bread And Butter Lens

20260417-Canon35mm-0224-Edit
The Canon EOS 30 film SLR with a Canon EF 35mm f2 lens mounted.


Regular readers may recall that I have been shooting film again and it has been great fun going out with a single camera and a single lens. My camera of choice is my Olympus OM4 with the Olympus OM Zuiko 35mm f2 lens. That combination is over forty years old and I’m a bit worried that it may give up the ghost because there will be no chance of repairing it. I had thought of getting another OM4 body or even the later OM4 Ti, but they are all getting on a bit. I do have another film camera body that I can use and that is the Canon EOS 30, also known as the Elan 7E in North America and EOS 7 in Japan. I’ve been using it with either my Canon EF 24-70mm f4 or my Canon EF 50mm f1.8. The zoom lens and camera combination is a bit on the heavy side heavy for an every day carry and while the 50mm was suitably lighter it’s not a focal length I particularly like. So I had the bright idea of buying a Canon EF 35mm f2 lens. They have the benefit of being small and light while being cheap second hand. So I scoured EBay and found that Map Cameras had a suitable copy rated as “B – Has been used preciously. Showing a few marks, scratches of cosmetic surface. Functions perfect.”. When it arrived it looked like it was new, there were no marks on the lens barrel, front and rear lens elements, and the mount looked pristine.


Canon EF 35mm f2 lens
The Canon EF 35mm f2 was part of Canon’s consumer range of lenses. Here it is shown with the 24mm f2.8 and 50mm f1.8 mk ii.


Canon introduced their autofocus EF lens mount in 1987 and it took them until October 1990 to introduce a basic 35mm lens – the EF 35mm f2 a no frills prosumer grade lens. It’s got a plastic body with a metal lens mount. There’s a focusing ring and a switch to put it into manual focus. The lens extends as you focus in and out, but, the front element doesn’t rotate which is a boon if you like to use polarising filters. It feels quite dense in the hand, but it doesn’t exude quality.


Canon EF 35mm f2 lens
It is a very no frills construction with a plastic body, manual focus switch and a rudimentary ribbed manual focus ring. You do get a focus scale for zone focusing and an infrared focus point. Which is all very welcome on a budget lens.

;


Canon EF 35mm f2 lens
It does have a metal lens mount which is always nice to see as many budget lenses have plastic mounts.


Specifications 

Focal Length 35mm
Maximum Aperture F/2
Angle of View (diagonal) 63° 26′ (for full-frame format)
Optical Construction 7 elements in 5 groups
Minimum Object Distance 0.25m
Maximum Magnification Ratio 0.23
Filter Size Φ52mm
Maximum Diameter Φ67.4mm
Length 42.5mm 
Weight 210g
Diaphragm Blade Number 5 straight blades
Minimum Aperture F/22
Standard Accessories Lens caps
Compatible Mounts Canon EF


EF35mm f2 - Canon Camera Museum 2025-07-28 16-18-22-Edit
The optical construction is very simple with 7 elements in 5 groups and no fancy glass elements.


Performance

Sharpness


20260501-Canon35mm-0001


20260501-Canon35mm-0004


20260501-Canon35mm-0002


20260501-Canon35mm-0003


Wide open the centre of the image is soft, but has reasonable contrast. The corners were far worse – low contrast mush. At first I thought I had a lens that was  decentered, but, when I checked all four corners they were equally bad so it was field curvature . This is, apart from a lens by Holga, the worst lens I’ve ever tested. Two stops down from wide open is where a lens traditionally hits optimum performance, well someone forgot to tell the Canon optical design team that as although there had been a slight improvement in the centre the corners were still very mushy. At f5.6 the centre of the frame is as good as it gets, but the corners still aren’t sharp and lack contrast. The best performing aperture is f8 in terms of the full field of view. By f16 diffraction starts to kick in degrading the image and that just gets worse at f22.

Now this is a 36 year old design for a consumer grade lens so is this performance to be expected. Well the Olympus OM Zuiko 35mm f2 was designed was introduced in 1972 a full 18 years before the Canon EF 35mm f2 and it has a better optical performance and better bokeh – more about that later. The only advantage the Canon has over the Olympus is that the Canon manages flare a lot better. We’re also told that primes are better than zooms so I compared the Canon EF 35mm f2 to my Canon EF 24-70mm f4 IS L at 35mm, and the zoom is better. Not surprising really. An old consumer grade design compare to a more modern professional grade. So I wouldn’t look to replace a good zoom lens with the Canon EF 35mm f2 unless you were considering some other metric of comparison such as size and weight.

Bokeh


20250918-Canon35mmf2-0225
Wide open the bokeh balls are bad. The transitions to out of focus areas are quite pleasant.


Wide open the Canon produces nice large round bokeh balls that have no onion rings – the lens has after all no aspheric elements. At the edges the balls take on a more elliptical shape caused by mechanical vignetting. As you stop the lens down to f2.8 the balls cease to be balls and become pentagonal thanks to the five straight aperture blades. They become defined the further you stop down.


20250918-Canon35mmf2-0226
Stopping down to f2.8 and the bokeh balls cease to be balls and take on a pentagonal shape thanks to the 5 straight blades of the aperture diaphragm.


Flare Resistance 


20250815-Canon35mmf2-0236-Edit


A specular light source within the frame will produce quite pronounced veiling and reflective flare. The effect becomes more pronounced as you stop down. It is a good argument for a lens hood, but Canon never supplied their non ‘L’ lenses with one, you had to buy it separately. It would be worth looking for a second lens that came with one. The diffraction spikes or sunstars are ugly with little definition. 

Chromatic aberration


Canon EF 35mm f2
Wide open there is axial chromatic aberration. Stopping down will fix the problem.


Axial chromatic aberration, also known as longitudinal chromatic aberration is present wide open with magenta and green fringing. This is difficult to remove in post, the best way to deal with it is to stop down.

Transverse or lateral chromatic aberration is present and considering the age of the design and the fact there are no fancy glass elements it does remarkably well. If using the lens on a digital camera this is easily dealt in post.

Distortion


Canon EF 35mm f2
Barrel distortion is present, it’s not too extreme – I’ve seen much worse. It is easily corrected if you shoot digital. You can also see the vignetting. This diminishes as you stop down and can also be fixed in post if working digitally. Personally I quite like a bit of vignetting and will often add it in post or in the darkroom.


As with most wide angle lenses there is barrel distortion, but it is very mild. Again shooting on digital this can be fixed by applying the profile for this lens.

Vignetting

There is some vignetting when shooting wide open and this clears up pretty quickly as you stop down. The Canon EF 35mm f2 lens profile in Lightroom also removes it.

Autofocus

When this lens was designed autofocus systems were a lot more primitive than they are now. Firstly these first generation auto focus lenses have according to Canon “an arc form drive for focusing. This is a conventional small motor unit, shaped to fit inside the curved barrel of a lens.”. Consequently they are slow and noisy. When I say say noisy I mean it. Racking the lens back and forth produces a sound that is akin to angry wasp trapped inside a bottle. It is very noticeable. There is no full-time manual focus, as found on later lenses that used USM and STM motors, you have to switch to manual focus using the switch on the lens barrel. Talking about manual focus there is a narrow ribbed focus ring and a focusing scale. While the lens is in AF mode the ring spins freely and does nothing. Throw the switch and the focus ring drives the lens elements back and forth. There are hard stops at either end so repeatable focus moves are possible. While not the most pleasant focusing ring to use it’s not unpleasant either. It gets the job done.

For stills this lens was made when a camera with seven AF points clustered in the centre of the frame was considered sophisticated. Single point AF was usually a matter of keeping the subject in the centre of the frame or focusing and recomposing. The AF on the lens is adequate, mostly it is accurate, but it can be a little slow and hunt in low light or with low contrast subjects. Continuous AF is much the same story.

This lens was not designed with video in mind, but I gave it a go.  I tried it on an 80d the Dual Pixel CMOS AF but it wasn’t the best performance. Finally I bunged the lens on my Sony A7r2 via a Metabones adapter and to some extent the AF was a little better but the lens really struggled and made some awful noises as it focused.


In Use


20250815-Canon35mmf2-0225-Edit


Moylan Silos


20260124-York-0244-Edit


Bing's Visit


From the above you’d think that this lens isn’t much chop. In photography there is a tendency to obsess about specifications and lens resolution charts, but they don’t tell the whole story. Wide angle retrofocus lens for SLRs don’t really perform well at close distances unless they have a floating rear element which the Canon EF 35mm f2 does not. That may explain some of the results. Also answer these two questions. How many times do you compose a photo with the main subject in the extreme corners? Short of very precise copy work how many images do you take that require corner to corner sharpness? I know I don’t do any of those two things. The attributes this lens brings to the table are that it is small and light and is sharp enough where it counts. It is ideal on a compact SLR as an everyday carry.  Although I primarily bought it to use on my film EOS 30 to date I’ve not done so preferring to use it on either my Canon 5d or 6d. It’s been a very pleasant experience and I’ve enjoyed using for landscape, urban landscape and street photography.


Smile


20251229-Perth-0224-Edit


20251229-Fremantle-0226-Edit


Conclusion


Canon EF 35mm f2 lens


If like me you want a small compact lens to walk around with on a film or digital Canon SLR and you aren’t bothered by not having a red ring, the best specs and best optical performance then this lens is perfect. There are loads of them out there which makes it easy to pick up a reasonably priced second hand example. If you want something to shoot video I’d look for the Canon 35mm f2 IS, the Canon 35mm f1.4 L, or a Sigma 35mm f1.4 Art. They will all have more modern motors which will make the autofocus experience more pleasurable. If you want to adapt the lens to shoot on a modern mirrorless again look for something more modern.


Canon EF 35mm f2 lens


All Change

The weather has finally broken and we’ve had some decent rain. Around Easter time York shifts into gear by acting as the host for numerous weekend events. The York Motorcycle Festival being the first one this year. Now to be perfectly honest motor vehicles have no allure for me at all – to be totally frank they bore the faecal matter out of me – but, I often attend the festival just for the photographic opportunities and this year was no different. What was different was that I used two cameras, one a Sony A6500 with Sigma 23mm f1.4 lens and the other a Canon EOS 30 with a Canon EF 24-70mm f4 lens loaded with Ilford FP4+ . I’m not going to say which was which because that’s not the point. I didn’t come away with anything breathtaking but it was fun couple of hours walking up and down taking photos. 


2025 York Motor Cycle Festival


2025 York Motor Cycle Festival


2025 York Motor Cycle Festival


2025 York Motor Cycle Festival


2025 York Motor Cycle Festival

Wildlife On Film

Kadar
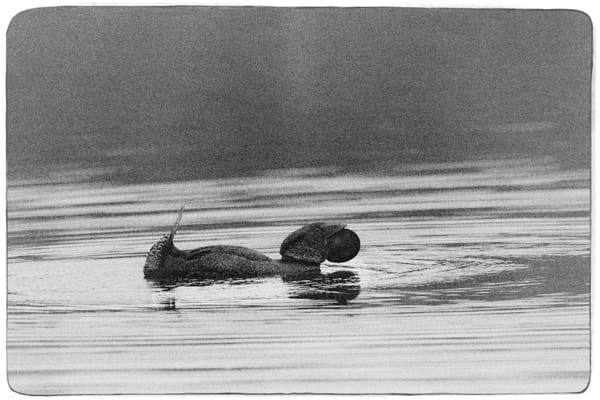
Kadar or Musk Duck (Biziura lobat), Lake Leschenaultia, Western Australia. Canon EOS 30 with Sigma 150-600mm and Ilford Delta 3200.


Can you shoot wildlife using film? Well the obvious answer is yes. People took wildlife photos using film for a lot longer than they have using digital. Cherry Kearton (1871-1927) and his brother Richard (1862-1928) the naturalist and writer were very early pioneers of wildlife photography and they published the first natural history book entirely illustrated with wild photographs in 1895. Their 1898 book “With Nature And A Camera: being the adventures of a field naturalist and an animal photographer” illustrated with 160 photos was a best seller and inspired many people to become wildlife photographers. Other notable wildlife photographers from the film days include Eric Hoskins, Stephen Dalton and Heather Angel. “Hold on” I hear you say “they shot film because that was what available”. It’s a valid point, so can you shoot wildlife on film in 2024? The answer is yes, but it’s not as simple as it once was.


Analogue Wildlife
The film stock I’ve chosen for photographing wildlife.


Back in the 1990’s and early 2000’s there were a lot of high speed film emulsions. Kodak had Ektar 1000 in colour negative, Ektachrome 400 slide film which could be pushed to 1600 ISO and TMax  P3200 in black and white. Ilford had its Delta 3200 black and white emulsion. Fuji had Fujicolour 1600 colour negative film, FujiChrome Provia 1600 which was a colour reversal film and Neopan 1600 Professional black and white film. Agfa (there’s a blast from the past) had a couple of 1000 ISO C41 film stocks and a 1000 ISO slide film. 3M made an E6 1000 ISO film which was sold under several trade names. Sakura, later Konica, had a 3200 ISO colour negative emulsion. Now in 2024 the situation is very different.There are no E6 films, only 2 colour negative films, but they are 800 ISO, and two black and white emulsions nominally rated at 3200. Camera and lens wise, well the secondhand market is your friend and top of the line cameras such as Nikon’s F4 or F5 can be picked up quite cheaply (although that is a relative term) as can Canon’s EOS1. Lenses aren’t difficult to come by, but their prices haven’t dropped like those of the camera bodies as they can still be used on DSLRs.


Analogue Wildlife
The Canon EOS30 is an enthusiast level 35mm SLR that is a very capable camera for shooting wildlife.


Sigma 150-600mm f5-6.3 DG
The Sigma 150-600mm f5-6.3 DG Contemporary lens is a relatively inexpensive lens that is excellent for photographing wildlife.


The parameters I set for myself with this project was that I had to use stuff that I already had, so while there are camera bodies more suited to shooting wildlife that have better autofocus and higher frame rates I stuck with my Canon EOS 30. Lens wise my Sigma 160-600 was the obvious choice. I did briefly think about using my Olympus OM cameras, but I didn’t have a suitable lens and I didn’t want to have to hunt around for a good copy of the hard to find Olympus OM 600 mm f/6.5. Also I didn’t fancy trying to find focus with my ageing eyes. So the Canon and Sigma combination won out.

The elephant in the room is the cost of film and developing. This is the major consideration. The following prices are for Australia as this is where I live. Kodak Portra 800 is $37 for 36 exp, Ilford Delta 3200 is $18, Kodak TMAX P3200 is $30, and Lomo 800 can cost as much as $48 for a single roll, but multipacks of 3 36 exp rolls can be bought for $140. The cost of processing is $10 for C41 and $18 for D76 (black and white). Those prices are for developing and cutting and sleeving. Now my Canon EOS 30 can shoot at 4 frames per second, so machine gunning birds in flight would see you get through a roll every 9 seconds at a cost of more than $1 per shot. Typically when I go out in the morning for three hours or so I’ll shoot around 3-4000 frames with my digital cameras so when I decided to undertake this project I decided that I’d only shoot a maximum of two rolls on an outing. Using my Canon EOS 30 meant that after finishing the film I could switch the body to my Canon 80d so I could make the most of the morning. I know that by developing your own film you can reduce the costs, and I’m hoping to do this in the future.

All the photos below are the full frame, and you can look at them larger by clicking on the image.


Djindjokoor
Djindjokoor, Brown Honeyeater, Lichmera indistincta. York, Western Australia.


Djindjokoor
Djindjokoor or Brown Honeyeater (Lichmera indistincta). York, Western Australia.


Kool-boort
Kool-boort or Singing Honeyeater (Gavicalis virescens). York, Western Australia.


Kanyinak
Kanyinak or Sacred Kingfisher (Todirmphus sanctus). Kodak Portra 800.


Caspian Tern
Caspian Tern, Hydrprogne caspia. Heirisson Island, Western Australia.


Bulland
Bulland or Great Egret, Ardea alba. Heirisson Island, Western Australia.


So after a few months what can I say? Well the first thing that really stuck out was the grain. Many photographers complain bitterly about noise in images, but that ain’t got nothing on the grain in these fast emulsions. Funnily enough I wasn’t too bothered with it in the black and white shots on Ilford Delta 3200 as I quite like the look. I had a Tri-X 400 pushed 2 stops developed in Rodinol phase many years ago which might explain that foible. The shots taken on Kodak Portra 800 were a bit different. I suppose I’d just become used to noise free images up to 1600 ISO on my digital cameras. Having said that I’ve got used to it and I quite like the results.


KodakPortra800


EM1x5000


Delta3200


EOS80d6400-1


Digitising the negatives was an interesting experience. To keep costs down I scanned the images myself using a DSLR and a macro lens. The learning curve has been a bit on the steep side, especially for the colour negatives, and I’m still not sure whether I’m happy with the results or not. If I were to continue with this, and I think at this stage I will, I’ll probably get a dedicated film scanner. The reason being that while scanning using a camera was quite quick, about 1/2 an hour for a roll of 36, it was the faffing around in Lightroom and Photoshop that took a lot more time.

Was I happy with the final results? Yes. I think that it is an interesting exercise as it makes you really think. Firstly which film stock to use. The Ilford Delta 3200 is great for low light and misty atmospheric conditions. It’s not a film to use if getting the maximum feather detail is your aim. The Kodak Portra 800 is best suited to brighter conditions with a nice light. When shooting digital I use shutter priority and and auto ISO which means I can just concentrate on the composition. With film the ISO is not a variable, once you’ve loaded the film and start using it at that ISO you’re committed to that for the whole roll. The net result is that I have to be very aware of what my exposure is all the time. This is not a bad thing as it makes me more engaged with whole picture taking process. Were there any downsides beside the expense? Yes. I found that using film made me be a lot more conservative in my photos. I was not so inclined to experiment. Shooting birds in flight I’d only take 2 or 3 frames, whereas on digital I’d think nothing of taking 20 or 30 frames as I’d want to be sure of getting the wings in the perfect position. I’ve just become accustomed to subject tracking and have become quite reliant on it. Going back to an autofocus system developed in the 1990’s was a bit of a shock. It wasn’t as positive or sticky which meant there were a lot of out of focus pictures. I missed having a histogram in my viewfinder and the lack of instant feedback of the LCD screen. This meant I had to remember how much exposure compensation to give for a black bird on a very dark background or a backlit white egret. Having to wait a couple of weeks for the films to come back from the lab was a lesson in deferred gratification.

Would I give up digital and convert solely to film? Is my name Rothschild? No. I don’t see it as a binary choice. In many ways digital is a better medium for wildlife photography. It gives you more freedom – you can shoot in incredibly low light and you don’t have the feeling a meter is running as you take photos. Film does have its place as a creative alternative, if you are after a specific look or mood then it is ideal.


Grain and Mist

Kadar by Paul Amyes on 500px.com

A male musk duck (Biziura lobata) swims through the mist on Lake Leschenaultia.


As I mentioned on a previous post I’m revisiting film photography again, particularly black and white. Initially I thought it be more suited to street photography, urban landscape and landscape , but, I’m enjoying a foray into black and white wildlife photography. So far this is highly experimental for a number of reasons.  At the moment I’m having to send my films out to a lab for development as getting photochemicals is ridiculously hard in Australia. So many retailers have no stock and can’t say when they will be getting any. Film photography is undergoing a huge resurgence at the moment and yet the photographic industry is remarkably slow to take advantage of this. Anyway because my film is being processed by lab, likely using D76, a developer I don’t much care for, I’m not quite getting the look I want. My favourite developers for fast film were Rodinol and Microphen. Another way it is experimental is that I’m not yet fixed on a film stock. At the moment I’m trying Ilford’s excellent Delta 3200 and Ilford HP5 Plus pushed two stops. Which ever way I go it still means lots of grain which I want to make a feature of. If I want pin sharp fine detail I can get that with digital capture. When using film I want to use its inherent properties as part of the aesthetic. The use of film grain is  a creative decision to create a certain look.


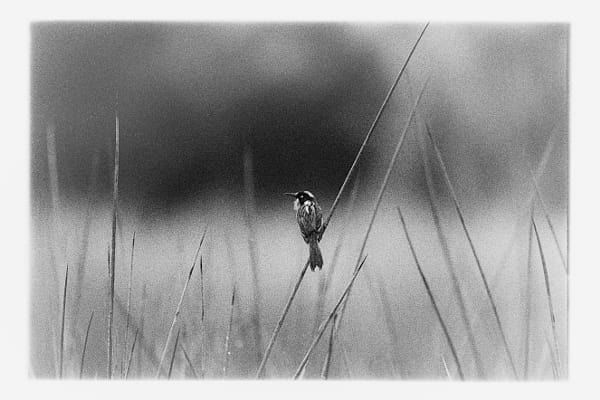
Bandiny by Paul Amyes on 500px.com

Bandiny or New Holland Honeyeater (Phylidonyris novaehollandiae) on a misty morning at Lake Leschenaultia.


Couple coarse film grain with the mist we are experiencing most mornings and the shots can take on quite a moody impressionist quality. I’m really enjoying this and will continue with it as long as the weather lasts.


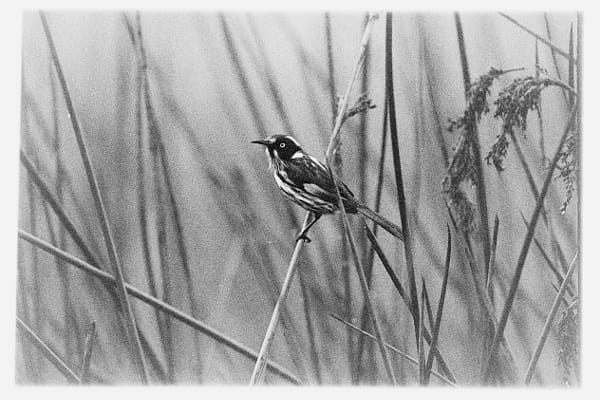
Bandiny by Paul Amyes on 500px.com

Bandiny or New Holland Honeyeater (Phylidonyris novaehollandiae) amongst the reeds on a misty morning at Lake Leschenaultia.


All three of the photos here were taken on Ilford Delta 3200 using a Canon EOS 30 and my Sigma 150-600mm f/5-6.3 DG OS HSM Contemporary lens.

Nannup Distractions

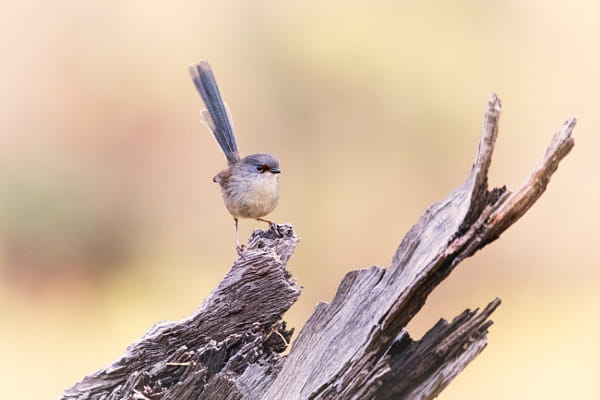
We’ve been to Nannup in the Blackwood Valley several times before and I’ve written about one of this visits before.  Last time I photographed orchids this time I meant to do some bird photography. I only managed to take a couple of bird photos on the first day – of a female Red-winged Fairy-wren (Malurus elegans) – as I got distracted and didn’t take the birding stuff out for the rest of the week.

Djoordjilya by Paul Amyes on 500px.com
A female Red-winged Fairy-wren (Malurus elegans) called Djoordjilya by the indigenous Nyoongar. . Nannup, Western Australia.


The cause of this distraction. Well as a last minute decision I’d decided to throw a film camera, a 50mm lens and a couple of rolls of film into my bag. At first I was just going to take nature photos while walking along the river foreshore. It was just initially to explore forms and textures. But, it wasn’t long before I was walking up and down the streets of Nannup (there aren’t many) taking pictures of anything that caught my eye. I have a particular fascination with signage – I often find it quite amusing.  Anyway the results are below.


Grasses and Bokeh
Grasses and Bokeh. Wild grasses growing along the banks of the Blackwood River in Nannup.


Lichen
Lichen growing on a tree trunk. Nannup, Western Australia.


Falling Limbs
There were arms and legs all over the place. Nannup, Western Australia.


Ducks Crossing


It wouldn’t be Nannup without any mention of the the Nannup Tiger or thylacine.


Stripes In The Forest

The Tigers were everywhere threatening to pounce out on the unsuspecting.


Thylacine #1


Thylacine #2