Unfortunately I have an unfortunate conflation of two factors that negatively impact upon image quality.
Kanamit or Welcome Swallow (Hirundo neoxxena). Northam, Western Australia. Taken at ISO 4000.
The first is that because I do a lot of wildlife photography which mostly requires being out at dawn and dusk to capture the action I often use high ISOs. While in itself high ISO doesn’t cause noise in an image the use of them amplifies the signal coming off of the camera sensor and this makes it more visible leading to luminance noise (graininess) and chromatic noise (colour noise or speckles). Good articles on image noise can be found here and here.
Micro Four Thirds cameras despite being fantastically specced are not known for their high ISO performance.
The second factor is that I predominantly use the Micro Four Thirds system of cameras and lenses. This means that if I compare the image files from my 20Mp Olympus EM1x and my 20 Mp Canon EOS 6d – same ISO, same shutter speed, and same aperture – grain is more apparent on the M4/3 file because it has to be magnified more than the full frame file.
Combine the two and things can get ugly real fast. When I first started using micro four thirds I was using the noise reduction in Photoshop and Lightroom and it wasn’t too flash smearing the details badly at ISOs over 1600. So that had me questioning my choices. Then I started hearing about Topaz DeNoise AI. I gave it a go and I was pretty impressed. Now I was happy to shoot at 3200 and occasionally use 6400. I was quite happy with that and used DeNoise as plugin from 2020 until this year. Topaz discontinued DeNoise as a stand alone app and wrapped it up with some other apps under the name Topaz Photo. I tried it but wasn’t happy with the results – they were a bit too crispy and crunchy giving a very “digital” look.
After a couple of months I learnt that quite a few of the OM System ambassadors were touting DXO Pure Raw 5. I gave it whirl on a free trial and was impressed. So impressed that I stumped up my own cash and bought it. It’s a one off payment so no subscription which is nice. I don’t know how it does what it does – it could be magic for all I care – but the results are fantastic. Click on the images below to see them larger.
Yongka or Western Grey Kangaroo (Macropus fuliginosus). Heirisson Island, Western Australia.
Koordji-koordji or Australian Reed Warbler (Acrocephalus australis subspecies gouldi). Lake Leschenaultia, Western Australia.
Djidi-djidi or Willie Wagtail (Rhipidura leucophrys). York, Western Australia.
Bandiny or New Holland Honeyeater (Phylidonyris novaehollandiae). Northam, Western Australia.
After a few months I’ve learnt that most of the time you can just rely on the auto settings, but every now and again you will need to fiddle about with the settings, but it’s all very easy to use. Of course you can use the apps on your full frame images and they will benefit too.
*The title of this entry is referencing the 1973 song by Slade.
Having watched the video the music has dated well, but the clothes! Some fashions deserve to be consigned to the dustbin of history.
This post came about as a response to post on a Google+ group I belong to. The post contained a link to an article at the website Olympus Passion by Chris Corradino (whom I don’t know) called “Full Frame vs Micro 4-3 Revisited with Pro Olympus Lens” where a canon EOS 6d with 17-40mm f4 L lens was compared with an Olympus OMD EM10 with 12-40mm f2.8 Pro lens. Nothing wrong with that, it serves as a potentially useful comparison of two popular cameras and lenses. In the article he posts two pictures of the same scene taken around a year apart, one used a polarizing filter one didn’t and the Canon 17-40L is not the best lens in the line up, and comparing a wide-angle zoom to a standard zoom doesn’t really tell anything. Also Olympus uses in camera software correction of its lenses to the RAW files whereas the Canon doesn’t and one has to manually apply correction when processing in Lightroom or ACR. So I thought about it and decided to do my own test. Now before I start I’d like to say that testing zoom lenses is fraught with difficulty and the reason why is very ably demonstrated by Roger Cicala’s excellent article “Painting Zoom Lenses with a Broad Brush – Roger’s Law of Wide Zoom Relativity” which is enough to make any sane person throw up their hands in horror at the enormity of it all.
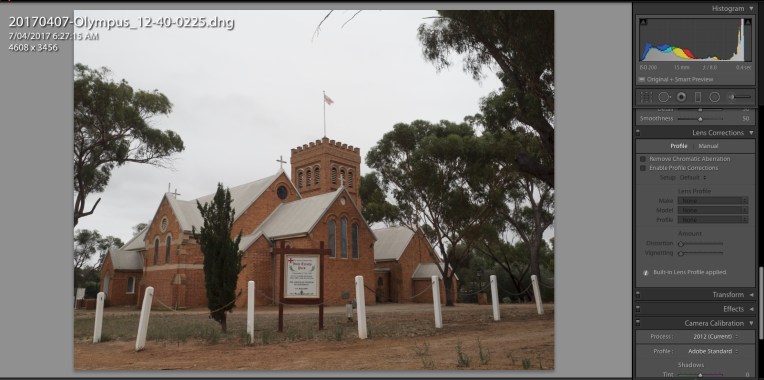
The file from the EM1 with the Olympus 12-40mm f2.8 opened in Lightroom.
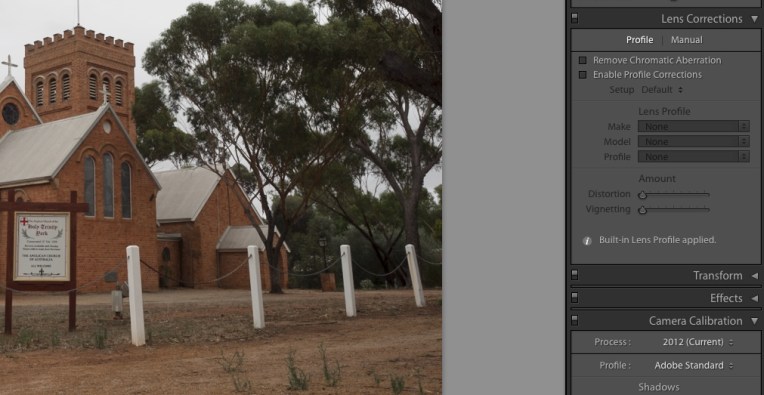
If we look at the lens correction box it shows that a built in lens profile has been applied.
I’m not really the scientific type, but I know that to make any form of comparison you have to compare like with like and remove all variables. The cameras and lenses tested were as follows:
Olympus OMD EM1 mki with Olympus m.Zuiko 12-40mm f2.8 pro
Canon EOS6d with Canon EF 24-70mm f4 IS L
Sony A7r with Sony FE 28-70 f3.5-5.6 OSS
Why three cameras and three lenses, well mainly a case of why not, but also I wanted to see how a budget kit lens performed against the two “pro” lenses, and I was using it as a control as I had previously looked at it. Each lens was shot at the wide end and the long end, with the wide end an architectural shot to look at how the lens behaved at infinity and close-ups at the long end.
Holy Trinity York provided the wide-angle subject.
Typically standard zooms behave best at the wide end and the performance deteriorates as you zoom into the long end. All the lenses were tested at an aperture of f8 for the two shots previously mentioned and wide open to test for vignetting. For each shot the camera was mounted to a tripod, there were no filters on the lenses, any image stabilisation was turned off and the shutter was tripped via the self timer. All metering was done using a handheld incident light meter – Minolta Auto Meter V f. Because the base ISO of the EM1 is 200 all the images on all cameras were shot at value. The only DSLR in the group was used in live view mode to avoid mirror slap. The images were all shot as RAW files and then converted to 8 bit jpgs using RawTherapee (version 4.2.1) which allows you to switch off any embedded lens correction. There was no sharpening, noise reduction or correction for chromatic aberration. Ok that’s the methodology lets look at what happened. Click on the images to see them at full size.
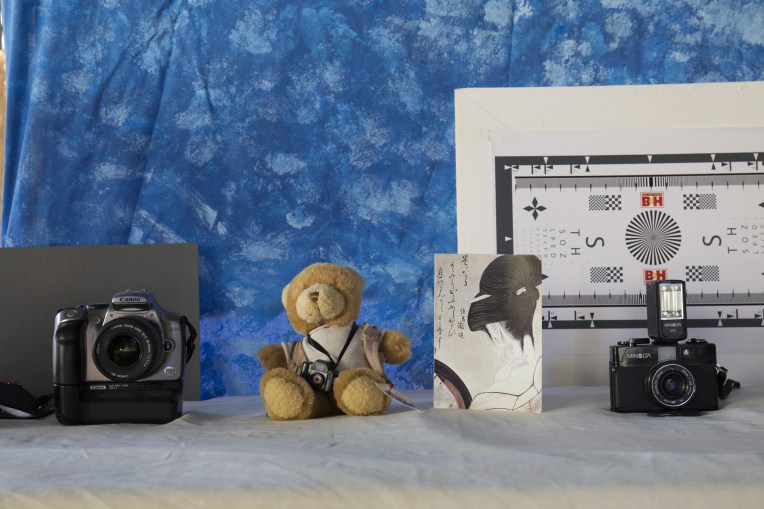
Phillip the photographic bear provided the tele test subject
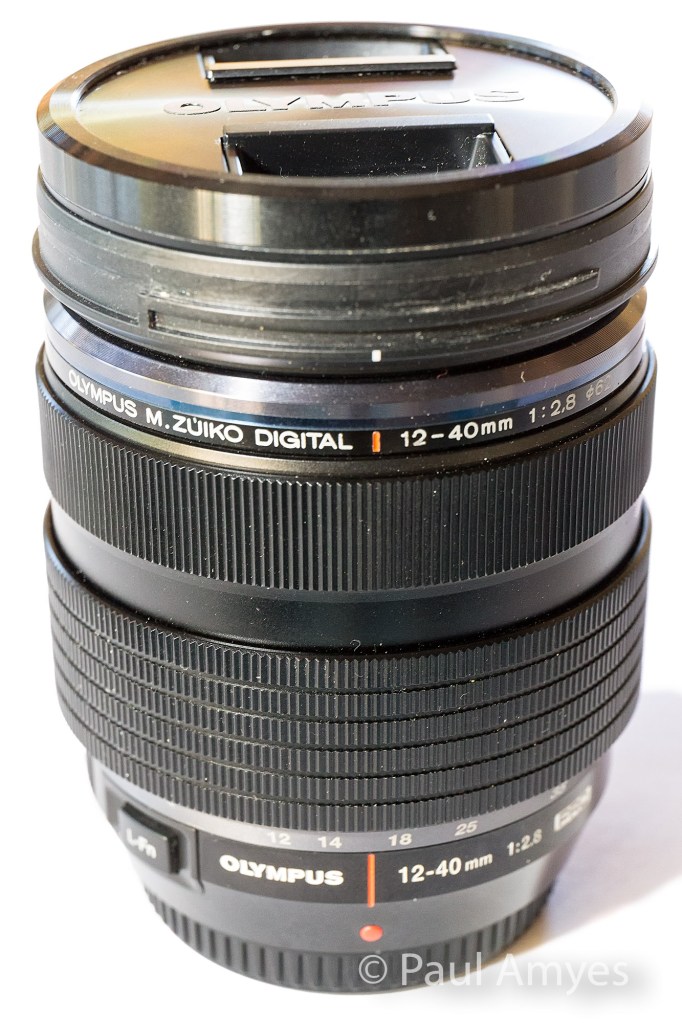
Olympus OMD EM1 mki with Olympus m.Zuiko 12-40mm f2.8 Pro lens
The Olympus m.Zuiko 12-40mm f2.8 Pro lens was announced as Olympus’ high end standard zoom in 2013 to accompany their then flagship camera the OMD EM1.
Built for the micro four thirds system this lens is equivalent to a 24-80 mm lens and that’s all the talk of equivalency you’ll get out of me, if you want more see this. The lens was launched at the same time as the EM1 in 2013 and it heralded a new line of “Pro” lenses. Of the three lenses here it is the only one with a metal outer construction and it has a splash proof and dust proof design. Its vital statistics are 84mm in length, a diameter of 69.9mm, has a filter thread of 62mm and weighs in at 382g. Not that it counts for much, but it feels nice in the hand and the manual focus clutch (reminiscent of the ones found on Pentax’s 645 range of lenses, is a very nice touch. Optically there are 14 elements in 9 groups – there are 1 aspherical element, 1 dual-sided aspherical element, 2 ED glass elements, 2 HR glass elements, 1 EDA glass element, 1 HD glass element. It is the most optically complex lens of the group. For bokeh aficionados there are 7 rounded aperture blades. The minimum focusing distance is 0.2m.
At the wide end the centre of the image is what you’d expect from a modern zoom, it is sharp and contrasty. At the edges the image is still sharp but the contrast has fallen off a little giving the appearance of softness. The chromatic aberration (CA) is very apparent. At the long end in the centre the image is still sharp but the contrast is lower than what we found on the wide end. The edges exhibit a little softness. The CA virtually non-existent. The results from the long end caused me a little consternation as it was the first time I’d seen images without any in camera correction applied so I repeated them just be sure and got exactly the same result.
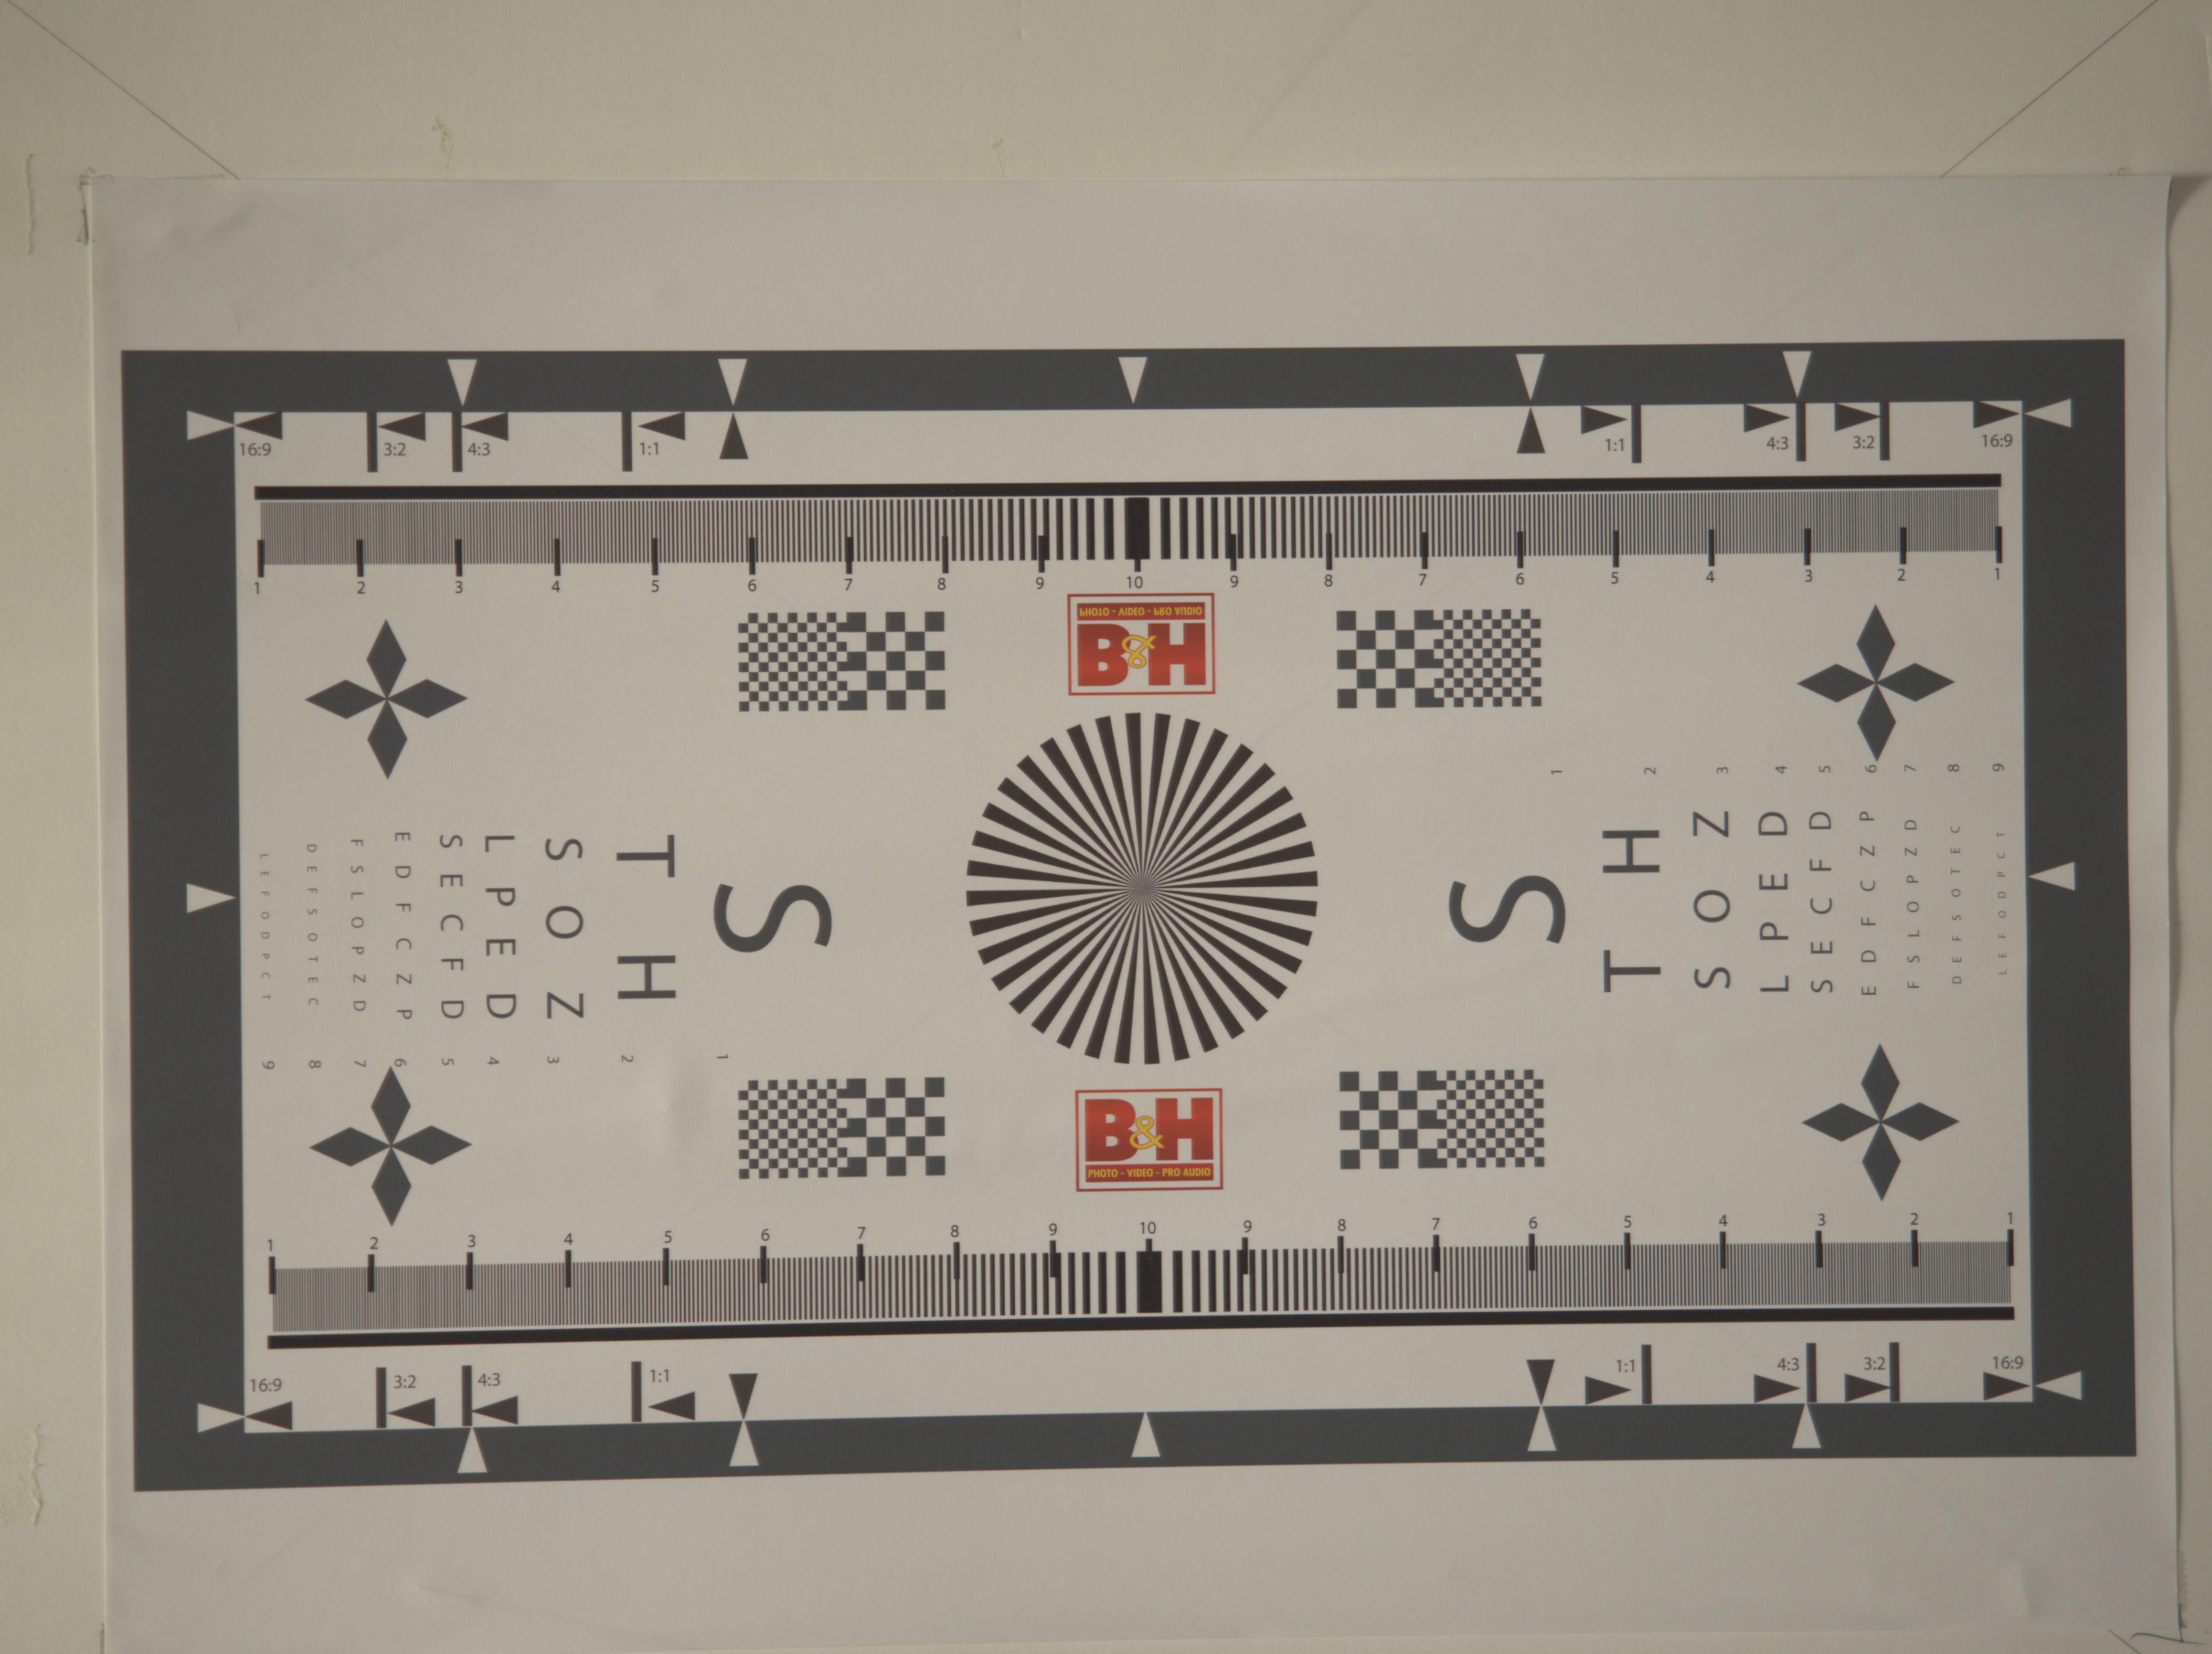
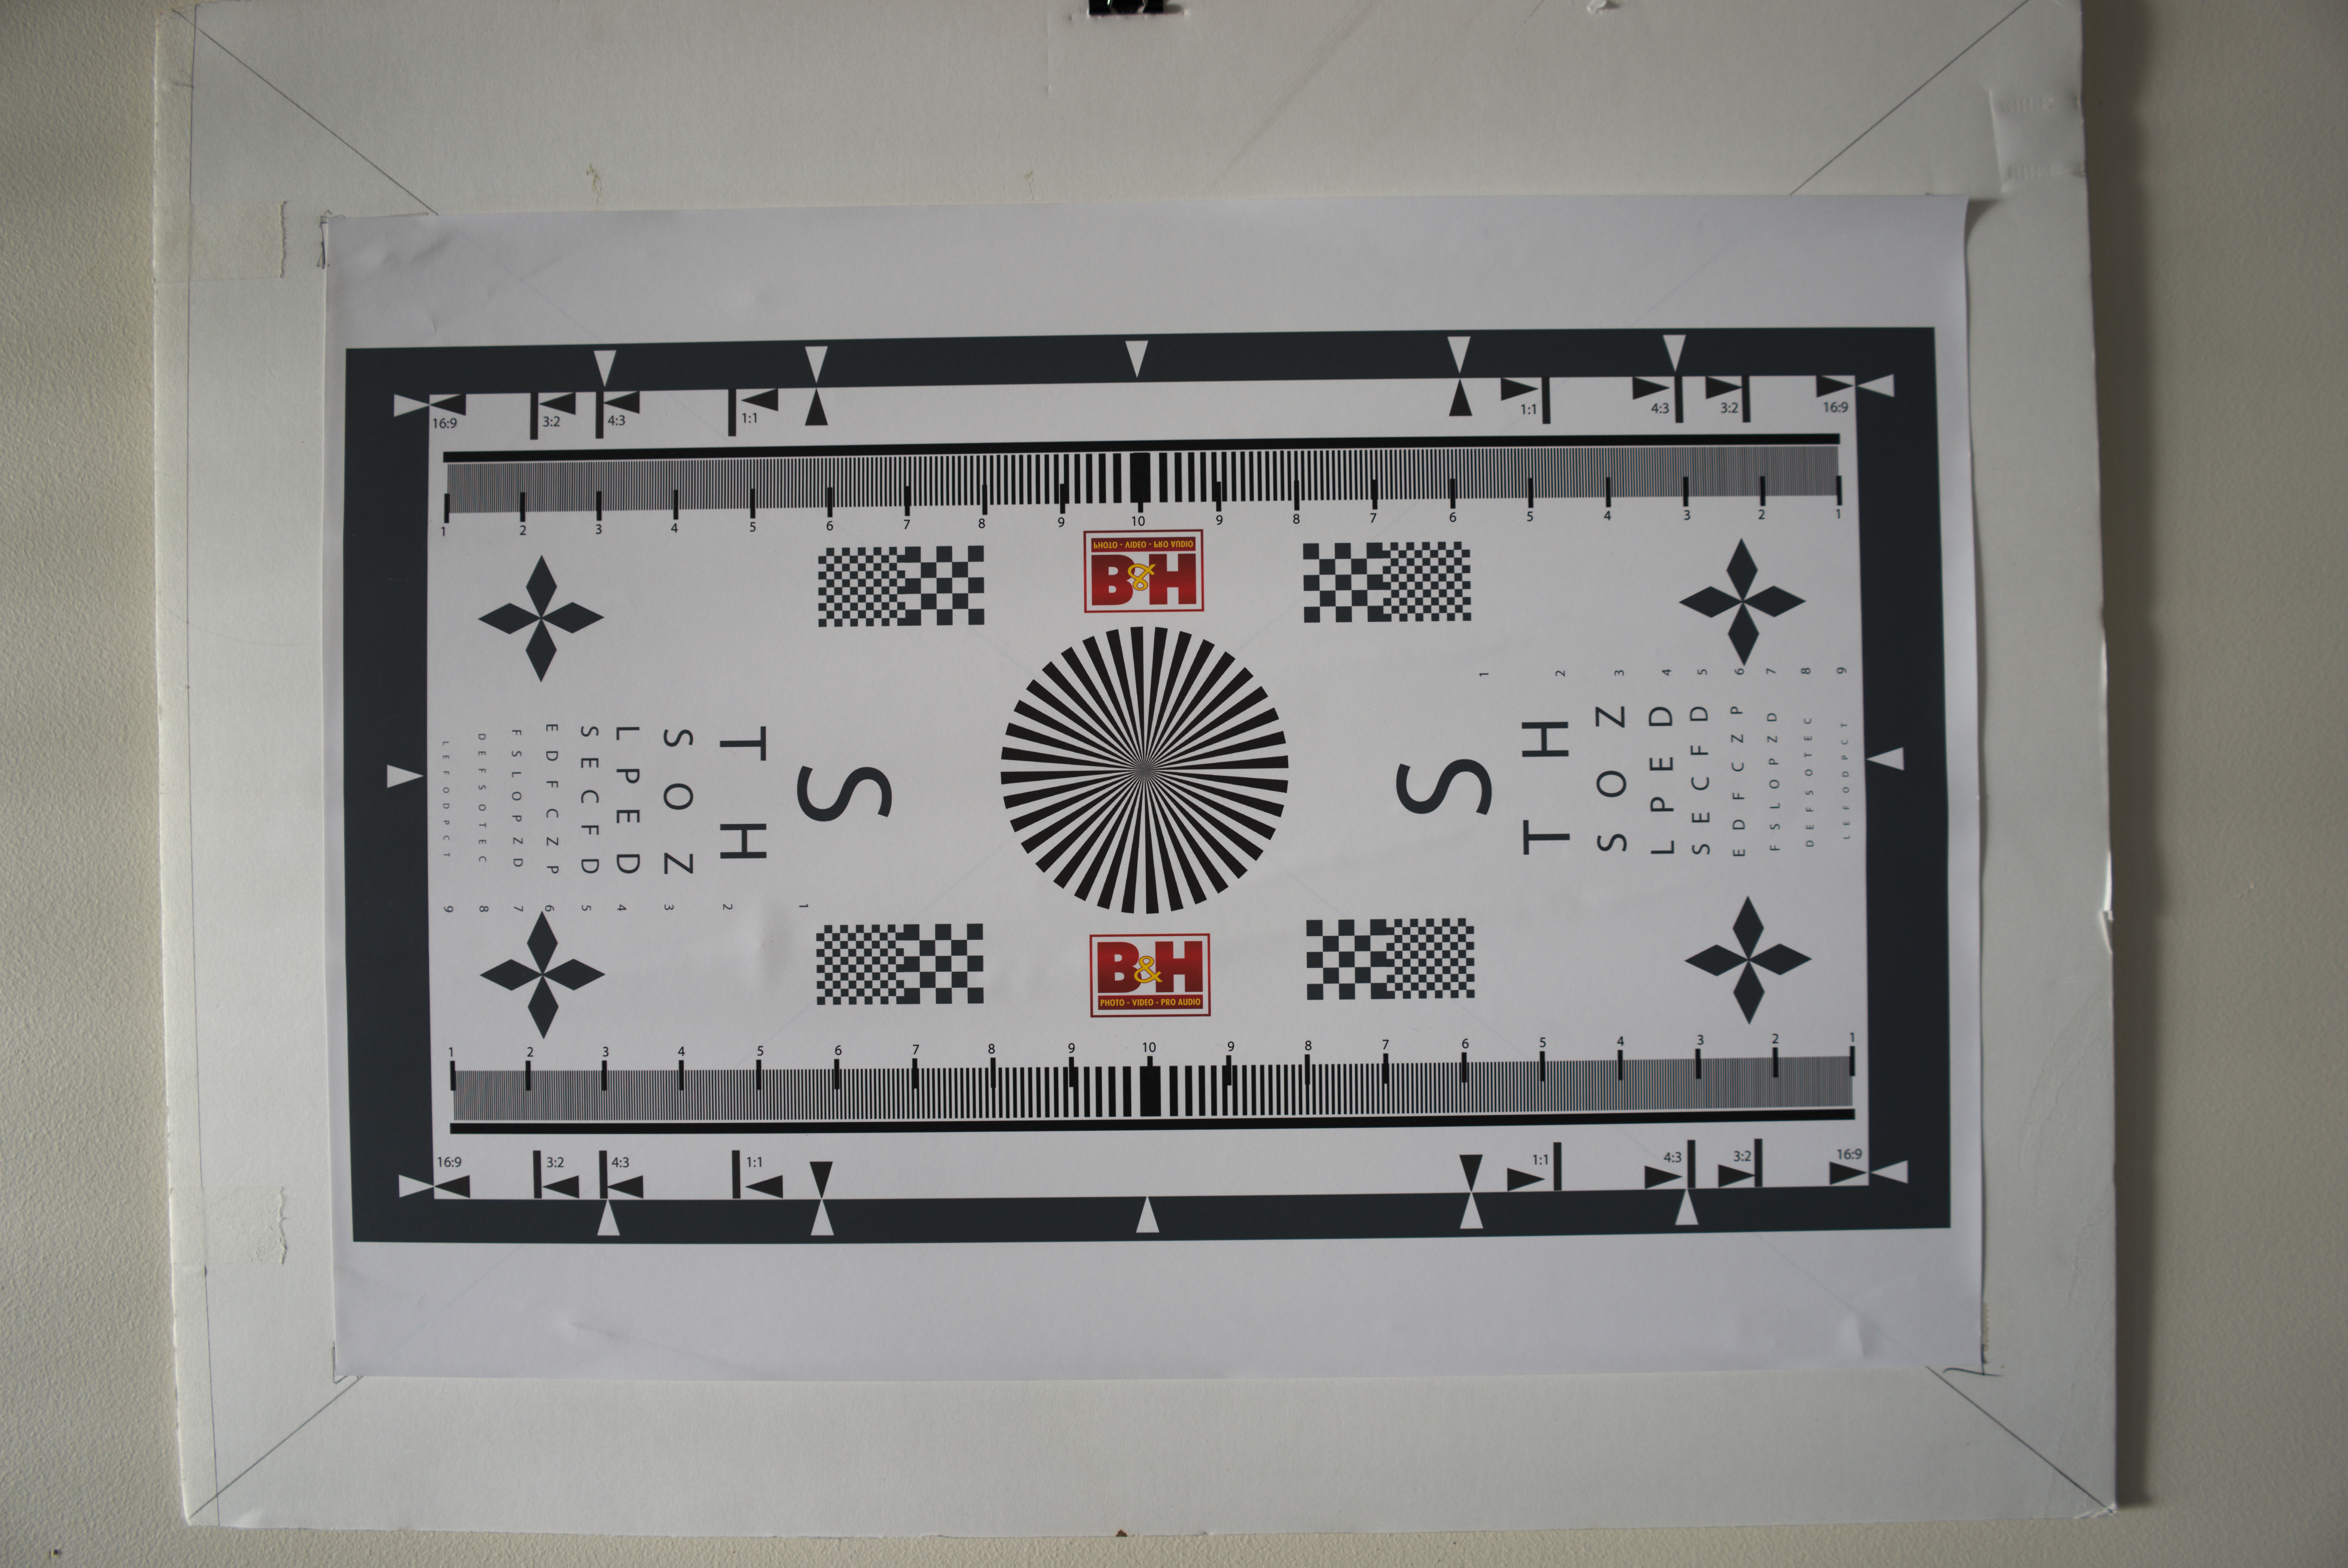
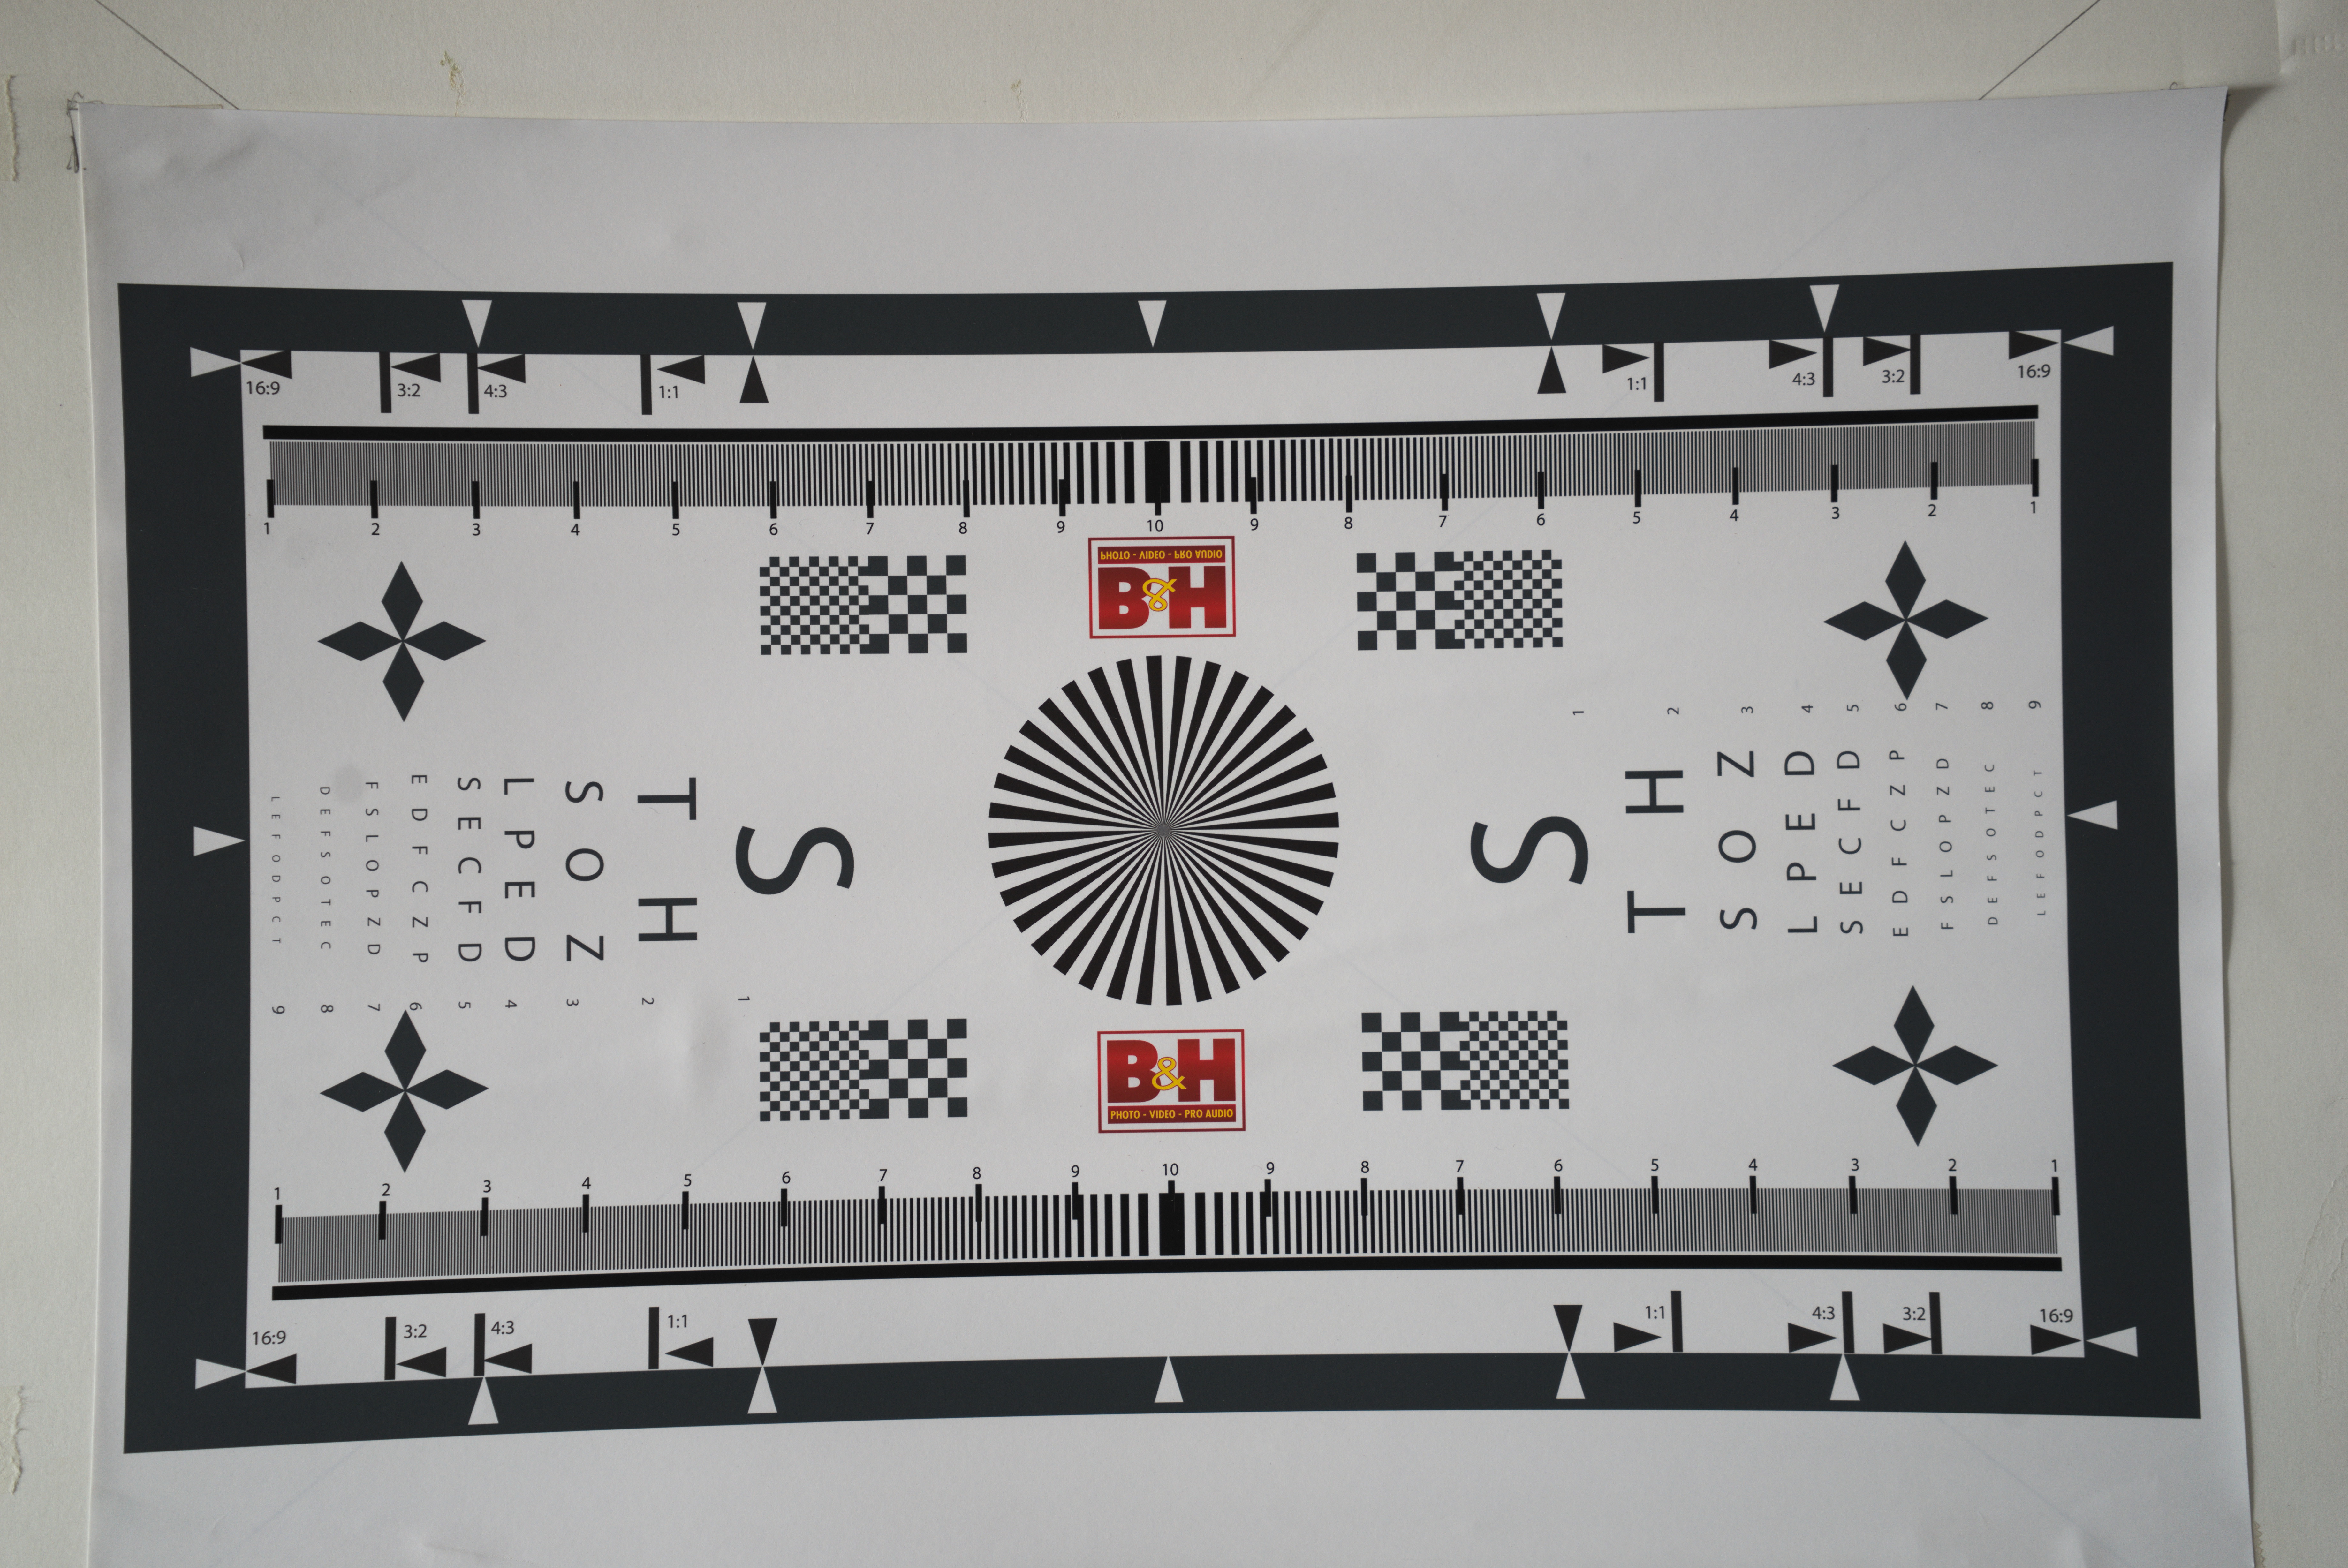
The lens resolution chart shot at 12mm wide open to show any vignetting or lens distortion.
Testing for vignetting and distortion I found that the lens exhibited marked vignetting and barrel distortion at the wide end at f2.8. The vignetting had disappeared on stopping down to f5.6.
This time at 40mm wide open.
At the long end there is only slight vignetting and very mild pincushion distortion. What is interesting is that there is significant variation in the exposure, remember these were metered using a handheld incident meter. The long end is nearly a whole stop darker than the wide end. This shouldn’t happen with a constant aperture zoom.
Canon EOS6d with Canon EF 24-70mm f4 IS L lens
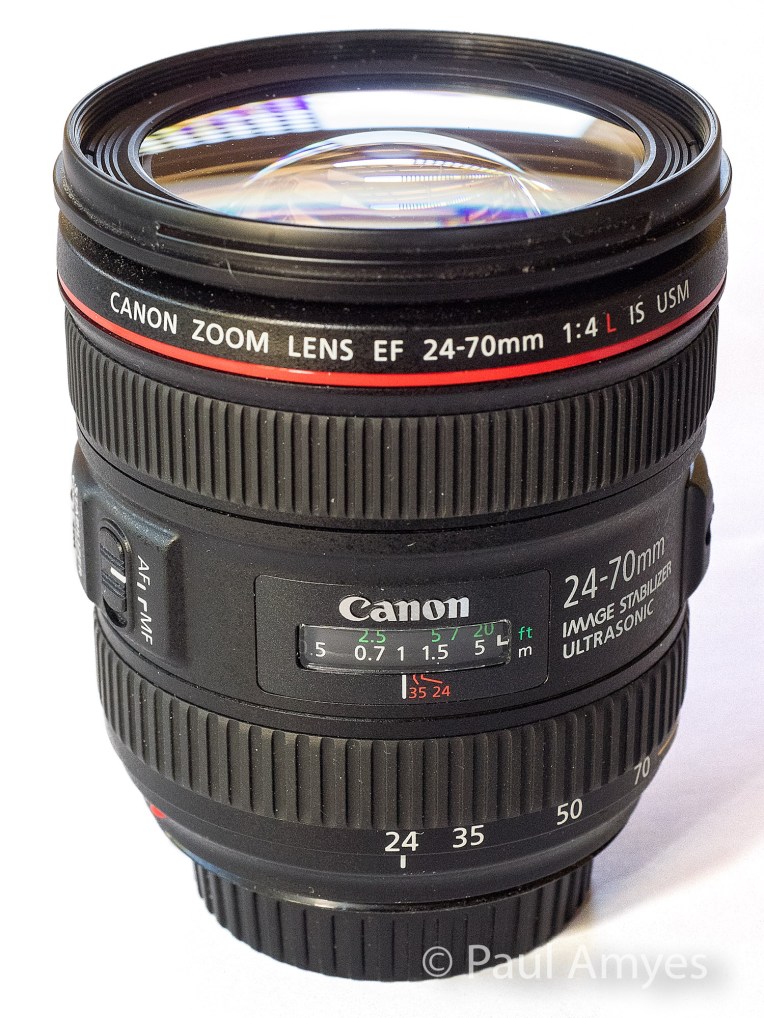
The Canon EF 24-70mm f4 IS L lens was introduced in 2012 as Canon’s budget (if that term can be used at this price) L series standard zoom lens.
This is the most expensive lens in the group with a retail price of around $1200 AUD. It is also worth pointing out that this is the budget standard zoom in Canon’s L range. This lens was introduced in 2012 and was intended to be a kit lens for then newly announced Canon EOS6d. The body is made of some variant of ABS plastic which is somewhat disappointing considering the price, but with a weight of 600g it has a satisfying heft. The optical construction is 15 lens elements in twelve groups with 2 aspherical and 2 UD elements. The aperture diaphragm is comprised of 9 rounded blades. Unsurprising it is the biggest lens of the trio being 93mm long, 83.4mm in diameter and has a 77mm filter thread. Image stabilisation is built into the lens and is good for four stops. The minimum focus distance is 0.38m, but the lens has a rather nifty macro feature where you press a button and turn the zoom ring and that takes it down to 0.2m and a maximum magnification of 0.7x.
At 24mm the centre of image is extremely sharp and contrasty and the edges are the same. At the tele end it is a repeat. Chromatic aberration is non-existent at both extremes.
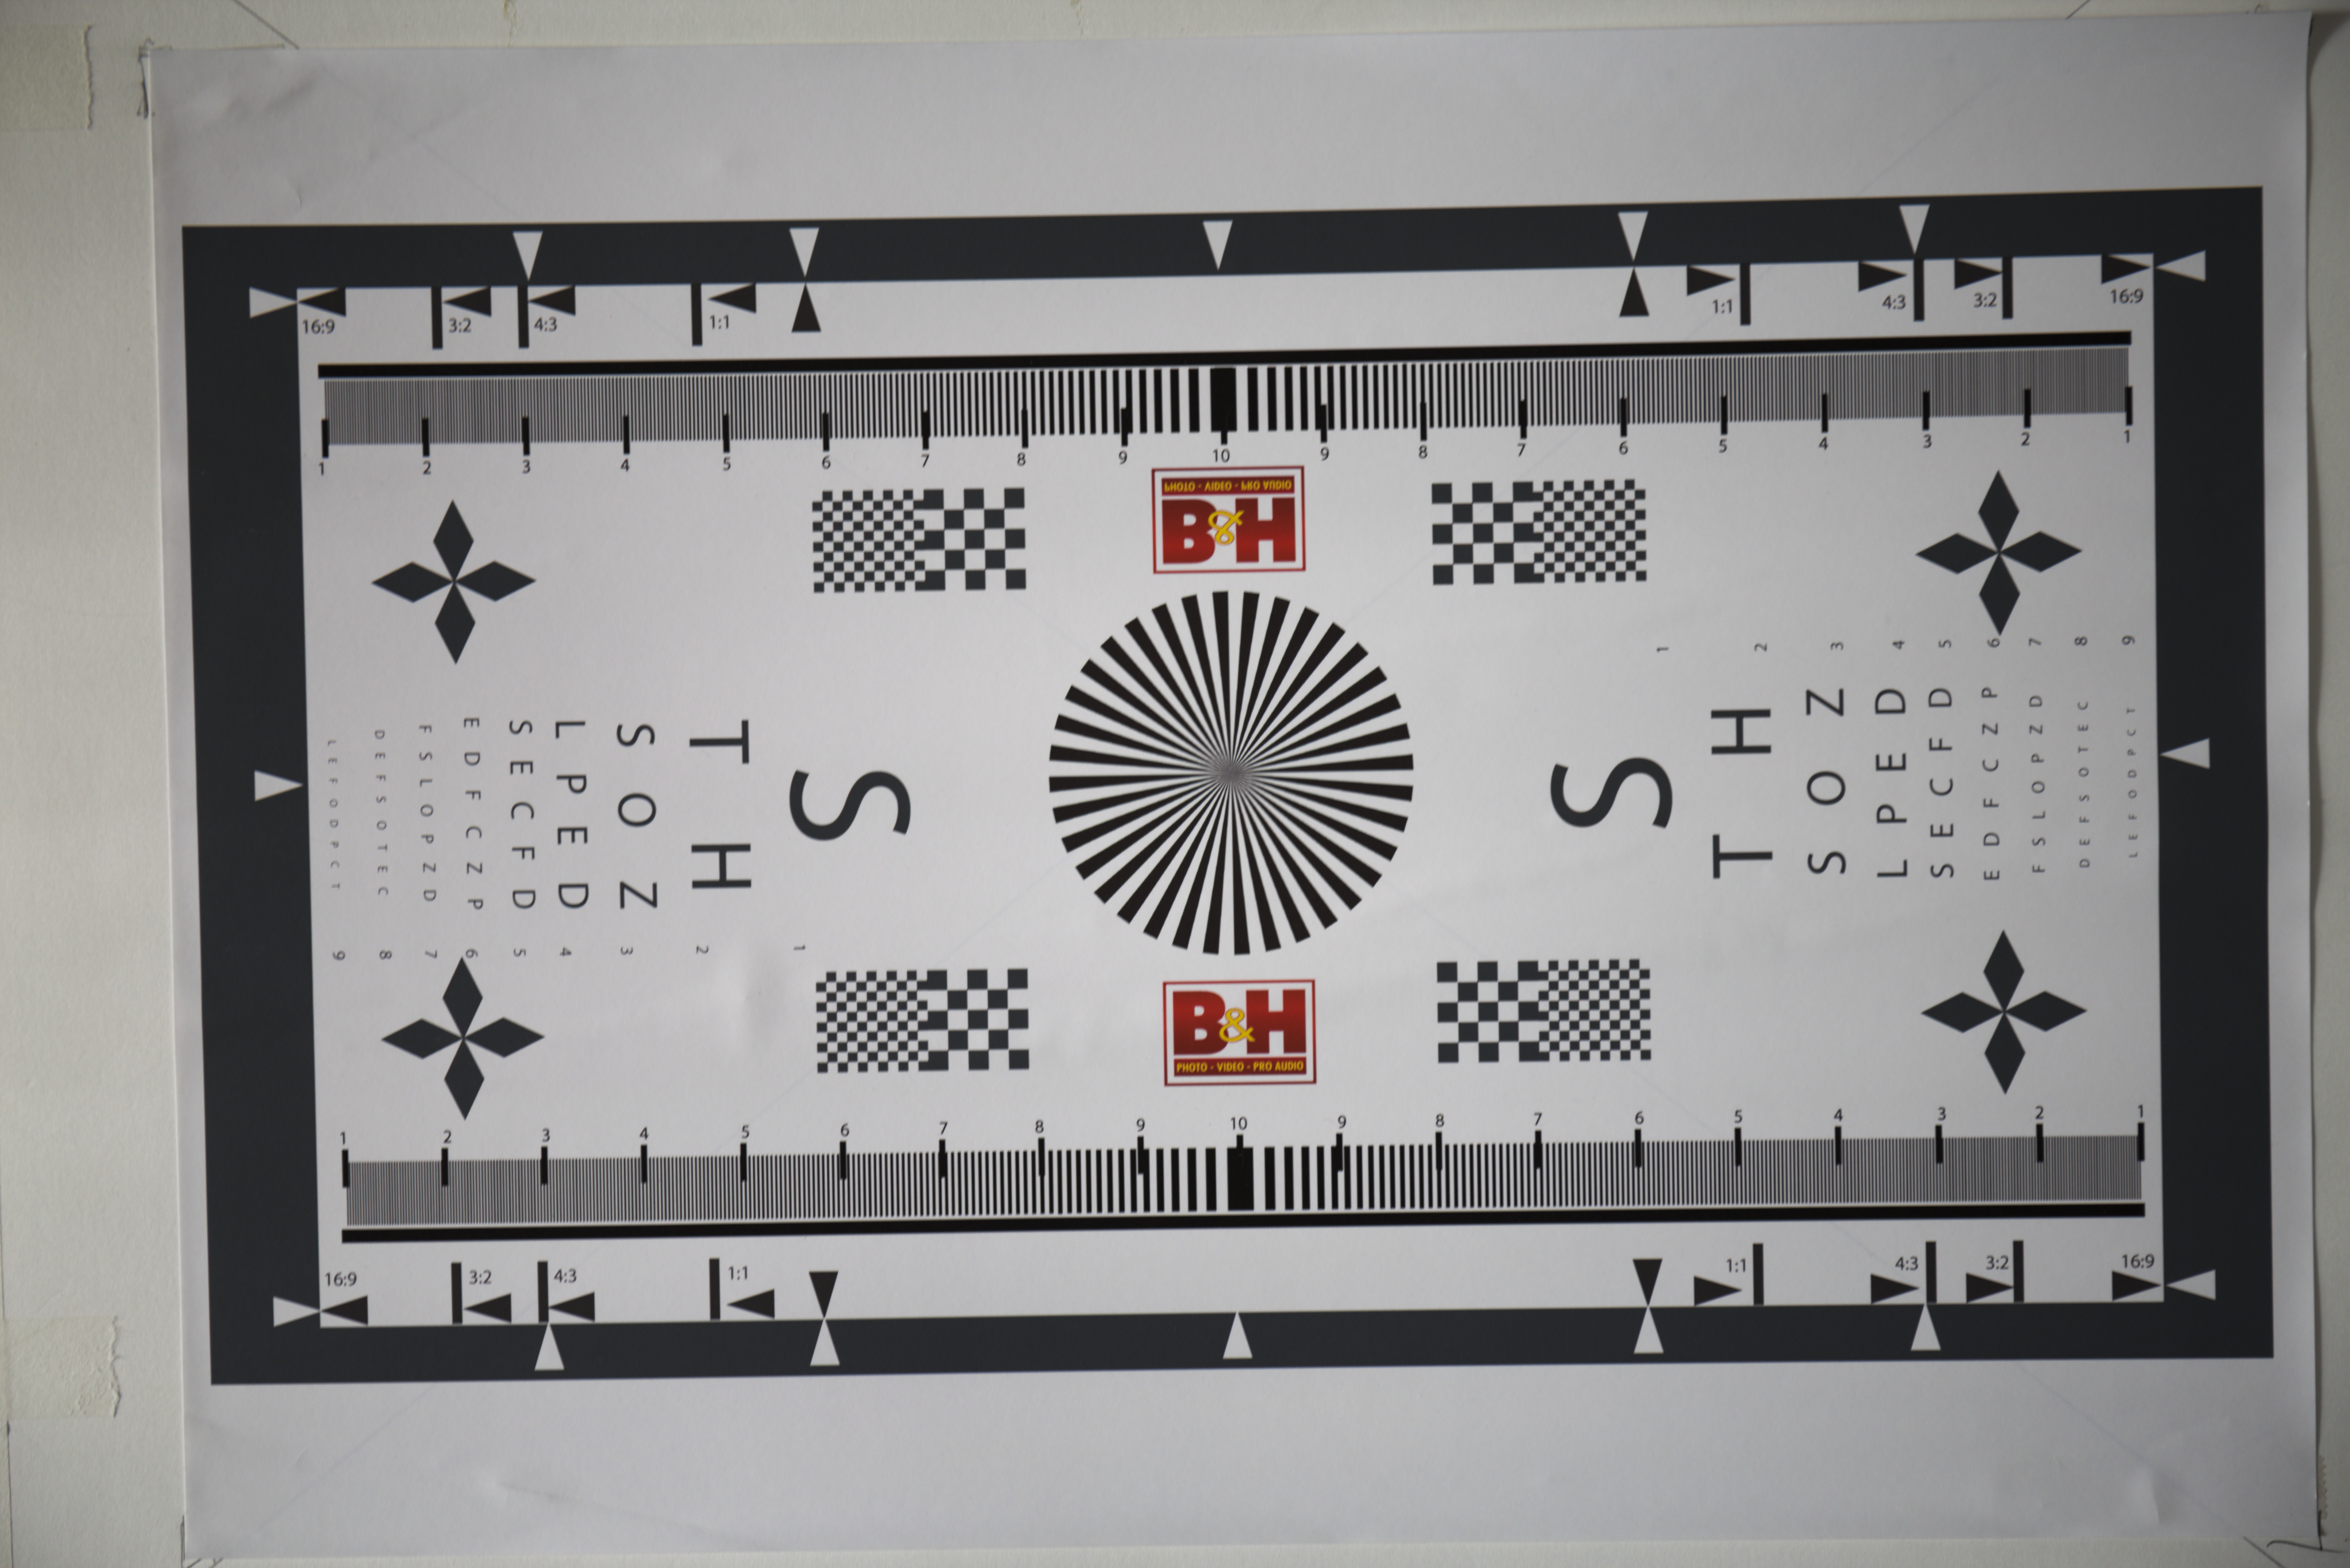
The Canon EF 24-70 f4 IS L at 24mm wide open
Shooting wide open at 24mm vignetting is very apparent, I would say that there’s probably 2 stops difference between the corner and the centre. The barrel distortion is not excessive but is noticeable. At 70mm a small amount of vignetting can be seen and there is some mild pincushion distortion.
The Canon EF 24-70mm f4 IS L at 70mm wide open.
Sony A7r with Sony FE 28-70mm f3.5-5.6 OSS
The Sony 28-70mm f3.5-5.6 OSS was introduced in 2013 as the budget kit zoom to accompany the Sony A7 mirrorless camera.
The joker in the pack and the cheapest on test at just under $350 AUD, and boy when you pick this one up it certainly feels like it. When I originally wrote about it on 3rd July 2016 I was very skeptical of its durability, well nothing adverse has happened to mine, but, Kirk Tuck wrote today that his met a tragic end courtesy of a dog’s tail and a hard floor. Well what do get for your $350? Well unsurprisingly at this price point this is largely made of plastic – the cheap kind – and is very light coming in at 295g. There’s not a lot of glass either just 9 elements in 8 groups made up 1 extra low dispersion and 3 aspherical elements. The simpler optical design and low price makes this the only variable aperture lens in the test group. The aperture diaphragm is made up of 7 blades. Size wise it is a compact 83mm long, has a diameter of 72.5mm and has a filter thread of 55mm. The plus points are that it is dust and moisture resistant, has built in image stabilisation, has a respectable minimum focusing distance of 0.4m and comes with a lens hood. As an aside I believe that every lens should come with a hood.
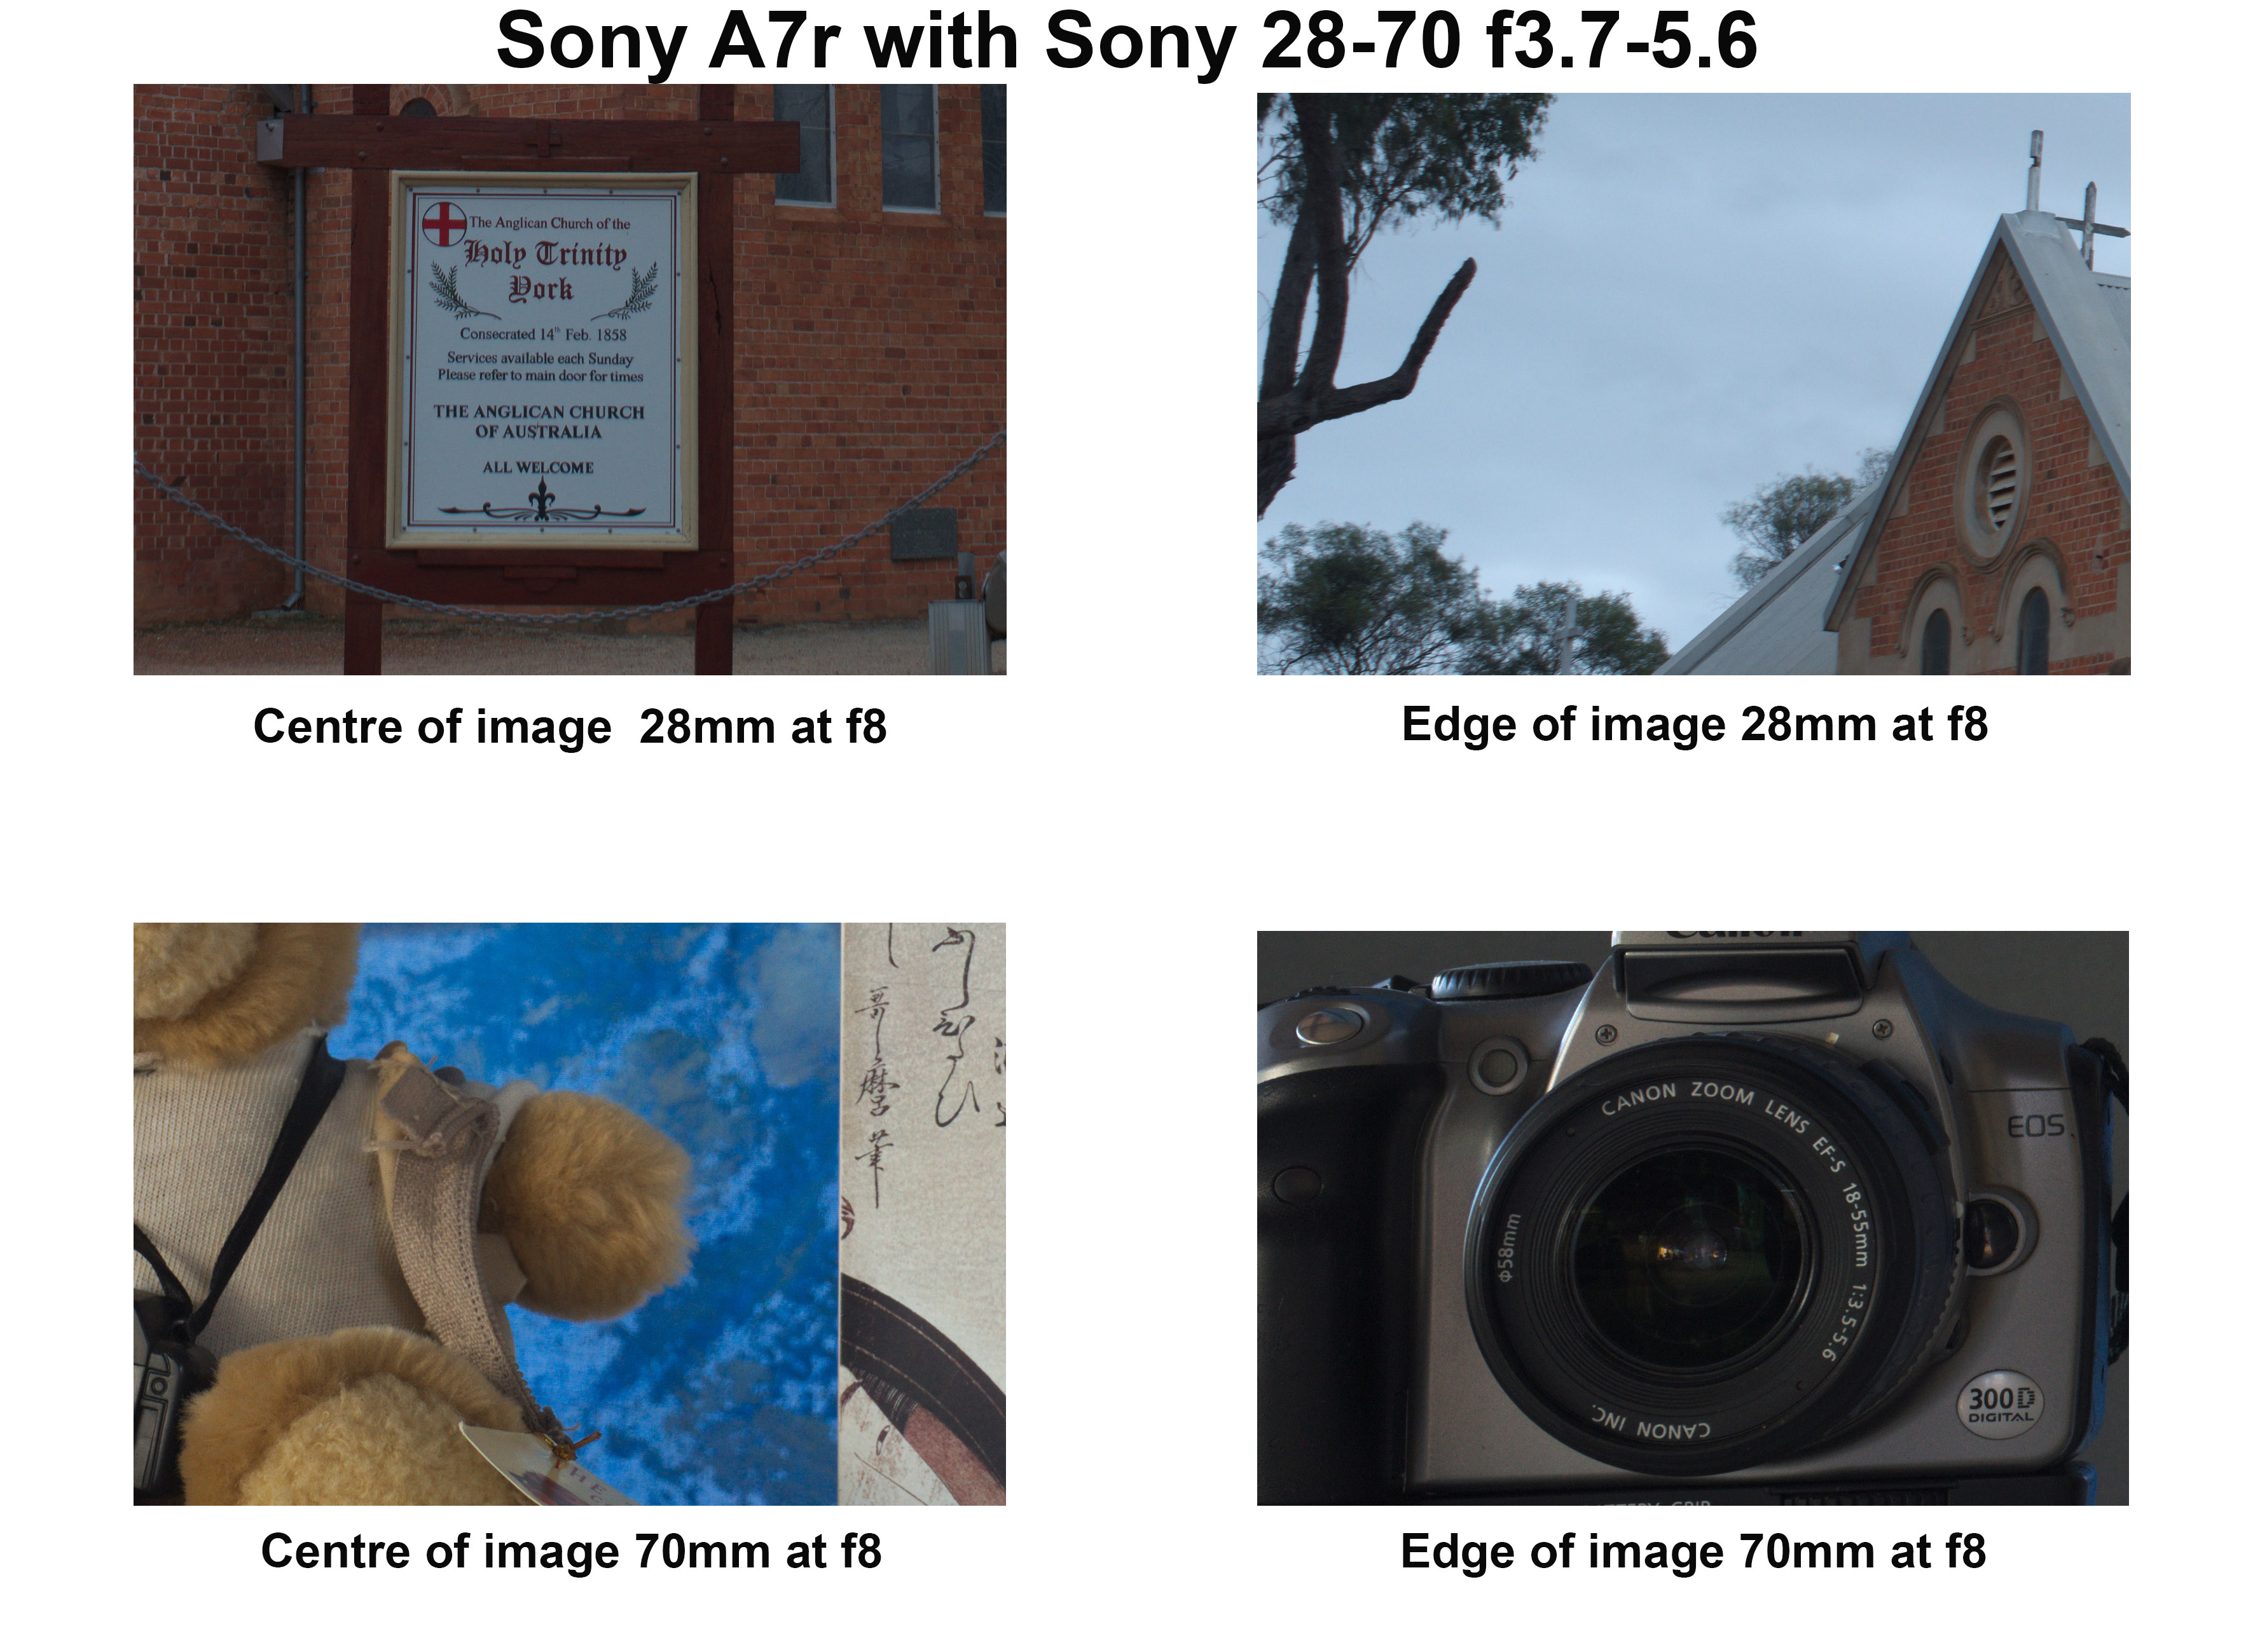
At 28mm the lens is again just like any other modern lens – sharp and contrasty. At the edges there is a drop off in contrast but they remain sharp. Chromatic aberration is very well controlled and easily fixed in Lightroom. The slow variable aperture means that vignetting is not a problem and there is only slight barrel distortion. At 70mm the centre is sharp and has good levels of contrast, the edges are sharp with a slightly lower contrast. There was also some evidence of coma. Again very little vignetting and a slight trace of pin cushion distortion.
The Sony 28-70mm f3.5-5.6 OSS lens at 28mm wide open.
The Sony 28-70mm f3.5-5.6 OSS lens at 70mm wide open.
Conclusion
So is the Olympus 12-40 the Canon killer that Chris Corroding says? Well without in camera software correction it is only just a bit better than the Sony which is half the price. It is the correction that elevates this lens to very good. Having said that the Canon 24-70 f4 is probably one of their very best zoom lenses and produces very good images straight out of the camera. Apply the Lightroom lens profile and it is even better. Is that surprising? No considering its cost I would hope it be optically very good. This is the rub – for $350 AUD you get a surprisingly good lens with the Sony and most people would be very happy with it. The Olympus at $870 AUD sees some significant improvement. The Canon at $1200 AUD sees only incremental improvement over the Olympus. The law of diminishing returns is very clearly at work here.
When it comes down to sensor performance the Sony A7r rips the head off of the EM1 and EOS6d and spits down the stump. I have been amazed by how well it performs – the dynamic range is very, very good, the lack of an anti-aliasing filter means that with good lenses insane amounts of detail can be rendered, and the high ISO performance is also very good. The Canon EOS6d’s sensor is capable of very nice colour rendition, especially skin tones, but it is not the best when it comes to dynamic range. It is what I’d call workman like. For the Olympus EM1, well the dynamic range is very good, high ISO performance not so. The lack of anti-aliasing filter helps you get the best out of the lenses. I really like my m4/3 Olympus cameras and lenses, I use them more than anything else, but I really feel that the sensors are holding them back. I’ve yet to get any long-term usage out of the new 20Mp sensor that is found in the EM1 Mkii, but I do think that if they got access to the latest BSI sensors from Sony and reduced the base ISO to 100 that there would be quite a sizeable performance boost. But all this is moot as all three are capable of excellent results if I do my part.
It is important to remember that I only have access to one of each lens so I have no idea of what the sample variation is for any of them. What does this all mean in terms of real world usage? Well I’ve used my Olympus 12-40 far more than the Canon 24-70 and I am more than happy with how it performs. I hardly ever use the Sony 28-70 as I only really use the A7r with legacy lenses.
Last weekend you could be forgiven in thinking that the War of The Roses had broken out afresh in the Western Australian town of York. There were lots of grim looking men glad in chain mail and armour brandishing an assortment of fearsome looking weapons while women wafted around wearing hose, kirtles, gowns, surcoats, girdles, and bonnets while listening to bards strum away on lutes.
A grim looking man in chain mail with a fearsome looking axe.
The images were shot with an Olympus OMD EM-1, an OMD EM-10 with Olympus m.Zuiko 12-40mm f2.8 and 40-150mm f2.8 lenses. The files were processed in Adobe Lightroom and Alienskin Exposure X.
The Faversham vintage van in Avon Terrace, York, Western Australia. Olympus OMD EM1 with Olympus OM Zuiko 35-105mm f3.5-5.6 zoom. Exposure: 1/200 sec, f5.6 ISO 400.
… or not to print. That is the question.
I picked up the latest edition of my fave photo mag (Black And White Photography ) and it had a short snippet of news that made me sit up and pay attention. Jessops the large UK photo chain commissioned a survey which found that 20% of British adults have NEVER had a photo printed, 8% of British adults printed a photo at least once a month, and a whopping 44% have lost a digital photo they wish that they had printed. Amazing stuff.
It maybe an age related thing, but, I have always liked prints. Even when I shot slide film I had prints made. To me prints are the ultimate expression of my photographic endeavours. I realise that for many people who came to photography post the digital revolution prints are anachronistic hang over from a bygone era, but for me printing is an essential part of the photographic process. I think many people are put off by the apparent complexity of the process – look on the internet and it all looks so hard, but actually it is relatively simple to get good prints. The first step in the process is to profile your monitor – this ensures that are no strange colour casts. I use a ColorMunki Display which is ridiculously easy to use and is relatively inexpensive. For the second step you can either send or take your image files to a lab and have them do the next bit, or like me print your own at home. I choose to print at home because I live in a rural area where there is no local lab, I’m impatient and want to see the results immediately and the surge to print often happens at odd times. I chose a Canon Pixma Pro 100S as it is an A3+ sized dye based printer. I prefer my prints to be on glossy paper and dye based inks look better than pigment based ones. Also dye based printers are less likely to clog. I don’t profile my printer for the paper I use I just use the canned profiles from the paper manufacturers website. The video below shows how easy the whole process is.
Shortly after reading the piece in Black and White Photography I was perusing the BBC website when I came across a piece on the science pages that was warning that the world was facing a ‘digital Dark Age” . Apparently Dr Vint Cerf an internet pioneer and Chief Internet Evangelist for Google (and yeah I had to Google him to find out who he was) has become famous for his predictions on how technology will affect future generations. He reckons that a lot of the digital images created in the early Twenty First Century will be lost as current hardware and software become obsolete so future generations will have no records of the period. I find this ironic considering Google is really pushing Google Photos as an in the cloud archive system. Anyway Google are apparently spending shed loads of money to try to prevent this with some you beaut techno solution. Personally I think the answer is obvious. The one material we know a lot about with regards to its archival properties is paper. In fact I’ve got quite a few family photos that date from the later half of the Nineteenth Century. So if you want to make sure your precious photos survive print them. Use good quality papers and inks and a lifespan in excess of 100 years is easily attainable. The Wilhelm Institute gives archival ratings for most ink and paper combinations and advice on how to store your prints. If you print at A4 then should your digital archive disappear into oblivion with a great deal of wailing and gnashing of teeth then you can scan your prints and salvage the situation.
So there you have it. Now you’re not only making art but you are protecting your precious images from a digital apocalypse.
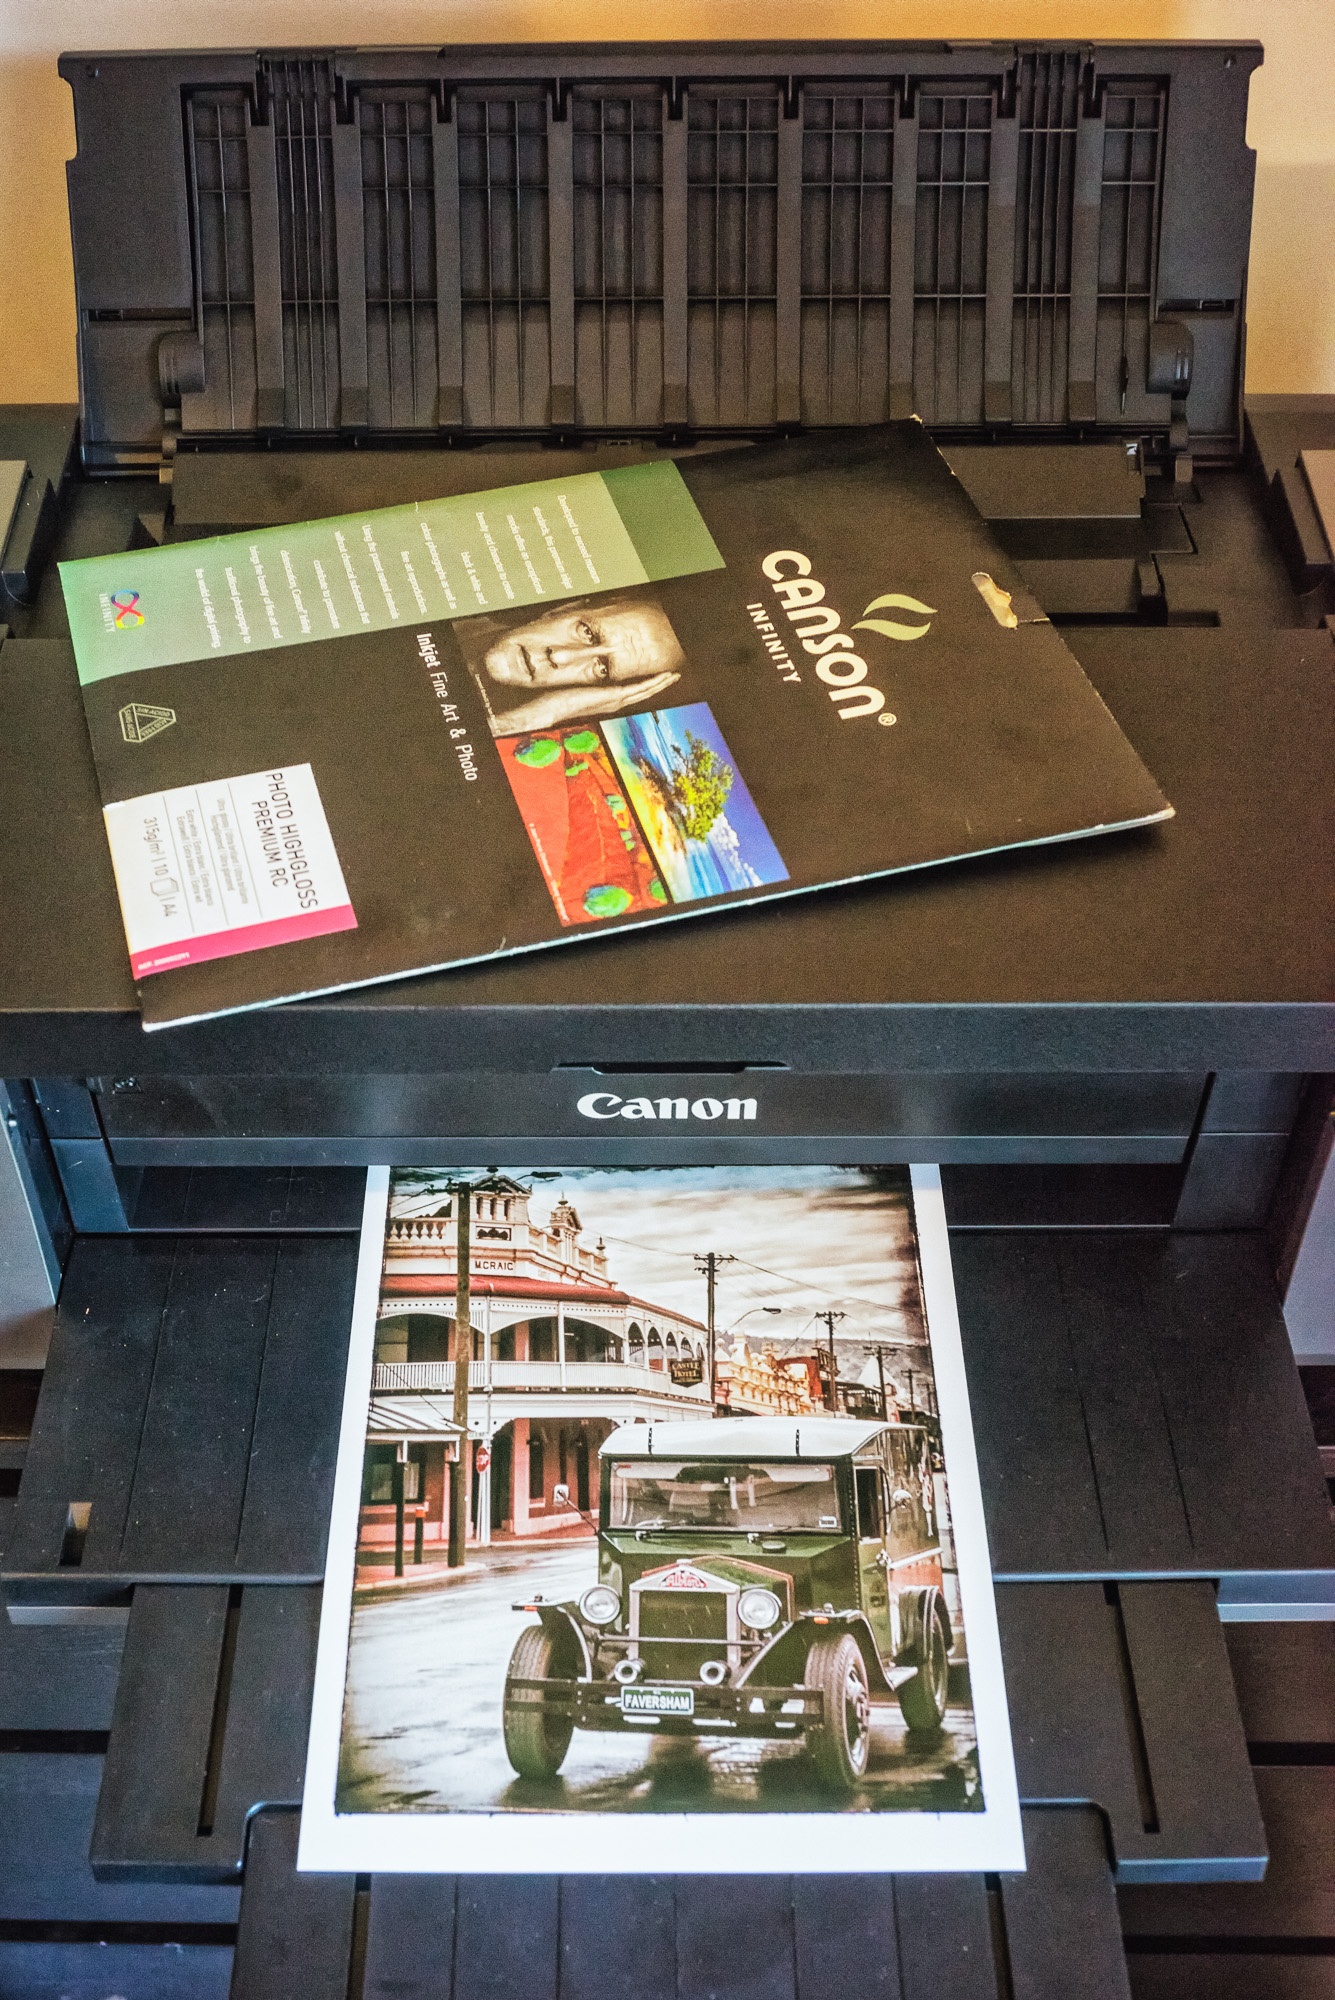
Photographic print on Canson Infinity Photo High Gloss Premium RC by a Canon Pixma Pro 100S printer. Shot on a Sony A7r with Voigtlander 35mm f2.5 Color-Skopar lens.
I’m going to preface this entry with the statement that most post processing is a matter of personal taste and that there are a hundred and one different ways of editing an image in Photoshop to get the same result. If this doesn’t appeal to you, or I do things differently to you it doesn’t mean I’m right and you’re wrong, nor does it mean you’re right and I’m wrong.
I have posted this because I got a lot enquiries about how I make my images and whether the colours captured are real or not. So the image below is a straight jpg conversion of the RAW file that came off my memory card. All I’ve done is reduce the size and convert to sRGB. The original exposure was made on an Olympus Pen EP-5 with OLYMPUS M.12-50mm F3.5-6.3 lens. A Cokin 2 stop soft graduated neutral density filter was used to hold back the sky. Exposure: 3.2 s at f/11.0 ISO 200 in manual exposure mode.
Lewisham foreshore at first light. This is a straight conversion of the untouched RAW file converted to jpg sRGB with no processing.
The video below shows how I work on the file in Adobe Lightroom 5.7 , Adobe Photoshop CS5.04, Alien Skin Exposure 3, Nik Soft’s Dfine 2 and Color Efex Pro 4. I use these products because I like them and have paid for them with my own money.
The finished image.
Lewisham foreshore at dawn. Tasmania. Olympus Pen EP-5 with OLYMPUS M.12-50mm F3.5-6.3 lens. Cokin 2 stop soft graduated neutral density filter. Exposure: 3.2 s at f/11.0 ISO 200 in manual exposure mode.
Clicking on the image will take you through to my gallery. I hope that you found this helpful.
Much is written about “Tasmanian Gothic” – a dark soberness that has its roots in the landscape and the colonial history. Personally I’m not a fan as I feel it colours much of modern-day Tasmania and restricts progress. But, there is no doubt that the weather and the landscape do particularly suit black and white or monochrome photography.
Wooden tender beached at Pirates Bay, Tasmania. Canon EOS 5D with Canon EF20mm f/2.8 USM lens. Exposure: 1/30 s at f/16.0 ISO 100
When I worked with film I loved the whole process for black and white photography. Picking a film and developer combination, then choosing a paper and then finally whether to tone the image or not. The whole process was magical and working in the darkroom, whether it was a commandeered bathroom or a purpose-built one was like a going back to the womb to create something wonderful. Admittedly an awful lot of the time I seemed to turn out a lot of dross, but it was an enjoyable process. To misquote Kilgore’s eulogy in the Coppola classic film Apocalypse Now“I love the smell of fixer in the morning,”.
Kite surfing off Park Beach in Tasmania. Olympus E-M10 and OLYMPUS M.75-300mm F4.8-6.7 II lens. Exposure: 1/1600 s at f/6.3 ISO 200.
I would love to work with black and white film again – but living with a rainwater tank for our supply and with a septic tank for waste water management means that I cannot develop film at home and there are no labs in Tasmania that develop the film. So for now it is the digital option, which is not as magical and mystical as the darkroom, is in its own way just as satisfying. No longer following the Zone Systemlaid down by St Ansel, I now expose to the right (ETTR) to get the maximum amount of tonal information in my RAW file and then process in Lightroom. The final black and white conversion is done in NikSoft’s Silver Efx Pro 2, which is always done the same way and mimics what I used to get with Ilford Delta 400 developed in Rodinol and then printed on Ilford FB Warmtone Multigrade paper. My Canon Pixma Pro9000 does a fantastic job of monochrome printing on Harman Gloss Baryta Warmtone. I’ve done two exhibitions using this combination and been delighted with the results.
Yachts moored on King George Bay Murdunna, Tasmania. Canon EOS 5D with Canon EF28-135mm f/3.5-5.6 IS USM lens. Exposure: 1/640 s at f/11.0 ISO 800.
Thankfully working digitally means that we can work in both colour and black and white at once, just making the decision of which way to go at the time of processing. It is a great time to be a photographer.
As always clicking on an image will take you through to my online gallery.
Park Beach at sunset. Tasmania, Australia. Olympus Pen EP-5 with OLYMPUS M.40-150mm F4.0-5.6 R lens, and Cokin 3 stop ND filter and 2 stop neutral grad. Exposure: 3.2 s at f/16.0 ISO 200.
Moonrise over Carlton Beach. Tasmania, Australia. Olympus Pen EP-5 with OLYMPUS M.12-50mm F3.5-6.3 lens. Exposure: 8.0 s at f/5.6 ISO 200.Silver Falls on Mount Wellington. Hobart, Tasmania. Olympus Pen EP-5 with OLYMPUS M.12-50mm F3.5-6.3 lens. Cokin filters – 3 stop ND and circular polarizing filter. Exposure: 10.0 s at f/8.0 ISO 200.
The Tessellated Pavement that is found at Lufra, Eaglehawk Neck on the Tasman Peninsula of Tasmania. Canon EOS5d with EF28-135mm f/3.5-5.6 IS USM lens. Cokin filters – 3 stop ND filter, 2 stop grad, and circular polarizing filter. Exposure: 1.6 s at f/11.0 ISO 100.
After my post on familiarity and Chichester Cathedral I got a few comments about the use of Cokin Filters and after answering them I thought it would be fun to dig them out again and shoot some landscapes. There’s no HDR or tone mapping each photo is the result of a single exposure. Processed in Adobe Lightroom 5 and Alien Skin Exposure 3 to simulate Fuji Velvia 50.
A bloke I know has just got into photography and has bought an Olympus OMD EM1 with the 12-50 kit lens. By his own admission he knows very little about photography and hasn’t settled into any specific genre. He now wants some more lenses, specifically the so-called Olympus Holy Trinity of f2.8 zooms – the 7-14mm f/2.8, the 12-40mm F2.8 and the 40-150mm F2.8. Nice lenses and in Australia you expect to pay around $4000 for them, and that is the problem. He is pretty convinced that he “needs” these lenses to be a good photographer and has read countless gear oriented forums about them. The major hurdles are that he can’t afford them, and he doesn’t know what to do with them. All he knows is that he wants to post the shots on a photo sharing web site and maybe make the occasional 10×15 cm print. Pushed hard he said that if he were to only have the one it would be the 40-150, but the reality is that he can’t afford even that on its own. I suggested he look at the 40-150mm F4.0-5.6 R which can be picked up for around $200 AUD, sometimes less if a white box special. The look on his face gave the impression that he thought I was stark raving bonkers. He then went onto to site all the usual internet complaints about the lens – its cheap and nasty, slow maximum aperture, unpleasant bokeh, plastic body and lens mount, soft at the longest end. My answer was that the f2.8 model costs around 8 times more than the cheaper one and I doubted whether he would see 8 times difference in terms of optical quality.
I don’t own or have access to the 40-150 f2.8, but I do own the 40-150mm f/4.0-5.6 R and I then decided to test it against a comparable lens from another manufacturer that costs nearly $3000 AUD. The pictures were processed exactly the same way in Lightroom and because the non m4/3 camera had a different aspect ration its image was cropped and sized to same as that from my Pen EP-5. I’m not saying which is which, that’s for you to decide. All I will say is that the 40-150mm f/4.0-5.6 R comes out of the test quite well.
All this reminds me of a conversation I had many years ago with a work colleague Steve. We were chewing the fat one boring night shift and he let on that he had been a full on Hi Fi tragic and had spent an absolute fortune on buying the ultimate set up. I nearly choked when he told how much he spent on speaker cables. I thought that photographers were gear obsessives. Anyway after a while of swapping components in and out and reading lots of technical papers he had the realisation that he was forking out literally thousands of dollars to gain frequencies that only dogs and bats could hear. After that epiphany he settled on the equipment that he had and used it for what it was designed for – listening to music. It’s the same here, you could spend thousands on a lens and most people would not be able to tell the difference. Therein lies the problem for my acquaintance. He is new to the hobby and has been led to believe that to be any good he has to go out and spend a bucket load of whonga on buying the best lenses. He doesn’t have the cash and so he will probably give photography away as he will feel he can’t afford it. My advice was to buy the cheaper alternative and really use it. Push the lens as hard as you can in a variety of situations and then see is you like the focal range, and if that lens prevents you from getting any pictures. If after a year or so you feel that the lens is a must have and that you absolutely need the extra performance and can use it then buy the expensive version. Just to finish I’ll post a picture taken with a camera that internet forums love to hate – the Canon EOS 550d. Its plastic, has a slow frame rate, a poor sensor with little dynamic range, dog slow auto focus, and a minuscule buffer.
Over the last few months I have been sharing about some of the features that I have found interesting with the Olympus m4/3s system. To me personally the remote control of flash and the wireless control of the camera are exciting, not necessarily in the form that they’re in now but in what they herald for the future. I know I talk a lot about the old days but I think its important to know where we have come from in order to understand the potential of modern equipment. I am as I keep saying a very promiscuous photographer – I rarely stick to any genre for long and photograph what gives me pleasure and interest. At the moment I’m taking photos of the wildlife we find in our garden to document it because my wife has joined gardens for wildlife and because I’m lazy and like taking photos close to home, The following are just some photos of birds that can be found in the garden.
Pink and Grey Galah or Eolophus roseicapilla, the most common Australian cockatoo.
The appropriately named the noisy miner bird, Manorina melanocephala leachi, is a vocal species with a large range of songs, calls, scoldings and alarms, and almost constant vocalizations particularly from young birds.
With the modern technology we have at our disposal taking these pics was straight forward. When we look at the work of pioneer ornithological photographer Eric Hosking and see the amount of kit he had to set up to take similar types of photos it is quite staggering. Examples of Hosking’s work can be seen here.
Eric Hoskins pioneer ornithological photographer and possibly the worlds first professional wildlife photographer.
Now an EM-10, a telephoto zoom, a couple of flash lights and an iPad takes the place of a van load of stuff. I decided to put the kit to the test and then Mother Nature sank my plans. Here in the island paradise of Tasmania we are in the middle of what is laughingly called summer. The last few days it has been sheeting down and blowing a gale. In fact the weather has been so bad that 120mm rain fell overnight and this morning on my daily perambulation I had to wear a fleece and a soft shell water proof. As you can imagine the local wildlife isn’t too keen at putting in an appearance and I doubt that any equipment setup outside would last long. So in place of the local wildlife you’ve got me showing you how to do a hi-tech selfie. My wife would probably say that there is no difference as I’m pretty feral!
OK having done this what have I learnt? Well first of all using WiFi and the RC function uses power like a trust fund baby spends money. Setting up is easy but the amount of control offered by the Olympus Image Share App is very basic. You can control the exposure but you can’t get access to the Olympus Super Control Panel and that means that you still have to access the camera itself if you want to change your lighting ratios or switch from TTL to manual or vice versa. Although the camera is connected to the iPad via WiFi you still have to physically touch the screen to trigger the camera. So in future what would I like to see, well to start I’d like to have access to the SCP via the app so I’ve got more control over the camera and lights. Secondly I’d like to have more options to trigger the camera. At the moment I can’t use the ioShutter™ as my Olympus cameras have a proprietary connection to allow the use of a remote cable, so I’d certainly welcome either Olympus or the makers of ioShutter to make a remote that allows me to trigger the camera via sound or with a light trigger. I really think that we’re just at the very start of connectivity when it comes to cameras. Back in August 2012 I wrote about shooting using my Canon EOS5d tethered via a USB cable to a laptop and using Lightroom. Now I can do the same and more but wirelessly using a mobile phone or tablet. I hoping that in 2 or 3 years time we’ll see the functions I’ve talked about here.













You must be logged in to post a comment.