No I’ve not been smoking university cigarettes. Just playing around photographing oil on water.
*Today’s song reference is of course the 1966 hit Mellow Yellow by Donovan. Contrary to popular opinion it is not a song about trying to get munted by smoking banana skins.
The Olympus FC-WR flash controller mounted on an Olympus OMD EM1 mark 2 and the FR-WR connected to an Olympus FL-600R speedlight.
When Olympus launched their wireless radio controlled flash system there were howls of derision from the combined blogosphere and photographic forums. Mainly it went along the lines of Olympus had lost the plot in charging so much for something that others were offering so cheaply.If all you want to do is take portraits with a couple of off camera speedlights then there maybe something to this argument. Let’s make a quick comparison.
So that is quite some difference – $794 AUD is a lot of money. Then the Godox fans will tell that the system is much more flexible because if you change camera system all you have to do is change the wireless trigger to one that is dedicated to your new system and you can keep using your existing speedlights. On the face of it it this quite a compelling argument. But this really doesn’t tell the whole story as it assumes that you have no existing flash equipment and that all you want to do is shoot basic lighting set ups with either TTL or full manual control. Now a lot of people who are attracted to Olympus cameras aren’t just attracted by the small size of micro four thirds but also by the advanced features that the cameras have such as focus stacking, keystone compensation, High Res Shot Mode, Live Bulb, Live Time, Live Composite, multi exposure, art filters, picture modes, and interval shooting. Plus Godox doesn’t offer a TTL enabled flash such as the Olympus Twin Flash STF-8 for macro and close up photography.
Using the Olympus STF-8 close up flash as part of a multi flash set up controlled by the Olympus FR-WR and FC-WR.
Regular readers will know that I do a lot of wildflower photography, product shots and the occasional portrait all using flash. I realised I wanted to use more complex lighting arrangements and so I decided to put together a system based around the existing flash units I already had – an Olympus FL-600R, an Olympus STF-8, 2 Metz 44AF-1’s, and a Metz 64AF-1. To that end I bought an Olympus FC-WR wireless commander and three Olympus FR-WR Wireless Radio Flash Receivers ($285 AUD each). Still not a super cheap option, but one that gives me a lot of scope. Now when I started this because the system was not well received there were next to no reviews of it and I didn’t know if everything I had, particularly the Metz units would work. Also I wanted to know whether they would also work with my Panasonic G85. So this was a real voyage of discovery
As I progressed with this I realised that I didn’t just want to write a review, but that I’d also say how to use the equipment in various modes across both Olympus and Panasonic cameras using third party flashguns so that prospective users can find all this information out without having to take a punt like I did. As usual I’ve provided the information in both video and written formats.
So with all that preliminary guff stated (phew!!) lets dig in by looking at the Commander and Receivers themselves first.
FC-WR Commander
Specifications
Maximum communication distance
Approx. 30 m
Frequency
2.4 GHz band
Number of channels
15 (in the commander mode; with automatic channel setting function)
Number of groups
3; maximum number of flash units; unlimited
Flash control modes
TTL / MANUAL / FP TTL / FP MANUAL / Off
Flash compensation
±5 EV (Increment: 1/3 EV or 1/2 EV)
Manual flash power settings
From 1/1 to 1/128 (Increment: 1/3 EV or 1/2 EV)
Power supply
AAA alkaline dry-cell batteries x 2 / AAA NiMH batteries x 2
Continuous usage duration
Approx. 6.4 hours (when using AAA alkaline dry-cell batteries)
Operable temperature / humidity
From -10 to 40℃ (14 to 104°F) / From 30 to 90%
Dimensions
Approx. 59.5 (W) x 51.0 (H) x 67.4 (D) mm
Weight
Approx. 73 g (excluding batteries)
Firstly the WR in designation is Olympus speak for the fact that the commander has a degree of weather resistance. This is a huge positive for me as I shoot a lot of stuff outside in all weathers. Olympus doesn’t specify the degree of water resistance, but says the unit will operate in temperatures ranging from -10 to 40ºC and humidity up to 90%. I didn’t throw it in a bucket of water but I have used it out in the rain on several occasions with no functional problems, and when I opened up the battery compartment it was dry so that’s all good.
The FC-WR uses AAA batteries. This was a bit of a disappointment and I would have liked AA as it means I only have to carry one type of battery and AAs last longer. However in practice I’m still using the first set of AAAs, and I suppose the use of them keeps the size down.
Olympus FC-WR, showing the information panel and the various controls.
Physically the FC-WR is made of sturdy plastic which doesn’t creak or flex if you give it a squeeze. The door to the batter compartment is on a sprung hinge and slides to lock and open. It fits well and there is some initial resistance to moving so there won’t be any accidental opening. On the base is a locking hotshot with the standard m4/3 pins providing electrical contact. On the to is a large LCD screen which gives all the necessary info and is backlit.Underneath that are three buttons – one each for the the three groups. Then there is a mode button, a test button, a dial and rocker switch surrounding the OK button and finally the on/off button. A nice touch is that if you turn off your camera the FC-WR automatically switches off, and if you restart your camera within 10 minutes it will automatically switch back on. Any longer and you have to press the on/off button.
To use it is simplicity itself. First select the group or flashgun you want to control, press the button followed by the mode button. Select between TTL, manual or off. Use the right side rocker switch to move to the +/- ratio to select either flash compensation for TTL mode or the power levels for manual mode. Another press of the rocker switch and you can select whether you want high speed flash sync or FP mode in Olympus speak. A final press of the rocker switch lets you select the channel that you want all this to occur on.
AAA alkaline dry-cell batteries x 2 / AAA NiMH batteries x 2
Continuous usage duration
Approx. 6.4 hours (when using AAA alkaline dry-cell batteries)
Operable temperature / humidity
From -10 to 40℃ (14 to 104°F) / From 30 to 90%
Dimensions
Approx. 59.1 (W) x 46.1 (H) x 51.0 (D) mm
Weight
Approx. 75 g (excluding batteries)
Olympus FR-WR showing the controls on the rear of the unit.
In terms of construction what I said about the the commander applies here. On top of the receiver is a standard four thirds protocol hot shoe. On the base there is a locking cold shoe with 1/4 20 mount. On the left side (looking from the front) is a pc sync socket – does anyone actually use these any more? – which would allow you to tigger a studio mono block or power pack. On the other side is the battery compartment which takes two AA cells.On the back panel is a dial that enables you to select channels (1-15) and beside it another dial for selecting channels. Then there are three buttons which are from the bottom the on/off switch. The neat little touch with this is if you are using an Olympus brand flash then switching off the receiver will switch off the flash. In the middle is a button for switching the beep on and off. I leave it on as it gives me an audible indication of when everything has recharged. Finally at the top is the X-RCV button. This allows you to either control the flash from the commander unit or from the flash itself. I choose to control the flash via the commander unit as I find that more convenient.
Usage Scenarios
Standard Mode
The Radio triggers work with both Olympus and Panasonic cameras and with third party flashes. It also works with the Olympus ST-F8 as part of a multi flash set up, but you will have to cobble together something to hold the FR-WR and ST-F8 body off of the camera.
Using the Olympus STF-8 close up flash as part of a multi flash set up controlled by the Olympus FR-WR and FC-WR.
FP Mode or High Speed Sync
FP mode or high speed sync is a function of the flashgun and not the camera. So if your flash supports it it you can use it. I got it work with the Metz 64AF-1 and the Olympus FL 600-R using both Panasonic and Olympus cameras.
Focus Stacking or Bracketing
The focus stacking feature found on Olympus cameras imposes certain operating restrictions:
Uses the electronic shutter
The flash sync speed is 1/50th sec or longer
You can’t use TTL flash you have to manually adjust the power settings of the flash to get correct exposure
When you set operating parameters for focus stacking in the camera menu remember to allow a a delay between shots that allows for the flash to recycle. I’ve found four seconds to be sufficient. Having set that up switch on the FC-WR and it automatically selects manual flash mode and the camera selects the the flash sync speed. This worked with both the Olympus and Metz flashes on only the Olympus cameras. Panasonic’s focus stacking function is video based (4K capture) and not stills like that of the Olympus.
The original shot with no focus stacking.The end result of the in camera focus stacking. Twelve shots taken at a different focusing distance and then merged in camera. The camera always applies a slight crop when doing this.
High Res Mode
In many ways this is similar to the focus stacking mode mentioned previously.It requires an electronic shutter set at 1/50th sec or longer and the flash to be set manually. This worked well with both the Olympus and Metz flash guns. I didn’t test this with a Panasonic camera as my G85 doesn’t have this function.
Conclusion
The Olympus FC-WR flash controller mounted on an Olympus OMD EM1 mark 2 and the FR-WR connected to an Olympus FL-600R speedlight.
Lets get the niggly issue out of the way first. Yes the system is expensive and I wish that it was a little cheaper. Having said that you get rock solid dependability. I found that the Godox units were somewhat flaky at times – occasional misfires where the flash didn’t go off. I like dependability and I’m prepared to spend a little more to get it.
The good stuff. I like the fact that the operation of the constituent parts is seamless even when using the advanced Olympus camera features. The build quality and the weather resistance is excellent, Olympus do a really good job in making small equipment that can handle all the vagaries that life can dish out. The fact that this works with Panasonic cameras is great. Cross compatibility was another factor that brought me into the micro four thirds system. If you want full frame these should work with Panasonic’s full frame offerings as they also share the m4/3 protocols for flash. I say “should” as I’ve not tested it and cannot find anything online to confirm one way or the other. The fact that you can use it with third party speedlights is a huge bonus.
If you are a micro four thirds user and want a rock solid off camera flash solution that gives you access to multi-flash set ups even with specialist close-up equipment using the specialist in camera features such as focus stacking or high res mode then I think its worth spending the cash.
I have written and made videos about several aspects of the Olympus flash system and these are:
Grand Master Flash : using Hahnel Captur manual radio triggers on Olympus m4/3 cameras. Probably made redundant by this article, but still relevant if you want a reliable affordable system and are willing to forego TTL control.
The new mug shot of yours truly. Olympus EM-10 with Olympus m.Zuiko 45mm f1.8 lens. Exposure 1/200 sec, f3.2 at ISO 200.
The “Strobist” phenomena burst onto the photographic scene some ten years ago and thanks to the efforts of David Hobby and the timely release of reliable affordable radio controlled flash triggers a whole movement was born. What was exciting was that Hobby advocated a lean and mean approach to lighting using affordable and portable speedlites. In an era of auto everything Hobby also broke the mould by showing people how easy it was to use manual flash. Joe McNally shooting Nikon and Syl Arena using Canon quickly jumped on the band waggon extolling the virtues of off camera flash using the TTL systems of Canikon.
The other day I had the sudden realisation that I would need a new photo for the promotion of current exhibition as the one I had been using was out of date – I have considerably more hair on my head and less hair on my chin now. My preferred photographer is Liv Stockley but she is currently somewhere in Africa and unavailable for the job. So I would have to shoot this myself aided by my partner Helen. Using the Olympus OMD EM10 with the fantastic Olympus m.Zuiko 45mm f1.8 was a no brainer – bags of resolution, fantastic image quality and it allowed Helen to take the shot by controlling the camera via wi-fi using an iPad. Lighting was the conundrum. It would have to be flash, but how to control it? I wanted the key light in a big brolly box, but this would mean I would lose the TTL flash capability as Olympus use a line of sight light transmission system for their wireless flash. Once the slave flash is enveloped by a large light modifier it can’t pick up the signal from the master, so I would have to use a radio trigger. There are no reliable easily available radio controlled TTL triggers for the m4/3 system so it would have to be manual all the way and the excellent Hahnel Captur fit the bill perfectly. They are available from good camera stores, I got mine from Digital Camera Warehouse, and they have a good warranty. Why take a punt with cheap no name “poverty wizards” from dodgy Chinese Ebay sellers when you can get an excellent product locally? So that’s the triggering taken care of. To work out the exposure I used my trusty Minolta Auto Meter Ⅴ F. Sadly no longer made by Minolta as Sony took them over and canned the flash meter product line, but it is now made by Kenko. Yes it is old school and some may argue that in the digital era not needed, but I like working this way. In this scenario there is no need for TTL flash as the lighting and subject to camera distance remain constant.
An Olympus OMD EM1 with the Hahnel Captur flash trigger in the hotshoe, and a Metz 64 AF-1 with the Hahnel Captur receiver. Canon EOS6d with Sigma 105mm f2.8 EX macro, Canon 430 and 550 EX Speedlites. Exposure: 1/180 sec, f8 at ISO 400.
Equipment sorted the styling of the photo was the next consideration. The portrait would be a classic head and shoulders, but I wanted something clean and contemporary. Initially I thought about using the classic Rembrandt lighting style. It’s the studio portraitist’s bread and butter lighting, but it is a little bit staid. So I decided to go with broad lighting. One Metz Mecablitz 64AF-1 Flash in a brolly box was the key and a large reflector provided the fill. To provide a bit of separation from the background a Metz 44 AF-1 (now superseded by the 44 AF-2) fitted with a Hohnl Speed Grid. Simple and effective.
Basic lighting diagram for broad lighting using one key light, a reflector as fill and a gridded background light.
So while the “Strobist” phenomena has largely gone out of fashion, the principles and skills are very useful and every photographer should have some grasp of the basics.
Camera systems are often measured by their range of lenses and flash units consequently it is Canon and Nikon that are the benchmarks. But when it comes to flash Canikon actually use a lot of Olympus technology. So before we get to the review of the FL-600R we’ll have a look at just what Olympus pioneered in flash photography and how that relates to its current M4/3 system.
One of the reasons why I first bought into the Olympus OM system back in 1983 was the flash system. For its day it was revolutionary and Canon and Nikon didn’t have anything like it. The OM2 was the first camera to have TTL metered flash. For those who have only ever known TTL flash you won’t believe how significant this was. It meant an end to worrying about guide numbers and subject distance, of getting lots of washed out looking images or hopelessly under exposed shots where the metering cell in the flash was confused by the amount of light reflecting back at it. All of a sudden we were able to get accurate flash exposures time after time. In 1986 Olympus launched the OM4Ti and the F280 flash gun. This combination was the first time full flash synchronisation at all shutter speeds on a camera with a focal plane shutter. Instead of firing a single light emission when the flash was used in conjunction with a shutter speed higher than the flash sync speed of 1/60 sec the F280 fired a series of short bursts starting when the first shutter curtain opened and finishing when the second closed. This was a big deal to wedding photographers as it meant that getting TTL high speed sync meant that fill flash was easy and didn’t involve spending a fortune on medium format cameras who were equipped with lenses that had leaf shutters.
With the M4/3 system Olympus is able to offer advanced flash features, and the good news is that these features (with some exceptions) are largely carried over to other cameras made by the Micro Four Thirds Consortium and that means Panasonic and Leica can use the same flash units. Using flash in M4/3s is very straight forward, the problem is Olympus seems unable to communicate that and continues their bad habit of poor instructions and obtuse menus. So help I’ll quickly run through using the system with both on camera and off camera flash. There are 3 different metering modes for flash:
i) manual flash – which is a bit of an oxymoron as there is no metering
ii) auto flash – this is where the flash out is controlled by a sensor on the body of the flash unit. The flash fires at full power and the sensor measures the amount of light reflected back from the subject and quenches the flash emission. The results on camera can be quite good, but its biggest failing is when the flash is being used off camera.
iii) TTL metering – this where the light from the flash is metered as it is reflected back through the lens. It offers the most convenient form of flash usage, but suffers from all the problems of any reflective metering system i.e. it can be fooled by excessively dark or light subjects. Olympus have tuned their metering system to protect the highlights for jpg users so the images can look under exposed. This is where the flash exposure compensation settings come in handy, and I’ll get around to explaining that shortly.
On Camera Flash
To get the most bang for you buck with the Olympus flash system I would suggest making the following changes to how your camera is set up. Go into the main camera menu and scroll through till you get to the cog wheel icon. This is the “Custom Menu” selection. Activate it and scroll down to Custom Menu F and here you can set the following settings:
i) The flash sync speed. I set this to the fastest that is available, which on my EM-10 is 1/250 sec. Although the flash guns like the FL-600R and FL-36R can’t use this setting the pop up flash or the little flash accessory that comes with all Olympus models without can. It is very handy for a little bit of fill flash on bright days.
ii)Next you have a slow limit for when you use aperture priority mode. I like to use slow sync flash for creative effects so I have mine set to 30 seconds, but you may just want to limit the shutter speed to what you can comfortably hand hold. The range goes from 1/250 sec to 30 seconds.
iii) The most important setting. Whether you have Exposure Compensation and Flash Exposure Compensation linked. I choose to have this set as off. The reason why is I shoot primarily in aperture priority and use exposure compensation to make adjustments to the image in tricky lighting. But when using flash being able to use these separately adds another creative string to your bow. The reason is that you are then able to alter your flash exposure and your ambient light exposure separately. I do a lot of shots where I mix daylight and flash and there are times when I want the flash to the main light (or key light) and day light (or ambient light) to be the fill light. If come from using the Canon flash system you’ll definitely want to do this, if you are used to Nikon then leave them linked.
The Olympus flash system is controlled through a combination of the controls on the flash unit and through menu choices in the Olympus Super Control Panel (SCP). The controls on the flash can vary from very simple with just a couple of buttons to push or have quite a sophisticated menu system, it all depends upon the model flash. My Metz 44AF-1 has a grand total of five buttons and no LCD screen while the FL-600R has four buttons, a dial and a rocker switch to make changes through a menu system using an LCD display. Thankfully after a few choices initially the main controls are then managed via the SCP. Herein lies Olympus’ problem – the default factory setting for any of Olympus’ m4/3 camera is not to have the SCP enabled and their instruction books are so poorly written that it isn’t very clear how to do this. Personally I feel that the Live Control Panel, which is the default setting should be abandoned and the SCP should be the only interface to control the most frequently used settings. I also feel that some of the flash control settings aren’t needed and the menu could be simplified. Prior to using m4/3 I used the Canon EOS system and its flash system when used in conjunction with a fully dedicated flash and the Quick menu was simple to use and very intuitive. When I first started working with m4/3 and looked at the flash system my first reaction was to not use it and keep using the Canon cameras for flash. With time I have now switched to using m4/3 for everything. To change to the SCP, if you have not already done so, switch your camera on and press the OK button. This brings up the LCP. Press info and this changes to the SCP as shown below.
The Super Control Pannel with the flash setting selected.
If you select the flash section in the SCP as is highlighted above you can cycle through the various flash options.
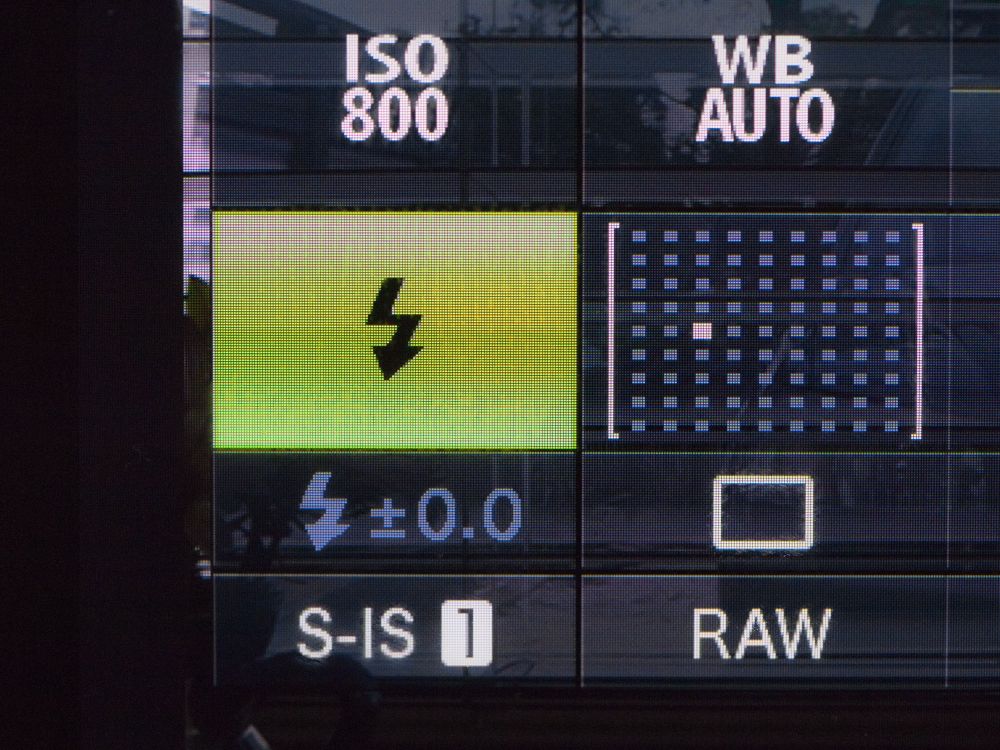
Auto TTL
Auto TTL. Here the flash fires automatically when there is low light or the subject is backlit.
TTL Fill Flash
TTL Fill Flash. This is where the flash fires irrespectively of lighting conditions.
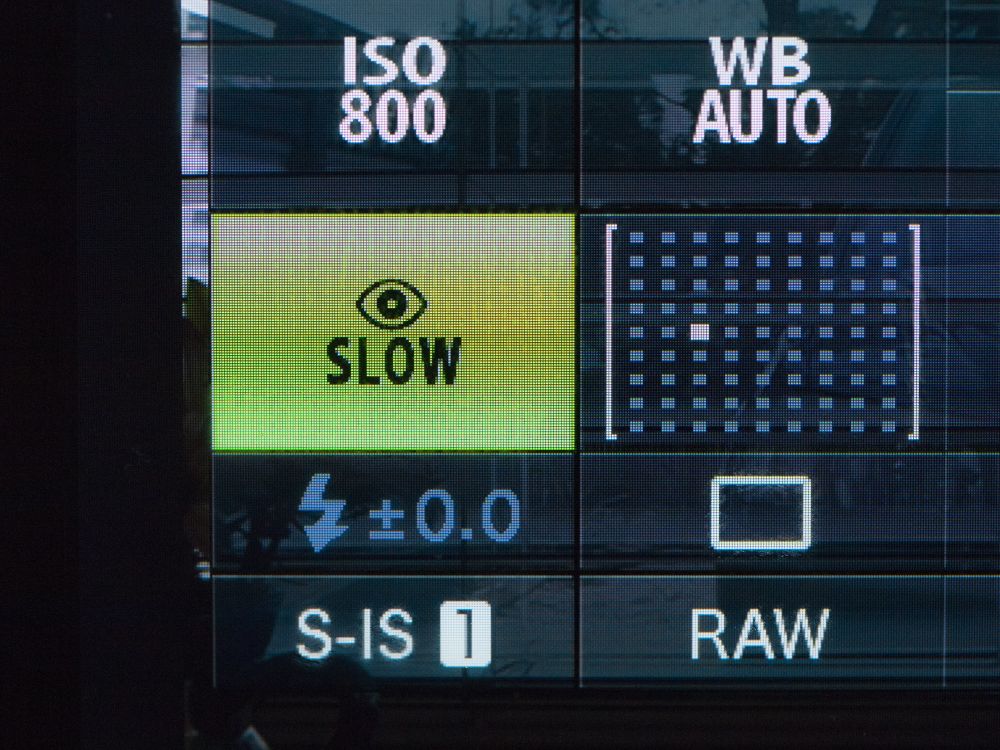
Red Eye Reduction
TTL Auto with red eye reduction. If you are shooting portraits with the flash on the camera this is the mode to use.
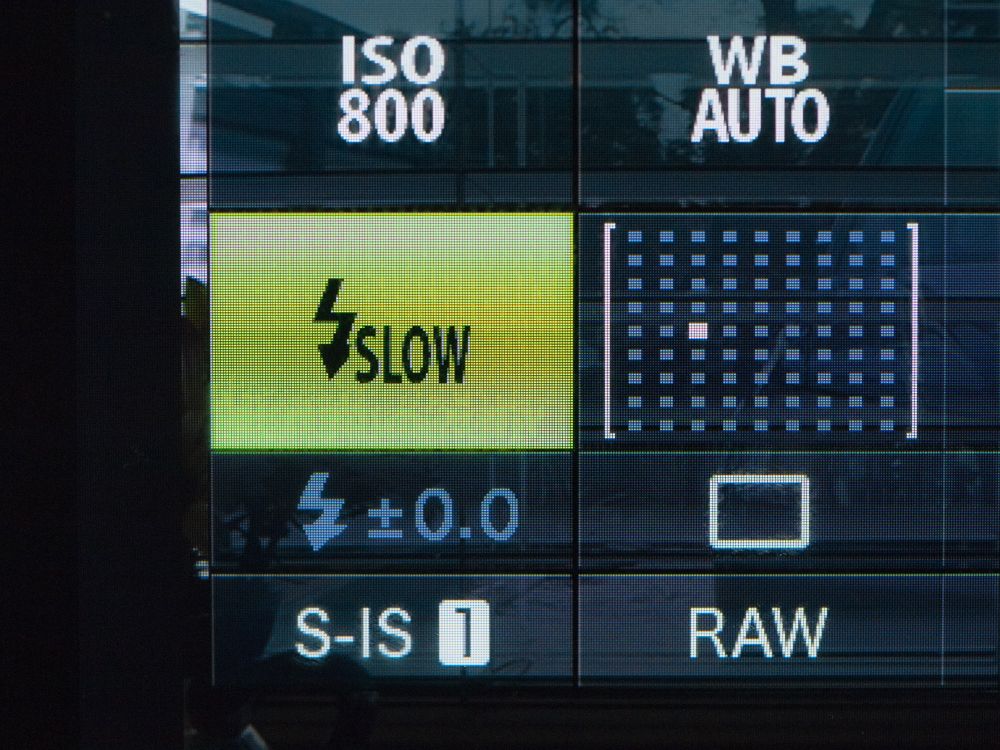
Slow Speed Sync
Slow speed flash for shutter speeds 60 sec to 1/200
Slow Speed Synch with Redeye Reduction
Slow speed sync with red eye reduction.
Slow Speed Sync on the 2nd Curtain
Slow speed sync with second curtain synchronisation. This means with moving subjects the light trail is behind the subject rather than in front of it as occurs with normal slow speed sync.
Manual
Manual – this is where the photographer decides to control the flash by either increasing or decreasing the out put. 1 is full power, 1/2 is half power, 1/4 etc. Manual mode must also be selected on the flashgun.
Flash off
When shooting in TTL mode the meter reads the amount of light reflected back off of the subject to determine the “correct” exposure. As mentioned previously the problem with reflective meeting is that certain tones or surfaces can fool the meter into over or under exposure. This can be corrected for in the SCP by using the flash exposure compensation. The photographer takes an initial photo and reviews it on the LCD, I prefer to do this using the histogram, others swear by the shadow and highlight blinkies. The flash out put can be adjusted by up to + or – 3 stops. The adjustment just effects the flash output and not the global exposure value. This can also be used for creative effect particularly when shooting portraits outside in strong sunlight. Using full TTL flash when combined with the sunlight can give an unnatural look as there will be no shadows on the face, dialling in -1 or 1 1/3 stops preserves the shadows but allows us to see into them. It can also give a pleasing catchlight in the subjects eyes.
Honey bee on a lavender flower. Olympus EM-10 with OLYMPUS M.60mm F2.8 Macro and Olympus FL-600R cash gun. Exposure aperture priority with high speed flash sync 1/640 s at f/4.0 ISO 400.
The non TTL modes of the flash must be selected on the flashgun itself. If you are using the Olympus FL-50R, the FL-36R or the FL-600R (and certain other third party models) you can shoot in FP mode in either TTL or manual modes. This means that you can shoot at shutter speeds higher than the maximum synchronisation speed (between 1/180 and 1/250 depending upon camera model) all the way up to your maximum shutter speed of 1/4000 sec (or 1/8000 for the EM-1). This a boon for shooting portraits out doors using fill flash. However, as with anything in photography there is no such thing as free lunch and the trade off for this is a reduction in the flashes output. Shooting a head and shoulders portrait with a 45mm lens using the FL-50R, the FL-36R or the FL-600R and you should be fine. Full length portraiture and you could be struggling.
Off Camera Flash
An Olympus dedicated Metz flash set up on a lighting stand ready to be triggered by an the RC mode on an Olympus camera.
Olympus provides two ways of using flash off of the camera:
i) Olympus Flash Extension Cable FL-CB05, which at $144 AUD is ludicrously expensive. I bought an Aputure AP-TLO TTL cable for $25 AUD including postage off of Ebay. This is handy if you want to use a flash bracket to just get the flash away from the axis of the lens so as to prevent red eye or you want to do some close up or macro work and don’t want to buy a separate flash for it. If you are using an Olympus flashgun you will have to change the custom settings for the flash to enable this.
ii) Remote Control or RC mode. As long as you have a model that was introduced after June 2011 when the EP-3 was announced and an Olympus Flash with the letter “R” at the end of the model number or a third party unit fully compatible with current Olympus TTL protocols including wireless, then you are good to go.
Generally there is a lot of confusion about the RC mode because it is also referred to as wireless by Olympus and people assume therefore it a radio trigger. In fact the system works off a near invisible flash pulse from the control flash. This has a couple of downsides. The first being that the sensor on the remote or slave flash must have line of sight communication with the master control unit so this limits where you can put the remote and precludes the use of certain types of light modifiers. Secondly The range isn’t very great. Olympus says that it is 5-7m depending upon the “local conditions”. What I have found that you’ll only get 7m inside, outside in very bright sunlight the performance is very much reduced and in some cases will not work at all.
To use RC mode, first you have to go into Shooting Menu 2 in the main camera menu and turn it on. This now enables the flash control menu in the Super Control Panel. To access it you either need to pop up the built in flash on your camera, or if you don’t have one then put in your accessory flash FL-LM2 in the camera hot shoe or use a larger external flash that has RC controller capabilities. Then access the SCP panel as normal.
The blinking camera icon is for controlling the onboard flash. It can be set to TTL, manual ( full power down to 1/64) and off. I generally leave it as off because when I use RC mode I don’t want the onboard flash contributing to the exposure. Even though it says off the flash still emits a series of pulses of nearly invisible light to transmit information to the slave flash units.
The FP box is highlighted here. The choices are FP or high speed sync (remember that this is a function of the flash and so your flash must have this ability to use it), and normal flash sync. Underneath is an icon that looks like the camera is shaking because it has had an electric shock. That sets the the intensity of the light pulse of the commander unit (Low, Medium, and High) I leave mine at high all the time as it is then one less thing to worry about.
It is important to ensure that both your RC controller and your slave flashes are set to the same channel. In the event of several m4/3 users wanting to all shoot with RC flash at the same time you can set up so you use a different channel.
You can have three groups of flash and although Olympus states that technically you are not limited to how many flashguns can be in a group they also say that three is probably the limit due to “interference” (page 36 of the English instruction manual for the FL-36R). Here I have A and B activated in TTL mode.
You can also use the manual exposure for flash in RC mode and you can set the power output via this panel. This is a very nice feature if you have your lights set up on stands you don’t have to keep walking over to the light and fiddling with it you can do the adjustment from your camera.
RC Auto lets you trigger the flashes remotely but the metering is done by a cell on the flash and it measures the light reflected back from the subject. Not a mode I could see myself using as it is quite an imprecise way of working and TTL or Manual offer far more control and consistent results.
So although it seems complicated the Olympus flash system offers an impressive range of features that allows for creative lighting techniques. With a small range of lighting modifiers such as diffusers, bounce cards, umbrellas etc you are able to produce “professional” looking photos.
The video below is a summary of the above.
The next part of this will look at the FL600-R flashgun and how to specifically use that in conjunction with a m4/3 camera.
A mosquito shelters from the wind and rain on a leopard orchid. Dodges Ferry, Tasmania. Olympus EM-10 with OLYMPUS M.60mm F2.8 Macro lens and Metz 44-AF1 flash. Exposure: Manual mode 1/180 s at f/8.0 ISO 200.
I first got my Olympus 60mm macro in May 2013 and wrote about it here. It is an amazing lens, but I was using it initially on an Olympus Pen EP-2 with the less than stellar 12Mp sensor I really wasn’t seeing what the lens was capable of. The picture of the mosquito on the Leopard orchid above was taken with the same lens but now mounted to an OMD EM-10 with the latest iteration of the 16Mp sensor. Tripod mounted and using flash I can now see how much detail the lens is able to resolve – you can see the hairs on the leg of the mosquito. Up until this morning when I processed the shot I never knew that mosquitos have hairy legs.
Leopard orchid (Diuris pardina), Dodges Ferry, Tasmania. Olympus EM-10 with OLYMPUS M.60mm F2.8 Macro and Metz 44-AF1 flash. Exposure: manual mode 1/180 s at f/8.0 ISO 200.
The other thing that I’m really taken with is the Olympus flash system. When I migrated from Canon I was particularly concerned about the flash capabilities and it was one of the reasons why I held onto my Canon kit. Now I have two dedicated speedlites for my Olympus kit, a Metz 44-AF1 (which I really do like) and a newer Olympus FL-600R (which I’m still getting to grips with and will be the subject of a separate blog entry a little later on). Like most things Olympus when you initially use the flash system the choices offered are quite daunting, but once you’ve set everything up it really is quite easy to use. The remote control for off camera flash is very sophisticated and make it very easy to get good results. Its only down fall is that it is radio controlled and there are no reliable third-party TTL radio controlled flash triggers. The day they arrive the Canon equipment will go.
My Olympus EM-10 tricked out for macro flash using a Custom Brackets Mini-RC, a Metz 44-AF! flash, an Aputure TTL sync cable and a cheap Chinese no name flash modifier.
The above shot shows how I had my camera set up to take the shots of the leopard orchids. The flash and the camera are mounted to a Custom Brackets Mini-RC via Manfotto quick release plates which makes setting things up a quick and easy affair. The TTL cable is by Aputure and was only $30 and the flash modifier is a cheap Chinese no name knock off of a Rogue FlashBender that I got off eBay for $5 including postage. What I like about it is that it is easy to use either handheld or tripod mounted.
As usual clicking on a photo will take you through to my online gallery.











You must be logged in to post a comment.