

When Olympus launched their wireless radio controlled flash system there were howls of derision from the combined blogosphere and photographic forums. Mainly it went along the lines of Olympus had lost the plot in charging so much for something that others were offering so cheaply. If all you want to do is take portraits with a couple of off camera speedlights then there maybe something to this argument. Let’s make a quick comparison.
| Olympus | Godox | |
| Commander or transmitter | Olympus FC-WR Wireless Commander $385 AUD | Godox X2T-O Wireless TTL Trigger $99 AUD |
| Speedlights with built in receivers | 2 x Olympus FL-700WR Flash $449 AUD each | 2 x Godox TT685OP Speedlight Flash $195 AUD each |
| Total Cost | $1283 AUD | $489 AUD |
So that is quite some difference – $794 AUD is a lot of money. Then the Godox fans will tell that the system is much more flexible because if you change camera system all you have to do is change the wireless trigger to one that is dedicated to your new system and you can keep using your existing speedlights. On the face of it it this quite a compelling argument. But this really doesn’t tell the whole story as it assumes that you have no existing flash equipment and that all you want to do is shoot basic lighting set ups with either TTL or full manual control. Now a lot of people who are attracted to Olympus cameras aren’t just attracted by the small size of micro four thirds but also by the advanced features that the cameras have such as focus stacking, keystone compensation, High Res Shot Mode, Live Bulb, Live Time, Live Composite, multi exposure, art filters, picture modes, and interval shooting. Plus Godox doesn’t offer a TTL enabled flash such as the Olympus Twin Flash STF-8 for macro and close up photography.

Regular readers will know that I do a lot of wildflower photography, product shots and the occasional portrait all using flash. I realised I wanted to use more complex lighting arrangements and so I decided to put together a system based around the existing flash units I already had – an Olympus FL-600R, an Olympus STF-8, 2 Metz 44AF-1’s, and a Metz 64AF-1. To that end I bought an Olympus FC-WR wireless commander and three Olympus FR-WR Wireless Radio Flash Receivers ($285 AUD each). Still not a super cheap option, but one that gives me a lot of scope. Now when I started this because the system was not well received there were next to no reviews of it and I didn’t know if everything I had, particularly the Metz units would work. Also I wanted to know whether they would also work with my Panasonic G85. So this was a real voyage of discovery
As I progressed with this I realised that I didn’t just want to write a review, but that I’d also say how to use the equipment in various modes across both Olympus and Panasonic cameras using third party flashguns so that prospective users can find all this information out without having to take a punt like I did. As usual I’ve provided the information in both video and written formats.
So with all that preliminary guff stated (phew!!) lets dig in by looking at the Commander and Receivers themselves first.
FC-WR Commander
Specifications
| Maximum communication distance | Approx. 30 m |
| Frequency | 2.4 GHz band |
| Number of channels | 15 (in the commander mode; with automatic channel setting function) |
| Number of groups | 3; maximum number of flash units; unlimited |
| Flash control modes | TTL / MANUAL / FP TTL / FP MANUAL / Off |
| Flash compensation | ±5 EV (Increment: 1/3 EV or 1/2 EV) |
| Manual flash power settings | From 1/1 to 1/128 (Increment: 1/3 EV or 1/2 EV) |
| Power supply | AAA alkaline dry-cell batteries x 2 / AAA NiMH batteries x 2 |
| Continuous usage duration | Approx. 6.4 hours (when using AAA alkaline dry-cell batteries) |
| Operable temperature / humidity | From -10 to 40℃ (14 to 104°F) / From 30 to 90% |
| Dimensions | Approx. 59.5 (W) x 51.0 (H) x 67.4 (D) mm |
| Weight | Approx. 73 g (excluding batteries) |
Firstly the WR in designation is Olympus speak for the fact that the commander has a degree of weather resistance. This is a huge positive for me as I shoot a lot of stuff outside in all weathers. Olympus doesn’t specify the degree of water resistance, but says the unit will operate in temperatures ranging from -10 to 40ºC and humidity up to 90%. I didn’t throw it in a bucket of water but I have used it out in the rain on several occasions with no functional problems, and when I opened up the battery compartment it was dry so that’s all good.
The FC-WR uses AAA batteries. This was a bit of a disappointment and I would have liked AA as it means I only have to carry one type of battery and AAs last longer. However in practice I’m still using the first set of AAAs, and I suppose the use of them keeps the size down.

Physically the FC-WR is made of sturdy plastic which doesn’t creak or flex if you give it a squeeze. The door to the batter compartment is on a sprung hinge and slides to lock and open. It fits well and there is some initial resistance to moving so there won’t be any accidental opening. On the base is a locking hotshot with the standard m4/3 pins providing electrical contact. On the to is a large LCD screen which gives all the necessary info and is backlit. Underneath that are three buttons – one each for the the three groups. Then there is a mode button, a test button, a dial and rocker switch surrounding the OK button and finally the on/off button. A nice touch is that if you turn off your camera the FC-WR automatically switches off, and if you restart your camera within 10 minutes it will automatically switch back on. Any longer and you have to press the on/off button.
To use it is simplicity itself. First select the group or flashgun you want to control, press the button followed by the mode button. Select between TTL, manual or off. Use the right side rocker switch to move to the +/- ratio to select either flash compensation for TTL mode or the power levels for manual mode. Another press of the rocker switch and you can select whether you want high speed flash sync or FP mode in Olympus speak. A final press of the rocker switch lets you select the channel that you want all this to occur on.
FR-WR Receiver
Specifications
| Maximum range | Approx. 30 m |
| Frequency | 2.4 GHz band |
| Number of channels | 15 |
| Number of groups | 3 |
| Control modes | RCV (commander flash control), X-RCV (connected flash control) |
| Charging completion indication | Beeping sound |
| External terminal | Sync terminal (output) |
| Power supply | AAA alkaline dry-cell batteries x 2 / AAA NiMH batteries x 2 |
| Continuous usage duration | Approx. 6.4 hours (when using AAA alkaline dry-cell batteries) |
| Operable temperature / humidity | From -10 to 40℃ (14 to 104°F) / From 30 to 90% |
| Dimensions | Approx. 59.1 (W) x 46.1 (H) x 51.0 (D) mm |
| Weight | Approx. 75 g (excluding batteries) |

In terms of construction what I said about the the commander applies here. On top of the receiver is a standard four thirds protocol hot shoe. On the base there is a locking cold shoe with 1/4 20 mount. On the left side (looking from the front) is a pc sync socket – does anyone actually use these any more? – which would allow you to tigger a studio mono block or power pack. On the other side is the battery compartment which takes two AA cells. On the back panel is a dial that enables you to select channels (1-15) and beside it another dial for selecting channels. Then there are three buttons which are from the bottom the on/off switch. The neat little touch with this is if you are using an Olympus brand flash then switching off the receiver will switch off the flash. In the middle is a button for switching the beep on and off. I leave it on as it gives me an audible indication of when everything has recharged. Finally at the top is the X-RCV button. This allows you to either control the flash from the commander unit or from the flash itself. I choose to control the flash via the commander unit as I find that more convenient.
Usage Scenarios
Standard Mode
The Radio triggers work with both Olympus and Panasonic cameras and with third party flashes. It also works with the Olympus ST-F8 as part of a multi flash set up, but you will have to cobble together something to hold the FR-WR and ST-F8 body off of the camera.

FP Mode or High Speed Sync
FP mode or high speed sync is a function of the flashgun and not the camera. So if your flash supports it it you can use it. I got it work with the Metz 64AF-1 and the Olympus FL 600-R using both Panasonic and Olympus cameras.
Focus Stacking or Bracketing
The focus stacking feature found on Olympus cameras imposes certain operating restrictions:
- Uses the electronic shutter
- The flash sync speed is 1/50th sec or longer
- You can’t use TTL flash you have to manually adjust the power settings of the flash to get correct exposure
When you set operating parameters for focus stacking in the camera menu remember to allow a a delay between shots that allows for the flash to recycle. I’ve found four seconds to be sufficient. Having set that up switch on the FC-WR and it automatically selects manual flash mode and the camera selects the the flash sync speed. This worked with both the Olympus and Metz flashes on only the Olympus cameras. Panasonic’s focus stacking function is video based (4K capture) and not stills like that of the Olympus.

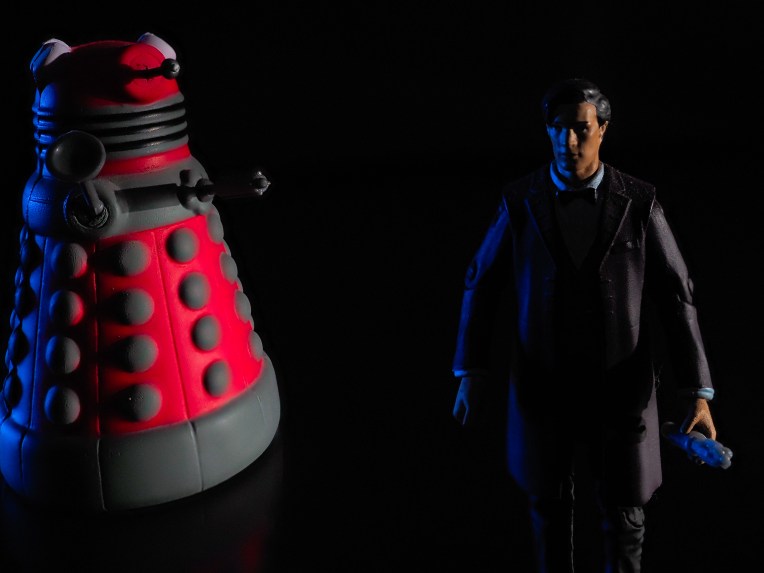
High Res Mode
In many ways this is similar to the focus stacking mode mentioned previously. It requires an electronic shutter set at 1/50th sec or longer and the flash to be set manually. This worked well with both the Olympus and Metz flash guns. I didn’t test this with a Panasonic camera as my G85 doesn’t have this function.
Conclusion

Lets get the niggly issue out of the way first. Yes the system is expensive and I wish that it was a little cheaper. Having said that you get rock solid dependability. I found that the Godox units were somewhat flaky at times – occasional misfires where the flash didn’t go off. I like dependability and I’m prepared to spend a little more to get it.
The good stuff. I like the fact that the operation of the constituent parts is seamless even when using the advanced Olympus camera features. The build quality and the weather resistance is excellent, Olympus do a really good job in making small equipment that can handle all the vagaries that life can dish out. The fact that this works with Panasonic cameras is great. Cross compatibility was another factor that brought me into the micro four thirds system. If you want full frame these should work with Panasonic’s full frame offerings as they also share the m4/3 protocols for flash. I say “should” as I’ve not tested it and cannot find anything online to confirm one way or the other. The fact that you can use it with third party speedlights is a huge bonus.
If you are a micro four thirds user and want a rock solid off camera flash solution that gives you access to multi-flash set ups even with specialist close-up equipment using the specialist in camera features such as focus stacking or high res mode then I think its worth spending the cash.
I have written and made videos about several aspects of the Olympus flash system and these are:
- A Flash of Inspiration – part 1 : a general introduction to the Olympus flash system
- A Flash of Inspiration – part 2 : using the Olympus FL-600R flash gun
- Grand Master Flash : using Hahnel Captur manual radio triggers on Olympus m4/3 cameras. Probably made redundant by this article, but still relevant if you want a reliable affordable system and are willing to forego TTL control.
- Olympus Twin Flash STF-8 Review : a video review on the STF-8







You must be logged in to post a comment.