Turning A Negative Into A Positive

20241227-JJC_filmscanner-0224-2-Edit


This last twelve months I have started using 35mm film again. Initially I had the lab where I got my film developed scan the negatives. The results were absolutely diabolical – and this was from one of what is considered the better labs in Western Australia. So I needed a scanner. The market had changed considerably since I bought my last one in 2005. Canon and Nikon have exited the market and Epson  has only the V850 flatbed (only $1600 AUD “cough”!) available in Australia. What is available at more reasonable prices are the Plustek range, which seem to be largely differentiated by the software bundled with them. While the price is attractive they are somewhat under specified. The advertised maximum resolution of 7200 dpi is somewhat optimistic as it really doesn’t resolve more that 3200 dpi in real terms. The density measurement of 3.6 D is pretty mediocre and they are incredibly slow in in use. I then figured the second hand market was the place to look. Back in the day the undisputed market leader for consumer dedicated 35mm film scanners was Nikon. Now Nikon stopped production in 2009 so I thought a late model with USB connection would be the way to go and the Nikon Coolscan 5000 seemed to fit the bill with a true resolution of 4000 dpi, autofocus lens, adapters available for scanning whole rolls of film, and a density measurement of 4.8 D (anything over 4 is the mutts nuts). Unfortunately the current film resurgence has meant that these are selling for $1800-2100 AUD for a working model. 

I had an ask around and was quickly informed that camera scanning was very popular. I watched a load of YouTube videos on the subject and saw everything from DIY Frankenscanners to very swish $6500 setups. I dipped my toe into the pool by making a negative holder from a scrap of matt board, an LED light diffused by tracing paper as the light source and set up a camera with a macro lens on a tripod. With a lot of trial and error (mostly error) I got some reasonable results – better than those I got from the lab. This was encouraging and it gave some idea of what I was looking for. I didn’t want to have to set up a camera on a tripod and then align the negative so it was parallel to the camera sensor plane and centred on the axis of the lens. It had to be compact and quick to set up and breakdown. Most importantly it had to work with one of the camera and lens combinations I already owned. Perusing the inter webs I found two set ups that fit the bill:

In crudest terms both are just a tube that attaches to your lens and at the other end is a film holder and an LED light source. Both offer a wide range of compatibility with different cameras and lenses. The Valoi looked very slick and well designed, the JJC looked a little more rudimentary. I plumped for the JJC as I wasn’t sure at that stage how much use it would get.


JJC Film Digitising Adapter And LED Light Set


20241227-JJC_filmscanner-0236-Edit
The kit comprises of several short threaded tubes and step down rings.


In the box you get a series of short threaded tubes, several step down rings, a negative holder, a holder for mounted slides, a holder for the negative and slide holders, an LED light, a diffusion panel and a USB power cable with switch. There is a comprehensive instruction sheet and a sheet detailing the necessary combination of parts needed for each camera and lens combination. It was all very straightforward and I was up and running in a couple of minutes.


20241227-JJC_filmscanner-0228-Edit


20241227-JJC_filmscanner-0237-Edit
The LED light is powered via USB. It has no battery.


The build quality is OK. It’s made out of plastic, but it fits together quite well. The negative holder does a good job of holding the film flat. The only thing I don’t particularly like is that the step down rings bind very tightly to the filter threads of my lenses and it can be a bit of a struggle to remove them.


20241228-JJC_filmscanner-0241-Edit
All assembled and mounted on a camera.


Before we get to results we must deal with the elephant in the room – lens compatibility. JJC list a total of 15 compatible macro lenses from Canon, Nikon, Sony, Olympus and Laowa covering micro four thirds, APSC, and full frame. Initially I used the lenses from the list – my Canon EF 100mm f2.8 IS L on my Canon 6d, and my Olympus 60mm f2.8 and EM1 mk ii. Both camera have a 20 Mp sensor and both worked very well. What I really wanted to use was my Sony A7r2 and Sigma 105mm f2.8, but the lens is not officially supported. I tried various combinations of the tubes until I found one that worked – a combination of large tubes listed for the Canon EF 100mm f2.8 L macro with the step down ring for the Nikkor Z MC 105mm macro. It delivered excellent results. So if your lens is not listed then it could be worth playing around with the tubes. Do you have to use a macro lens? For best results I’d say yes. It’s not just close focusing capability that’s important. Field curvature is as well. In simple terms an ordinary lens when photographing a flat object ie a film negative cannot bring the whole subject into focus. The centre is sharp and then that sharpness falls off towards the edges of the camera sensor. Macro lenses have inbuilt correction to achieve a flat film plane ie where the image is sharp across the whole frame. Some would say stop down and the problem goes away, and to an extent that could work depending on how acute the field curvature is because if you stop down too far then the diffraction kicks in and the image softens. Having said that if you don’t have access to a macro lens then there is nothing to stop you using a 50mm lens with 2 x 25mm extension tubes to see how you get on. Personally if you’ve got a mirrorless camera I’d look on EBay for a second hand manual focus macro lens and get an adapter so you can mount it on your camera. You don’t need autofocus to scan film.


20241228-JJC_filmscanner-0243-Edit
Mounted on a Sigma 105mm f2.8 DG DN macro lens for Sony E mount. The lens is not on the JJC list of supported lenses, but playing around with the tubes and step down rings I was able to find a combination that worked.


Results. Well I compared the results from my three camera and lens combinations with some images I’d scanned using my old  Canoscan 9900f. On comparing them all the camera scans were better than the flatbed scanner. There was more detail in the highlights, there was finer detail in the whole image, subtle tonal roll off, and the images weren’t over sharpened.
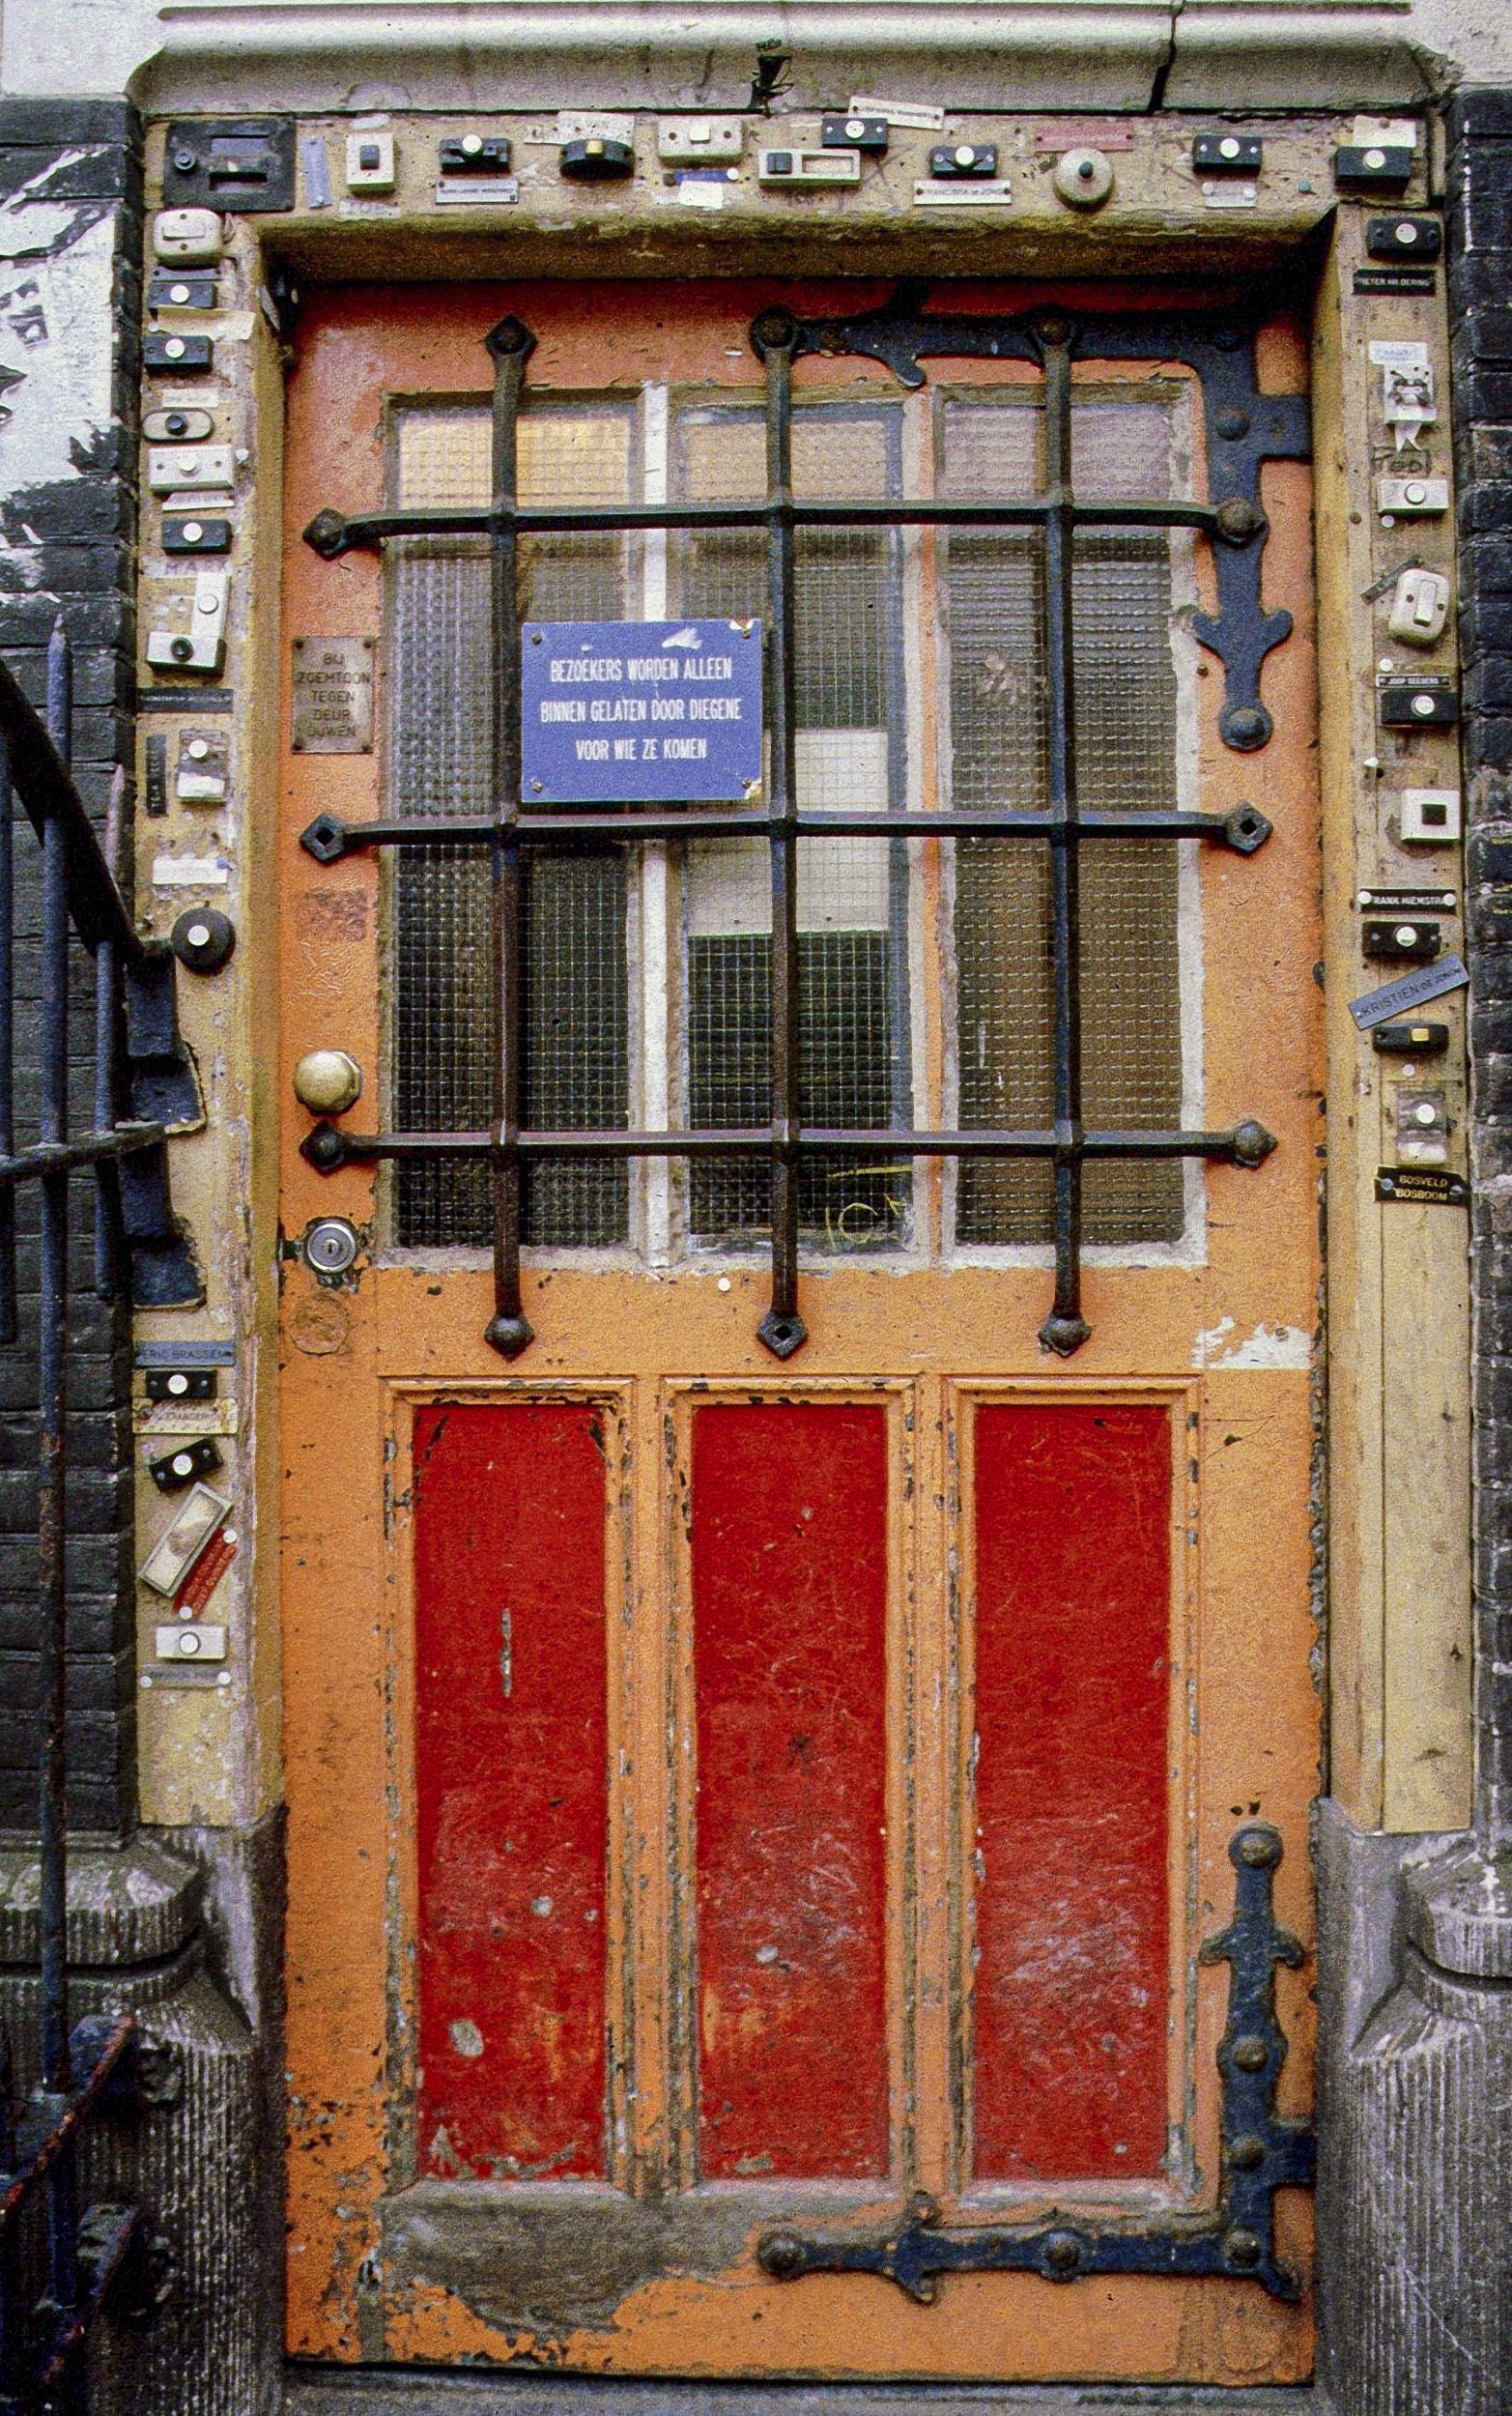
 

This is an image I shot on slide film in 1986 and scanned using a Canoscan 9950f flatbed scanner.


Squat Door
Now viewed at 200%


Camera Scanning
Sony A7r2 with Sigma 105mm macro lens. 42Mp. Viewed at 200%.


Camera Scanning
Canon EOS6d with Canon 100mm macro lens. 20Mp Viewed at 200%.


Camera Scanning
Olympus EM1 mk ii with 60mm f2.8 macro lens. High Res mode. Equivalent to 80 Mp. Viewed at 200%.


Camera Scanning
Olympus EM1 mk ii with 60mm f2.8 macro lens. 20 Mp. Viewed at 200%.


Under The Olive Tree
A section of an Ilford SFX negative scanned with the Canoscan 9950f viewed at 200%


200%SonyA7r220240318-Cobdar-0226-Edit
The same negative scanned with the Sony A7rii and Sigma 105mm macro. There is more fine detail and a much gentler roll off of tones with greater dynamic range.


Cóbdar,
This is a section of an Ilford FP4 negative scanned by the Canoscan 9950f and viewed at 200%.


200%SonyA7rii20240318-Cobdar-0224-Edit
The same negative at 200% shot with the Sony A7rii and Sigma 105. Again note the finer detail and tonal range of the image. The camera is able to extract more information out of a negative.


Now you’ve got a memory card full of digitised film what happens next. Well I’m using Adobe Lightroom so I ingest the images into the Lightroom catalogue. What happens next depends upon the film stock. With black and white or slide film no special software is required and you can process entirely in Lightroom. It’s really not difficult. With black and white just invert the tonal curve and with colour slide it’s just a case of making small scale adjustments to the colour balance, unless the slide is old and experienced a colour shift then the adjustments are bigger and you may have to do contrast masking. With colour negative things are harder due to the orange colour masking. Now it is possible to do this manually yourself, but you’ll save yourself a lot of time and frustration if you get a Lightroom plugin to do it for you. I tried once doing it myself because I once considered myself a fairly competent colour darkroom worker. I mean with with red areas appearing cyan, greens appearing magenta, and blues appearing yellow, and vice versa just how hard could it be? After an hour of chasing my tail on one negative I happily plonked down the money for Negative Lab Pro. It’s easy to use and the money is well spent as it preserves sanity.


Conclusion


20240318-Beijing-0224-Edit
Ilford XP1 scanned with the Olympus EM1 mk ii and 60mm macro at the native 20Mp of the camera.


Six months and a couple of dozen films in how do I feel about camera scanning? Well to be honest if I could get a modern version of the Nikon Coolscan 5000 with up to date software, drivers and a USB C interface I’d buy it in a heartbeat (Nikon are you listening?). The reality is that there isn’t and it is unlikely to happen. So I guess I’m a camera scanner with reservations. With a good macro lens and good post processing skills it is a viable alternative to the dedicated film scanner and is streets ahead of what flatbed scanners can achieve.


20240318-Beijing-0231-Edit
Ilford XP2 scanned with the Olympus EM1 mk ii and 60mm lens at 20Mp.


As to JJC Film Digitising Adapter And LED Light Set I think it is good as a low cost entry to camera scanning.

Pros

  • Cheap – $130 AUD from Amazon
  • Quick to set up and quick to scan
  • Easy to use
  • Adapts well to a range of lenses and cameras
  • Better results than a flatbed scanner when using a camera with around 24Mp
  • Good documentation making it easy to get started

Cons

  • It can only scan 35mm film
  • On paper it is only compatible with a limited number of lenses
  • Black and white negatives and slide film can be processed with no special software, but colour negative will require a plugin such as Negative Lab Pro
  • Expensive if you don’t own a digital camera and macro lens
  • The negative and slide holders are sloppy as is the holder insertion slot on the LED. They wobble and rotate as you feed the film through. Also the locating notches on the holders are not accurate so it is not a quick or smooth process when you put the film through and it requires fiddling with to ensure accurate framing

For the time being I’ll continue using it and work around some of the quirks as the price was right. Let’s put it another way. My lab charges $11 to scan a roll of film. Scan 12 rolls of film and the scanner has paid for itself.

 

20240318-Fremantle-0225-Edit
Ilford Delta 400 scanned with a Canon 6d and Canon EF 100mm macro lens.


Big Cats and Flowers

My last wander about the local Wandoo forest didn’t yield anything much. The only plants worth getting the camera out for were some Leopard Orchids. So I did my usual full length portrait using my 40-150mm f2.8 plus MC-14 teleconverter with focus stacking. Then a tighter “head and shoulders” shot with the 60mm f2.8 macro and flash. I finished up with really tight detail shot at close to 1:1 again with the 60mm macro.


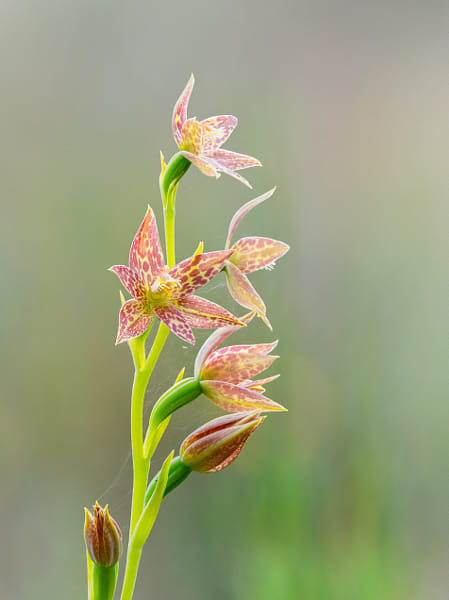
Leopard Orchid by Paul Amyes on 500px.com
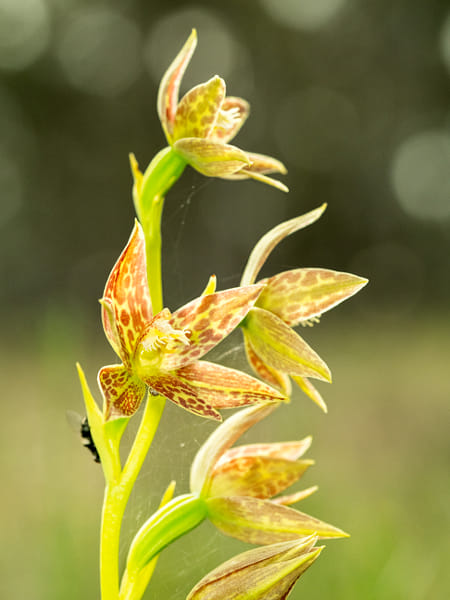
Leopard Orchid, Thelymitra benthamiana. A 10 shot focus stack using the Olympus EM1 mk ii, Olympus 40-150mm f28 lens and the the Olympus MC-14 teleconverter. File assembled in Photoshop.


Leopard Orchid by Paul Amyes on 500px.com
If you look closely at the main flower there is a spider peeping out and the fly on the edge of plant is caught in its web. Leopard Orchid, Thelymitra benthamiana.


In the past I’ve used OM Workspace to do the focus stacks, but after it’s latest update it has become so slow – glaciers move quicker. So I decided to to do the stack using Adobe Lightroom and Photoshop. To say it was much faster would be a massive understatement, but the final result was a lot better as well. For the life of me I can’t work out why camera manufacturers software is so bad. It should be better as they know all the features of the cameras and how to get the best out of them. This isn’t just a whinge directed at OM Systems. Canon’s DPP is absolutely appalling as well. Adobe would’t have such a stranglehold on the market if the camera manufacturers could develop good software.

Wayfaring in Williams

Whenever I’ve stopped in Williams it always been on the way to somewhere else and I’ve always been quick to get a move on. Well the other day I gave Williams my full attention. There are a few good spots for orchids there and I wanted to visit one in particular as it is the home to the Common Dragon Orchid. Despite its name I’ve never found the Common Dragon Orchid to be very common – in fact I’d only seen a rather manky looking one some twenty years ago. That, as they say, is a long time between drinks.

The bit of scrubby land that is home to the flowers is pretty ordinary to look at. It’s situated on the corner of a busy highway and a dirt track. Judging from the car bodies, rusted metal, bottles and corrugated asbestos it’s been used for fly tipping for years. But situated under the sheaoak trees in amongst the needles were an amazing variety of orchids. Common Dragon Orchids, well they were certainly common there. There were hundreds of them.

The first three images are pretty straight photos using the Olympus 60mm f2.8 macro lens and STF-8 flash or the Olympus 40-150mm f2.8 with no flash.


Common Dragon Orchid by Paul Amyes on 500px.com
Common Dragon Orchid, Caladenia barbarossa. Williams, Western Australia.


Zebra Orchid by Paul Amyes on 500px.com
Zebra Orchid, Caladenia cairnsiana. Williams, Western Australia.


Clubbed Spider Orchid by Paul Amyes on 500px.com
Clubbed Spider Orchid, Caladenia longiclavata. Williams, Western Australia.


The last couple were done as focus stacks using the Olympus 40-150mm f2.8 and MC-14 1.4x teleconverter. The stacks were assembled in Photoshop.


Common Dragon Orchid by Paul Amyes on 500px.com
Common Dragon Orchid, Caladenia barbarossa. Williams, Western Australia.


Zebra Orchid by Paul Amyes on 500px.com
Zebra Orchid, Caladenia cairnsiana. Williams, Western Australia.


Toolibin Lake

When you arrive at Toolibin Lake it’s hard not to be underwhelmed. It’s a smallish fresh water lake fringed by scrubby trees and populated by voracious mosquitos. While I was there only two other vehicles pulled up, the first visitor walked over to the information board and then got straight back in his car and drove off. A couple got out of the second car and walked down to the waters edge and then they too got back in their car and headed off. Perhaps it was the mosquitoes or perhaps their expectations did not match the reality of the place. Don’t know. All I do know is that it’s a fantastic nature reserve with plenty of nature.


Fringed Mantis Orchid by Paul Amyes on 500px.com
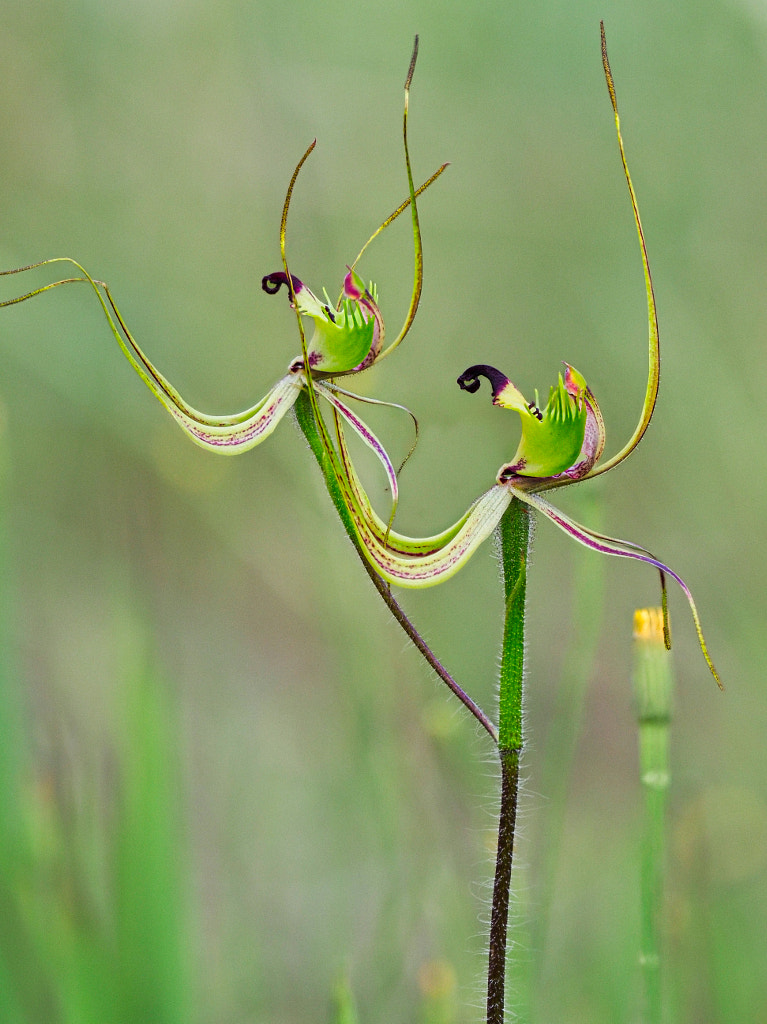
Fringed Mantis Orchid aka Green Spider Orchid (Caladenia falcata).Toolibin Nature Reserve, Western Australia.


Fringed Mantis Orchid by Paul Amyes on 500px.com
A closer look at the Fringed Mantis Orchid.


What makes Toolibin Lake so special? There used to be lots of lakes like this throughout the Wheatbelt, but agricultural land clearances have rendered them saline which has killed off the vegetation around them and destroyed the native animals habitats. Toolibin has miraculously managed to survive and has become an oasis for rare and threatened flora and fauna. If you want to see a Freckled Duck or a Red-tailed Phascogale  then Toolibin Lake Nature Reserves is one of your best bets for finding them. I wasn’t there for the wildlife, I was looking for the wild orchids that can be found in the surrounding woodland of flooded gum, acorn banksia and rock sheoak. What I found was nothing short of spectacular.  While species like Cowslip Orchids are ten a penny in the South West of Western Australia it was the quantity of them that was amazing. It was a magnificent sight. I was looking for two species – the Clown Orchid (Caladenia roei) and its cousin the Purple-veined Spider Orchid (Caladenia doutchiae) both of which I found pretty quickly.  The Clown Orchid I’d seen before at Wongan Hills, which is quite hike from where I live, but, the Purple-veined Spider Orchid was completely new to me and was the one I particularly wanted to photograph. I decided to photograph both as they can be a bit difficult to tell apart. As it was I passed up a Common Dragon Orchid as I thought it was a damaged Fringed Mantis Orchid. Note to self: next time photograph everything that you find.


Purple-veined Spider Orchid by Paul Amyes on 500px.com
Purple-veined Spider Orchid, Caladenia doutchiae. Toolibin Nature Reserve, Western Australia.


Purple-veined Spider Orchid by Paul Amyes on 500px.com
Purple-veined Spider Orchid, Caladenia doutchiae. Toolibin Nature Reserve, Western Australia.


Clown Orchid by Paul Amyes on 500px.com
Clown Orchid, AKA Ant Orchid, Man Orchid, and Jack-in-the-box Orchid, Caladenia roei. Toolibin Nature Reserve, Western Australia.


20240906-Toolibin_Lake-0249-2-Edit by Paul Amyes on 500px.com
In profile. Clown Orchid, AKA Ant Orchid, Man Orchid, and Jack-in-the-box Orchid, Caladenia roei. Toolibin Nature Reserve, Western Australia.


Toolibin Lake is definitely a place I’ll be visiting again, although the next time I’ll forego the orchids and look for the Freckled Duck and the Red-tailed Phascogale. For anyone interested in visiting be aware that Toolibin Lake lies in a low rainfall area of the Wheatbelt and consequently it usually only holds water at certain times of year and some years it may not have any water at all. This year while the rains have been late they have been very heavy so everything was in top shape. 


Dancing Spider Orchid by Paul Amyes on 500px.com

Dancing Spider Orchid, Caladenia discoidea. Toolibin Nature Reserve, Western Australia.

On The Road

It’s that time of year – the natural world here in Western Australia has started to step up a gear and  it is time to get out and see it and more importantly photograph it.

I was recently reading a book on Western Australian orchids and I discovered within it mention of a few species that are found in the Wheatbelt, where I live, that I had never heard of before let alone seen. After a bit more research and a consultation with Florabase and Atlas of Living Australia I was all set to head off to Kweda.


On The Road To Kweda
Not a very reassuring sign.


On The Road To Kweda
Another comforting sign.


20240823-Kweda-0246-Edit
The floodway that empties into Lake Mears. Although there was a lot of the water it hadn’t flooded the road.


It was nice to get out and about again, but after seeing a couple of road signs I wasn’t so sure I’d made the right decision. Kweda Reserve is located on the corner of an intersection of two dirt roads and  apart from the reserve the only other feature of note was a mobile phone tower. Getting out of the car it seemed as if the bottom end of the reserve once played host to a railway siding. The tracks were long gone only the embankments and a few bridges over creek lines remained. There was quite a bit of water about thanks to the late heavy rains and I was quite surprised as the genus of orchids I was looking for tend to favour drier sandy soils rather than the heavy wet clay that was at Kweda. There were a lot of birds and dragonflies about and I saw a bob tailed lizard happily grazing on some mushrooms.


Kweda Reserve
The bottom end of Kweda Reserve used to have a railway line. The last vestiges of the embankment and bridges can still be seen.


Kweda Reserve
Lots of late heavy rainfall have meant there is a surprising amount of water about.


Kweda Reserve
One of the locals. Bob tailed lizard (Tiliqua rugosa). Kweda Reserve.


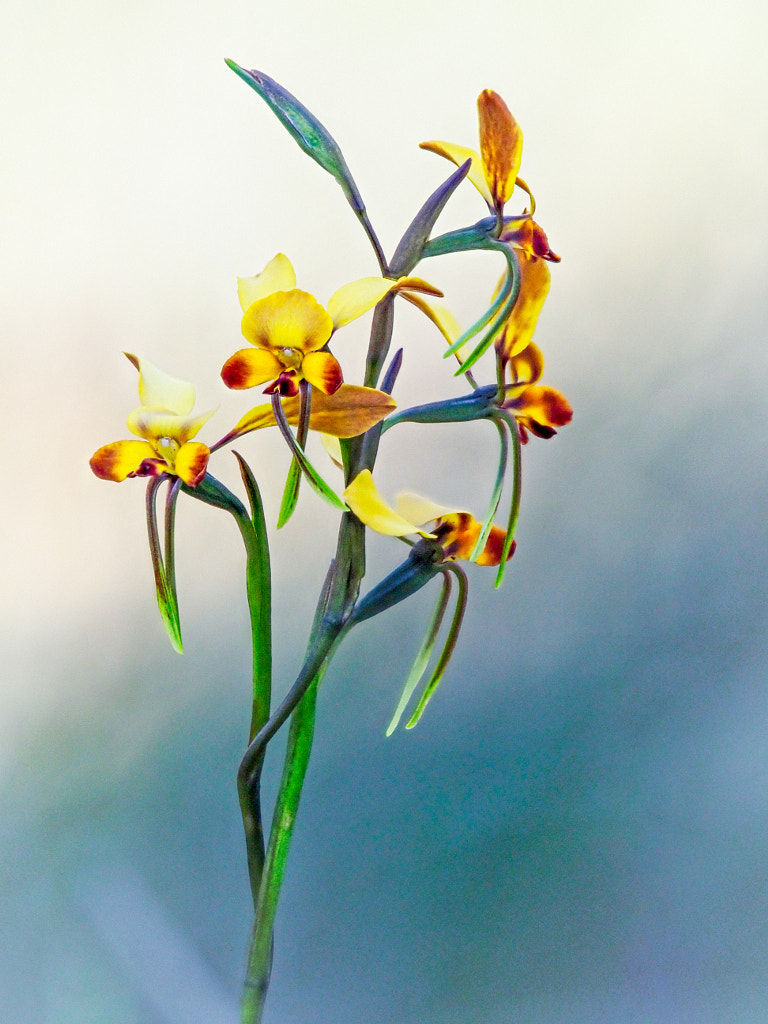
Western Wheatbelt Donkey Orchid
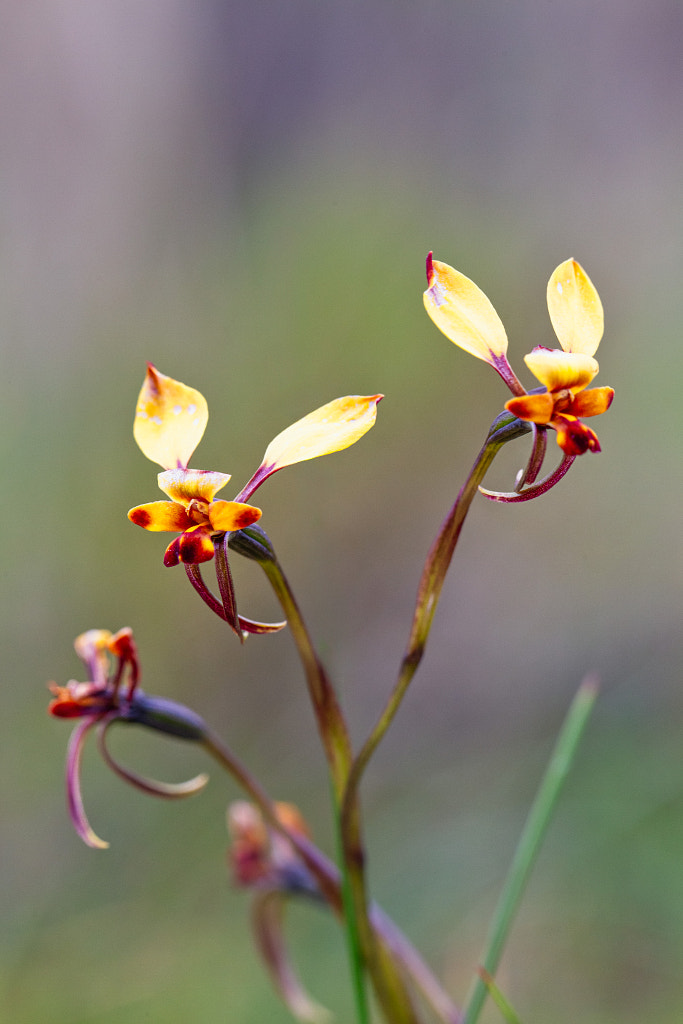
Western Wheatbelt Donkey Orchid, Diuris brachyscapa. Kweda.


Western Wheatbelt Donkey Orchid
Western Wheatbelt Donkey Orchid, Diuris brachyscapa. Kweda.


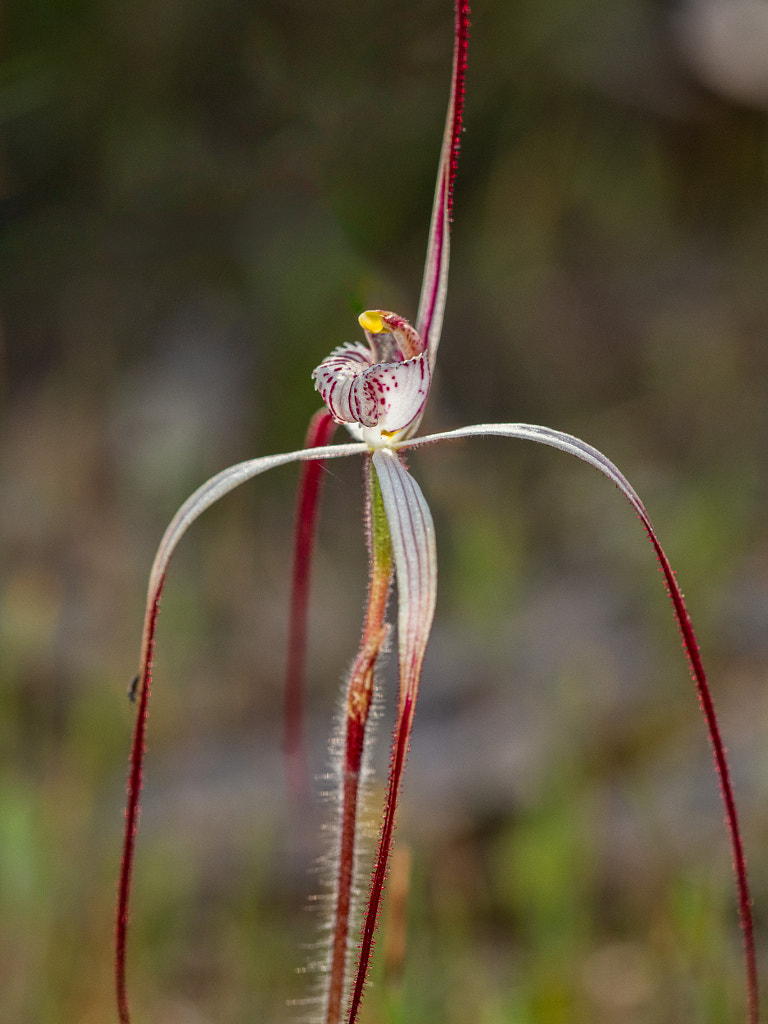
Drooping Spider Orchid,
Drooping Spider Orchid, Caladenia radialis. Kweda.


Drooping Spider Orchid,
Drooping Spider Orchid, Caladenia radialis. Kweda.


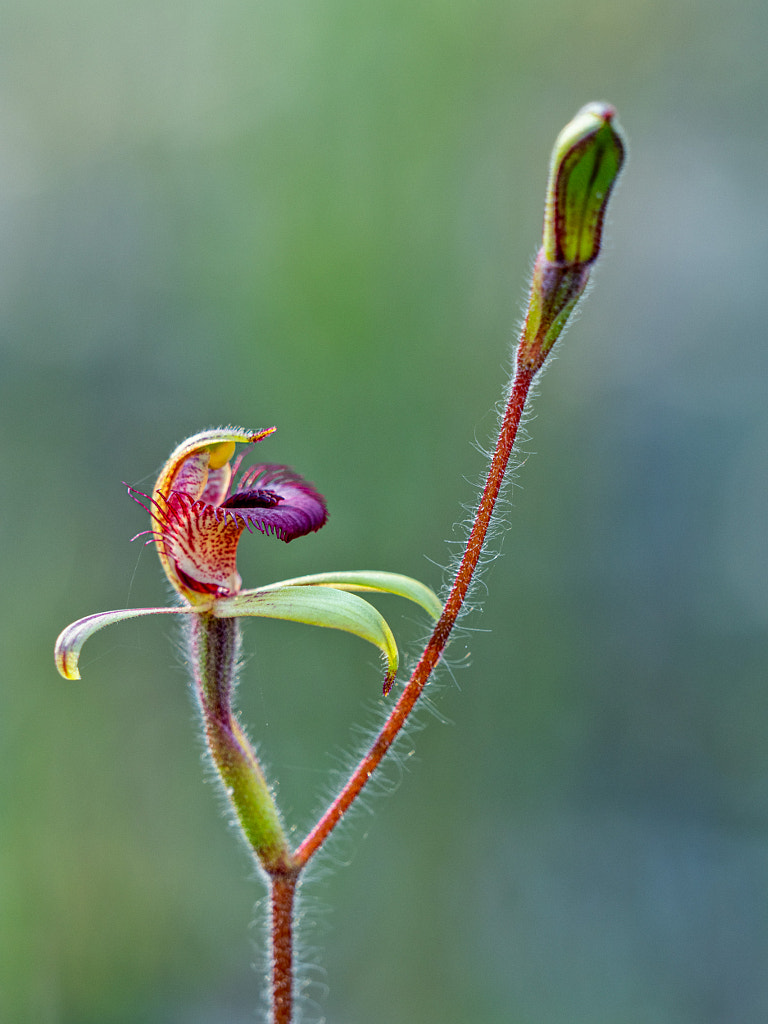
Fringed Mantis Orchid
Fringed Mantis Orchid, aka Green Spider Orchid, Caladenia falcata. Kweda.


Did I find what I was looking for? No. But, I did find a couple of species I’d not photographed before so it was worth the effort. I’m also hoping to visit again, and the nearby Lake Mears, looking for wildlife.


The title for this blog entry came from the song by Misty In Roots.


Prodigious Display

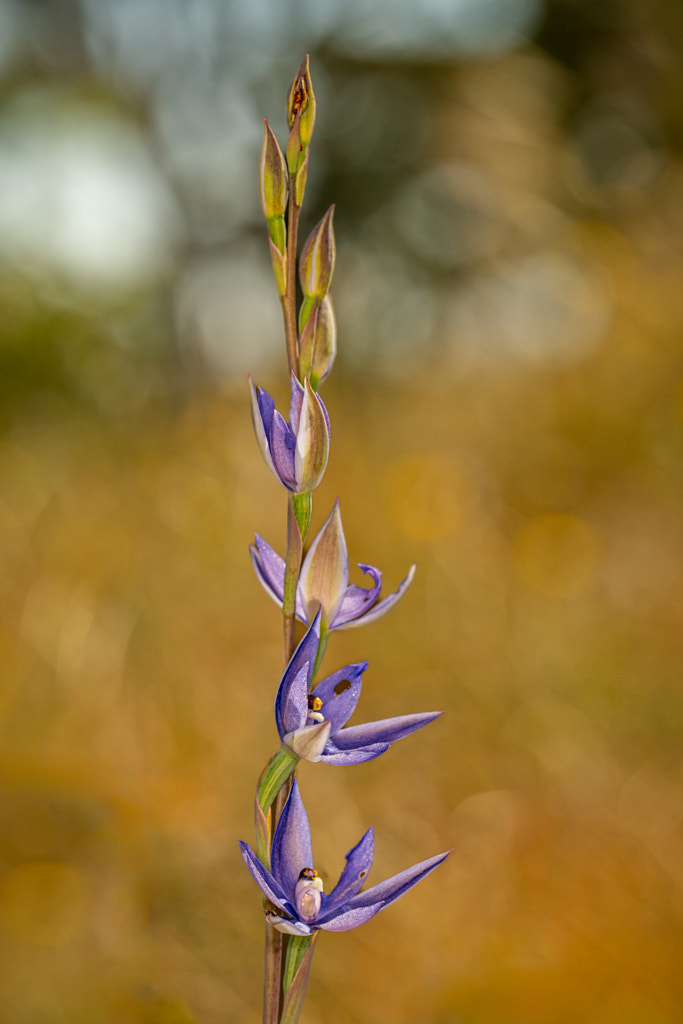
Up until this time last year I had only ever seen one leopard orchid (Thelymitra benthamiana). It is not that they are rare or hard to find, it’s just been that I’ve never been in the right place at the right time. The one I saw wasn’t at its best, but it made me very happy to see it. I went back to the same place last week and I was amazed to find not not one, not 10, but over a hundred of them. It was quite a spectacle. I’ve been saying how unseasonably warm it has been and dry the bush is, but obviously it suits leopard orchids. I was spoilt for choice as I wandered around looking for a good specimen with a good background that was sheltered from the wind.


Leopard Orchid by Paul Amyes on 500px.com

Leopard Orchid, Thelymitra benthamiana. Wandoo National Park, Western Australia.


Leopard Orchid by Paul Amyes on 500px.com

Leopard Orchid

The Best Of September

September has seen me wandering around Wandoo National Park’s lesser know areas photographing orchids.


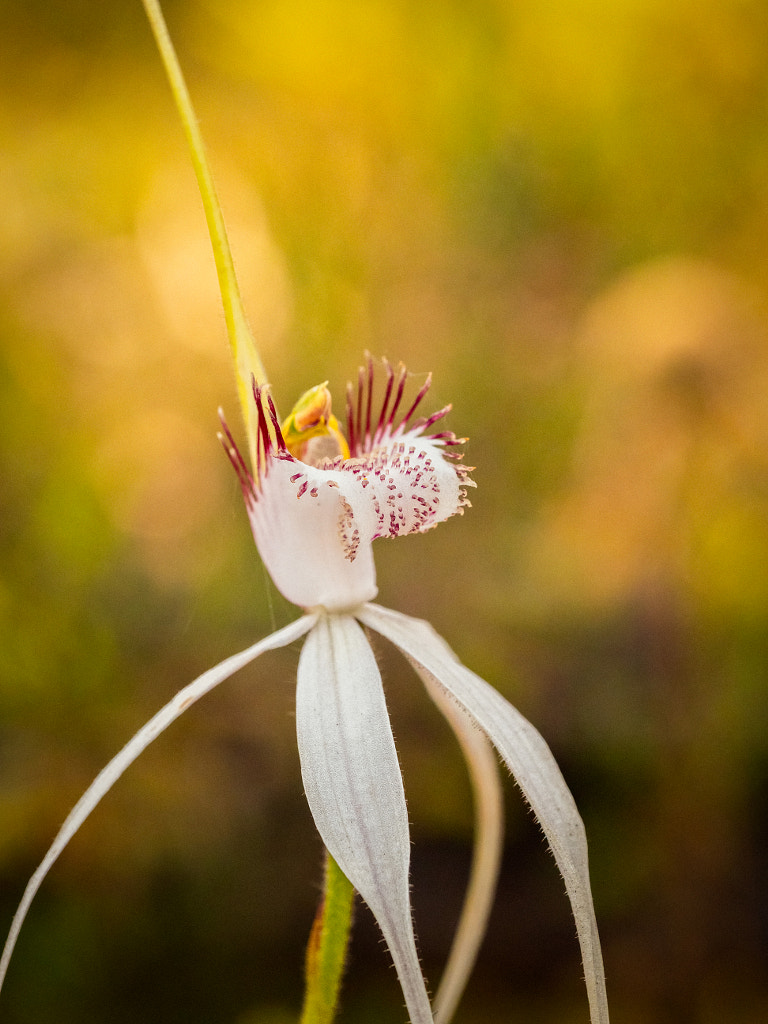
White Spider Orchid by Paul Amyes on 500px.com

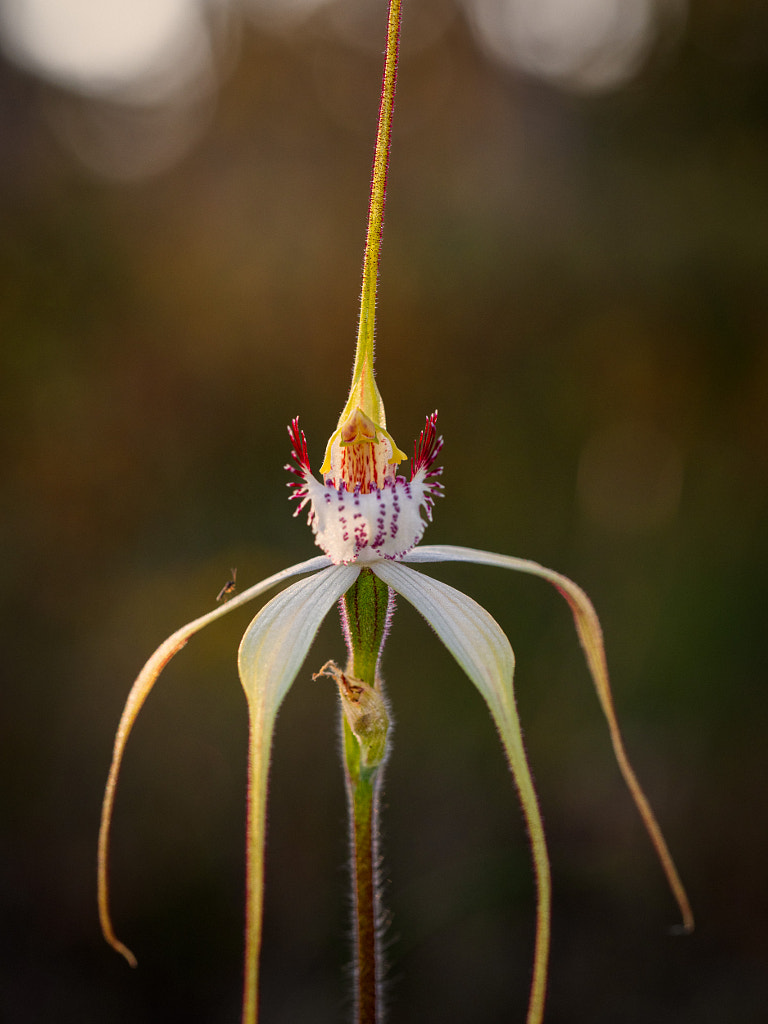
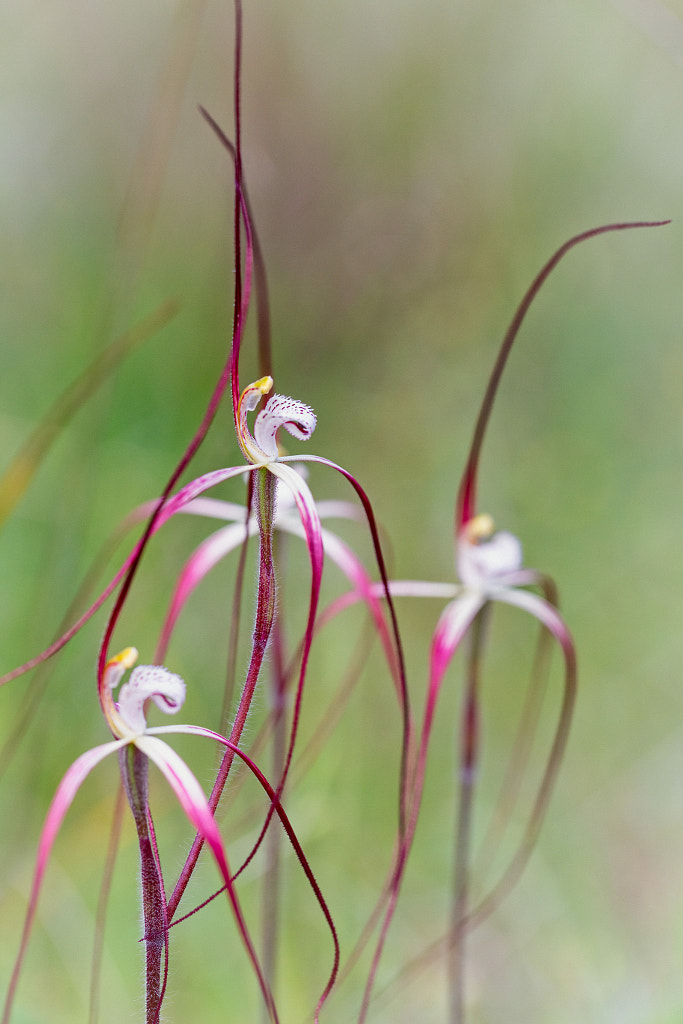
White Spider Orchid, Caladenia longicauda subsp longicauda.


Forest Mantis Orchid by Paul Amyes on 500px.com

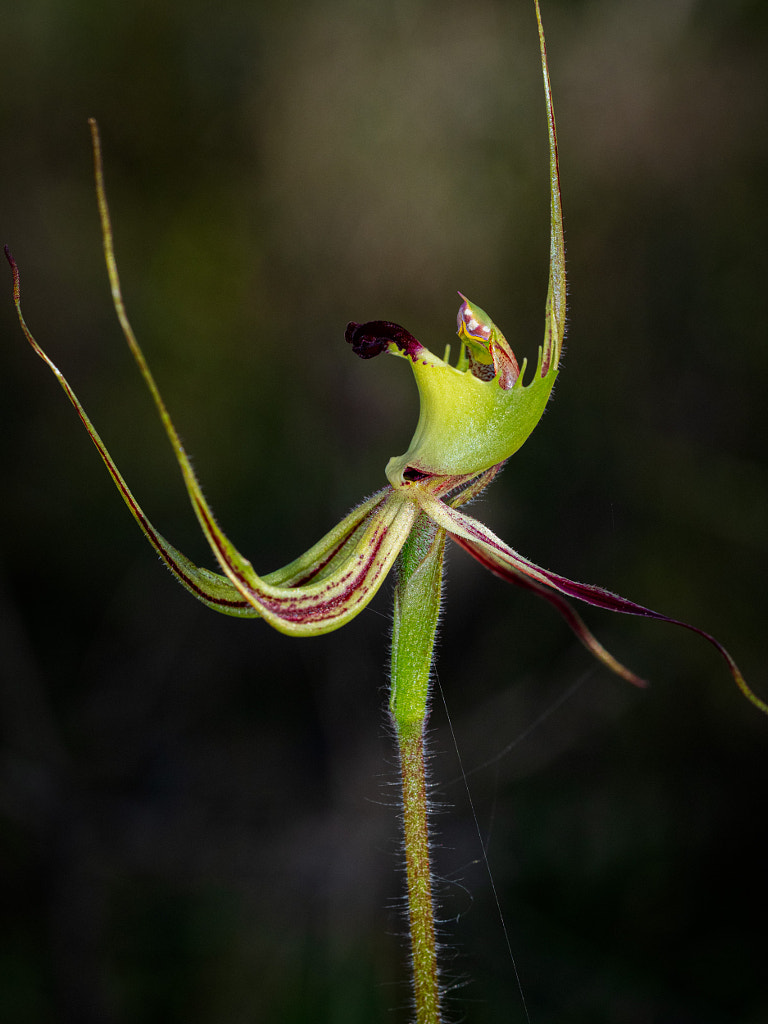
Forest Mantis Orchid or Green Spider Orchid (Caladenia falcata).


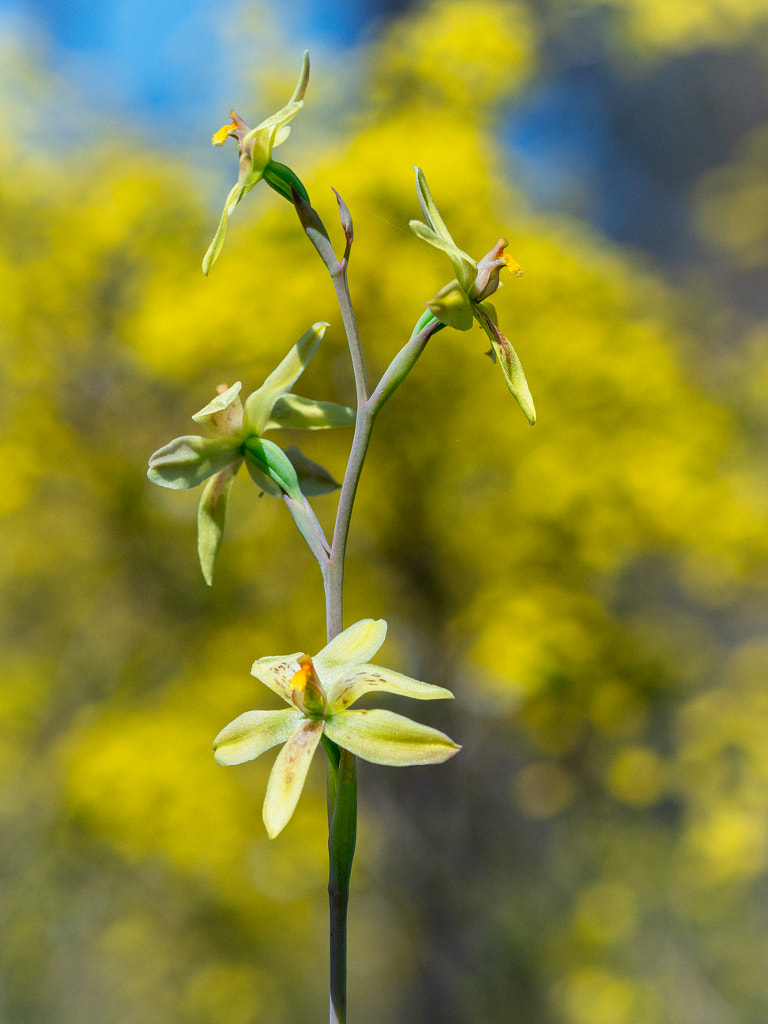
Lemon-Scented Sun Orchid by Paul Amyes on 500px.com
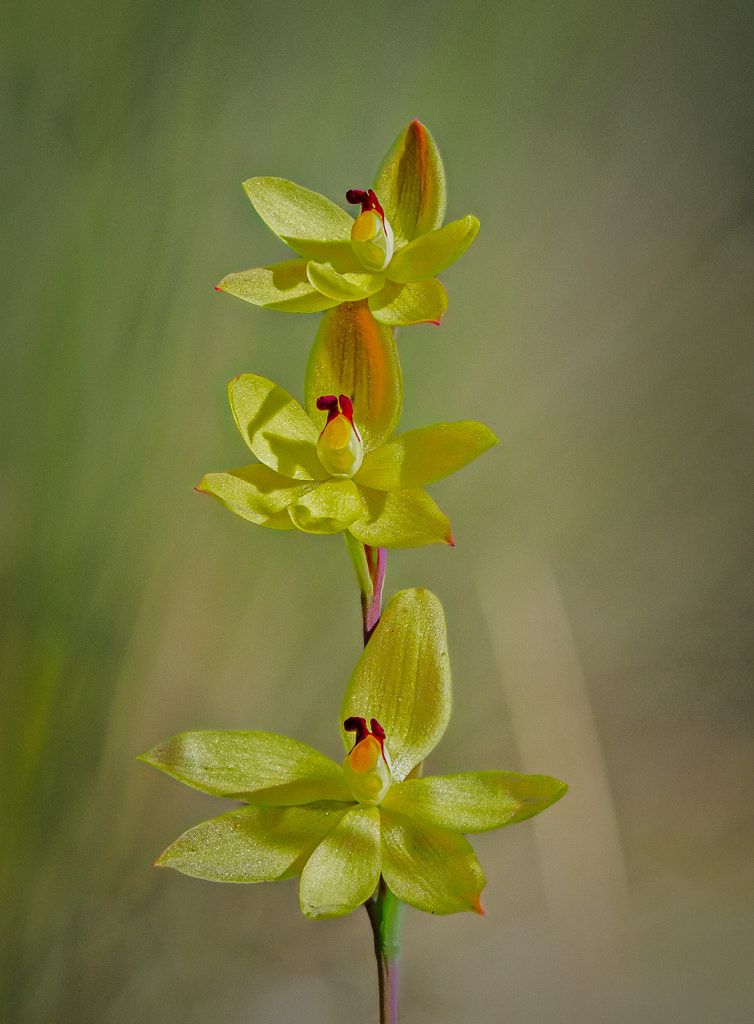
Lemon-Scented Sun Orchid or Vanilla Orchid (Thelymitra antennifera).


Talbot's Spider Orchid by Paul Amyes on 500px.com

Talbot’s Spider Orchid, Caladenia pendens subsp talbotii.


Dancing Spider Orchid by Paul Amyes on 500px.com

Dancing Spider Orchid, Caladenia discoidea.


Stark White Spider Orchid by Paul Amyes on 500px.com

Stark White Spider Orchid, Caladenia longicauda.


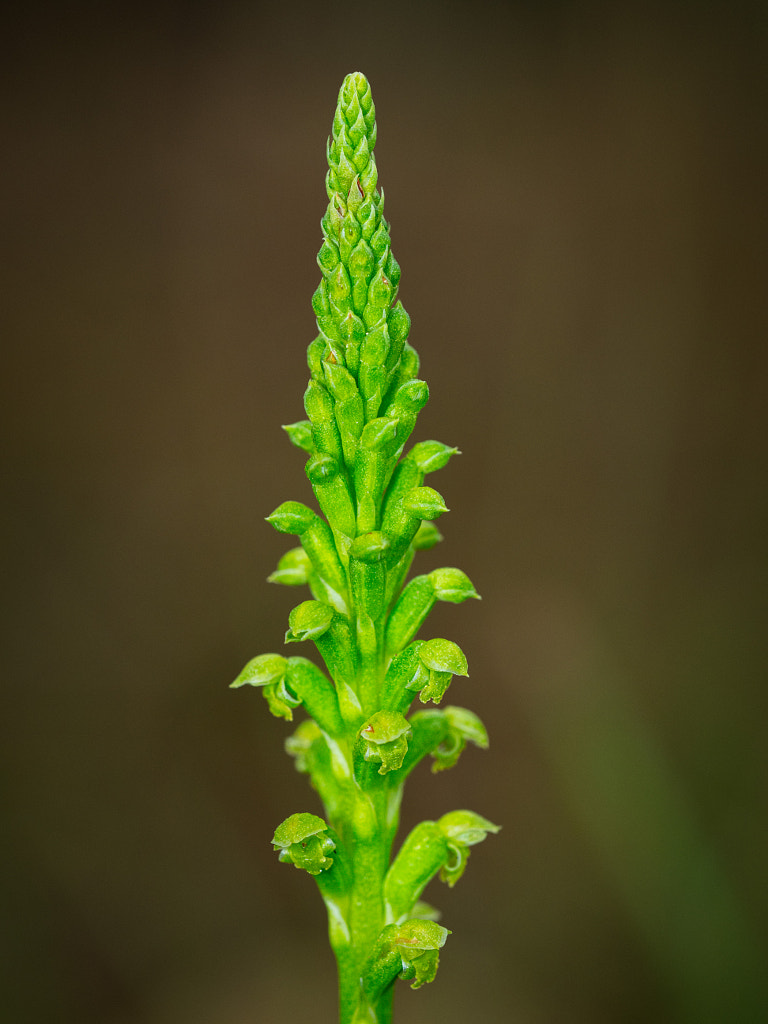
Common Mignnonette Orchid by Paul Amyes on 500px.com

Common Mignnonette Orchid, Microtis media subsp media.


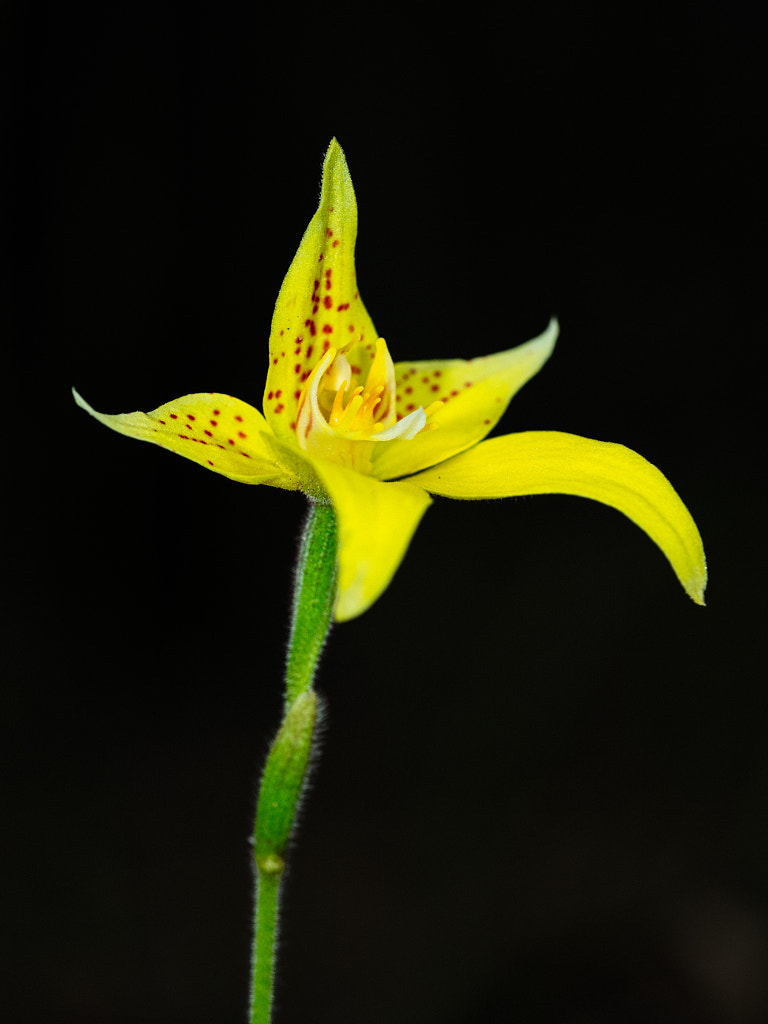
Cowslip Orchid by Paul Amyes on 500px.com
Cowslip Orchid, Caladenia flava subsp flava.


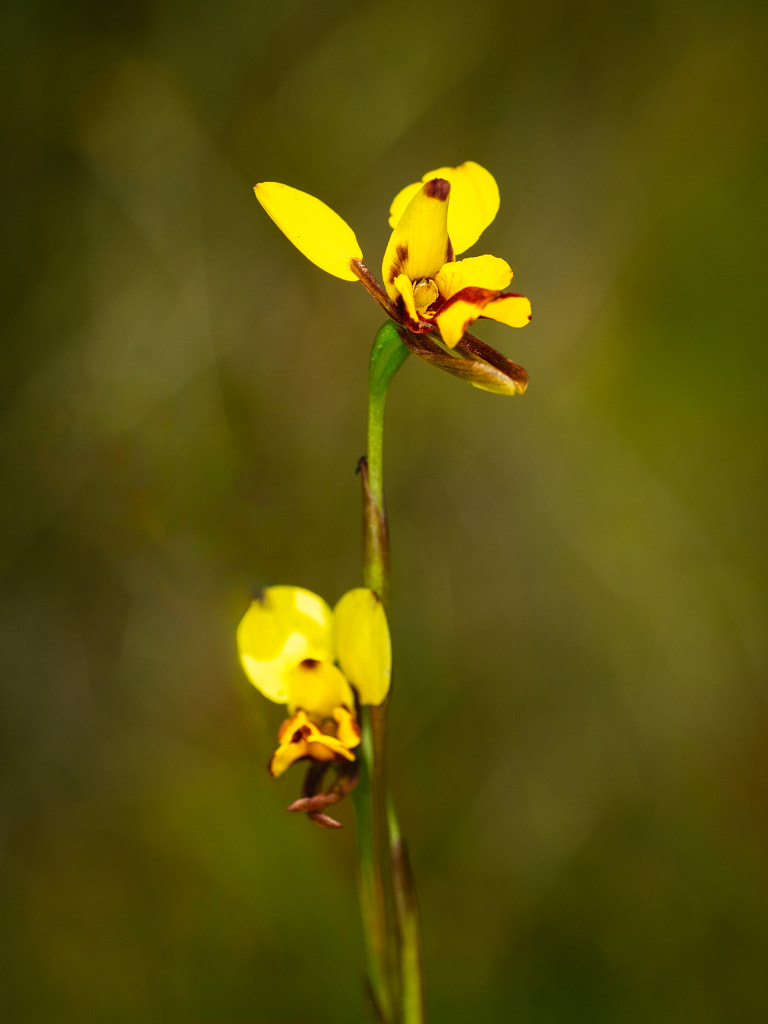
Common Bee Orchid by Paul Amyes on 500px.com

Common Bee Orchid, Diuris decrementum.


Custard Orchid by Paul Amyes on 500px.com

Custard Orchid, Thelymitra villosa.


Scented Sun Orchid, by Paul Amyes on 500px.com

Scented Sun Orchid, Thelymitra macrophylla


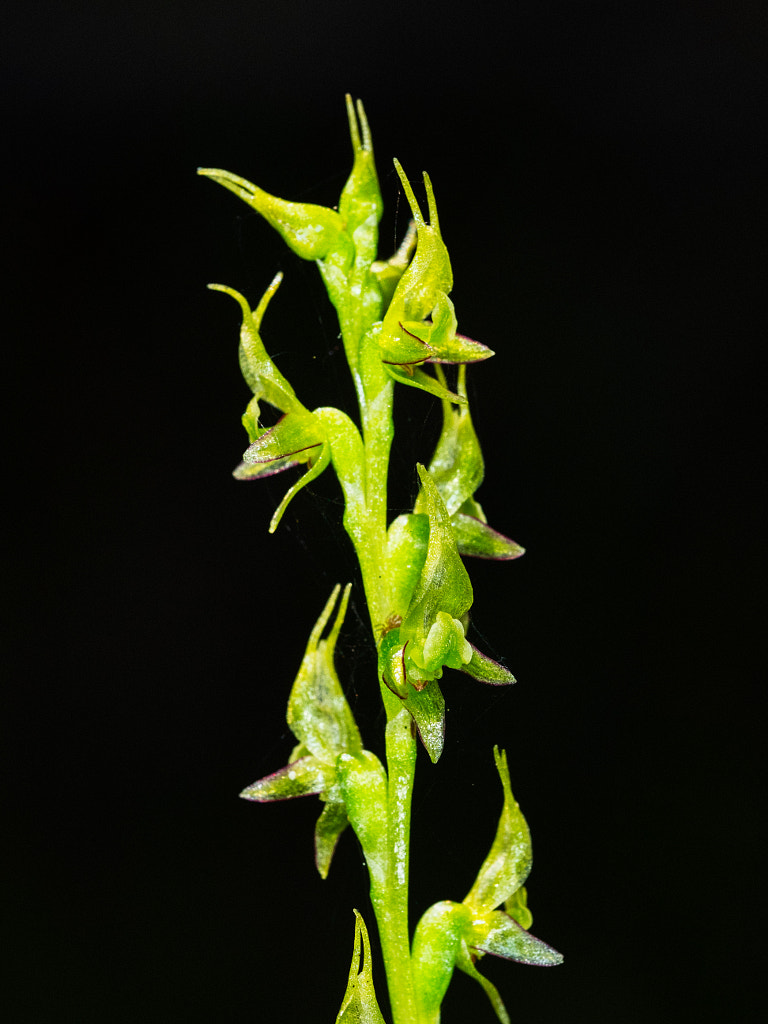
Little Laughing Leek Orchid by Paul Amyes on 500px.com

Little Laughing Leek Orchid, Prasophyllum gracile


Custard Orchid by Paul Amyes on 500px.com

Custard Orchid, Thelymitra villosa.


Splendid White Spider Orchid by Paul Amyes on 500px.com

Splendid White Spider Orchid, Caladenia splendens.


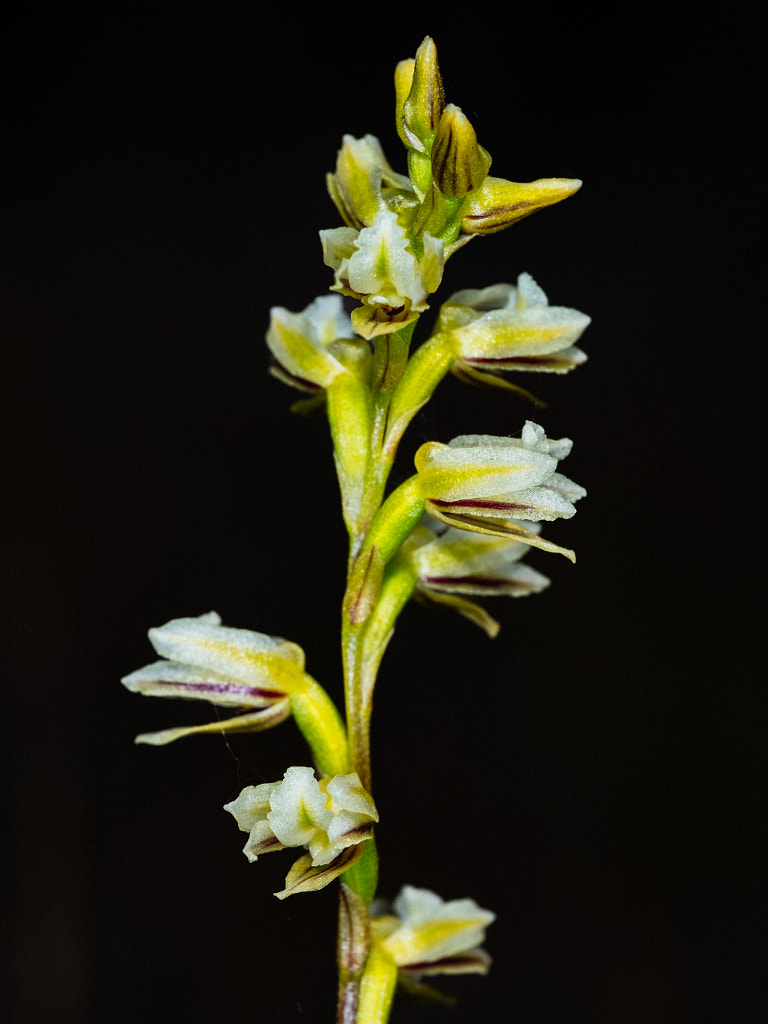
Pouched Leek Orchid by Paul Amyes on 500px.com

Pouched Leek Orchid, Prasophyllum cyphochilum.


Scented Sun Orchid by Paul Amyes on 500px.com

Scented Sun Orchid, Thelymitra macrophylla.


Forest Mantis Orchid by Paul Amyes on 500px.com

Green Spider Orchid or Forest Mantis Orchid (Caladenia attingens subsp attingens).


Winter Donkey Orchid by Paul Amyes on 500px.com

Winter Donkey Orchid, Diuris brumalis.


Chapman's Spider Orchid by Paul Amyes on 500px.com

Chapman’s Spider Orchid, Caladenia chapmanii.

A Strange August

Winter Donkey Orchid by Paul Amyes on 500px.com
Winter donkey orchid, Diuris brumalis.


It’s been a strange August. From my blog entries you’d think that it has been a very wet winter, but the reality is that it has been very little rain and the bush is very dry – almost crispy. It has has a tremendous impact on the wildflowers – there aren’t as many as the previous few years. This is causing problems for the tourist industry with some interstate and overseas tourists getting upset.

Dark Banded Greenhood by Paul Amyes on 500px.com
Dark banded greenhood, Pterostylis sanguinea.


Locally it has been very strange. Some species of orchid didn’t flower at all while some flowered 6-8 weeks earlier than normal as the winter as well as being dry has been warmer than normal. This last month I’ve been concentrating on the bush reserves around York and particularly those I’ve never been to. It’s quite boggling to think that after almost 20 years of living in the area I still haven’t visited all the reserves. The pictures accompanying this piece are some of the ones I’ve taken in August.


Lemon Scented Sun Orchid by Paul Amyes on 500px.com
Lemon Scented Sun Orchid or vanilla orchid (Thelymitra antennifera).


One of the most disturbing things this year is the impact of orchid tourism. Usually the reserves around York receive a fraction of the visitors that other orchid hotspots do, but with high petrol prices more and more people are now restricting their days out to those areas an hours drive from Perth. Having more visitors isn’t bad in and of itself. What is bad is the deterioration in people’s behaviour. The amount of litter left in some spots is huge. Another thing is that people aren’t prepared to walk to sites and so drive off the tracks to look for flowers causing a lot of damage. The worst thing is that people are now digging up the orchids. On Friday 25th August I went out to photograph Curly Locks orchids in the Wandoo National Park. I found six in three separate clumps. The flowers hadn’t fully opened so I decided to go back in a couple of days time. The following Tuesday I went back and all three clumps had been dug up. I tried to report it but was told it was a kangaroo that did it, but in my experience kangaroos don’t dig perfectly square holes with spades, and nor do they smoke cigarettes while they do it and leave behind their water bottle.
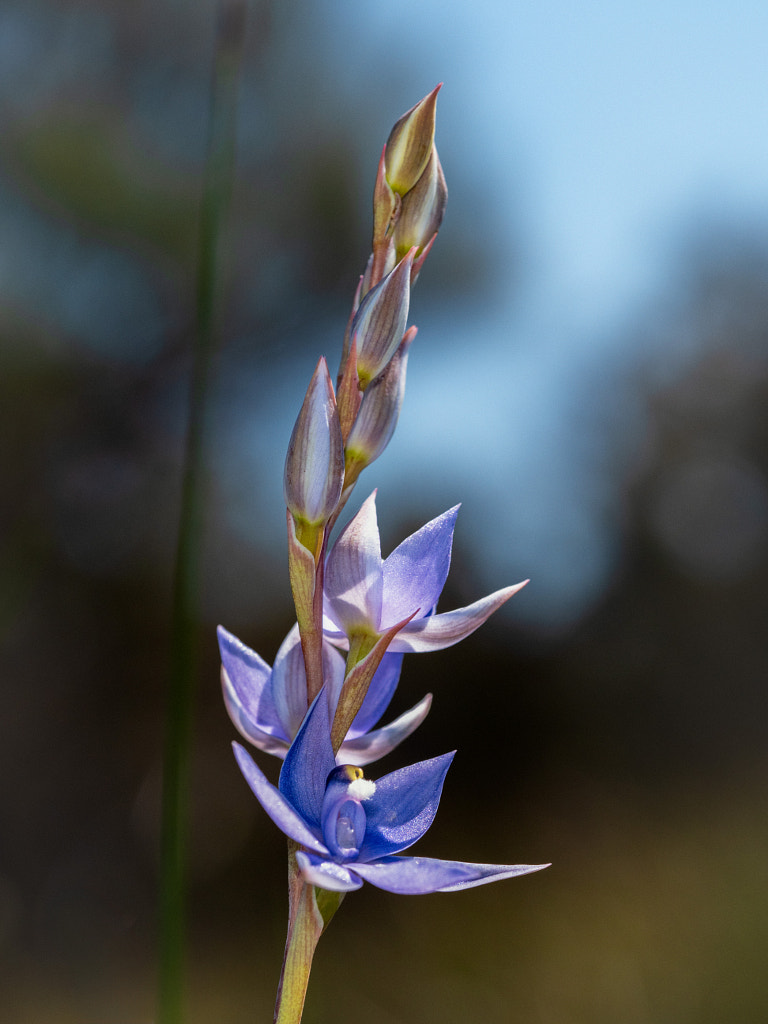
 

Jug Orchid by Paul Amyes on 500px.com
Jug Orchid or Recurved Shell Orchid (Pterostylis recurva).


Orchid poaching is a big problem. Earlier this year Kings Park in Perth had nine hundred rare species of Western Australian orchids stolen. It seems that there people afflicted by orchidelirium a kind of flower-driven madness where people just have to own the rarest of the orchid species. It is a growing problem and only the other day I was approached by a man in his early 70’s claiming to be a friend of a noted Western Australian expert and that he was prepared to sell me orchid tubers for $40 a tuber. I told him in no uncertain terms where to go. The frustrating thing about this is that a lot of the orchid species are very specialised requiring certain other plants and pollinating insects to survive. Without these they die. In the case of the Curly Locks I know of only three sites where they can be found round York and at best there are only half a dozen flowering plants at each site per year. Wiping out one locations population like that means that is one less place where they can be found, which means extinction is even closer.


Bird Orchid by Paul Amyes on 500px.com
Bird Orchid, Pterostylis barbata


I’m sorry for the rant but the whole thing was a little upsetting and I’m not sure what was worse, the theft, the indifference of the authorities, or the brazenness of people trying to sell the orchids.


Clubbed Spider Orchid by Paul Amyes on 500px.com
Clubbed Spider Orchid, Caladenia longiclavata.


Fringed Mantis Orchid by Paul Amyes on 500px.com
Fringed Mantis Orchid or Green Spider Orchid (Caladenia falcata).


Chapman's Spider Orchid by Paul Amyes on 500px.com
Chapman’s Spider Orchid, Caladenia chapmanii.

Work It Baby!!


The other week I had the privilege of being asked to judge one of Mundaring Camera Club’s monthly competitions. It was a great experience and I really enjoyed looking at all the wonderful photos that had been entered. At one point when looking a shot of a flower I made my oft said statement shoot photos of flowers like they are a portrait of a person. So what do I actually mean by that? After a couple of weeks thought – I’m not the quickest! – I’ve decided to actually write it down.

The following four shots are all photos of the same Winter Donkey Orchid – it’s nothing special it’s just a plant I found the other day. But they do illustrate how I approach each subject.

Winter donkey orchid, Diuris brumalis. Woottating, Western Australia.

The first is the establishing shot, an environmental portrait. It shows the plant in situ and how it relates to bush around it.


Winter Donkey Orchid by Paul Amyes on 500px.com
The first of the mid length portraits.


Winter Donkey Orchid by Paul Amyes on 500px.com
The second mid length shot done with the macro lens and flash. It creates a very different looking picture when compared with first one.


The next two are mid length shots. Two different techniques are used to try and produce the same effect. One is a single shot taken with a macro lens and flash, the other is done with a long telephoto lens as a focus stack. The aim is produce a shot with a nice clean back ground.


Winter Donkey Orchid by Paul Amyes on 500px.com
The tight “head” shot.


The fourth shot is a close up portrait – a head and shoulders if you like – to reveal some of the characteristics of the flower.

It is how I work the subject. Unlike Austin Powers I’m not asking the flower to be a tiger, but, what I am doing is taking a series of photos from different angles to bring out the best in the subject.

As an aside the clip of Austin Powers is its self a parody of another famous screen photographer – the protagonist of Michelangelo Antonioni’s masterpiece ‘Blowup’. I certainly don’t behave like David Hemmings’ character did when photographing Veruschka von Lehndorff in the film. That would be a bit strange.