Birds On A Budget

The title is really an exercise in alliteration. It really should be “Can You Do Wildlife Photography On A Limited Budget?”, but that’s not as catchy or succinct. I used to think it was impossible. I thought to be a wildlife photographer you needed deep pockets to be able to afford the cameras and lenses. The photo review sites would have you believe that you need to drop unto $10K AUD on a camera body and up to $24K AUD on a lens to be in with a chance of taking a decent photo. Then you had to have the wonga to be able to travel to Africa, Antartica etc to actually find animals worthy of being photographed. About twenty years ago my sister tried to encourage me to enter the BBC Wildlife Photographer Of The Year competition my response was that I didn’t have the money for the equipment let alone alone being able to travel to a suitable location.


Richard and Cherry Kearton photographing a birds nest.


Twenty years later my views have radically changed. What changed them was the confluence of learning about two of the pioneers of wildlife photography and the digital camera revolution. The photographers were Cherry Kearton (1871-1927) and his brother Richard (1862-1928) the naturalist and writer. They were very early pioneers of wildlife photography and they published the first natural history book entirely illustrated with wild photographs in 1895. Their 1898 book “With Nature And A Camera: being the adventures of a field naturalist and an animal photographer” illustrated with 160 photos was a best seller and inspired many people to become wildlife photographers. A very young David Attenborough attended one of their film lectures and in an interview to The Guardian Newspaper said “It captured my imagination and made me dream of travelling to far-off places to film wild animals.” (Vidal, J; The Guardian 4th December 2021).  In their book the two brothers list what it takes to be a wildlife photographer:

“The great points about successful natural history photography are: the possession of suitable apparatus to work with, an aptitude for taking care in stalking timid creatures and plenty of patience and determination to wait for and get what is wanted in spite of obstacles.”

p.334 Kearton, R and Kearton, C; With Nature and a Camera, 1898, Cassel, London.
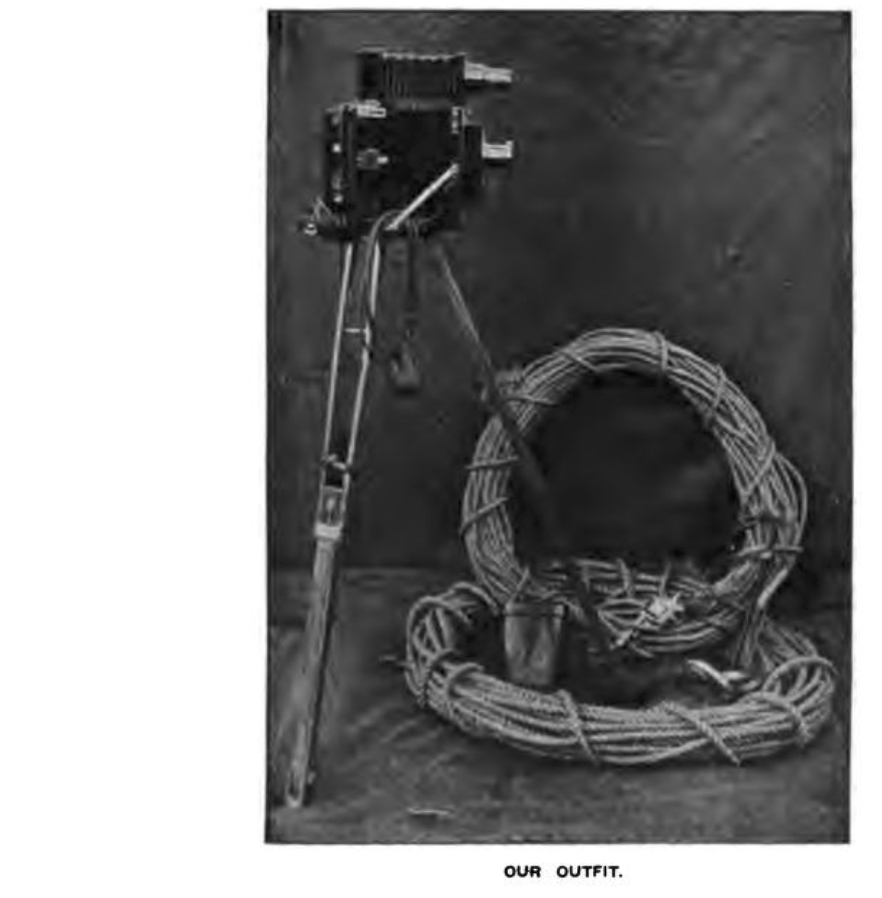
 

The “suitable apparatus” was a half plate (4¾ × 6½ in or 120mm × 165mm) Dallmeyer camera with a pneumatically controlled silent shutter for still subjects and a large quantity of hemp rope for scaling cliffs.


The “suitable apparatus” was a half plate (4¾ × 6½ in or 120mm × 165mm) Dallmeyer camera with a pneumatically controlled silent shutter for still subjects and miniature plate camera (probably 3 1/4” x 4 1/4” glass plates with a 5 1/4” f8 lens) for birds in flight. There was no autofocus with bird recognition AI. No 40 fps. Nothing under 4Kg in weight and certainly no endless digital images on a memory card. The plates had a sensitivity of 2 to 25 ISO. They’d be lucky to carry a dozen glass plates and take one picture every 2 minutes. They initially started just photographing the fauna of their native Yorkshire in their days off often sleeping in hedges or barns. No luxury safaris with 5 star accommodation and the convenience of modern jet travel.


No memory cards giving unlimited shooting for the Keaton’s. This is a box of Ilford photographic glass plates.


The digital camera revolution has meant for the last twenty years camera and lens manufactures have brought out new products with amazing technological innovations every year. This has meant that the second hand market has been flooded with equipment as photographers unload their “obsolete” stuff so they can buy the new stuff only to do the same 12 months later. This now means that there is a wealth of extremely capable second hand equipment out there to suit every budget.
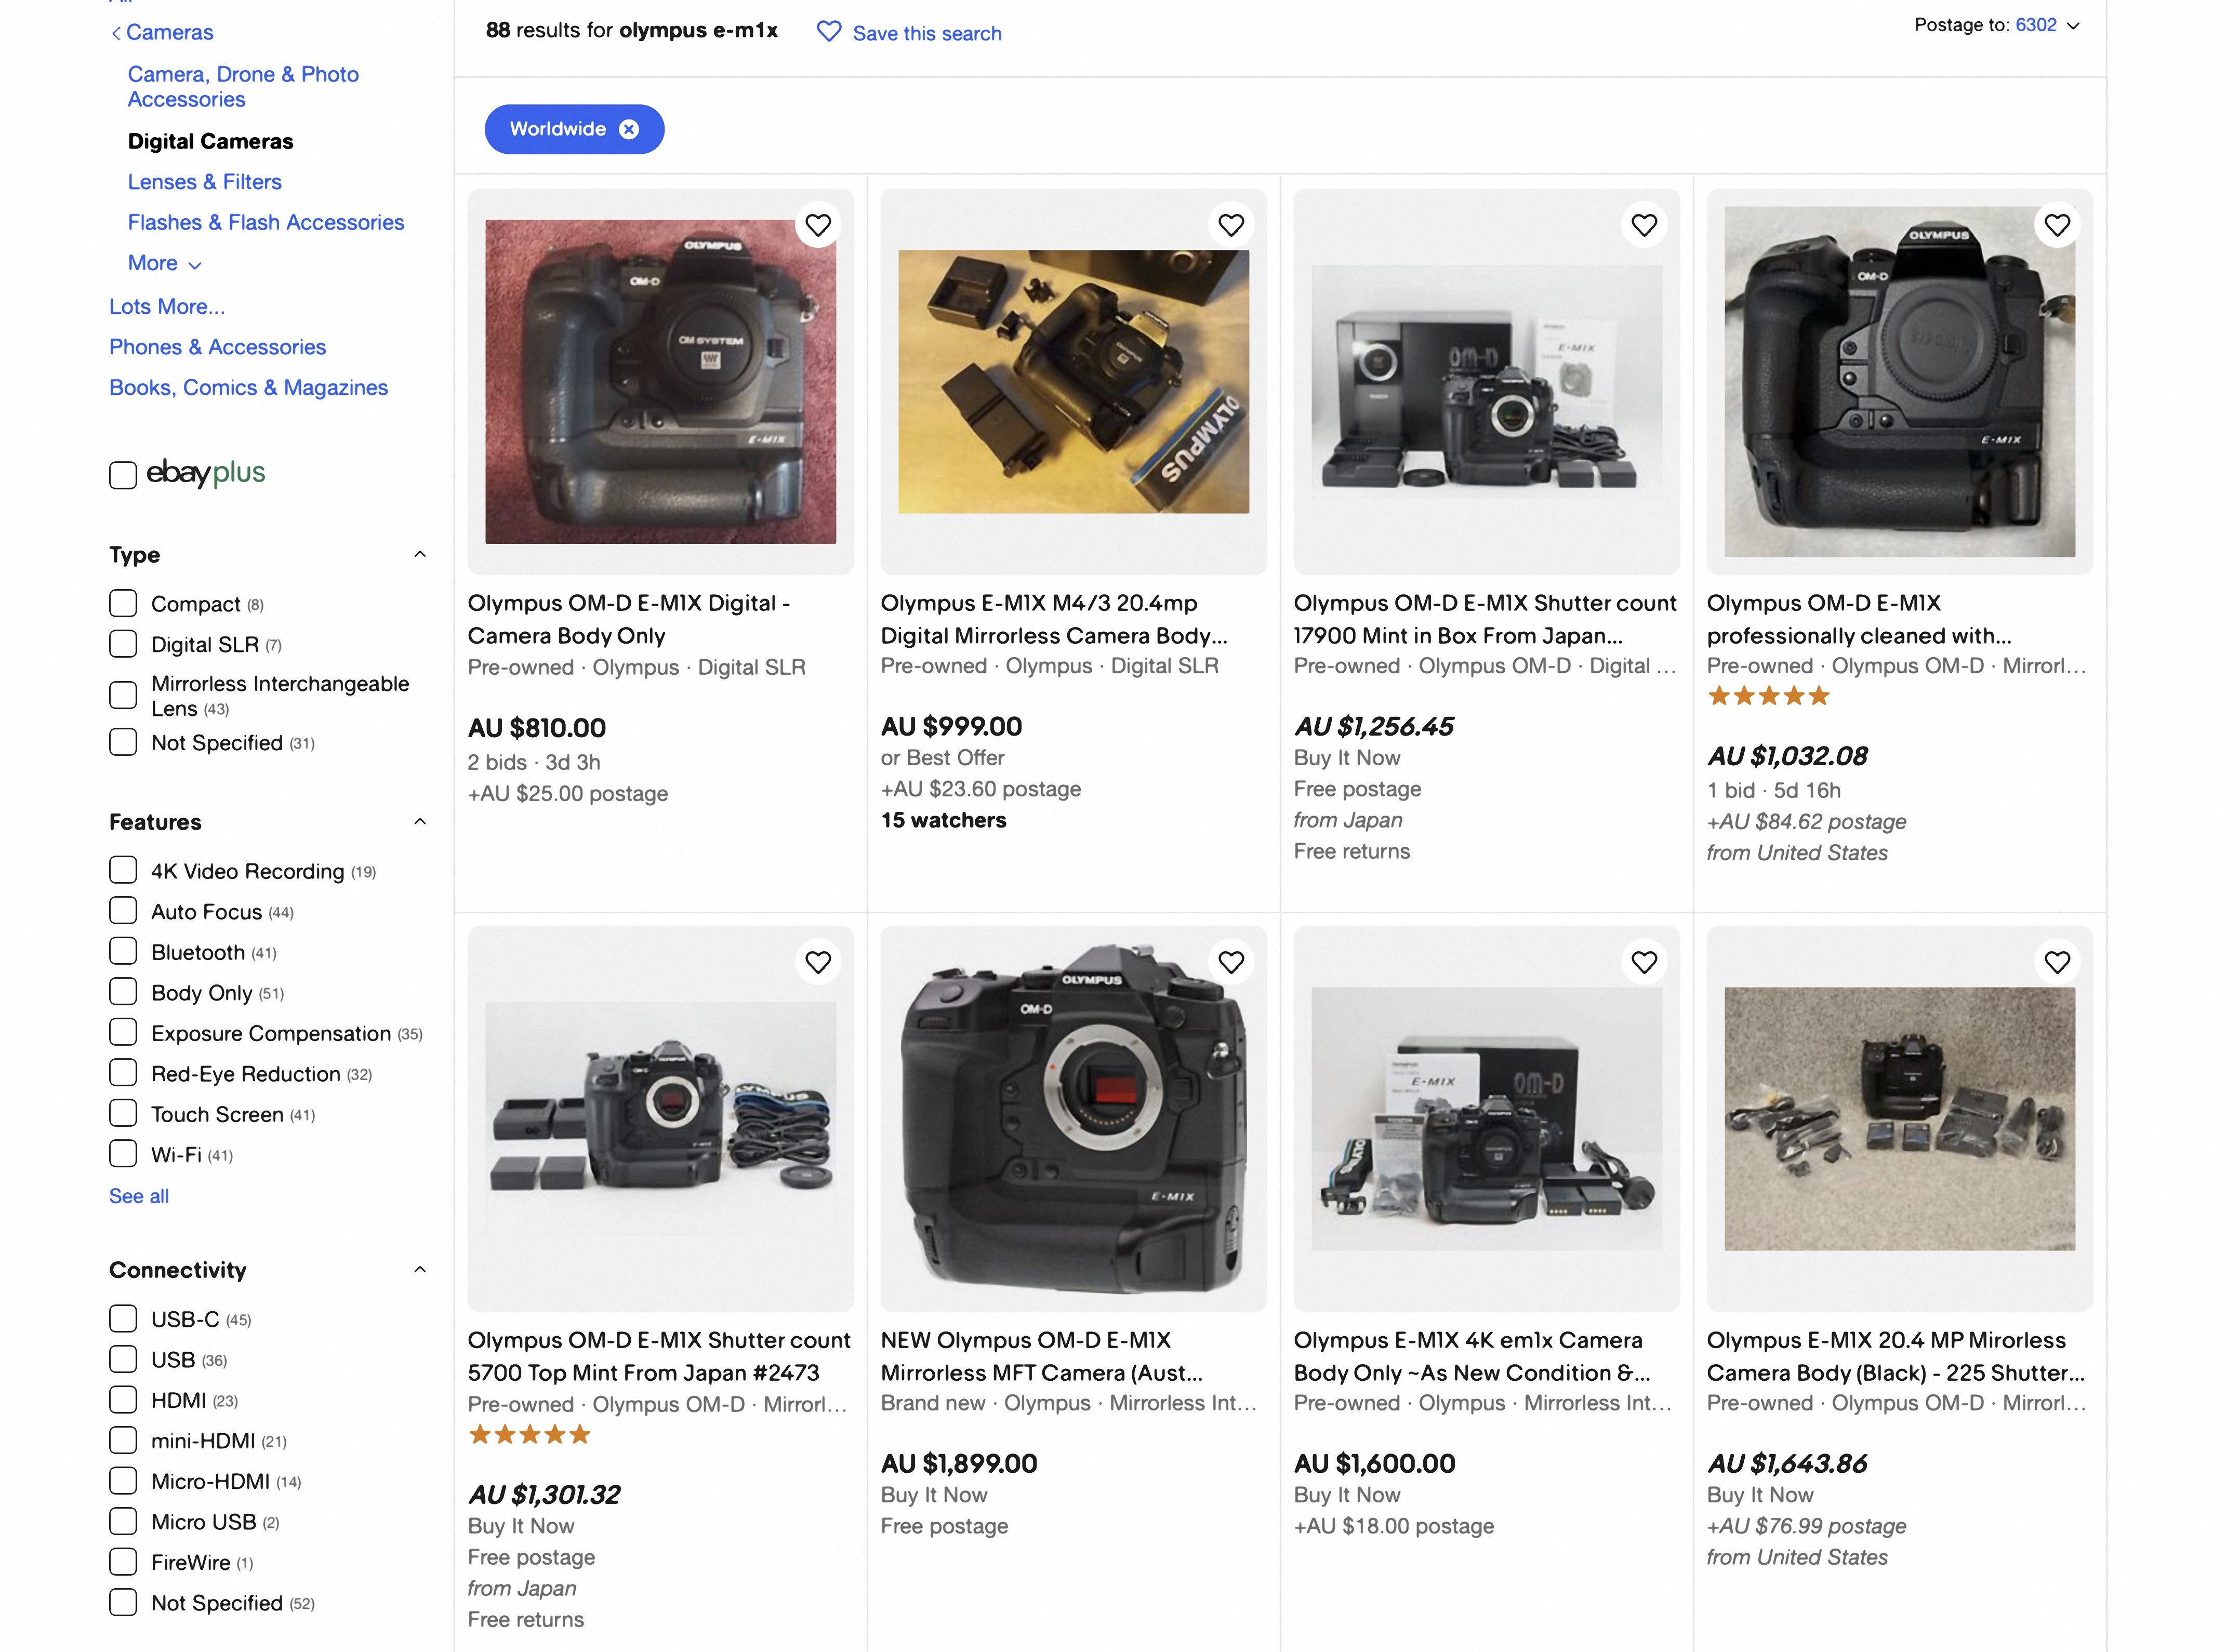
 

Advances in in digital photographic technology has meant that there is a plethora of second hand equipment for sale.


TLDR


Needs Versus Wants

This is quite important as it will help us decide on equipment and set a budget. For instance if all you want to do is post some photos on social media then pretty well any interchangeable lens DSLR or mirrorless camera released in the last 20 years will suffice. If you want to print photos up to A3 in size then a 12Mp camera is adequate. If HD video and 4K video are important then that sets another parameter. It’s nice to day dream about having top of the line equipment such as a Sony A1 and a Sony 600mm f4 lens, but that combination will set you back $27000 AUD new and won’t be had for thrift shop prices second hand. But, say you want to print up to A3 it is possible with a bit of careful shopping on EBay or GumTree to get a DSLR with an APSC sized sensor and a 75-300mm lens for less than  $500 AUD second hand.

I basically find that deciding on the lens is the most important part of the exercise and you really should aim to put most of your budget to that. So what are we looking for?


Sensor size Full frame (36x24mm) APSC (23.6 x 15.7mm or 22.2 x 14.8mm [Canon cameras only]) Micro Four Thirds (17.3 x 13mm)
Minimum Focal length 400mm 300mm  300mm
Best Case Scenario 600mm 600mm 400mm


The focal length will determine how close you need to get to your subject. The shorter the focal length the closer you will have to get. Having said that a shorter focal length is not a handicap because you’ll have to learn bushcraft so you can approach animals and that is a very good skill to have in this game and it’ll also stand you in good stead if you get a longer lens later on down the track. 

You can use zoom lenses or primes. A prime lens is a fixed focal length, whereas a zoom lens  covers a range of focal lengths such as 75-300mm, or 100-400, or 150-600mm. In theory a prime lens will give better image quality and have a larger maximum aperture value which will let more light in. The down sides are that primes are usually more expensive and being a fixed focal length means that if your subject gets too close (it does happen more often that you’d think) you won’t be able to take a picture. Zooms offer flexibility in that you’re not stuck at one focal length, but the trade off is that they’re not as optically good as primes at the cheaper end and the maximum aperture value isn’t as great meaning that you may have to stop shooting as the light goes down.


A comparison of the common camera sensor sizes.


Now as soon as you tell another photographer what you’re planning to do they will inevitably tell you that you should get a camera with a full frame sensor as you’ll get a whole heap of benefits over the other smaller sensors. Now if we just content ourselves with reading spec sheets maybe, but out in the real world other things come into play. You want to photograph a bird that is 20cm long and fill the frame with it, so that’ll mean getting 5m away from it. To do that with a full frame camera you’ll need a focal length of 800mm, with an APSC camera 600mm and with a micro four thirds camera 400mm. There is a magnification factor when comparing the focal lengths on the different sensor sizes. It is x1.5 (or 1.6 for Canon) for APSC and x2 for micro four thirds. We’ll look at this comparing three common focal length ranges for the three sensor sizes.


75-300mm 100-400mm 150-600mm
Full Frame (36x24mm) 75-300mm 100-400mm 150-600mm
APSC (23.6 x 15.7mm)

(22.2 x 14.8mm Canon cameras)

112-450mm full frame equivalent

120-480mm full frame equivalent when used on a Canon APSC camera

150-600mm full frame equivalent

160-640mm full frame equivalent when used on a Canon APSC camera

225-900mm full frame equivalent

240-960mm full frame equivalent when used on a Canon APSC camera

Micro Four Thirds (17.3 x 13mm) 150-600mm full frame equivalent 200-800mm full frame equivalent 300-1200mm full frame equivalent


So a smaller sensor will mean you don’t need very long lenses and that is good because they are expensive. Shorter lenses have the advantage of being lighter which is good when carrying stuff in the bush.


Canon EOS 300d
Canon EOS 300d body with Canon EF 75-300mm f4-5.6 IS lens.


I started my nature photography using a Canon EOS 300d with a Canon EF 75-300mm lens. The camera has an APSC sensor so that gave me almost enough reach to fill frame with my 20cm bird at 5m. It did me well until I decided that I wanted to invest more into the hobby. So if your budget is really tight I would recommend getting either a Canon of Nikon APSC camera and a 75-300mm lens as the bare minimum, and we’ll look at what’s available a bit later on.
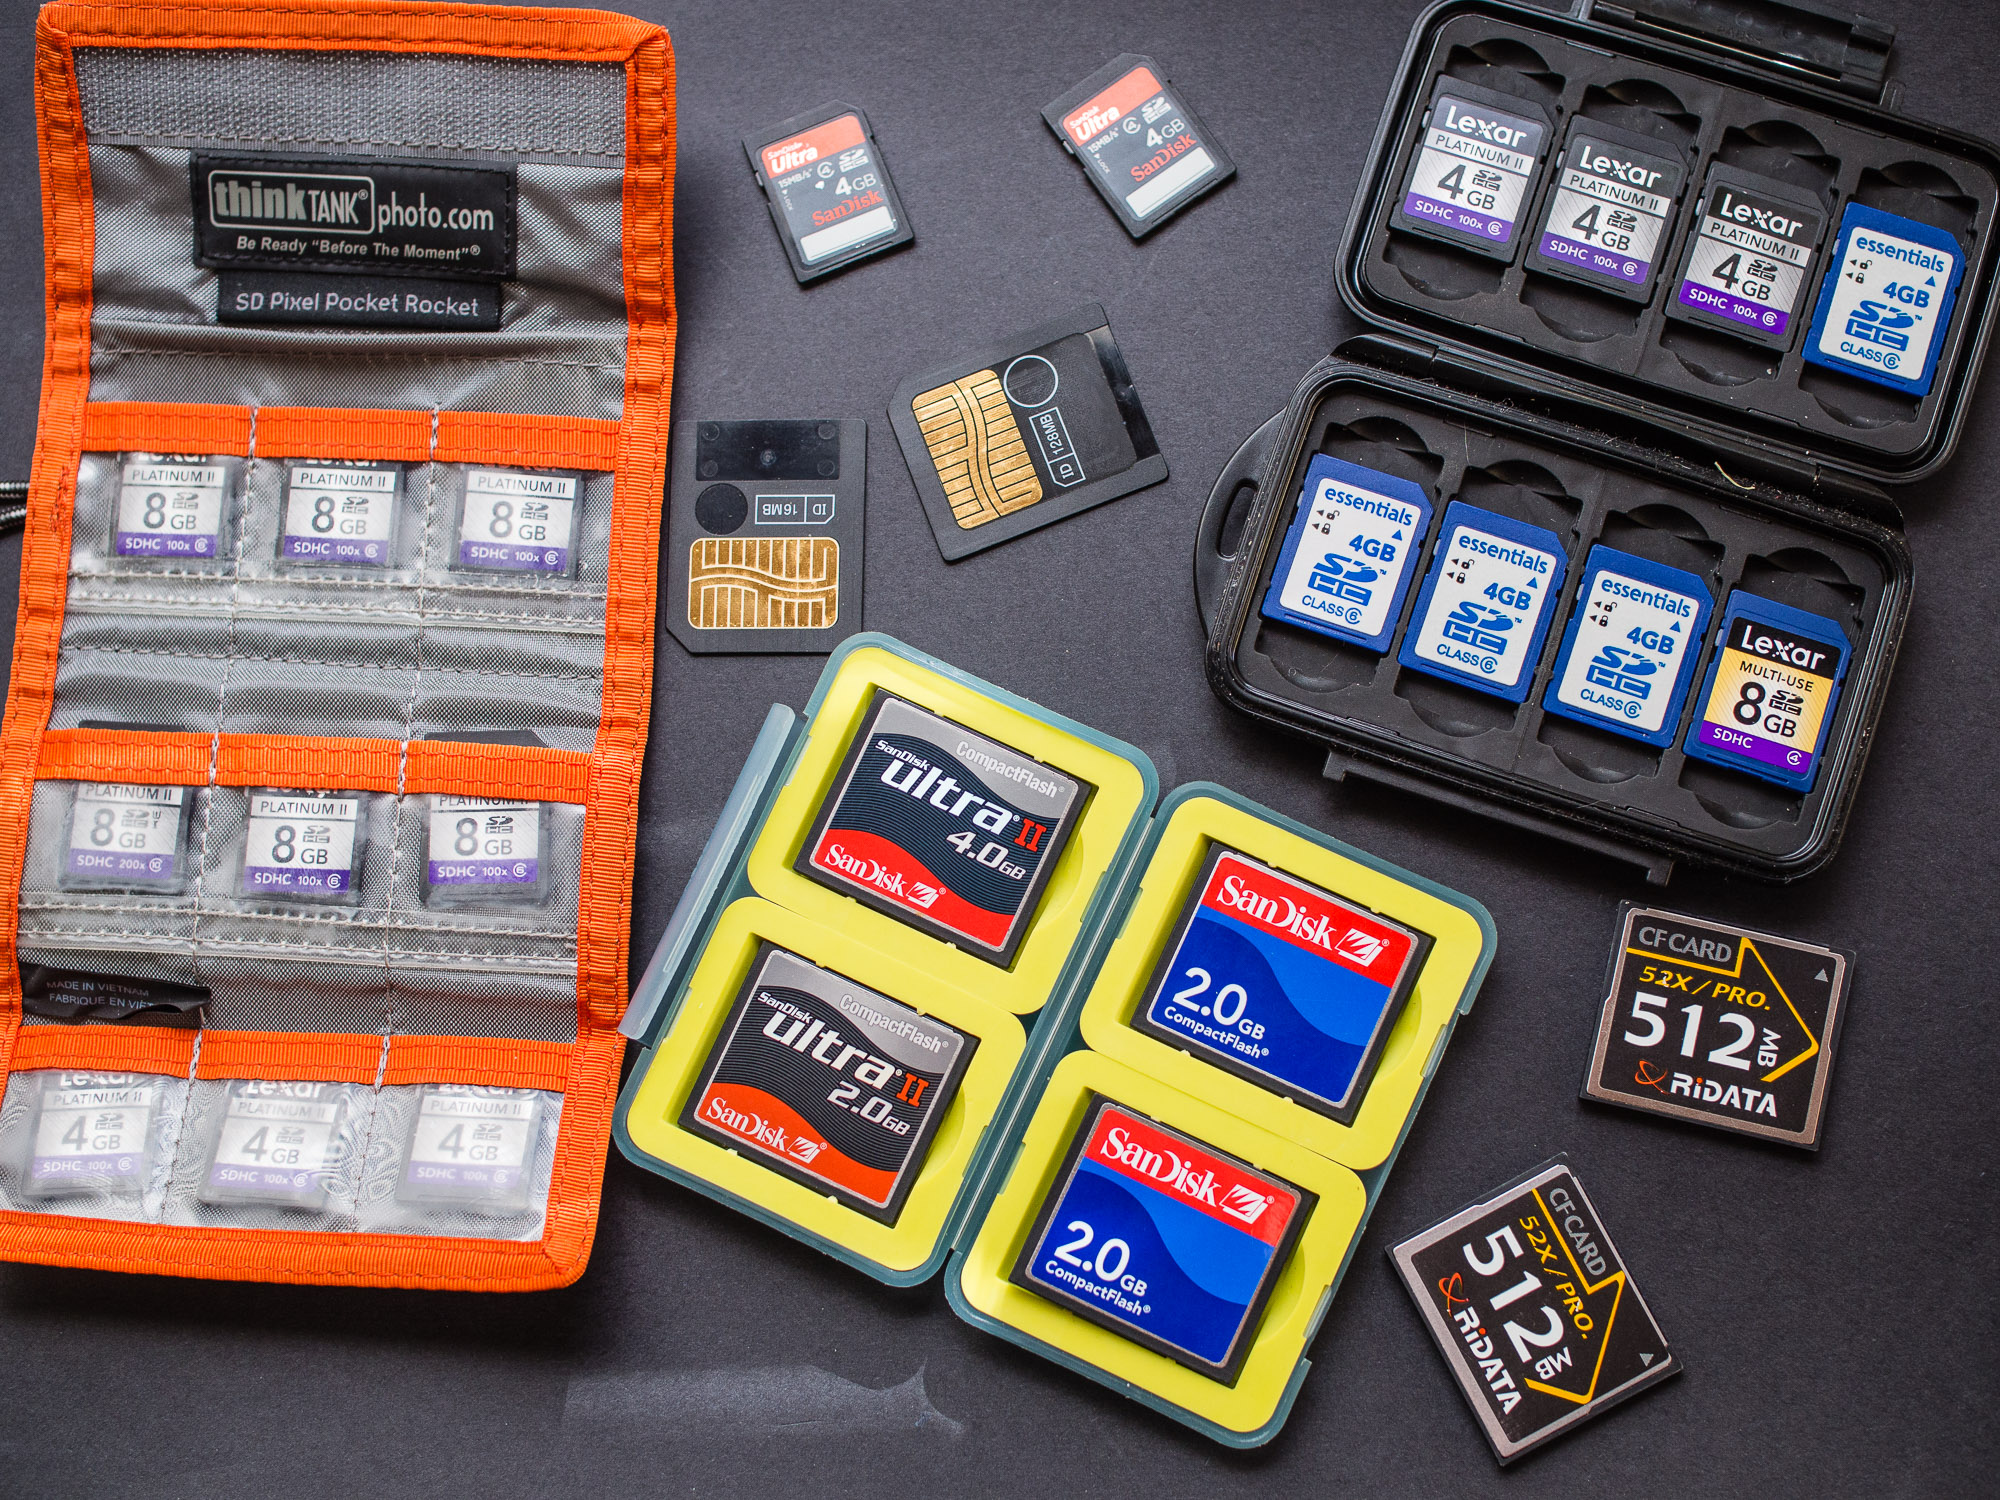
 

Memory cards are now very cheap. Develop a strategy for keeping them safe while working in the field.


The other thing to consider is that when you buy a camera and lens you also have to budget for batteries and memory cards. First things first; when looking at memory cards over the last 20-25 years there have been roughly ten types of memory card and many of them have gone obsolete so when buying a camera I would suggest that buying one with a commonly available card such as Secure Digital Card or SD Card. Similarly with batteries, make sure batteries are easily obtainable. With both cards and batteries try to buy the best you can afford and I’ll expand on this a bit further later on. Buying second hand also means that there is a chance where you’ll be able to buy the camera with spare batteries, a memory card, strap and possibly some form of bag as a package. Just make sure you’re getting things you actually want and are not paying more than if you to buy each item separately.

All the cameras I’ll be talking about are cameras I’ve owned or used. They’re not recommendations they are to give an idea of what’s about and where possible I’ll suggest equivalent models from other manufacturers.


Bargin Basement

You’ve got next to no money. OK a bit of a draw back, but not insurmountable. Back in the dim dark days of digital photography there existed a class of camera that you don’t hear much about now – the bridge camera. They are a cross between a point and shoot compact and an SLR. You get a wide range zoom lens with a small body. They were popular with enthusiasts in the early noughties as more serious cameras were way way expensive. Every manufacturer offered at least one some several at different price points. Sony and Panasonic still make a few models and they range in price from $500 to $2400 AUD new. But on the second hand market that’s where things get interesting. You can pick up something for less than $50. 

What you are looking for is camera models with the terms “UltraZoom“, “superzoom” or “mega zoom” in the model name. Ideally look for something with at least an 8x zoom, better yet 10x or 15x. The more zoom the bigger your subject will be in the final image.


Olympus Camedia C-720 Ultra Zoom
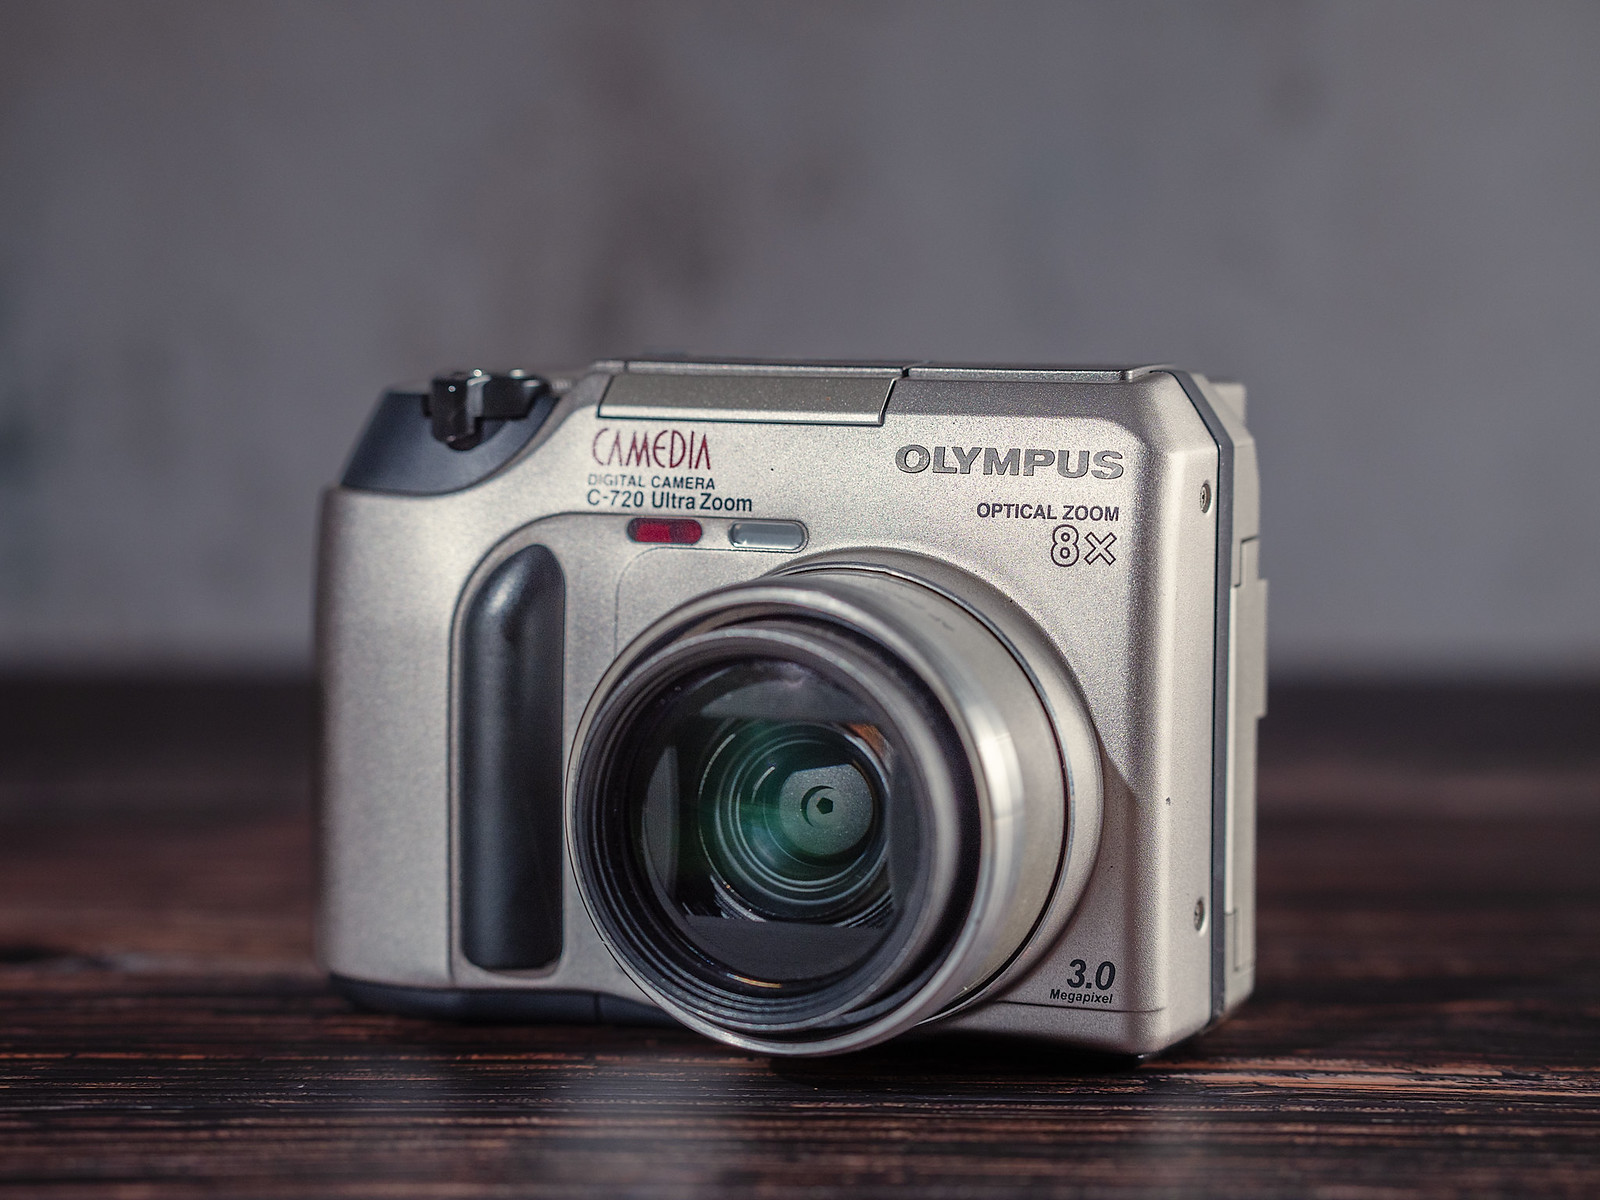
 

Olympus C-720
Olympus Camedia C-720 UltraZoom bridge camera.


The Olympus C-720 was introduced in 2002 and is fairly typical of models from that era. It has a whopping 3 Megapixels and an 8x zoom range (24x if digital zoom is switched on but it is crap). It’s small, light, and cheap. Typically expect to pay about $15 to $35 AUD for one. What makes it ideal is that the camera runs off 4x AA batteries which are plentiful and cheap. The downsides are that it takes a SmartMedia memory card which while obsolete can still be bought. The downside is that you will probably spend more on the memory card than the camera. Another problem is that the largest capacity card is 128MB which can hold 14 photos at the best quality TIFF setting, 58 in SHQ jpg, 170 HQ, 196 in SQ1, and 206 in SQ2. The last two come at a smaller resolution. Although 3MP is a bit limiting you can print a postcard sized print comfortably and print an A4 sized print at a stretch.


Olympus C-720


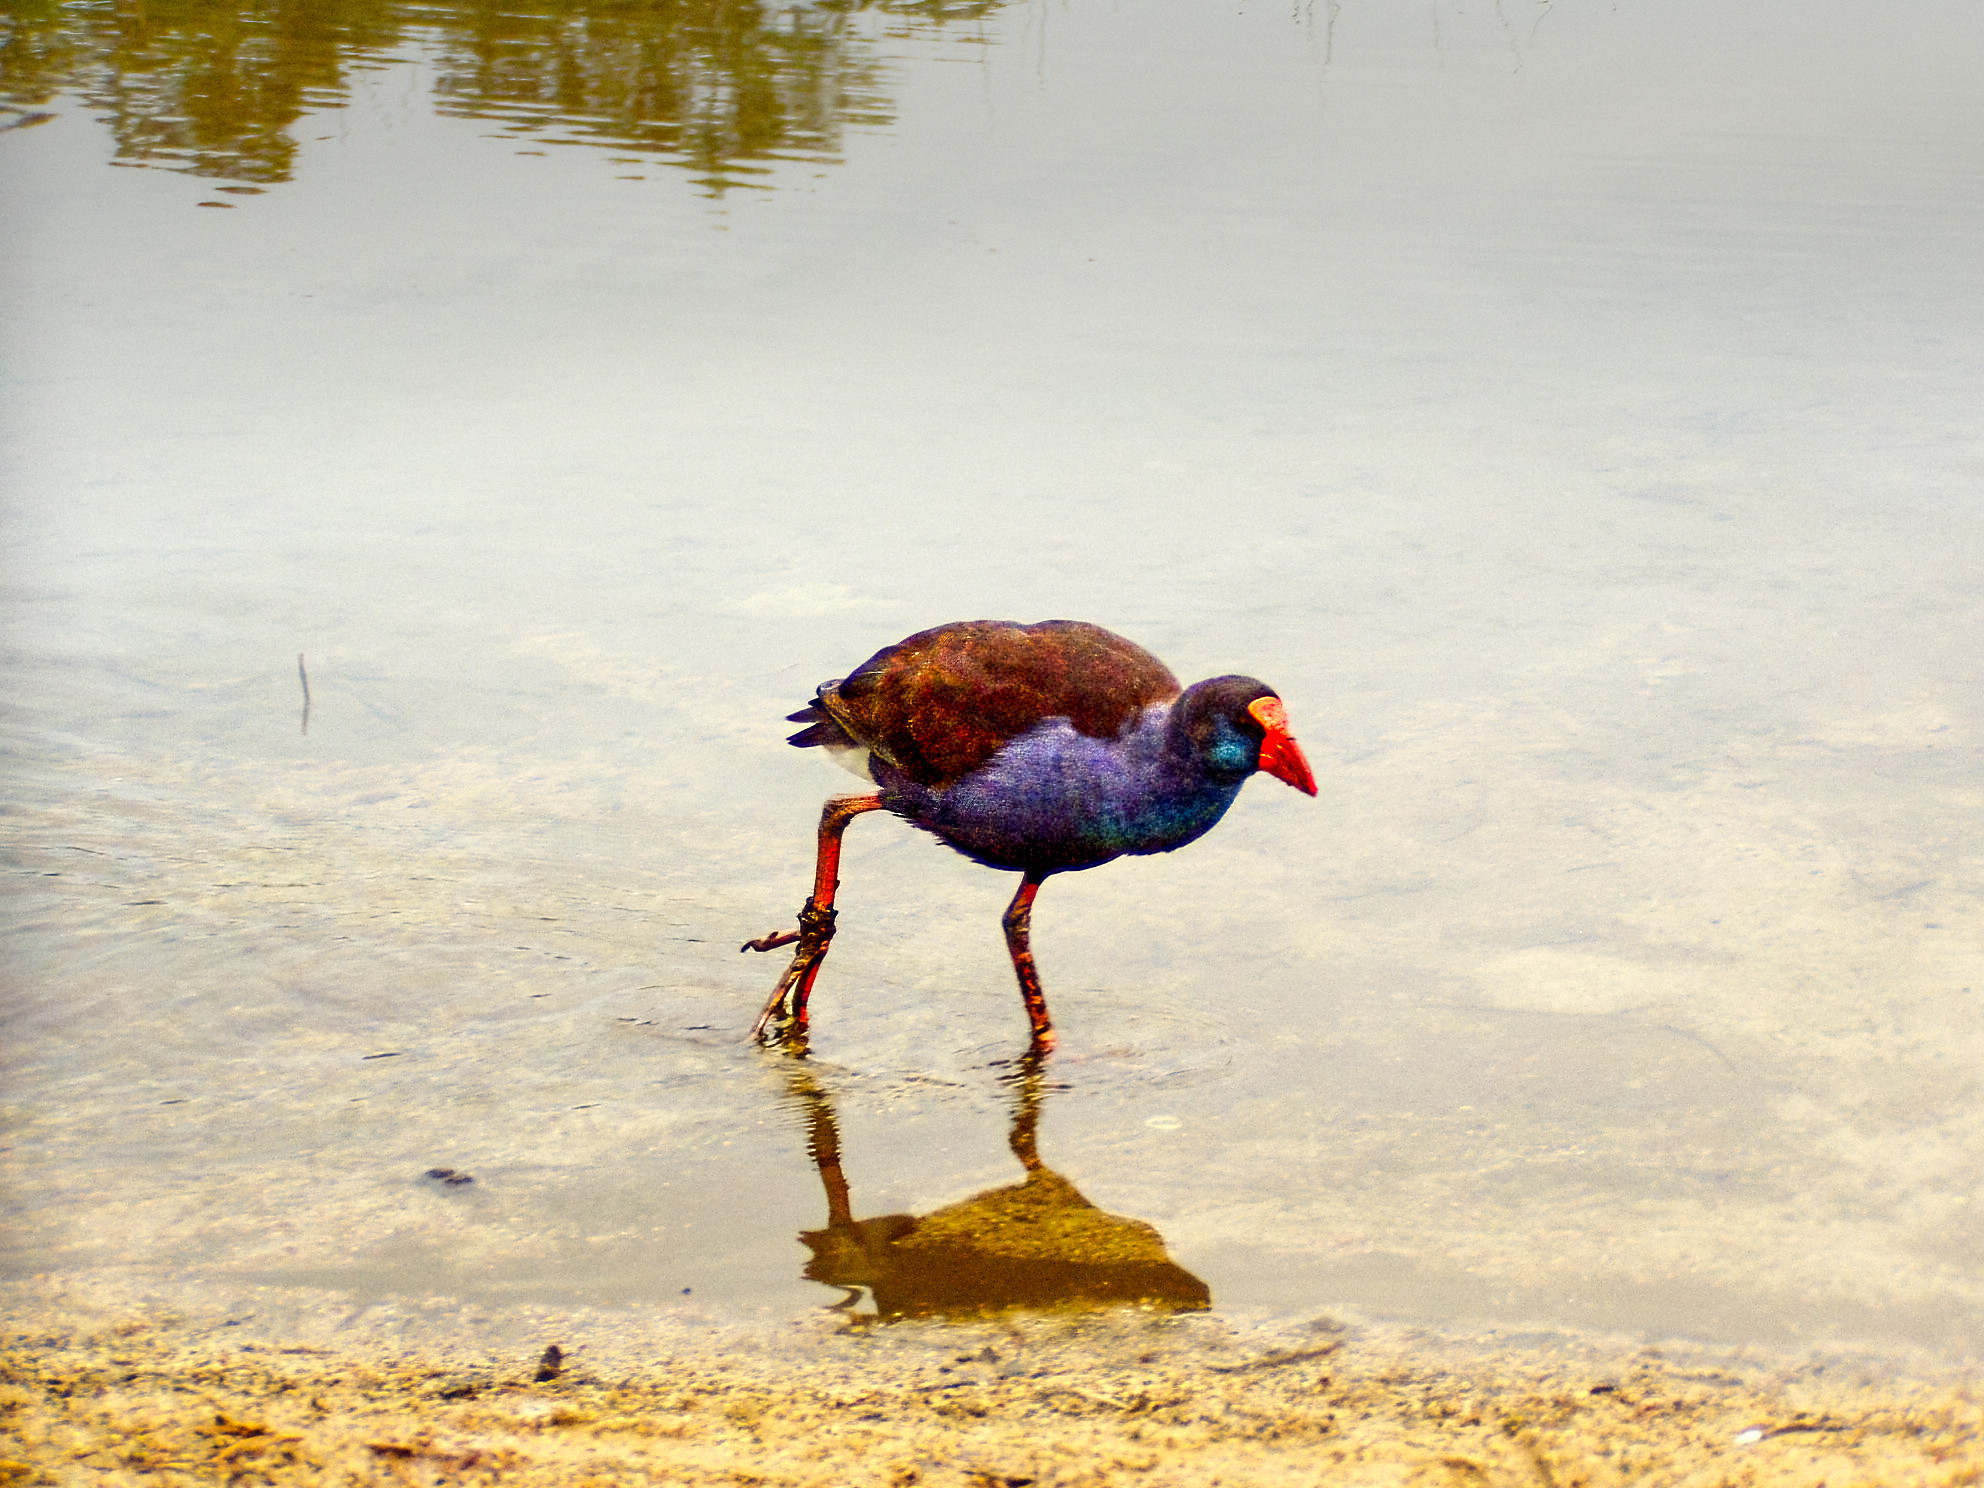
In use it is not a speed demon, it takes about four seconds to power up. When shooting in sports mode with medium quality jpgs the camera can manage to shoot at 1 fps for a total of 15 frames. The autofocus is slow and very noisy. The top shutter speed is 1/1000 and the maximum ISO, or sensitivity, is 400.  At 400 ISO the noise is bad and prevents you from recoding fine details. This is not a camera with which to take pictures of fast moving subjects in low light. But in good light, with a heap of patience and an understanding of the cameras limitations you can get some pictures. Whether you enjoy the process or not will depend upon your outlook.

 

011231-York-0224
Little Corellas taken with the Olympus C720UZ camera.


Kwirlam
When light levels fall the inadequacies of the C720UZ are quite apparent. The noise patter prevents detailed images.


Canon EOS 300d with a 75-300mm lens
Canon EOS 300d
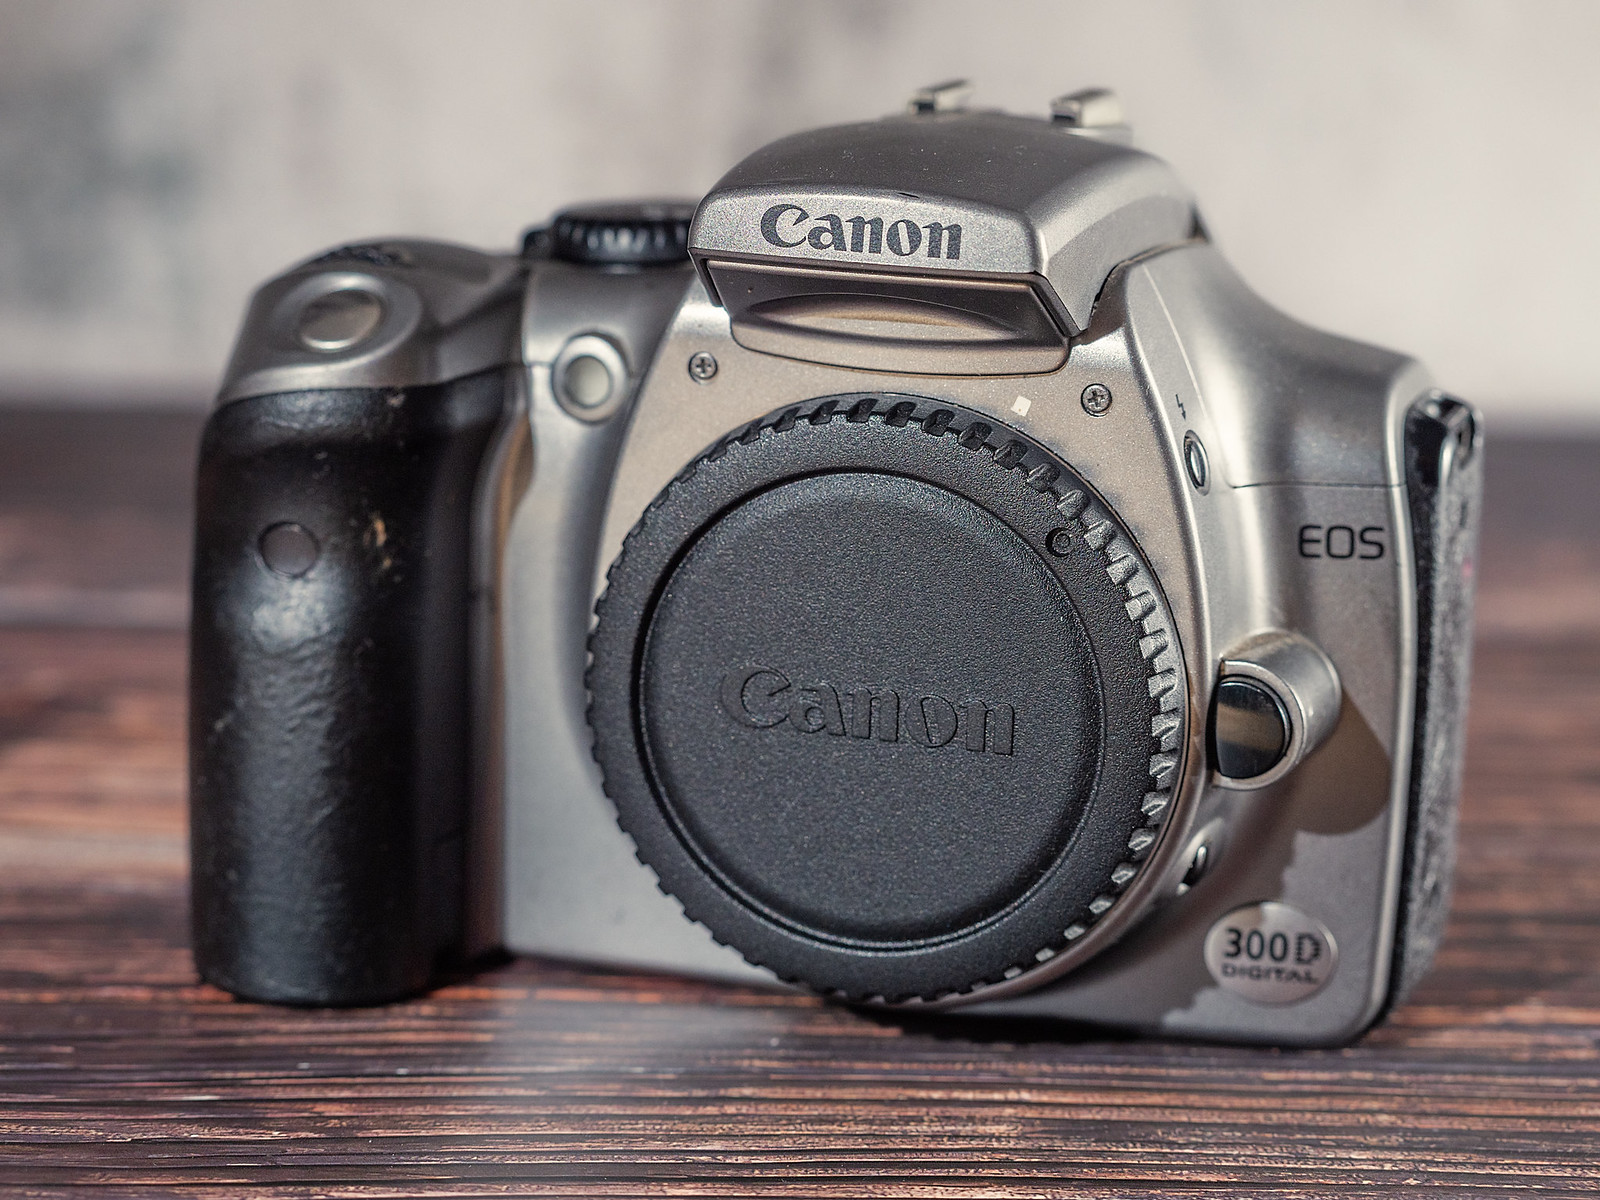
Canon EOS 300d body.


If you can swing to $250-300 AUD there are better alternatives than the very old bridge cameras. The Canon Canon EOS 300D (Canon EOS Digital Rebel in North America and the Canon EOS Kiss Digital in Japan) was the first real consumer budget DSLR when released back in 2003. For $60-100 you should be able to find a body only. I’d look to team this up with a  70-300mm zoom lens. With a bit of careful searching the combo should come in at under $300. Alternatives from that period going for around that are the Canon EOS 10d and the Nikon D100. They’ll be a little bit more money but they have slightly better features. The downside to them is that they were often used professionally and so they might not have much life left in them.


Canon EF 75-300mm f4-5.6 IS lens


So with the 300d what do you get for your money. Well you get a 6MP camera that takes Canon EF mount lenses – one of the biggest ecosystems of lenses in the world which means lots of choice at a variety of prices. Canon themselves have made an assortment of 75-300mm lenses over the last 30 years and you should be able to pick up something for $120 AUD and the one I’m looking at with Image Stabilisation for about $220. Sigma and Tamron are third party lens makers and you can find their versions for around the $100 mark.

The good points of the 300d are that it’s cheap, batteries (Canon BP-511a) and memory card (Compact Flash) are still available. The camera has a 6MP sensor that produces very nice A4 prints and it is very simple to use. The downside is that the camera was built to a budget and it is not possible to shoot in Continuous Autofocus when shooting RAW, the buffer is 2.5 frames per second for 4 frames, and the plastic body looks a bit tacky (but at least it feels solid). On the copy I have the rubber panels have gone a bit soft and sticky.  To use Continuous AF you need to shoot in the Sports mode which is jpg only and you cannot adjust the exposure using exposure compensation in this mode. There is no being able to use the rear LCD screen to compose pictures on and there is no video mode. Maximum ISO is 1600 and the quality is  ropey, but files can clean up quite well in image processing software.

The 70-300mm lenses at this price point are not going to win any awards for optical performance, but they will suffice to get you started. Irrespective of the manufacturer they all tend to be a little soft at the 300mm end and are not the fastest to find focus especially in low light, but they are capable of giving you a nice image if you don’t shoot wide open and keep the shutter speed up.

If you don’t want to buy Canon then at this price point look at the Nikon D100. Obviously you’ll have to substitute Nikon fit lenses as well.


Woodman Point
Australian Pelican at Woodman Point, Western Australia. Canon EOS 300d with Canon EF 75-300mm f4-5.6 IS.


Kadjinak
Kadjinak or Grey Fantail (Rhipidura albiscapa). York, Western Australia.


Djidi-djidi
Djidi-djidi or Willie Wagtail (Rhipidura leucophrys). York, Western Australia.


Djida
Djida or Yellow-rumped Thornbill (Acanthiza chrysorrhoa). York, Western Australia.


Koolbort
Koolbort or Singing Honeyeater (Gavicalis virescens). York, Western Australia.


Rainy Day On The River
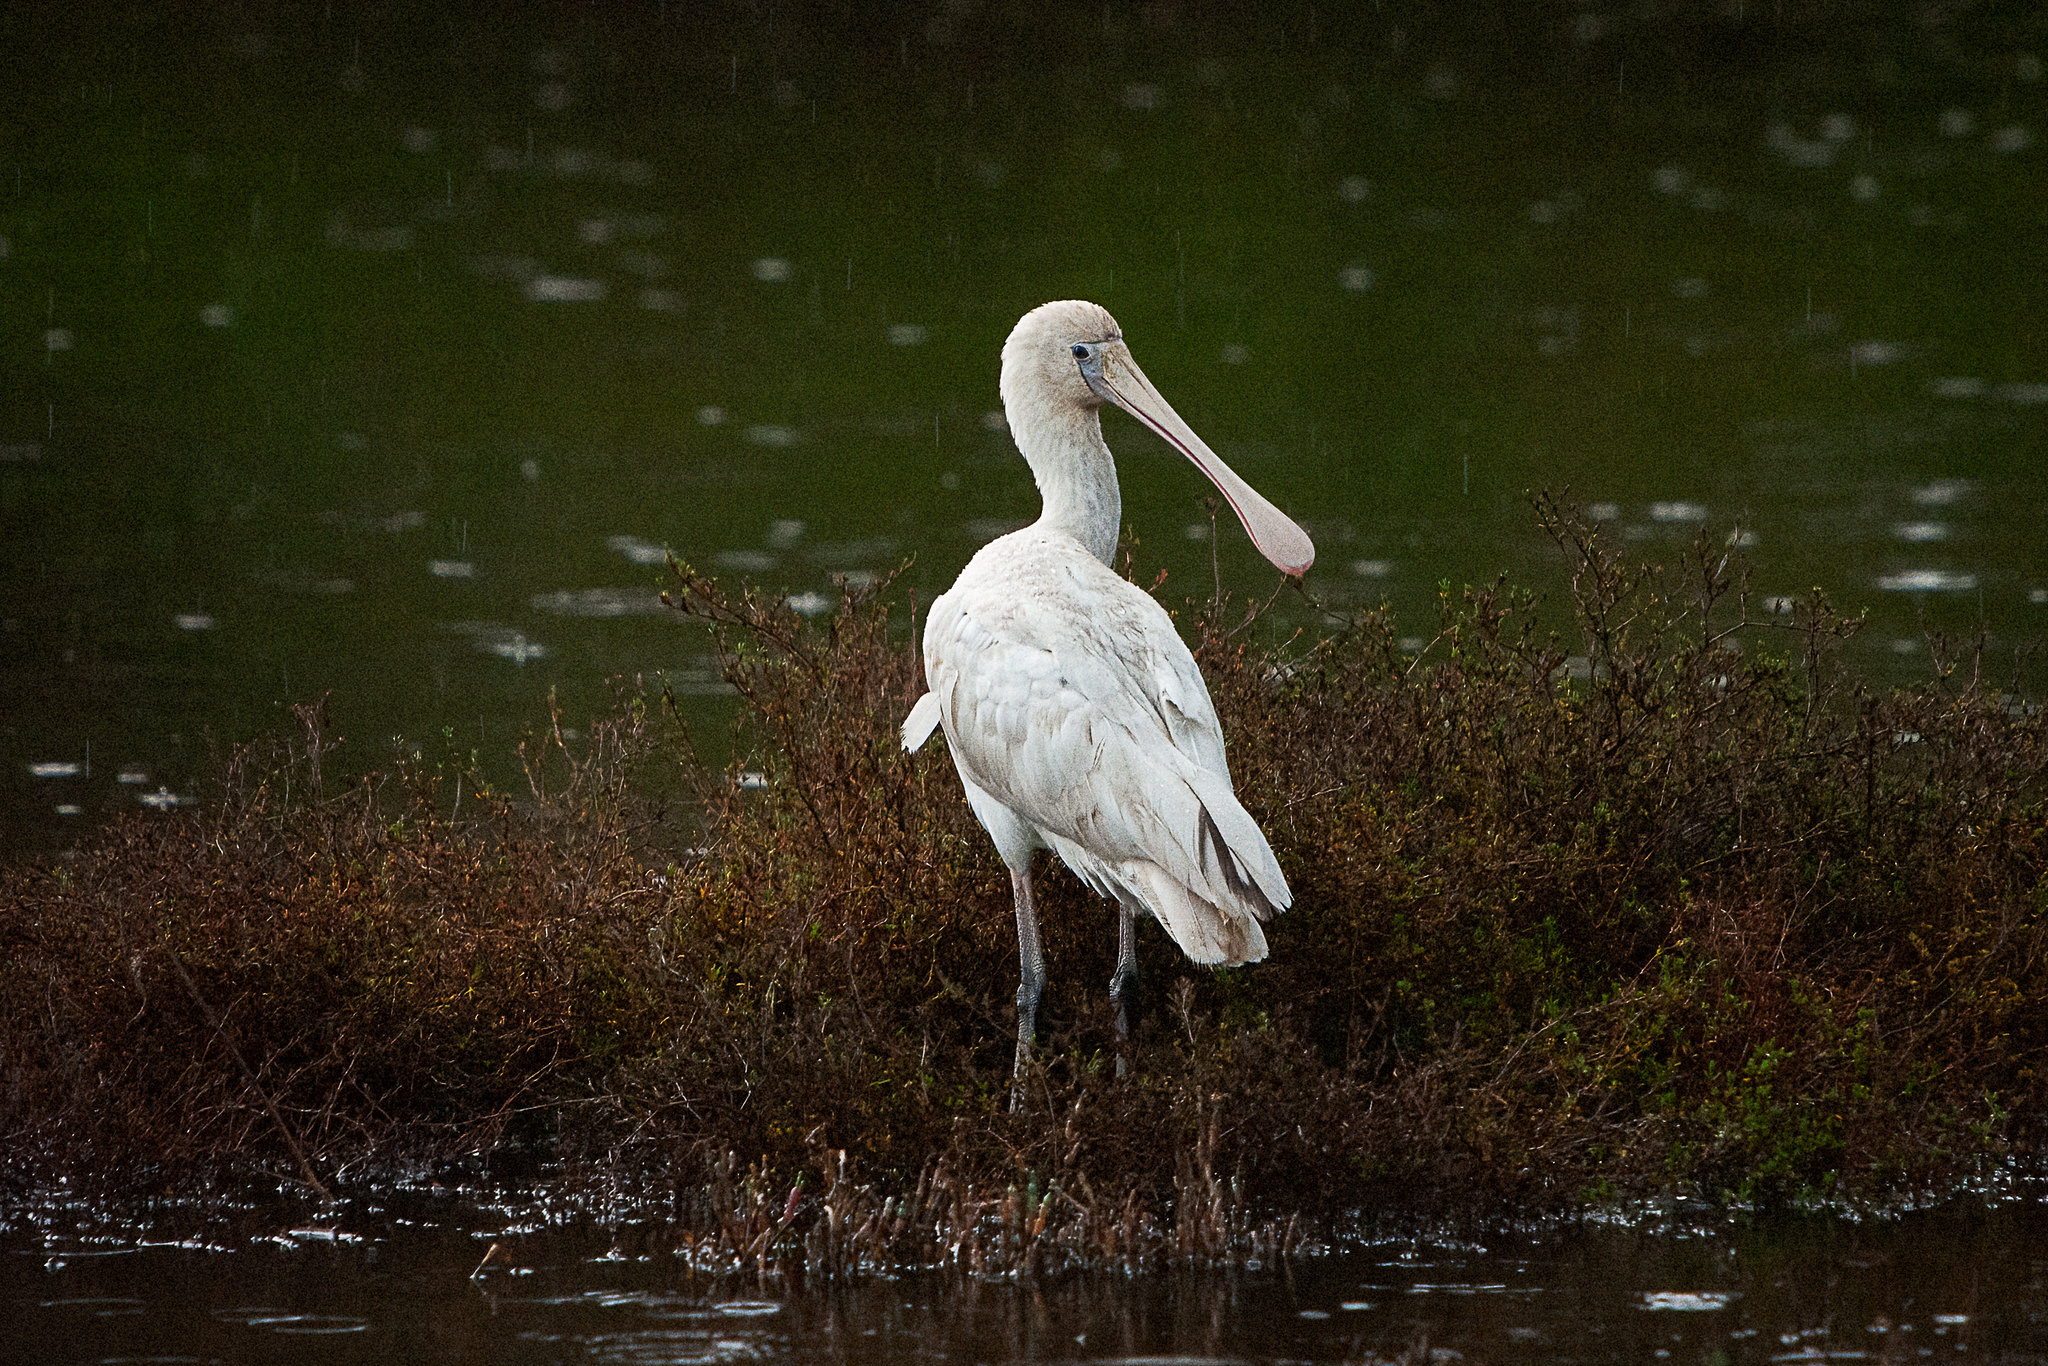
Kaaka-baaka or Yellow-billed Spoonbill (Platalea flavipes) in the rain. York, Western Australia.


Djangkang
Djangkang or Red Wattlebird (Anthochaera carunculata subs woodwardi). York, Western Australia.


Canon Eos 550d with a 75-300mm lens


Canon EOS 550d
Canon EOS 550d body.


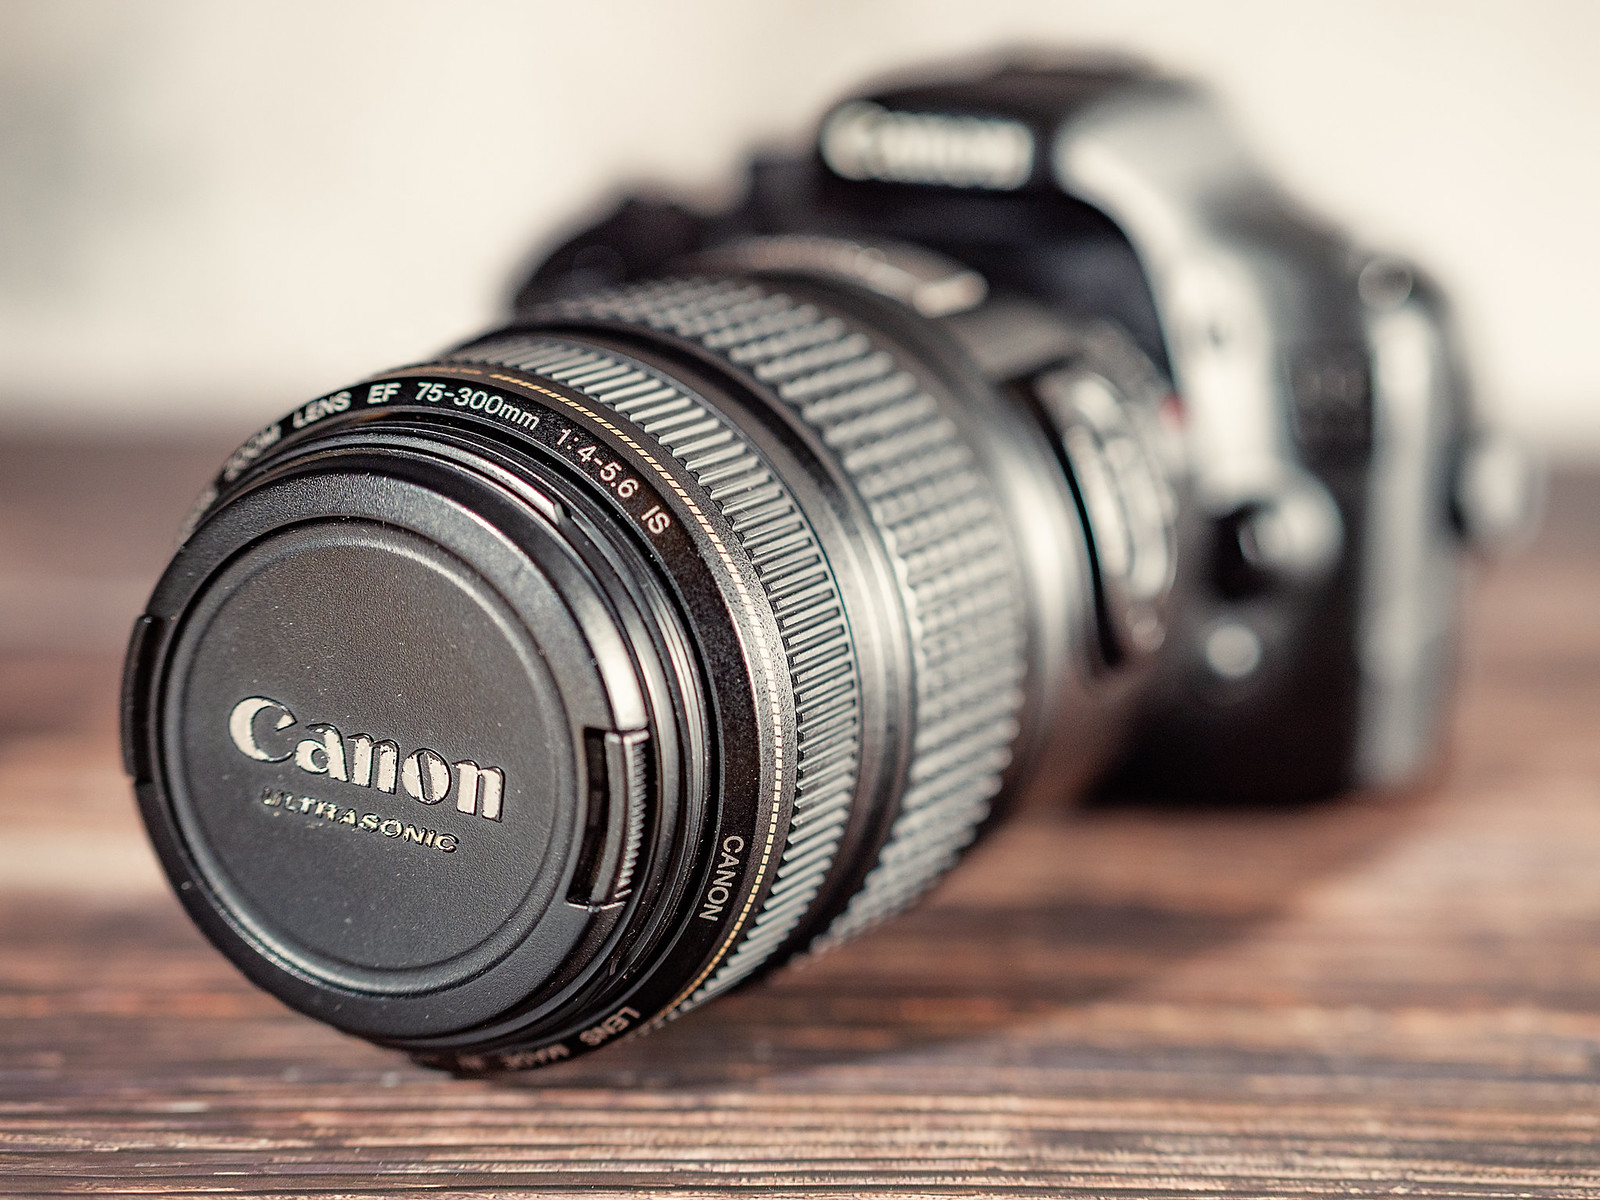
If you can squeeze another $50-100 then a good option would be to go for something like the Canon EOS 550d. You have a substantial increase in resolution with an 18Mp sensor with better high ISO performance – now up to 6400 natively or 12800 by expansion. Continuous auto focusing in all shooting modes and the frame rate is increased to 3.7 frames per second with a buffer of 34 frames shooting jpg and 6 frames shooting RAW. The AF system has been beefed up a little and while  still only having 9 centrally arranged focus points  it has a cross type sensor in the centre with extra sensitivity. The camera uses SD cards which are cheap and easily found. The battery, the Canon LP-E8 is a bit of a down grade in terms of performance compared to BP-511a used in the 300d, but it is readily available and affordable. While being able to shoot 1080 video it is only really suitable for still subjects as the contrast based autofocus is is too slow to lock onto moving subjects. My first videos were shot with this camera and it is capable of producing a good result if you are prepared to manually focus. Other downsides are the limited buffer and the slow frame rate, the lack of a second control dial also makes using exposure compensation a little fiddly. I try and keep my ISO below 3200 as the chroma noise is quite intrusive and difficult to clean up without destroying fine details. But, having said all that this is a camera which is capable of producing very good results. Even though I now have other better cameras I still like to get the 550d out and use it because it is just fun to use.
 

Canon EOS 550d
Canon EOS 550d with Canon EF 75-300mm f4-5.6 IS lens.


Rottnest Island - Perth's summer island playground by Paul Amyes on 500px.com
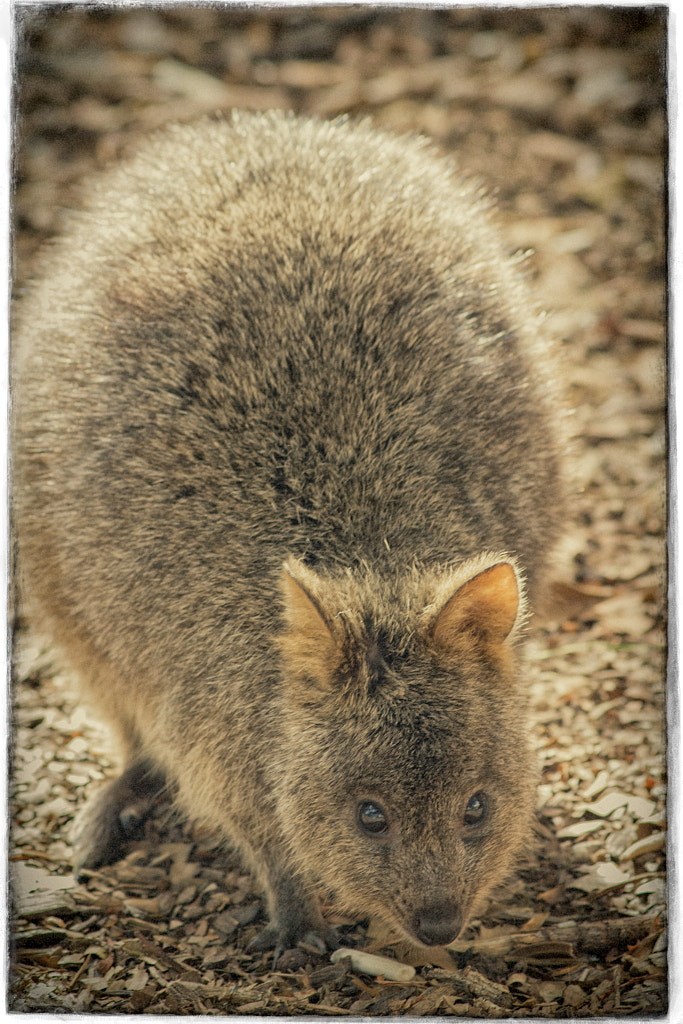
Quokkas are a small marsupial that inhabit Rottnest Island. Canon EOS 550d with Canon 75-300mm f4-5.6 IS lens.


Brushtail Possum by Paul Amyes on 500px.com
Brushtail Possum (Trichosurus vulpecula) at the Coal Mines Historic in Tasmania. Canon 550d with Canon 75-300mm f4-5.6 IS lens.


John George Walk Trail by Paul Amyes on 500px.com
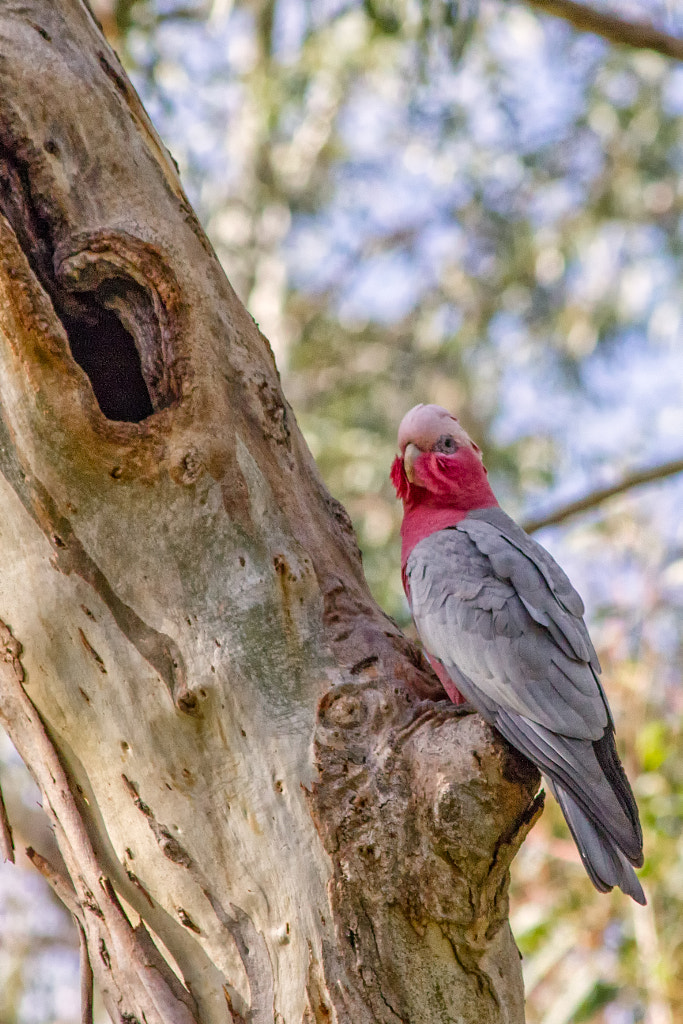
Like many cockatoos Galahs, Eolophus roseicapilla, nest in hollows in eucalypt trees. Woodbridge Riverside Park. Canon EOS 550d with Canon 75-300mm f4-5.6 IS lens


John George Walk Trail by Paul Amyes on 500px.com
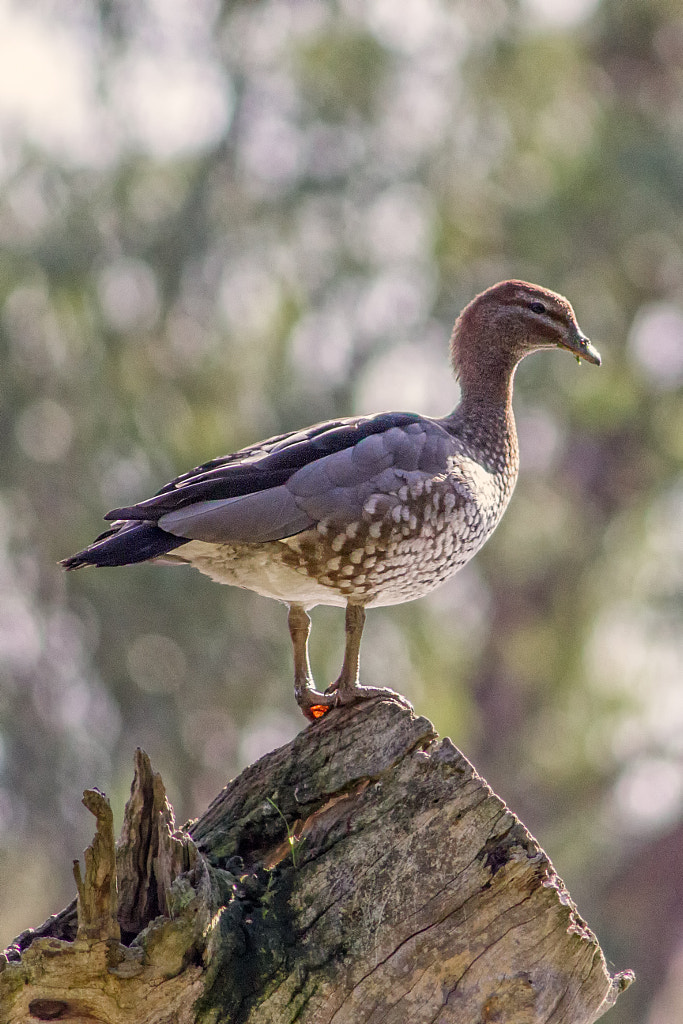
Maned Duck (Chenonetta jubata) also known as the Australian Wood Duck, Swan River, Woodbridge. Canon 550d with Canon EF 75-300mm f4-5.6 IS lens.


John George Walk Trail by Paul Amyes on 500px.com
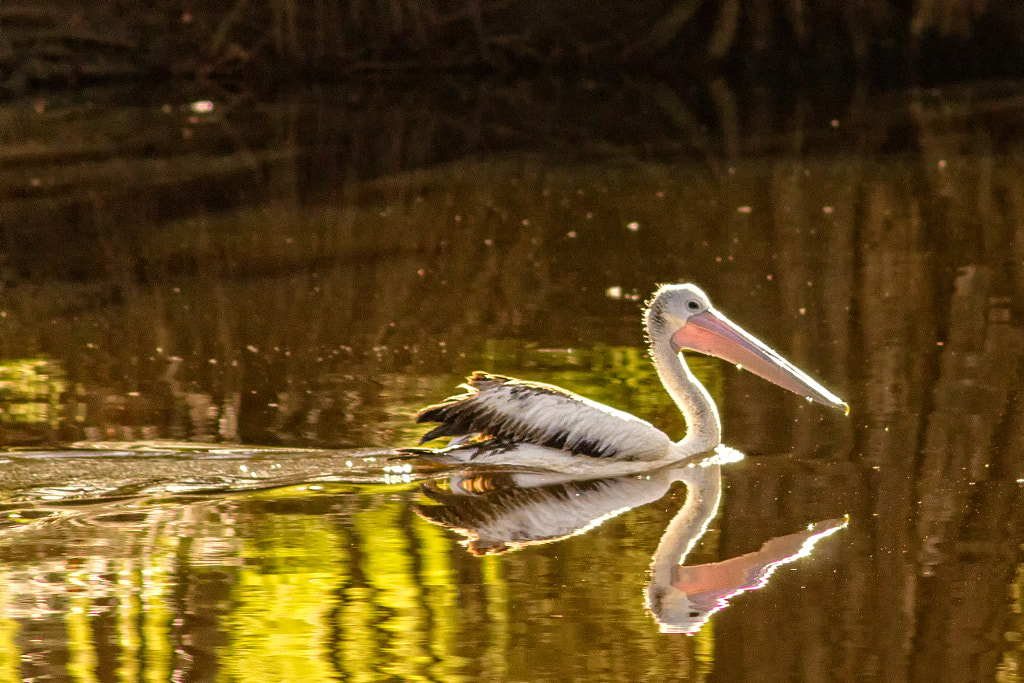
Australian pelican (Pelecanus conspicillatus), Swan River, Woodbridge. Canon EOS 550d with Canon 75-300mm f4-5.6 IS lens.


This would be a camera which would benefit with a better lens if you can afford it. Something like a Canon EF 300mm f4 (approx $500 on EBay) or a 400mm f5.6 (approx $600 on EBay). This would be a nice nimble set up that would give great results.

The Nikon equivalent to this camera would be the Nikon D5000 for about the same amount of money.


Summary

It is quite possible to put together a competent kit to photograph wildlife for less than $500 AUD. It won’t have all the bells and whistles of more modern high end cameras but you will be able to make it work. The limitations mainly are speed of operation and picture quality. Learning how to make up for the short comings will inevitably make you a far better photographer in the long run than having the latest and greatest camera will.

New Arrival

The EM-10 fitted with the Olympus m4/3 Zuiko 12-50 f3.5-6.3 lens. A good walk around combination for stills and video.

It has been a very exciting two weeks here at Paul Amyes Photography Towers. A little note from the Fed-Ex man turned up in the mail box saying he wanted to deliver me something. To say I was perplexed was an understatement as I hadn’t been bashing the plastic in an orgy of online shopping. So I dutifully walked up to the depot (its only 500m) up the road, and collected it. On getting it home I found inside a was a shiny new Olympus OM-D EM-10 (which shall just be referred to as the EM-10 henceforth) and an offer to have for long-term testing and evaluation. Woooohooo! A new toy to play with.

The EM-10 is smaller than the EP-2 with the VF2 viewfinder attached.

So two weeks later I’m siting down and trying to marshal my thoughts about the experience thus far. I think that I should give a little background. My first 35mm camera was an Olympus XA2 and since then I have owned OM1, 2, 4, 20, and 40’s, an XA4, an AF10, a C720 UZ and more recently an EP-2. I was shooting weddings professionally with my OM4 up until 2005 when one sad day it broke down and the repairman said there were no more parts to fix it. I then had an expensive dalliance with Canon, which no matter how hard I tried I could not turn into fully fledged relationship because the spark just wasn’t there. I’ve used other cameras and I really enjoyed them – Voigtlander Bessas, Pentax 645, Panaonic LX-5 all spring to mind, but I have to confess that the EM-10 is the first camera I’ve ever used that has made me want to hurl it across the room and then jump up and down on the pieces in sheer frustration. My EP-2 is my all time favourite camera to use. I accept its idiosyncrasies and can work round them because the whole process is so enjoyable. I use it as my travel camera and for multimedia projects. The EM-10 I thought would be an ideal replacement.


The pop up flash can also act as a remote control for off camera speedlites.

Well lets talk about the good stuff. The camera looks drop dead gorgeous and it feels just right in the hands. My father always used to say that I had hands like bunches of bananas yet this small camera feels just right. In fact it such a tactile experience I’ve found that I often just pick it up to fondle and just hold. I know, I know it just sounds so wrong, but for me a camera has to actually feel good in the hand. I like cameras that become transparent and don’t get in the way of taking photos.

Portrait of my bully, Frida, using m4/3 Olympus 17mm f2.8 on the Olympus EM-10. Exposure 1/100 sec, f2.8 ISO 1600.

Olympus when they introduced the 16Mp sensor with the EM-5 were onto a sure-fire winner. Its origins were, and still are hotly debated on internet forums and while most accept that it is from Sony a few diehards are like the Birthers in the US arguing that it comes from Panasonic. Personally I don’t care where it comes from, all I know is that the latest iteration in the EM-10 is very good. The dynamic range and the pixel amount are just about perfect for my needs. If you want more details then DXO or DPReview can shed more light on the technical aspects.

Using the built in pop up flash as in RC mode to controll a Metz 44AF1 speedlite.

I very much like the EVF. When I bought the C720 UZ in 2002 I was convinced that EVFs were the future. The EVF in the EM-10 is not the same as the one in the flagship EM-1 or in the VF4, but it is better than the VF2 and the one in the EM-5. It is crisp, has a good refresh rate, and I find that I can focus manually quite accurately which is better than I can say for the viewfinders on many dSLRs. Where my EP-2 used to frustrate me was that I could not use the viewfinder and a flash, it had to be either or. I like having the EVF built in to the camera. Speaking of flash the EM-10 is the first in the series to have a pop up flash. I can’t see myself using it as a flash, but it can be used as a remote control for off camera flashguns and in that mode it works excellently and I can see myself using the function a lot when I start photographing orchids in spring. The rear screen is nice, it is the first tilt and touch screen that I’ve used and I like both features. The aspect ratio of the screen is 3:2 rather than 4:3 so you have black bars at the edges when shooting in the native 4:3 format. In the strong Aussie sun the screen is hard to see, I think this to do with it being a LCD rather than an OLED as in the other OMDs.

The 3 axis IBIS is a down grade from the previous models 5, but it works very well and the video below demonstrates that. With my 17mm f2.8 I’m able to get sharp images at 1 second which I find amazing. It works very well in video mode in conjunction with digital image stabilisation and it possible to capture steady video without the need for a rig or monopod. Many have poo pooed the video quality of Olympus cameras as being not suitable for serious work because there is only 30fps and a maximum bit rate of 24Mb/s in 1080p. Well I would have to say that while I do shoot a fair bit of video it is only destined for YouTube or converting to SD for DVDs that my elderly relies can play. So for those purposes it is more than adequate. The video clips below are straight out of the camera, nothing has been done to them apart from adding subtitles and a sound track. I’ve uploaded them to YouTube in 1080 so you can see what the camera actually produces. Any artefacts you may see will be a result of the compression YouTube uses. The only thing about the video function I don’t like is that there is nowhere to plug an external mic or recorder in. Yup no accessory port under the hot shoe and no 3.5mm socket. Bad Olympus, very bad!


Ok as I have just started with a fault I’ll move on to them. I like shooting HDR panoramas. I know many will consider that as a crime against humanity, but I like doing it. The EM-10 has both HDR and panorama modes. Can they be used in conjunction? NO! Ah well back to shooting them manually. I’ve programed the function button on my 12-50mm lens to turn exposure bracketing on. Nice it means I don’t have to delve deeply through the notorious Olympus menus. Not so nice is that the bracketing is still limited to 3 frame at -1, 0, and +1 EV. Come on Olympus it is 2014, your sensor has great dynamic range lets at least have 2 stop intervals.

While the EM-10 has both a HDR mode and panoramic function they cannot be used together. This handheld panorama is made up of 12 frames put together in CS5 and HDR Efex Pro 2. The 3 axis stabilisation works very well and makes this sort of work a doddle.

Focus peaking is a very nice feature and it works very well, but as a default straight out of the box it will only work with native m4/3 lenses that have electronic contacts in the lens mount. I searched the manual and there is no mention of focus peaking with legacy glass. I searched the internet high and low and there seemed to be a great deal of confusion as to whether focus peaking could be activated with old lenses. After some fiddling around I found that if you assign a button to activate it you can use it with adapted lenses. Hoorah! But you can’t use it in video. Boo!


Nodding Jesus. Using legacy glass on the EM-10 is a breeze with the new focus peaking function. Shot wide open on an Olympus Zuiko 50mm f1.4 lens.

Speaking of the manual it deserves special mention. It should be held up as an example to all consumer manufacturers as an example of how not to write a manual. I wanted to test the new live composite function. I shoot a lot of night photos and this looked like it could really be good and save time faffing around in Photoshop with blending layers. Did the instructions tell you how to use it? No. Did Olympus Australia’s website shed any light on how to use it? No. After searching for ½ a day on the internet I found a photo forum in Singapore where one of its members had posted some shots using the function and enough information for me to work it out. Unfortunately since then the local farmers have been burning off their fields and the Avon Valley is choking to death on the smoke haze which means no clear night skies. Hopefully in the next couple of weeks I’ll be able to see the stars and photograph them.

I won’t say any more at the moment as I want to use the camera some more. However, I find the EM-10 to be a curious beast. Olympus is going after the first time DSLR buyer with this model, you know the people who buy something like a Canon Rebel or the Nikon equivalent because they want to be able take better pictures while on holiday, or photograph the kids sports day etc. Well both Canon and Nikon know that market very well and they sell their cameras by the boat load because they are relatively cheap, easy to use and can still satisfy the user as their skills grow. The EM-10 is a bit more expensive but thanks to the awful menu structure Olympus insists on continuing to use and poor instructions it is not easy to use. I have a feeling that there will be a lot of EM-10s for sale on EBay in six months time with a lot of frustrated buyers being either put off photography as a whole or buying something from Canikon. I think it is a great shame. The EM-10 could have the makings of a great camera, the sensor is terrific, it looks great, it handles well, but the user interface is absolutely appalling. I’m all for giving people the option of custom configuration, but on a camera targeted at the beginner who doesn’t know their f stops from their ISOs it is not as it just adds to confusion with such a frustrating UI. The EM-10 is like the curates egg – good in parts.


Lens Sharpness

sutemi waza by Paul Amyes on 500px.com
Sutemi waza from Yōseikan Aikido. Taken on Olympus C-720 Ultra Zoom with slow sync flash edited using Photoshop Elements 2 and Genuine Fractuals


Currently in photography there are several sacred cows and you’d think that from the amount of chatter these subjects generated that they were the be all and end all of photography. Thankfully for the actual art form of photography they are mostly irrelevant. These sacred cows are:

  • megapixels
  • dynamic range
  • sensor size
  • lens sharpness

My feeling is that these topics are so hotly debated is because now in this digital age it is easy to quantify these values numerically and the bigger the number the better. There is no doubt about it a great big  spreadsheet of impressive looking numbers must be right after all. This is why the website http://www.dxomark.com has become a sacred text among the denizens of the internet fora and its proclamations and pronouncements can lift a camera or lens to photographic nirvana or condemn it to the lowest reaches of hell. Well having ruffled a few feathers with the piece on sensor size and depth of field this weeks entry is going to cause the DXO fundamentalists to really froth at the mouth in holy indignation.


ura tai otoshi by Paul Amyes on 500px.com
Ura Tai Otoshi from Yoseikan Aikido as taught by Shihan Jan de Jong. Shot using an Olympus C-720 Ultra using slow sync flash. Edited using Photoshop Elements 2 and Genuine Fractuals


Lens sharpness  is something to be coveted. After all Leica, Zeiss, Schneider, Rodenstock, Canon and Nikon have made an art form of it. Those who worship at the high altar of lens sharpness are prepared to spend the equivalent of the GDP of a small African nation on the lenses that have the highest DXO score. The Carl Zeiss Distagon T* Otus 1.4/55 ZF.2 Nikon has a DXO score of 45 while the lowly Canon EF 50mm f/1.8 II only has a rating of 25.  So the Otus is nearly twice as good as the plastic fantastic Canon. Phwoaaaaarrrrr forum domination and photographic greatness here I come,  I’ll go out and buy one straight away. The Australian list price for the Zeiss is $4474 while the Canon is $135, so the Zeiss must be 33 times better. Er no. To quote DXO “The DxOMark Score shows the performance of a lens, mounted on a given camera body, for its optimal focal length/aperture combination and for defined exposure conditions.” So the lens has been mounted to a camera on an optical bench shooting a 2D lens chart at an aperture that is guaranteed to give the best results in carefully controlled lighting. So in other words it does not reflect real world usage unless your photographic interests lie in shooting charts or brick walls with a camera on a heavy tripod so you can orgasm over how sharp the image is at the edges. Shoot a complex 3D object in rapidly changing light conditions at sub optimal aperture settings and these ratings really don’t mean anything.

sutemi waza 2 by Paul Amyes on 500px.com
A sacrice throw from Yoseikan Aikido. Taken using an Olympus OM 4 with a Zuiko 35-105 lens on Fujichrome 400 pushed to 800 ISO. Scanned using an Olypus ES-10 scanner and edited using Adobe Photoshop Elements 2 and Genuine Fractuals.


There is no doubt that lenses have become a lot sharper over recent years, but I find it amusing to see that they have become so sharp that they are now unflattering for portraiture as they show every blemish and pore. So much so that photographers are now spending time and money on lessening the sharpness (blurring if you will) on portraits. Don’t you think that is ironic? I’ll spend a fortune on a very sharp lens that is so clinically sharp that no-one likes the results so I’ll spend some more money on a Photoshop plugin to blur it.

 “Sharpness is a bourgeois concept.” – Henri Cartier-Bresson

A famous quote and often mis-quoted as nobody can really tell you the context in which Cartier-Bresson said it.  If we forget the Marxist definition of bourgeois and just concentrate on the dictionary definition we get:

 “belonging to or characteristic of the middle class, typically with reference to its perceived materialistic values or conventional attitudes: a rich, bored, bourgeois family | these views will shock the bourgeois critics.”

I would hazard a guess that dear old Henri was stirring a bit when he said it and meant something along the lines that sharpness in a photograph is a very conventional and staid way of judging it and doesn’t look at its other qualities. How can I be sure, well I can’t but he also said:

 “It is an illusion that photos are made with the camera, they are made with the eye, heart & head.” – Henri Cartier-Bresson

 So I think it is more than likely to assume that Cartier-Bresson felt that there is a lot more to photography than technical perfection.

Iaido by Paul Amyes on 500px.com
The Japanese art of sword drawing. Taken with an Olympus OM 4 with a Tamron 28 mm lens, using Ifford Delta 3200. Scanned using an Olypus ES-10 scanner and edited using Adobe Photoshop Elements 2 and Genuine Fractuals.


So by now you’ll have read this and seen some photos I made years ago of some people practicing Aikido and Iado, both Japanese martial arts. You’ll also have noticed that there is a lot of blurred movement and very little sharpness. The reason why is that I wanted to capture the beauty of the flowing energy that is involved in them and I felt that while static shots might capture the technical aspects of the techniques being demonstrated they don’t capture the nature of the philosophy behind them nor the dynamism. I like to feel that these are photos “made with the eye, heart & head” rather than the clinical gaze of the optically perfect lens. This is for me where the beauty of any art lies, not in technique but in the expression of ideas and emotions. None of the equipment used in the making of those photographs warrants a mention on DXOMark so I guess that gives them a score of zero. The equipment HCB used also isn’t on the DXO charts, and guess what quite a few of his pictures are blurred because he often relied on zone focusing and didn’t get it right, but I’d sooner have one of his pictures on my wall than a lens test chart any day.

Behind the Gare St. Lazare. By Henri Cartier-Bresson, Paris 1932. © 2014 Henri Cartier-Bresson/Magnum Photos, courtesy Fondation Henri Cartier-Bresson, Paris


If you are not familiar with work of Cartier-Bresson try this:

If those video clips have whetted your appetite then might I recommend Henri Cartier-Bresson  – the man, the image & the world. A retrospective. Published by Thames & Hudson.