I’ve Got A Silver Nose


Olympus G_Zuiko 50mm f1.4 lens
Blimey it’s a silver nose!


A little while ago I got a new to me camera (more about that in a later entry) and it came with an Olympus OM Zuiko 50mm f1.4. Initially I wasn’t really interested in the lens at all as I already had a copy. However, on arrival I noticed that the front filter ring and the edge of the aperture ring were silver chrome and I realised that it was an Olympus “Silver Nose” lens. This realisation sent me down a rabbit hole looking at all the variations of Olympus lenses and the effects of lens coatings and trying to see which lens is better.


Olympus G_Zuiko 50mm f1.4 lens
First and third generation Olympus 50mm f1.4s.


Get online and look at the many forums that talk about classic film cameras and lenses you can find “Olympusphiles” (or should it be “Zuikoholics”) discussing/arguing about the merits of silver nose lenses and whether they are better than black nosed lenses. So what is a silver nose exactly? Well when Olympus launched its 35mm OM camera system at Photokina in 1972 the lenses all had the chromed filter rings and they were single coated, I think there were a couple of exceptions, but, I’ve not managed to confirm this one way or the other. These lenses stayed in production until roughly 1983/4 and were replaced by multi-coated lenses. The situation is not entirely clear cut as between 1972 and 2002, when production of OM Zuiko lenses ceased there were four generations where each iteration brought some improvement in either the optical performance, or manufacturing efficiency. The table below goes through the various changes each generation brought.


1st generation The original lenses released in 1972 and they have the characteristic silver nose. They also have a prefix letter in front of the Zuiko label that indicates the number of lens elements. My 50mm f1.4 is G.Zuiko which shows it has seven elements. The lens elements are single coated.
2nd generation This was largely just a cosmetic change where the silver nose was dropped in favour of the so-called black nose.
3rd generation The letter prefix is dropped and replaced with Zuiko. MC which indicates the lens is multi coated which makes the lens appear sharper.
4th generation The MC designation ceases and construction was changed to cementing the lens elements in place.


To further aid in identification Olympus OM lenses have a code indicating place and date of manufacture. Pre 1983 this code is found underneath the rubber focusing ring and accessing it is a destructive process. After 1983 the code was printed on the light baffle retaining ring in the lens mount. Having said this I have a 1984 35-105mm f3.5-4.5 that doesn’t have this. An example of this code can be found on my 21mm f3.5 which has the code TNMA. The first two letters are the factory where the lens was made, in this case Tatsuno-Machi. The third letter is the year 1993, and the fourth letter is October. If you would like more information about these codes then I would suggest looking at Konrad Beck’s entry on photo.net.

To further understand what a silver nosed lens is we need to talk a little about lens coatings. This is going to be very brief as it is such a complicated subject.  Simply put lens coatings are thin layers of minerals applied to a lens surface to improve optical performance by reducing reflections and improving the transmission of light through the glass element. The effects of lens coatings was discovered by accident in 1886 by John William Strutt, 3rd Baron Rayleigh. He observed that a new lens he had acquired didn’t transmit as much light as an older version he had which was a bit tarnished. It was found that by controlling the material used, examples being magnesium fluoride and calcium fluoride amongst others and its thickness meant you could fine tune the characteristics of a lens. Initially this was done in a single coating. Zeiss pioneered multi-coating in 1935, but it wasn’t until a collaboration with Pentax in the early 1970’s until the process bore fruition with the launch of Pentax’s Super Multi Coating, or SMC and Zeiss’ T* coating. The first multi-coated lens for an SLR was the Pentax 50mm f1.4 Takumar in 1972. These multiple layers of minerals increase the amount of light transmitted through the lens, cut down on flare, and improves the contrast which all adds to the apparent sharpness of the lens. The need for multi-coated was accentuated by the increased take up colour film.


Olympus G_Zuiko 50mm f1.4 lens
That orange coloured coating is not radio-active. The thorium glass used for some of the elements is the radio active bit.


A little known fact about the silver nose 50mm f1.4 is that it is mildly radioactive. Most people attribute this to the lens coating which is incorrect. There is no thorium in the coating, it is in the glass used in the lens elements. This was done to increase the refractive index of the glass so as to reduce chromatic aberration. With age the thorium glass discolours and developes a yellowish tinge. People often mistake the yellow hue of lens coatings for this but the only way to find out is to hold your lens up to a plane white illuminated background and look through it. If the image has a yellowish brown tint then the thorium has started to degrade. This can be reversed by exposure to UV light. Is thorium glass dangerous? Well only if you grind up the glass and either inhale it or digest it. To put this into context you are exposed to more radiation when you eat a banana. Having said that for the sake of my love spuds I’m not going to walk around all day with this in my trouser pocket. The use of radioactive materials in glass was phased out by the 1980’s mainly as a health and safety precaution for the people who made the lens elements – they  came into contact with a lot of thorium glass dust when grinding and polishing the lens elements. Another reason was that lens manufacturers had discovered they could get better results by using magnesium fluoride and calcium fluoride.

In the end it is all very bewildering. So I decided to take a more practical approach and compare my first generation Olympus OM G.Zuiko 50mm f1.4 to my third generation Olympus OM Zuiko MC 50mm f1.4 and see which one I thought was better.


Physical Properties


Irrespective of the version the Olympus 50mm f1.4 has seven elements in six groups.


Olympus OM G.Zuiko 50mm f1.4 Olympus OM Zuiko MC 50mm f1.4
Focal length 50mm 50mm
Angle of view 43º 43º
Minimum focusing distance 45cm 45cm
Maximum magnification 0.15x 0.15x
Lens construction 7 elements in 6 groups 7 elements in 6 groups
Lens coatings Single coated Multi-coated
Maximum aperture f1.4 f1.4
Minimum aperture f16 f16
Diaphragm 8 curved blades 8 curved blades
Focusing Manual focus with a straight helicoid Manual focus with a straight helicoid
Filter size 49mm 49mm
Dimensions 36mm (h) x 60mm ⌀ 40mm (h) x 60mm ⌀
Weight 227g 229g

Apart from the cosmetics the only differences are the lens coatings, the length and the weight. Both lenses have that loverly dense feel with glass inside the metal barrel. The focusing is beautifully buttery smooth with a throw of 180º and the aperture ring is click stopped in one whole stop intervals. They are wonderfully tactile – I just can’t help fondle them.


Optical Performance


f1_4 sharpness


f2.8sharpness


f4sharpness


f8sharpness
Wide open both lenses were very noticeably soft in the centre and at the corners with the MC version having a bit more contrast. The silver nose had very pronounced chromatic aberration while on the MC version it was more controlled. By f2.8 the MC version’s chromatic aberration has cleared up completely. In the centre of the frame both lenses have improved sharpness and contrast. In the corners the MC has improved sharpness and contrast while the silver nose shows no improvement in sharpness but the contrast is slightly better. At f4 the silver nose is now equal in performance to the MC version in all areas except for chromatic aberration where it is still present. At f8 both lenses have reached their best optical performance and the CA has cleared up in the silver nose. By f11 both lenses are starting to show the effect of diffraction and at f16both lenses are quite soft and CA has returned.


Olympus G_Zuiko 50mm f1.4 lens


Olympus OM Zuiko MC 50mm f1.4
Olympus G_Zuiko 50mm f1.4 lens


Olympus OM Zuiko MC 50mm f1.4


You don’t buy an f1.4 lens and not be concerned about the quality of the bokeh. Well given both lens have the same lens construction and aperture configuration they are all but identical. Misshapen cat eye bokeh at f1.4 throughout the frame. Polygonal bokeh balls as you stop down. More importantly the transitions from in focus to out of focus are nice and smooth.

In terms of optical aberration both lenses exhibit mild barrel distortion and produce vignetting. Stop down to f4 and the vignetting disappears.


Olympus G_Zuiko 50mm f1.4 lens
At f2.8 with a specular light source in the frame the OM G.Zuiko 50mm f1.4 is prone to flare. Note the veiling flare and the relections of the lens elements. The effect gets more pronounced as you stop down.


Olympus OM Zuiko MC 50mm f1.4
At f2.8 with a specular light source in the frame the OM Zuiko MC 50mm f1.4 is also prone to flare.The MC handles the flare better than the earlier silver nose. What is interesting is the change in colour of the rflections, from yellow orange to green. This is the change in colour of the lens coatings.

That leaves us with flare resistance. Well it should come as no surprise that the later multi-coated version is better than the single coated, but the difference isn’t as marked as you’d expect. Both lenses are prone to veiling glare which which reduces contrast and dynamic range. Lens flare and reflective glare is also present in both lenses – this is where light is reflected off the lens elements and bounces around the lens internals until it hits the film/sensor. The colourful  polygons that are often seen is light reflected off of the rear of the lens diaphragm. The more you stop down the worse they become. Changing your composition so specular highlights aren’t visible in the frame and/or using a lens hood can fix the problem. On the subject of lens flares we should also talk about diffraction spikes or sun stars – well they aren’t very special being poorly defined. This all sounds pretty damming, but we shouldn’t compare these lenses to their modern counterparts. A lot has happened in lens design and manufacture in the last 40-50 years. You buy these old lenses if you are looking for character.


Olympus G_Zuiko 50mm f1.4 lens
Olympus G_Zuiko 50mm f1.4 lens at f16. The diffraction spikes aren’t that thrilling.


Olympus OM Zuiko 50mm 1.4 test
Olympus OM Zuiko MC 50mm 1.4 shooting into the sun at f16. Note the ghosting, the veiled flare and lack lustre diffraction spikes.


Conclusion


Olympus G_Zuiko 50mm f1.4 lens


Which one of these lenses would I recommend? Well I didn’t buy either of these lenses intentionally. Both of them came bundled with a camera body that I bought – the Olympus OM Zuiko MC 50mm f1.4 came with an OM4 that I bought in 1986 and the Olympus OM G.Zuiko 50mm f1.4 came with a camera body I bought last month. Now if you were to ask me which Olympus OM Zuiko 50mm f1.4 is the best I’d have to say neither of these. It is generally acknowledged that the best version is a 4th generation one with a serial number higher than 1,100,000. 

The argument that single coated lenses are inferior to multi coated lenses doesn’t take into account what the photographer actually wants from a lens. Generally single coated lenses are favoured for black and white film photography as the lack of contrast and flatter look suit the medium especially if you do your own printing in a darkroom. Multi-coated lenses give stronger colours, more contrast, and reduced flare which makes them more suitable for coloured photography. But it’s not that hard and fast. Some colour photographers like a more muted palate, lower contrast and lens flare as they think it adds character so favour the use of single coated lenses, indeed they are also popular with cinematographers for the same reason. If you like punchy high contrast black and white look at multi-coated lenses.

Oh and if someone offers to sell you silver nose 50mm f1.4 and says they are rare, well Olympus churned these lenses out by the barrel load. To give some perspective my silver nose has a serial number of 347876 and my MC version is 800260 – that’s a difference of 452, 384 lenses.


Sample Images

All images below were taken with the Olympus OM G.Zuiko 50mm f1.4 mounted on a Sony A7r via Fotodiox OM to E adapter.


The Stromalites
The Stromalites Jazz Trio perfom at the York Mill.


York Mill
The main gates at the York Mill.


The Book Nook
The Book Nook second hand bookshop at the York Mill.


York Mill
Doors on a wall. York Mill.


20240328-Mundaring-0224-Edit
The Naked Butcher. Becareful when you ask for 1/2Kg of sausages.


20240328-Mundaring-0228-Edit
The Railways Heritage Trail, Mundaring.


20240328-Mundaring-0232-Edit
The little people at Mundaring Sculpture Park.


20240407-York-0226-Edit
Coils


20240413-York-0229-Edit
Dayzies on Avon Terrace.


20240415-York-0235-Edit-2
York Mill at sunset.


20240415-York-0237-Edit
The River Avon in the evening light.


20240415-York-0239-Edit
Holy Trinity York bathed in the light from the setting sun. Even thought the sun is not in the frame notice the lens flare.


20240418-York-0225-Edit
Knackered Bedford.

Olympus m.Zuiko 45mm f1.2 Pro Lens


As usual there is a video for those that prefer or the full written piece is below.


The Olympus m.Zuiko 45mm f1.2 PRO lens mounted on an EM1 mk ii.

The Olympus m.Zuiko 45mm f1.2 Pro Lens was announced in by Olympus back in October 2017 as one of their trio of f1.2 lenses. The others being the 17mm and 25mm. According to Olympus they were designed to “have beautiful defocusing effects” and “beautiful feathered bokeh to make your image stand out” (https://shop.olympus.com.au/m-zuiko-ed-45mm-f1-2-pro). In the case of the 45mm (and I suspect the other two) the lens is designed so that spherical aberration is not fully corrected. This means that as light rays enter the lens only those that pass through the centre of the lens are made to come together at the focus point. The rays at the edges focus slightly in front of that point and this causes the bokeh to have a gentle roll off – the so-called “feathered bokeh”. Olympus themselves claim this matches “classic” older lens designs. At this point it should be noted that spherical aberration and chromatic aberration are different. Spherical aberration occurs when a single wavelength of light or colour cannot be focused whereas chromatic aberration occurs when a lens cannot focus the red, green, and blue wavelengths on a single point. Although Olympus claims to match the performance of older classic lenses they have chosen a lens design that is very different from them.


Lens Construction and Build Quality

Olympus 45mm f1.2 lens has 14 elements in 10 groups with one ED element, four HR element, and one aspherical element.


Focal Length 45mm (90mm in full frame equvalence)
Angle of view 27º
Minimum focusing distance 50cm
Maximum magnification 0.1 X
Lens construction 14 elements in 10 groups with one ED element, four HR element, and one aspherical element
Maximum aperture F1.2
Minimum aperture f16
Diaphragm 9 curved blades
Focusing Auto focus – yes, MSC mechanism making fast and silent AF possible in video mode.

Manual focusing – the focusing ring can be pulled back to engage a clutch mechanism with hard stops at each end.

Filter size 62mm
Dimensions 85mm (h) x 70mm ⌀
Weight 410g
Other features Hermetic sealing making the lens dust proof, splash proof, and freeze proof. 60529 IPX1 IP rating.


The lens mount of the Olympus 45mm f1.2 lens. The mount has an ‘o’ ring that contributes to its 60529 IPX1 IP rating.


To see how this differs from an older classic design lets compare it to Olympus OM Zuiko 50mm f1.4 which was first produced in 1971 and remained in production until 1984. 


Olympus OM Zuiko MC 50mm f1.4


Focal length 50mm 
Angle of view On 35mm 43º, on micro four thirds 21º
Minimum focusing distance 45cm
Maximum magnification 0.15 X
Lens construction 7 elements in 6 groups
Maximum aperture f1.4
Minimum aperture f16
Diaphragm 8 curved blades
Focusing Manual focus with a straight helicoid
Filter size 49mm
Dimensions 36mm (h) x 60mm ⌀
Weight 230g


The 45mm f1.2 dwarves the f1.8 version.


Comparing the Olympus 45mm f1.2 to the Canon EF 50mm f1.8. On their respective bodies they both offer a similar field of view.


The 45mm f1.2 mounted on an Olympus EM1 mk i compared to the Voigtänder 75mm f2.5 Color-Heliar mounted on a Sony A7r. Both a ideal focal lengths for portraiture.

Physically this is a large lens. It dwarfs my Olympus 50mm f1.4, my Canon EF 50mm f1.8 and my Sony FE 50mm f1.8. It is a smidge larger than the Olympus m.Zuiko 12-40 f2.8 Pro and 27g heavier. The 45mm f1.2 follows the look of the other lenses in the Pro line and it also has a L-Fn button which can be programmed to various functions on Olympus cameras. In the hand the lens is reassuringly solid, it has that dense feeling that quality optics have. The focusing ring is nice and large and has the same ribbing that all the other lenses have in the Pro line. Like the other Pro lenses the 45mm f1.2 enables manual focusing by pulling back the focusing ring to engage a clutch to give a nice smooth focus throw of about 110º that has hard stops at either end. Combined with focus peaking this makes for manual focusing nirvana. As to what the lens is made out of this is hard to say, the lens mount is chrome plated brass, parts of the lens barrel have a metallic feel, and other parts feel plastic. Is this a problem? I don’t think so. For certain applications metals can be a poor choice and high quality engineering plastics such as ABS make better sense. In fact Sigma makes a big deal out of the use of their Thermally Stable Composite (TSC) which is substantially stronger than conventional polycarbonates while having similar thermal expansion properties to aluminium. Bottom line the 45mm f1.2 feels nice in the hand and is easy on the eye.


Optical Performance


The Olympus m.Zuiko 45mm f1.2 PRO lens is sharp wide open.


Lens sharpness test at f1.2 and f4. Click on the image to see it larger.

Image sharpness in the centre of the frame wide open is good and reaches its best at f4. The corners wide open are less sharp than the centre, however, by f2.8 the sharpness and contrast improves considerably and the lens reaches optimum sharpness at f4. By f8 the image starts to soften due to diffraction. Vignetting is also present wide open but this disappears at f4. There is a minute amount of pincushion distortion present, but unless you are shooting very demanding architectural work then it is largely unnoticeable. Chromatic aberration is present on high contrast edges, but it is very slight and easily removed in post. Longitudinal chromatic aberration is also present, but it too is very slight and not painfully obvious which is good as it is quite difficult to get rid of in post. All this is managed using firmware corrections. I like to turn these off using RAWTherapee to see how much correction is going on beneath the hood so to speak. The amount of vignetting is greater than the corrected images but it still clears up by f4. The pincushion distortion is also more evident. All in all the firmware corrections plus topnotch lens design make a lens that performs very well.


Chromatic aberration is well controlled and what little there is is easily fixed in post.


Longitudinal Chromatic aberration.


With regard to resistance to lens flare pointing the 45mm f1.2 at a very point light source shows it is quite prone to ghosting flare – images of the lens diaphragm as colourful bright spots. This is more evident on lenses with complex constructions with lots of lens elements. The red blobs in the photo are not lens defects. They are caused by light being reflected  off of the sensor surface back onto the rear element. As each pixel is reflected it causes a grid pattern. Unfortunately the smaller lens flange distances on mirrorless cameras means this phenomena is more apparent than on a DSLR with their great lens flange distance.


The Olympus 45mm f1.2 is quite prone to flare so it is advisable to use the included lens hood.


The Olympus 45mm f1.2 is quite prone to flare so it is advisable to use the included lens hood. At f16 the sun stars are quite pronounced.


f1.2 bokeh balls test. In the centre of the frame nice round and smooth bokeh balls with no evidence of any onion rings. At the edgeges you can see cats eye shapped balls. Click on the image to see it larger.

Olympus make great claims about the bokeh, or more importantly the feathered bokeh of this lens. Up until the announcement of this line of lenses I’d never heard the term feather bokeh before and to be honest I’m not all that sure about what it is and how that you quantify it. I guess in simple terms Olympus means that edges of the bokeh balls are not harsh and to quantify how feathered they are we’ll have to make some comparisons. At f1.2 the centre of the frame has nice round bokeh balls with no evidence of any onion rings. Onion rings occur with the use of ground aspheric lens elements. Basically the grinding process leaves a series of ridges which can be seen with a defocused point source. The biggest problem with them is that for most people they go unseen, but once seen they can’t be unseen. At the edges of the frame there is cats eye shaped bokeh – this is caused by mechanical vignetting from the lens barrel.  At f5.6 I was quite surprised to see star burst effects forming around specular highlights, I was expecting them to start appearing at the f11 mark. By f16 the bokeh balls in the corners have become spherical.

So the question is what to compare the Olympus 45mm f1.2 to? The most obvious contender is the 45mm f1.8. In their advertising blurb for the f1.2 Olympus compare the lens on an Old EM1 mk ii to a full frame DSLR with 85mm lens. Interestingly having made such a bid deal about the bokeh the only comparison is made with weight so I’ve decided to make the comparison using weight and bokeh quality with the Canon EF 50mm f1.8 on a Canon EOS550d. The 50mm lens has an equivalent focal length of 80mm in full frame terms. The nearest full frame equivalent I’ve got on hand is the Cosina Voigtländer 75mm f2.5 Color-Heliar on a Sony A7r2. Finally as I’ve already talked about the Olympus OM Zuiko 50mm f1.4 I’ll add it to the list with it mounted to the Olympus EM 1 mk ii. The older Olympus and the Canon and Voigtländer are also considered classic lens designs.

Olympus OMD EM1 mk ii with Olympus 45mm f1.2 Pro lens 984g
Olympus OMD EM1 mk ii with Olympus 45mm f1.8 737g
Canon EOS550d with Canon EF 50mm f1.8 mk ii 601g
Sony A7r2 with Voigtländer 75mm f2.5 Color-Heliar 932g
Olympus OMD EM1 mk ii with Olympus OM Zuiko 50mm f1.4 980g

So the Olympus 45mm f1.2 combo is the heaviest. Lets look at the bokeh. With the three Olympus lenses I’ll just compare the lenses at widest aperture of the slowest lens. With the other two I’m going take equivalency into account so 45mm f1.2 on the Olympus is roughly equivalent to 50mm f1.8 on the APSC sensor and the Olympus’ f1.2 is equivalent to f2.5 on the full frame sensor. 


Bokeh comparison between Olympus 45mm f1.2 and the Olympus 45mm f1.8. Click on the image to see it larger.


First cab off the rank is the Olympus m.Zuiko 45mm f1.8 lens. It has an optical construction of 9 elements in 8 groups, weighs in at 116g and has a 37mm filter thread. This little lens is an absolute gem and I use it a lot to do both stills and video product shots. It currently retails for $1300 AUD less than the f1.2. Wide open at f1.8 there is vey little to distinguish it from the more expensive lens at f1.8. So I would have to say unless you absolutely need an aperture of f1.2 then save your money.


Bokeh comparison between the Olympus 45mm f1.2 and the Olympus OM 50mm f1.4 at f1.4. Click on the image to see it larger.


The Olympus OM Zuiko 50mm f1.4 was introduced way back in 1972 with the original OM1. The lens used here is the revamped version with improved coatings that came out in 1984.  The lens construction is very simple with 7 elements in 6 groups and no fancy glass. Wide open it is not the sharpest lens and the bokeh balls are irregularly shaped, but stop it down to f2 and the bokeh is just as good as the 45mm f1.2 at f2. It’s possible to pick this lens up for about $100 on eBay and for $150 you can get it with a film SLR such as an OM1 or 2.


Bokeh comparison between the Olympus 45mm f1.2 at f1.2 and the Canon EF 50mm f1.8 at f1.8. Click on the image to see it larger.


When you put the Canon EF 50mm f1.8 on an APS-C camera such as my EOS550d it has a focal length that is equivalent to 80mm on full frame. It has a simple double-gauss design of 6 elements in 5 groups. This model is the mk ii version which was introduced in 1991 and is sometimes called the “plastic fantastic” because of its plastic body and lens mount. At the edges and in the corners of the frame the Canon has more pronounced cats eye bokeh, but at the centre it is nice and round. Thanks to only having a diaphragm consisting of 5 blades the bokeh becomes polygonal as it is stopped down. No longer in production it can be picked up for around $60 on eBay or you could really push the boat and buy the latest version which retails for $200 AUD. 


Bokeh comparison between the Olympus 45mm f1.2 at f1.2 and the Voigtländer 75mm f2.5 Color-Heliar at f2.5. Click on the image to see it larger.


The last lens is the Voigtländer 75mm f2.5 Color-Heliar mounted on a full frame body.The original Heliar design was developed in 1900 by Dr. Hans Harting as a symmetrical 5-element variant of the simple anastigmatic and well colour-corrected Cooke triplet. In 1902 the design was revised correcting astigmatism, curvature and coma better than the original design. That new design was asymmetrical six elements in five groups. In 1950 Dr. A.W. Tronnier refined the design even further to produce the Color-Heliar. When Cosina revitalised and relaunched the Voigtländer line they revived the Heliar concept with the 75mm f2.5 Color-Heliar. Cosina wanted to recreate the German optical aesthetic and engineering quality from the 1950s. The lens construction by modern standards is pretty basic with 6 elements in 5 groups and the 10 aperture blades bodes well for nice bokeh. Wide open at f2.5 it has the same depth of field characteristics as the Olympus at f1.2. It is not as sharp as the Olympus wide open but the tonal transitions are very smooth. The bokeh balls are nice and round at the centre, but at the edges and corners they take on the elliptical cats eye shape. This lens is longer in production and for a while it was possible to pick one up for around the $300 mark second hand, but the interest in adapting classic lens to mirrorless cameras has seen prices rise to almost $700.


Auto Focus Performance


the reluctant bull terrier test


Shooting stills the AF is very quick and accurate. Using the reluctant bull terrier test I shot a sequence of 25 frames using continuous autofocus  at 10 frames per second with an EM1 mk i which does not have the latest iteration of Olympus’ on sensor phase detection AF. At f4 all the shots were in focus. Switching out the mk i for the mk ii with its better AF systemI shot a 71 frame sequence at f2 at 10 frames a second and only 6 frames were slightly soft.

Shooting video on the Olympus EM 1 mk ii using face tracking the camera and lens responds quickly and smoothly without hesitation. Many m4/3 users shoot video using Panasonics cameras so I put the 45mm f1.2 on my G85 and set it it use face tracking. The results were dismal. There was a lot of hunting, and if and when the camera acquired focus it would quickly drift off. Having had good success with the EM1 I can only put this down to Panasonic’s use of DFD contrast based autofocus and not the lens.


Conclusion


The fantastic  little 45mm f1.8 is only $500 new and is just as sharp. The only place where it is found wanting is the maximum aperture.


There is no doubt that the Olympus m.Zuiko 45mm f1.2 PRO lens is a very good lens. It is well built and optically performs very well. The only thing that counts against it is its price when compared to other options. In the last quarter of 2020 Olympus ran a promotion in many parts of the world enabling purchasers of the EM1 to claim a free lens from the f1.2 trinity. If you were one of those and chose the 45mm then you got a great lens and I hope that you really enjoy it. If you are a committed Micro Four Thirds user and were wanting to purchase this lens today at the street price of $1800 I would suggest that your money could be better spent. The fantastic  little 45mm f1.8 is only $500 new and is just as sharp. The only place where it is found wanting is the maximum aperture. If you are not so wedded to the idea of 45mm but just wanted a fast short telephoto then I’d seriously consider the Sigma 56mm f1.4 which at $750 is great value and a seriously good performer.

If you are just getting into photography and want a camera and lens combo that gives enormous creative control over depth of field then you’ve got to look at full frame cameras ($1800 will get you a new one less if second hand) and pick up an 85mm f1.8 where Canon, Sony and Nikon all have offerings between $600-900 new. 

For video the 45mm f1.2 is a nice option as on the right camera it can autofocus extremely well and the the provision of a manual focus clutch that gives hard stops makes it very useful for manual focus pulls. If autofocus isn’t important to you then there are a huge number of older classic f1.2 and f1.4 lenses that can be picked up very cheaply.


Example Images


Wide open the Olympus m.Zuiko 45mm f1.2 PRO lens gives a nice please rendition with gentle tonal transitions.


The close focusing capabilities of the Olympus 45mm f1.2 are impressive and couple this with pleasing bokeh it makes for a very nice lens with which to do product photography or still life.


The Olympus 45mm f1.2 also makes for a good lens for equine portraits.


Frida at 45mm f1.2.


Taken at the minimum focusing distance of 50cm.

Olympus Has Fallen

Not the dreadful film, but the camera company. On the 24th June 2020 Olympus announced that they were in talks with Japan Industrial Partners to divest themselves of their camera business after three continuous years of losses despite numerous restructuring attempts. I’ve got no idea what all this means from a practical point of view, but from an emotional point of view it is quite a sad day. I’ve always considered myself to brand agnostic and have used over the years Praktika, Pentax, Minolta, Canon, Leica, Voigtländer, Sony, Panasonic and of course Olympus. But I’ve got to say that over the last 38 years I’ve always had at least one Olympus camera. More than just a few key moments in my life have been documented by an Olympus camera.


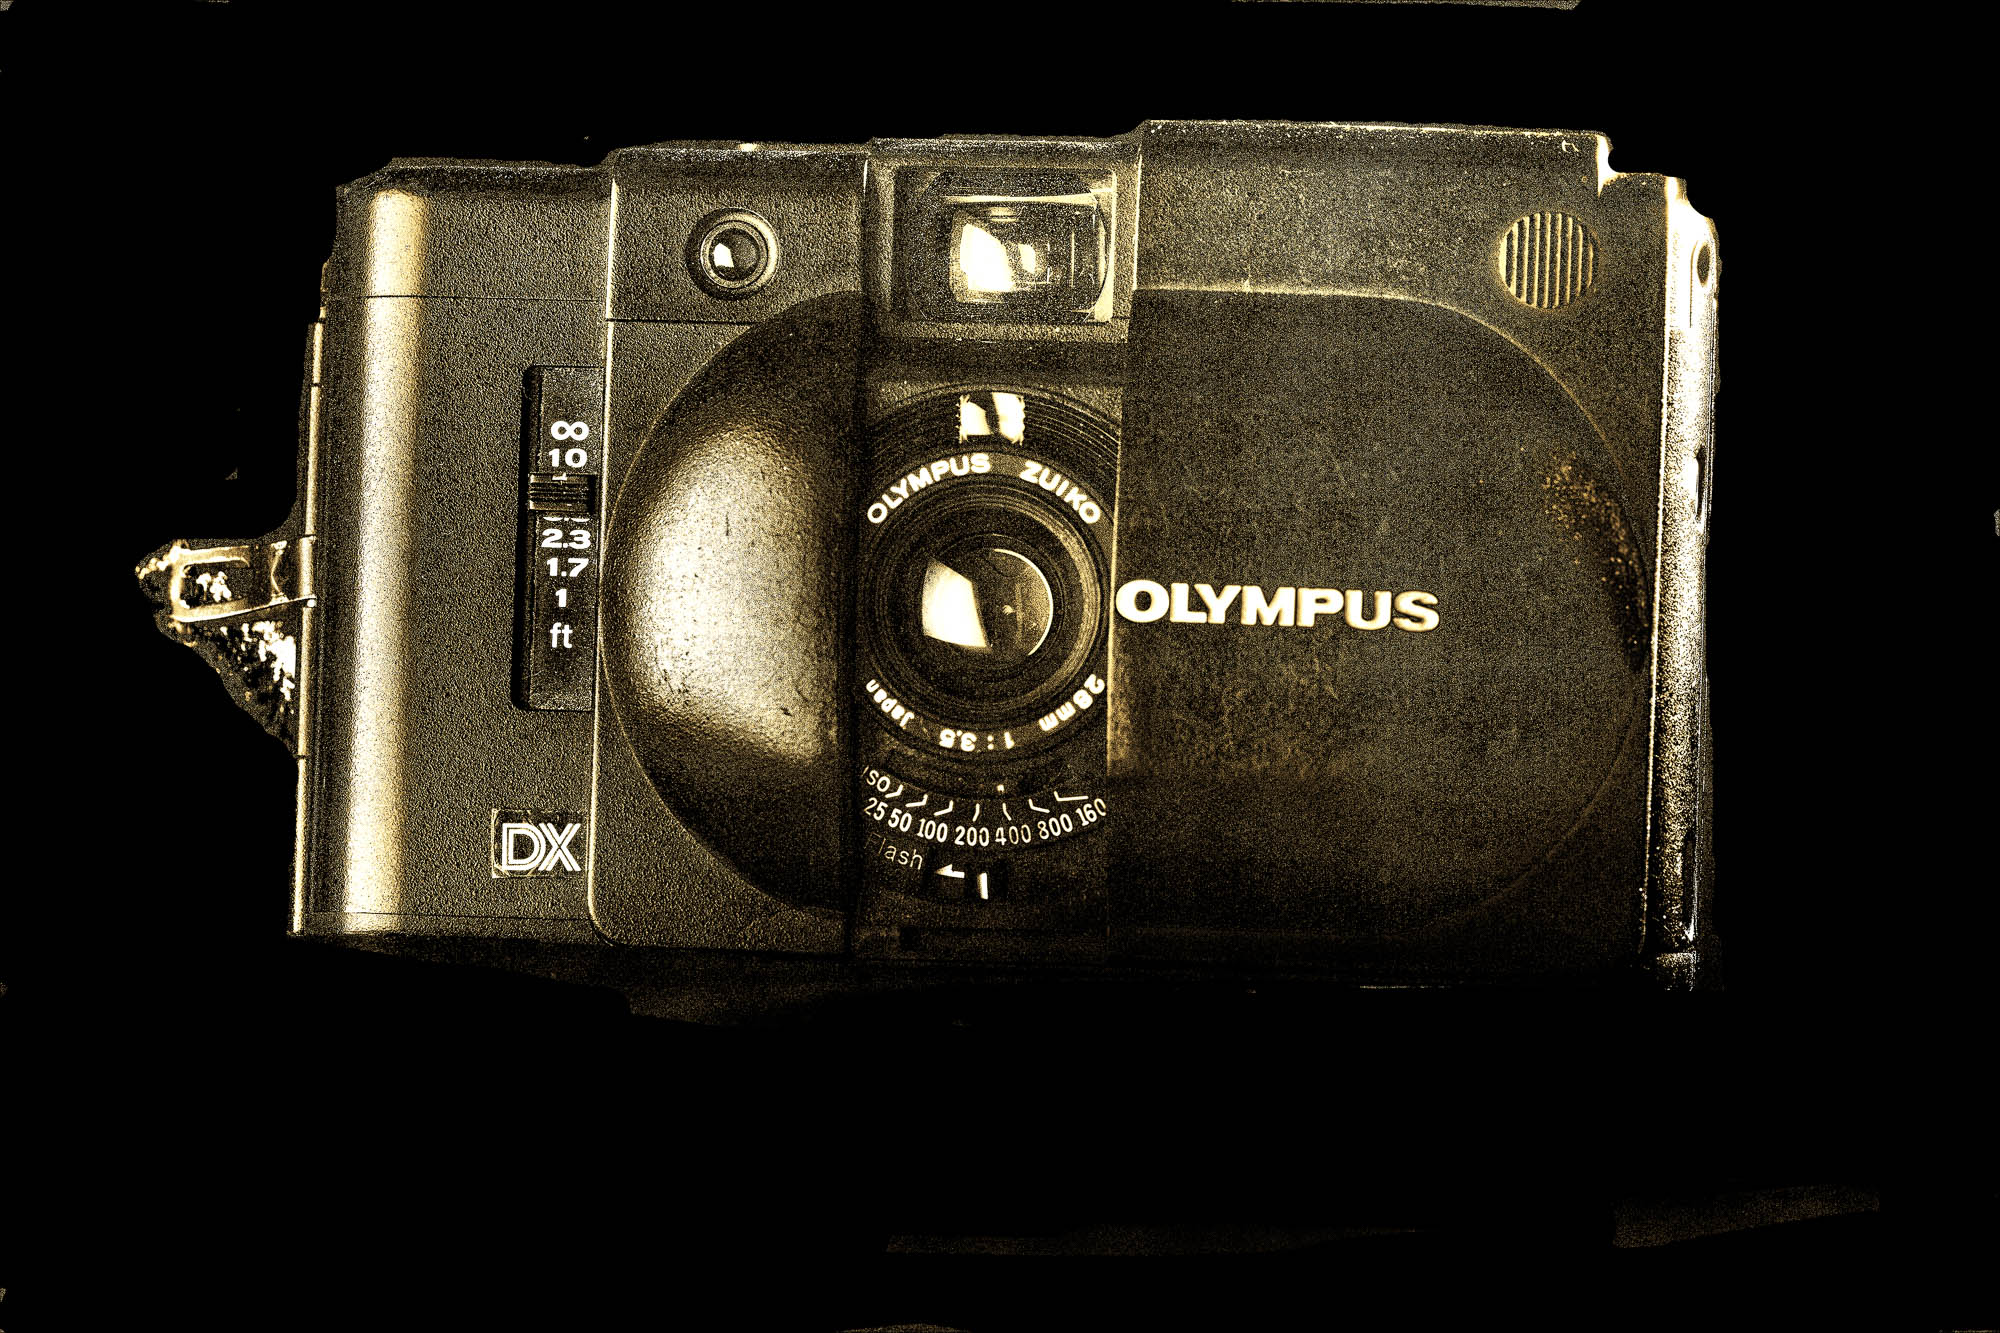
My first Olympus camera was an XA2. This is the XA4 I bought later to replace it, they look very similar, the major difference being that XA2 had a 35mm lens while the XA4 had a 28mm macro lens.


Portrait of me in Majorca taken in March 1986 by my father in law, Brooke Spencer. Probably taken with a Leica R4 with a Leica 135/2.8 Elmarit-R on Kodak colour negative film. I’m holding my OM1n with 35-105 lens.


I bought my first Olympus camera in 1982 after returning back home from an extended stay in Israel where I got into taking photos. Previously I had a Kodak 110 cartridge camera and when I got the films back from the processors I was dismayed with how crap they looked. I was determined that on the next trip I would take a much better camera. So after a trip to the newly opened Whibys camera shopping Chichester and a long and informative chat with the owner Derek Whitby I left with an Olympus XA2 – a unique 35mm clam shell compact camera. I kept going to Whitby’s until 1988 which was when I migrated to Australia. In that time Derek went on to sell me an OM20, OM1n, OM2n, OM4 and my partner an OM40. Along with those cameras was wheelbarrow load of lenses, some very specie flashguns for the time and a shed load of film. I’m glad their business is still going although Derek and his wife Jacqui no longer run it. The cameras kept marching on and were perfect for my travels being small, durable and highly featured for their time. The lenses were also compact and gave great image quality. I’ve still got most of the lenses and still use them, and I’ve written about them on this blog ( 21mm f3.5, 24mm f2.8, 35mm f2, 50mm f1.4,135mm f2.8, and 35-105mm f3.5-4.5).


Believe it or not that’s me in Red Square, Moscow in January 1987. The temperatures were -40ºC. You can just about see my camera bag slung over my shoulder. In it is an OM1n, an OM2n, a 35-105mm, a 50mm f1.4, a 200mm f4 lens a T32 flash and a T20 flash. We went to document the plight of Russians in Moscow and Leningrad (now St Petersberg for a human rights campaign that was to be launched later that year at the House of Commons in London). The cameras worked flawlessly in the cold. The photo was taken by my wife on an Olympus AF1.


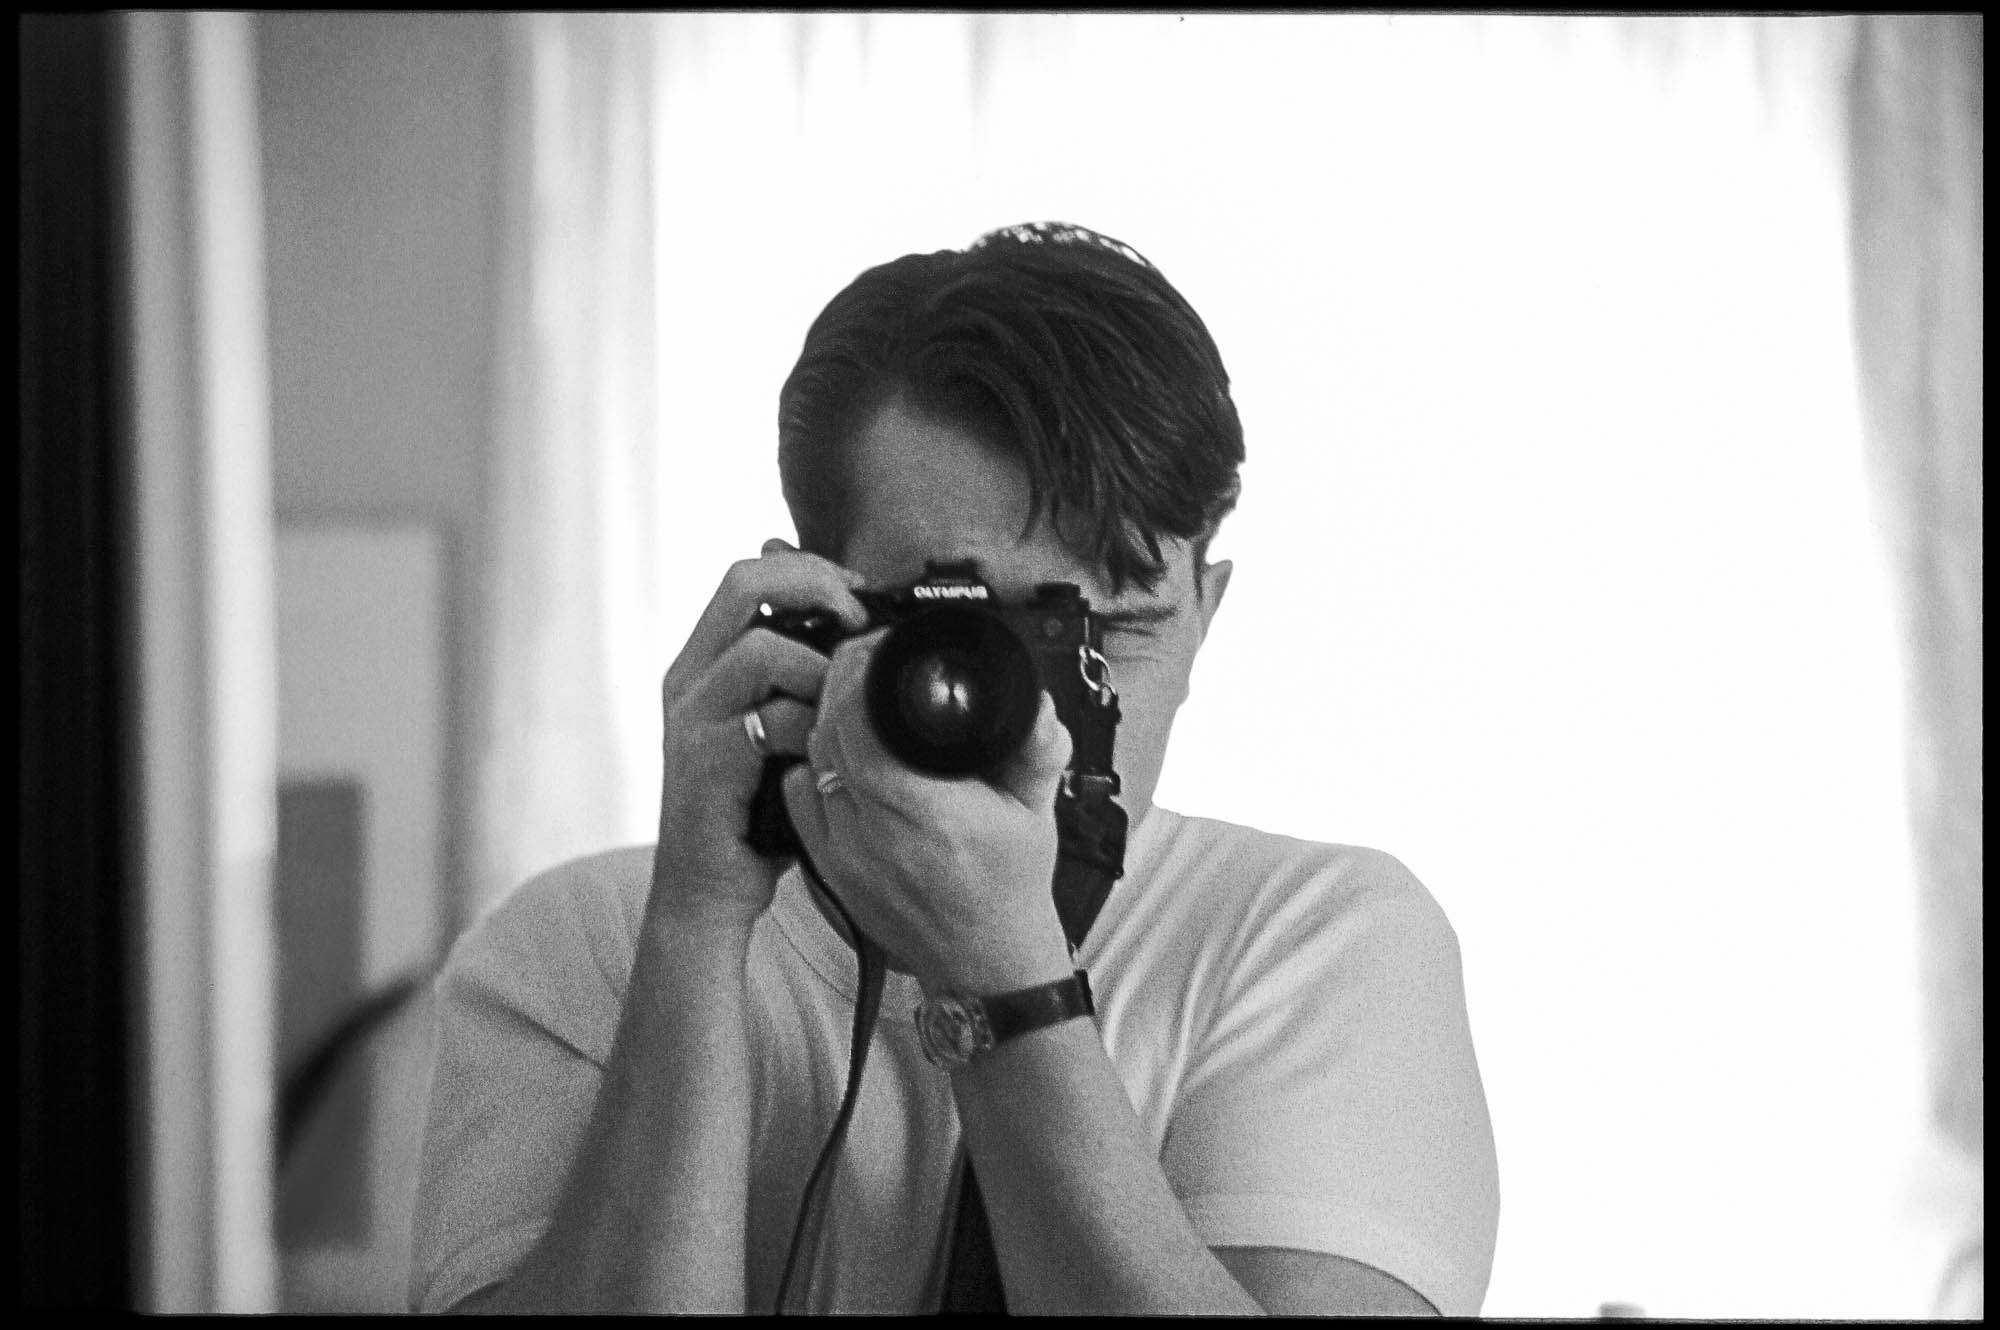
My earliest selfie – taken in September 1987 while I was staying with my in-laws just prior to departing for India and Nepal. The camera is an Olympus OM4 with an Olympus OM Zuiko 35-105mm lens. Originally shot on Ektachrome 200 but converted to black and white because of fading.


Yours truly on a house boat on Lake Dal in Srinagar, Kashmir, India. I’m wearing a Camera Care Systems pouch with my Olympus OM4 in it. Taken by my partner with her OM40 and 35-105 lens.


In 2003 I shot a couple of weddings and my OM4s developed problems, one the shutter failed and the other the film advance jammed. I took them to the local camera whisperer but he broke the bad news to me – there were no new spare parts. He said I could by up some old models and use them as donor cameras but there was no guarantee as to the condition of the parts and how long they would last. To say I was gutted would be an understatement. This came a a particularly bad time for me, I was recovering after a bad accident and was pretty broke. I had enrolled at college to study photography as a form of therapy and now I was pretty well camera less. My late father-in-law (Brooke Spencer) in an act of supreme kindness stepped into the breach. He had just bought a Canon EOS D60 digital SLR and he sent me his old EOS3 film SLR and a couple of lenses. I now had a camera to complete college with and had inadvertently changed system. I went digital with Canon but I wasn’t really happy with it. I found the Canon EOS system to be large, heavy and cumbersome. About this time I fell into writing about and photographing outdoor activities and then was commissioned to write a walking guide. Well after a year lugging a Canon 5d and three lenses on over 1000Km of walks I knew I needed something lighter.

The Canon EOS system full monty. Three bodies, seven lenses, two flashes, flash meter, filters, cables, flash triggers, and reflectors. It is a hernia inducing load.


This is the camera kit I used on my first walking guide book. Less hernia inducing than the Full Monty, but still coming in at 7Kg including filters and batteries.


When I saw the Olympus Pen EP1 in 2009 I was smitten, but it didn’t have a viewfinder so I held off buying one. Less than a year later Olympus introduced the EP2 and I got one. The next guide book was done with an outfit based around that camera and a a few lenses and I was much happier.


Coming in at under 2Kg complete with batteries, filters, microphone and assorted cables for video. This kit still gives me coverage from 24emm to 300emm with 1:1 macro and a smallish prime. All that’s missing is flash.


Here I am pausing to take a photo with EP2 while walking up Frenchman Peak in Cape Le Grand National Park, Western Australia.


Over the last ten years I’ve heard a lot reasons from keyboard warriors on various photographic forums why the micro four thirds format that Olympus and Panasonic used was inferior to full frame sensors and that you couldn’t get work published if you used it. Well after three books, two exhibitions and loads of print sales no one has ever said the image quality was not up to snuff. Unfortunately photography is an activity dominated by very conservative men who see a small camera, no matter how capable, as being an affront to their masculinity. So Olympus was sandwiched by the small minded conservatives that wanted big cameras and at the other end the onslaught of the do anything mobile phones which now have very good photo and video capabilities.


The Canon EOS6d with Sigma 150-600mm lens compared to the Panasonic G85, which uses the same sensor format and lens mount as Olympus, with the Panasonic Leica 100-400mm lens. The Panasonic has great reach, better video, the same number of megapixels, weighs less and costs less.


The Canon EOS 6d camera with 100mm f2.8 macro lens that I used to use for photographing orchids alongside the Olympus EM 1 mk ii with 60mm f2.8 macro lens that I use now. Both produce amazing images, but the Olympus is a lot nicer to carry through the bush all day.


As I said at the beginning of this piece I have no way of knowing what will happen. Maybe JIP will turn the company around and make it it profitable and innovative. Maybe they’ll just asset strip and close it down. The company does both. I hope it is the former, but if it is the later I guess that this a eulogy for Olympus. But whatever may happen my current Olympus cameras have plenty of mileage left in them and if I can get another 10 years out of them, and at this stage I don’t see why not, then I’ll be very happy.


Winter Coat*

Winter Coat by Paul Amyes on 500px.com


As the nights are getting longer and colder the local horses have been put into their winter coats. Another two photos from the shoot with the Olympus OM Zuiko 50mm f1.4 lens.


Winter Coat by Paul Amyes on 500px.com


*This week’s post title was inspired by Paul Kelly’s song “Winter Coat”

Hell Or High Water

Hell or high water is the new motto for the Avon Descent and was adopted because recent years have seen decreasing amounts of rainfall falling and competitors have had to carry their craft where there was insufficient water. This year, 2017 and the 45th occasion of the race, the water levels were high which meant potentially new records could be set. The Avon Descent was first held in 1973, and there were only forty-nine competitors. This year there were 370 competitors with many coming from interstate and overseas. In more ways than one it deserves the title the “world’s greatest white water event”. The 124 km or 77 mile two day event starts at Northam and finishes at the Riverside Garden in Bayswater with an over night stop at the Boral Campsite just outside Toodyay. For the majority of entrants the aim is just to complete the course, but for the elite athletes it is a chance of competing in a unique endurance race.

The beauty of this race is that you can pick out a few vantage points from a list put out by the race organisers on their website and follow the whole event documenting the whole story rather than just getting an isolated snap shot. In previous years I’d covered the race for magazines shooting stills and then writing the story. This year I had intended to cover the entire event from start to finish and it was to be first time I’d covered it shooting video. Having planned my weekend around the race it was time to check the maps and the approximate timings for each stage. For instance there was no point heading to the first stage after the start as I would not have had time to get there by car, park, and then walk along the river to find a good location to set up. Also I had to think about the weather conditions, because at some of the viewing points you are bussed in and that would mean I’d have to carry everything with me. As the forecast for the weekend was a cold start it was thermals, and fleece. he key was light layers that could be added or taken off as conditions permitted. Camera and lens choice was hard, and I found it difficult to make a decision. For the Friday shots I could work from the back of the car and it was all to be people shots around Northam and for the sake of mobility using either a monopod or a gimbal. In the end I decided to use the Sony A7r and with Olympus OM Zuiko lenses – the 20mm, 50mm and 135mm. This and the gimbal went in a belt pack. Saturday involved shooting at three sites and I wanted to shoot some time-lapse as well as video footage. So I chose the Olympus OMD EM 1 with 40-150mm f2.8 lens for the video work and the EM10 with 12-40mm f2.8 for the time-lapse. I couldn’t set up a tripod at the start as I was going to shoot on the swing bridge so I used a monopod for the video and for the time-lapse I clamped the Syrp Genie Mini to the bridge safety barrier with a Manfrotto super clamp. All this went into my photo back pack. Sunday was the biggest problem with no car access to Bells Rapids everything had to be carried. So I took the Canon EOS6d with 24-70mm, 70-200 and a x2 converter. I’d also need plenty of batteries and memory cards as there would be no nipping back to the car. I decided to carry all this in pouches on a belt as I needed to be able to scramble up some rocks to get a good vantage point. At Bells I mounted the camera on a tripod but at the finish line I shot just using a monopod.

The race happens on the first weekend of August every year. It kicked off on the Friday with the competitor registration at the Northam Swimming Pool and then their craft were taken down to the race marshalling area on the banks of the river. Late in afternoon and into the evening was the Avon River Festival with a huge fireworks display on the Avon River, stage shows featuring a variety of local talent, a family fun zone, rides for all the family, sideshow alley and roving entertainment, a community street parade, markets for avid shoppers, and food. On Saturday morning the event kicked off proper. As I arrived I could see hot air balloons drifting lazily above the river. The power craft were away quickly and smoothly and then it was the turn of the paddle craft. I was surprised to see that someone was competing for the first time on a Stand Up Paddleboard (SUP). Barely had half the paddle craft left than the news came through that the first power craft had reached Toodyay. It was going to be a very fast race with little hope of getting shots of the power craft. I spent a total of an hour and half standing on the swing bridge -it is a wire suspension bridge that bounces a lot, the police constable standing next to me complained of feeling seasick from the constant motion. It didn’t effect me but it really made me glad that I had the in body stabilisation activated on the cameras. After the start I went to Williamson Weir stayed there for an hour and a half. The Weir is man-made and its concrete lip and rock wall are hazardous to boat and paddler alike so around half the competitors choose to portage around it. Thankfully the other half run it and you get the thrills and spills with plenty of encouragement from the watching crowd. Finishing up in Toodyay for the day is great. There is always a great vibe with a tremendous crowd and a party like atmosphere. When I got there the town was packed and in full on carnival mode. It took an age to find some parking and get down to the river. Here there was a team change over area, and along the riverside were lots of anxious looking paddlers all staring up river for any sign of their team mates. As the first canoes started to come round the corner and pass under the timing gate they got their first sight of their team mates and their faces would burst into a huge grin of relief. The spectators would burst into rapturous cheers as the fresh team-mate paddled away heading for the Boral Campsite that marked the halfway point and the end of day one.

I couldn’t face getting up at 4;30am in the dark and freezing cold to get to the start at Boral Camp for day two so I just headed out a bit later and went straight to Bells Rapids in Walyunga National Park. You have to leave the car at the nearby state equestrian centre and then you taken in by bus. From there it was a quick walk to what I call the media rock. It’s a nice big rock that juts out into the river which gives a good view of the competitors coming under the bridge and through the rapids. I got there just as the TV crews were claiming their spots and setting up. I squeezed onto the end closest to the bank and put my tripod up to mark my territory. When the press photographers arrived they gave us a filthy look, but as they were shooting hand-held they didn’t need as much space. A little while later a hopeful photo enthusiast asked if could join us on the rock, one of the guys I know from the papers said it was OK if he didn’t talk about equipment – his or ours – and if he did he’d get thrown in the river. He decided that he couldn’t not talk about kit and took himself off somewhere else. After a couple of hours I knew that I’d have to get my skates on if I was to get to the finish line.

The finish line is in Bayswater a suburb of Perth. A huge screen had been put up and there was a live commentary being given. I positioned myself by the finish line as I find that the images taken as the paddlers beach their boats and walk ashore tells a very powerful story. It does not seem to matter whether they are newbie’s in their first race or veterans each face has a similar look etched upon it. It is a mixture of pain from the sheer physical effort, relief from finishing, and disbelief that it is all over. Some will swear that they will never do it again, but most know that even as they hit the finish line that they will be back next year.

So now a week later, I’ve edited the 50Gb of footage and made a 7 minute clip. As I write this I’m thinking about how things went and what I would change if I were to do it again. Well to start with I wouldn’t bother with the Sony. It produces very nice images, but the screen is terrible. It is winter here and the days aren’t as bright as they can be, but the Sony’s rear LCD panel is virtually unusable. The other thing that puts me off is that the user interface isn’t very intuitive and so adjusting some settings in a hurry is a pain in the nethers. The OMD EM1 mk i is constantly a surprise when shooting video. The touch screen is a pleasure to use and the phase detect auto focus does very well. It is tempting to run off and get a mk ii for the 4K and the improved focusing. The Canon EOS 6d was the surprise, the autofocus is crap, but Technicolor’s CineStyle Profile and Canon’s superb lenses produce gorgeous images. All it needs is a flippy flappy touch screen and dual pixel auto focus and it would be perfect. “The 6d mk ii has that!” I hear you say, but (and there is always a but) the mk ii’s video compression is worse than the mk i. What Canon give they take away! There is always the EOS 80d. I might try to hire one for the next project I shoot. I wish I’d used the gimbal more instead of the monopod, accepting the fact that I couldn’t use it for the long lens shots. Sound could be a lot better – it is the aspect of video I always struggle with. I’m also beginning to think that I’ve out grown iMovie – a better editor would give me some more options. I’ve downloaded DaVinci Resolve to give that a whirl on my next project. In many ways I’m no different to the competitors in the race – I’m already starting to plan for next year!

OM*

My new full frame Olympus with the Olympus OM Zuiko 50mm f1.4 lens mounted on a Fotodiox adapter.

Well I’ve done it. I’ve gone full frame digital with Olympus. No I’ve not got access to some top-secret prototype from Olympus. Instead I’m mounting OM Zuiko lenses on a “full frame” (I hate that term, I much prefer 35mm sensor) camera digital – the Sony A7r to be precise – with a Fotodiox pro OM-NEX adapter.

“If you date your cameras, you marry your lenses.”

– David Hobby

Sony A7r with Olympus 24mm, 35mm and 50mm lenses. The Fotodiox Pro OM to Nex lens mount adaptor allows them to be mounted to the camera.

I was left with a collection of Olympus OM lenses when Olympus in their infinite wisdom decided to abandon the OM mount – this did not occur with the advent of digital imaging, but back in the film era. I migrated to the Canon EOS system reluctantly and left my lovely jewel like Zuiko lenses sitting in a drawer. Every now and again I would get one out and fondle it. Oh the beautiful feel of the buttery smooth focusing ring with its long throw. The cool feeling of the metal body with that heft that instantly denotes high quality precision engineering. To cap it off and send me into a rapturous state is the aperture ring – firstly there is one, and then there is the feel and sound of that ring as you change aperture. Just thinking about sends me into the throes of ecstasy.

Now it is a little known fact that when Yoshihisa Maitani designed the OM system he chose to make the flange distance a mere 46mm. At the time he probably thought that this would make a very compact SLR. But the unforeseen benefit of this decision is that it makes the OM lenses very easy to adapt to other cameras. Indeed when Canon brought out the ground breaking EOS 5d I was aware that you could buy an adapter to fit Olympus lenses to the body. But the experience was to me somewhat dismal. DSLRs really aren’t made to use manual lenses. It’s like expecting to find meat in a chicken McNugget. A disappointing experience. When Panasonic and Olympus announced the birth of micro four thirds in 2008 one of key features was the jettisoning of the mirror box found in SLRs. This has a couple of benefits. Firstly it means that a much shorter flange focal distance can be used. In ordinary speak this is the distance between the sensor/film plane and the lens mount on the camera body. Micro four thirds has a distance of 19.25mm which meant it was ideally suited to adapting lenses. I talked about this in April 2013 and again in April 2016. The second benefit was the provision of focus peaking. Focus peaking had long been found on video cameras by dint of them having an electronic viewfinder, it was quickly added to the feature list of mirrorless cameras. I first used it with the EM10 and was very happy with it. But there was a fly in the ointment. My carefully considered lens collection had been altered by virtue of the crop factor, basically a 50mm lens on m4/3 gives an angle of view equivalent to a 100mm lens on a 35mm sensor. Bugger! So apart from video use I put the old lenses away again.
A little while later Sony heralded the launch of their A7 series of full framed mirrorless cameras and initially my interest was piqued but the reality of buying into another camera system (I was already running Olympus m4/3 and Canon EOS) was just not an option. So I feigned disinterest. But an interesting thing happened, Sony update their models with incredible speed and that meant the prices of second-hand A7 and A7r dropped faster than an Essex girl’s knickers. All of a sudden my beautiful OM lenses were restored to their full frame glory.


Olympus OM Zuiko 50mm f1.4 at f8.

To test the lenses I shot a standard scene which was composed of a book shelf in my sitting room. Mounting the camera on a tripod I then framed up so that the complete height of the shelf filled the frame. The shots were taken wide open and then stopped down to f8. To see more detail in the test shots just click on the image and it will open in a new browser. This will be an evolving series of articles about using various OM lenses.


Olympus OM Zuiko MC 50mm f1.4


Olympus OM Zuiko MC 50mm f1.4

The first lens most people whack an adapter on is a fast standard. The 50mm f1.4 was one of the original lenses that was introduced when the OM system was launched at Photokina in 1972. The original silver nosed (a term referring to chromed front mount ring) had a single lens coating and was 36mm in length.The newer MC version was introduced in 1984. Along with the new improved lens multi coating the design was changed resulting in a length of 40mm with a weight of 280g. The lens construction is seven elements in six groups. Despite being a fast lens it has a modest size and has a 49mm filter thread.

50mmf14optic


Shooting my test subject one of the very first things I noticed is that the image displays very slight barrel distortion. This is where image magnification decreases with distance from the optical axis and makes parallel straight lines look like the edges of a wooden barrel. This phenomenon is usually associated with wide-angle prime lenses or the wide end of standard zooms. It does happen in standard primes lenses but usually only at close focussing distances so it was surprising to see it here. Wide open lateral chromatic aberration (CA) is perceptible and at f8 cannot be seen. In terms of sharpness at f1.4 the image is universally soft and lacking in contrast. Stopping down to f8 improves the image and the lens is sharp across the frame. The lens renders beautifully with a gentle fall off in tones and the bokeh is a delight being soft and smooth. The lens is quite resistant to flare and I haven’t felt any great need to put on a lens hood.

olympus-50-cpmparison-1

A street sign on Avon Terrace in York, Western Australia. Taken on a Sony A7r with Olympus OM Zuiko 50mm f14. Shot at f1.4.


Al fresco at Henry Saw in Grand Lane in Perth WA. Olympus OM Zuiko 50mm f1.4

In conclusion – well I always thought that it was a very good lens when I shot film and now having had the opportunity to mount it on a high megapixel digital camera I am not disappointed. If adapted lenses are your thing I would definitely recommend you to acquire a copy.


* today’s musical reference is to the Moody Blues the pioneers of art rock and progressive rock.