Olympus m.Zuiko 17mm f2.8 lens – a belated review

The Olympus 17mm f2.8 lens mounted on an Olympus Pen EP-2.


The Olympus 17mm f2.8 lens was the first prime lens from Olympus for its new Micro Four Thirds System and was launched in 2009 with the Olympus Pen EP-1 their first camera. I didn’t buy the EP-1 when came out, I was deeply tempted but I wanted a camera with a viewfinder. Less than a year later the EP-2 was launched and it had provision for accepting an auxiliary EVF and I promptly bought one and the 17mm f2.8 came as part of the kit and I’ve used it ever since.


The 17mm f2.8 is what is termed a pancake lens. This is where the lens specs are sacrificed to produce the smallest possible lens.


The Olympus 17mm f2.8 wasn’t well received – a lot of people felt that its minimum aperture of f2.8 was somewhat underwhelming especially compared to the Panasonic 20mm f1.7 which was launched in the same year. The Panasonic while sharper in the centre of the frame and having a faster minimum aperture (1.7 compared to 2.8) was larger, heavier, more expensive had slow noisy AF, marked chromatic aberration and didn’t behave very well with the sensor stack of Olympus cameras. There was a strange banding effect when it was used on the EM5 at higher ISO. In 2012 Olympus introduced the 17mm f1.8 which addressed all the short comings  of the older f2.8 lens which was allowed to slip silently into oblivion.


The Olympus 17mm f2.8 lens mounted on an Olympus Pen EP-5.


I wanted to upgrade to the new f1.7 but I could never find a dealer who had it in stock. The same was true when I thought I wanted the Panasonic Leica 15mm f1.7 as a replacement. In the end I bought the Sigma 16mm f1.4 DG DN which is optically a huge improvement over the little Olympus, but is physically enormous.  I kept the Old 17mm f2.8 because it served several purposes. It had a very useful close focusing capability when compared to the Sigma (0.11x compared to the Sigma’s 0.07x) and when mounted to my EP-5 it was small, unobtrusive, and would fit in a jacket pocket. The same could not be said for the Sigma.


A size comparisson between the m.Zuiko 17mm f2.8, the Sigma 16mm f1.4 which offers a similar field of view and the Olympus OM Zuiko 35mm f2 for full frame cameras.


TLDR


Vital Statistics


Lens construction of the m.Zuiko 17mm f2.8 lens.


Focal length 17mm equivalent to 34mm on full frame
Diagonal angle of view 65º
Optical construction  6 elements in 4 groups with 1 aspherical lens
Diaphragm  5 rounded blades
Minimum aperture F2.8
Maximum aperture f22
Minimum focusing distance  20cm
Maximum magnification ratio 0.11x
Filter diameter 37mm
Dimensions  ⦰ 57mm x 22mm (h)
Weight 71g
Internal focusing No
Lens hood No


The Olympus 17mm f2.8 is the same size as this Canon EF rear lens cap and body cap.


This lens is small – really small – just 22mm high and 57mm in diameter at its widest. To put that into perspective the lens is only just a little bigger than a Canon EF body and lens cap and weighs just 43g heavier. For such a small and lightweight lens it does feel surprisingly dense in the hand. The lens mount is metal and the body is plastic with no weather sealing. The only control on the lens is the focusing ring which is of the focus by wire type and is nicely dampened. Filter size is weenie – just 37mm. Olympus did not supply a lens hood and nor did they make one. I bought an after market vented metal hood which looks very spiffy when the lens is mounted on my EP-5.


The Olympus 17mm f2.8 lens with vented lens hood mounted on an Olympus Pen EP-5.


Optical Performance 

f2.8


Wide open at f2.8 in the centre of the frame the image lacks a little “bite” . Stop down to f4 and sharpness and contrast improve and it remains good until f11. After that diffraction softens the image. In the corners wide open the lens is tiny bit softer than the centre. Sharpness improves at f5.6 but it is not as sharp as the centre at this aperture. 


100% crop showing Chromatic aberation at f2.8.


Wide open lateral chromatic aberration is very apparent with magenta and cyan fringing. The modest minimum aperture of f2.8 and the wide angle of view means that there is longitudinal chromatic aberration visible. When Olympus and Panasonic established the Micro Four Thirds standard they made the lens with built in profiles which correct for distortion and vignetting. Consequently looking at an image straight out of the camera with the profile applies there is no sign of distortion or vignetting on the Olympus 17mm f2.8. Switch that profile off and the barrel distortion is very noticeable as is very slight vignetting.


At f2.8 with lens profile disabled. Note the lack of contrast and the prominent barrel distortion.


Diffraction spikes or sunstars at f22.


Veiling flare and reflections are quite prominent shooting into the sun wide open. The result is a significant loss of contrast.

Veiling flare and ghosting are prominent when shooting into the sun as is the loss of contrast. The diffraction spikes (aka  sun stars) are a bit pedestrian and nothing to write home about.


Bokeh balls wide open at f2.8.


When it comes to bokeh well this lens is never going to be the “Bokeh King”. The bokeh balls are consistently shaped throughout the frame but were not quite perfectly circular. While the rendering of out of focus areas is smooth it is not the most attractive that I’ve seen.


Close up of the bokeh


Autofocus Performance

When the EP-1 was introduced it and the Panasonic G1 were heading the rise of a new class of camera – the mirrorless interchangeable lens camera. The autofocus was contrast based and still in its infancy. In fact dodgy AF was one of the things that was always levelled at mirrorless cameras by DSLR users in those far off days. The AF performance of the Olympus 17mm f2.8 certainly reflects this. For point to point AF using single shot mode the lens is quick and accurate if a little noisy. It is when you switch to continuous autofocus and tracking that things become dodgier than a Balinese Rolex. The performance is very hit and miss. Even when you put it on a phase detect auto focus camera (EM1 mk ii and later) the results are only marginally better. The fault is the because of the type of motor used to move the lens elements.  It just can’t keep up with information being sent by the camera. This is why Olympus later introduced its MSC technology. MSC stands for Movie and Stills Compatible and consists of a high speed motor that can provide very small precise adjustments. So while it appears poor compared to later models this is not a lens you’re going to shoot sports with.

Video AF is also a bit pants. The lens makes a horrible noise as it rocks back and forth. It does find focus eventually its just not very elegant or confidence inspiring in the way it does it.


Conclusion

The Olympus 17mm f2.8 lens mounted on an Olympus Pen EP-5.


This lens is not what you call optically brilliant – if you want that look at the Olympus m.Zuiko 17mm f1.2 Pro which costs $1900 AUD – but that’s not what this lens is about. This is a fun lens to use. It’s so convenient to slap it onto an Olympus Pen EP-5 or EM-10 and have a great small camera lens combo that can go with you anywhere. This is what micro four thirds was all about when it was introduced. Team it up with the ridiculously compact Olympus 45mm f1.8 and you have a nice two lens outfit that will fit in a jacket pocket and produce good photos. Unfortunately 17mm f2.8 is out of production, but it can be bought second hand for about $200 AUD. Factor in $10 AUD for a lens hood and you’ve got a nice little walk about lens.


Sample Images

Royal swans near the bridge to Eaton.


Getting in touch with his inner Elvis on Brighton Beach.


Fishing boat pulled up onto the beach at Bognor Regis.


Urban Cowboy waiting at the Perth Rail Station.


Salamnaca Market, Hobart, Tasmania.


Frida thoroughly approves of having a sofa on the verrandah.


On location filming at the Bellerive Yacht Club with the Olympus EM-10 and 25mm f1.8 lens.


St Luke’s Anglican Church .Richmond, Tasmania.


Lavender ice cream in a waffle cone for sale in Richmond Tasmania.


First Contact , Elizabeth Quay in Perth, is a five metre tall artwork by Nyoongar artist Laurel Nannup.


St George’s Cathedral reflected in windows of a high rise building. Perth, Western Australia.


Decorating the Christmas tree on Perth Esplanade. Perth, Western Australia.


James Turrell’s Amarna at dawn. MONA, Hobart, Tasmania.

Is Bigger Better?

A visual representation of the differences in sensor size.

Since 2011 I have been primarily a micro four thirds (m43) shooter supplemented by occasional full frame usage. Until about 18 months ago I was very happy with my choice. I accepted that the benefit of a lighter more portable camera system would come at the cost of reduced megapixel count, reduced dynamic range, and high ISO performance that was less than stellar. But now I have this desire to return as it were to the full frame fold. The reason why is that I sell prints and I felt that if I had a camera with better dynamic range  and more megapixels then I would generate more sales. This belief was what was really behind my recent dalliance with the 42Mp Sony A7r ii.

Canon EOS 550D with EF75-300mm f/4-5.6 IS USM lens. Exposure: 1/100, f8 at ISO 400.


Olympus EM 1 mk ii with Panasonic Leica 100-400mm lens.


Sony A7r with Olympus OM Zuiko 135mm f2.8 lens. Exposure: 1/1000 sec, f4, at ISO 200.


Canon EOS 6d with Canon EF100mm f/2.8L Macro IS USM lens. Exposure: 1/100 s at f/11.0 at ISO 1600.

The other day I started going through my statement for print sales for this year and surprisingly I’d had a very good year which buoyed me up considerably. When I started looking closely at what images had sold and what they were taken with I made a startling discovery. Full frame made up 26%, APSC came in at 26% and m43 took 48%. In terms of Megapixels:

  • 36 Mp + 6.66%
  • 20 Mp 33.33%
  • 18 Mp 26.66%
  • 16 Mp 6.66%
  • 12 Mp 13.33%

Intrigued I decided to look at print sales going back to 2004 when I went digital and the results were as follows:-

  • Full frame 34%
  • APSC 14%
  • m43 37.5 %
  • Compact cameras 5.5%
  • Mobile phone 1.5%
  • Scanned film 7.5%

My two best selling prints of all time were taken with a Panasonic Lumix FX-01 which was introduced all the way back in 2004 had a sensor that measured 6.4mm x 4.8mm and had a whopping 6.4 Mp of resolution. It also suffered badly from noise at anything beyond 100 ISO and had a very limited dynamic range.


Panasonic Lumix FX-01


Panasonic FX-01


Dropped from use. The Panasonic FX-01 was a 6Mp camera introduced in 2004.


Moving beyond prints sales to look at PR and editorial work I’ve never once had a complaint about image quality or size. So do all these buyers of my images know something that I don’t? Well I think that they’re not looking at the images as photographers, they are looking at the subject and how it makes them feel. When photographers look at images they see all the technical deficiencies and then think they need better cameras and lenses. When we look at new gear we always see the promise of more resolution, more frames per second, more dynamic range. The manufacturers know that we’re easily seduced by bigger numbers and they play to our insecurities.
So in the light of this do I need a bigger and better camera? Need – no. Want – yes. But needs and wants are two different things. What I’ve got is perfectly adequate and so perhaps the answer to generating more sales is, therefore, taking more pictures with appealing content.

Adapt Or…

…go with out.

Lately I’ve been reading a lot of how photography has become really expensive. Sony released the A1 at $10,000 AUD, Canon are due to release the R3 at the same amount. As for lenses well the latest fast primes are priced in the stratosphere. But here’s the news – photography is very expensive if you treat it as technological proliferation. If you insist on having the latest and greatest you are going to have to pay. But do you really need the latest and greatest? Do you honestly need 30 fps shutter speed? 8K video? 4K 10 bit 4:2:2 video at 120fps? Fifteen stop dynamic range? Only you can say what you need, but I’m guessing that like 90% of photography enthusiasts you don’t. I know I don’t. Let’s face it the greatest photos of the Twentieth Century were taken with basic equipment. The vast majority on cameras that didn’t have autofocus or built in metering.


The back bone of my professional kit has been full frame Canon DSLRs since the launch of the original Canon 5d in 2005. Here is my 6d with my lenses.


Maybe you’re a bit like me. You’ve been doing the photography thing for quite a while. You were a happy SLR user in the days of film and when the digital revolution took place you patiently waited for the affordable DSLRs to arrive on the market and you made the switch. You bought into a system, acquired some nice lenses and upgraded the camera body as needed. But now something has come along that threatens that. That something is the advent of the mirrorless camera. These new wonder cameras are technological marvels with their WYSIWYG viewfinders and their information overlays, the incredible image stabilisation systems, the convergence with video, and the list of features goes on and on. The fly in the ointment is that to achieve this the manufacturers abandoned their lens mounts and developed new ones that could take advantage of the lack of the mirror box. This is where the expense comes in because to make the switch you have to spend big on not only a new camera body but also on new lenses. When I went digital I went Canon and over the years I ended up with a modest kit based around an EOS 6d, a 24-70 f4, a 70-200 f2.8, a 100mm f2.8 macro, a 50mm f1.8, and a Sigma 150-600mm. To get the equivalent kit based around an R6 body would cost me a few dollars under $20,000. That is a phenomenal amount of money. My wallet puckers up just thinking about it. So I looked at the more wallet friendly option of the R6, a Canon EOS-R Mount Adapter to adapt my EF lenses to the new RF mount, and a Canon RF 50mm f1.8 STM as my old 50mm f1.8 wouldn’t cope with CAF needed for video. The damage would be just under $5000 which while more wallet friendly was still more than I really wanted to spend. The other problem is that the  Canon EOS-R Mount Adapter is currently back ordered here in Australia at the time of writing with no word on when stock would become available. Bugger!


The Olympus OMD EM1 mk ii with the Olympus m.Zuiko 60mm f2.8 macro lens.


Time to reappraise the problem. As regular readers will know I went mirrorless about ten years ago with the Micro Four Thirds system and this is what does the bulk of my work. But I wanted a larger sensor and higher resolution for certain situations. A bit like when I was running Canon  35mm SLRs in conjunction with a Pentax 645n II. So m43 gives enough quality for about 80% of my needs. I wanted auto focus, 5-6 fps frame rate, in body image stabilisation, 4K video , and of course full frame. So the Canon R and RP were  immediately excluded. Then it occurred to me that if I was going to have to adapt my Canon glass to use on an R series camera why not consider adapting them to another make such as Sony. Now again regular readers will be aware that I acquired a Sony A7r with which to use my old collection of manual focus Olympus OM mount and Voigtländer M mount lenses. So perhaps going Sony was the solution. From what I read the Sony A7r was not a suitable candidate for this because of its contrast based auto focus so it was going to have to be 2nd generation cameras or later. New prices were still out of my league, but secondhand looked promising. I also found that the secondhand prices on the Metabones Canon EF to Sony E-mount T Smart Adapter (Mark V) and the Sigma MC-11  EF-Mount Lenses to Sony E mount were less than half the price of new. To keep within my $2000 AUD budget I decided to go for a Sony A7r II as I wouldn’t need to buy extra batteries as I already had loads for my A7r. So it was just a case of searching and eventually I came up trumps and found an A7r II with less than 50 shutter actuations, a Sigma and a Metabones adapter that kept me within my budget.


The Olympus OM Zuiko 35mm f2 mounted on a Sony A7r.


So did this end up a workable solution? Well I’m not going to review the A7r II as that has been done to death on the internet. But, suffice to say it gave everything I was looking for in a full frame mirrorless camera. The next two parts will look at how well the adapters worked with my lenses and the A7r II.


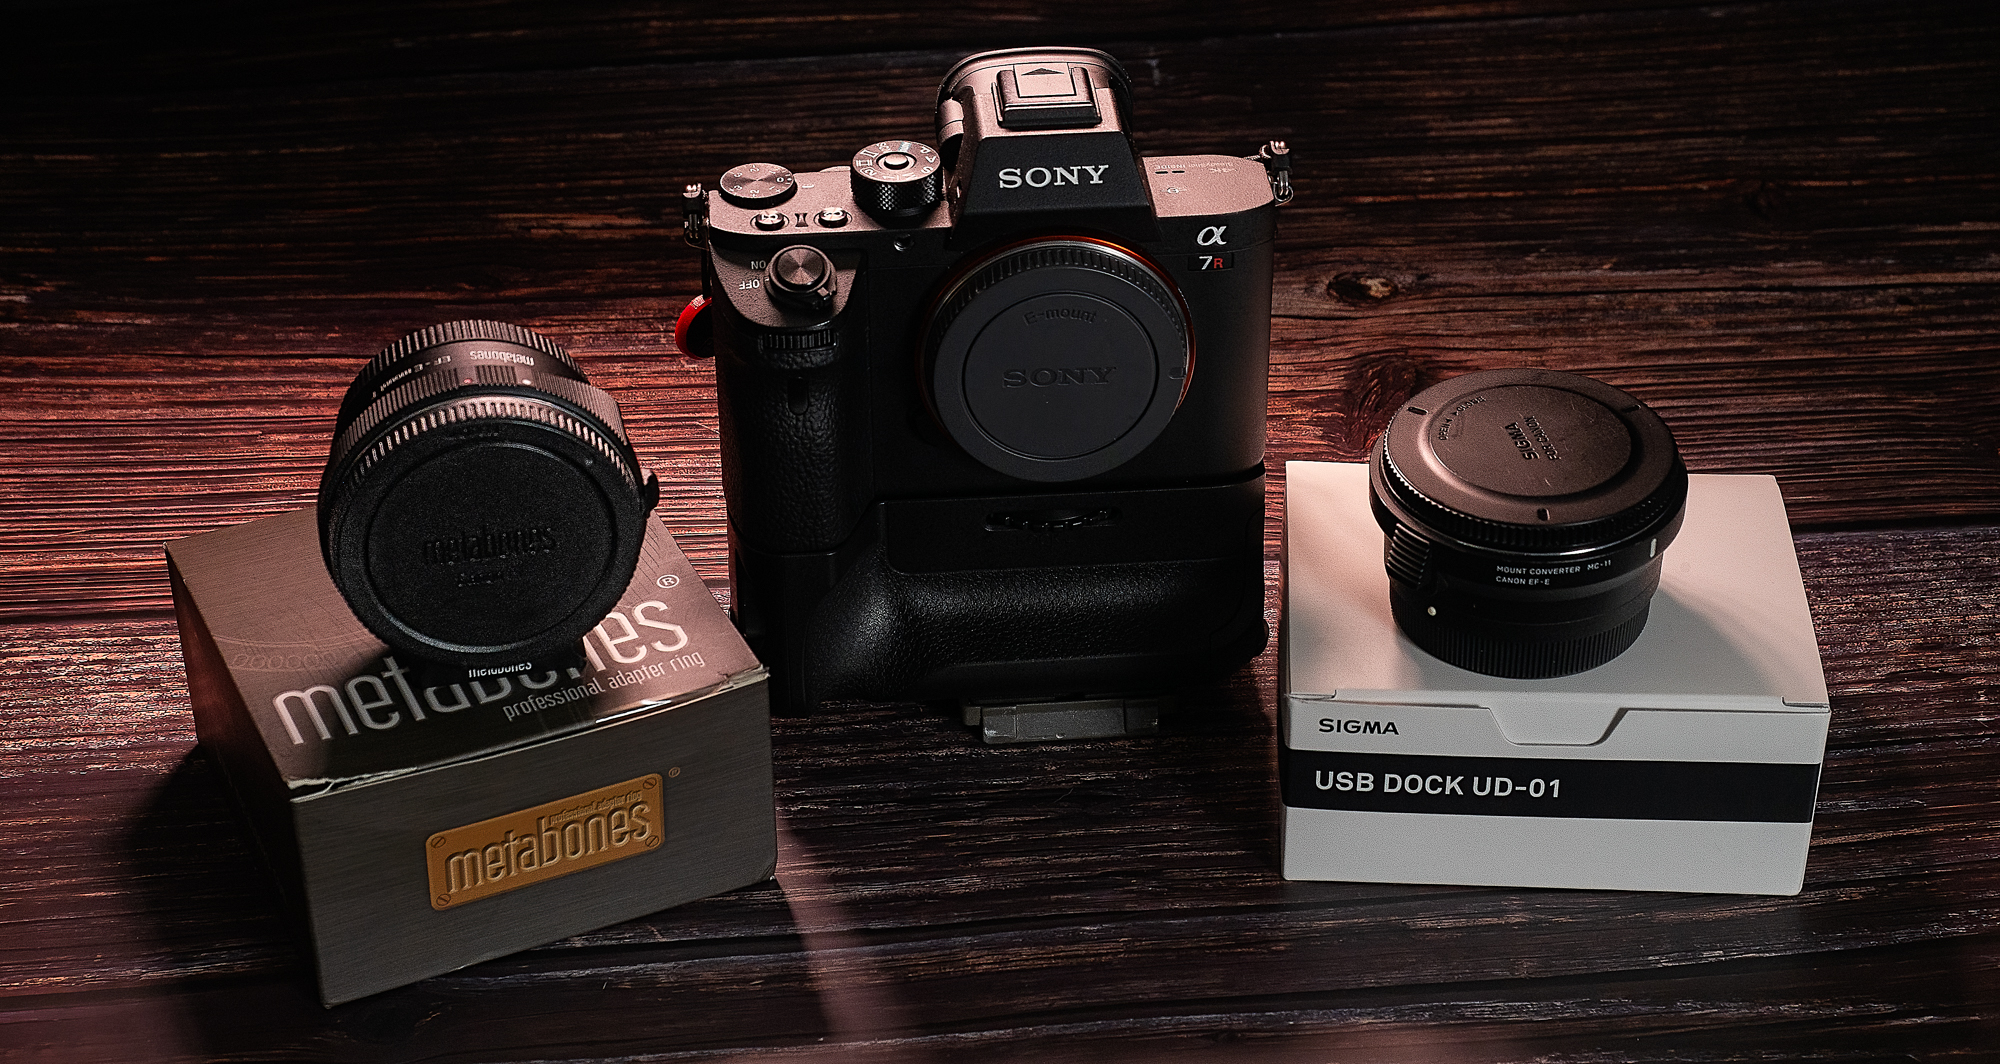
The Sony A7rii with the Sigma MC-11 and Metabobes V EF to FE lens adapters.


Mount your Canon EF lenses to your Sony A7rii using the Metabones V Smart Adapter.


Will the Sony A7rii work well with my Canon lenses? Is it time to say “Adios EOS”?

A Flash Piece Of Kit

The Olympus FC-WR flash controller mounted on an Olympus OMD EM1 mark 2 and the FR-WR connected to an Olympus FL-600R speedlight.

When Olympus launched their wireless radio controlled flash system there were howls of derision from the combined blogosphere and photographic forums. Mainly it went along the lines of Olympus had lost the plot in charging so much for something that others were offering so cheaply.  If all you want to do is take portraits with a couple of off camera speedlights then there maybe something to this argument. Let’s make a quick comparison.

Olympus Godox
Commander or transmitter Olympus FC-WR Wireless Commander $385 AUD Godox X2T-O Wireless TTL Trigger $99 AUD
Speedlights with built in receivers 2 x Olympus FL-700WR Flash $449 AUD each 2 x Godox TT685OP Speedlight Flash $195 AUD each
Total Cost $1283 AUD $489 AUD

So that is quite some difference – $794 AUD is a lot of money. Then the Godox fans will tell that the system is much more flexible because if you change camera system all you have to do is change the wireless trigger to one that is dedicated to your new system and you can keep using your existing speedlights. On the face of it it this quite a compelling argument. But this really doesn’t tell the whole story as it assumes that you have no existing flash equipment and that all you want to do is shoot basic lighting set ups with either TTL or full manual control. Now a lot of people who are attracted to Olympus cameras aren’t just attracted by the small size of micro four thirds but also by the advanced features that the cameras have such as focus stacking, keystone compensation, High Res Shot Mode, Live Bulb, Live Time, Live Composite, multi exposure, art filters, picture modes, and interval shooting. Plus Godox doesn’t offer a TTL enabled flash such as the Olympus Twin Flash STF-8 for macro and close up photography.

Using the Olympus STF-8 close up flash as part of a multi flash set up controlled by the Olympus FR-WR and FC-WR.

Regular readers will know that I do a lot of wildflower photography, product shots and the occasional portrait all using flash. I realised I wanted to use more complex lighting arrangements and so I decided to put together a system based around the existing flash units I already had – an Olympus FL-600R, an Olympus STF-8, 2 Metz 44AF-1’s, and a Metz 64AF-1. To that end I bought an Olympus FC-WR wireless commander and three Olympus FR-WR Wireless Radio Flash Receivers ($285 AUD each). Still not a super cheap option, but one that gives me a lot of scope. Now when I started this because the system was not well received there were next to no reviews of it and I didn’t know if everything I had, particularly the Metz units would work. Also I wanted to know whether they would also work with my Panasonic G85. So this was a real voyage of discovery

As I progressed with this I realised that I didn’t just want to write a review, but that I’d also say how to use the equipment in various modes across both Olympus and Panasonic cameras using third party flashguns so that prospective users can find all this information out without having to take a punt like I did. As usual I’ve provided the information in both video and written formats.

So with all that preliminary guff stated (phew!!) lets dig in by looking at the Commander and Receivers themselves first.

FC-WR Commander


Specifications

Maximum communication distance Approx. 30 m
Frequency 2.4 GHz band
Number of channels 15 (in the commander mode; with automatic channel setting function)
Number of groups 3; maximum number of flash units; unlimited
Flash control modes TTL / MANUAL / FP TTL / FP MANUAL / Off
Flash compensation ±5 EV (Increment: 1/3 EV or 1/2 EV)
Manual flash power settings From 1/1 to 1/128 (Increment: 1/3 EV or 1/2 EV)
Power supply AAA alkaline dry-cell batteries x 2 / AAA NiMH batteries x 2
Continuous usage duration Approx. 6.4 hours (when using AAA alkaline dry-cell batteries)
Operable temperature / humidity From -10 to 40℃ (14 to 104°F) / From 30 to 90%
Dimensions Approx. 59.5 (W) x 51.0 (H) x 67.4 (D) mm
Weight Approx. 73 g (excluding batteries)

Firstly the WR in designation is Olympus speak for the fact that the commander has a degree of weather resistance. This is a huge positive for me as I shoot a lot of stuff outside in all weathers. Olympus doesn’t specify the degree of water resistance, but says the unit will operate in temperatures ranging from -10 to 40ºC and humidity up to 90%. I didn’t throw it in a bucket of water but I have used it out in the rain on several occasions with no functional problems, and when I opened up the battery compartment it was dry so that’s all good.

The FC-WR uses AAA batteries. This was a bit of a disappointment and I would have liked AA as it means I only have to carry one type of battery and AAs last longer. However in practice I’m still using the first set of AAAs, and I suppose the use of them keeps the size down.

Olympus FC-WR, showing the information panel and the various controls.

Physically the FC-WR is made of sturdy plastic which doesn’t creak or flex if you give it a squeeze. The door to the batter compartment is on a sprung hinge and slides to lock and open. It fits well and there is some initial resistance to moving so there won’t be any accidental opening. On the base is a locking hotshot with the standard m4/3 pins providing electrical contact. On the to is a large LCD screen which gives all the necessary info and is backlit.  Underneath that are three buttons – one each for the the three groups. Then there is a mode button, a test button, a dial and rocker switch surrounding the OK button and finally the on/off button. A nice touch is that if you turn off your camera the FC-WR automatically switches off, and if you restart your camera within 10 minutes it will automatically switch back on. Any longer and you have to press the on/off button.

To use it is simplicity itself. First select the group or flashgun you want to control, press the button followed by the mode button. Select between TTL, manual or off. Use the right side rocker switch to move to the +/- ratio to select either flash compensation for TTL mode or the power levels for manual mode. Another press of the rocker switch and you can select whether you want high speed flash sync or FP mode in Olympus speak. A final press of the rocker switch lets you select the channel that you want all this to occur on.

FR-WR Receiver


Specifications

Maximum range Approx. 30 m
Frequency 2.4 GHz band
Number of channels 15
Number of groups 3
Control modes RCV (commander flash control), X-RCV (connected flash control)
Charging completion indication Beeping sound
External terminal Sync terminal (output)
Power supply AAA alkaline dry-cell batteries x 2 / AAA NiMH batteries x 2
Continuous usage duration Approx. 6.4 hours (when using AAA alkaline dry-cell batteries)
Operable temperature / humidity From -10 to 40℃ (14 to 104°F) / From 30 to 90%
Dimensions Approx. 59.1 (W) x 46.1 (H) x 51.0 (D) mm
Weight Approx. 75 g (excluding batteries)
Olympus FR-WR showing the controls on the rear of the unit.

In terms of construction what I said about the the commander applies here. On top of the receiver is a standard four thirds protocol hot shoe. On the base there is a locking cold shoe with 1/4 20 mount. On the left side (looking from the front) is a pc sync socket – does anyone actually use these any more? – which would allow you to tigger a studio mono block or power pack. On the other side is the battery compartment which takes two AA cells.  On the back panel is a dial that enables you to select channels (1-15) and beside it another dial for selecting channels. Then there are three buttons which are from the bottom the on/off switch. The neat little touch with this is if you are using an Olympus brand flash then switching off the receiver will switch off the flash. In the middle is a button for switching the beep on and off. I leave it on as it gives me an audible indication of when everything has recharged. Finally at the top is the X-RCV button. This allows you to either control the flash from the commander unit or from the flash itself. I choose to control the flash via the commander unit as I find that more convenient.

Usage Scenarios


Standard Mode

The Radio triggers work with both Olympus and Panasonic cameras and with third party flashes. It also works with the Olympus ST-F8 as part of a multi flash set up, but you will have to cobble together something to hold the FR-WR and ST-F8 body off of the camera.

Using the Olympus STF-8 close up flash as part of a multi flash set up controlled by the Olympus FR-WR and FC-WR.

FP Mode or High Speed Sync

FP mode or high speed sync is a function of the flashgun and not the camera. So if your flash supports it it you can use it. I got it work with the Metz 64AF-1 and the Olympus FL 600-R using both Panasonic and Olympus cameras.

Focus Stacking or Bracketing

The focus stacking feature found on Olympus cameras imposes certain operating restrictions:

  1. Uses the electronic shutter
  2. The flash sync speed is 1/50th sec or longer
  3. You can’t use TTL flash you have to manually adjust the power settings of the flash to get correct exposure

When you set operating parameters for focus stacking in the camera menu remember to allow a a delay between shots that allows for the flash to recycle. I’ve found four seconds to be sufficient. Having set that up switch on the FC-WR and it automatically selects manual flash mode and the camera selects the the flash sync speed. This worked with both the Olympus and Metz flashes on only the Olympus cameras. Panasonic’s focus stacking function is video based (4K capture) and not stills like that of the Olympus.

The original shot with no focus stacking.
The end result of the in camera focus stacking. Twelve shots taken at a different focusing distance and then merged in camera. The camera always applies a slight crop when doing this.

High Res Mode

In many ways this is similar to the focus stacking mode mentioned previously.  It requires an electronic shutter set at 1/50th sec or longer and the flash to be set manually. This worked well with both the Olympus and Metz flash guns. I didn’t test this with a Panasonic camera as my G85 doesn’t have this function.

Conclusion


The Olympus FC-WR flash controller mounted on an Olympus OMD EM1 mark 2 and the FR-WR connected to an Olympus FL-600R speedlight.

Lets get the niggly issue out of the way first. Yes the system is expensive and I wish that it was a little cheaper. Having said that you get rock solid dependability. I found that the Godox units were somewhat flaky at times – occasional misfires where the flash didn’t go off. I like dependability and I’m prepared to spend a little more to get it.

The good stuff. I like the fact that the operation of the constituent parts is seamless even when using the advanced Olympus camera features. The build quality and the weather resistance is excellent, Olympus do a really good job in making small equipment that can handle all the vagaries that life can dish out. The fact that this works with Panasonic cameras is great. Cross compatibility was another factor that brought me into the micro four thirds system. If you want full frame these should work with Panasonic’s full frame offerings as they also share the m4/3 protocols for flash. I say “should” as I’ve not tested it and cannot find anything online to confirm one way or the other. The fact that you can use it with third party speedlights is a huge bonus.

If you are a micro four thirds user and want a rock solid off camera flash solution that gives you access to multi-flash set ups even with specialist close-up equipment using the specialist in camera features such as focus stacking or high res mode then I think its worth spending the cash.


I have written and made videos about several aspects of the Olympus flash system and these are:

Broadening My Horizons…


… with the Panasonic Leica DG Vario-Elmarit 8-18mm f2.8-4 micro four thirds lens which will be referred to hence forth as the 8-18 for brevity’s sake. For those who prefer video there is a video review at the bottom of the page.

The 8-18 was introduced as part of Panasonic’s Leica branded f2.8-4 lens range in April 2017. I was immediately interested as I wanted a wide-angle zoom in m4/3. I had discounted the existing Panasonic 7-14mm f4 and the Olympus 7-14mm f2.8 because they wouldn’t accept screw in filters and the Olympus 9-18mm f4-5.6 because the collapsible design means the lens is prone to failure due to the internal ribbon cables breaking. The new 8-18 presented itself with a high quality metal construction that was splash proof and a modest 67mm filter thread. I wanted to use the lens for video work and so the ability to take a variable neutral density filter was a must. So when the lens became available here in Australia I plonked my cash down and got one.


My first impression on opening the box was that it is a quality bit of kit – it feels nice in the hand with a cool metallic feel and satisfying density. The bulbous front element is well recessed and combined with the excellent locking lens hood means that it is protected from stray light and from being physically damaged. The lens barrel has two ring controls – the front being for focus and the rear for zoom – and a switch for selecting auto or manual focus.The focusing ring is of the fly-by-wire type that twiddles endlessly – I wish that Panasonic would follow Olympus’s lead and have the pull back clutch type focusing rings with hard stops. The zoom ring is nicely damped and travels in a smooth 90º rotation. Another gripe is that both Panasonic and Olympus are members of the m4/3 consortium so why oh why can’t they agree on which way the zoom ring turns? Both zoom and focus are internal which is nice as it does not affect the centre of balance while using a gimbal. The lens body is finished in a smooth black satin with the engravings done in the Leica font and colours. The lens mount is metal and looks to be chrome plated brass. So full marks to Panasonic for presentation.

Vital Statistics

lens mount m4/3
focal length 8-18mm (16-36mm 35mm full frame equivalent)
angle of view 62º – 107º
maximum aperture f2.8-4
minimum aperture f22
filter size 67mm
optical stabilisation no
internal focusing yes
internal zoom yes
minimum focusing distance 23cm
maximum magnification 0.12 x
number of lens elements 15
number of lens groups 10
weight 315g
length 88mm
diameter 73.4mm


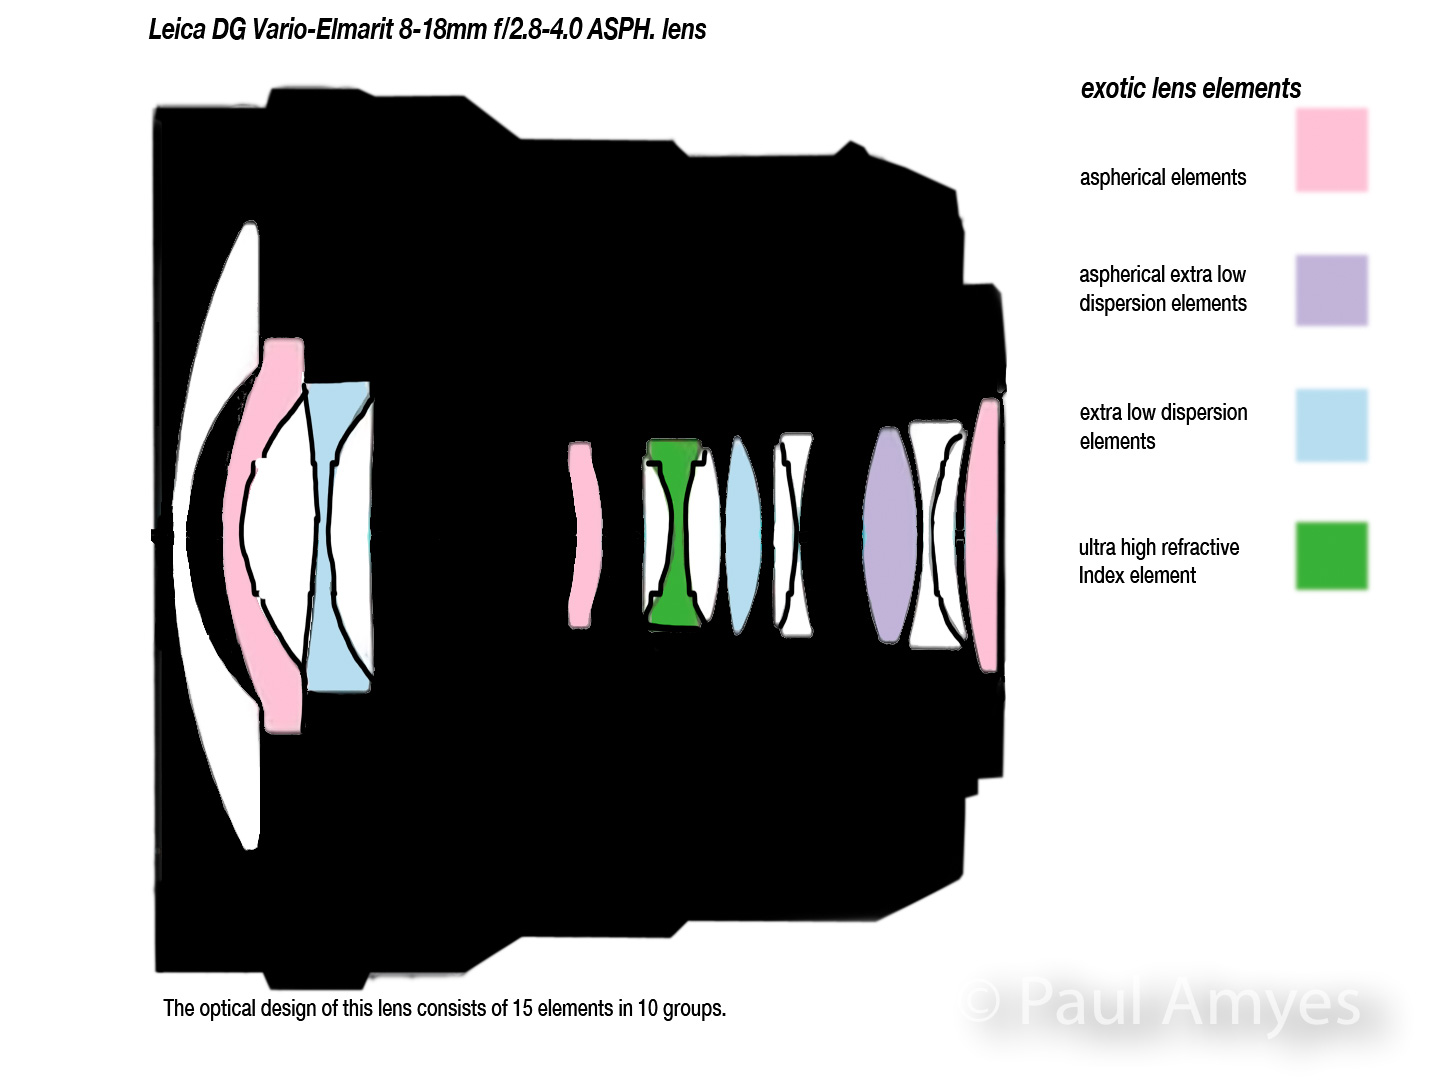
The lens construction is 15 elements in 10 groups with 1 aspherical extra low dispersion element, 2 extra low dispersion elements and 1 ultra high refractive index element. Combined with the nano coatings they should reduce internal flare, distortion and chromatic aberration. Control of distortion and chromatic aberration is also aided by an internal software profile that is baked into the image file. A lot of people don’t like this approach as they feel corrections should be made optically. The main criticism is that there is too much of an image quality hit in the corners with this approach. Hasselblad was the manufacturer to take this approach with their H3 camera and when that was introduced there were few complaints about image quality. The reality is that using lens profiles means lenses can be cheaper, smaller, and lighter than their optically optimised brethren.

The 8-18 has a variable aperture and unfortunately it quickly steps down as you zoom in as can be seen by the chart below.

8mm f2.8
9mm f3.1
10mm f3.2
12mm f3.4
14mm f3.6
18mm f4

Test Results

I’ve done my standard tests to look for distortion, chromatic aberration, and sharpness at 8mm, 12mm and 18mm to give an indication of how the lens does throughout its zoom range. I have just for interest sake posted images with no profile correction to give an idea of what the lens is actually doing. Click on the images to see them at full size.


8mm at f2.8 no lens profile applied


8mm at f2.8 with internal profile applied.

At 8mm without any inbuilt lens profile applied there is very obvious barrel distortion and vignetting at f2.8. With the profile applied there is still a very slight barrel distortion and the vignetting remains until f5.6. In terms of sharpness well at f2.8 the centre of the image is nicely sharp and contrasty and remain so until f16 when diffraction kicks in and softens the image. In the corners the story is different, at f2.8 the corners are significantly softer and less contrasty than the centre, they improve a little as you stop down reaching best performance at f5.6 and then get worse at f16 with diffraction. A small amount of chromatic aberration is present throughout the aperture range and is easily corrected in post.


12mm at f3.4 no lens profile applied


12mm at f3.4 with profile applied.

At 12mm we can see no distortion when the lens profile is applied and the vignetting is about 1/2 stop and is barely discernible. Wide open at f3.4 the centre of the image is sharp and contrasty and the best performance is at f5.6. In the corners the image is softer and has less contrast than the centre. The best performance is at f8. Diffraction starts to set in at f11.


18mm at f4 no lens profile


18mm at f4 with internal profile applied.

At 18mm there is some pincushion distortion in the profile corrected image. There is also a tiny bit of vignetting at f4 but this clears up at f5.6. Sharpness at f4 is very, very good in the centre throughout the aperture range only deteriorating at f16 due to diffraction.The corners are remarkably sharp at f4 but have slightly less contrast than the centre. Peak performance sets in at f5.6 and then again diffraction rears its ugly head at f16 and spoils the party. Chromatic aberration is very well controlled across the whole range and is very, very slight.

Like most ultra wide-angle zooms Panasonic’s 8-18mm f2.8-4 is prone to flare. The recessed front element and tulip lens hood do minimise this, but with the sun in the frame you will see veiling flare. When stopped down you can achieve nice sun stars.

Like most wide-angle zooms the 8-18 is prone to flare. In order to reduce this the engineers recessed the front lens element and then provided a decent lens hood. The Panasonic 7-14mm f4 caused purple blobs on Olympus cameras when there was a specular light source in the frame. Some people pointed the finger at the difference in UV coatings between Panasonic and Olympus cameras. Others said the thickness of the Olympus sensor stack caused the problem. Anyway the 8-18 is thankfully free of those artefacts. Shooting into the sun there is some veiling flare and ghosting.

Auto focus is done via a stepping motor and it is designed to work with Panasonic’s Depth From Defocus technology that is basically a contrast based auto focus system that is enhanced by software profiles for each Panasonic lens. Single point autofocus in single shot drive mode is incredibly fast and accurate. I decided to check the Continuous Auto Focus by continuous shooting at medium speed wide open on the Panasonic G85 with a person walking slowly towards the camera at focal lengths of 8mm and 18mm. All the shots were in focus. Then I tried to see how the lens would perform on a camera without DFD – in this case an Olympus OMD EM1 mk i. At 8mm and f2.8 all the images were in focus. At 18mm shooting a burst of 10 images the camera lost focus on the last 2 images of the burst. So this very limited test shows that the autofocus of the lens does perform better on Panasonic cameras with DFD.

Conclusions

The Panasonic Leica DG Vario-Elmarit 8-18mm f2.8-4 lens with Cokin P system wide-angle lens filter holder attached.

Ok I’ve had the lens a year now and I’ve used it for stills, time lapses and video shooting on the afore-mentioned EM1 and G85 along with an EP5 and EM10 so what can I say. The in camera lens profiles make a huge difference in terms of distortion, but most people won’t see this as they’ll see the corrected images. I did expect this to have some impact on sharpness in the corners but was pleasantly surprised to find that not the case at all. Most zooms perform best at the short end and become softer at the long end. With my copy of the 8-18 this lens is very good at the long end and it is a little softer at the short end. The ability to use filters is a boon for landscape photography and video. The 67mm filter size does not make filter purchases onerous and with the wide-angle filter holder you can use the Cokin P filter system with rectangular filter with an 85mm width. It is really nice not to use filters the size of dinner plates with this lens. I’ve been caught in a couple of downpours while using the 8-18 and have had no problems. I have found the lens immensely satisfying to use and have put it to more uses than I originally thought I would. In all I feel it is a very good lens if you can live without a fixed aperture. I would definitely recommend it.


This slideshow requires JavaScript.


Voigtländer 15mm f4.5 Super wide-Heliar

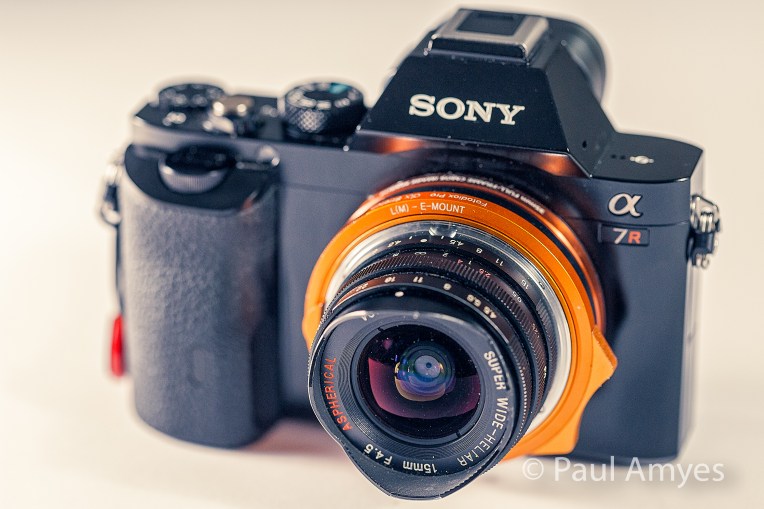
Cosina Voigtlander 15mm f4.5 Super Wide-Heliar lens mounted to a Sony A7r via a Voigtlander VM Adapter II. and Voigtlander L39 to M mount adapter.

I’ve been meaning to write a review of this lens for a long time – well over a year in fact – and it has proven difficult for a number of reasons which will become apparent as we proceed. In an ideal world all lenses would be wonderful for every possible use we put them to, and to be fair with modern lens their computer aided design makes this happen for the most part. Things get sketchy when we are dealing with older designs on modern digital cameras. High resolution digital imaging has placed a great deal of strain on lenses. With film only a few people had the time, ability, resources and inclination to examine the optical performance of lenses. This was largely the province of a few magazines (remember them?) and they would accompany a review with a couple of graphs which would reference the resolving capabilities with fine grains low ISO black and white films developed in special developers designed to minimise grain and maximise acutance. Now anyone can open up an image in Photoshop and zoom into 200% and see a lenses faults. This is why Canon, Nikon and independents such as Sigma are going through their catalogue of lenses and updating them, and this need for optical improvements explains why lenses are getting bigger, heavier and more expensive. Back to the matter at hand. The video below is the short version.


Cosina Voigtlander 15mm f4.5 Super Wide-Heliar Lens.

The Voigtländer 15mm f4.5 Aspherical Super wide-Heliar to give its full name is really the antithesis of modern lens design. It is small, light, affordable and not heavily optically corrected. But having said that this is the lens that really put Cosina’s re-launch of the Voigtländer brand on the radar of photographers. I can remember when this lens first came out a friend of mine borrowed one and ran around madly shooting roll after roll of film with a silly look on his face enthusing about it wildly. Up until then the widest lens in Leica M mount was the Zeiss 15mm f8 Hologon of which only 225 were made and currently change hands for around the $10,000 USD for one in mint condition.

The Voigtländer 15mm f4.5 is now discontinued but can be obtained as new old stock for approximately $600 USD, or second-hand on Ebay for around the $400 USD mark at the time of writing.


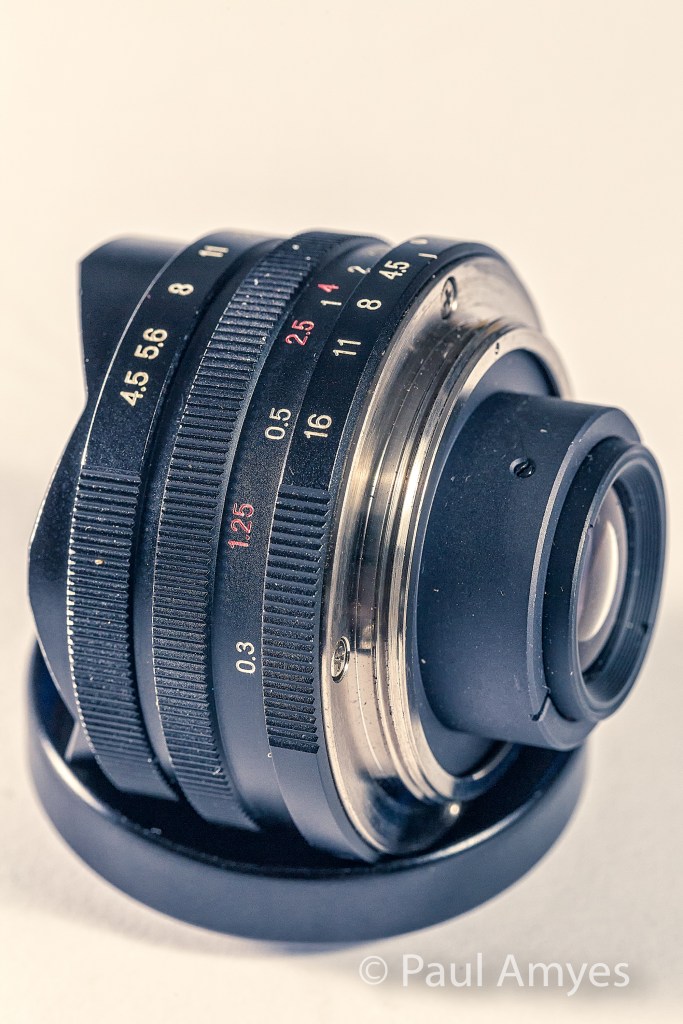
Cosina Voigtlander 15mm f4.5 Super Wide-Heliar lens showing the Leica L39 screw mount.


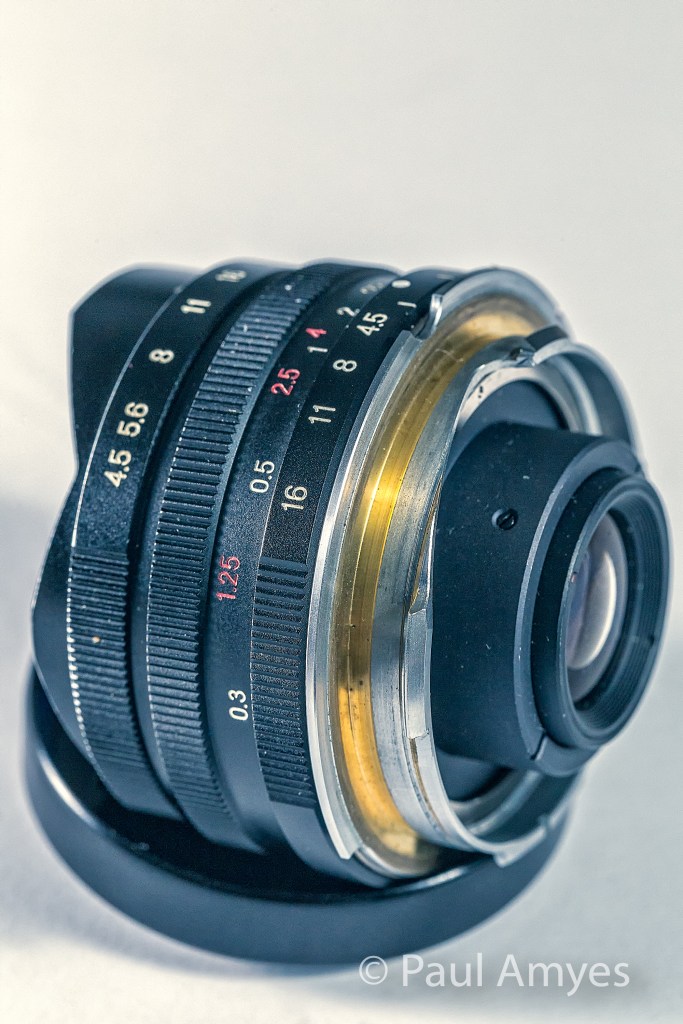
Cosina Voigtlander 15mm f4.5 Super Wide-Heliar lens showing the Voigtlander L39 to M mount adapter.


Cosina Voigtlander 15mm f4.5 Super Wide-Heliar lens showing the Voigtlander VM adapter II Sony E mount adapter.


Specifications

Mount – Leica thread or L39
Angle of view – 110º
Lens construction – 8 elements in 6 groups with one aspherical element
Number of aperture blades – 10
Aperture range f4.5 – f22 in half click stops
Minimum focusing distance – 29.85cm or 11.75 inches
Weight – 113g or 4oz
Diameter 49.6mm or 1.94 inches
Length – 30.7mm or 1.2 inches
Filter thread – N/A
Lens hood – built in tulip style
Rangefinder coupling – no

The lens is very well made – up to Cosina’s very high standards and it has, despite its diminutive size a solid feel and satisfying heft. The aperture ring is at the front of the lens, as is usual with rangefinder lenses, and turns nicely with satisfying half stop click indents. The focusing action is very smooth and has an approximate 100º throw. I found that I tended to use hyper focal distances to zone focus the lens in use as the short focal length means that the DOF is immense. The lens has a very clearly marked scale to make this easy. An aperture of f8 means that everything from 0.5m to infinity is in focus. Conversely lovers of shallow depth of field should really be looking elsewhere.


Test Results

Cosina Voigtlander 15mm f4.5 Super Wide-Heliar lens mounted to a Sony A7r via a Voigtlander VM Adapter II.


Cosina Voigtlander 15mm f4.5 Super Wide-Heliar lens mounted to a Sony A7r via a Voigtlander VM Adapter II.


Years ago Clint Eastwood made a film called “The “Good, The Bad, The Ugly” (a movie which had the coolest theme tune ever, actually that is an exaggeration as everyone knows Shaft had the coolest, but it’s a close run thing) well this lens is all three. Good, bad and ugly. The good comes when you use the lens as intended on a film rangefinder body. The bad when you mount it on a digital m4/3s body and the ugly when you put in from of the A7r’s 36Mp sensor. This lens is one of the worst I’ve ever had on a digital camera – the worst was a $20 25 mm f/8 Holga lens in m4/3s mount which I tried using on my Olympus EP2 several years ago, but that is, as they say, another story. My friend who I mentioned earlier abused Kodak Tri-X by pushing it, developing in Rodinal and then lith printed the results. He wouldn’t have noticed what I’m about to describe. So this is how it was on the Sony A7r.Right from the get go there is obvious barrel distortion. Wide open there is considerable vignetting which has a very obvious magenta cast. No matter how far you stop down this does not go away (kind of like Mormon missionaries on your doorstep). Wide open the centre sharpness is quite good and remains so until f22 when diffraction rears its ugly head. The corners are smeared and out of focus, things improve a little by f11 but they never get to the level of sharpness of the centre of the lens. Chromatic aberration is also present throughout the aperture range. Flare for such a wide lens is remarkably well controlled and lovers of sunstars should be happy as the 10 aperture blades produce nice results.


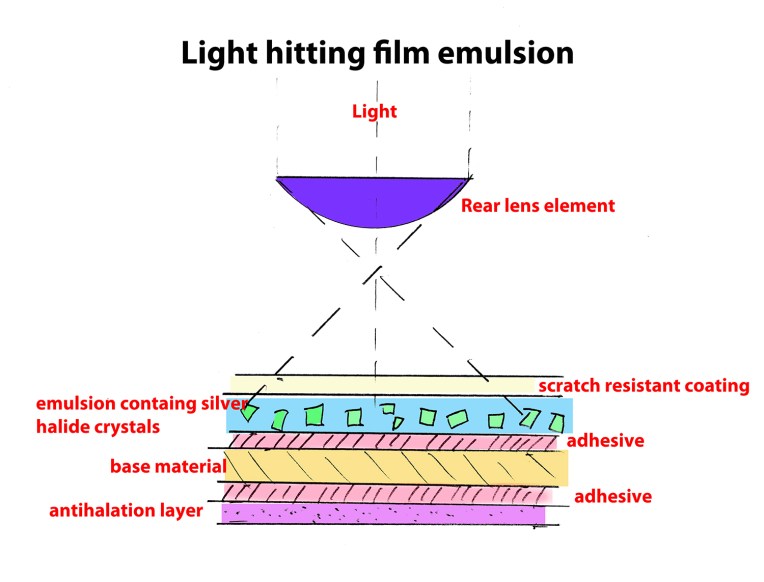
With film the light-sensitive silver halide crystals don’t care at which angle light hits them.

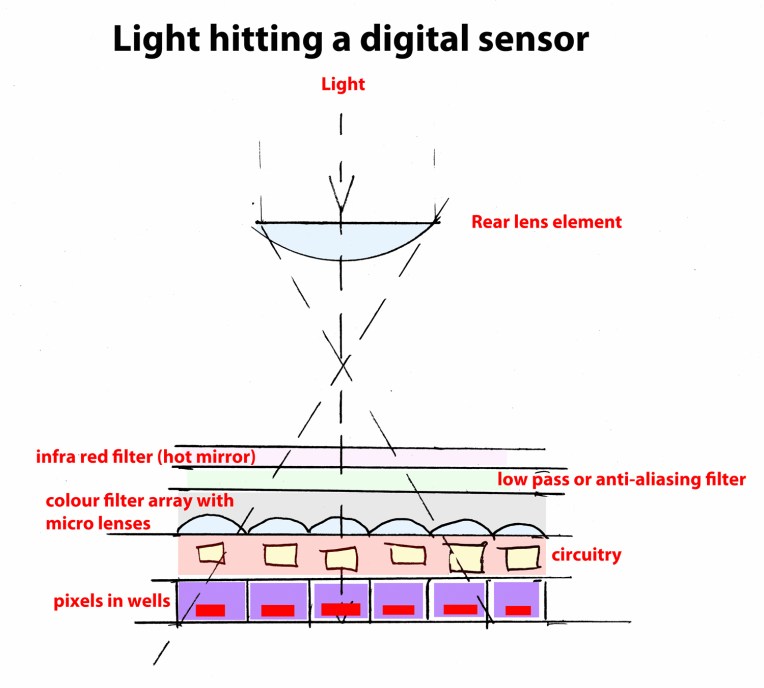
The reasons for this are that Voigtländer 15mm was designed for use with film and the silver halide crystals in the film emulsion did not care at what angle lights hits them to provide the necessary reaction to form the latent image. But with a digital sensor it is a whole different ball game because the sensor is no longer just a gelatine substrate coated with an emulsion containing silver halide crystals it is a complex sandwich of filters, lenses and electronic componentry as the schematics  show. For best performance the light needs to enter micro lenses at 90º, when the incidence of the light is severely off perpendicular then not all of it reaches the pixel at the bottom of its well this can cause vignetting, smearing with loss of detail, and severe colour fringing. This is what stopped Leica initially developing a digital range finder. Kodak developed a special sensor with offset micro lenses for Leica to help overcome this along with in camera software correction the digital M became a reality.

For light to hit the pixel in its well it needs to travel as near to perpendicular to the sensor plane as possible.

In Use

For stills photography the 15mm f4.5 could be a consideration if you don’t have the current fixation of razor sharpness corner to corner i.e. if the hero of your shot is central to the frame and you don’t mind loss of sharpness at the edges. Working in monochrome would help get rid of the magenta cast of the edges as well. Have said that the magenta cast and vignetting are removable in post, the accompanying video shows how this can be done in Lightroom. In the gallery of example pictures below I’ve left the magenta cast in some of the photos so you can see what it looks like. If you’d like to see the photos larger they can be seen here.

This slideshow requires JavaScript.

Video is another matter. Ideally this lens should be perfect for vlogging on a Sony A7 but the smearing, colour cast and vignetting make it quite unsuitable. Also it has no filter threads so it is impossible to use a variable neutral density filter which further adds to its unsuitability.

Conclusion


To be completely fair we are demonstrating uses for this lens that it was never designed for. With film and optical/chemical printing it is an amazing lens at very cheap price. When looking at it from a digital imaging point of view, whether stills or video, it really can’t be recommended unless you already own it and are prepared to put up with its short comings. If you are looking for an ultra wide the are better options available such as the Laowa 15mm f/2 Zero-D Lens.

The Black Hole Of Babakin

Plus One by Paul Amyes on 500px.com
Plus One – a winter spider orchid (Caladenia drummondii) and its visitor. Sorenson’s Reserve, Western Australia. Canon EOS 6d with Canon EF 100mm f2.8 IS L macro lens. Exposure: 1/250 sec, f11, at ISO 400.


Yesterday I decided to go on a little road trip to Babakin in search of the winter spider orchid. You’ve got to be mad to do a round trip of 320Km in the hope of finding one very small flower. It was a good day for it, the weather was cloudy and overcast, perfect for this type of photography, and I had nothing else scheduled. So packed my camera gear into the car, made sure the mobile was loaded with music and set off to the teeming Wheatbelt metropolis of Babakin. Now Babakin is in the local government area of Bruce Rock, which according to the Australian Bureau of Statistics covers an area of 2,727 square kilometres (1,053 sq mi) and has a population as of 2015 of 939 people. Babakin itself has a population of 25 – it is safe to assume that the local canine population out numbers the people – so there’s not a lot out there except wheat fields.


The drive was great, a lot of it on dirt track so plenty of red dust, and the time and distance just flew by thanks to the music. The shuffle play threw up some golden oldies – the best being Crazy On You by American group Heart. Put that one on full-bore. I wasn’t exactly head banging but lets say that the bouncing around of the car wasn’t entirely due to the road surface.  Oh that took me back to the Chichester RocSoc at the New Park Road Community Centre.

Now these days we rely an awful lot on technology, I’m no exception,  I was using my mobile phone for music and navigation. As I got close to my destination the phone just cut out – no more navigation,  no more music. No mobile network coverage could explain the first but not the later. I switch to my TomTom SatNav and that packed up – couldn’t get a signal. OOOOeeeeeerrrrrr! Luckily I was nearly there. When I got to the nature reserve I did what I normally do and that is switch on my handheld GPS and mark the position of the car. These reserves have no facilities of any kind, not even paths or tracks, so I do this so I can just wander around in the bush and then when I’ve had enough I just follow the GPS to get me back. So off I walk. After an hour and a half I eventually find a single tiny specimen and proceed to photograph it. I use off camera flash fired by radio triggers to light my pictures of orchids. I set everything up as usual took a shot and noticed the flash didn’t go off. Tried again – nothing. Checked everything was firmly in place – nothing. Changed the batteries in the transmitter and receiver – still nothing. Bugger! Had a rummage around in my camera bag and found an old TTL cable so that got me out of the fix. Eventually I packed up and started walking to the car.  I looked at the GPS screen and saw that it was blank. Bugger! I replaced the batteries – nothing. Another set of batteries and still NOTHING!!! Buggeration with bloody great knobs! A rising tide of panic starts to wash over me. Wash? No it was more like a tsunami. After a little pep talk I heard a truck go past. Now remember how I said earlier that this was a sparsely populated area? Yes? Well I can tell you I have never been so glad to hear a truck. I walked off in that direction battling through the scrub and eventually hit the road about 300 metres from the car. Phew!

The drive home was quiet – no phone, no SatNav, no music. When I got there after an hour and a half I carried everything into my office and started my usual post shoot ritual of zeroing all the camera settings, downloading the images and checking batteries prior to packing everything away. I almost jumped out of my skin when my phone beeped and started to play music. I checked the SatNav and it was picking up a signal, as was the handheld GPS. I tentatively got the flash triggers out and checked them and they were working just fine. WEIRD! Perhaps there’s just something about Babakin.

I can’t go without putting a YouTube video up for Heart’s Crazy On You. It’s a cracking track and this time I’ll put up a live recording from 1978 and from 2013 so you can see how the band has fared over time. All I can say is that Anne and Nancy Wilson can still strut their stuff in their sixties. Respect!


Three Lenses

This post came about as a response to post on a Google+ group I belong to. The post contained a link to an article at the website Olympus Passion by Chris Corradino (whom I don’t know) called “Full Frame vs Micro 4-3 Revisited with Pro Olympus Lens” where a canon EOS 6d with 17-40mm f4 L lens was compared with an Olympus OMD EM10 with 12-40mm f2.8 Pro lens. Nothing wrong with that, it serves as a potentially useful comparison of two popular cameras and lenses. In the article he posts two pictures of the same scene taken around a year apart, one used a polarizing filter one didn’t and the Canon 17-40L is not the best lens in the line up, and comparing a wide-angle zoom to a standard zoom doesn’t really tell anything. Also Olympus uses in camera software correction of its lenses to the RAW files whereas the Canon doesn’t and one has to manually apply correction when processing in Lightroom or ACR. So I thought about it and decided to do my own test. Now before I start I’d like to say that testing zoom lenses is fraught with difficulty and the reason why is very ably demonstrated by Roger Cicala’s excellent article “Painting Zoom Lenses with a Broad Brush – Roger’s Law of Wide Zoom Relativity” which is enough to make any sane person throw up their hands in horror at the enormity of it all.


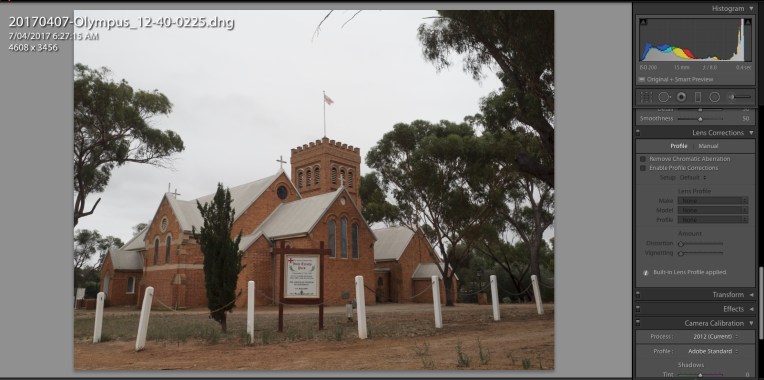
The file from the EM1 with the Olympus 12-40mm f2.8 opened in Lightroom.


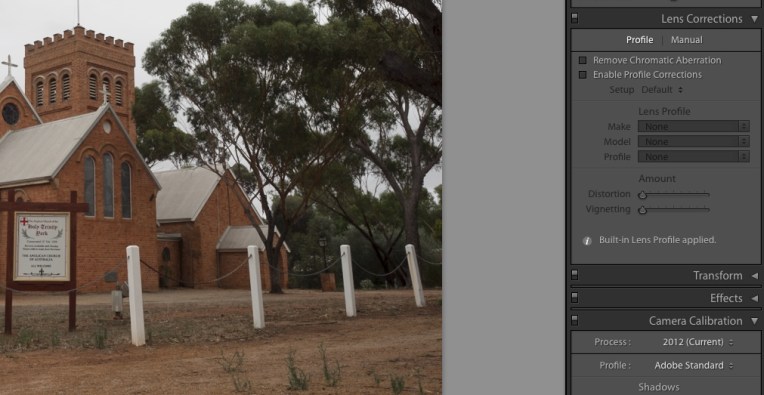
If we look at the lens correction box it shows that a built in lens profile has been applied.


I’m not really the scientific type, but I know that to make any form of comparison you have to compare like with like and remove all variables. The cameras and lenses tested were as follows:

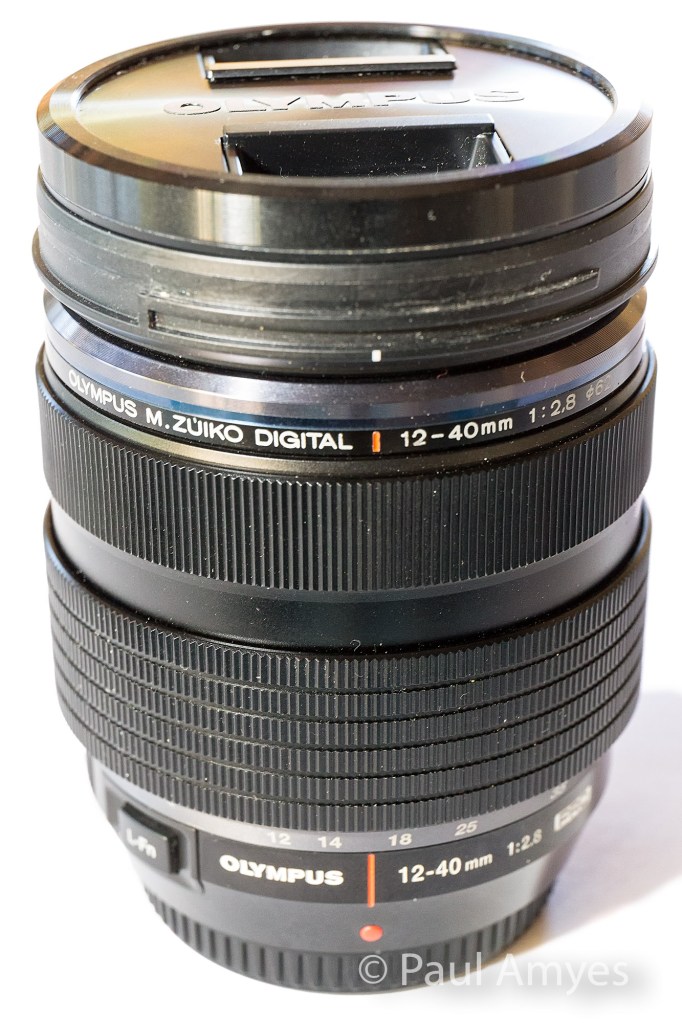
  • Olympus OMD EM1 mki with Olympus m.Zuiko 12-40mm f2.8 pro
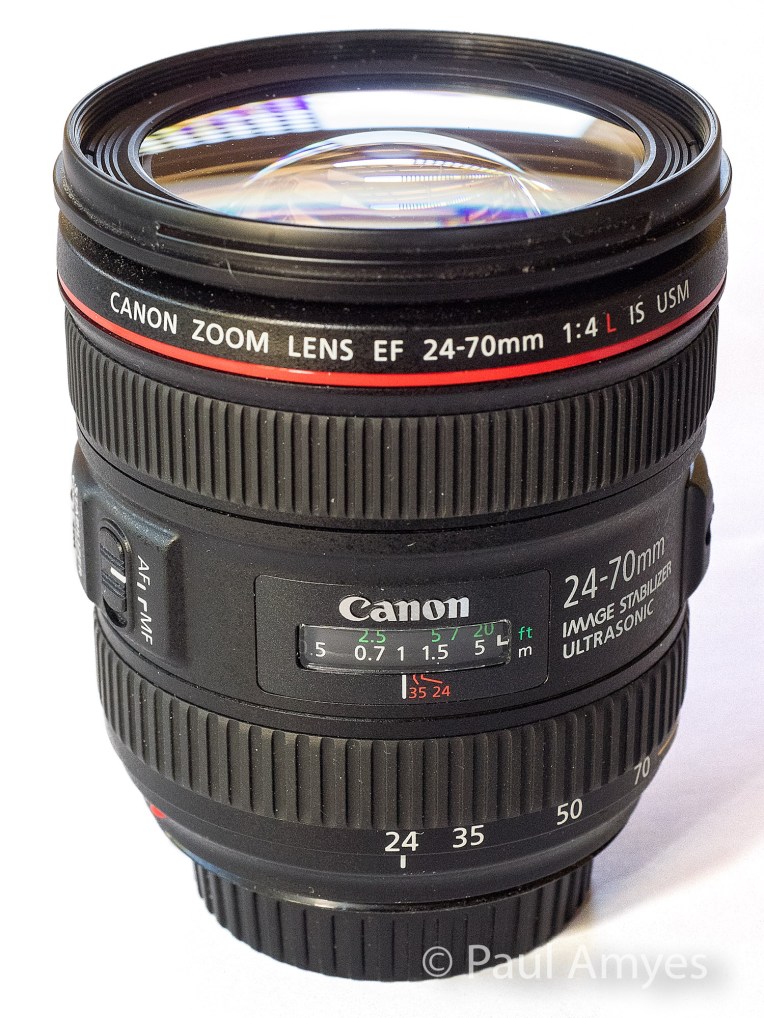
  • Canon EOS6d with Canon EF 24-70mm f4 IS L
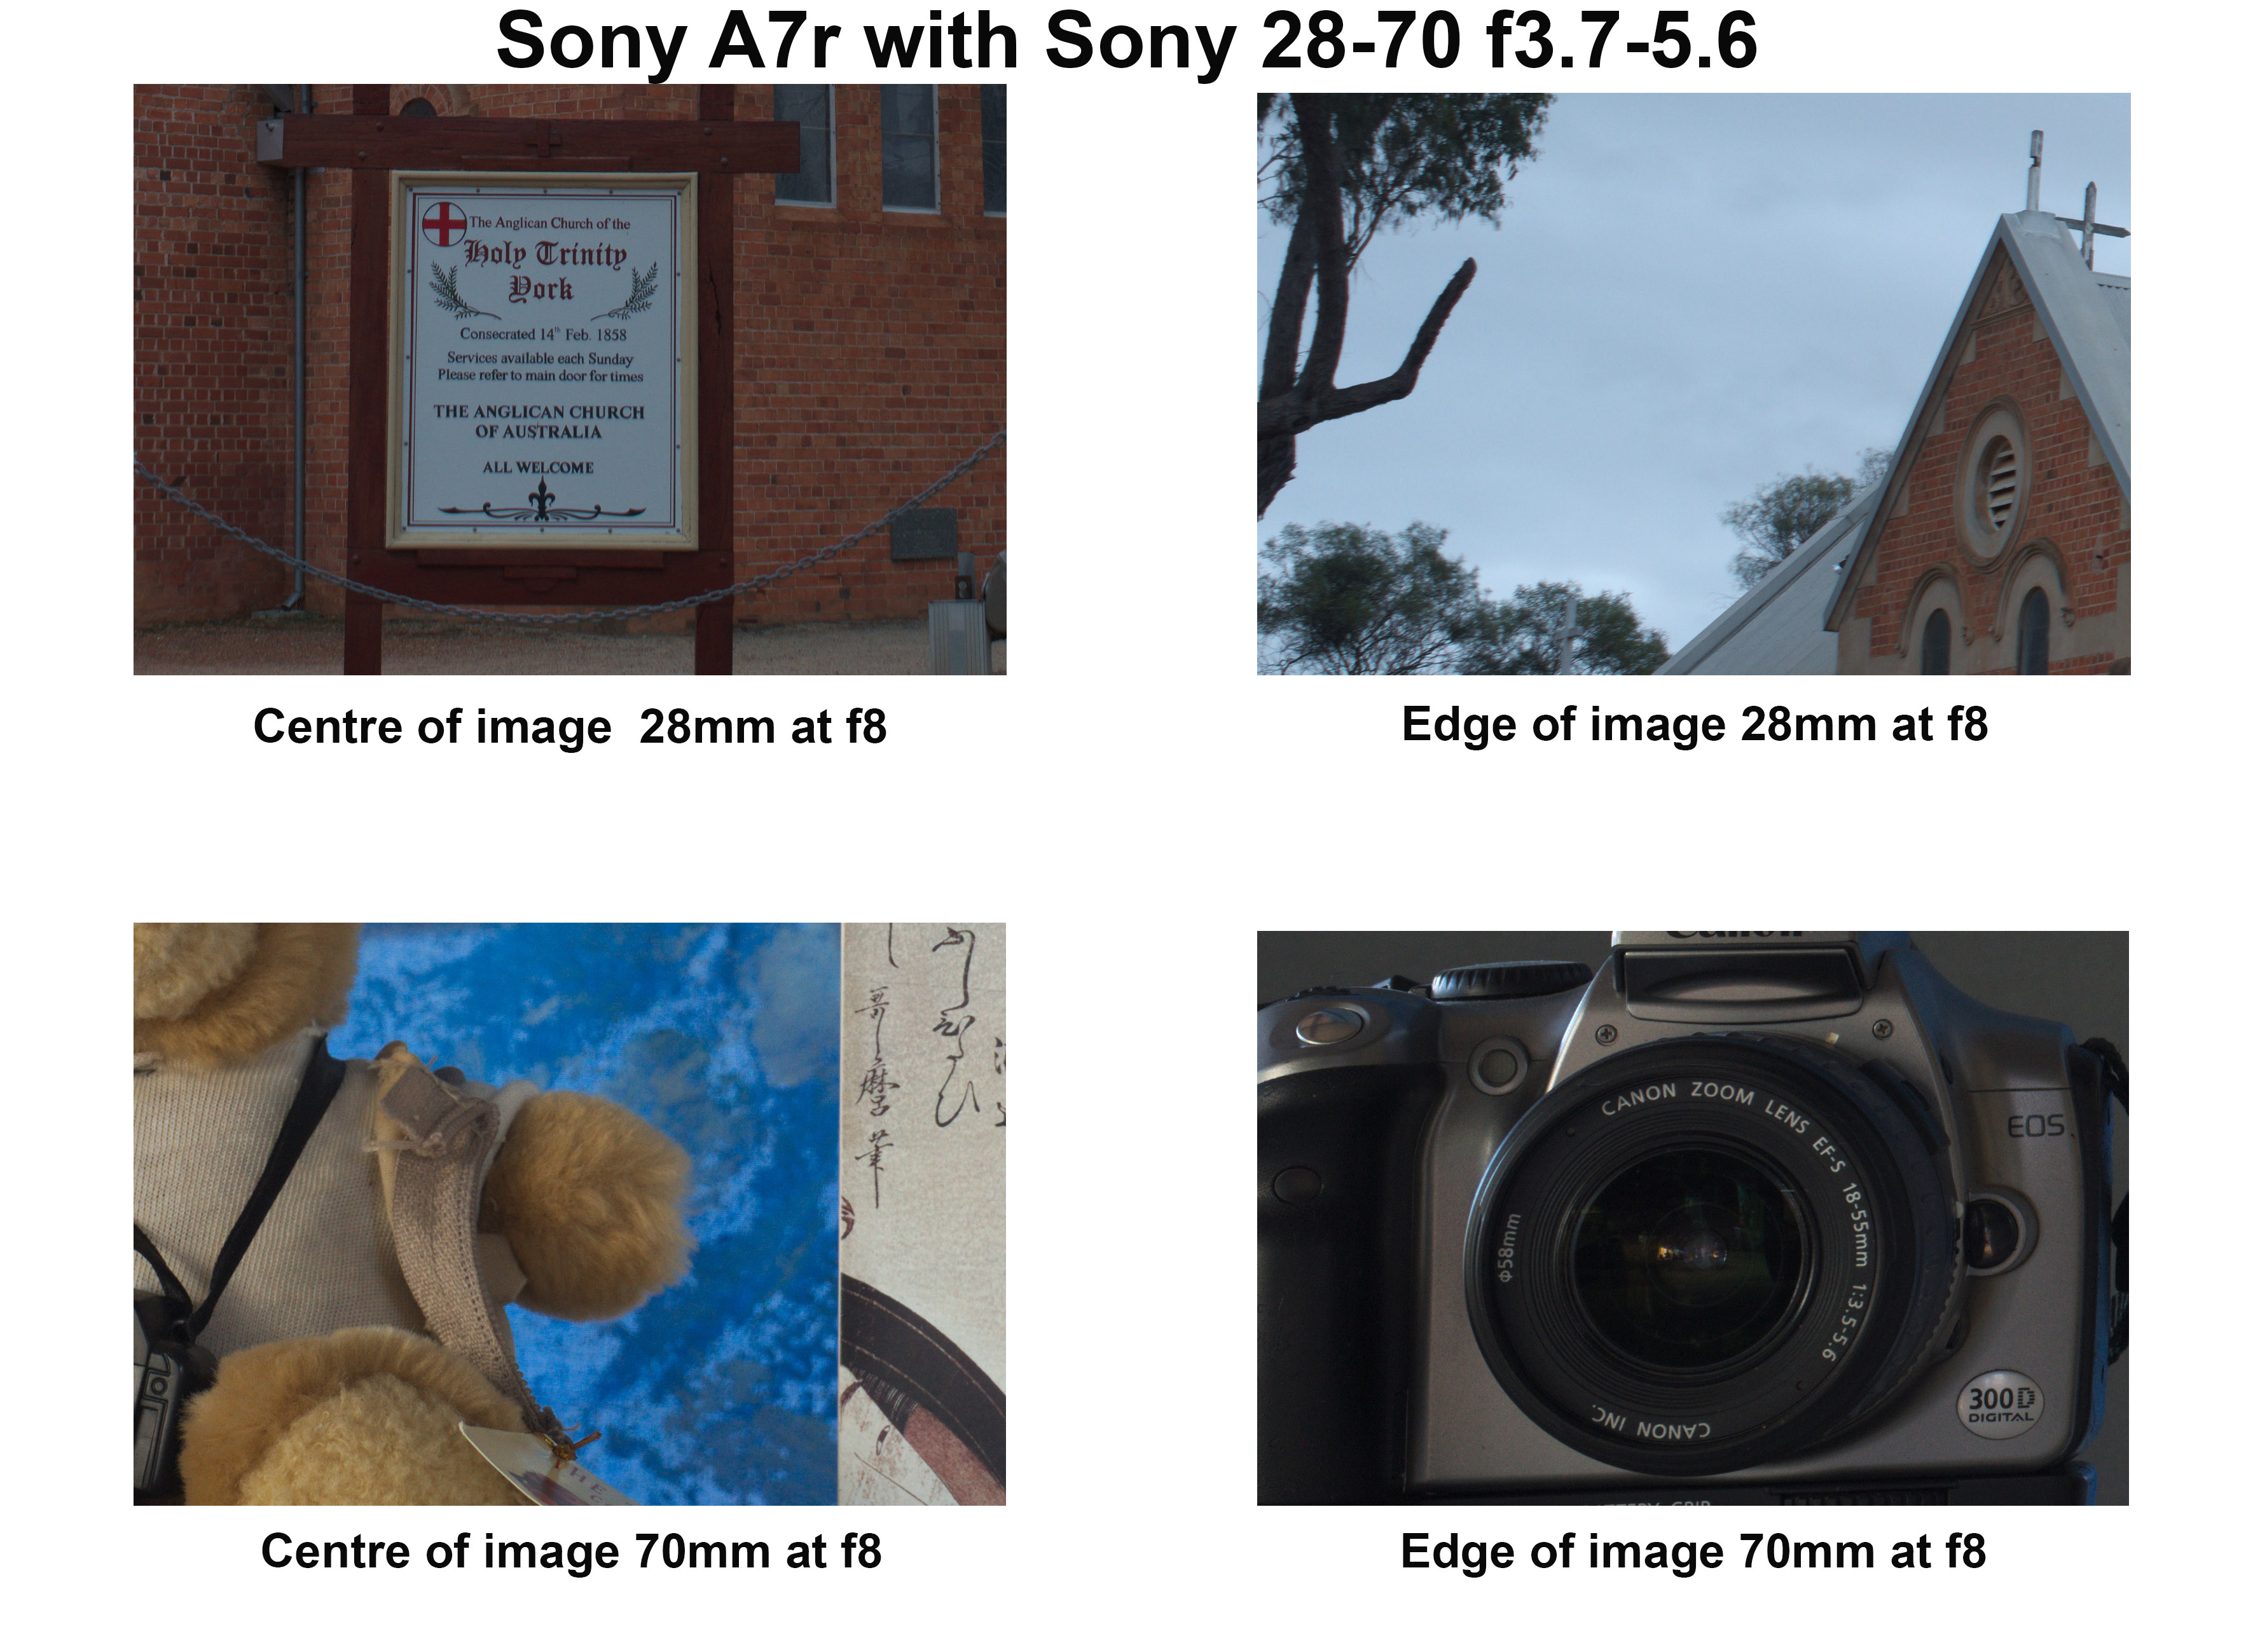
  • Sony A7r with Sony FE 28-70 f3.5-5.6 OSS

Why three cameras and three lenses, well mainly a case of why not, but also I wanted to see how a budget kit lens performed against the two “pro” lenses, and I was using it as a control as I had previously looked at it. Each lens was shot at the wide end and the long end, with the wide end an architectural shot to look at how the lens behaved at infinity and close-ups at the long end.


Holy Trinity York provided the wide-angle subject.


Typically standard zooms behave best at the wide end and the performance deteriorates as you zoom into the long end. All the lenses were tested at an aperture of f8 for the two shots previously mentioned and wide open to test for vignetting. For each shot the camera was mounted to a tripod, there were no filters on the lenses, any image stabilisation was turned off and the shutter was tripped via the self timer. All metering was done using a handheld incident light meter – Minolta Auto Meter V f. Because the base ISO of the EM1 is 200 all the images on all cameras were shot at value. The only DSLR in the group was used in live view mode to avoid mirror slap. The images were all shot as RAW files and then converted to 8 bit jpgs using RawTherapee (version 4.2.1) which allows you to switch off any embedded lens correction. There was no sharpening, noise reduction or correction for chromatic aberration. Ok that’s the methodology lets look at what happened. Click on the images to see them at full size.

Phillip the photographic bear provided the tele test subject


Olympus OMD EM1 mki with Olympus m.Zuiko 12-40mm f2.8 Pro lens

The Olympus m.Zuiko 12-40mm f2.8 Pro lens was announced as Olympus’ high end standard zoom in 2013 to accompany their then flagship camera the OMD EM1.


Built for the micro four thirds system this lens is equivalent to a 24-80 mm lens and that’s all the talk of equivalency you’ll get out of me, if you want more see this. The lens was launched at the same time as the EM1 in 2013 and it heralded a new line of “Pro” lenses. Of the three lenses here it is the only one with a metal outer construction and it has a splash proof and dust proof design. Its vital statistics are 84mm in length, a diameter of 69.9mm, has a filter thread of 62mm and weighs in at 382g. Not that it counts for much, but it feels nice in the hand and the manual focus clutch (reminiscent of the ones found on Pentax’s 645 range of lenses, is a very nice touch. Optically there are 14 elements in 9 groups – there are 1 aspherical element, 1 dual-sided aspherical element, 2 ED glass elements, 2 HR glass elements, 1 EDA glass element, 1 HD glass element. It is the most optically complex lens of the group. For bokeh aficionados there are 7 rounded aperture blades. The minimum focusing distance is 0.2m.


At the wide end the centre of the image is what you’d expect from a modern zoom, it is sharp and contrasty. At the edges the image is still sharp but the contrast has fallen off a little giving the appearance of softness. The chromatic aberration (CA) is very apparent. At the long end in the centre the image is still sharp but the contrast is lower than what we found on the wide end. The edges exhibit a little softness. The CA virtually non-existent. The results from the long end caused me a little consternation as it was the first time I’d seen images without any in camera correction applied so I repeated them just be sure and got exactly the same result.

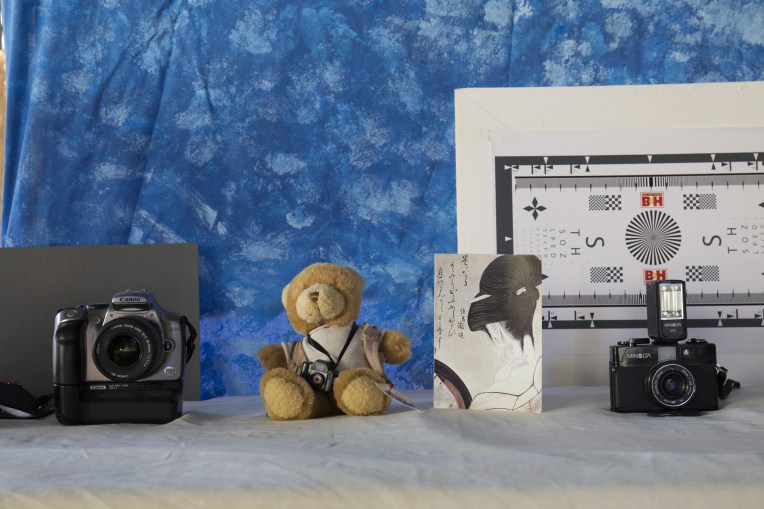
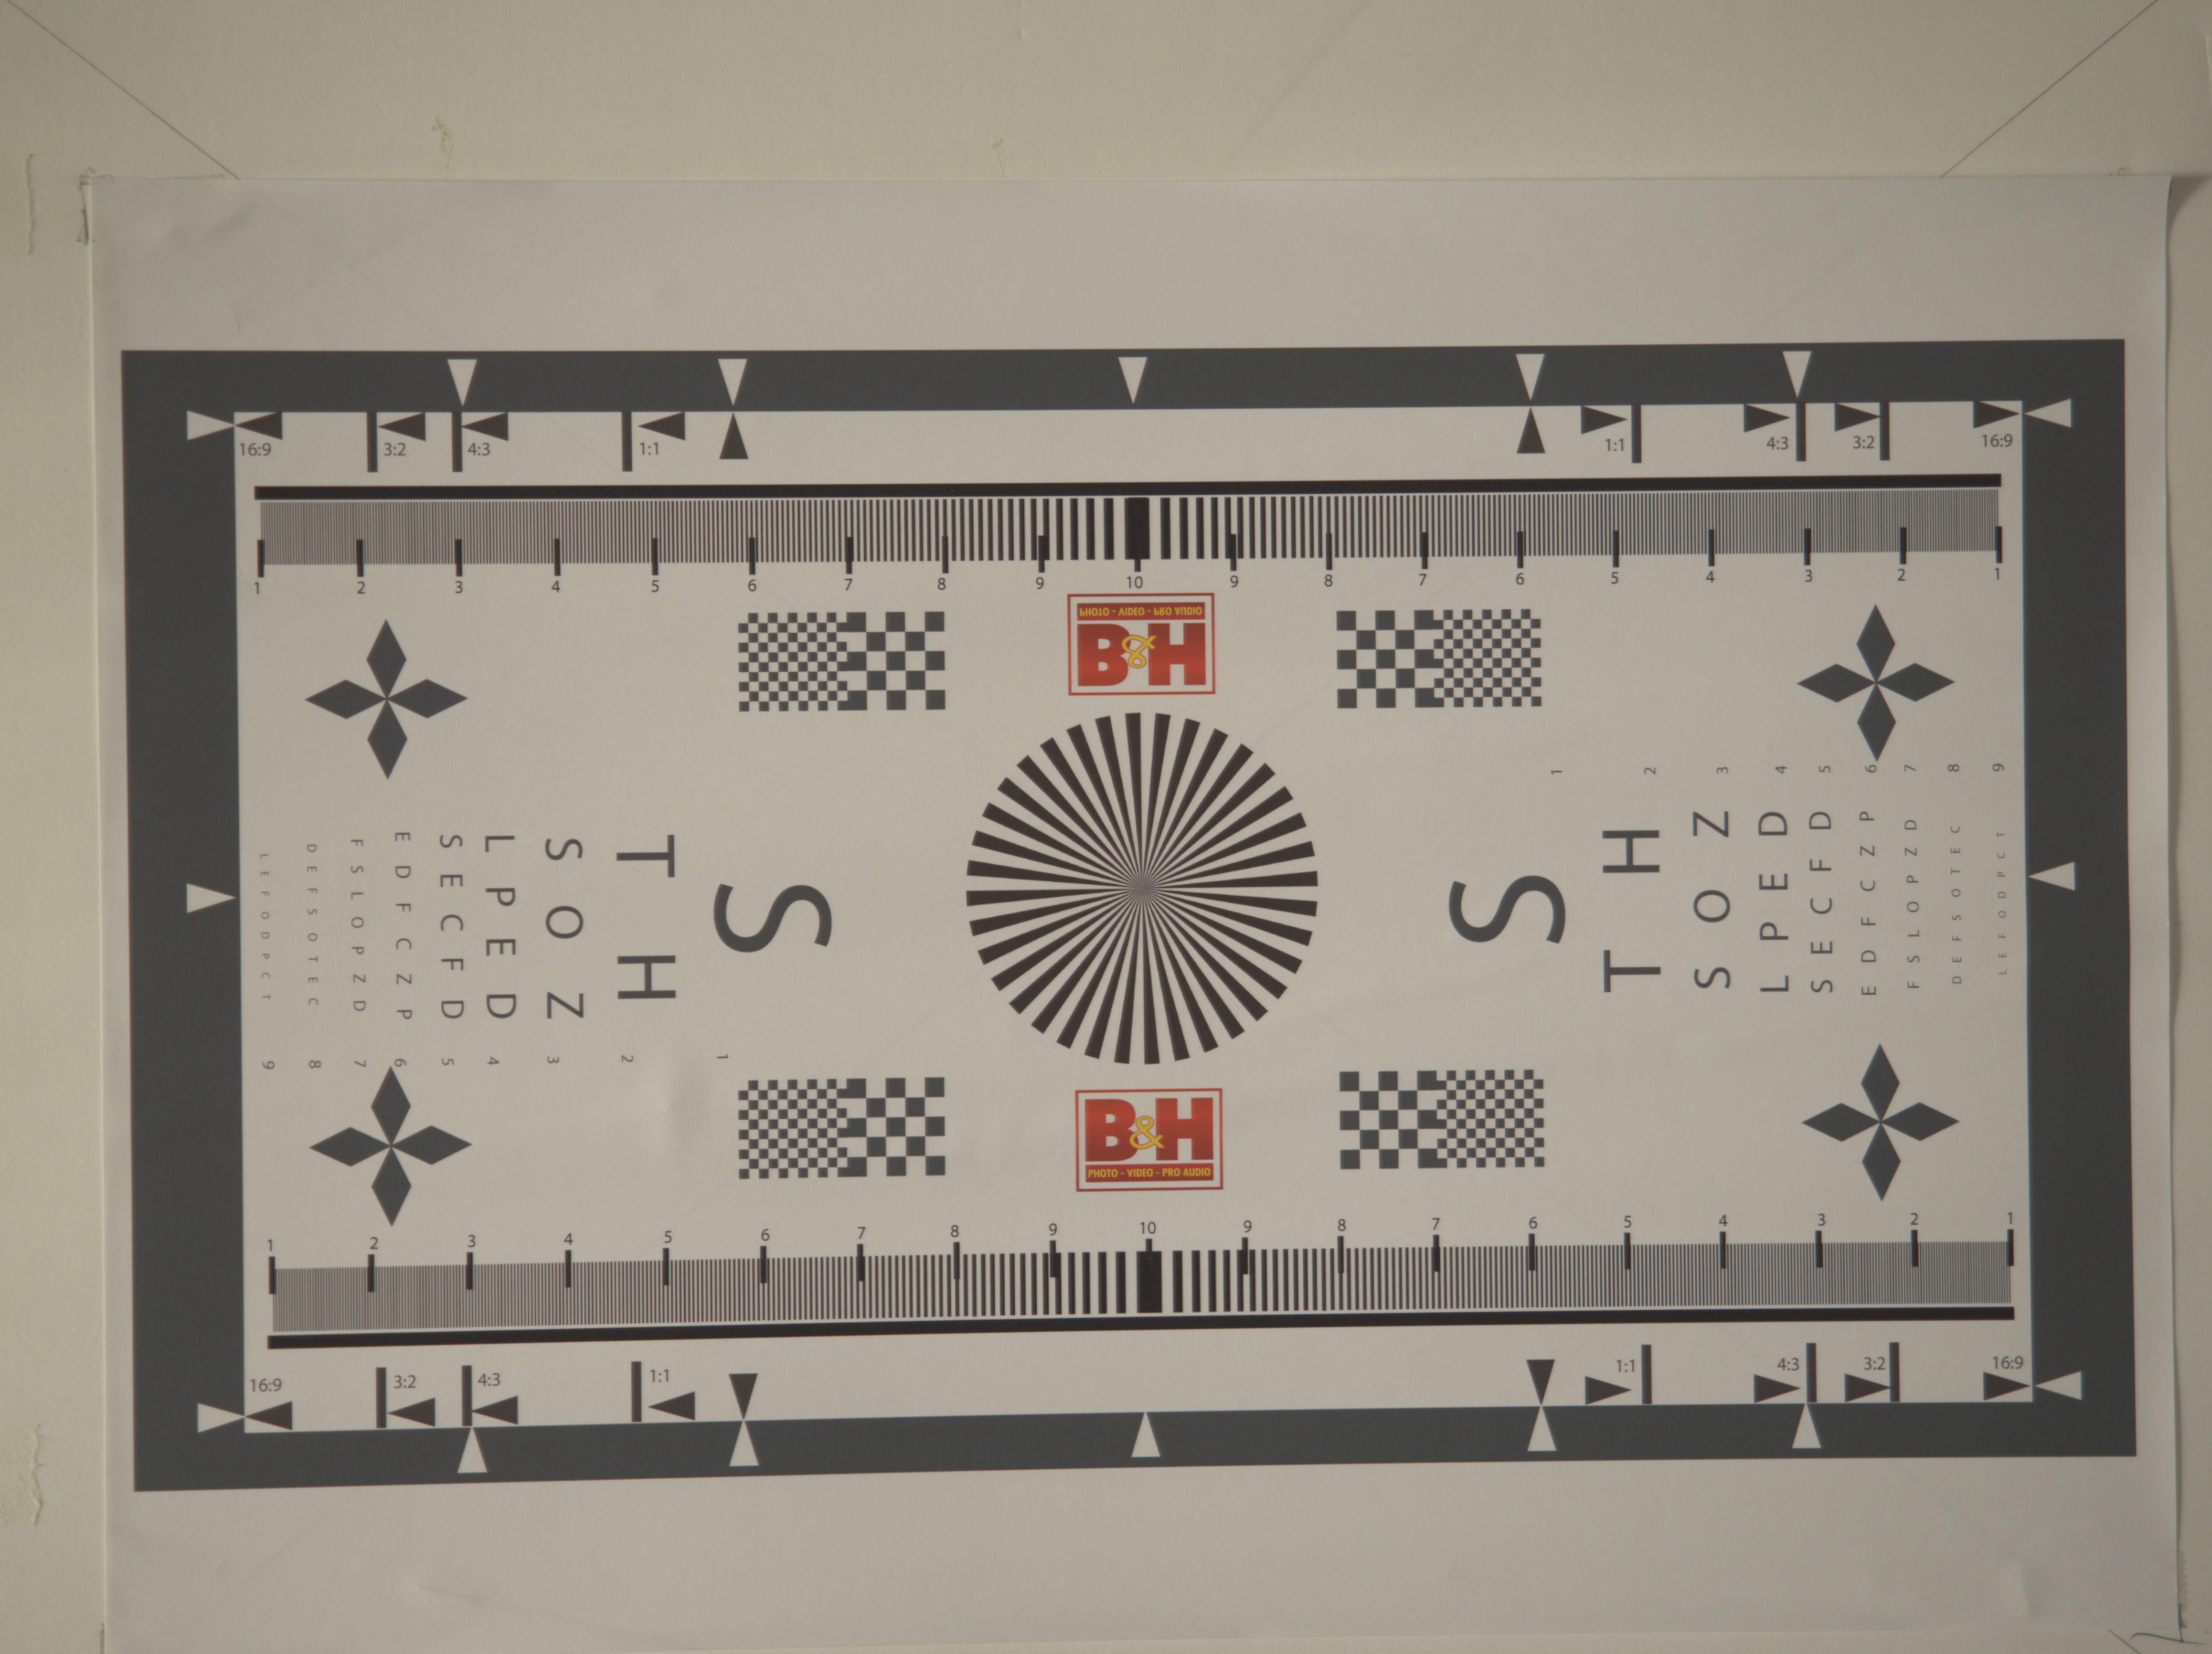
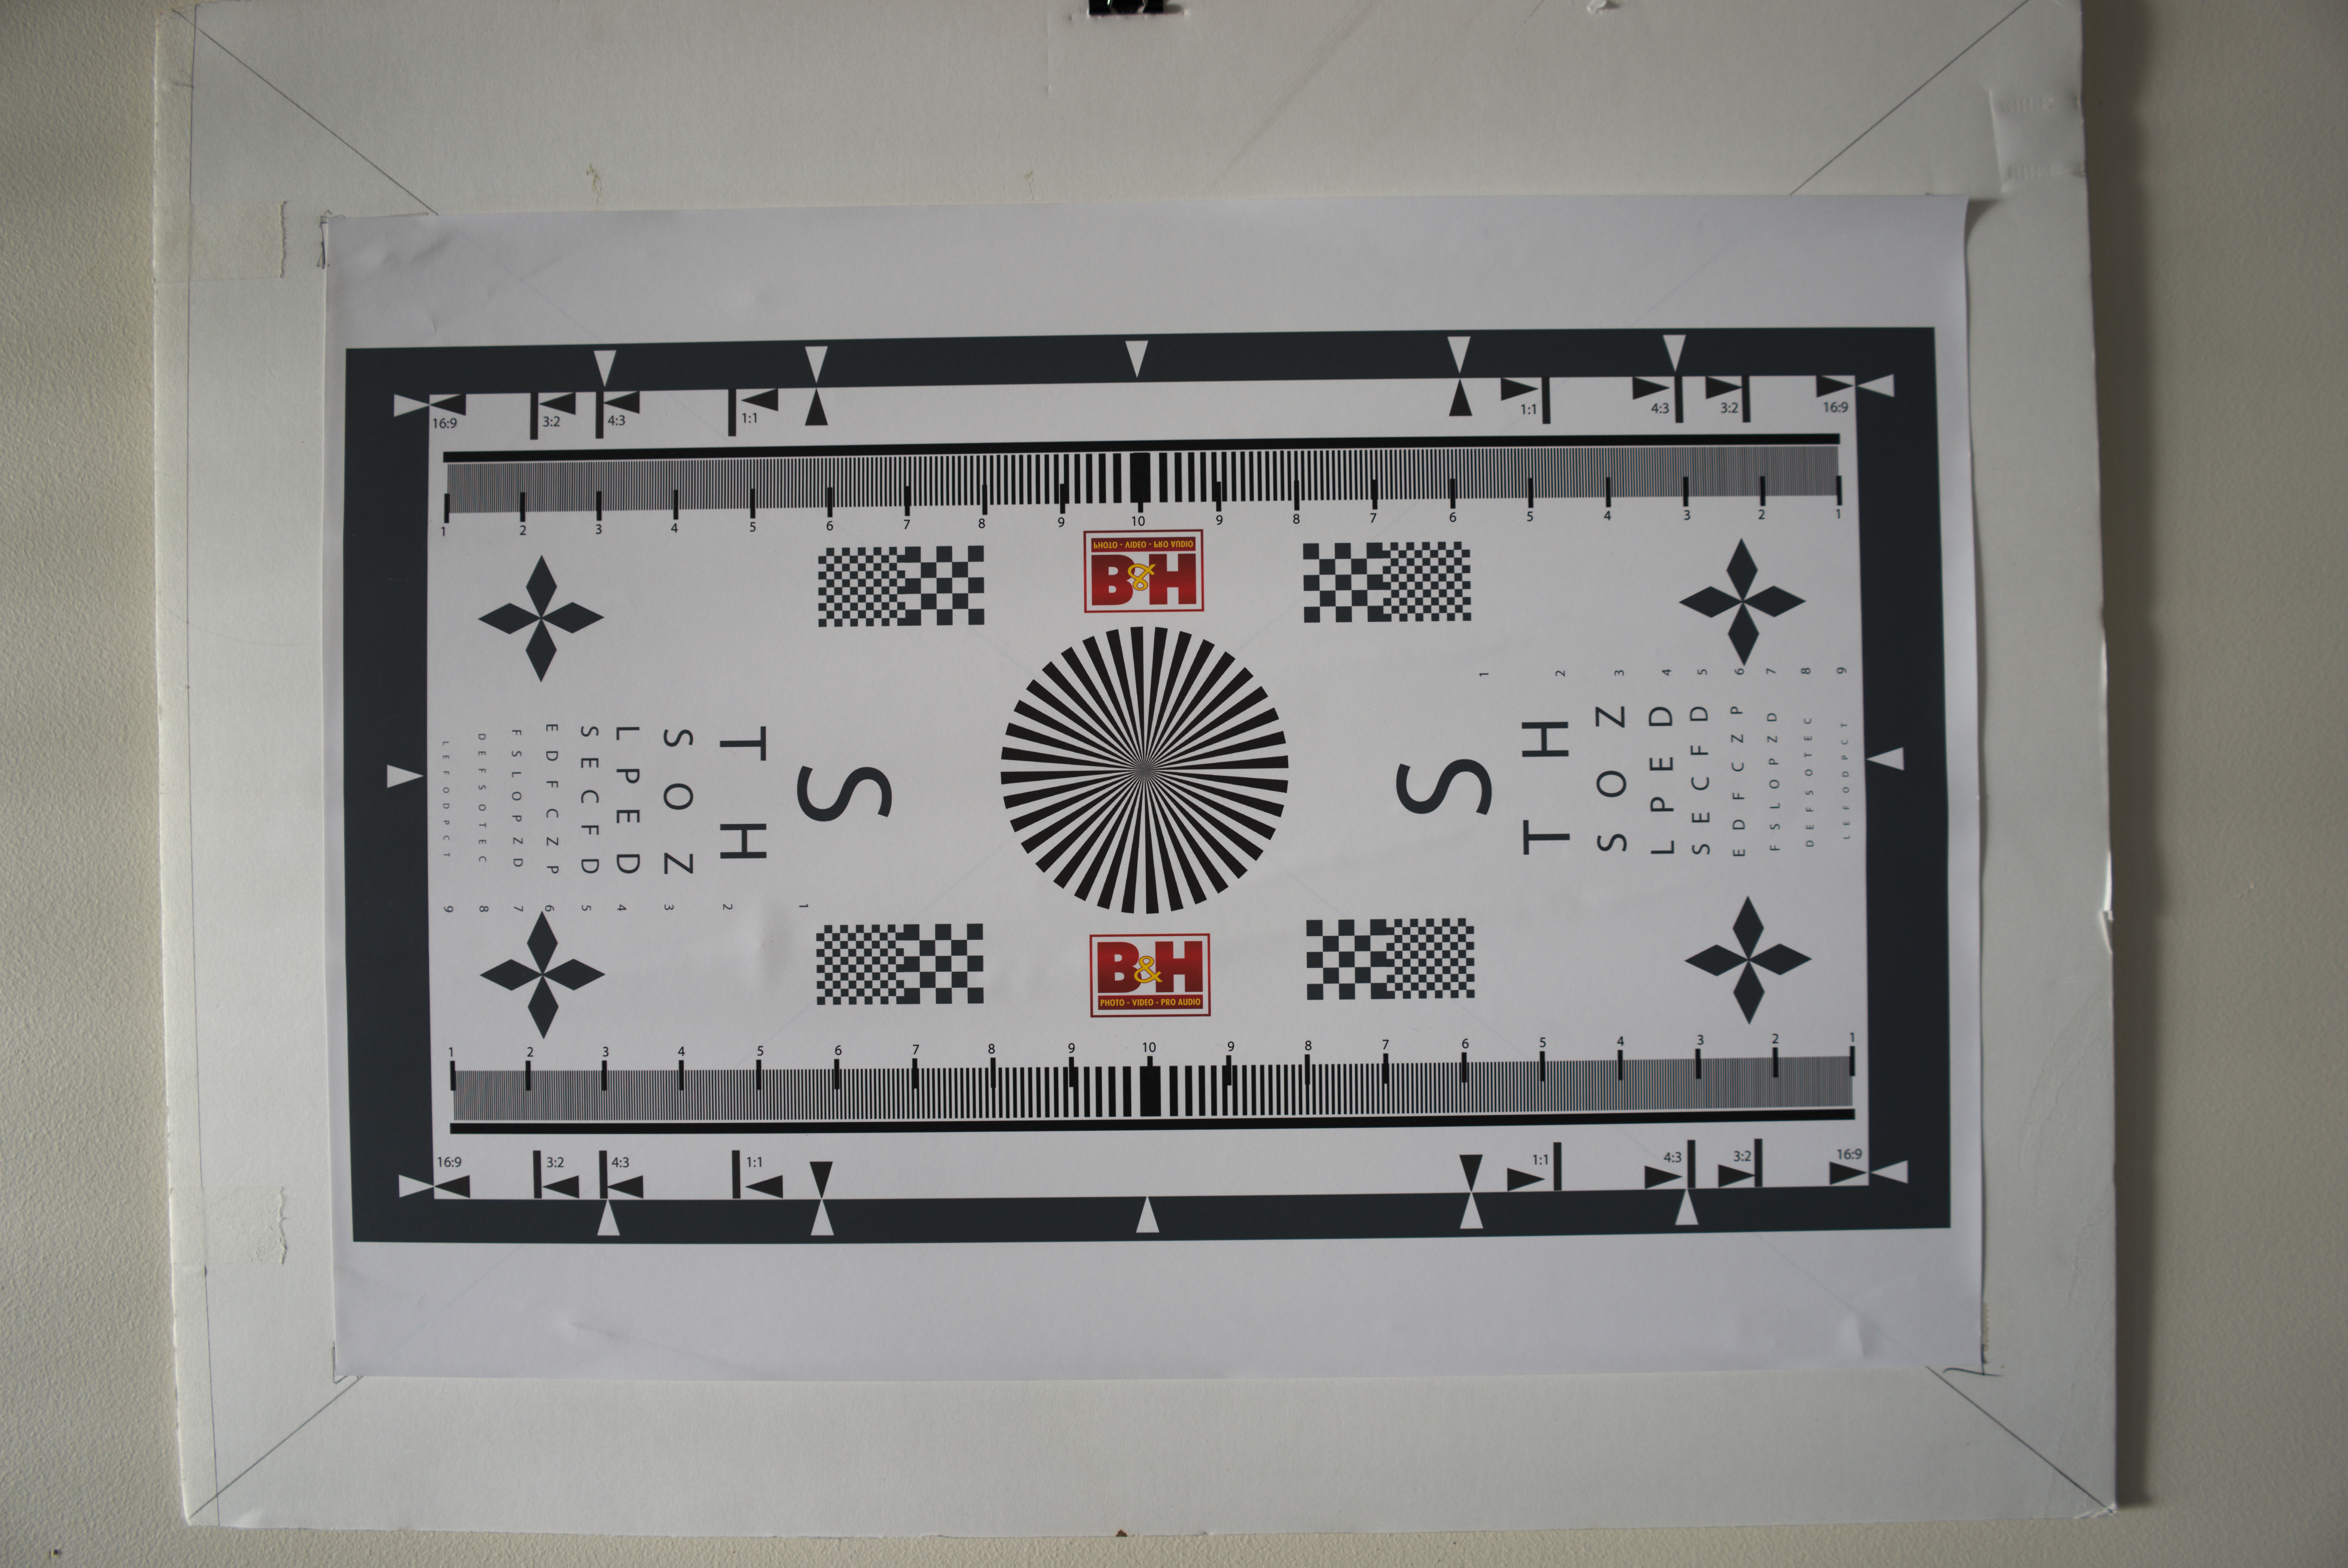
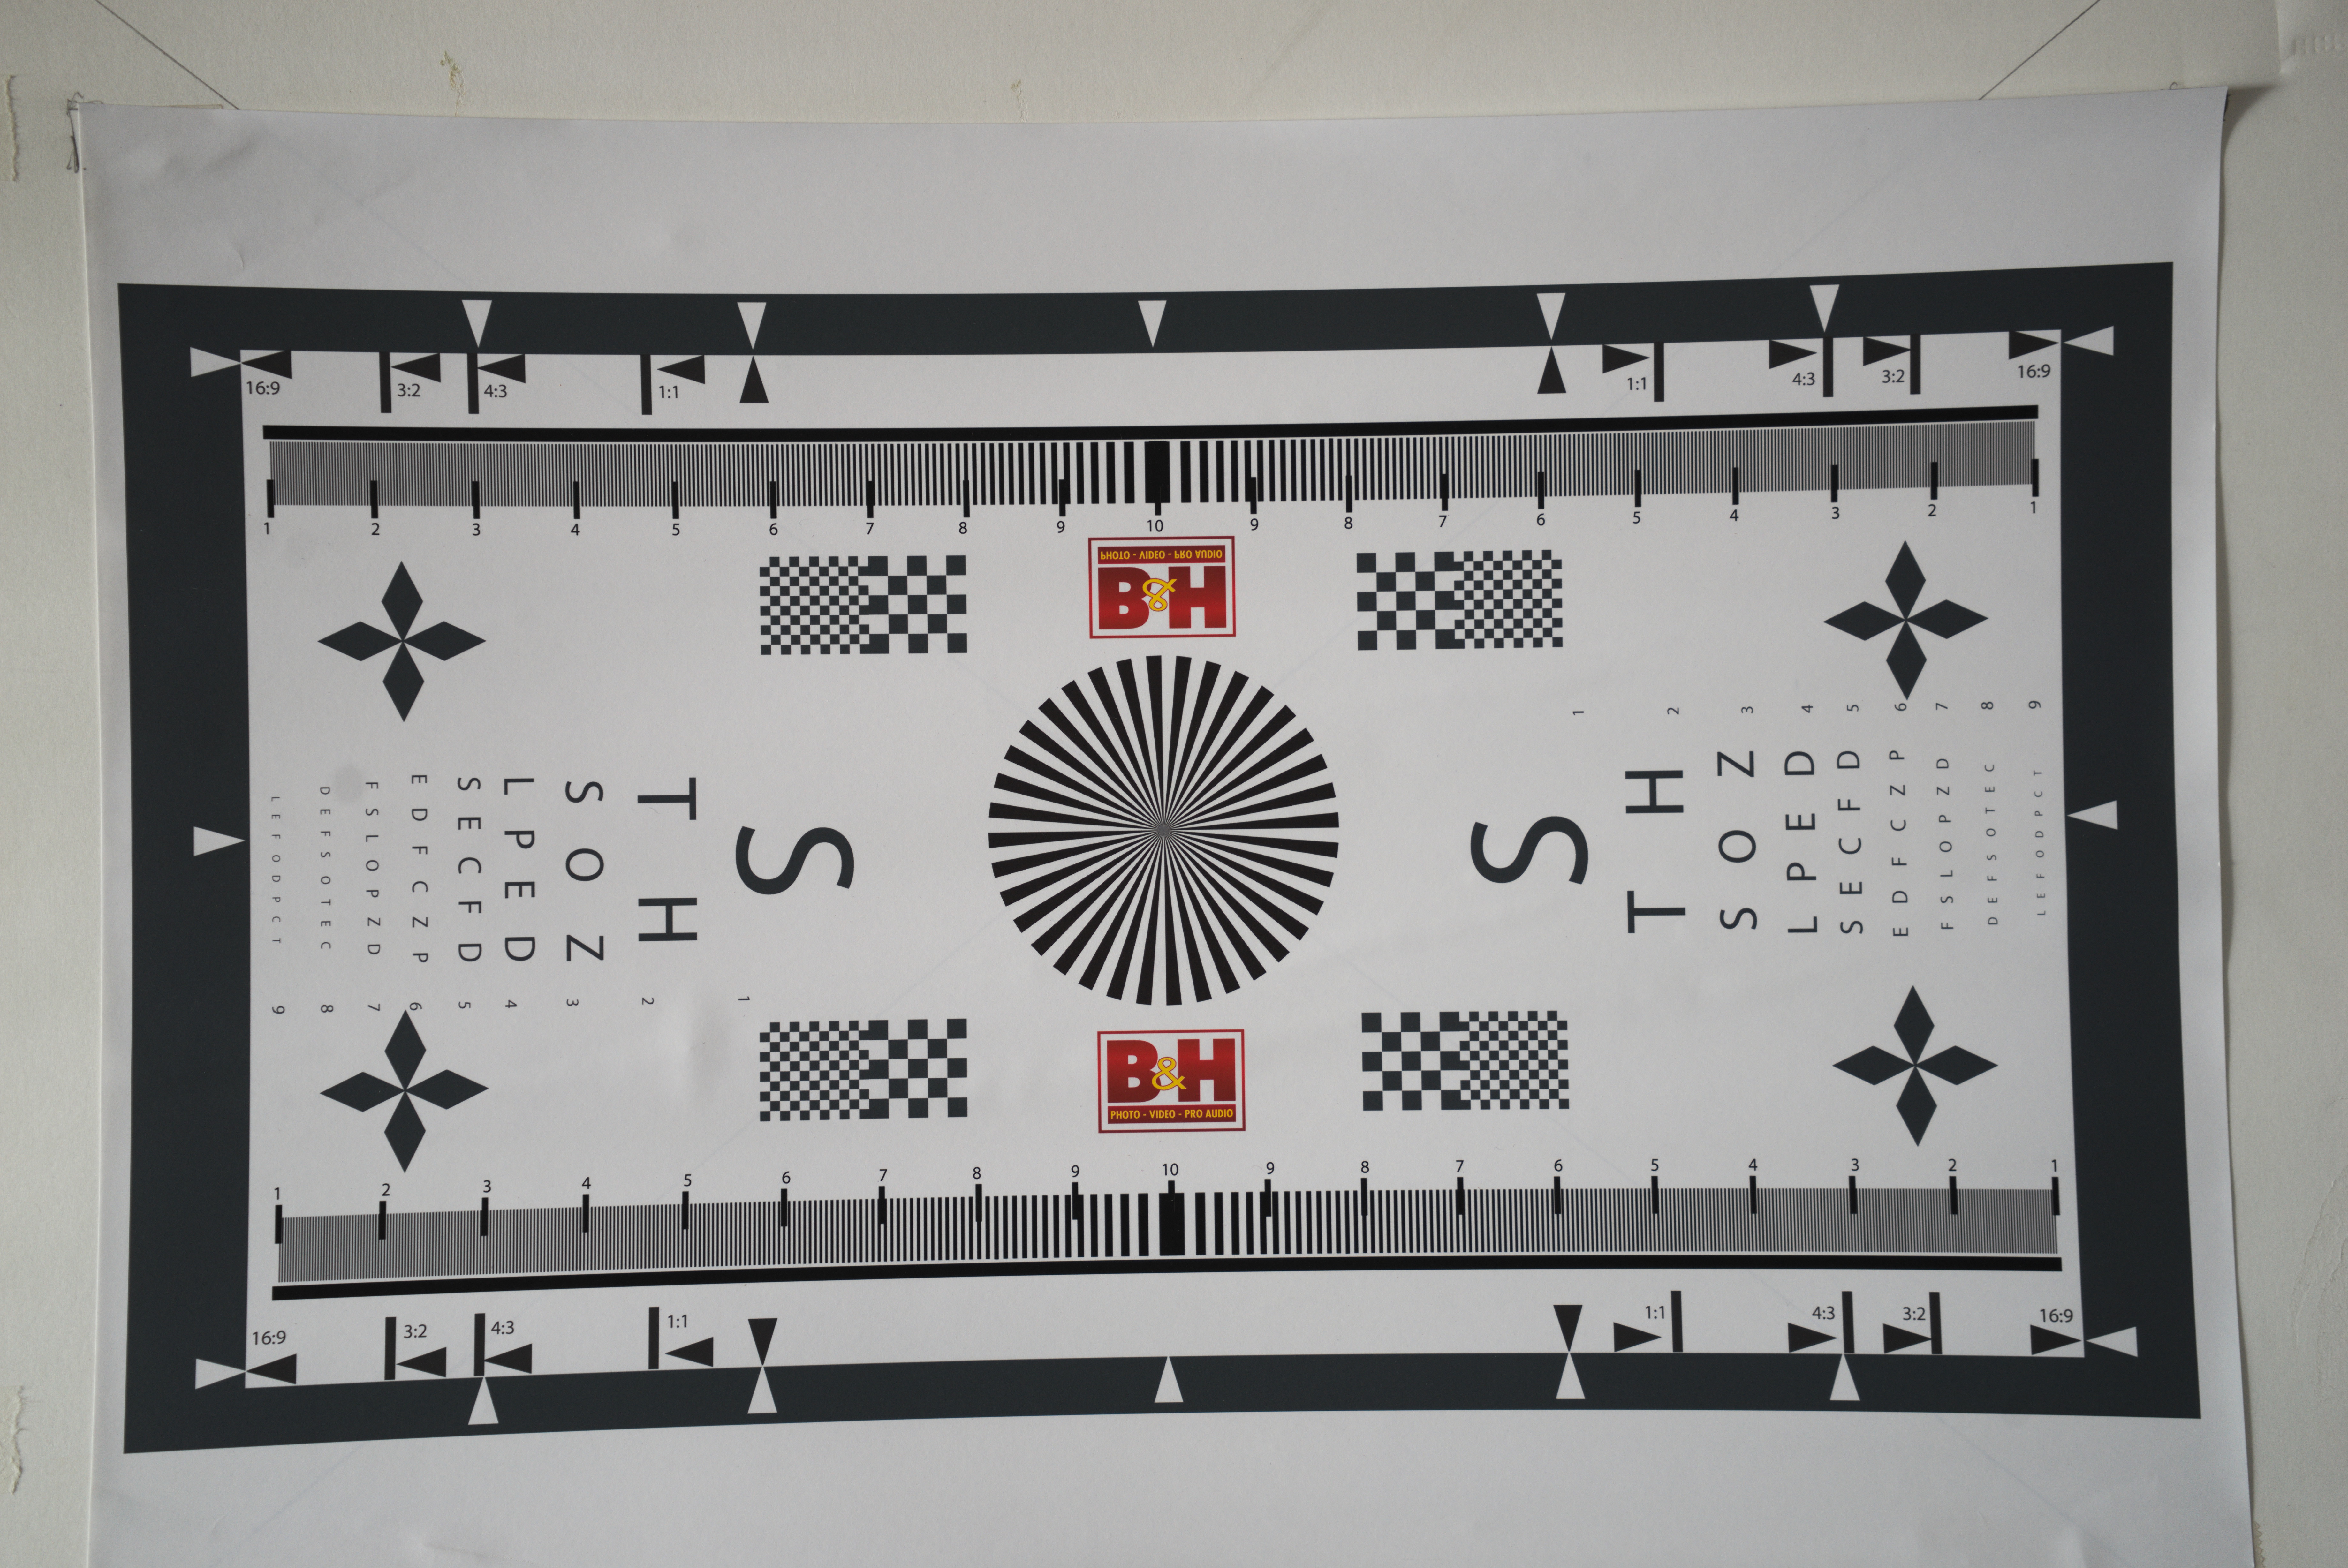
The lens resolution chart shot at 12mm wide open to show any vignetting or lens distortion.


Testing for vignetting and distortion I found that the lens exhibited marked vignetting and barrel distortion at the wide end at f2.8. The vignetting had disappeared on stopping down to f5.6.


This time at 40mm wide open.

At the long end there is only slight vignetting and very mild pincushion distortion. What is interesting is that there is significant variation in the exposure, remember these were metered using a handheld incident meter. The long end is nearly a whole stop darker than the wide end. This shouldn’t happen with a constant aperture zoom.


Canon EOS6d with Canon EF 24-70mm f4 IS L lens

The Canon EF 24-70mm f4 IS L lens was introduced in 2012 as Canon’s budget (if that term can be used at this price) L series standard zoom lens.


This is the most expensive lens in the group with a retail price of around $1200 AUD. It is also worth pointing out that this is the budget standard zoom in Canon’s L range. This lens was introduced in 2012 and was intended to be a kit lens for then newly announced Canon EOS6d. The body is made of some variant of ABS plastic which is somewhat disappointing considering the price, but with a weight of 600g it has a satisfying heft. The optical construction is 15 lens elements in twelve groups with 2 aspherical and 2 UD elements. The aperture diaphragm is comprised of 9 rounded blades. Unsurprising it is the biggest lens of the trio being 93mm long, 83.4mm in diameter and has a 77mm filter thread. Image stabilisation is built into the lens and is good for four stops. The minimum focus distance is 0.38m, but the lens has a rather nifty macro feature where you press a button and turn the zoom ring and that takes it down to 0.2m and a maximum magnification of 0.7x.

At 24mm the centre of image is extremely sharp and contrasty and the edges are the same. At the tele end it is a repeat. Chromatic aberration is non-existent at both extremes.

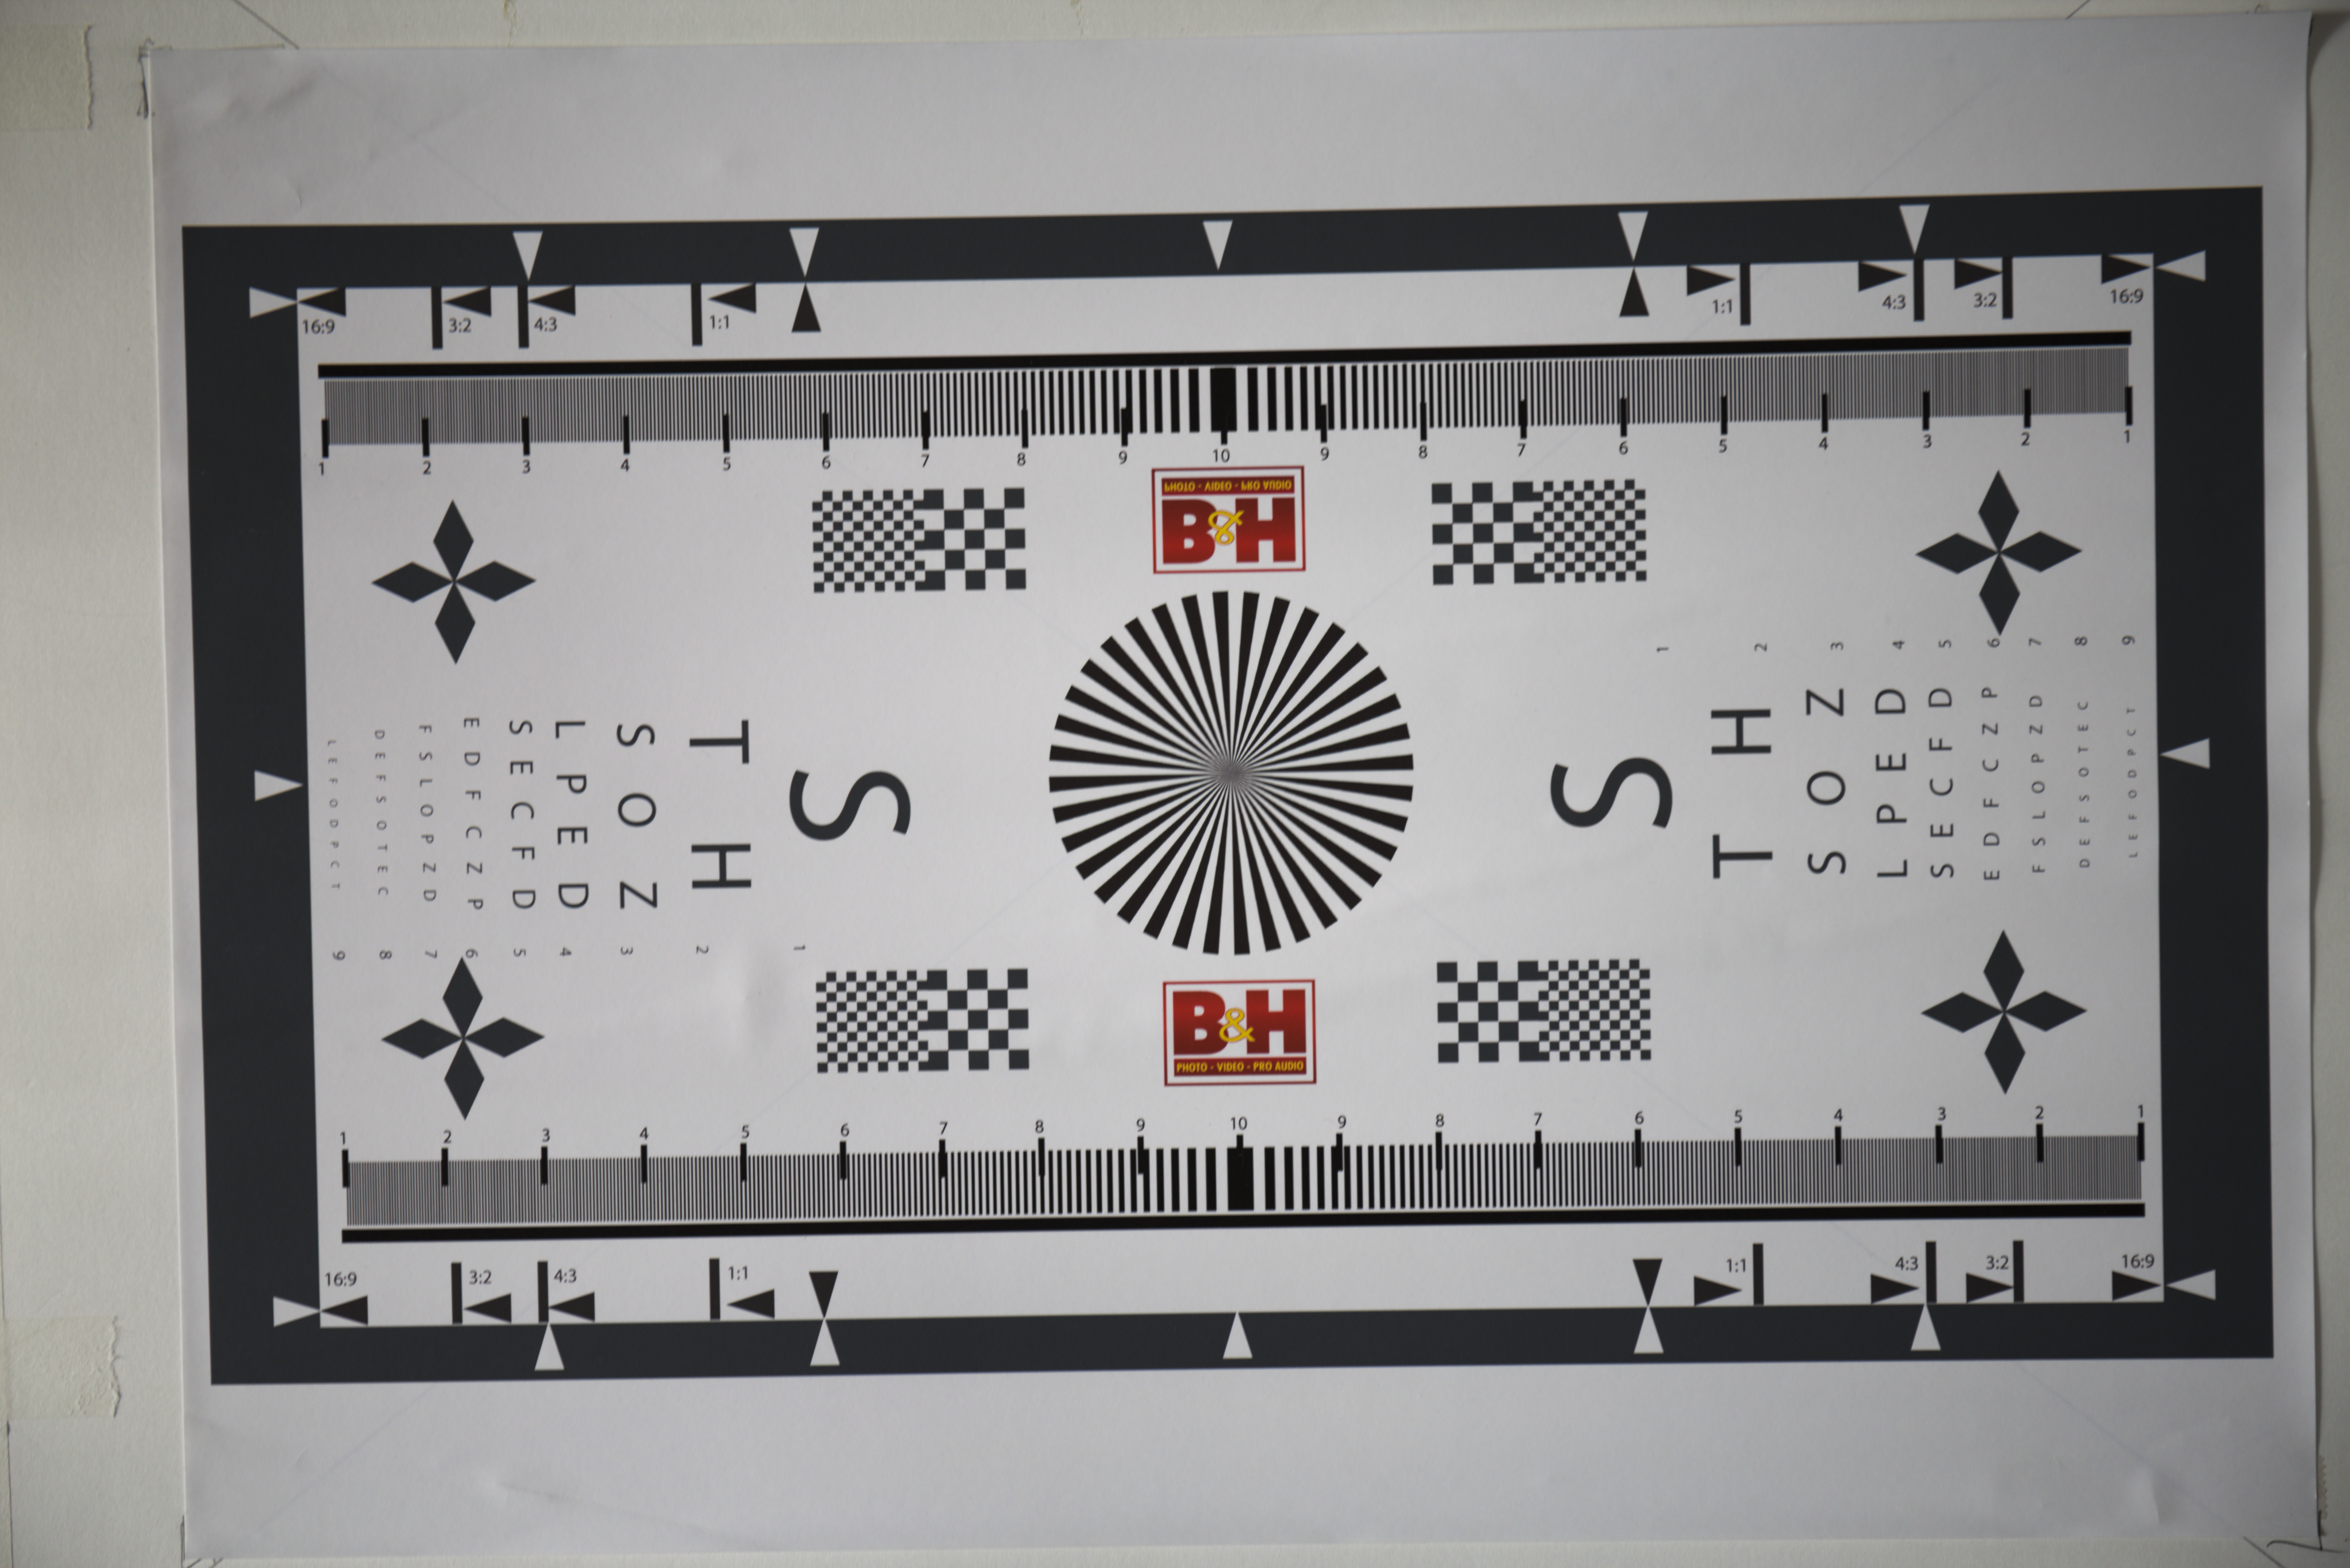
The Canon EF 24-70 f4 IS L at 24mm wide open


Shooting wide open at 24mm vignetting is very apparent, I would say that there’s probably 2 stops difference between the corner and the centre. The barrel distortion is not excessive but is noticeable. At 70mm a small amount of vignetting can be seen and there is some mild pincushion distortion.


The Canon EF 24-70mm f4 IS L at 70mm wide open.

Sony A7r with Sony FE 28-70mm f3.5-5.6 OSS


The Sony 28-70mm f3.5-5.6 OSS was introduced in 2013 as the budget kit zoom to accompany the Sony A7 mirrorless camera.


The joker in the pack and the cheapest on test at just under $350 AUD, and boy when you pick this one up it certainly feels like it. When I originally wrote about it on 3rd July 2016 I was very skeptical of its durability, well nothing adverse has happened to mine, but, Kirk Tuck wrote today that his met a tragic end courtesy of a dog’s tail and a hard floor. Well what do get for your $350? Well unsurprisingly at this price point this is largely made of plastic – the cheap kind – and is very light coming in at 295g. There’s not a lot of glass either just 9 elements in 8 groups made up 1 extra low dispersion and 3 aspherical elements. The simpler optical design and low price makes this the only variable aperture lens in the test group. The aperture diaphragm is made up of 7 blades. Size wise it is a compact 83mm long, has a diameter of 72.5mm and has a filter thread of 55mm. The plus points are that it is dust and moisture resistant, has built in image stabilisation, has a respectable minimum focusing distance of 0.4m and comes with a lens hood. As an aside I believe that every lens should come with a hood.


At 28mm the lens is again just like any other modern lens – sharp and contrasty. At the edges there is a drop off in contrast but they remain sharp. Chromatic aberration is very well controlled and easily fixed in Lightroom. The slow variable aperture means that vignetting is not a problem and there is only slight barrel distortion. At 70mm the centre is sharp and has good levels of contrast, the edges are sharp with a slightly lower contrast. There was also some evidence of coma. Again very little vignetting and a slight trace of pin cushion distortion.

The Sony 28-70mm f3.5-5.6 OSS lens at 28mm wide open.


The Sony 28-70mm f3.5-5.6 OSS lens at 70mm wide open.


Conclusion

So is the Olympus 12-40 the Canon killer that Chris Corroding says? Well without in camera software correction it is only just a bit better than the Sony which is half the price. It is the correction that elevates this lens to very good. Having said that the Canon 24-70 f4 is probably one of their very best zoom lenses and produces very good images straight out of the camera. Apply the Lightroom lens profile and it is even better. Is that surprising? No considering its cost I would hope it be optically very good. This is the rub – for $350 AUD you get a surprisingly good lens with the Sony and most people would be very happy with it. The Olympus at $870 AUD sees some significant improvement. The Canon at $1200 AUD sees only incremental improvement over the Olympus. The law of diminishing returns is very clearly at work here.

When it comes down to sensor performance the Sony A7r rips the head off of the EM1 and EOS6d and spits down the stump. I have been amazed by how well it performs – the dynamic range is very, very good, the lack of an anti-aliasing filter means that with good lenses insane amounts of detail can be rendered, and the high ISO performance is also very good. The Canon EOS6d’s sensor is capable of very nice colour rendition, especially skin tones, but it is not the best when it comes to dynamic range. It is what I’d call workman like. For the Olympus EM1, well the dynamic range is very good, high ISO performance not so. The lack of anti-aliasing filter helps you get the best out of the lenses. I really like my m4/3 Olympus cameras and lenses, I use them more than anything else, but I really feel that the sensors are holding them back. I’ve yet to get any long-term usage out of the new 20Mp sensor that is found in the EM1 Mkii, but I do think that if they got access to the latest BSI sensors from Sony and reduced the base ISO to 100 that there would be quite a sizeable performance boost. But all this is moot as all three are capable of excellent results if I do my part.

It is important to remember that I only have access to one of each lens so I have no idea of what the sample variation is for any of them. What does this all mean in terms of real world usage? Well I’ve used my Olympus 12-40 far more than the Canon 24-70 and I am more than happy with how it performs. I hardly ever use the Sony 28-70 as I only really use the A7r with legacy lenses.


Leica Look

Leica want you and everyone around you to know that you are using one of its cameras.


First off a big thanks to Saul Frank and the nice people at Camera Electronic who very kindly awarded me a Leica D-Lux Type 109 in a recent in store competition.

It's all about the lens. Forget the red dot, the Leica DC Vario-Summilux 10.9-34mm f1.7-2.8 is the star of the show.
It’s all about the lens. Forget the red dot, the Leica DC Vario-Summilux 10.9-34mm f1.7-2.8 is the star of the show.

For many years Leica aficionados have talked about the “Leica look”. They weren’t talking about the design of the camera, but the way Leica lenses render an image. Many would say that they can look at a photo and tell whether it was taken with a Leica or not. Non Leica users scoff at this and generally accuse Leica owners of being people with more money than sense and with no knowledge of photography. Roger Hicks, the noted English photographic author, once attributed the Leica look to older Leica lenses, film with no anti-halation layer, and over exposure. This allowed soft light to reflected from behind the film and cause bright edges in the image. So that brings us to modern digital Leicas and in the case of the D-Lux those that are built by Panasonic. Do they exhibit the “Leica look”? I think the answer is emphatically no! Modern lenses, even those made by Leica, are inherently more contrasty and digital sensors behave in a completely different way to film.

The Leica D-Lux compared with the Panasonic Lunix LX5. Looking from the front there is not a lot of difference in the size despite the D_Lux have a sensor much larger than the LX5.
The Leica D-Lux compared with the Panasonic Lumix LX5. Looking from the front there is not a lot of difference in the size despite the D-Lux having a sensor much larger than the LX5.


The Leica D-Lux compared with the Panasonic Lunix LX5. From above the size difference is more apparent.
The Leica D-Lux compared with the Panasonic Lumix LX5. From above the size difference is more apparent.

So lets talk about the D-Lux, or should I say the Panasonic Lumix LX100? It’s not the first time Leica have re-branded a Panasonic model. The Panasonic Lumix LX5, which I own and have sung the virtues of on this blog, was marketed by Leica as the D-Lux5 and there were many others before that. So what does paying the Leica tax get you over the Panasonic? Leica say they have had the firmware tweaked to their specification and that differentiates it from the LX 100.  Both cameras have a Leica DC Vario-Summilux 10.9–34 mm f/1.7–2.8 ASPH zoom lens which gives a 35mm equivalent of a 24-75mm lens. I doubt very much that the lenses are made by Leica, it is more likely that Panasonic have licensed the Leica name in the same way that Sony have with Zeiss. The only thing that really differentiates them is the design of the outer shell. The Panasonic has a grip and a faux leatherette covering while the Leica is smooth with no grip. I’d have to say I prefer the look of the Leica, it is to my eye a very sexy looking beast. The only thing that lets it down to my mind is that the shell is plastic, and although the body has a very pleasing heft it feels disappointing not to have the cool feel of a metal shell. Technically the camera is a m4/3 camera with a 16Mp 17.3 mm × 13.0 mm sensor, but the reality is that the camera uses a smaller portion. This has enabled the manufacturer to provide a fast zoom lens in a small size and the image circle created by the lens is smaller than the sensor. The upshot is that you get a multi format camera (4:3, 3;2, 1:1 and 16:9) with a good fast lens. The down side is that you only get 12Mp out of a 16Mp sensor which means even at base ISO of 200 grain is apparent. Having said that thanks to the lens the image quality is good enough for an A3+ (13″ x 19″ or 329mm x 483mm) print which is great for a compact camera. The lens has some corrections applied in camera and is distortion free and suffers from minimal chromatic aberration. I only shoot RAW so can’t comment on the jpgs.

The top plate shows the camera was designed by a photographer. aperture, shutter speed, and exposure compensation all handled by dials. To switch to aperture priority put the shutter speed dial on "A". To go to shutter speed priority switch the aperture to "A". Want programe mode put both the aperture and shutter speed dial on "A". Simple.
The top plate shows the camera was designed by a photographer. aperture, shutter speed, and exposure compensation all handled by dials. To switch to aperture priority put the shutter speed dial on “A”. To go to shutter speed priority switch the aperture to “A”. Want program mode put both the aperture and shutter speed dial on “A”. Simple.


Everlastings on Mount Brown in York, WA. Exposure: 1/400th sec, f8 at ISO 800. The close focusing capability made this shot a doddle as did the evaluative metering and the dynamic range of the sensor.


St Mary’s Cathedral, Perth, Western Australia. Exposure: 1/320th sec, f8 at ISO 200. The lens is still very good, showing minimal distortion and very little chromatic aberration. Again the metering and the dynamic range combined to handle this scene with aplomb.


Graffiti under the Great Southern Highway traffic bridge in York, Western Australia. Exposure: 1/640th sec, f2.8, at ISO 1600. Wide open the lens is sharp and contrasty. The sensor is noisy at high ISO, but appears very organic and film like.


Nature trying to reclaim the CBD. Northbridge, Western Australia. Exposure: 1/640th sec, f16 at ISO 3200. The lens is quite resistant to flare which is just as well as like other premium compacts the camera ships without a lens hood.


Defacing Reclaim Australia notices in Northbridge, Western Australia. Exposure: 1/2000, f2.8 at ISO 200. A combination of large sensor and fast lens means that shallow depth of field shots are possible. The lens renders subjects very well with a nice fall off in tones and sharpness.


Wall mural at the North Metropolitan TAFE Campus in Northbridge. Exposure: 1/1000th sec, f8 at ISO 200. Panasonic aren’t as accomplished with colour science as some other manufacturers so it is safe to say that Leica’s secret sauce has delivered some really nice colour profiles.


The patterns on a pruned grass tree. Balladong, Western Australia. Exposure: 1/125th sec, f8 at ISO 250. This file prints out fantastically at A3+. The edge to edge sharpness and detail are amazing


Watching the large screen in the Perth Cultural Precinct. Exposure: 1/250th sec, f8 at ISO 200. With its small size, great lens, and good AF performance the Leica D-Lux makes an excellent street camera.

Video quality is very very good. The camera shoots 4K video at 25p 100Mbps and HD at 50p 28Mbps, but specs aren’t everything. For example my phone can shoot 4K video but it is horrible looking and very brittle when processing. The D-Lux gives you a good file that will stand some post processing. I’ve really enjoyed shooting movies and time-lapse sequences with the camera. This is where the DNA proves Panasonic’s paternity. There are only two things that lets it down. First is sound – there is no mic input. With this small feature added the camera would really rock as discrete video cam. Second some form of built in ND filter would really make the camera perfect enabling lovely wide open shots possible in bright sunlight. The wide shots in the video below were shot with the D-Lux.


The rear of the D-Lux is very tidy and well organised.


My Leica D-Lux pimped out with its accessory grip, tripod adapter and Peak Designs Anchor Link.


So to sum up. This was a prize that I won, not a purchase. To be honest if it were my money I would have bought the Panasonic LX100 which is over $500 AUD cheaper. Leica try to talk you up by saying their version thanks to its Leica firmware produces better images and they throw in a copy of Adobe Lightroom. But honestly Lightroom is less than $200 and if you shoot RAW you can get the look you want easily enough. I found the body too smooth and sprung for the accessory grip which made life a lot better. The EVF ain’t crash hot – it is a field sequential LCD which means that it is subject to tearing with moving subjects or moving your eye around the viewfinder. This doesn’t bother some people as much as others, but it may be a deal killer. There’s no floppy touch screen and no mic input. On the plus side the camera is responsive produces good stills, very good video and is compact enough that it can be taken anywhere. When I got the camera I initially thought I’d use it for a few days and then sell it on Ebay. Instead I’ve had so much fun with it I’ve decided to keep it.

UPDATE   Well I wrote this before Photokina, the big camera industry trade show in Cologne, Germany. I was hoping for a new updated model from either Leica or Panasonic to be announced with some of the changes I’ve talked about. Panasonic announced the  launch of the  LX10/LX15 (depending on which region you live in) camera. There are some worthy upgrades in the form of a tilt touch screen, an improved image stabilisation system, increase in MP to 20 and Panasonic’s very spiffy 4K photo mode which allows users to record video at 4K 30fps and extract stills from the clip. But the downsides are the loss of the viewfinder and the smaller sensor.