We recently went to Cairns in Queensland on a birding trip – more about that later – part of the deal on the flight was that we were limited to carry on luggage only. We’d been able to increase my allowance from 7Kg to 14Kg. At first glance this looks easily doable, but the devil is in the details. The main bag could weigh a maximum of 10Kg and measure 56 x 36 x 23cm. The second bag had to be able to fit under the seat in front of you. This pretty well meant that my camera equipment had to be 4Kg in a small bag. I can tell you this caused weeks of furious activity in terms of weighing equipment, doing test packs, looking online at small bags, studying various videos for how wildlife photographers pack for flights, and an inordinate amount of worry.
The Olympus EM1x and OM Systems 100-400mm f5-6.3 is my preferred choice for wildlife photography.
For our last two trips where we flew (Darwin and Broome) we had the luxury of checked baggage which meant my photographic kit could weigh 7 Kg and fit in a photo backpack that went as carry on. For the last few trips I’d settled on the following equipment:
This all came to 7.25kg. Clearly something would have to go. The other headache was that my bag wasn’t small enough to fit under a seat. I did countless test packs and made countless changes. Two days before our flight I was stillplagued with doubt and indecision. In the end at literally the twelfth hour I made a radical decision and then spent the whole 5 hour flight worrying about whether I’d done the right thing.
The Panasonic Lumix G9 mk 2 with Panasonic Leica 100-400mm f4-6.3 lens for wildlife photography.
So what did I leave behind? All of the above except batteries and SD cards. I took instead a totally untested combination. A brave decision or totally bonkers? Well in the end it was the right decision. So what did I take?
Total combined weight 3.83Kg so a 3.42Kg weight saving. So in practical terms I reduced the load by nearly half and importantly it would fit under the seat in front of me.
To carry my camera equipment while in Cairns I used a Think Tank Digital Holster 50 v2.0, a Think Tank Speed Changer v2.0, and a Think Tank Thin Skin Belt v2.0 in carry on luggage configation.
Yours truly sitting on a houseboat in Kashmir, India, in 1987. You can just see the Camera Care Systems belt pouch on my hip. Oh to be young and thin again! Photo by Helen Amyes.
Before we talk about the camera and lens choice let’s address the carrying system – it is a a modular belt system which means it is easy to configure for the job in hand. I’ve been using these since the late 1980’s after a trip to the island of Santorini in the Mediterranean. The bag I used for that was heavy without any load, configured badly and the designers had obviously never heard of the concept of ergonomics. At one point on a walk across the island I could have quite happily thrown the the bag and its contents off of a cliff and into the sea. I quickly bought a belt and series of pouches that were made by the now sadly defunct Camera Care Systems. After twenty or so years I started using the Lowe Pro Street and Field System which was originally designed for working professional photojournalists. After a while Lowe Pro made changes to the system and it was no longer as extensive or flexible and I moved over to the Think Tank System. It’s basically a series of pouches and camera holsters that can be used singularly or in various combinations using a waist belt and/or straps. These are great when working events as all the weight is carried on your hips, they are easy to work out of and means you can walk through crowds without knocking anyone flying with a big photo backpack. The major down side is that unlike a backpack there is nowhere to stuff a jacket or anything else.
What the well dressed bird photographer is wearing this season at the Cattana Wetlands. Here I’m wearing the Think Tank Modular Belt System. Photo by Helen Amyes.
So how did it go? The short answer is very well. Not having a backpack while I walked through the rainforest in high humidity was heaven. The only downside was that it often caused my trousers to migrate south towards my ankles, so I was walking around hitching them up all the time.
The Panasonic G9 mk2 and the 100-400mm lens worked flawlessly even in quite dim conditions. The new 25Mp dual gain sensor produces lovely files that are a pleasure to work with and the high ISO performance is much better than my Olympus EM1x. There were a couple of aspects that initially caused concern. The first was that the G9 mk ii RAW files are really large – about twice the size of those from the 20Mp EM1x which meant that I’d have to take a lot more SD cards. Normally I take 12 64Gb V60 SD cards and that is all I have of them. I didn’t want to go out and buy a load more as the current price of memory cards is very high. I had a load of 64Gb cards in the slower V30 rating which would mean that the camera buffer would take longer to clear. I took the slower cards but didn’t end up using them. The second was that my EM1x has a built in GPS and tags the files with the location while the G9 mk2 doesn’t. So I had to manually annotate the EXIF with the GPS co-ordinates when I got home. It was only a minor inconvenience.
The Leica D-Lux Type -108 had all other photographic opportunities covered.
The Leica D-Lux Type 109 camera was a little gem. The fast standard zoom did everything I wanted. I really should use this camera more.
The pavillion at the Cairns Chinese Friendship Garden. Cairns Botanic Garden, Queensland. Leica D-LUX (Typ 109).
The trip went really well, probably one of the best we’ve ever done. I’ll post some stuff about it a bit later.
If video is more your thing there is a video review at the bottom of the page.
The Mindshift Rotation 180º Horizon 34L
Photography and bushwalking (hiking, tramping) go together like cheese and Branston Pickle. What I find strange that after all this time that there is still a dearth of bags that are both good for bushwalking and carrying photographic equipment. The average photo backpack is absolutely pants in the bush. First off the straps, harness and if you’re lucky the hip belt are really not up to snuff.They are either too thin and lacking in padding or they are poorly positioned and make no ergonomic sense at all. Then when it comes to carrying stuff the photography side is well taken care of, but there is no room for the things a bushwalker needs such as a fleece, waterproof, water and food. Photo backpacks are also unbelievably heavy. I have a LowePro one that is actually heavier than the camera and three lenses that I put in it. Finally they become instruments of torture when used for anything more than an hour. The alternative has been to use a standard walking pack and then carry your kit in pouches, or wrapped up in something soft (for many years I used a keffiyeh), inside the back pack. The benefits of this approach are you get a bag that is well suited to walking and is comfy to wear, but accessing your photo equipment is a bit of a chore. I like many others tried using camera holsters in conjunction with a back pack, but often felt like a pack-horse with lots of things strapped to me. Recently we have started to see some manufacturers introduce backpacks for the outdoor market.
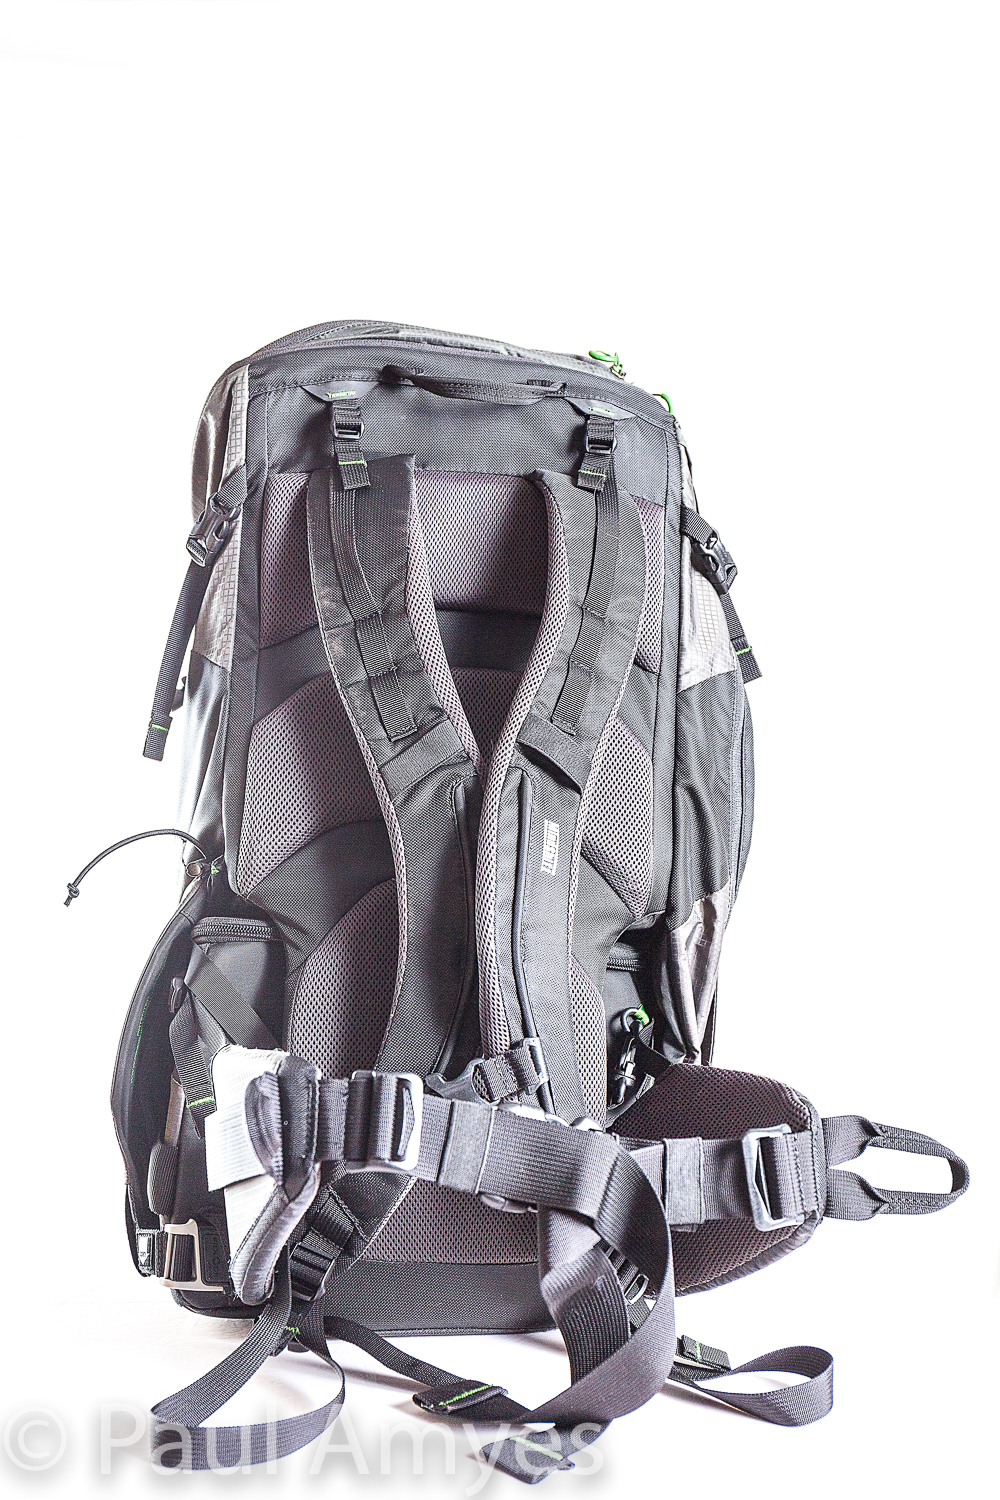
Looking at the harness of the Mindshift Rotation 180º Horizon 34L.
This is where the MindShift Rotation 180º Horizon 34L comes in. Before I start talking about the bag I’ll talk about the manufacturers. MindShift is a subsidiary of Think Tank Photo which are a company founded to produce high quality, innovative carrying solutions for professional photographers. I have been using their belt based carrying system and camera holsters for quite a while now and find them to be well made, well designed and well priced. The customer support is truly excellent – I received a faulty item and upon contacting Think Tank a replacement was quickly sent out from the USA to me in rural Western Australia. MindShift was created to provide photographers carrying systems that are suitable to use off the beaten track. So I had high hopes for this bag.
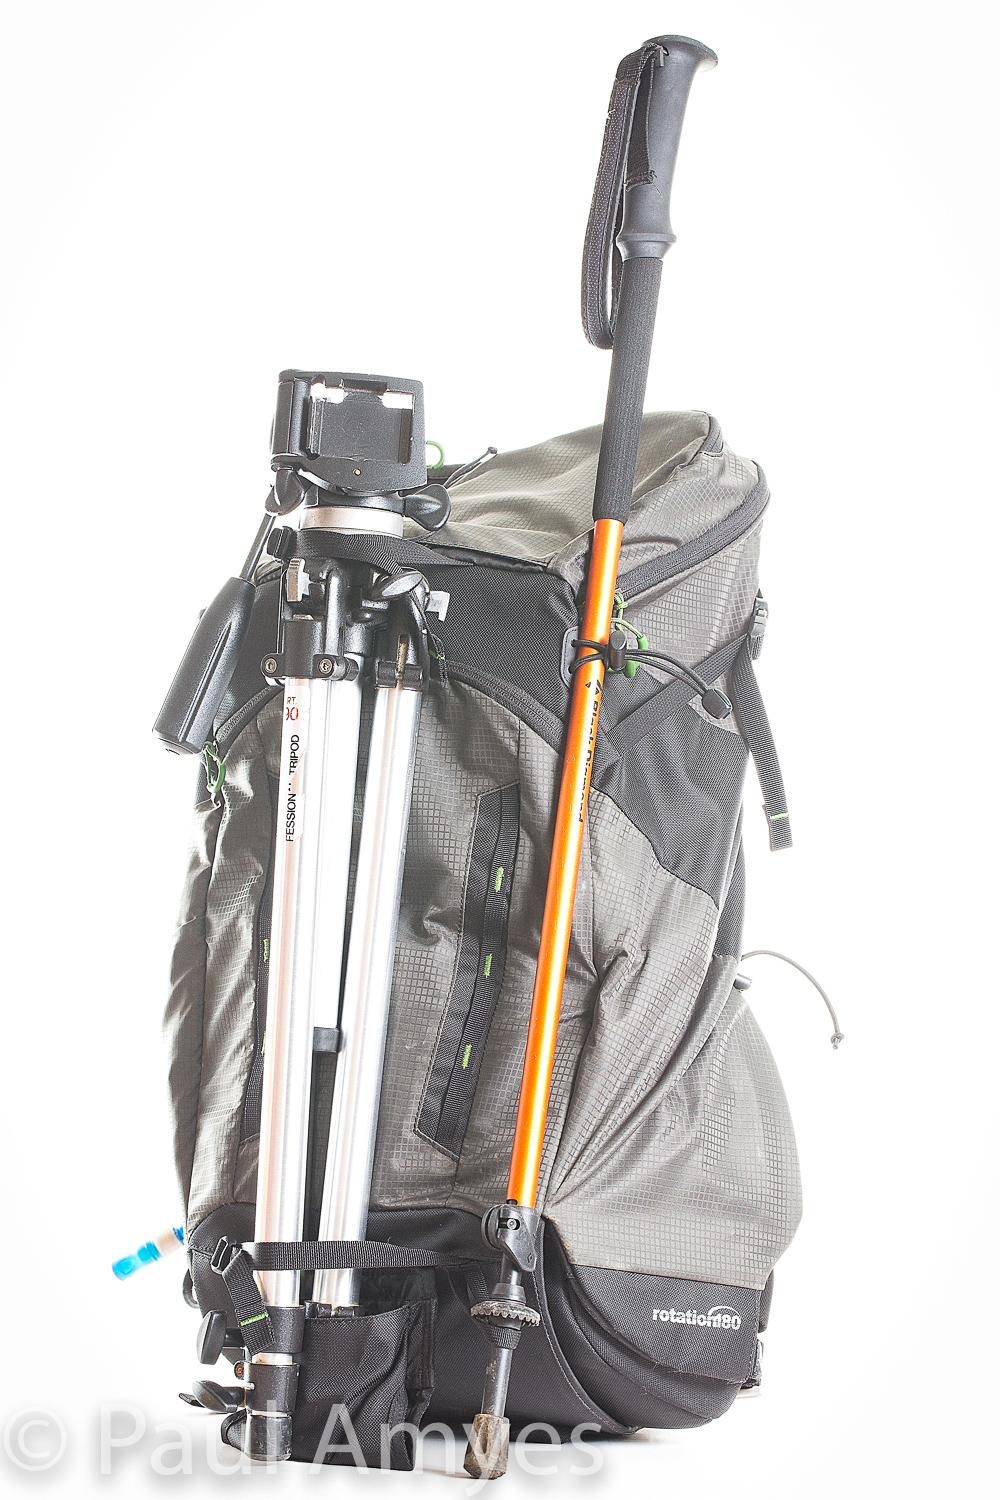
The Horizon 34L has straps on the exterior that allow you to carry a tripod and accessories such as walking poles.Showing the compartment that can hold a 3L hydration bladder and how the hose routs out and down the strap to allow access to it.
The Horizon 34L is a pack that is divided into two sections – a 7L photo section and a 27L pack. Nothing revolutionary here you say, well what sets it apart is that the lower section is affixedto a waist beltthat can rotate from it compartment at the bottom of the pack round to the front. This means you can work from the bag without having to take the pack off. The whole palaver of repeatedly taking a laden pack on and off your back and rummaging around looking for filters, memory cards etc on a long walk can become a big disincentiveto taking photos. Initially I was a little sceptical about how useful this feature would be and how well it would work in practice, but with use I was won over. It is a great idea and I’m surprised nobody thought of it before. The bag comes in blue and grey and retails for $365 AUD or $260 USD which puts it at the more expensive end of the market.
The photo compartment of the Horizon 34L mounts on the backpack’s waist belt which allows it to be rotated round to the wearer’s front to gain access.
On unpacking it I was presented with a fairly large daypack made out of a lightweight ripstop nylon with a polyurethane backing. At various points of anticipated abrasion there are reinforcing panels of Cordura pack cloth. The harness appears well made and is well padded with a good range of adjustment. I’m 1.93 m tall and have a long torso which means I usually find getting a comfortable pack quite difficult but Horizon 34L fitted well and over the last 8 months have clocked up just under 1000Km wearing it. The hip belt has padded wings and adjustable belt and does a grand job of placing the load on your hips in a comfy manner.The back of the pack has three pads with large spaces between them to promote air flow and stop you getting a sweaty back. Here in Australia they are a bit academic, especially in the warmer months, but I imagine they will be of some use in more temperate climates. In terms of exterior pockets there is one on the lid, one on the front-end on the left hand side there is a pocket that will take a 3L water bladder. There is also a pocket for a water bottle on the flap of the bladder pocket. In terms of exterior fixing points there is are straps for a tripod, walking pole and two rows of daisy chains. The top section of the pack eschews the normal walking pack type enclosures of a drawstring mouth with a large lid that buckles down in favour of a large YKK zip. While I appreciate the convenience of a zip for quick and easy access zips allow water ingress especially when they have no storm cover like this. The inside of the top compartment has a stretchy mesh pocket to hold things like maps or guide books. There is ample room to stow a gore-tex, a fleece, lunch and a first aid kit. There is no provision for carrying a laptop, but you could put an iPad in the stretchy pocket. On the lid is an exterior pocket which has a key clip inside. Its big enough to hold gloves, a hat, a personal locator beacon and some snacks. All fairly standard stuff for this type of day pack.
The photo compartment can separate from the backpack to allow it to be used as a waist pack.
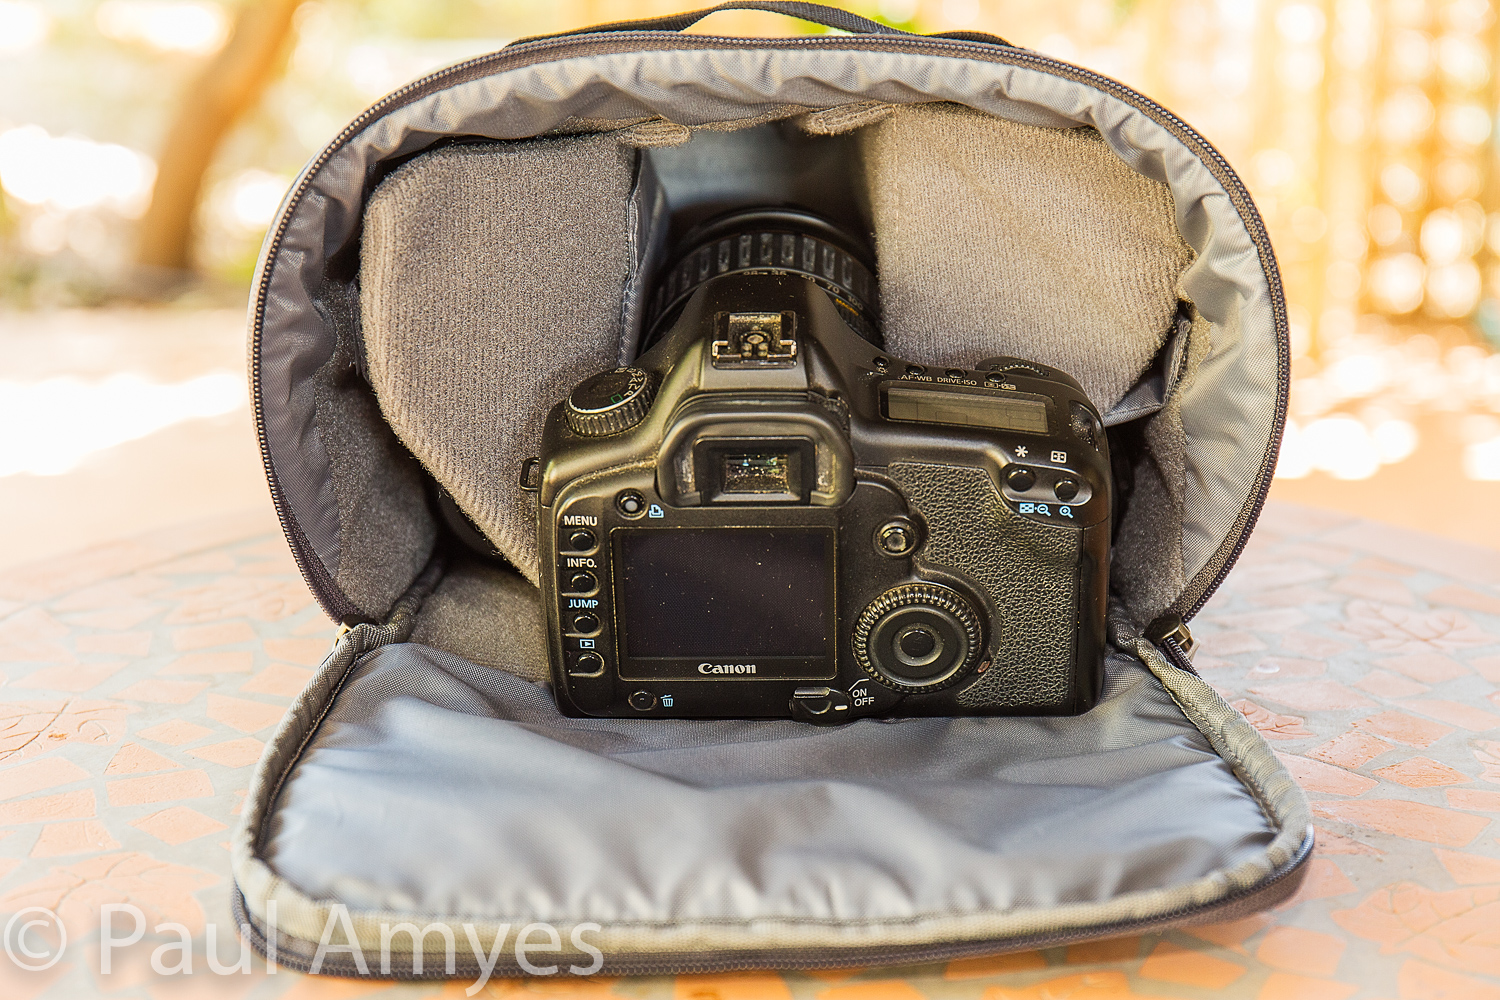
Not standard is the bottom camera compartment. Basically the bottom of the pack has a tube in which a waist pack or as our American cousins call them a ‘Fanny Pack” (snigger!). The left side of the tube (as you wear the pack) is sealed and it has a gap to allow the waist belt to pass through. The right end has a flap which is secured by a magnetic clip and this in conjunction with a leash stops the waist pack from falling out as you walk. This flap has an ingenious pop up system which allows you set the preferred tension. To rotate the waist pack to your front to gain access to it you reach behind you and open the magnetic clip, The flap pops up out of the way and then you pull on the loop on the right side of the belt and the camera compartment rotates around. You then undo the zip and lift the lid away from you. The camera compartment has two dividers that can be repositioned so as to allow you to configure the storage as you wish. I opted for a large central space to hold a camera body and lens with two smaller areas either side to hold two more lenses. The lid has a mesh pocket to allow you to stow small bits and pieces. So what will it hold. Well I used it with two different camera systems. Most commonly I used it to hold a gripped Panasonic Lumix G85 oran Olympus EM1 with grip with a mounted 12-40mm f2.8 lens. Then I would put in the side compartments a Panasonic Leica 8-18mm and an Olympus 75-300mm. Sometimes I’d swap out the wide-angle zoom for the Olympus 60mm macro. The other system I carried was either an ungripped Canon 5 or 6d with a 24-70mm f4 zoom and aCanon 75-300mm and a 100mm macro. Because I was researching a walking guide-book and needed access to a note-book, pen and handheld GPS I mounted a Lowepro Street and Field 100AW utility bag on the righthand fin of the waist belt. This held the afore-mentioned bits and also camera batteries and memory cards. If you don’t want to carry the whole shebang then you can detach the camera compartment and use it as a waist pack/fanny pack (snigger !).
There is enough room to stow a DSLR such as the Canon 5d pictured mounted with a lens, two additional lenses, a notebook, memory cards and batteries.
Showing how the weather resistant PU layer on the inside of the pack is already perishing after 8 months of use.
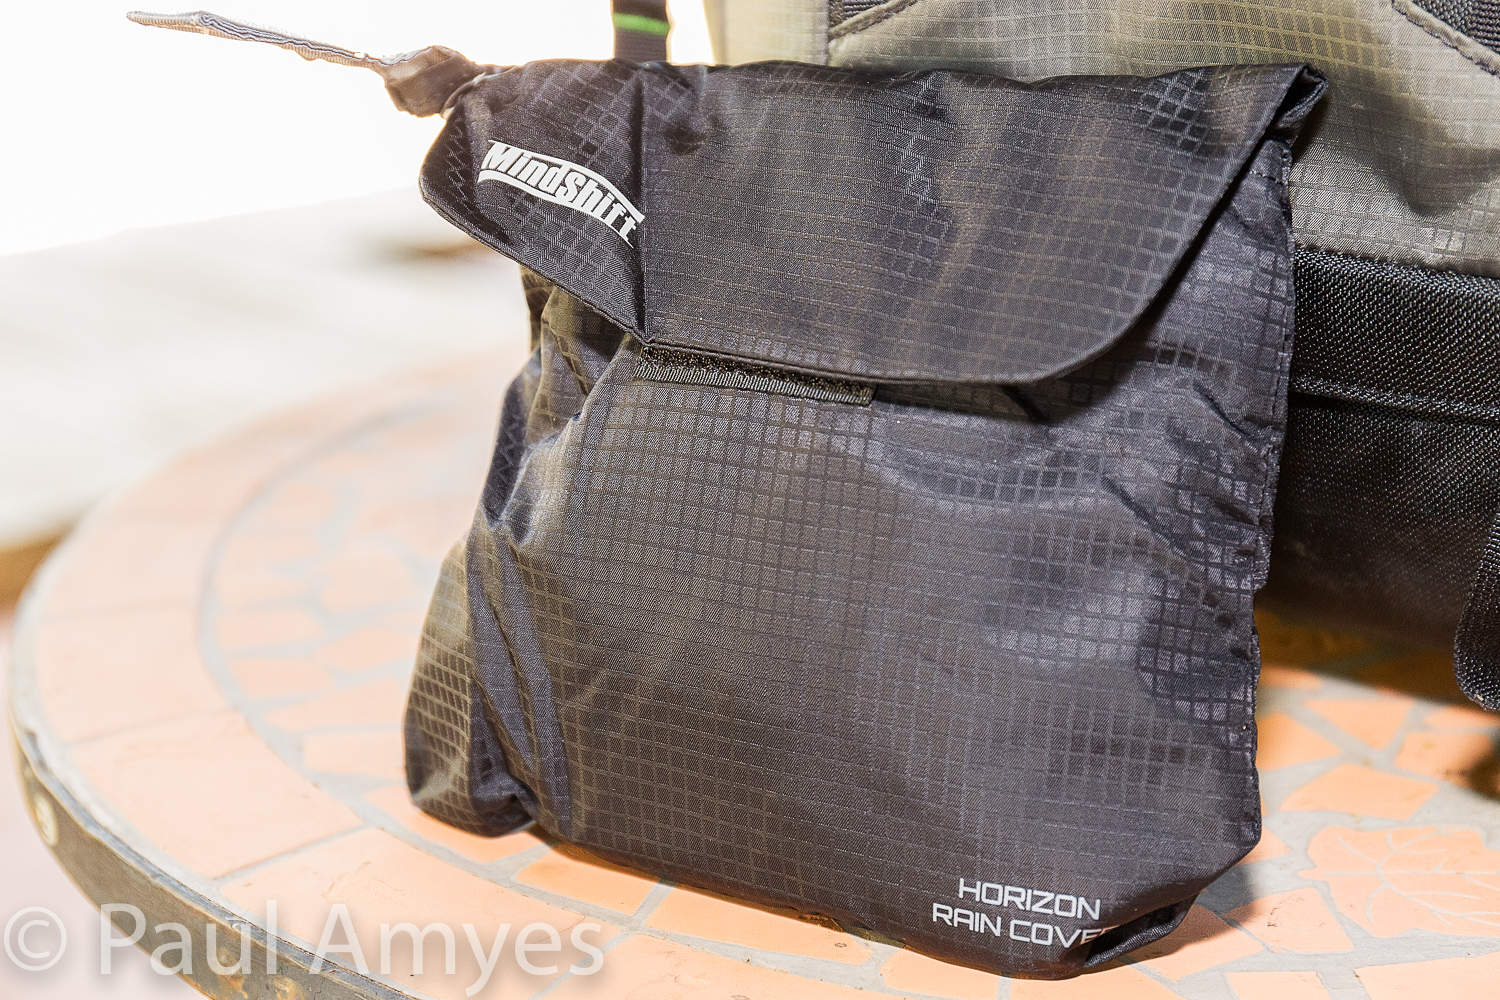
In use. The pack is very comfy and I carried it on a range of hikes for nearly 1000Km. To work from it is great. Most of the time I had my camera on strap slung across my body. If I needed to change lenses then I’d access the camera compartment. The whole thing worked really well. However, if you take the pack off while taking photos then it becomes a right royal pain in the derrière as it becomes quite clumsy to use. Pulling out the camera compartment while the rest of the back rests on the ground feels very clumsy compared to the elegance of using it while it is worn on your back. The pack isn’t very weather resistant and MindShift sell a separate rain cover for $45 AUD or $25 USD. Given the price of the Horizon 34 I think MindShift are being tighter than a fishes eyelid here especially when the Think Tank bags from the same company have them built in. The rain cover is also fiddly to affix which is not what you need when you are cold and tired as a rainstorm breaks. The pack material isn’t very durable and after 8 months of use the polyurethane backing has peeled off in m any places and the lightweight ripstop nylon that makes up most of the pack has started to wear through. I’ve got some camera pouches made by the now defunct Camera Care Systems in England that are over 30 years old and have led a very hard life and they show less wear than the Horizon 34.
The $45 AUD optional rain cover that should come as standard with the pack considering its $365 AUD price. To add insult to injury it is difficult to attach and mine has already started to have it weather resistant PU backing wear through rending it not rain resistant and therefore redundant.
In conclusion The MindShift Rotation 180º Horizon 34L is quite an innovative product that solves carrying camera equipment on day hikes into the wilderness. The concept is quite brilliant and I’m astounded that no-one has done it before. Unfortunately the execution of the product lets it down and it seems very expensive for a bag that I’ll probably end up throwing away in 12-18 months as it has worn out. I think that MindShift should construct the pack from heavier duty Cordura Pack cloth throughout and make sure that the polyurethane backing is more durable. A pack cover should be integral to the main pack body not an optional extra. If they did that it would be an excellent product. Ah well back to a proper walking pack and camera pouches.






You must be logged in to post a comment.