Olympus m.Zuiko 45mm f1.2 Pro Lens


As usual there is a video for those that prefer or the full written piece is below.


The Olympus m.Zuiko 45mm f1.2 PRO lens mounted on an EM1 mk ii.

The Olympus m.Zuiko 45mm f1.2 Pro Lens was announced in by Olympus back in October 2017 as one of their trio of f1.2 lenses. The others being the 17mm and 25mm. According to Olympus they were designed to “have beautiful defocusing effects” and “beautiful feathered bokeh to make your image stand out” (https://shop.olympus.com.au/m-zuiko-ed-45mm-f1-2-pro). In the case of the 45mm (and I suspect the other two) the lens is designed so that spherical aberration is not fully corrected. This means that as light rays enter the lens only those that pass through the centre of the lens are made to come together at the focus point. The rays at the edges focus slightly in front of that point and this causes the bokeh to have a gentle roll off – the so-called “feathered bokeh”. Olympus themselves claim this matches “classic” older lens designs. At this point it should be noted that spherical aberration and chromatic aberration are different. Spherical aberration occurs when a single wavelength of light or colour cannot be focused whereas chromatic aberration occurs when a lens cannot focus the red, green, and blue wavelengths on a single point. Although Olympus claims to match the performance of older classic lenses they have chosen a lens design that is very different from them.


Lens Construction and Build Quality

Olympus 45mm f1.2 lens has 14 elements in 10 groups with one ED element, four HR element, and one aspherical element.


Focal Length 45mm (90mm in full frame equvalence)
Angle of view 27º
Minimum focusing distance 50cm
Maximum magnification 0.1 X
Lens construction 14 elements in 10 groups with one ED element, four HR element, and one aspherical element
Maximum aperture F1.2
Minimum aperture f16
Diaphragm 9 curved blades
Focusing Auto focus – yes, MSC mechanism making fast and silent AF possible in video mode.

Manual focusing – the focusing ring can be pulled back to engage a clutch mechanism with hard stops at each end.

Filter size 62mm
Dimensions 85mm (h) x 70mm ⌀
Weight 410g
Other features Hermetic sealing making the lens dust proof, splash proof, and freeze proof. 60529 IPX1 IP rating.


The lens mount of the Olympus 45mm f1.2 lens. The mount has an ‘o’ ring that contributes to its 60529 IPX1 IP rating.


To see how this differs from an older classic design lets compare it to Olympus OM Zuiko 50mm f1.4 which was first produced in 1971 and remained in production until 1984. 


Olympus OM Zuiko MC 50mm f1.4


Focal length 50mm 
Angle of view On 35mm 43º, on micro four thirds 21º
Minimum focusing distance 45cm
Maximum magnification 0.15 X
Lens construction 7 elements in 6 groups
Maximum aperture f1.4
Minimum aperture f16
Diaphragm 8 curved blades
Focusing Manual focus with a straight helicoid
Filter size 49mm
Dimensions 36mm (h) x 60mm ⌀
Weight 230g


The 45mm f1.2 dwarves the f1.8 version.


Comparing the Olympus 45mm f1.2 to the Canon EF 50mm f1.8. On their respective bodies they both offer a similar field of view.


The 45mm f1.2 mounted on an Olympus EM1 mk i compared to the Voigtänder 75mm f2.5 Color-Heliar mounted on a Sony A7r. Both a ideal focal lengths for portraiture.

Physically this is a large lens. It dwarfs my Olympus 50mm f1.4, my Canon EF 50mm f1.8 and my Sony FE 50mm f1.8. It is a smidge larger than the Olympus m.Zuiko 12-40 f2.8 Pro and 27g heavier. The 45mm f1.2 follows the look of the other lenses in the Pro line and it also has a L-Fn button which can be programmed to various functions on Olympus cameras. In the hand the lens is reassuringly solid, it has that dense feeling that quality optics have. The focusing ring is nice and large and has the same ribbing that all the other lenses have in the Pro line. Like the other Pro lenses the 45mm f1.2 enables manual focusing by pulling back the focusing ring to engage a clutch to give a nice smooth focus throw of about 110º that has hard stops at either end. Combined with focus peaking this makes for manual focusing nirvana. As to what the lens is made out of this is hard to say, the lens mount is chrome plated brass, parts of the lens barrel have a metallic feel, and other parts feel plastic. Is this a problem? I don’t think so. For certain applications metals can be a poor choice and high quality engineering plastics such as ABS make better sense. In fact Sigma makes a big deal out of the use of their Thermally Stable Composite (TSC) which is substantially stronger than conventional polycarbonates while having similar thermal expansion properties to aluminium. Bottom line the 45mm f1.2 feels nice in the hand and is easy on the eye.


Optical Performance


The Olympus m.Zuiko 45mm f1.2 PRO lens is sharp wide open.


Lens sharpness test at f1.2 and f4. Click on the image to see it larger.

Image sharpness in the centre of the frame wide open is good and reaches its best at f4. The corners wide open are less sharp than the centre, however, by f2.8 the sharpness and contrast improves considerably and the lens reaches optimum sharpness at f4. By f8 the image starts to soften due to diffraction. Vignetting is also present wide open but this disappears at f4. There is a minute amount of pincushion distortion present, but unless you are shooting very demanding architectural work then it is largely unnoticeable. Chromatic aberration is present on high contrast edges, but it is very slight and easily removed in post. Longitudinal chromatic aberration is also present, but it too is very slight and not painfully obvious which is good as it is quite difficult to get rid of in post. All this is managed using firmware corrections. I like to turn these off using RAWTherapee to see how much correction is going on beneath the hood so to speak. The amount of vignetting is greater than the corrected images but it still clears up by f4. The pincushion distortion is also more evident. All in all the firmware corrections plus topnotch lens design make a lens that performs very well.


Chromatic aberration is well controlled and what little there is is easily fixed in post.


Longitudinal Chromatic aberration.


With regard to resistance to lens flare pointing the 45mm f1.2 at a very point light source shows it is quite prone to ghosting flare – images of the lens diaphragm as colourful bright spots. This is more evident on lenses with complex constructions with lots of lens elements. The red blobs in the photo are not lens defects. They are caused by light being reflected  off of the sensor surface back onto the rear element. As each pixel is reflected it causes a grid pattern. Unfortunately the smaller lens flange distances on mirrorless cameras means this phenomena is more apparent than on a DSLR with their great lens flange distance.


The Olympus 45mm f1.2 is quite prone to flare so it is advisable to use the included lens hood.


The Olympus 45mm f1.2 is quite prone to flare so it is advisable to use the included lens hood. At f16 the sun stars are quite pronounced.


f1.2 bokeh balls test. In the centre of the frame nice round and smooth bokeh balls with no evidence of any onion rings. At the edgeges you can see cats eye shapped balls. Click on the image to see it larger.

Olympus make great claims about the bokeh, or more importantly the feathered bokeh of this lens. Up until the announcement of this line of lenses I’d never heard the term feather bokeh before and to be honest I’m not all that sure about what it is and how that you quantify it. I guess in simple terms Olympus means that edges of the bokeh balls are not harsh and to quantify how feathered they are we’ll have to make some comparisons. At f1.2 the centre of the frame has nice round bokeh balls with no evidence of any onion rings. Onion rings occur with the use of ground aspheric lens elements. Basically the grinding process leaves a series of ridges which can be seen with a defocused point source. The biggest problem with them is that for most people they go unseen, but once seen they can’t be unseen. At the edges of the frame there is cats eye shaped bokeh – this is caused by mechanical vignetting from the lens barrel.  At f5.6 I was quite surprised to see star burst effects forming around specular highlights, I was expecting them to start appearing at the f11 mark. By f16 the bokeh balls in the corners have become spherical.

So the question is what to compare the Olympus 45mm f1.2 to? The most obvious contender is the 45mm f1.8. In their advertising blurb for the f1.2 Olympus compare the lens on an Old EM1 mk ii to a full frame DSLR with 85mm lens. Interestingly having made such a bid deal about the bokeh the only comparison is made with weight so I’ve decided to make the comparison using weight and bokeh quality with the Canon EF 50mm f1.8 on a Canon EOS550d. The 50mm lens has an equivalent focal length of 80mm in full frame terms. The nearest full frame equivalent I’ve got on hand is the Cosina Voigtländer 75mm f2.5 Color-Heliar on a Sony A7r2. Finally as I’ve already talked about the Olympus OM Zuiko 50mm f1.4 I’ll add it to the list with it mounted to the Olympus EM 1 mk ii. The older Olympus and the Canon and Voigtländer are also considered classic lens designs.

Olympus OMD EM1 mk ii with Olympus 45mm f1.2 Pro lens 984g
Olympus OMD EM1 mk ii with Olympus 45mm f1.8 737g
Canon EOS550d with Canon EF 50mm f1.8 mk ii 601g
Sony A7r2 with Voigtländer 75mm f2.5 Color-Heliar 932g
Olympus OMD EM1 mk ii with Olympus OM Zuiko 50mm f1.4 980g

So the Olympus 45mm f1.2 combo is the heaviest. Lets look at the bokeh. With the three Olympus lenses I’ll just compare the lenses at widest aperture of the slowest lens. With the other two I’m going take equivalency into account so 45mm f1.2 on the Olympus is roughly equivalent to 50mm f1.8 on the APSC sensor and the Olympus’ f1.2 is equivalent to f2.5 on the full frame sensor. 


Bokeh comparison between Olympus 45mm f1.2 and the Olympus 45mm f1.8. Click on the image to see it larger.


First cab off the rank is the Olympus m.Zuiko 45mm f1.8 lens. It has an optical construction of 9 elements in 8 groups, weighs in at 116g and has a 37mm filter thread. This little lens is an absolute gem and I use it a lot to do both stills and video product shots. It currently retails for $1300 AUD less than the f1.2. Wide open at f1.8 there is vey little to distinguish it from the more expensive lens at f1.8. So I would have to say unless you absolutely need an aperture of f1.2 then save your money.


Bokeh comparison between the Olympus 45mm f1.2 and the Olympus OM 50mm f1.4 at f1.4. Click on the image to see it larger.


The Olympus OM Zuiko 50mm f1.4 was introduced way back in 1972 with the original OM1. The lens used here is the revamped version with improved coatings that came out in 1984.  The lens construction is very simple with 7 elements in 6 groups and no fancy glass. Wide open it is not the sharpest lens and the bokeh balls are irregularly shaped, but stop it down to f2 and the bokeh is just as good as the 45mm f1.2 at f2. It’s possible to pick this lens up for about $100 on eBay and for $150 you can get it with a film SLR such as an OM1 or 2.


Bokeh comparison between the Olympus 45mm f1.2 at f1.2 and the Canon EF 50mm f1.8 at f1.8. Click on the image to see it larger.


When you put the Canon EF 50mm f1.8 on an APS-C camera such as my EOS550d it has a focal length that is equivalent to 80mm on full frame. It has a simple double-gauss design of 6 elements in 5 groups. This model is the mk ii version which was introduced in 1991 and is sometimes called the “plastic fantastic” because of its plastic body and lens mount. At the edges and in the corners of the frame the Canon has more pronounced cats eye bokeh, but at the centre it is nice and round. Thanks to only having a diaphragm consisting of 5 blades the bokeh becomes polygonal as it is stopped down. No longer in production it can be picked up for around $60 on eBay or you could really push the boat and buy the latest version which retails for $200 AUD. 


Bokeh comparison between the Olympus 45mm f1.2 at f1.2 and the Voigtländer 75mm f2.5 Color-Heliar at f2.5. Click on the image to see it larger.


The last lens is the Voigtländer 75mm f2.5 Color-Heliar mounted on a full frame body.The original Heliar design was developed in 1900 by Dr. Hans Harting as a symmetrical 5-element variant of the simple anastigmatic and well colour-corrected Cooke triplet. In 1902 the design was revised correcting astigmatism, curvature and coma better than the original design. That new design was asymmetrical six elements in five groups. In 1950 Dr. A.W. Tronnier refined the design even further to produce the Color-Heliar. When Cosina revitalised and relaunched the Voigtländer line they revived the Heliar concept with the 75mm f2.5 Color-Heliar. Cosina wanted to recreate the German optical aesthetic and engineering quality from the 1950s. The lens construction by modern standards is pretty basic with 6 elements in 5 groups and the 10 aperture blades bodes well for nice bokeh. Wide open at f2.5 it has the same depth of field characteristics as the Olympus at f1.2. It is not as sharp as the Olympus wide open but the tonal transitions are very smooth. The bokeh balls are nice and round at the centre, but at the edges and corners they take on the elliptical cats eye shape. This lens is longer in production and for a while it was possible to pick one up for around the $300 mark second hand, but the interest in adapting classic lens to mirrorless cameras has seen prices rise to almost $700.


Auto Focus Performance


the reluctant bull terrier test


Shooting stills the AF is very quick and accurate. Using the reluctant bull terrier test I shot a sequence of 25 frames using continuous autofocus  at 10 frames per second with an EM1 mk i which does not have the latest iteration of Olympus’ on sensor phase detection AF. At f4 all the shots were in focus. Switching out the mk i for the mk ii with its better AF systemI shot a 71 frame sequence at f2 at 10 frames a second and only 6 frames were slightly soft.

Shooting video on the Olympus EM 1 mk ii using face tracking the camera and lens responds quickly and smoothly without hesitation. Many m4/3 users shoot video using Panasonics cameras so I put the 45mm f1.2 on my G85 and set it it use face tracking. The results were dismal. There was a lot of hunting, and if and when the camera acquired focus it would quickly drift off. Having had good success with the EM1 I can only put this down to Panasonic’s use of DFD contrast based autofocus and not the lens.


Conclusion


The fantastic  little 45mm f1.8 is only $500 new and is just as sharp. The only place where it is found wanting is the maximum aperture.


There is no doubt that the Olympus m.Zuiko 45mm f1.2 PRO lens is a very good lens. It is well built and optically performs very well. The only thing that counts against it is its price when compared to other options. In the last quarter of 2020 Olympus ran a promotion in many parts of the world enabling purchasers of the EM1 to claim a free lens from the f1.2 trinity. If you were one of those and chose the 45mm then you got a great lens and I hope that you really enjoy it. If you are a committed Micro Four Thirds user and were wanting to purchase this lens today at the street price of $1800 I would suggest that your money could be better spent. The fantastic  little 45mm f1.8 is only $500 new and is just as sharp. The only place where it is found wanting is the maximum aperture. If you are not so wedded to the idea of 45mm but just wanted a fast short telephoto then I’d seriously consider the Sigma 56mm f1.4 which at $750 is great value and a seriously good performer.

If you are just getting into photography and want a camera and lens combo that gives enormous creative control over depth of field then you’ve got to look at full frame cameras ($1800 will get you a new one less if second hand) and pick up an 85mm f1.8 where Canon, Sony and Nikon all have offerings between $600-900 new. 

For video the 45mm f1.2 is a nice option as on the right camera it can autofocus extremely well and the the provision of a manual focus clutch that gives hard stops makes it very useful for manual focus pulls. If autofocus isn’t important to you then there are a huge number of older classic f1.2 and f1.4 lenses that can be picked up very cheaply.


Example Images


Wide open the Olympus m.Zuiko 45mm f1.2 PRO lens gives a nice please rendition with gentle tonal transitions.


The close focusing capabilities of the Olympus 45mm f1.2 are impressive and couple this with pleasing bokeh it makes for a very nice lens with which to do product photography or still life.


The Olympus 45mm f1.2 also makes for a good lens for equine portraits.


Frida at 45mm f1.2.


Taken at the minimum focusing distance of 50cm.

Voigtländer 75mm f2.5 Color-Heliar


The above video is the short version. If you would like to see the test images for image quality larger please click on the photos.
 

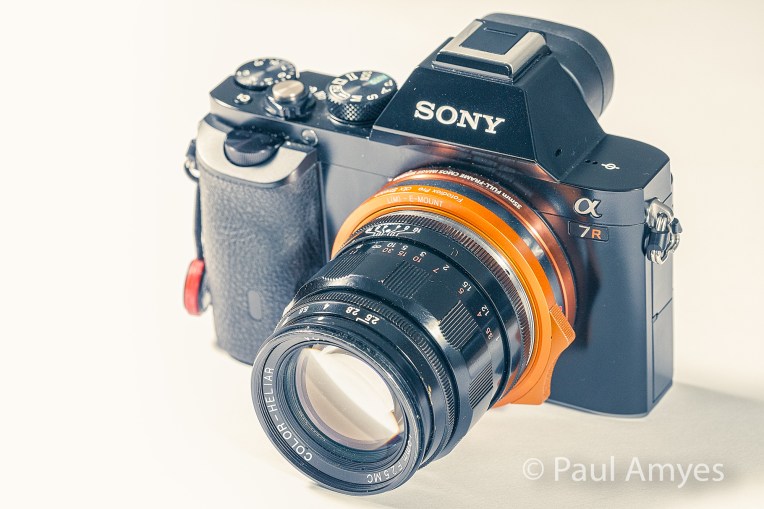
Cosina Voigtlander 75mm f2.5 Color Heliar mounted on a Sony A7r via a Fotodiox DLX Stretch adapter.

This L39 or Leica Thread Mount (LTM) short telephoto lens was one of the first lenses release with the launch of Cosina’s Voigtländer branded camera line. It was discontinued in 2010 with the introduction of the 75mm f1.8 Heliar Classic in August of 2010. The 75mm f2.5 can still be purchased as new old stock from some resellers ( Cameraquest being one of them) for $689 USD or second-hand on eBay for around $300. I bought this lens new in 2004 and put a LTM to M adapter on it to use with a Bessa R2.

Cosina Voigtlander 75mm f2.5 Color Heliar showing the native L39 mount.


Cosina Voigtlander 75mm f2.5 Color Heliar showing the Voigtlander Leica L to Leica M adapter.


Cosina Voigtlander 75mm f2.5 Color Heliar showing the Voigtlander Leica M to Sony E mount adapter.


The original Heliar design was developed in 1900 by Dr. Hans Harting as a symmetrical 5-element variant of the simple anastigmatic and well color-corrected Cooke triplet. In 1902 the design was revised correcting astigmatism, curvature and coma better than the original design. That new design was asymmetrical six elements in five groups. In 1950 Dr. A.W. Tronnier refined the design even further to produce the Color-Heliar. When Cosina revitalised and relaunched the Voigtländer line they revived the Heliar concept with the 75mm f2.5 Color-Heliar. Cosina wanted to recreate the German optical aesthetic and engineering quality. This modern lens has a definite 1950’s look with its beautiful all metal construction. The scalloped focusing ring and ribbed aperture ring aid grip and the focusing ring is nicely dampened and has a throw of approximately 90º. The aperture ring has full and half click stops. The lens comes with a lens hood and it as well as the lens cap are made of brass. The lens hood is a push on fit over the lens hood, a particularly nice touch is the strip of velvet inside the cap to increase the friction between it and the lens hood. The gloss black finish does tend to wear but as it does so it creates a wonderful patina with the brass showing through.


Specifications

Mount – L39
Six elements in 5 groups
Aperture blades – 10
Aperture range – f2.5 -16
Angle of view on 35mm – 32º
Closest focusing distance – 1m
Filter size – 43mm
Length 64.5mm
Diameter – 55.5mm
Weight – 230g

Image Quality


Cosina Voigtlander 75mm f2.5 Color Heliar mounted on a Sony A7r via a Fotodiox DLX Stretch adapter. Shot wide open at f2.5.


Cosina Voigtlander 75mm f2.5 Color Heliar mounted on a Sony A7r via a Fotodiox DLX Stretch adapter. Shot at f5.6.

Vignetting is present at f2.5, but by f5,6 it has completely disappeared. Lateral or transverse chromatic aberration is present throughout the aperture range, but it is well controlled and very slight. It is easy to remove in Lightroom as is the slight pincushion distortion using the lens correction profiles. Wide open the centre is very sharp and contrasty while the edges are a little softer and less contrasty. At f5.6 the corners are as sharp and contrasty as the centre. Diffraction starts to kick in at f11 and decreases the optical quality. There is focus shift as the lens stops down and the lens breathes when focusing.


In Use

The minimum focusing distance of 1 metre does preclude its use for head and shoulders portraits unless you use something like the Fotodiox DLX Stretch or the Voigtlander VM/E Close Focus Adapter  which gives 4mm of extension and allows focusing as close as 0.65m. For half-length portraits the lens renders the background out of focus beautifully when shot slightly stopped down at f2.8 with lovely tonal transitions. This makes it a great lens for street photography and events. The fly in the ointment is that the total depth of field for 1.5m distance using an aperture of f2.8 is just 0.07m or 7 cm or 2.77 inches and the focus peaking on my A7r is not sensitive enough to make accurate focusing possible 100% of the time so I have to use the focus magnifier to punch in and fine adjust.

Now according to the pixel peepers on the forums at DPReview it is impossible to shoot moving subjects with anything less that a Nikon D5 or a Canon 1DX Mkii. In fact I get a an attack of hysterical laughter every time some one makes a post about wanting to take pictures of their young children and they are pushed towards those cameras with fast eye wateringly expensive fast primes. I digress. It is possible to shoot moving subjects with manual focus lenses and the A7r. At a recent Medieval Fayre I was able to shoot some action sequences of mounted archers and re-enactments of combat using a mixture and sometimes a combination of pre-focusing and follow focus. Stopping down to f5.6 and f8 gave a little leeway with focusing and smooth focusing action definitely helped. The whole experience of going out with a camera, two small lenses (the other was Voigtländer 15mm f4.5 Super Wide-Heliar), a couple of batteries, and an extra memory card was extremely liberating and made the whole experience fun.

Conclusion

The Voigtländer 75mm f2.5 Color-Heliar is not a sexy fast aperture lens and this is why it was replaced by the 75mm f1.8 Heliar Classic. Consequently it is ignored by many people which is a great shame as it is a very well made and well performing short telephoto lens. If you like candid portraiture then it is a no-brainer.


Sample Photos

Fremantle council has gone a bit overboard with the double yellow lines.


Reading about the history of migration outside the Maritime Museum in Fremantle, Western Australia.


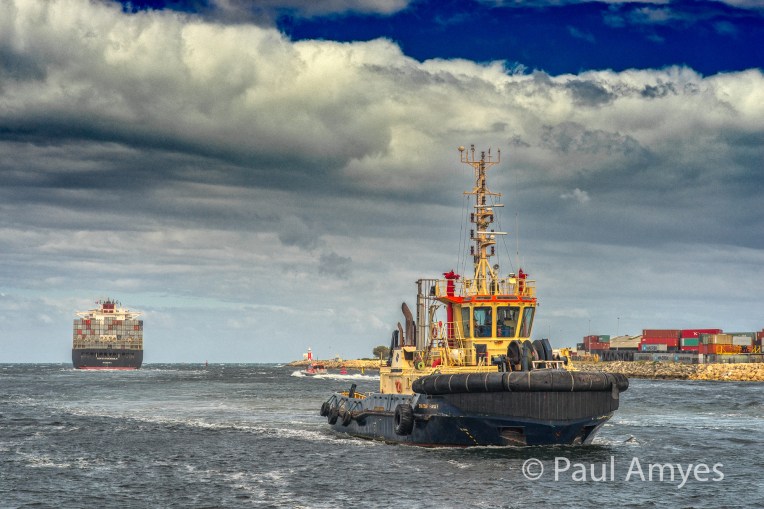
The Svitzer Eagle tug boat returns to Fremantle Harbour after escorting to Conti Stockholm out to sea.


A dog waiting for its owner outside the Beverley Hotel. Beverley Western Australia.


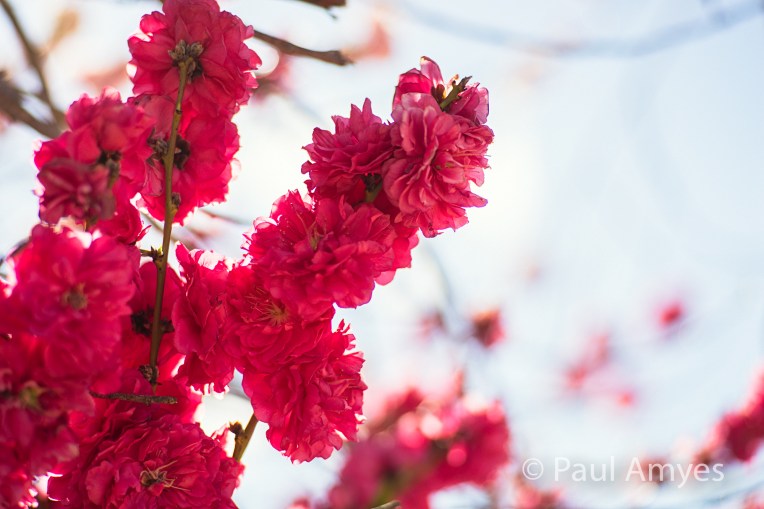
Close up of some ornamental blossom using the Cosina Voigtlander 75mm f2.5 Color-Heliar and the Fotodiox DX Stretch.


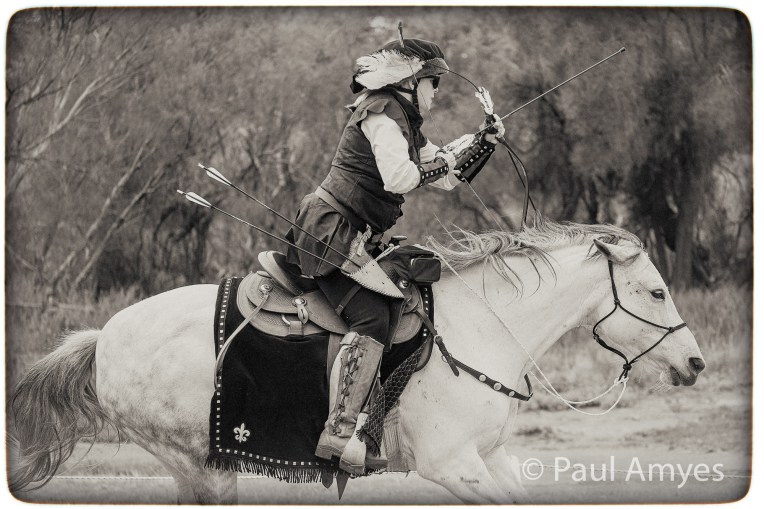
Mounted archery demonstration at the 2017 York Medieval Fayre. Western Australia.


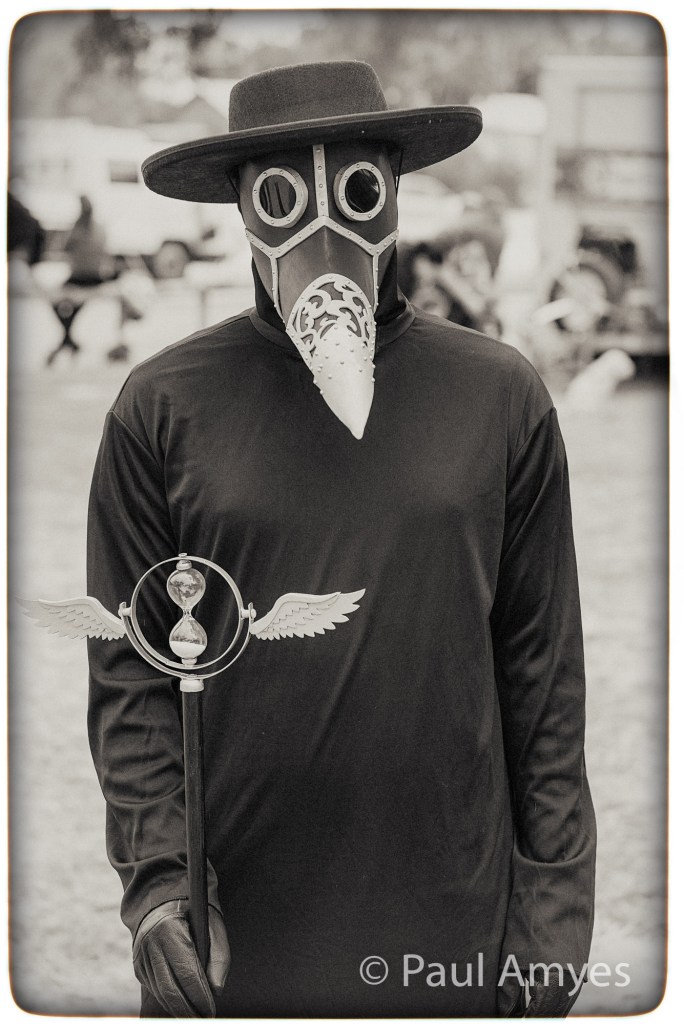
The plague doctor carrying out his duties at the 2017 York Medieval Fayre. Western Australia.


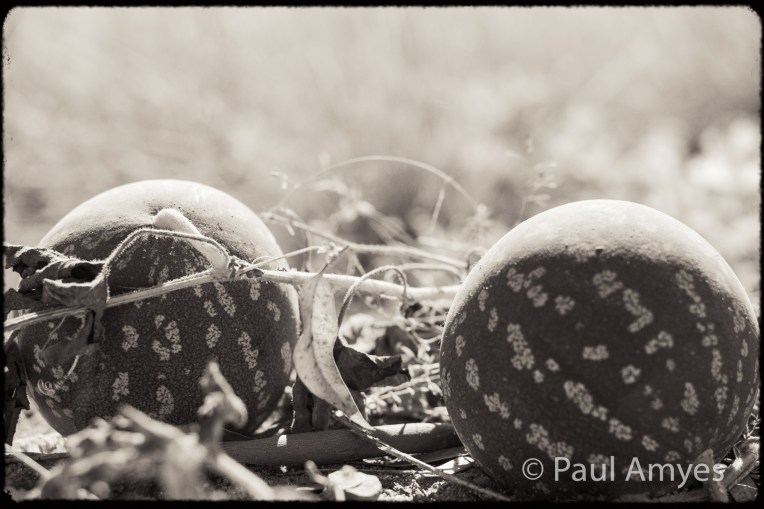
Pie Melons or Citrullus lanatus (Thunb.) Matsum. & Nakai are an introduced pest in Western Australia.


York Motor Show 2016. Avon Terrace, York, Western Australia.


An old Mercedes truck sits in a paddock slowly rusting. Quairading, Western Australia.


No Parking

No Parking by Paul Amyes on 500px.com
No Parking! Fremantle council has gone a bit overboard with the double yellow lines. In reality is a geometric painting on a massive scale by Swiss artist Felice Varini called Arcs D’Ellipses. Sony A7r with Voigtlander 75mm f2.5 Color Heliar lens. Exposure: 1/640th sec, f8, ISO 100.


Arrow Of Time

2017 York Medieval Fayre by Paul Amyes on 500px.com
Mounted archery demonstration at the 2017 York Medieval Fayre. Western Australia. Sony A7r with Cosina Voigtlander 75mm f2.5 Color-Heliar lens. Exposure: 1/1600 sec, f4, ISO 200.


The other morning I took the dog for her usual perambulation along the river, as we were walking along deep in thought (well I was I can’t vouch for the dog) our tranquility was disrupted by the sound of thundering hooves  and the odd sound of something being hit at high velocity. Getting closer I was met with a sight redolent of the medieval Eastern European steppes – not what you expect to see in Western Australia in Twenty First Century. But little did I realise that actually mounted archery or more specifically horse archery is quite a popular pastime. It is a new sport in WA, only 5 years old but is quickly attracting enthusiastic participants some of whom are jetting off to South Korea to represent Australia at the World Horseback Archery Championships. What I was seeing was a demonstration that was part of the 2017 York Medieval Fayre. If you are interested you can contact the fine people at the Western Australian Horse Archery Association via their Facebook page and they have regular events at the State Equestrian Centre in Brigadoon.


2017 York Medieval Fayre by Paul Amyes on 500px.com
Mounted archery demonstration at the 2017 York Medieval Fayre. Sony A7r with Cosina Voigtlander 75mm f2.5 Color-Heliar lens. Exposure: 1/1600, f4, ISO 200.


Melon Bokeh

Pie Melons by Paul Amyes on 500px.com
Pie Melons or Citrullus lanatus (Thunb.) Matsum. & Nakai are an introduced pest in Western Australia. Sony A7r with Voigtlander 75mm f2.5 Color-Heliar lens. Exposure: 1/640th sec, f2.8, ISO 100.


M To N


The Sony NEX mount was made for sad old gits like me. “Hold on Paul…” I can hear you say “do you mean that Sony engineered a whole camera line specifically for you?”. No! There was a happy accident that had some unforeseen benefits. I’ll explain. This is going to be a bit beardy and nerdy.

The first commercial 35m film camera was produced – the Tourist Multiple. made by Herbert & Huesgen of New York

Just over 100 years ago, or to be precise in 1909, the film (or movie depending upon where you are from) industry standardised on a film format of 1.37 inches in width with four perforations per frame. The decision was economic, it meant that cinemas didn’t have to have different sized film projectors. In 1913 the first commercial 35m film camera was produced – the Tourist Multiple. made by Herbert & Huesgen of New York. Unfortunately this achievement is largely forgotten because the story of Oskar Barnack inventing 35mm film for stills and the Leica camera has become the accepted history, but that is FAKE NEWS as a certain orange haired buffoon is apt to say. Not long after these small format cameras as they were then known took two distinct evolutionary paths the rangefinder (which was the first) as pioneered by Leica and the Single Lens Reflex as pioneered by K. Nüchterlein’s when the Kine Exakta launched in 1936.

The first Single Lens Reflex was the Kine Exakta launched in 1936.


Looking through a rangefinder viewfinder. Illustration p.31 London, B et al Photography, 7th Edition, Prentice Hall, New Jersey, 2002.
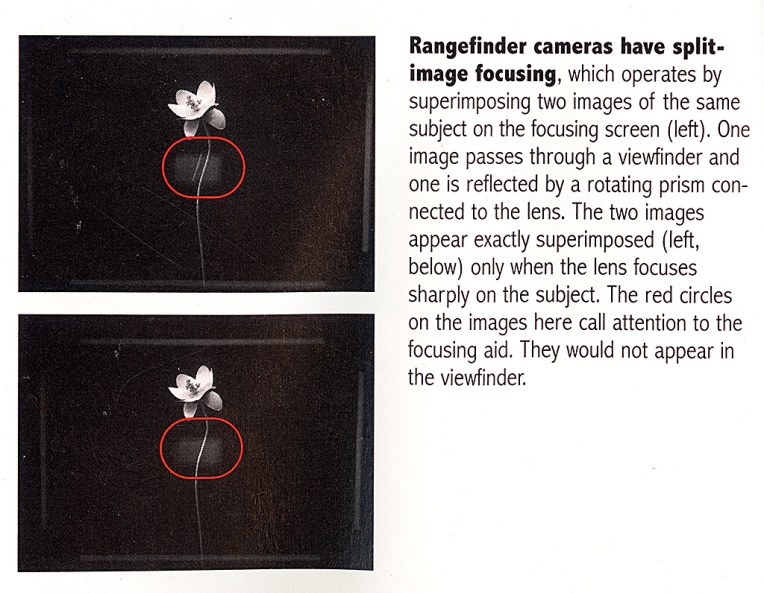
How range finder focusing works. Illustration from p.31 London, B et al Photography, 7th Edition, Prentice Hall, New Jersey, 2002.

Rangefinder cameras initially were very popular. The technology was available and relatively simple and the cameras and lenses were very compact. The photographer looks through a window on the camera and sees an image with a fainter duplicate from a rotating prism over laid. The photographer adjusts the rangefinder until the two images match up exactly, then the image is in focus. This system was called the split image rangefinder and had been developed to sight artillery pieces and was well understood at the time. The disadvantage is of course that the photographer is not seeing what the lens sees, only an approximation which can lead to inaccurate framing due to parallax errors. Interchangeable lenses were facilitated by having a screw mount and Leica adopted as their standard the L39 or LTM (Leica Thread Mount) which is 39mm in diameter with a Whitworth thread of 0.977 pitch and a flange distance of 28.8mm. Other manufacturers made variations on a theme i.e. the Canon M39 (aka J Mount) and the FED 39 which all share the same diameter but the thread pitch and flange distances are different. By the 1950’s photographers were looking for a faster way of changing lenses and so short throw bayonet mounts were developed. In 1954 Leica introduced the M mount and this is characterised by it having an external diameter of 44mm, a bayonet consisting of four claws and a flange distance of 27.8mm.
With the advent of digital imaging camera designers were suddenly allowed to consider alternative designs where there were no moving parts. It was hoped that eliminating the mirror and using an Electronic Viewfinder (EVF) and taking a direct readout off of the sensor would allow cheaper and easier manufacture. The autofocus system would be more accurate because the readings could be taken directly off of the sensor and the use of electronics allowed more accuracy than mechanical linkages. With no flappy mirror to interfere with things the flange distance could be reduced along with it’s radius. So the Sony NEX mount has a flange distance of 18mm and a diameter 41.6mm which means that just about any lens can be mounted to a NEX body via an adapter and as long as it has an imaging circle big enough so that an image can be projected on the sensor. The NEX mount covers both so-called full frame format (35 x 24mm) and the APSC format (24 x 16mm). This is the happy accident because I’m sure that when Sony adopted this standard they didn’t realise that it would allow legions of photographers all over the world to mount legacy lenses (lenses made for cameras that are no longer produced) to be mounted to the new Sony mirrorless cameras. Now I am the first to admit dear reader that as a photographer I have been promiscuous. I have not stayed faithful to one brand or lens mount which means that I have a fair few lenses sitting in a shoe box that I no longer have camera bodies for. Now I’ve already talked about mounting my old Olympus OM Zuiko lenses on my Sony A7r here. This and a few subsequent posts are going to be about using L39 and M mount lenses.

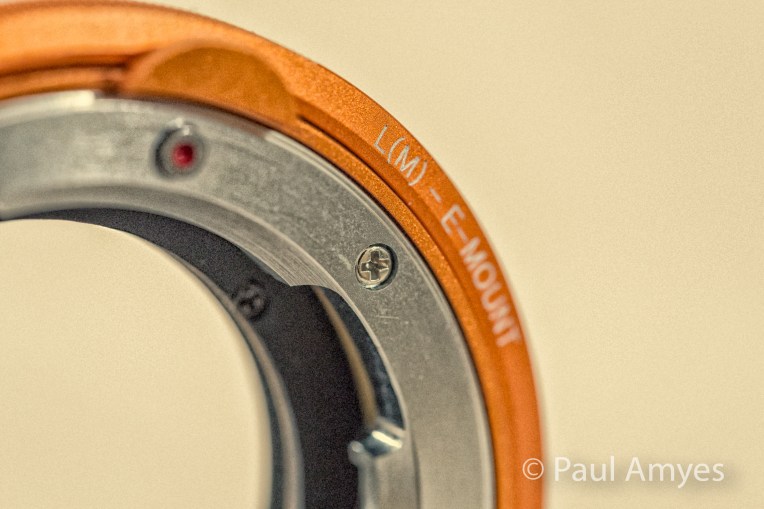
The Fotodiox DLX Stretch is a clever M mount to NEX adapter that has a built in adjustable extension tube to allow a degree of close focusing with any M Mount lens.

“So who in their right mind would want to do this?” Well you’re probably right to want to do this would be a sign of mental infirmity to some, but for many people (myself included) auto everything cameras are a bit boring and modern lenses while being technically very good can be a bit characterless. While Leica lenses are wallet puckeringly expensive there are plenty of more affordable alternatives made by Minolta (now absorbed by Sony), Konica (initially taken over by Minolta and then swallowed up by Sony), Ricoh, Voigtländer, Rollei (both of these as part of Cosina’s licensing of their names) Zeiss and those produced in Russia such as Zorki and Fed. These lenses are beautifully made with metal barrels and mounts, buttery smooth focusing, and exquisite clicking aperture rings. I’ve got a Canon L macro lens, and while it produces wonderful images the plastic body is somewhat underwhelming considering the price Canon charge for it and it’s not something I’d pick up for the tactile experience and as for the whole joy of ownership – well let’s not talk about it. These older lenses just feel so satisfying in the hand that makes you want to do some serious lens fondling. They just engender a joy of ownership that plastic can’t. I told you there are mental health issues with this.
SLRs have a big flippy flappy mirror between the lens and the film/sensor. Illustration p.38 Parish, S; Photograph Australia With Steve Parish, Steve Parish Publishing, Brisbane, 2003.

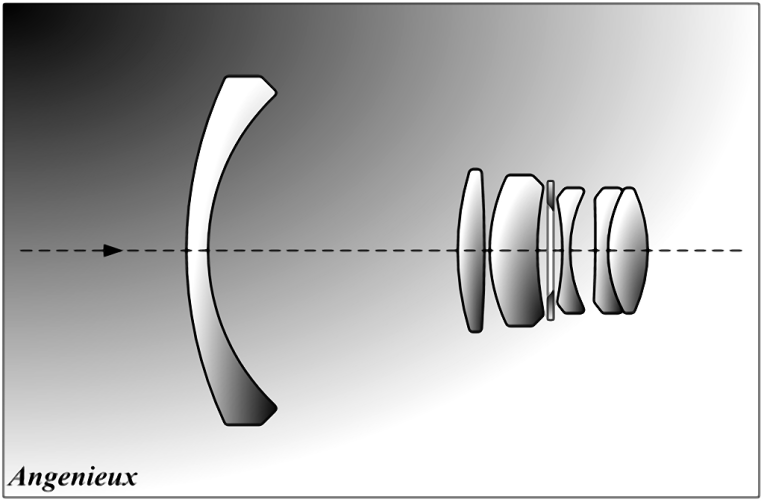
Another reason why rangefinder lenses are attractive is that there are fewer optical design compromises. SLRs have a big flippy flappy mirror between the lens and the film/sensor. This meant making wide-angle lenses next to impossible because the rear lens element would foul the mirror. In 1950 Pierre Angénieux invented the retrofocus lens which is a kind of “reverse” telephoto design where the lens elements closest to the film plane have a negative effect making the image smaller. The downsides are more glass elements means more air to glass surfaces which means more refraction which means more potential chromatic aberration and distortion. More glass means more weight. Here’s an interesting fact – a cubic centimetre of glass is heavier than a cubic centimetre of concrete. Range finders are mirrorless cameras so there isn’t a restrictive mirror flapping about, this has the net effect that your 28mm lens can be a true 28mm lens without a whole bunch of extra glass causing problems. It also means that rangefinder lenses are much smaller than their SLR counterparts.

The retro focus lens design invented by Pierre Angenieux.

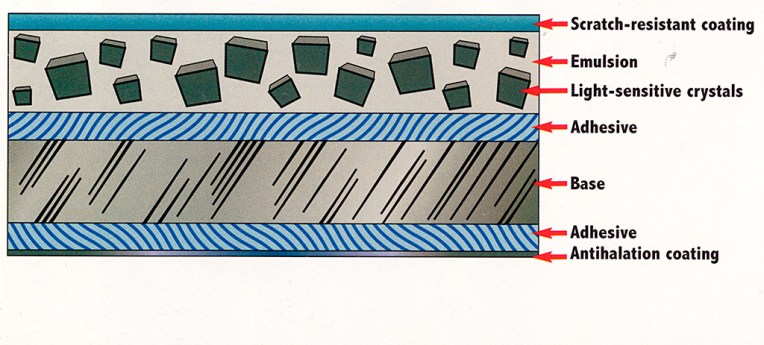
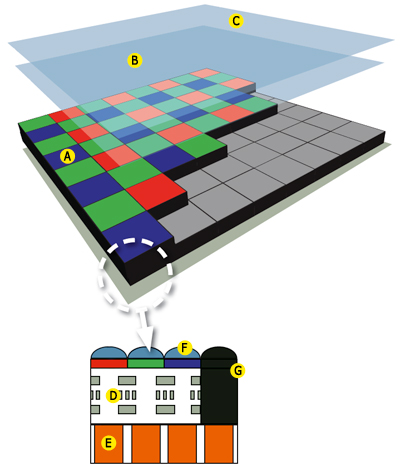
However, it is not all unicorns at the bottom of the garden. Rangefinder lenses were designed for use with film and the silver halide crystals in the film emulsion did not care at what angle lights hits them to provide the necessary reaction to form the latent image. But with a digital sensor it is a whole different ball game because the sensor is no longer just a gelatine substrate coated with an emulsion containing silver halide crystals it is a complex sandwich of filters, lenses and electronic componentry as the schematic from whatdigitalcamera shows. For best performance the light needs to enter micro lenses at 90º, when the incidence of the light is severely off perpendicular then not all of it reaches the pixel at the bottom of its well this can cause vignetting, smearing with loss of detail, and severe colour fringing. This is what stopped Leica initially developing a digital range finder. Kodak developed a special sensor with offset micro lenses for Leica M8 to help overcome this along with in camera software correction the digital M became a reality.

The many layers that make up film emulsion. The silver halide crystals respond to light hitting them at any angle. Illustration from London, B et al; Photography, 7th Edition, Prentice Hall, New Jersey, 2002.


Anatomy of a sensor. A – Colour filter array
. B – Low-pass filter / Anti-aliasing filter
. C – Infrared filter (hot mirror). D – Circuitry
. E – Pixel
. F – Microlenses. G – Black pixels

. For light to hit the pixel in its well it needs to travel as near to perpendicular to the sensor plane as possible. Illustration from http://www.whatdigitalcamera.com/technical-guides/technology-guides/sensors-explained-11457


Why not buy a digital M and be done with it? There is no way I could afford a digital Leica as I’m not a “Trustafarian”, and also and perhaps more importantly, my lenses are not made by Leica they are the much cheaper Voigtländers so I’m not going to drop nearly $10K AUD just to use them again. But as I had a Sony A7r for experimenting with my collection of Olympus OM Zuiko lenses I thought I’d just buy a M to N adapter. Because the Sony NEX mount is a much shorter flange distance than a conventional DSLR its sensor does have micro lenses to cope with the native wide angles. However, the fly in the ointment is that just having them alone does not fix the problems with M mount lenses because there is no in camera correction via firmware. So straight away the situation is more complex than using old SLR lenses. The answer is obviously to fix the problems in post. Users of Lightroom can rejoice as there are profiles for Voigtländers lenses in the developing module. They are easy to use but given that they are somewhat generic they sometimes don’t fix the problem entirely requiring a little extra fiddling about. If you are really keen then you can build your own profiles using Cornerfix.

The Voigtlander M to Nex adapter allows users of M mount lenses from Leica, Zeiss and Voigtlander to mount their lenses on Mirrorless cameras from Sony

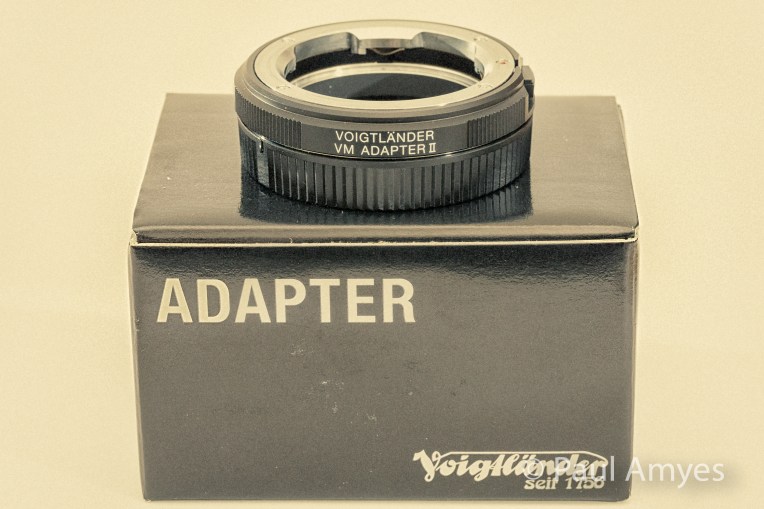
Well now we’ve got that out of the way lets talk about adapters. At their most basic an adapter is just a tube with a male bayonet mount at one end and a female at the other. For the sake of brevity I’ll limit this to just dumb adapters i.e. you’re not trying to get auto focus and stabilisation to work. There are a huge range of prices for essentially the same thing. I’ve paid as little as $15 including postage from China to as much as $200. So what do you get for your money? Not a lot. I got a Voigtländers VM II Adapter – Leica M Lenses to Sony E Mount for $200 AUD from an Australian seller. It looked nicely made but it had a serious flaw, there was no spring in the lens release button which means that your lens could fall off as it wasn’t secured. I don’t know if that is typical but I had no luck with trying to exchange it with the seller so I was kind off put off spending a lot of money. The next adapter I bought was from a Chinese seller on eBay and it cost a grand total of $15 AUD and it worked fine. A little agrarian in the looks department but it did the job nicely. Then I noticed that Voigtländer made a close focus adapter which took my fancy. Generally rangefinder lenses only focus down to 1 metre and I like to use wide angles closer than that for dramatic effect and it also meant that my 75mm was suitable for tight portraits. So my interest was definitely piqued, but my wallet was a little bit shy about coughing up $389 AUD after my experience with the other one. Then I discovered the Fotodiox DLX Stretch for $170 AUD from B&H Photo and for half the price of the Voigtländer coupled with B&H’s excellent customer service I was in like Flynn.

The Fotodiox DLX Stretch is a clever M mount to NEX adapter that has a built in adjustable extension tube to allow a degree of close focusing with any M Mount lens.

When the DLX Stretch arrived in its plain brown wrapper I quickly reassured the significant other that it wasn’t anything X rated (“No luv I said photographic accessory not pornographic accessory!”) and got down to playing with it. Basically what it is is an adapter with its own built in variable extension ring. The extension is achieved via a helicoid with a long throw. The amount of extension is not great about 2-3mm but that is enough to reduce the minimum focusing on my Voigtländer 35mm f2.5 Color Skopar from 70cm to 30cm. As my Voigtländer 15mm f4.5 Super-Wide Heliar and Voigtländer 75mm f2.5 Color Heliar are both L39 screw fitting I promptly ordered two L39 to Leica M adapters so I could use them with the Fotodiox DLX Stretch and the results were just as impressive. For the 75mm the minimum focus is 100cm and is then reduced to 65cm, and for the 15mm the minimum focus was reduced from 30cm to 12cm.

The Voigtlander 15mm f4.5 Super Wide Heliar normally has a minimum focusing distance of 30cm but when used with the Fotodiox DLX Stretch at full extension the minimum focusing distance becomes 12cm.

In terms of construction the DLX Stretch is reassuringly weighty (unlike the cheap Chinese adapters which feel so light that they may be made from a lacquered toilet roll tube). Both the male and female mounts are chrome plated brass. The aluminium body is anodised a natty orange colour that matches the orange lens mount trim on Sony A7 series cameras. The ring that moves the helicoid is knurled and has a prominent finger tab and has a nice smooth action although saying that it is difficult to use while videoing without creating camera shake. There is no wiggle or play with the extension and the unit attaches to cameras and lens snuggly with evidence of any play or light leaks. To further install confidence in the product Fotodiox warranty the adapter for 24 months.

The Cosina Voigtländer 35mm f2.5 Color Skopar mounted to a Sony A7r via a Fotodiox DLX Stretch M to E lens adapter.


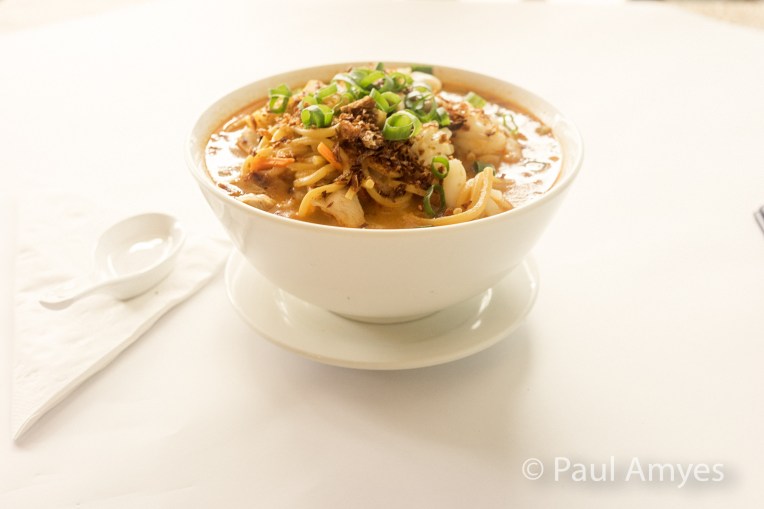
A photo of bowl of curry laksa taken with the Voigtlander 35mm f2.5 Color Skopar lens on a Sony A7r at the lenses normal minimum focusing distance of 70 cm.


The same bowl of Laksa with the same camera and lens but this time the Fotodiox DLX Stretch is extended to give a minimum focusing distance of 30 cm.

Overall I can see some photographers scoffing at the concept saying they have no need. Myself I like it very much and am using it a lot especially with the Voigtländer 15mm f4.5 Super-Wide Heliar.

“I Like Driving…

…in my car”*

Willys Knight
Willys Knight
York Motor Show. Avon Terrace, York, Western Australia.

Last weekend was the York Motor Show, it has been held every year since 2004 and usually draws a big turn out of cars and visitors. This means that a walk down Avon Terrace  can be a hazardous matter as the pedestrian is blinded by the sun glistening off of the duco and the gleaming chrome trim. Unfortunately this years event was marred by the weather – it was a cloudy grey day with occasional drizzle. Drizzle is a weather form I don’t really associate with Western Australia, it’s more a dank dour dreary weather form for the UK, or Tasmania. Western Australia is all about big blue skies with occasional heavy rain storms in winter. Anyway I digress – 18 months in Tasmania has meant that I think and talk about meteorological conditions far more than I should. So despite the fickleness of the weather those who did turn up were very enthusiastic and had a good time.

Sunbeam Rapier
Sunbeam Rapier

Although my late father worked for many years in the car industry selling luxury cars such as Jensen, BMW and Mercedes , I must confess that I have virtually zero interest in them. What I do enjoy is the spectacle of events such as these and the photo opportunities they present. I enjoyed a fun couple of hours walking up and down taking photos and talking to people. At events like this people are only too happy to talk about their pride and joy and photographing it is a form of showing how you appreciate their efforts. It’s almost rude not to take a photo. Photographically speaking shooting events like these is akin to shooting fish in a barrel. I used one body, a 15mm ultra wide-angle, a 35mm moderate wide-angle and a 75mm short telephoto. The two wide-angles seeing the most action. A couple of spare batteries (not needed despite over 300 shots taken) and a large empty memory card completed the kit. Travelling light means that walking up and down is an enjoyable experience.

York Motor Show 2016
The members of Dunrooten Racing study the form of the competition. York Motor Show 2016. Avon Terrace, York, Western Australia.
Bugatti On Avon Terrace
Stutz 8
Stutz 8

Todays musical reference was a single by British group Madness.  The band burst on to music scene in 1976 as part of the ska revival channeling such influences as Prince Buster and their first hit in 1979 directly referenced him and their later track Al Capone was another reference. By the time “I Like Driving In My Car” came out in 1982 the band had abandoned their Jamaican inspired groove and had become more mainstream pop occasionally breaking out into quirky songs such as this one.

Quirky Quairading

Quairading Railway Station
Aboriginal art at Quairading Railway Station, Western Australia. Sony A7r with Olympus OM Zuiko 24mm f2.8 lens. Exposure 1/4000 f8 ISO 400.


Situated 166 Km (or 103 miles for the imperially minded) east of Perth is the small Wheatbelt town of Quairading. If you can’t pronounce it you’re not a local! Really it is just a blip on the map, one of countless small Australian country towns. Gazetted in 1907 the town was built around the rail terminus. Typical of many Wheatbelt towns is the CBH grain handling facility built near the station to ship the crop out at harvest time. The railway line has since closed and the grain moved by road. For many towns this would possibly be the last straw, but Quairading carries on. As you drive into town you are met


Quairading CBH Grain Bins
The land around Quairading was cleared for farming and in 1932 two grain elevators were built and wheat from the district was transported via rail. The railway shut in 2013 and now the grain travels by road. Canon EOS 550d with Sigma 17-50mm f2.8 OS EX lens. Exposure: 1/100, f8, at ISO 400.


by members of the grain family – cartoon characters based on grains of wheat created by local artist Lyn Whyte. Some of the businesses in the town centre shut down long ago but their buildings have been repurposed. The old bank is now someone’s home and has been called the Brass Razoo Bank, which is Australian slang for having no money and is kind of appropriate.


Wesley Wheat
Wesley Wheat a member of the Grain Family. He and his siblings Basil Barley, Ollie Oat and Lucy Lupin are the concept of local artist Lyn Whyte, the family can be seen in quite a few locations around the Quairading district.


One of the old shops has a huge street frontage and this now houses a collection of cars straight out of the 1970’s. Just a few doors down is the antique/collectables shop whose contents spill out onto the pavement. The items displayed are often arranged in odd juxtapositions which often cause passers-by to do a double take to see what is going on.


Flowers of Quairading
Flowers of Quairading. A street side shop display from the antique shop in Quairading. Sony A7r with Voigtlander 15mm f4.5 Super Wide – Heliar. Exposure: 1/5000 sec, f16 at ISO 6400.


The Car Dealership From The 1970's.
The Car Dealership From The 1970’s. Sony A7r with Olympus OM Zuiko 24mm f2.8 lens. Exposure: 1/200 sec, f16, ISO 1600.


Mercedes Truck
An old Mercedes truck sits in a paddock slowly rusting. Quairading, Western Australia. Sony A7r with Voigtlander 75mm f2.5 Color-Heliar lens. Exposure: 1/4000, f2.5 at ISO 400.


100 Years of ANZAC
The Anzac memorial in Quairading. Western Australia. Sony A7r with Voigtlander 15mm f4.5 Super Wide – Heliar lens. Exposure: 1/250 sec, f16 at ISO 1600.


The real highlight is the people – friendly, upbeat and generous. My partner walked into the local tourist office cum art centre cum civic museum and walked out with a free pumpkin. What more could you want?


Nostalgia Versus Current Reality

Paul in Majorca
Portrait of me in Majorca taken in March 1986 by my father in law, Brooke Spencer. Probably taken with a Leica R4 with a Leica 135/2.8 Elmarit-R on Kodak colour negative film. I’m holding my trusty Olympus OM1n with the Olympus Zuiko 35-105mm f3.5-4.5 lens. Those were the days.

Since the trans-continental relocation of the global behemoth that is Paul Amyes Photography (PAP) I have been hunkered down in the research lab deep in thought. To continue with my quest for photographic world domination I have been contemplating a new fine art project with a commercial bent that trades heavily on nostalgia for a bygone age.

While studying photography at art school I took two units in fine art photography and I was particularly taken with alternative processes, namely gum bichromate and cyanotypes. I experimented with taking digital images and then turning them into an A4 sized negative and using that to contact print onto papers that I had coated. To tap into that nostalgia thing and enjoy a retro photographic process I initially thought about capturing the new images on large format and using the resulting negative to make the contact print. There is something very beautiful about a large format contact but this is countered by the very damaging effect a large format camera has on your bank account. So this made me think about using digital capture and then making a negative from the file. It is not particularly difficult and at art school I experimented with paper negatives and ones made using overhead projector sheets. The paper negatives were best oiled with WD40 and they produced an image which was softened by the natural fibres of the paper. OHP transparencies gave a sharper image but the out put still looked like a modern image. Then I had a brain wave. What if I took older lenses and adapted them to a modern high-resolution digital body. The Sony A7r is now appearing on the second had market at very reasonable prices, and these will continue to fall as Sony introduces a new updated model every other week (a slight exaggeration perhaps). But before I splashed out some serious cash I thought I better find out whether the motley collection of old lenses I’ve got tucked in a shoe box in my equipment cupboard would be suitable. I decided to put them on an m4/3 camera and see how they perform.


A New Lease Of Life
Four of my favourite lenses; an Olympus Zuiko 35-105 zoom, an Olympus Zuiko 50mm f1.4, a Voigtlander 75mm shot telephoto and a Voigtlander 35mm lens.


The test was relatively straight forward. I’d use my Olympus EM1 as the camera body and mount the lenses using the relative adapters. The camera would be hand-held with the image stabilisation set manually to the focal length. The camera would be in aperture priority at base ISO (which for the EM1 is 200) and I would shoot wide open and then stop down full aperture stops until f8 – any smaller aperture and the results would be clouded by diffraction. I’d use focus peaking to focus accurately and I would refocus after every aperture change to avoid focus shift.

Voigtlander 35mm f2.5 Color Skopar
Voigtlander 35mm f2.5 Color-Skopar mounted on an Olympus OMD EM-1 mirrorless camera.

The lenses were:

Olympus Zuiko 50mm f1.4 MC. This was the third version of the lens and was introduced in 1984. I had fond memories of the lens and it produced some cracking images for me.
Olympus Zuiko 35-105mm f3.5-4.5. This lens was introduced in 1983, which is when I bought it. It cost me a small fortune, if I recall correctly £189, which at that time was two weeks wages. At the time I thought it was worth it and I used it as my every day do anything lens right up until 2003 when I switch to Canon because I could no longer get my OMs serviced. This was a lens that figured prominently in my plan.
Voigtländer 35mm f2.5 Color-Skopar. Introduced in 2004 this was another favourite lens, it was tiny, and very sharp. I loved using this with Ilford Delta 400 on my Bessa R2. Again a lens I had very high expectations for.
Voigtländer 75mm f2.5 Color-Heliar Introduced in 1999 this was a lens I feel I should have liked. It is wickedly sharp and with its ten aperture blades produced wonderful bokeh. But for some reason I just did not click with it – I think it was the minimum focusing distance which made it possible to only get a head and shoulders portrait rather than a full headshot.


The images were shot with the camera in RAW and then opened up in Lightroom and examined at full screen size and then at 100%. There was no post processing done. The results weren’t really a surprise, but they were somewhat disappointing as they revealed some uncomfortable truths and some pleasant surprises. Here are the results:

Olympus 50mm f1.4 – wide open there was significant colour fringing, low contrast, and overall the image was soft getting worse at the edges. Stopping the lens down brought about significant improvements – the chromatic aberration all but disappeared by f8 and the corner sharpness really started to improve from f4. The bokeh was nice and smooth. A good start.


Olympus Zuiko 35-105mm f3.5-4.5
Olympus Zuiko 35-105mm f3.5-4.5. Focal length 105mm f4.5


Olympus 35-105mm – at 35mm and wide open the colour fringing very apparent even before pixel peeping at 100% and it didn’t improve any by f8. At 105mm and wide open the CA was significant but it does improve by f8, but is still visible. Edge sharpness was nothing to write home about wide open but by the time it was stopped down to f8 it did improve. Surprisingly the bokeh was better than expected at both extremes of the focal range.

35mm Color-Skopar – chromatic aberration was quite well controlled wide open and just improved as it was stopped down. The edge sharpness was slightly soft wide open but improved dramatically once stopped down to f4 and kept improving past that. Bokeh was a bit iffy, something that Voigtländers are often criticised for on the inter web.

Voigtlander 75mm f2.5 Color-Heliar
Voigtlander 75mm f2.5 Color-Heliar. Aperture 2.5

75mm Color-Heliar – straight off the bat this was a very strong performer and for me was a real surprise. Wide open CA was virtually non-existent and disappeared by f4. Edge sharpness was very good from f4 onwards. The bokeh was just gorgeous. The 10 aperture blades produce very smooth tonal transitions and lovely perfectly round bokeh balls.


Olympus Zuiko 35-105mm f3.5-4.5
Frida. Olympus OMD EM1 with Olympus Zuiko 35-105mm lens.


Olympus Zuiko 35-105mm f3.5-4.5
Avon Terrace – York. Olympus EM-1 with Olympus 35-105mm f3.5-4.5 lens.

Of the 4 lenses the poorest performer is the 35-105 zoom. In reality this should be expected in a thirty year old zoom lens design, but it is disappointing to me as I had such a high regard for this lens based upon my extensive use of it. Countless rolls of Fuji Velvia and Kodachrome 64 over a twenty year period had convinced me that it was a good performer. However slap it on a digital camera and the results are quite frankly so-so at best and absolutely pants at worst.

The 50mm has a lovely creamy dreamy quality to it that would make it very suited to fashion and beauty portraiture. The 50mm has a very nice smooth tonal fall off which now makes me question whether sensor size is as significant factor for this and that perhaps lens design also plays a considerable part.

The 35mm Color-Skopar was OK – meaning it wasn’t good or bad. I’d be interested to see what it does on a full frame sensor.


Voigtlander 75mm f2.5 Color-Heliar
Frida on Mount Brown taken on an Olympus EM10 with Voigtlander 75mm f2.5 Color-Heliar.


Voigtlander 75mm f2.5 Color-Heliar
Pig melons on Mount Brown. Olympus EM-10 with Voigtlander 75mm f2.5 lens.

The 75mm Color-Heliar was a revelation, and it is certainly the standout lens here. It was when introduced an underrated lens when introduced with the Bessa rangefinder film cameras and was quickly replaced with an f1.8 version. But since then this lens has developed quite a following with people adapting it for use on digital cameras. Voigtländer took a classic lens design, gave it modern glass and coatings, boosted the lens aperture blades to 10 and produced something rather special. For shooting studio portraiture it would make anyone look good. Definitely a keeper lens and quite possibly the kind of lens you’d buy a camera body for just so you can use it. If only the 35mm was that good – I’d go out and hit the camera shops and dent the credit card straight away.

Modern lenses are technically very good, most of the problems with vignetting, corner and edge sharpness and colour fringing are now corrected in camera by software. They are sharp and contrasty which appeals to a great many photographers who have only known digital imaging. The legacy lenses are sharp in the centre of the frame, but they have lower contrast and this doesn’t give the edge acuity that many digital photographers want. But this also makes them more attractive because they have character and render images in a more 3D way with smoother tonality. The test has shown that the Olympus Zuiko 35-105mm is really not up to the demands of a high-resolution digital sensor. Nostalgia destroyed by the brutal reality of modern digital imaging. The other three lenses could stand some further experimentation.