By Western Australian standards it is freezing – well 2ºC – and just after dawn. I find myself sitting in a reed bed wondering why I abandoned a nice warm bed to be wet and cold.
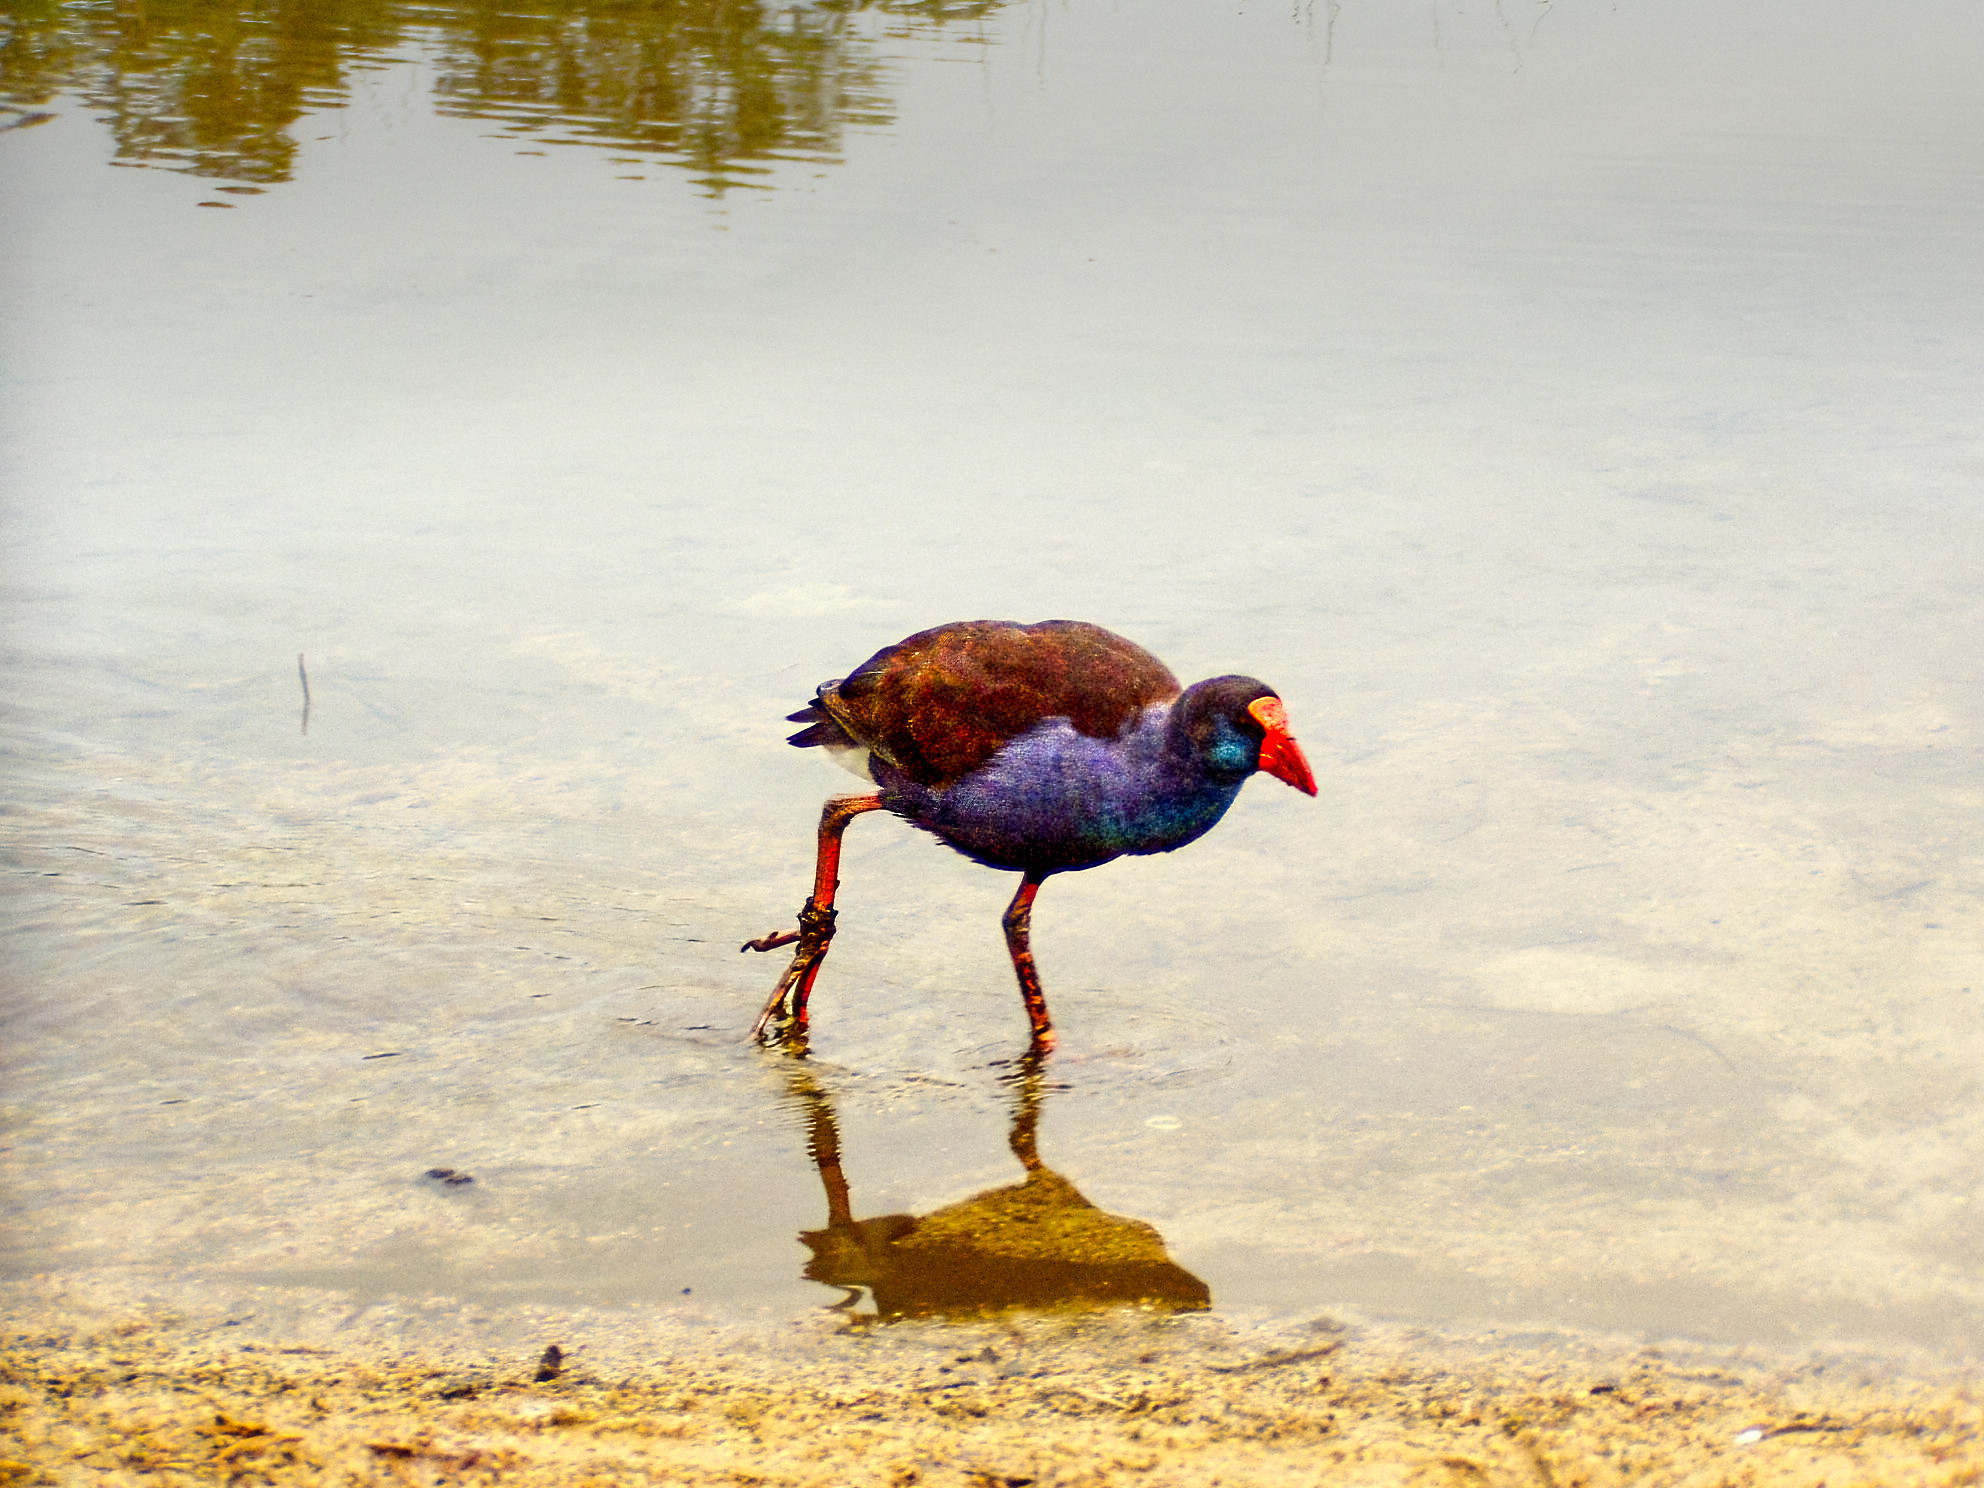
Waradja or Spotless Crake (Porzana tabuensis). Lake Leschenaultia, Western Australia. A bit of a grab shot. It was taken with a geriatric Canon EOS 300d and an equally old Canon EF 75-300mm lens. Unfortunately the bird moved too quickly and the camera’s autofocus system wasn’t able to keep up.
Well the answer to that is four weeks ago I was here at Lake Leschenaultia mucking about with an old camera and lens when I spotted a small bird in the reeds that I’d not seen before. I grabbed a quick photo but it disappeared back into the reeds before I could properly sort myself out. When I got home I identified the bird from the blurry grab shot as a Waradja or spotless crake. Since then I’d been full of good intentions to go back and try to get a better photo, but,they were sabotaged by a great deal of procrastination until the other day when I’d decided to resurrect an old favourite camera of mine – the original Canon EOS 5d from 2005. The original batteries had perished and would no longer hold a charge so I got a set of replacements and found a couple of memory cards at the back of a drawer. I just needed something to point it at, and that is when I remembered the spotless crake.
A flotilla of Ngoonan or Australasian grebe (Tachybaptus novaehollandiae) came to check out what I was doing.
After a quick shufti they headed off to the centre of lake.
Things had changed considerably in the ensuing four weeks. There had been a lot of rain and the water levels had risen considerably. So much so that the area where I saw the bird was now under water. The other thing that had changed was that there was a lot of noisy building work going on – and when I mean noisy I mean really loud. Combine this with the cold and it was no surprise that there were no birds on the lake, not even the Eurasian Coots. Undeterred I parked myself in among the reeds as close as I could to the place where I’d seen the spotless crake and just waited. Some large jarrah trees cast their shade over me so I didn’t get the warming effect of the rising sun. After a couple of hours a flotilla of Australasian Grebes approached and gave me the once over and then made off to centre of lake to be in the sun. By now I was really cold and miserable. It was obvious that the spotless crakes weren’t going to put in an appearance so I decided to walk down the other side of the lake to warm up in the sun and restore some feeling back to my feet.
This Kakak or little pied cormorant (Phalacrocorax melanoleucos)was glad to see me move as I was disturbing its morning.
As walked past the dam wall I could hear the commotion of a whole heap of passerine birds moving through the forest understory. There were New Holland Honeyeaters, assorted thornbills, grey fantails and weebills. But, what really caught my attention were the splendid fairy wrens chasing insects at the waters edge. They were chasing small insects and occasionally they would perch on an old log or tree stump. For text twenty minutes or so I just took photos of them and then as quick as you like they were gone.
Bandiny or New Holland Honeyeater (Phylidonyris novaehollandiae) was one of the small passerine birds flitting about in the understory.
Djer-djer or Splendid Fairy-wren (Malurus splendens)catching the warmth of the sun.
Time out from chasing insects.
Is a splendid fairy wren on a log worth an invisible spotless crake in the reed beds ? Yes it was this time.
The title is really an exercise in alliteration. It really should be “Can You Do Wildlife Photography On A Limited Budget?”, but that’s not as catchy or succinct. I used to think it was impossible. I thought to be a wildlife photographer you needed deep pockets to be able to afford the cameras and lenses. The photo review sites would have you believe that you need to drop unto $10K AUD on a camera body and up to $24K AUD on a lens to be in with a chance of taking a decent photo. Then you had to have the wonga to be able to travel to Africa, Antartica etc to actually find animals worthy of being photographed. About twenty years ago my sister tried to encourage me to enter the BBC Wildlife Photographer Of The Year competition my response was that I didn’t have the money for the equipment let alone alone being able to travel to a suitable location.
Richard and Cherry Kearton photographing a birds nest.
Twenty years later my views have radically changed. What changed them was the confluence of learning about two of the pioneers of wildlife photography and the digital camera revolution. The photographers were Cherry Kearton (1871-1927) and his brother Richard (1862-1928) the naturalist and writer. They were very early pioneers of wildlife photography and they published the first natural history book entirely illustrated with wild photographs in 1895. Their 1898 book “With Nature And A Camera: being the adventures of a field naturalist and an animal photographer” illustrated with 160 photos was a best seller and inspired many people to become wildlife photographers. A very young David Attenborough attended one of their film lectures and in an interview to The Guardian Newspaper said “It captured my imagination and made me dream of travelling to far-off places to film wild animals.” (Vidal, J; The Guardian 4th December 2021).In their book the two brothers list what it takes to be a wildlife photographer:
“The great points about successful natural history photography are: the possession of suitable apparatus to work with, an aptitude for taking care in stalking timid creatures and plenty of patience and determination to wait for and get what is wanted in spite of obstacles.”
p.334 Kearton, R and Kearton, C; With Nature and a Camera, 1898, Cassel, London.
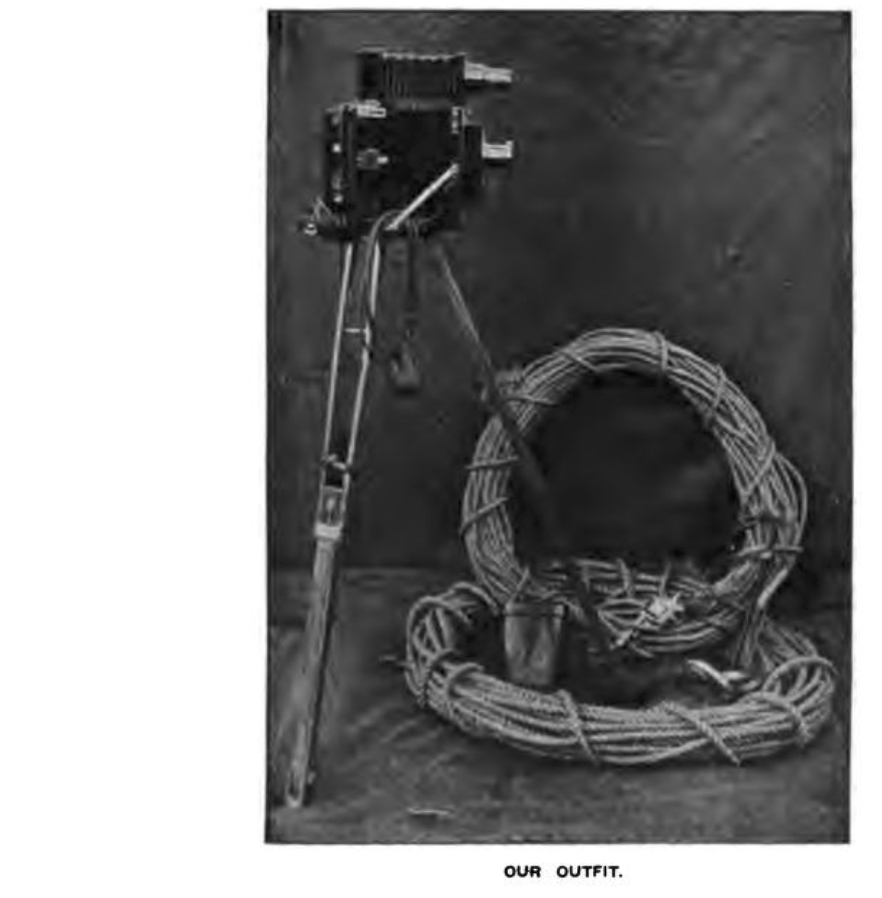
The “suitable apparatus” was a half plate (4¾ × 6½ in or 120mm × 165mm) Dallmeyer camera with a pneumatically controlled silent shutter for still subjects and a large quantity of hemp rope for scaling cliffs.
The “suitable apparatus” was a half plate (4¾ × 6½ in or 120mm × 165mm) Dallmeyer camera with a pneumatically controlled silent shutter for still subjects and miniature plate camera (probably 3 1/4” x 4 1/4” glass plates with a 5 1/4” f8 lens) for birds in flight. There was no autofocus with bird recognition AI. No 40 fps. Nothing under 4Kg in weight and certainly no endless digital images on a memory card. The plates had a sensitivity of 2 to 25 ISO. They’d be lucky to carry a dozen glass plates and take one picture every 2 minutes. They initially started just photographing the fauna of their native Yorkshire in their days off often sleeping in hedges or barns. No luxury safaris with 5 star accommodation and the convenience of modern jet travel.
No memory cards giving unlimited shooting for the Keaton’s. This is a box of Ilford photographic glass plates.
The digital camera revolution has meant for the last twenty years camera and lens manufactures have brought out new products with amazing technological innovations every year. This has meant that the second hand market has been flooded with equipment as photographers unload their “obsolete” stuff so they can buy the new stuff only to do the same 12 months later. This now means that there is a wealth of extremely capable second hand equipment out there to suit every budget.
Advances in in digital photographic technology has meant that there is a plethora of second hand equipment for sale.
TLDR
Needs Versus Wants
This is quite important as it will help us decide on equipment and set a budget. For instance if all you want to do is post some photos on social media then pretty well any interchangeable lens DSLR or mirrorless camera released in the last 20 years will suffice. If you want to print photos up to A3 in size then a 12Mp camera is adequate. If HD video and 4K video are important then that sets another parameter. It’s nice to day dream about having top of the line equipment such as a Sony A1 and a Sony 600mm f4 lens, but that combination will set you back $27000 AUD new and won’t be had for thrift shop prices second hand. But, say you want to print up to A3 it is possible with a bit of careful shopping on EBay or GumTree to get a DSLR with an APSC sized sensor and a 75-300mm lens for less than $500 AUD second hand.
I basically find that deciding on the lens is the most important part of the exercise and you really should aim to put most of your budget to that. So what are we looking for?
Sensor size
Full frame (36x24mm)
APSC (23.6 x 15.7mm or 22.2 x 14.8mm [Canon cameras only])
Micro Four Thirds (17.3 x 13mm)
Minimum Focal length
400mm
300mm
300mm
Best Case Scenario
600mm
600mm
400mm
The focal length will determine how close you need to get to your subject. The shorter the focal length the closer you will have to get. Having said that a shorter focal length is not a handicap because you’ll have to learn bushcraft so you can approach animals and that is a very good skill to have in this game and it’ll also stand you in good stead if you get a longer lens later on down the track.
You can use zoom lenses or primes. A prime lens is a fixed focal length, whereas a zoom lenscovers a range of focal lengths such as 75-300mm, or 100-400, or 150-600mm. In theory a prime lens will give better image quality and have a larger maximum aperture value which will let more light in. The down sides are that primes are usually more expensive and being a fixed focal length means that if your subject gets too close (it does happen more often that you’d think) you won’t be able to take a picture. Zooms offer flexibility in that you’re not stuck at one focal length, but the trade off is that they’re not as optically good as primes at the cheaper end and the maximum aperture value isn’t as great meaning that you may have to stop shooting as the light goes down.
A comparison of the common camera sensor sizes.
Now as soon as you tell another photographer what you’re planning to do they will inevitably tell you that you should get a camera with a full frame sensor as you’ll get a whole heap of benefits over the other smaller sensors. Now if we just content ourselves with reading spec sheets maybe, but out in the real world other things come into play. You want to photograph a bird that is 20cm long and fill the frame with it, so that’ll mean getting 5m away from it. To do that with a full frame camera you’ll need a focal length of 800mm, with an APSC camera 600mm and with a micro four thirds camera 400mm. There is a magnification factor when comparing the focal lengths on the different sensor sizes. It is x1.5 (or 1.6 for Canon) for APSC and x2 for micro four thirds. We’ll look at this comparing three common focal length ranges for the three sensor sizes.
75-300mm
100-400mm
150-600mm
Full Frame (36x24mm)
75-300mm
100-400mm
150-600mm
APSC (23.6 x 15.7mm)
(22.2 x 14.8mm Canon cameras)
112-450mm full frame equivalent
120-480mm full frame equivalent when used on a Canon APSC camera
150-600mm full frame equivalent
160-640mm full frame equivalent when used on a Canon APSC camera
225-900mm full frame equivalent
240-960mm full frame equivalent when used on a Canon APSC camera
Micro Four Thirds (17.3 x 13mm)
150-600mm full frame equivalent
200-800mm full frame equivalent
300-1200mm full frame equivalent
So a smaller sensor will mean you don’t need very long lenses and that is good because they are expensive. Shorter lenses have the advantage of being lighter which is good when carrying stuff in the bush.
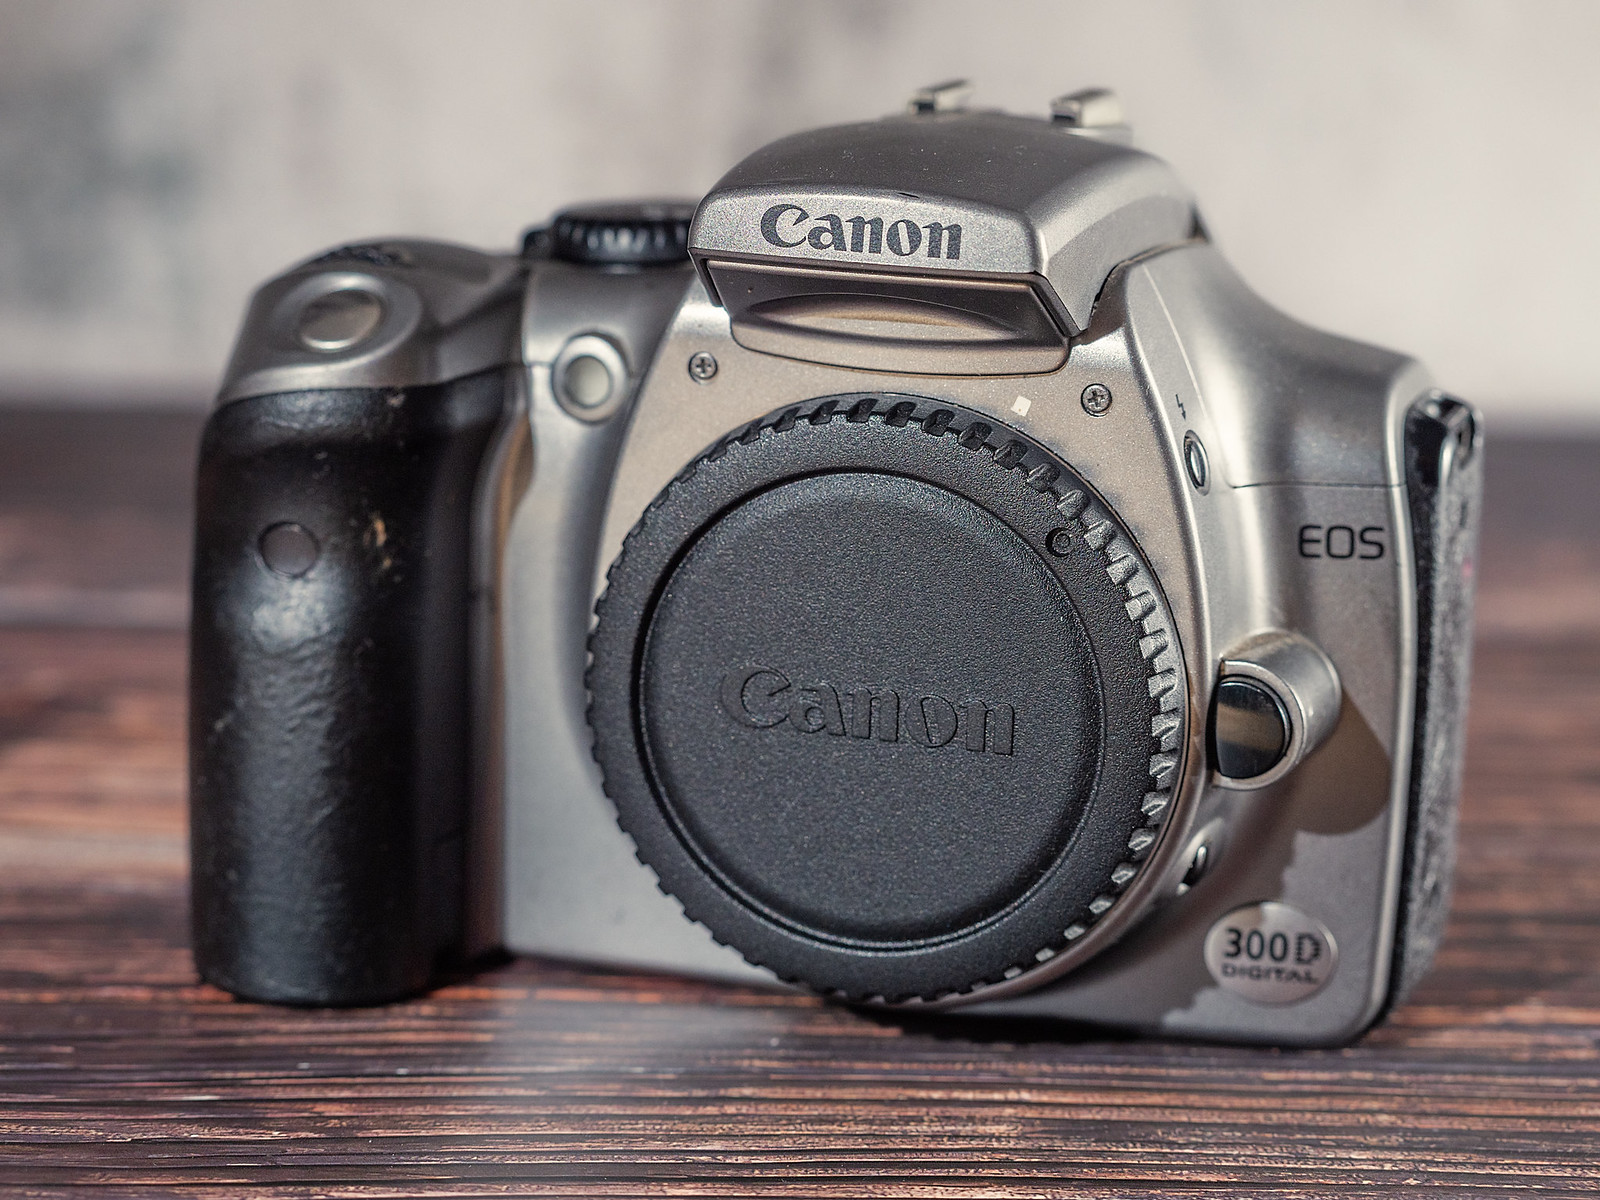
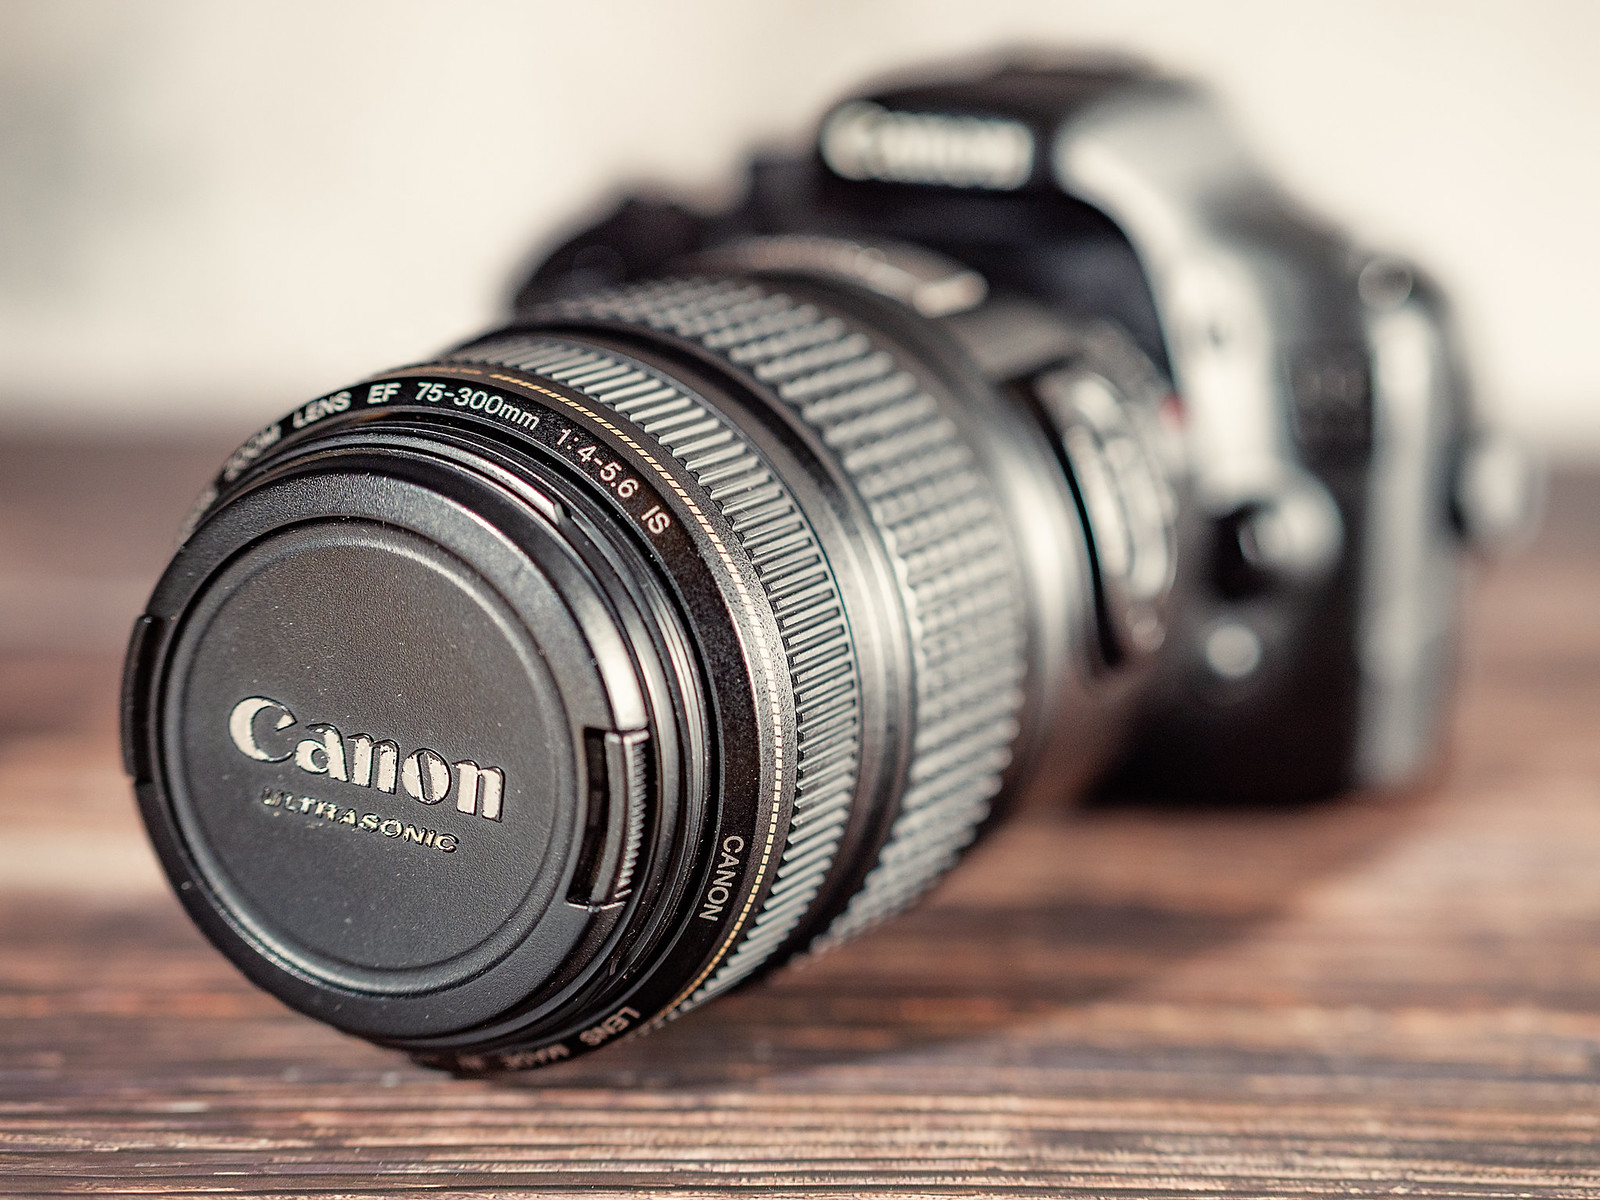
Canon EOS 300d body with Canon EF 75-300mm f4-5.6 IS lens.
I started my nature photography using a Canon EOS 300d with a Canon EF 75-300mm lens. The camera has an APSC sensor so that gave me almost enough reach to fill frame with my 20cm bird at 5m. It did me well until I decided that I wanted to invest more into the hobby. So if your budget is really tight I would recommend getting either a Canon of Nikon APSC camera and a 75-300mm lens as the bare minimum, and we’ll look at what’s available a bit later on.
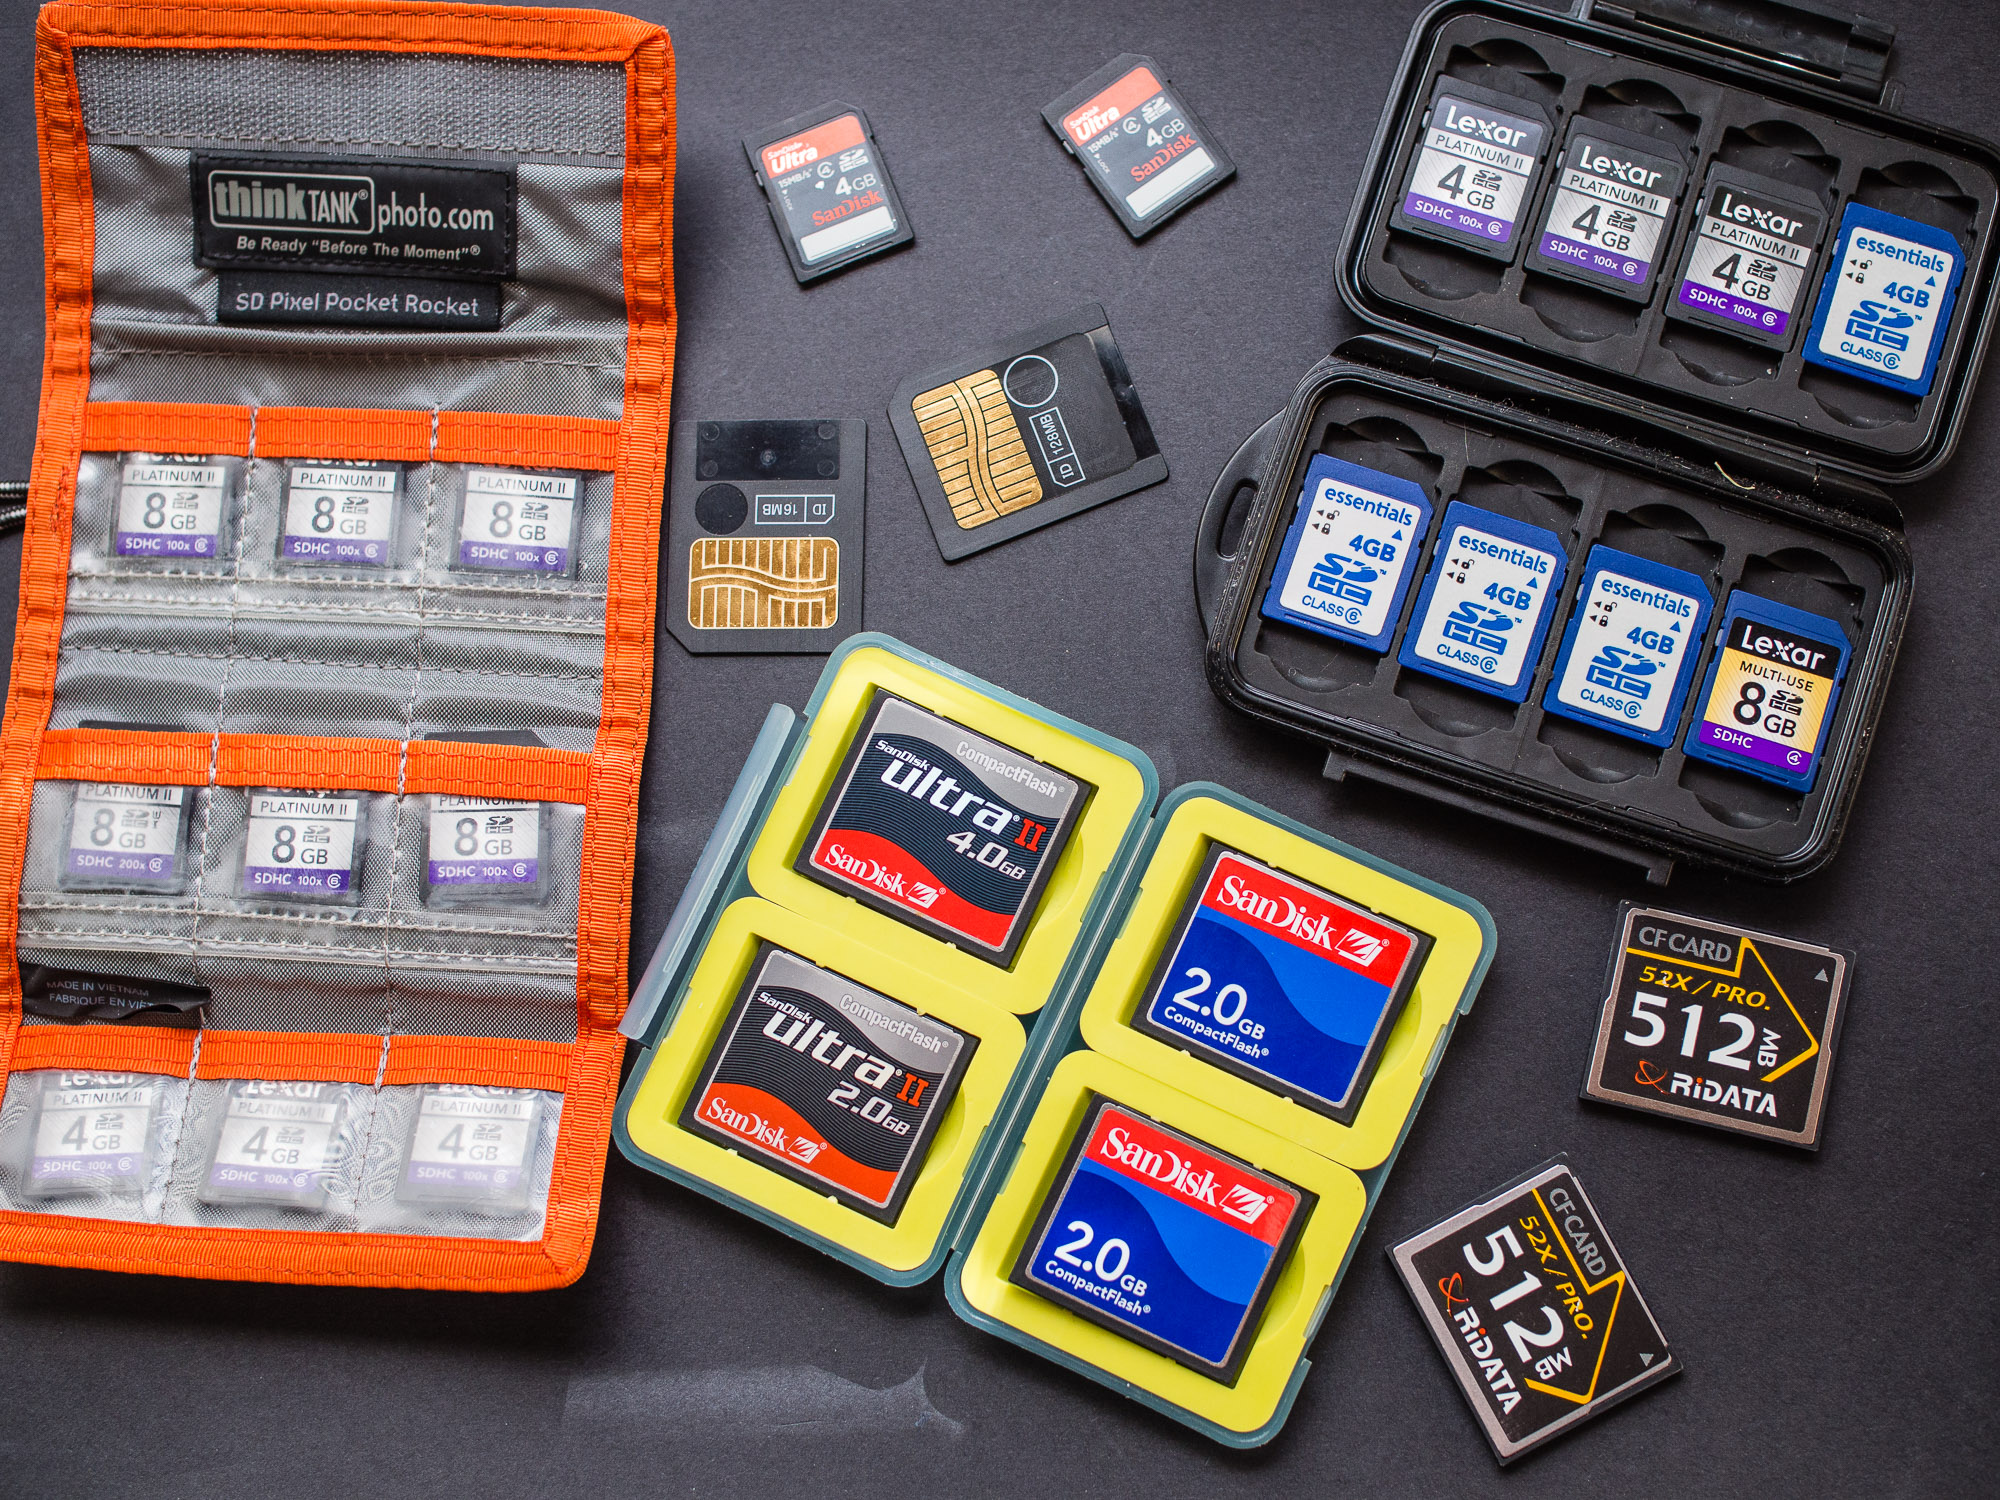
Memory cards are now very cheap. Develop a strategy for keeping them safe while working in the field.
The other thing to consider is that when you buy a camera and lens you also have to budget for batteries and memory cards. First things first; when looking at memory cards over the last 20-25 years there have been roughly ten types of memory card and many of them have gone obsolete so when buying a camera I would suggest that buying one with a commonly available card such as Secure Digital Card or SD Card. Similarly with batteries, make sure batteries are easily obtainable. With both cards and batteries try to buy the best you can afford and I’ll expand on this a bit further later on. Buying second hand also means that there is a chance where you’ll be able to buy the camera with spare batteries, a memory card, strap and possibly some form of bag as a package. Just make sure you’re getting things you actually want and are not paying more than if you to buy each item separately.
All the cameras I’ll be talking about are cameras I’ve owned or used. They’re not recommendations they are to give an idea of what’s about and where possible I’ll suggest equivalent models from other manufacturers.
Bargin Basement
You’ve got next to no money. OK a bit of a draw back, but not insurmountable. Back in the dim dark days of digital photography there existed a class of camera that you don’t hear much about now – the bridge camera. They are a cross between a point and shoot compact and an SLR. You get a wide range zoom lens with a small body. They were popular with enthusiasts in the early noughties as more serious cameras were way way expensive. Every manufacturer offered at least one some several at different price points. Sony and Panasonic still make a few models and they range in price from $500 to $2400 AUD new. But on the second hand market that’s where things get interesting. You can pick up something for less than $50.
What you are looking for is camera models with the terms “UltraZoom“, “superzoom” or “mega zoom” in the model name. Ideally look for something with at least an 8x zoom, better yet 10x or 15x. The more zoom the bigger your subject will be in the final image.
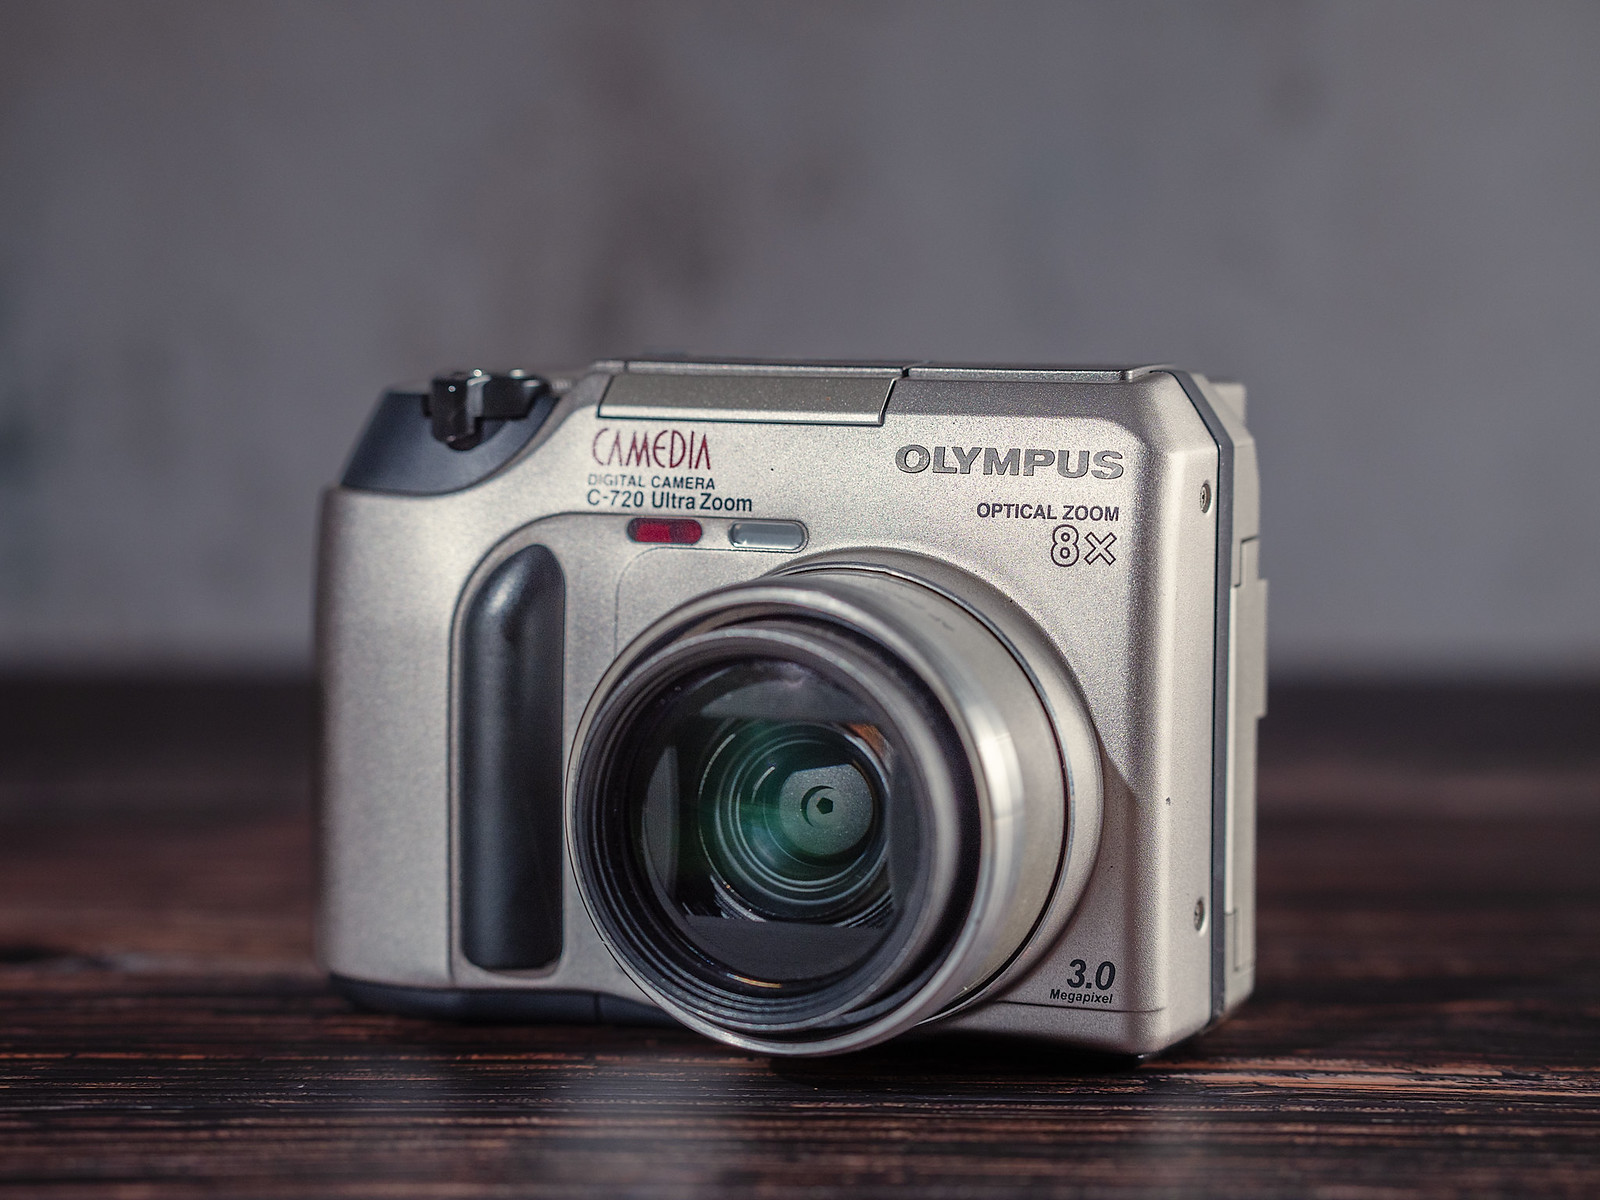
Olympus Camedia C-720 Ultra Zoom
Olympus Camedia C-720 UltraZoom bridge camera.
The Olympus C-720 was introduced in 2002 and is fairly typical of models from that era. It has a whopping 3 Megapixels and an 8x zoom range (24x if digital zoom is switched on but it is crap). It’s small, light, and cheap. Typically expect to pay about $15 to $35 AUD for one. What makes it ideal is that the camera runs off 4x AA batteries which are plentiful and cheap. The downsides are that it takes a SmartMedia memory card which while obsolete can still be bought. The downside is that you will probably spend more on the memory card than the camera. Another problem is that the largest capacity card is 128MB which can hold 14 photos at the best quality TIFF setting, 58 in SHQ jpg, 170 HQ, 196 in SQ1, and 206 in SQ2. The last two come at a smaller resolution. Although 3MP is a bit limiting you can print a postcard sized print comfortably and print an A4 sized print at a stretch.
In use it is not a speed demon, it takes about four seconds to power up. When shooting in sports mode with medium quality jpgs the camera can manage to shoot at 1 fps for a total of 15 frames. The autofocus is slow and very noisy. The top shutter speed is 1/1000 and the maximum ISO, or sensitivity, is 400. At 400 ISO the noise is bad and prevents you from recoding fine details. This is not a camera with which to take pictures of fast moving subjects in low light. But in good light, with a heap of patience and an understanding of the cameras limitations you can get some pictures. Whether you enjoy the process or not will depend upon your outlook.
Little Corellas taken with the Olympus C720UZ camera.
When light levels fall the inadequacies of the C720UZ are quite apparent. The noise patter prevents detailed images.
Canon EOS 300d with a 75-300mm lens
Canon EOS 300d body.
If you can swing to $250-300 AUD there are better alternatives than the very old bridge cameras. The Canon Canon EOS 300D (Canon EOS Digital Rebel in North America and the Canon EOS Kiss Digital in Japan) was the first real consumer budget DSLR when released back in 2003. For $60-100 you should be able to find a body only. I’d look to team this up with a 70-300mm zoom lens. With a bit of careful searching the combo should come in at under $300. Alternatives from that period going for around that are the Canon EOS 10d and the Nikon D100. They’ll be a little bit more money but they have slightly better features. The downside to them is that they were often used professionally and so they might not have much life left in them.
Canon EF 75-300mm f4-5.6 IS lens
So with the 300d what do you get for your money. Well you get a 6MP camera that takes Canon EF mount lenses – one of the biggest ecosystems of lenses in the world which means lots of choice at a variety of prices. Canon themselves have made an assortment of 75-300mm lenses over the last 30 years and you should be able to pick up something for $120 AUD and the one I’m looking at with Image Stabilisation for about $220. Sigma and Tamron are third party lens makers and you can find their versions for around the $100 mark.
The good points of the 300d are that it’s cheap, batteries (Canon BP-511a) and memory card (Compact Flash) are still available. The camera has a 6MP sensor that produces very nice A4 prints and it is very simple to use. The downside is that the camera was built to a budget and it is not possible to shoot in Continuous Autofocus when shooting RAW, the buffer is 2.5 frames per second for 4 frames, and the plastic body looks a bit tacky (but at least it feels solid). On the copy I have the rubber panels have gone a bit soft and sticky. To use Continuous AF you need to shoot in the Sports mode which is jpg only and you cannot adjust the exposure using exposure compensation in this mode. There is no being able to use the rear LCD screen to compose pictures on and there is no video mode. Maximum ISO is 1600 and the quality is ropey, but files can clean up quite well in image processing software.
The 70-300mm lenses at this price point are not going to win any awards for optical performance, but they will suffice to get you started. Irrespective of the manufacturer they all tend to be a little soft at the 300mm end and are not the fastest to find focus especially in low light, but they are capable of giving you a nice image if you don’t shoot wide open and keep the shutter speed up.
If you don’t want to buy Canon then at this price point look at the Nikon D100. Obviously you’ll have to substitute Nikon fit lenses as well.
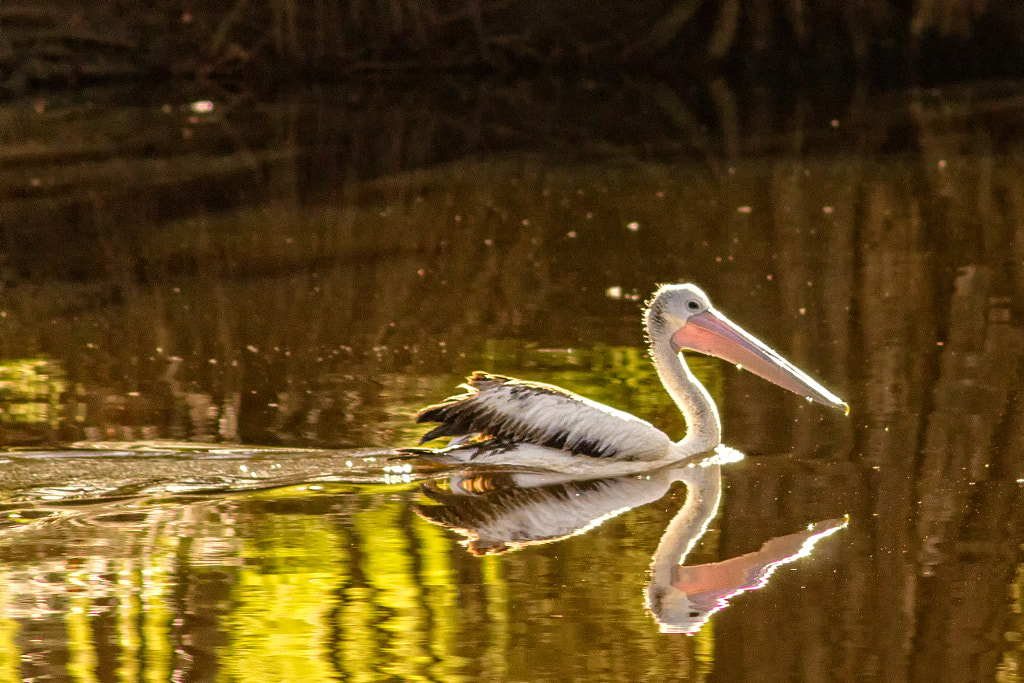
Australian Pelican at Woodman Point, Western Australia. Canon EOS 300d with Canon EF 75-300mm f4-5.6 IS.
Kadjinak or Grey Fantail (Rhipidura albiscapa). York, Western Australia.
Djidi-djidi or Willie Wagtail (Rhipidura leucophrys). York, Western Australia.
Djida or Yellow-rumped Thornbill (Acanthiza chrysorrhoa). York, Western Australia.
Koolbort or Singing Honeyeater (Gavicalis virescens). York, Western Australia.
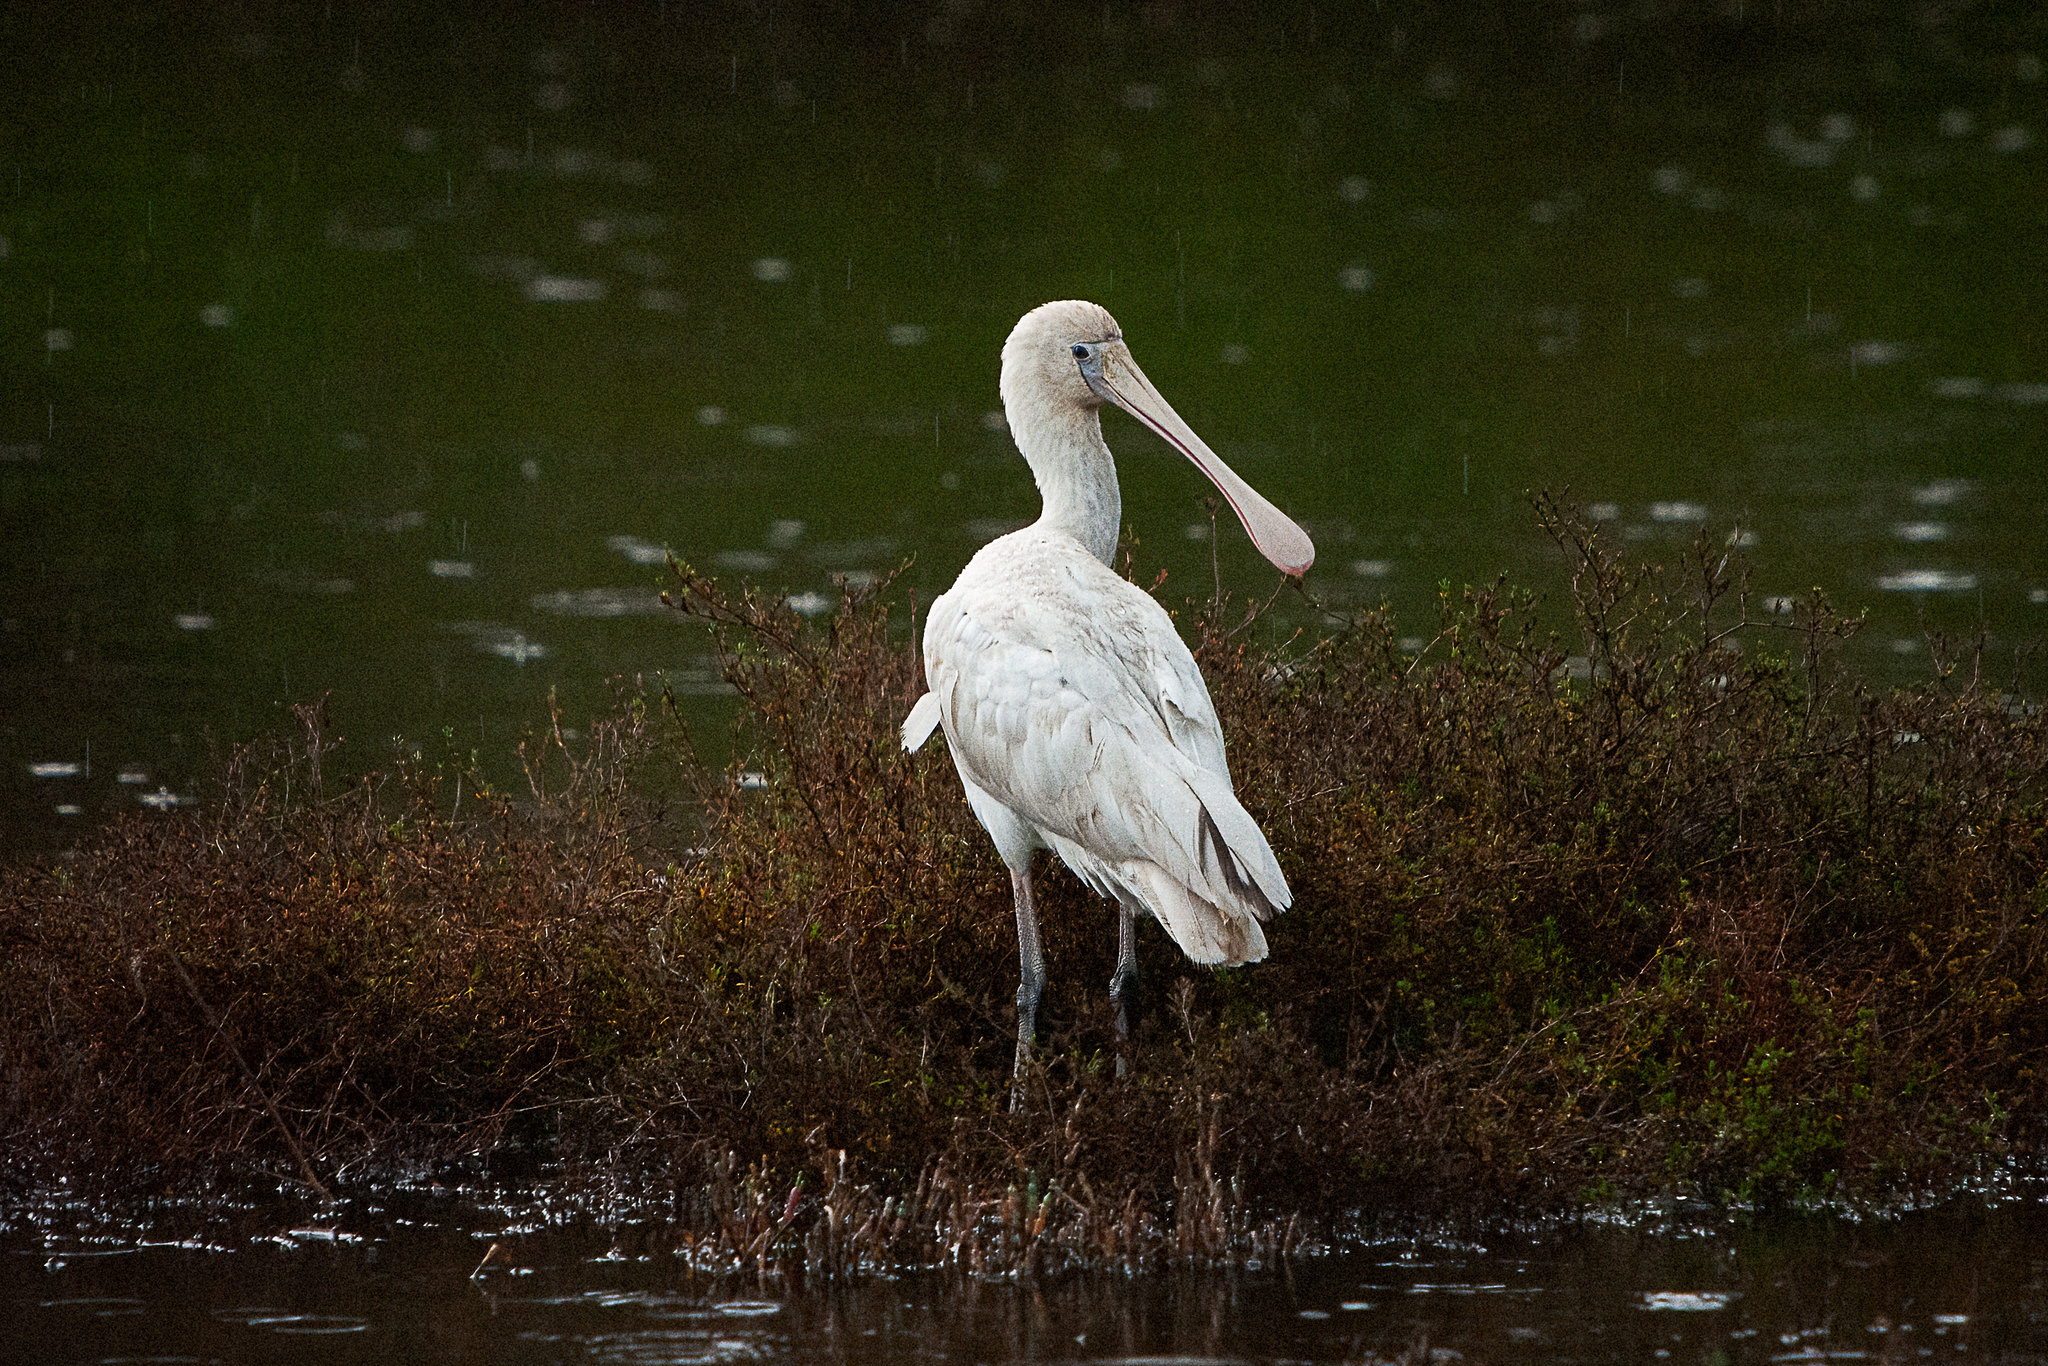
Kaaka-baaka or Yellow-billed Spoonbill (Platalea flavipes) in the rain. York, Western Australia.
Djangkang or Red Wattlebird (Anthochaera carunculata subs woodwardi). York, Western Australia.
Canon Eos 550d with a 75-300mm lens
Canon EOS 550d body.
If you can squeeze another $50-100 then a good option would be to go for something like the Canon EOS 550d. You have a substantial increase in resolution with an 18Mp sensor with better high ISO performance – now up to 6400 natively or 12800 by expansion. Continuous auto focusing in all shooting modes and the frame rate is increased to 3.7 frames per second with a buffer of 34 frames shooting jpg and 6 frames shooting RAW. The AF system has been beefed up a little and while still only having 9 centrally arranged focus points it has a cross type sensor in the centre with extra sensitivity. The camera uses SD cards which are cheap and easily found. The battery, the Canon LP-E8 is a bit of a down grade in terms of performance compared to BP-511a used in the 300d, but it is readily available and affordable. While being able to shoot 1080 video it is only really suitable for still subjects as the contrast based autofocus is is too slow to lock onto moving subjects. My first videos were shot with this camera and it is capable of producing a good result if you are prepared to manually focus. Other downsides are the limited buffer and the slow frame rate, the lack of a second control dial also makes using exposure compensation a little fiddly. I try and keep my ISO below 3200 as the chroma noise is quite intrusive and difficult to clean up without destroying fine details. But, having said all that this is a camera which is capable of producing very good results. Even though I now have other better cameras I still like to get the 550d out and use it because it is just fun to use.
Canon EOS 550d with Canon EF 75-300mm f4-5.6 IS lens.
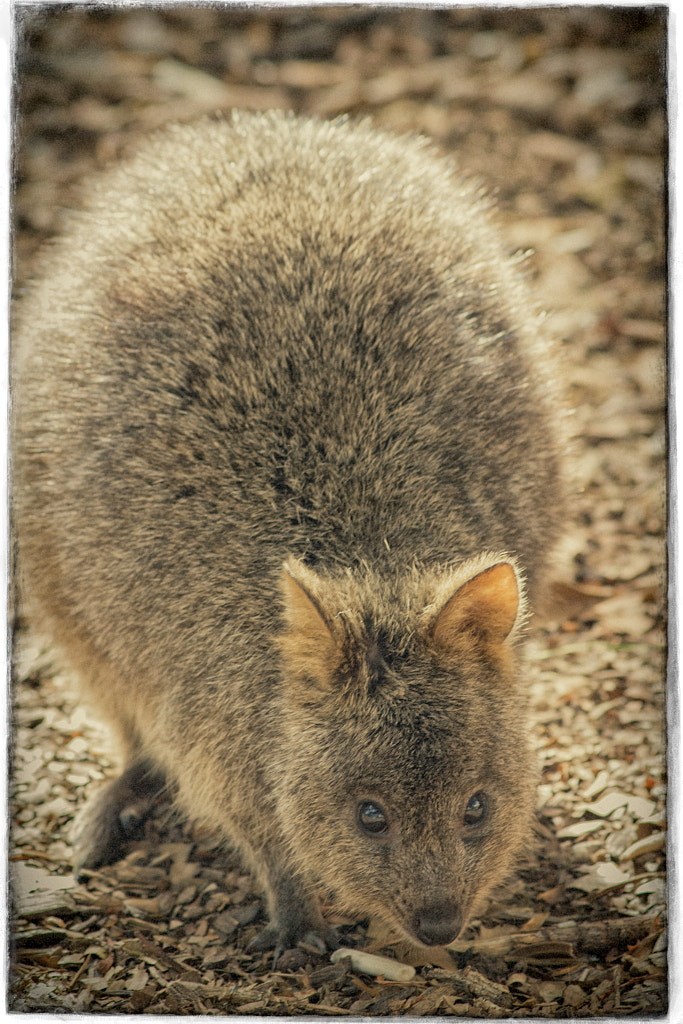
Quokkas are a small marsupial that inhabit Rottnest Island. Canon EOS 550d with Canon 75-300mm f4-5.6 IS lens.
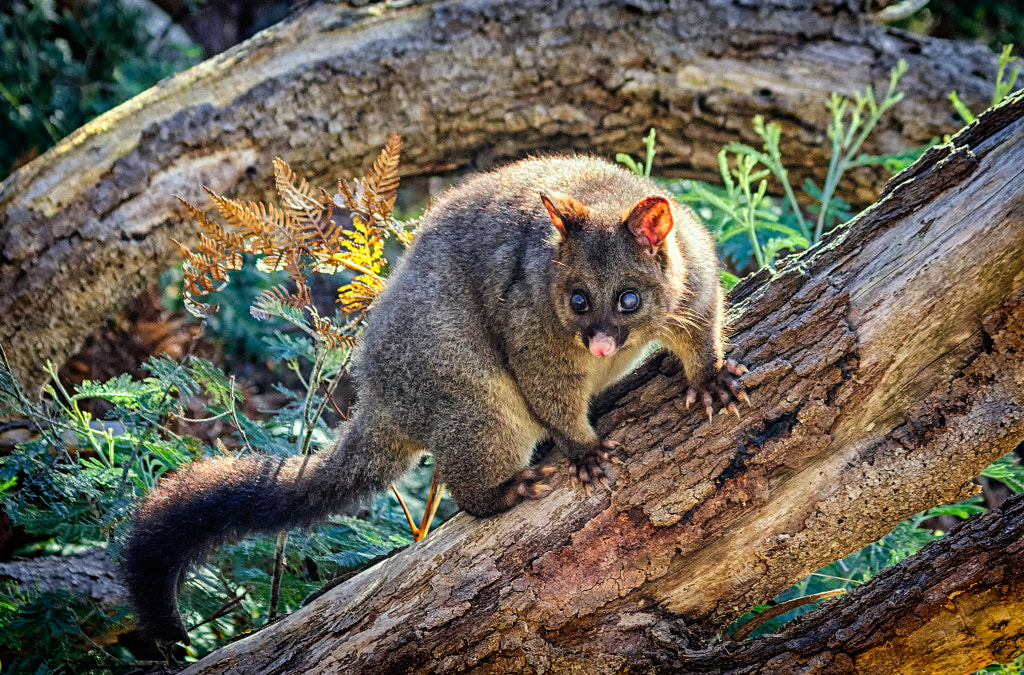
Brushtail Possum (Trichosurus vulpecula) at the Coal Mines Historic in Tasmania. Canon 550d with Canon 75-300mm f4-5.6 IS lens.
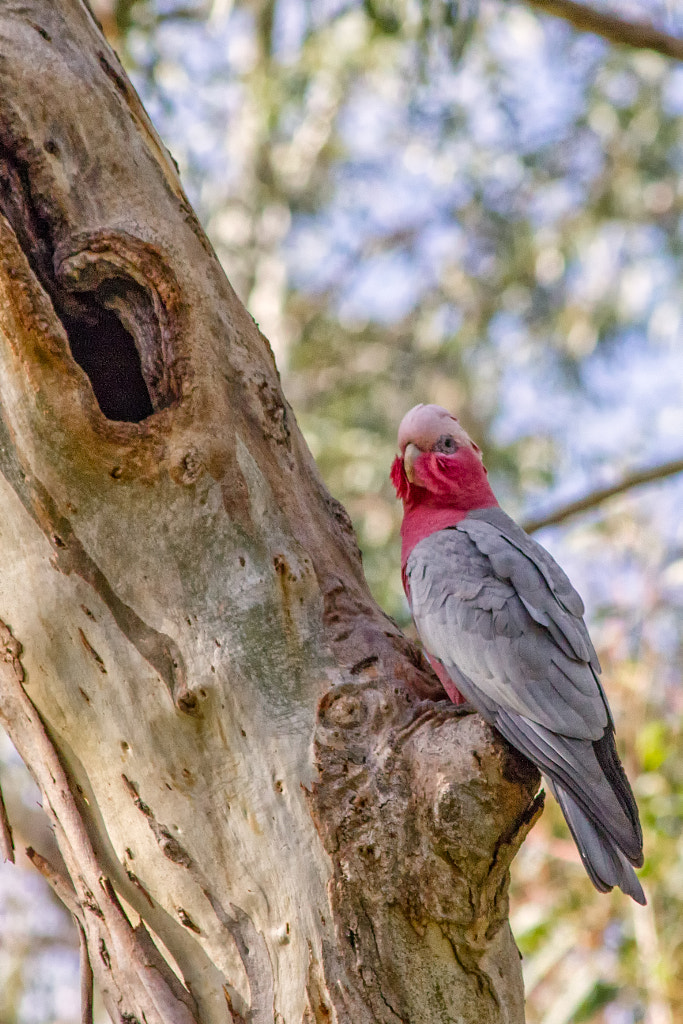
Like many cockatoos Galahs, Eolophus roseicapilla, nest in hollows in eucalypt trees. Woodbridge Riverside Park. Canon EOS 550d with Canon 75-300mm f4-5.6 IS lens
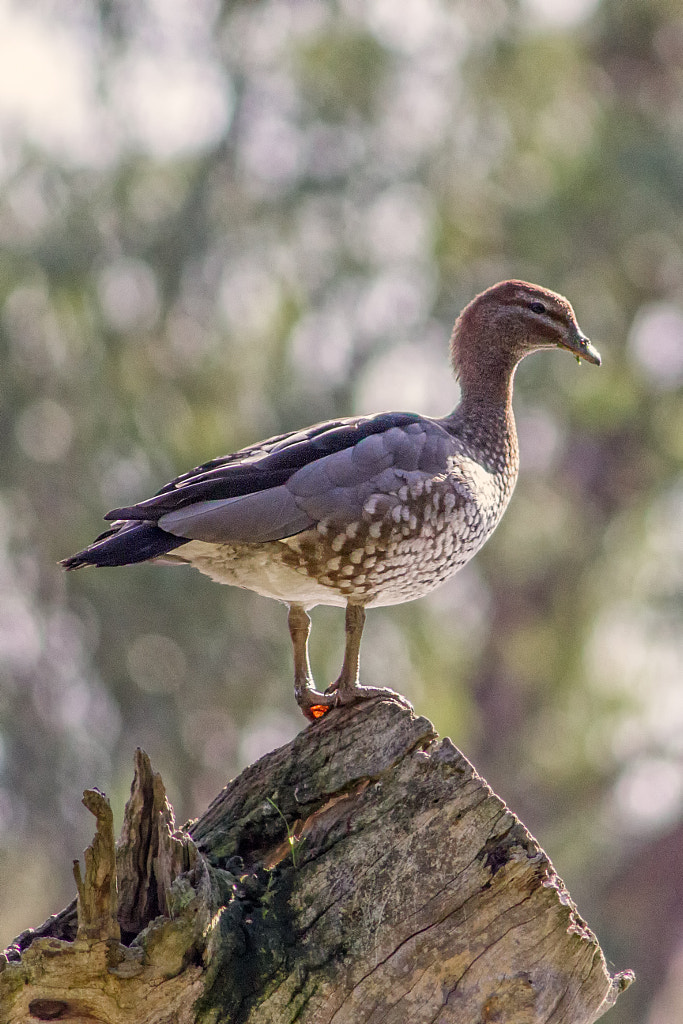
Maned Duck (Chenonetta jubata) also known as the Australian Wood Duck, Swan River, Woodbridge. Canon 550d with Canon EF 75-300mm f4-5.6 IS lens.
Australian pelican (Pelecanus conspicillatus), Swan River, Woodbridge. Canon EOS 550d with Canon 75-300mm f4-5.6 IS lens.
This would be a camera which would benefit with a better lens if you can afford it. Something like a Canon EF 300mm f4 (approx $500 on EBay) or a 400mm f5.6 (approx $600 on EBay). This would be a nice nimble set up that would give great results.
The Nikon equivalent to this camera would be the Nikon D5000 for about the same amount of money.
Summary
It is quite possible to put together a competent kit to photograph wildlife for less than $500 AUD. It won’t have all the bells and whistles of more modern high end cameras but you will be able to make it work. The limitations mainly are speed of operation and picture quality. Learning how to make up for the short comings will inevitably make you a far better photographer in the long run than having the latest and greatest camera will.
Based on the evidence of what I post on this blog I go out to take nature and wildlife photos, but actually I go to be out in nature. The photos below are what I love being out in.
The warm light of sunset reflected by the trees in the Oswald Sargent Reserve.
Driving back home from the Oswald Regent Reserve at sunset.
This shot of a Scented Sun Orchid was what I considered my first successful photo of an orchid. The subject is separated from the background making easy to see.
I took what I call my first proper shot of an orchid back in 2008. Back then my technique was very simple – handheld with a macro lens. The problem was that it was often very difficult to isolate the flower from the background while having sufficient depth of field and a low ISO. For every successful photo there were hundreds of duds.
This shot of a Butterfly Orchid is one of the hundreds of duds. The messy background threatens to overwhelm the subject.
After about a year of trial and error (mostly error) I decided to photograph the orchids in the same way I would take a portrait of a person. Get down at “eye” level, use an off axis flash to provide the key light and have the natural light as my fill light at -1 to -2 stops. This was a huge improvement, but I still wasn’t getting the clarity and sharpness in the images I desired.
My first flash rig for photographing orchids. Using a flash brake allowed me to get the flash off of the lens axis and get a more pleasing lighting effect.
The next attempt at better lighting was a heavy tripod and light stand. My back hurts just looking at this photo.
The next evolution was to mount the camera on a tripod and then mount the flash to one of the tripod legs via a “magic arm”. This allowed greater choice in the positioning of the flash and allowed me to use different flash modifiers such as soft boxes, grids and snoots. The arrival of affordable and reliable wireless flash triggersmeant I could use multiple speedlights for more sophisticated lighting. This came a tremendous cost. I have a chronically bad back and all that kit was heavy, the tripod and “magic arm weighed just under 6Kg. Then there was the futzing about setting everything up, taking the shot, breaking it all down, walking to the next subject and then repeating it all again. Suddenly it wasn’t fun anymore. Something had to give and it was my back.
The diminutive Olympus EP-2. Just what the orthopaedic surgeon ordered.
A size comparison of my DSLRs (Canon 5d and 550d) and the Olympus EP-2 which replaced them.
In 2013 I bought an Olympus EP-2 mainly for travel and street photography. It was a revelation – small size, In Body Image Stabilisation (IBIS), and excellent flash implementation. It quickly became my orchid camera of choice. I could chuck out the tripod and become more mobile. It wasn’t all beer and skittles though. The 12Mp sensor wasn’t the best in terms of high ISO performance and dynamic range, the lack of a viewfinder made usage in bright sunlight problematic (solved with the addition of the optional EVF) and the contrast based autofocus system was a bit on the temperamental side. But the positives were enough to keep me using it and when the EM10 came out with a built in EVF, a better IBIS system and an improved sensor then I knew that the system would be just about perfect for what I did. I could walk around in the bush for hours at a time without back pain which meant I could explore further afield. This freedom allowed me to experiment a lot more.
Sigma’s 105mm f2.8 DG DN macro lens attached a Sony A7Rii.
The Tamron 35mm f2.8 lens has excellent macro capabilities.
Curly Locks, Thelymitra spiralis. Wandoo National Park, Western Australia. Sony A7r2 with Sigma 105mm f2.8 DG DN macro lens.
White Spider Orchid, Caladenia longicauda subsp longicauda. Wambyn, Western Australia. Sony A7r with Tamron 35mm f2.8 lens.
In 2021 I felt that I wanted more resolution than the 20Mp EM1 mk ii was giving me. So I tentatively dipped my toe into the world of full frame mirrorless and I went with a second hand Sony A7r2. The image files produced by the camera were absolutely gorgeous. Alongside my usual working method of using flash with macro lens I decided to experiment with environmental portraiture of orchids. For this I used a 35mm lens with a half size macro capability and the results were pleasing. The downsides were as follows. The rear LCD is hopeless in bright light and it has no touch control facility. The IBIS wasn’t as effective as that on my Olympus cameras and the sensor resolution emphasised very tiny camera shake. A tripod was the solution. The sensor is a dust magnet which means that changing lenses enables dust bunnies to proliferate. The answer was to have one camera with the 105mm macro and one camera with the 35mm. Arrrrrgh! I was back carrying a load of heavy equipment. So it was back to the Olympus kit.
This shot of a Lemon Scented Sun Orchid was made with the Olympus Em1 mk ii, Olympus 40-150mm f2.8 lens with 1.4 x teleconverter and the Olympus FL600R flash using the focus stacking function.
I’m still trying to evolve a style which produces a nice clean portrait of an orchid. One of the great benefits of Olympus’s cameras and lenses is that it allows very long telephoto lenses to have an almost macro capability. The use of such long lenses allows you to throw backgrounds well out of focus by dint of their increased magnification which reduces depth of field. The problem is that that decreased DOF means that it is hard to get your subject rendered sharp whilst retaining all that loverly bokeh. The counter to this is focus stacking which involves taking a series of pictures of the subject while moving the focus point and then blending the images in post. Olympus has a very neat feature that allows you to do this automatically in camera which is fantastic. Unfortunately the function limits your flash usage by restricting your maximum flash sync speed to 1/50th second and you have to manually set the flash exposure. I tried doing this for a while and it was a right royal pain. So now I don’t use the flash and just make the exposure using ambient light. The lens I’m using is the Olympus 40-150mm f2.8 with the the mc-14 1.4 x teleconverter. This gives me a 210mm f4 lens (420mm in full frame terms). Despite shooting wide open this invariably means shooting at a low shutter speed. So while the IBIS is fantastic on my EM1 mk ii using it with a long lens while focus bracketing wasn’t the best way to proceed. So it was back to a tripod. My aluminium Manfrotto 055 tripod is a good tripod but it is that heavy you could use it as a boat anchor. It was time to get a bit of fibre in my life – carbon fibre. So I bought a nice SiruiAM-254 carbon fibre tripod which weighs just a smidge over 1Kg. It doesn’t have a centre column and so a minimum working height of 7.8cm which means you can get down and close to the subject. The results have been excellent and now I feel that using both my normal macro lens and the telephoto zoom with converter I’m getting closer to what I have envisioned.
The Sirui AM 254 tripod in action.
So this has been my journey of finding what works for me. I’ve discovered that learning how your equipment works is just as an important step in developing vision and style as is technique. Continual learning and experimentation will help you develop as an artist and we shouldn’t be afraid to do so. A few times I’ve felt that I was going backwards, but it was worth persevering. I’ve still got a couple of things to sort out, but I feel now I’m on the right track.
The following shots were made this last week.
Common Bunny Orchid, Eriochilus dilatatus subsp. multifloris. Oswald Sargent Reserve, Western Australia.A focus stack using the Olympus EM1 mk ii with the Olympus 40-150mm f2.8 lens and 1.4 x teleconverter.
Hare Orchid or Fringed Hare Orchid (Leporella fimbriata). Oswald Sargent Reserve, Western Australia.
The last few weeks I’ve been concentrating on the Avon River and I wanted a change. So early one morning I got up so I could be in the wandoo woodland of Mount Ronan’s Nature Reserve as the sun comes up. There is nothing like the first rays of the sun hitting the trunks of the wandoo trees. The golden rays illuminate their pale bark and they all but glow in the warm light.
Wardawort or Grey Butcherbird (Cracticus torquatus). Mount Ronan Nature Reserve, Western Australia.
I got off to a promising start – as I pulled up I was greeted by a mob of kangaroos. They weren’t so keen to see me however and took off into the bush. There was an incredibly loud melodious piping and warbling coming from the tops of the trees. At first I thought it was magpies singing a bit strangely, but after closer inspection I found it was about a dozen grey butcher birds calling out to each other. What was amazing about it was they were all singing the same phrases taking turns with no gaps. You would be forgiven for thinking it was one bird as the performance was so seamless. It was like a choir recital.
Djini or Rufous Treecreeper (Climacteris rufa) climbing up the trunk of a tree. Mount Ronan Nature Reserve, Western Australia.
Djini or Rufous Treecreeper (Climacteris rufa) taking some time out in the sun. Mount Ronan Nature Reserve, Western Australia.
Stalking animals in the wandoo forests is hard as the trees shed bark, twigs, branches and leaves in great quantities which means that the ground is covered in a thick crunchy mulch and no matter how hard you try to move quietly you always end up making a racket. The end result is that it is hard to get close enough to take photos. The ideal approach is to sit down and wait for the birds to come to you. After about half an hour I could hear the sound of small birds chasing insects and was rewarded with several rufous tree creepers. A few minutes later and I could see one climbing up the trunks of a tree to foraging for insects and grubs – I’ve never seen one going down they always seem to climb, and when they get as far up as they want the glide down to the ground or the next tree.
Djida or Yellow-rumped Thornbill (Acanthiza chrysorrhoa). Mount Ronan Nature Reserve, Western Australia.
As I continued to walk around the forest I must confess that I lost focus as I spotted a couple of orchids. It was annoying that I only had my bird photography rig with me and nothing really suited to photographing very small flowers. From that point on I was trying to watch for birds while looking on the ground for orchids. It is an impossible task.
Hare Orchid or Fringed Hare Orchid (Leporella fimbriata). Mount Ronan Nature Reserve, Western Australia.
Common Bunny Orchid, Eriochilus dilatatus subsp. multifloris. Mount Ronan Nature Reserve, Western Australia.
By 9:30 the best light had gone so I decided to call it a day and walk back to the car. Waiting for me was a female red-capped robin sitting on the fence. She was quite obliging and sat for a while allowing me to take her photo.
Female Dermokalitj or Scarlet Robin (Petroica boodang aka Petroica multicolour subsp campbelli). Mount Ronan Nature Reserve, Western Australia.
Moonset over Mount Ronan Nature Reserve, Western Australia.
Big Bob is the resident Yoorn or Bobtailed Lizard. He lives under the house and can occasionally be seen exploring the garden. Normally he is a very feisty lizard with a lot of attitude, but on Monday we found him in the shade house looking very sorry for himself. At first we thought he’d gone down with Bobtailed flu, but on closer inspection he was shedding his skin. We often find the old skins in the garden but I’ve never seen this happen. So we thought we’d just leave him be and get on with it. On Tuesday he’d moved out onto the grass and we were worried about him as we often get kestrels, goshawks or sparrow hawks use our TV aerial as an observation post and they’d have no qualms about making a meal of him. He started wriggling and writhing in the grass in an attempt to get his old skin off. By lunch time apart from a few scraps between his toes he’d got the job done. By Wednesday he was back to scaring our Bull Terrier, Frida, and walking round the garden like he owns it. Another couple of weeks and he’ll be tucking himself up for the winter.
Big Bob our resident Bobtailed Lizard found in the shadehouse looking very sorry for himself.
He’d started to shed his skin and was looking very tatty.
Not dead, wriggling in the wet grass trying to remove the old skin.
As the sun warmed everything up he was content to lie like this for about half an hour.
Right side up again.
Still looking a bit manky.
After another hour mission accomplished – looking all new and neat again.
Wayan or White-faced Heron (Ardea novaehollandiae) shrouded in the mist on the banks of the Avon River. York, Western Australia.
Early mornings along the River Avon have taken on a decidedly misty appearance. Going down to Monger’s Crossing at first light and I’ve been hard pushed to see across the river. The upside of this is that by carefully walking and crawling I can get quite close to the herons and spoonbills there. The spoonbills seem a bit more stoic than the herons. They just get on with the normal morning routine of foraging in the shallows for food. In contrast the heron looked decidedly unimpressed with the weather just standing in the long grass with its shoulder hunched up and looking forlornly at the water coming down from the weir.
Kaaka-baaka or Yellow-billed Spoonbill (Platalea flavipes) foraging on a misty morning.
Ngalkaning or Nankeen Night Heron (Nycticorax caledonicus subsp mannillenis) in the early morning mist.
Looking up the Avon River with Mount Bakewell shrouded in the early morning mist. York, Western Australia.
After an hour or so the sun gradually started burn off the mist and the golden light gave a radiance to everything. The sun’s warmth began to take effect and the birds became a lot more active and I was able to get some photos of birds flying, which is always a thrill. The still and quietness of the mist was gone and replaced by the raucous noise of the corellas and the honking of the herons as they flew overhead. By 9 o’cock it was all over. The birds had settled and no activity could be seen.
Golden Orb-weaving Spider’s web lit by the golden dawn light.
Wayan or White-faced Heron (Ardea novaehollandiae) flying in the warm light of dawn.
Manatj or Western Corellas (Cacatua pastinator) flying over the Avon River in York Western Australia.














You must be logged in to post a comment.