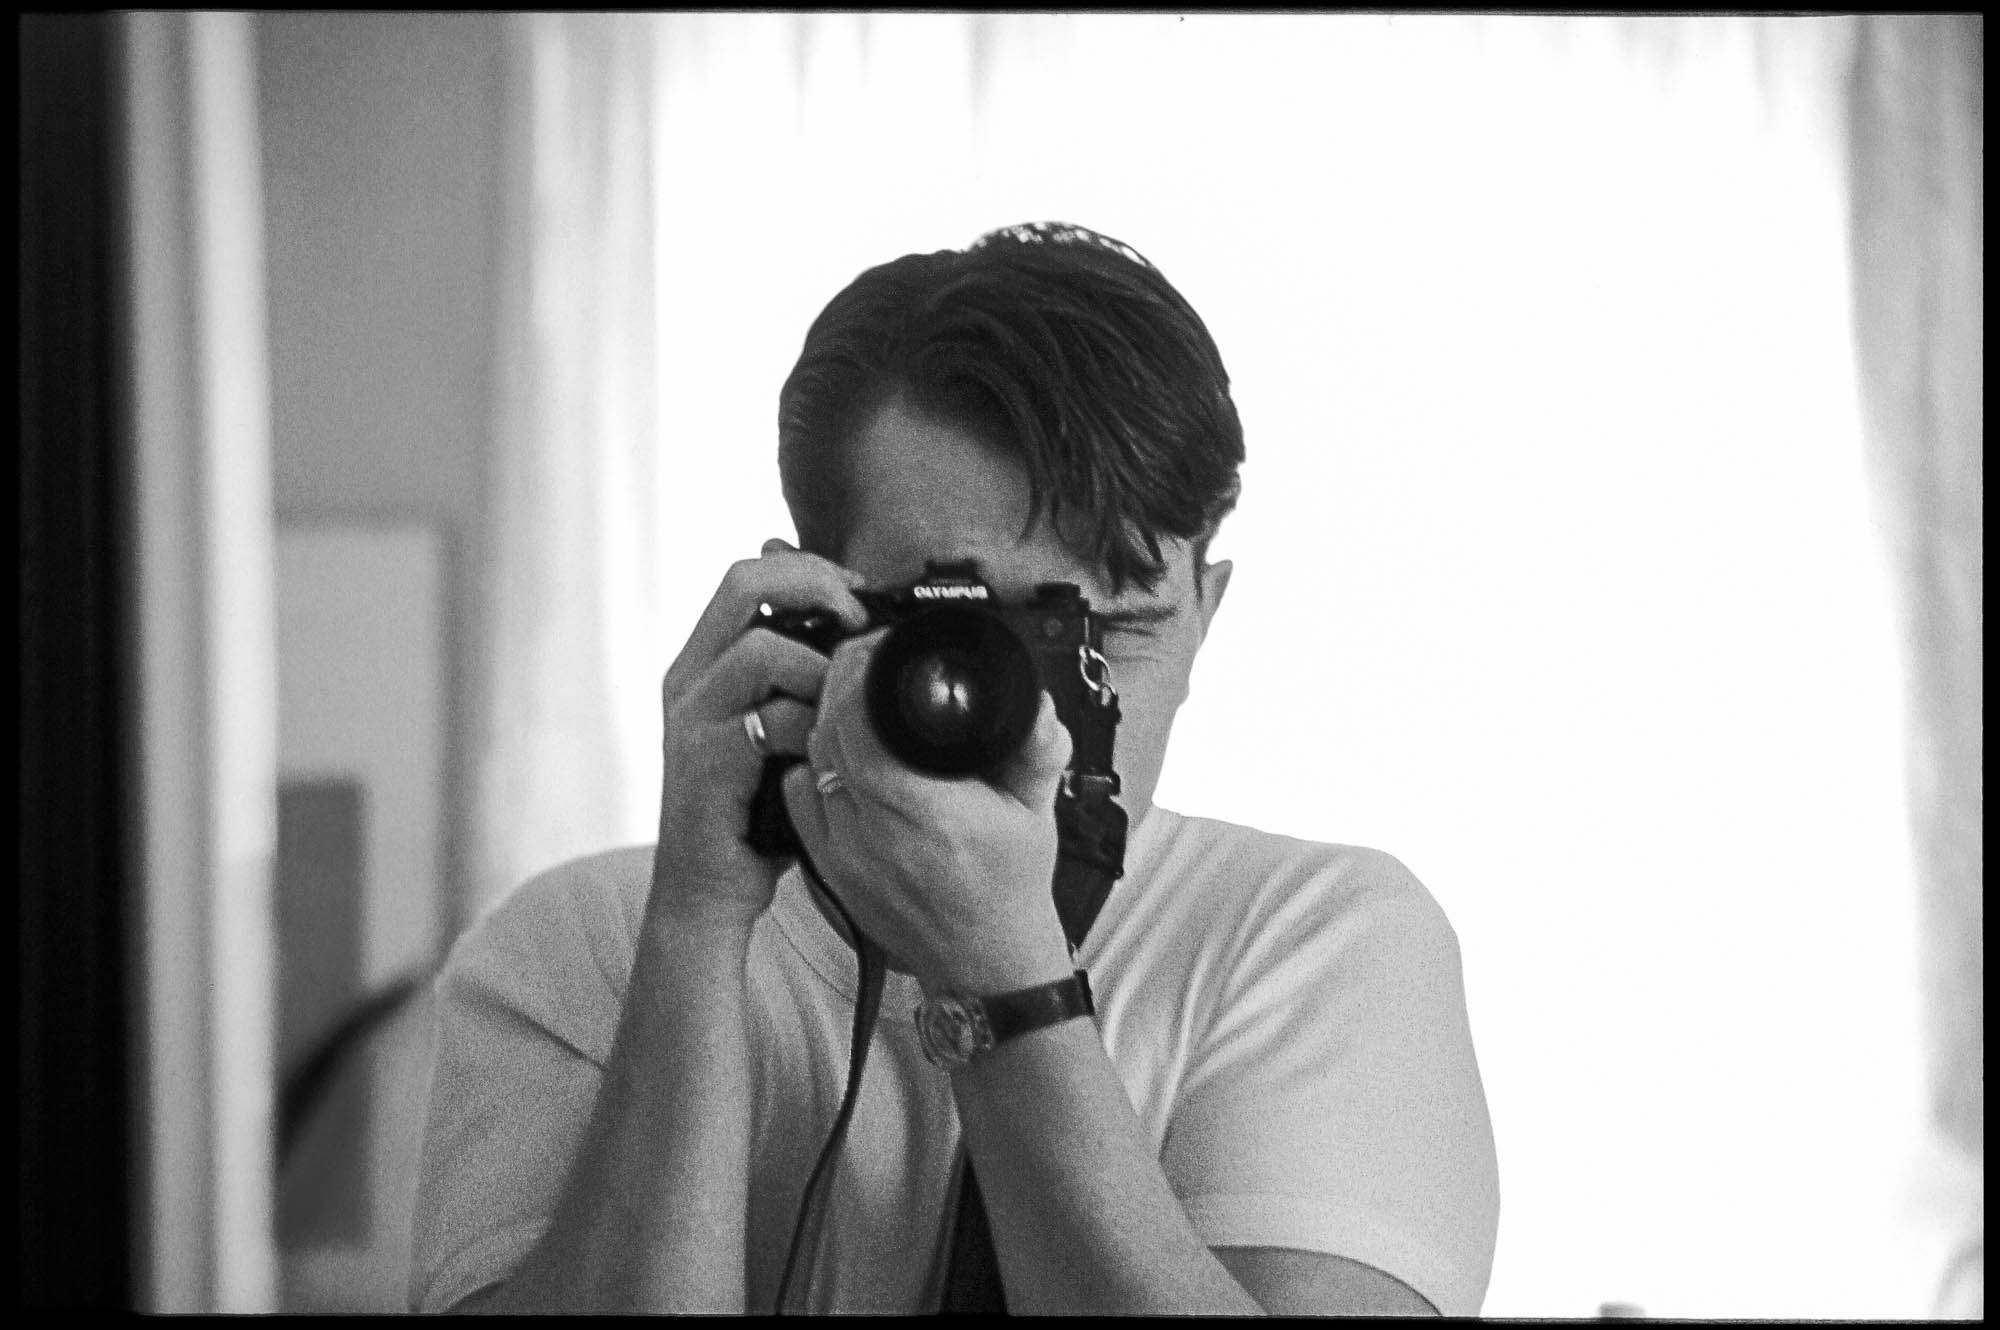
My earliest selfie – taken in September 1987 while I was staying with my in-laws just prior to departing for India and Nepal. The camera is an Olympus OM4 with an Olympus OM Zuiko 35-105mm lens. Originally shot on Ektachrome 200 but converted to black and white because of fading.
I’m of an age where I learning to use a camera meant learning to focus the lens. The first SLR camera I used was my brothers Praktica TL with a Domiplan 50mm f2.8 lens. A combination of a dim viewfinder, a very murky micro prism focusing screen and a slow lens made focusing anything that didn’t stay still a tricky affair. A little while later he upgraded to a fancy Praktica B200 – it had aperture priority, a top shutter speed of 1/1000 sec, and an LED shutter speed display in the viewfinder. It was according to my brother the dogs bollocks. So I borrowed it and his Pentcon 135mm f2.8 lens and went to photograph a rugby match at our local club. I shot two rolls of film (yep I really pushed the boat out) and was bitterly disappointed. I got about 1/2 dozen in focus pictures of the scrums and line outs but all the attempts at capturing the running play were out of focus. Things started to improve once I bought my own camera and lenses. Brighter viewfinder’s, better focusing screens and faster lenses made a huge difference as did constant practice. I stayed with manual focus until 2004 when I was given a Canon EOS 3 and then shortly after I went digital and bought a Canon 300d.
My first DSLR the Canon EOS 300d. It may have had auto focus but it was very primitive compared to what is available today.
The AF system in my Canon DSLRs was certainly good for the editorial photography I was then doing. Changing to the mirrorless M4/3 system was a bit of a shock as their first cameras had contrast detect autofocus which was great for anything that didn’t move, but absolutely pants for anything that did. This was one of the reasons why I didn’t give up on my Canon DSLRs (the other was to do with flash photography). The advent of the Olympus EM1 mk 1 in 2013 brought with it phase detect autofocus and that improved things drastically after a couple of firmware upgrades. A while later I bought a reconditioned EM1 mk 2 and the autofocus was better again. This is what I primarily use for most of nature photography where fast and accurate AF is vital to getting the shot. However, the progress of technology steadily marches on and we now see AI enhanced systems that can identify the subject and even pick out the eye. Initially I was sceptical, especially as those systems were in very expensive flagship cameras, but now I’ve had cause to change my viewpoint.
The Olympus OMD EM1x was the flagship camera of the Olympus m4/3 range when introduced. Twin processors allowed subject recognition autofocus tracking.
I’ve been lucky to get a long term loan of an Olympus EM1x which when it was launched, in 2019,was one of the first cameras to have AI subject recognition, but on release this was limited to motorsports, trains and planes. At the end of 2020 a firmware update added bird detection and it was this that I was keen to try.Before taking it out I watched a few videos on YouTube on how best to set this up for best effect and found that nearly everyone has their own ideas on how to dothis. So I just reset the camera and left it at its default settings as a starting place and I haven’t moved them since. How does it work? Well the short answer is that upon initially recognising a bird the camera places a white rectangle around it. When you activate the autofocus and it locks on it will do one of two things. If the bird is close enough it will place a green tracking box around the head focusing on the eye. If is too far away then it will place the green tracking box on the birds body.
On recognising a bird the camera puts a white rectangle around it.
Activate the autofocus and the camera will focus on the bird’s eye where possible.
When there is more than one bird the camera will put a rectangle around them all.
Activate the AF and it focuses on the nearest or largest bird.
When the bird detect AF firmware was launched it wasn’t well received. There were claims of unreliability and unpredictability. One of the major criticisms was that when there were lots of birds in the frame it would select all the birds, but that is not strictly true because when you activate the AF then it will track the one closest to the camera. The problem arises when all the birds are on the same focal plane. I have set bird AF to C1 of the custom settings with all the AF points active and if this situation arises I switch to C2 which has CAF set at a single point and I can then move that single point with the cameras joystick. It’s quick to change and I haven’t felt that the camera was stopping me take photos. The next criticism is that if the bird is in foliage or against a busy background the camera gets confused and focuses anywhere but the bird. Now when I read that I was a little concerned as I mainly photograph birds in woodland, but after several outings – even in very low light which makes things even harder – I found the camera again copes well and if it does get lost then switching to my C2 setting solves it. What really impressed me was on my first outing with the lens I was walking along the river to find some Nankeen Night Herons and the sun hadn’t quite come up when I spied a little pied cormorant perched in the lee of some trees drying out. It was a very busy background and very dark. The AF latched onto the bird and I managed to get a sequence of in focus shots before it eventually flew off. I’ve encountered similar situations before with my EM1 mk ii and it had a very hard time focusing if at all. Another shot I’m happy with is of a yellow-billed spoonbill flying along the course of the river with a background of trees and foliage. The EM1x’s AF locked onto the bird nicely enabling me to get the shot. Again the EM1 mk ii would’ve struggled in this situation.
Against a busy background in dark conditions the EM1x locked onto this little pied cormorant with no problems.
The AF kept tracking the bird as it flew off.
This is a scenario that would have fooled my EM1 mk ii. The EM1x managed it with aplomb.
Were there any downsides? This is a little unfair, but the bird detection AF didn’t work in video mode, but Olympus themselves said it wouldn’t so I can’t complain. The video AF will sometimes drift rendering your subject out of focus. Again there are remedies such as using manual focus or single AF rather than Contiuos AF. I have shot a lot of video with it and I’m happy enough with the results, but I wouldn’t get this camera for it’s video capabilities as they are quite limited – C4K at 24p, 4K at 24/25/30p, HD at 24/25/30/50/60/100/120p with the last two having no continuous autofocus. The video at the bottom of the page was shot with a combination of the Olympus EM1x with the Panasonic 100-400mm f4-6.3 for the long lens work and an Olympus EM1 mk ii with Olympus 12-40mm f2.8 for the time lapse sequence and the wider shots.
The autofocus wasn’t fooled by birds surrounded by foliage.
Shooting through foliage in low light conditions.
Backlighting didn’t confuse the camera.
Small birds that move erratically, such as this Yellow-rumped Thornbill , were very problematic for my EM1 mk ii, the EM1x handles it well.
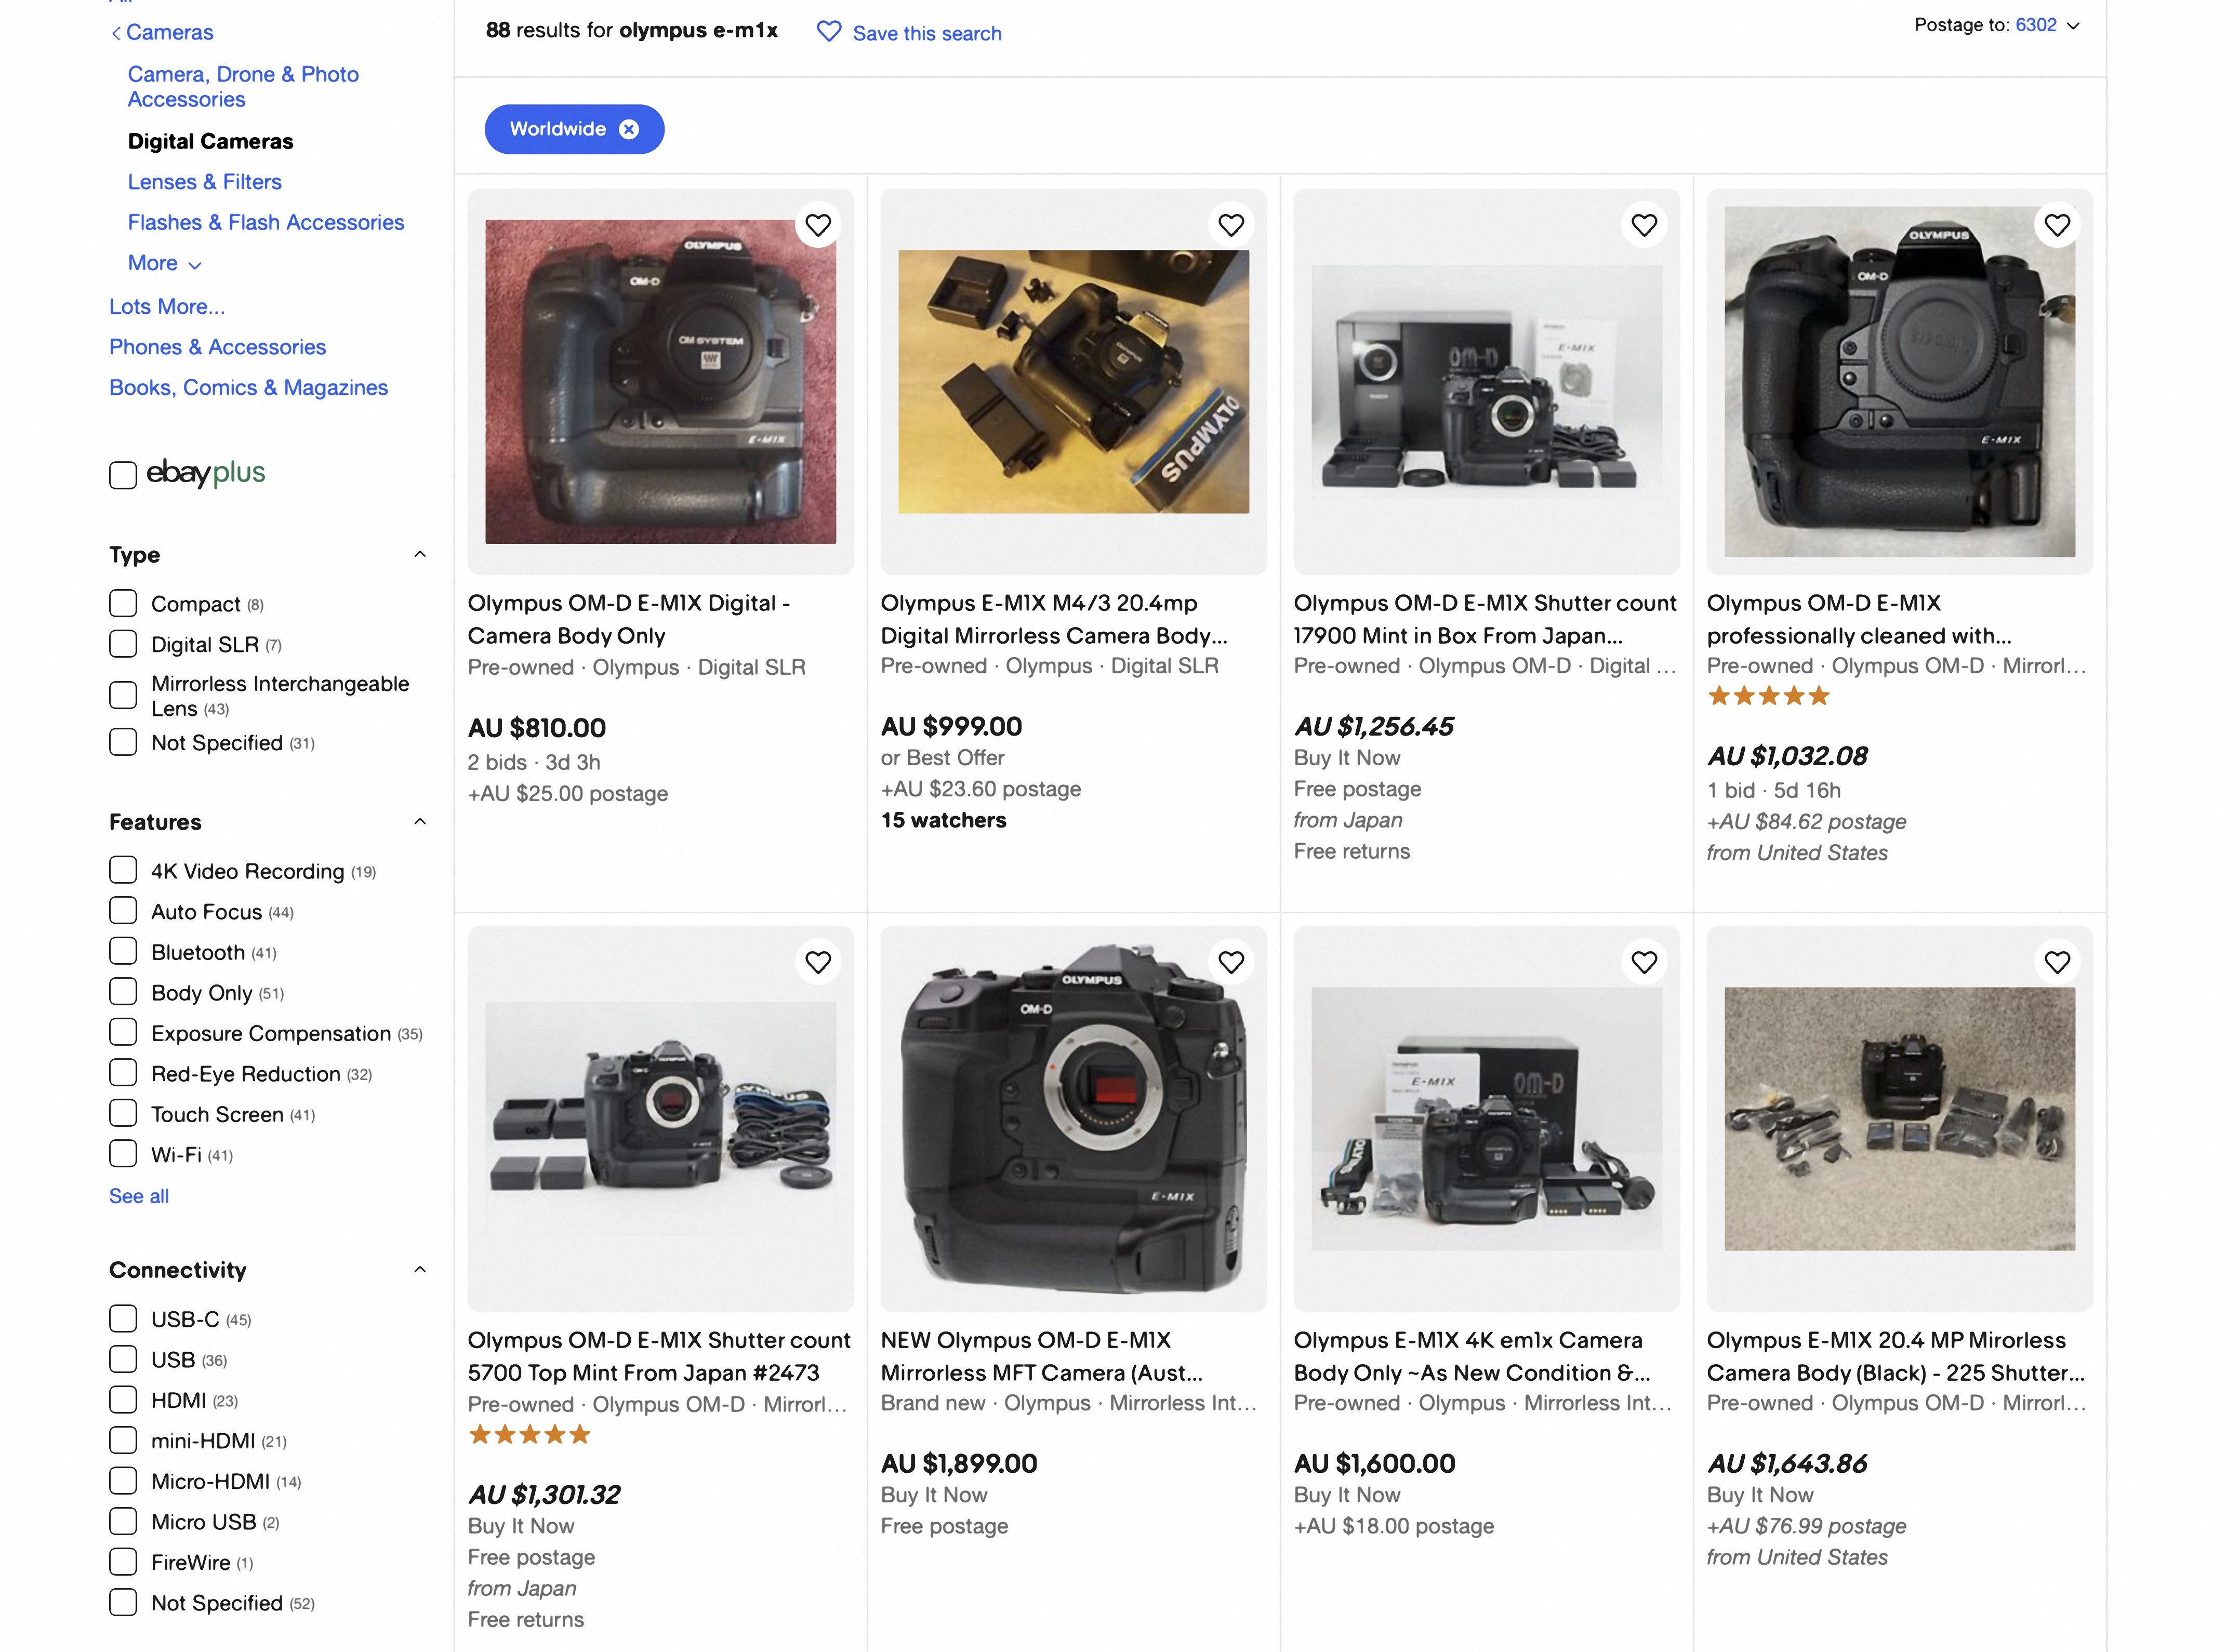
At launch the Olympus EM1x was a much disliked camera. People railed against its size, its price, the sensor and the viewfinder. DPReview complained that the EM1x’s phase detect autofocus was worse than the Panasonic G9’s contrast detect AF. But, if you are a wildlife photographer of limited fiscal means then the EM1x represents terrific value when bought second hand. Cameras with incredibly low shutter counts of just over a 1000 go for around $700USD.That must make it the cheapest available camera with a pro spec and AI autofocus on the used market to date. This leaves me with a conundrum. What do I do when I have to give it back? Do I buy myself an EM1x? Or do I get a second hand OM System OM-1 now that the used price is heading rapidly towards the $1000USD mark. While the OM System OM1 will have better AF, better video capabilities it will require me buying different batteries, a new type of battery charger and faster SD cards all will push the cost up considerably. The EM1x uses the same batteries and cards as my current EM1 mk ii. Decisions decisions.
For wildlife photographers on a budget I happen to believe that micro four thirds (M4/3) has a lot to offer and represents incredible value. The micro in micro four thirds is a reference to the size and weight savings the system brings, it has no impact on the features and performance on offer.
Available Lenses
The Panasonic Leica DG Vario-Elmar 100-400mm f4-6.3 and the Olympus M.ZUIKO DIGITAL ED 75-300mm f/4.8-6.7 II lens are just two of the long lenses available for Micro Four Thirds wildlife enthusiasts.
The M4/3 system is now at the time of writing 15 years old and is, therefore, fully fleshed out. This means that there is plenty available on the second hand market. But, before we consider camera bodies let’s look at lenses first. Both Olympus (now OM Systems) and Panasonic provide a range of long lenses suitable for photographing wildlife. At the budget end there’s the Olympus 75-300mm II f4.8-6.7 and the Panasonic 100-300mm f4-5.6 which represent excellent value. On a M4/3 camera these two lenses have the same angle of view as a 150-600mm and 200-600mm lens respectively when used on a camera with a 35mm full frame sensor at a fraction of the weight and cost. The Olympus 75-300 can be found for around $500 AUD second hand (or $600 new) and the Panasonic 100-300 can be picked up for about $550 2nd hand ($1000 new). This means it is very feasible to put a good kit together for under $1000 AUD which is about $650 USD.
The Olympus 75-300mm lens delivers amazing performance for its price.
In the midrange category both companies offer 100-400mm zooms. The Olympus 100-400mm F5.0-6.3 IS sells for around $1500 2nd hand or $2200 new and the Panasonic Leica Vario-Elmar 100-400mm f4-6.3 sells for around thee $1200 mark second hand or $2200 new. This is for the original version. It has just been updated to make it compatible with tele-converters and will likely retail for around $2600 AUD.These two lenses give an angle of view equal to that of 200-800mm on a 35mm sensor in a very compact package.
Panasonic Leica DG Vario-Elmar 100-400mm f4-6.3 is a premium lens that be picked up on the secong hand market for a fraction of the price of full frame equivalents.
At the top end of town there are two lenses. The Olympus 300mm f4 IS which apparently is a gem of a lens and can be had for approx $2800 on the used market or $4000 new. Then we reach the stratosphere with the Olympus 150-400mmf4.5 IS PRO which retails for an eye watering price of $11500 new. Good luck in finding one new at a dealer as they are in short supply. I have seen a used one on a Japanese dealerswebsite going for $7500 and it was gone within a day.
The Panasonic G85 with the Panasonic 100-400mm lens compared to a Canon 6d with Sigma 150-600mm lens. The Panasonic combo is a fraction of the weight and has more reach.
So out of all these lenses I own the Olympus 75-300 and the Panasonic 100-400. Both of them have been very good, but with some caveats. The major criticism of the Olympus 75-300 is that it is soft at the long end. First I’d like to say get real! This is a budget lens. But, seriously this is a common complaint about zoom lenses especially at the budget end of the market. In my opinion,and based upon the example that I own, it is not as bad as people make out wide open and it improves if you stop down a bit. The pluses are it is amazingly small and light. I did intend to sell it when I got the Panasonic 100-400 but I kept it for those moments when I don’t want to carry the larger Panasonic ie when I’m out walking the dog. The Panasonic 100-400 is an amazing lens and I really enjoy using it. When it was first introduced there were complaints about it having an overly stiff zoom ring and it couldn’t be repaired. I’ve not experienced any problems and have used the lens extensively in all sorts of weather since I got in 2018. My only criticism of the 100-400 is that the lens based image stabilisation isn’t compatible with that of my Olympus cameras’s IBIS.
Click on the image to see full size
Click on the image to see it full size
Click on the image to see it full size.
Click on the image to see it full size
Camera Bodies
The Panasonic G85.
Once you’ve decided upon your lens then you can consider camera bodies. As things are at the time of writing I’ll be looking at the following camera which can be picked up easily second hand. The Olympus EM 1 mk I (approx $400 AUD), the Olympus EM1 mk ii, and the Panasonic G85. I own all three and think they all offer tremendous value for the wildlife photographer on restricted budget.
The Olympus EM1 is a very capable wildlife camera for those on a restricted budget.
Panasonic G85
Olympus EM1
Olympus EM1 mk ii
Year of Introduction
2016
2013
2016
Resolution
16 Mp
16 Mp
20 Mp
ISO range
200-25600
200-25600
200
Boosted ISO
100
100
64 and 100
IBIS
5 axis
5 axis
5 axis
File Formats
RAW and jpg for stills
AVCHD and MP4 for video
RAW and jpg for stills
H.264 and Motion jpg for video
RAW and jpg for stills
H.264 and Motion jpg for video
Auto Focus
Contrast only (DFD)
Multi area
Centre zone
Selective single point
Single AF
Continuous AF
Tracking AF
Face detection AF
Touch screen AF
Contrast and phase detect hybrid system.
Multi area
Centre zone
Selective single point AF
Single AF
Continuous AF
Tracking AF
Face detection
Touch screen AF
Contrast and phase detect hybrid system.
Multi area
Centre zone
Selective single point AF
Single AF
Continuous AF
Tracking AF
Face detection
Touch screen AF
Manual Focus Aides
Focus peaking
Focus peaking
Focus peaking
Focus Points
49
81
121
Maximum Shutter Speed
1/4000 mechanical
1/16000 electronic
1/8000 mechanical
1/32000 electronic
1/8000 mechanical
1/32000 electronic
Exposure Modes
Program, aperture priority, shutter priority, and manual.
22 Creative Control modes.
iAuto, Program, aperture priority, shutter priority, and manual.
22 scene modes and 12 Art filters.
iAuto, Program, aperture priority, shutter priority, and manual.
22 scene modes and 14 Art filters
Built In Flash
Yes
No
No
Dive Modes
Single frame
9 frames per second with the mechanical shutter and continuous AF. Up to 40 fps with the electronic shutter and the autofocus set to single point.
Single frame
6.5 fps with mechanical shutter and continuous AF. 11 fps with single AF and electronic shutter.
Single frame
Up to 18 fps with mechanical shutter and continuous AF. 60 fps with single AF and electronic shutter
Buffer
300 large jpgs,
45 RAW and RAW plus jpgs
50 large jpgs,
34 RAW
117 large jpgs,
84 RAW
Metering Modes
Multi zone, centre weighted and spot metering.
Multi zone, centre weighted, and spot metering.
Multi zone, centre weighted, and spot metering.
Video
4K up to 30 fps
HD up to 60 fps
HD up to 30 fps
Cinema 4k 24fps IPB
4K up to 30 fps
HD up to 60 fps
Storage media
1 x SD card slot UHS-II compatible
1 x SD card slot UHS-I compatible
2 x SD card slot with only 1 UHS-II compatible
Environmentally Sealed
Yes
Yes
Yes
Anti Aliasing Filter
No
No
No
Weight
505g with battery and card
497g with battery and card
574g with battery and cards
Battery CIPA Rating
330 shots
350 shots
440 shots
The Olympus EM1 mk ii is an extremely well specified camera that can be found for less than $1000 AUD on the used market making it somewhat of a bargin.
All three cameras feel good in the hand. The G85 has the easiest to navigate menu system. The Olympus menus cop a load of flack for being labyrinthine but they do allow a phenomenal amount of customisation and once these are set, your custom modes set up, and you use the Super Control Panel (SCP) you shouldn’t have to deep dive them often.
The Panasonic G85 with Panasonic Leica 100-400mm lens makes a very good wildlife video set up.
Which one should you get? Well that depends upon your budget and what you intend to do with the camera. If cash strapped the the EM1 is the one to go for. It’s a beautifully built camera that turns out a great performance. The only place is where it is lacking is video. If you shoot primarily stationary targets and some video capability is important I think the G85 is a great buy. It is only let down by its auto focus the DFD technology Panasonic uses just wasn’t as good for action as phase detection autofocus. Having said that I have used the camera to shoot some wildlife videos – you’ve just got to be patient and pick situations that the camera can cope with. If you’ve got the budget then the EM1 mk ii is the one to get.Not as accomplished in the video department as the G85 but it does produce a solid result and the AF for video and stills works quite well. You’d have to spend quite a bit more money to get better performance.
The Olympus EM1 is a very capable wildlife camera for those on a restricted budget. Pair it with the Olympus 75-300mm lens and you have a compact lightweight, but powerful combination.
Teleconverters are an affordable way of getting longer focal lengths, but with the advent of software such as Blow Up 3, Topaz Gigapixel Ai and Adobe Lightroom’s Super resolution do they still have a place in the wildlife photographers kit bag?
TLDR
The Canon Extender EF 2x ii.
A teleconverter is a tube containing a series of lens elements that goes between the camera body and the camera lens. They commonly come in the following strengths; x1.4, x2, and x3. They work by enlarging the centre part of the image. So for a full frame camera (36 x 24mm) a 1.4 teleconverter magnifies a rectangle of 25 x 17mm and a x2 teleconverter magnifies a rectangle of 18 x 12mm. So while the look like they’re increasing your focal length they are really just cropping your image and magnifying it. In photography the old adage “There’s No Such Thing As A Free Lunch” comes into play a lot, and no more so than here. The penalty for doing this is light loss. A x2 teleconverter looses 2 stops of light and a 1.4 teleconverter looses 1 stop. This is usually expressed in the following way:-
A 300mm f4 lens with a x1.4 teleconverter becomes a 420mm f5.6
A 300mm f4 lens with a x2 teleconverter becomes a 600mm f8
This means that to keep your shutter speed high enough to stop the motion of animals you have to use a higher ISO.
A 300mm f4 lens will make it difficult to photograph small shy animals, while adding a x2 teleconverter will make it an attractive proposition so you can see why they are so popular. Indeed if you take into consideration the cost of long lenses then you’ll see how they can look a screaming bargain. Lets look at the current range of Canon EF lenses for an example:-
The Canon EF 600mm f4 lens costs a whopping $21,000 AUD
The Canon EF 300mm f4 costs $2000 AUD
The Canon EF x2 extender mark iii costs $750 AUD
So for for $2750 you can get a combination that gives you a focal length600mm and saves you $18,250 AUD sounds pretty good, but are you getting the same optical performance? The short answer is no. The in depth answer is somewhat more complicated. When photographing birds in flight (BIF) a shutter speed of 1/2000 sec is the minimum I’d consider. So if were shooting with the 600mm f4 shooting wide open at f4 and an ISO of 1600 for the 300mm f4 plus x2 teleconverter I’d have a wide open aperture of f8 which would mean I’d have to use ISO 6400 which would impact on my image quality by having more noise and less dynamic range.
Remember that I said previously that the teleconverter magnifies the image, well in doing this it also magnifies any optical faults in the lens. Chromatic aberration is magnified – the coloured fringing on high contrast edges looks broader and more noticeable. If your lens isn’t tack sharp it will make it look softer. The more magnification a teleconverter has the more impact it has on the image quality. The perceived wisdom is that if you’re going to use one then the x1.4 varieties have the least impact on image quality and just don’t bother with the x3 ones.
Also remember what I said about light loss – it impacts the autofocus performance. In most cases it will just slow the subject acquisition, but in some cases (dependent on your camera and lens) it mean your camera won’t focus at all. When you put a x2 teleconverter on a lens with an aperture of f4 it becomes an f8 and some DSLRs won’t autofocus with an aperture of f8 and slower. So before you commit to this check your camera manufacturer’s website.
The Canon Extender EF 2x ii is a matched teleconverter and is designed to only fit certain Canon L lenses. Note how the lens elements stand proud of the lens mount.
In the case of teleconverters you really get what you pay for. With the camera manufacturers when they design a teleconverter they do so with only certain lenses in mind and they are designed to become part of the host lenses optical formula. You can see this when you look at the teleconverter as the optics protrude from the body and nestle into a space left for it at the back of the lens. The design goal is that the teleconverter should not cause any optical degradation. They are often described as “matched teleconverters” or “matched multipliers” and they won’t fit any other lens from that manufacturer. Cheap teleconverters are designed to work with any lens with that mount. They don’t have as many lens elements or the lens coatings of the more expensive camera marque models.
Model
Lens construction
Weather sealing
Compatability
Price (Australian Dollars)
Canon EF x2 extended iii
9 elements in 5 groups
Yes
All prime L lenses above 135mm, EF 70-200mm f2.8 L, EF 70-200mm f2.8 IS L, EF 70-200mm f4 L, EF 100-400mm f4.5-5.6 IS L.
$750.00
Viltrox C-AF 2x ii AF 2.0 teleconverter for Canon EF
7 elements in 4 groups
No
All EF mount lenses except EF-S
$154.00
Fotodiox Pro Autofocus 2x teleconverter for Canon EF
4 elements in 3 groups
No
All EF mount lenses except EF-S
$100.00
Luckily Canon and Nikon have been making teleconverters for years so there are plenty on the secondhand market. Canon, for example, have since 1987 produced three versions of the x2 teleconverter. Their x1.4 teleconverters have been in production since 1988 and there are also three models. The first versions were pretty lacklustre but the mark ii was considerably better and can be had for around $300 AUD. The mark iii has even better performance and can be had for around $500 AUD. If you have a Sigma or Tamron lens they have also produced matched converters for some of their lenses. My Sigma 150-600mm f5-6.3 DG OS Contemporary is compatible with the Sigma Teleconverter TC-1401, which is weather sealed and will allow autofocus up to f8. So check the website of your lens’ manufacturer to see what is compatible.
I know the mist isn’t helping image quality here and nor is shooting 400ISO film, but the x2 teleconverter had a big impact on image quality. Dal Lake, Kashmir, India.
Working elephant heading off to work in the early morning mist in Chitwan National Park, Nepal.
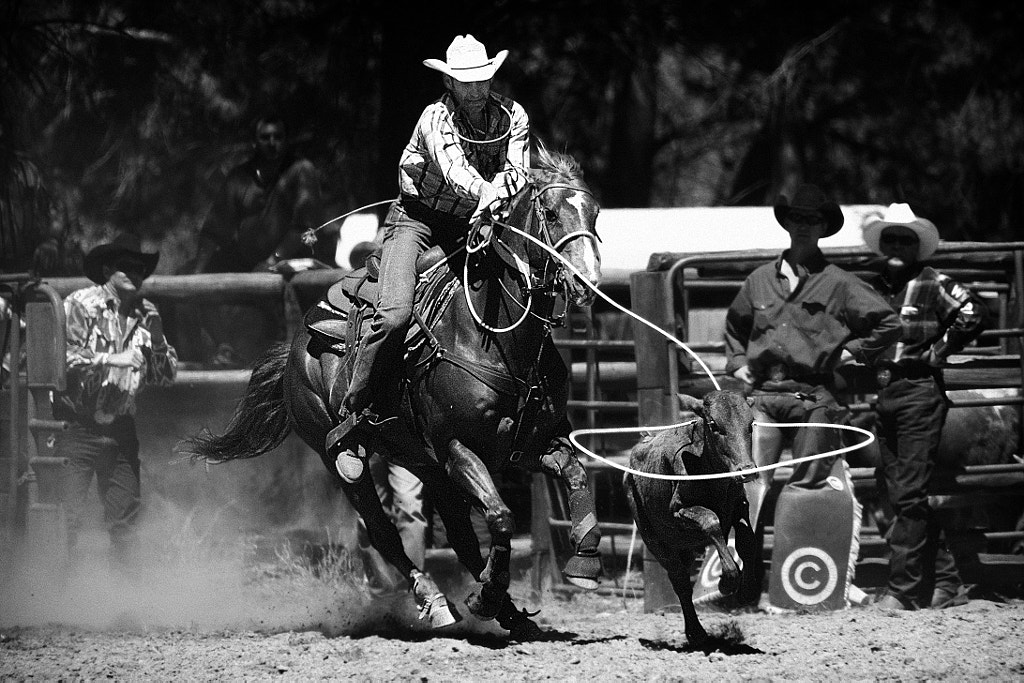
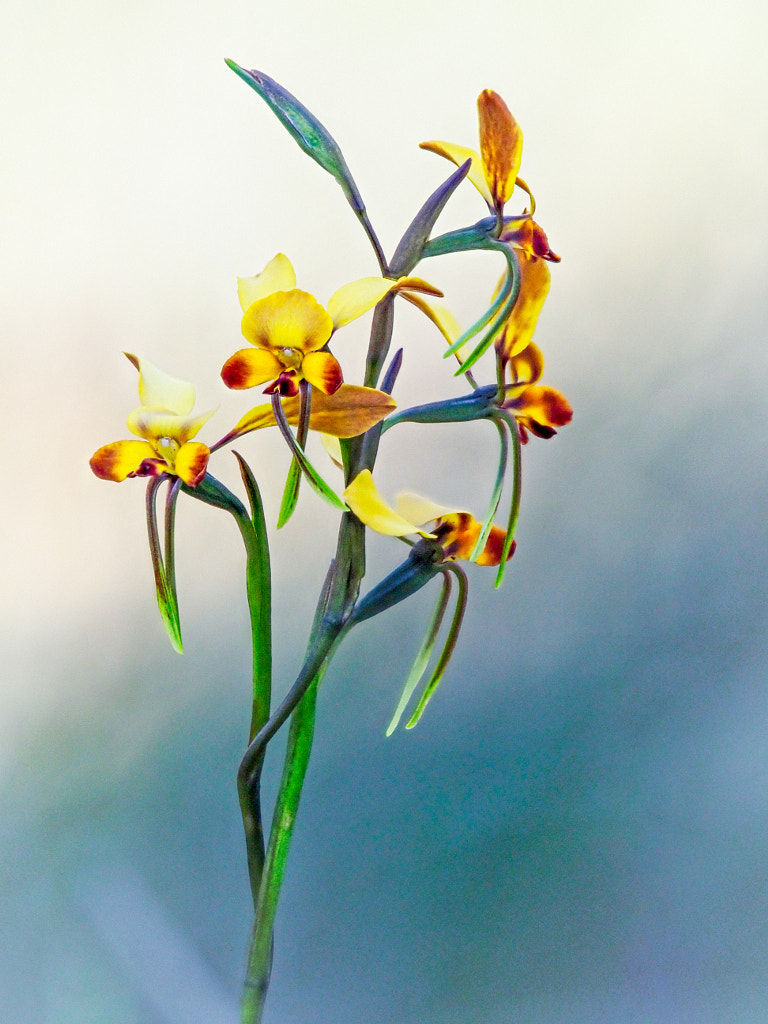
My own history with teleconverters goes back to the late 1980s. I was heading off to back pack around India and Nepal for a year and wanted to take only two lens – a 35-105mm and a 75-210mm. Virtually couple of days before we were due to head off I went to my local camera store to pick up the 200 rolls of film I’d ordered and I thought I’d get a x2 teleconverter to give me a bit more reach when in the National Parks. So I bought a Vivitar x2 teleconverter for £25 and set off without knowing what I’d actually bought. When I got back and processed the film I was shocked to see how soft the images taken with it were. It was as if someone had used a belt sander on the front lens element. What I’d done is put a bad teleconverter on a mediocre zoom lens. This was the experience of a lot of people at the time and it was why teleconverters got such a bad reputation. In 2004 I started a project photographing the Western Australian rodeo scene and I decided to get a Canon 100-400mm lens to help with this. At the time they were like hens teeth in Australia and my dealer suggested getting a Canon x2 converter for my Canon EF 70-200mm f2.8 IS L lens. I was very skeptical because of my previous experience, but the sales person said if I wasn’t happy with the results I could bring it back and get a refund. When I looked at the first images taken with it I couldn’t believe how sharp they were. This convinced me when I changed to the Olympus micro four thirds system to get the Olympus x1.4 teleconverter to go with the 40-150mm f2.8 lens. I use that combination a lot to photograph wild flowers and I’m extremely happy with it.
Taken on the Canon 5d with Canon EF 70-200mm f2.8 IS L lens with x 2 teleconverter at 400mm f5.6.Steer roping competition. Boddington Rodeo, Western Australia.
Taken with an Olympus OMD EM 1 mk ii with Olympus m.Zuiko 40-150mm f2.8 and a x 1.4 Olympus teleconverter at 210mm f4. Winter donkey orchid, Diuris brumalis. Woottating, Western Australia.
Since then, however, a new alternative has come up and that is using AI powered software to enlarge images. Exposure Software’s Blow Up was one of the first, Topaz Labs has Gigapixel AI which are plugins for Photoshop and Lightroom. Adobe now has Super Resolution as part of its Enhance function in Lightroom. GigaPixel is $99 USD, Blow Up is $125 AUD and Super Resolution comes with your Lightroom subscription. So do these make teleconverters obsolete? If you want the best image quality should you even use any of these options?
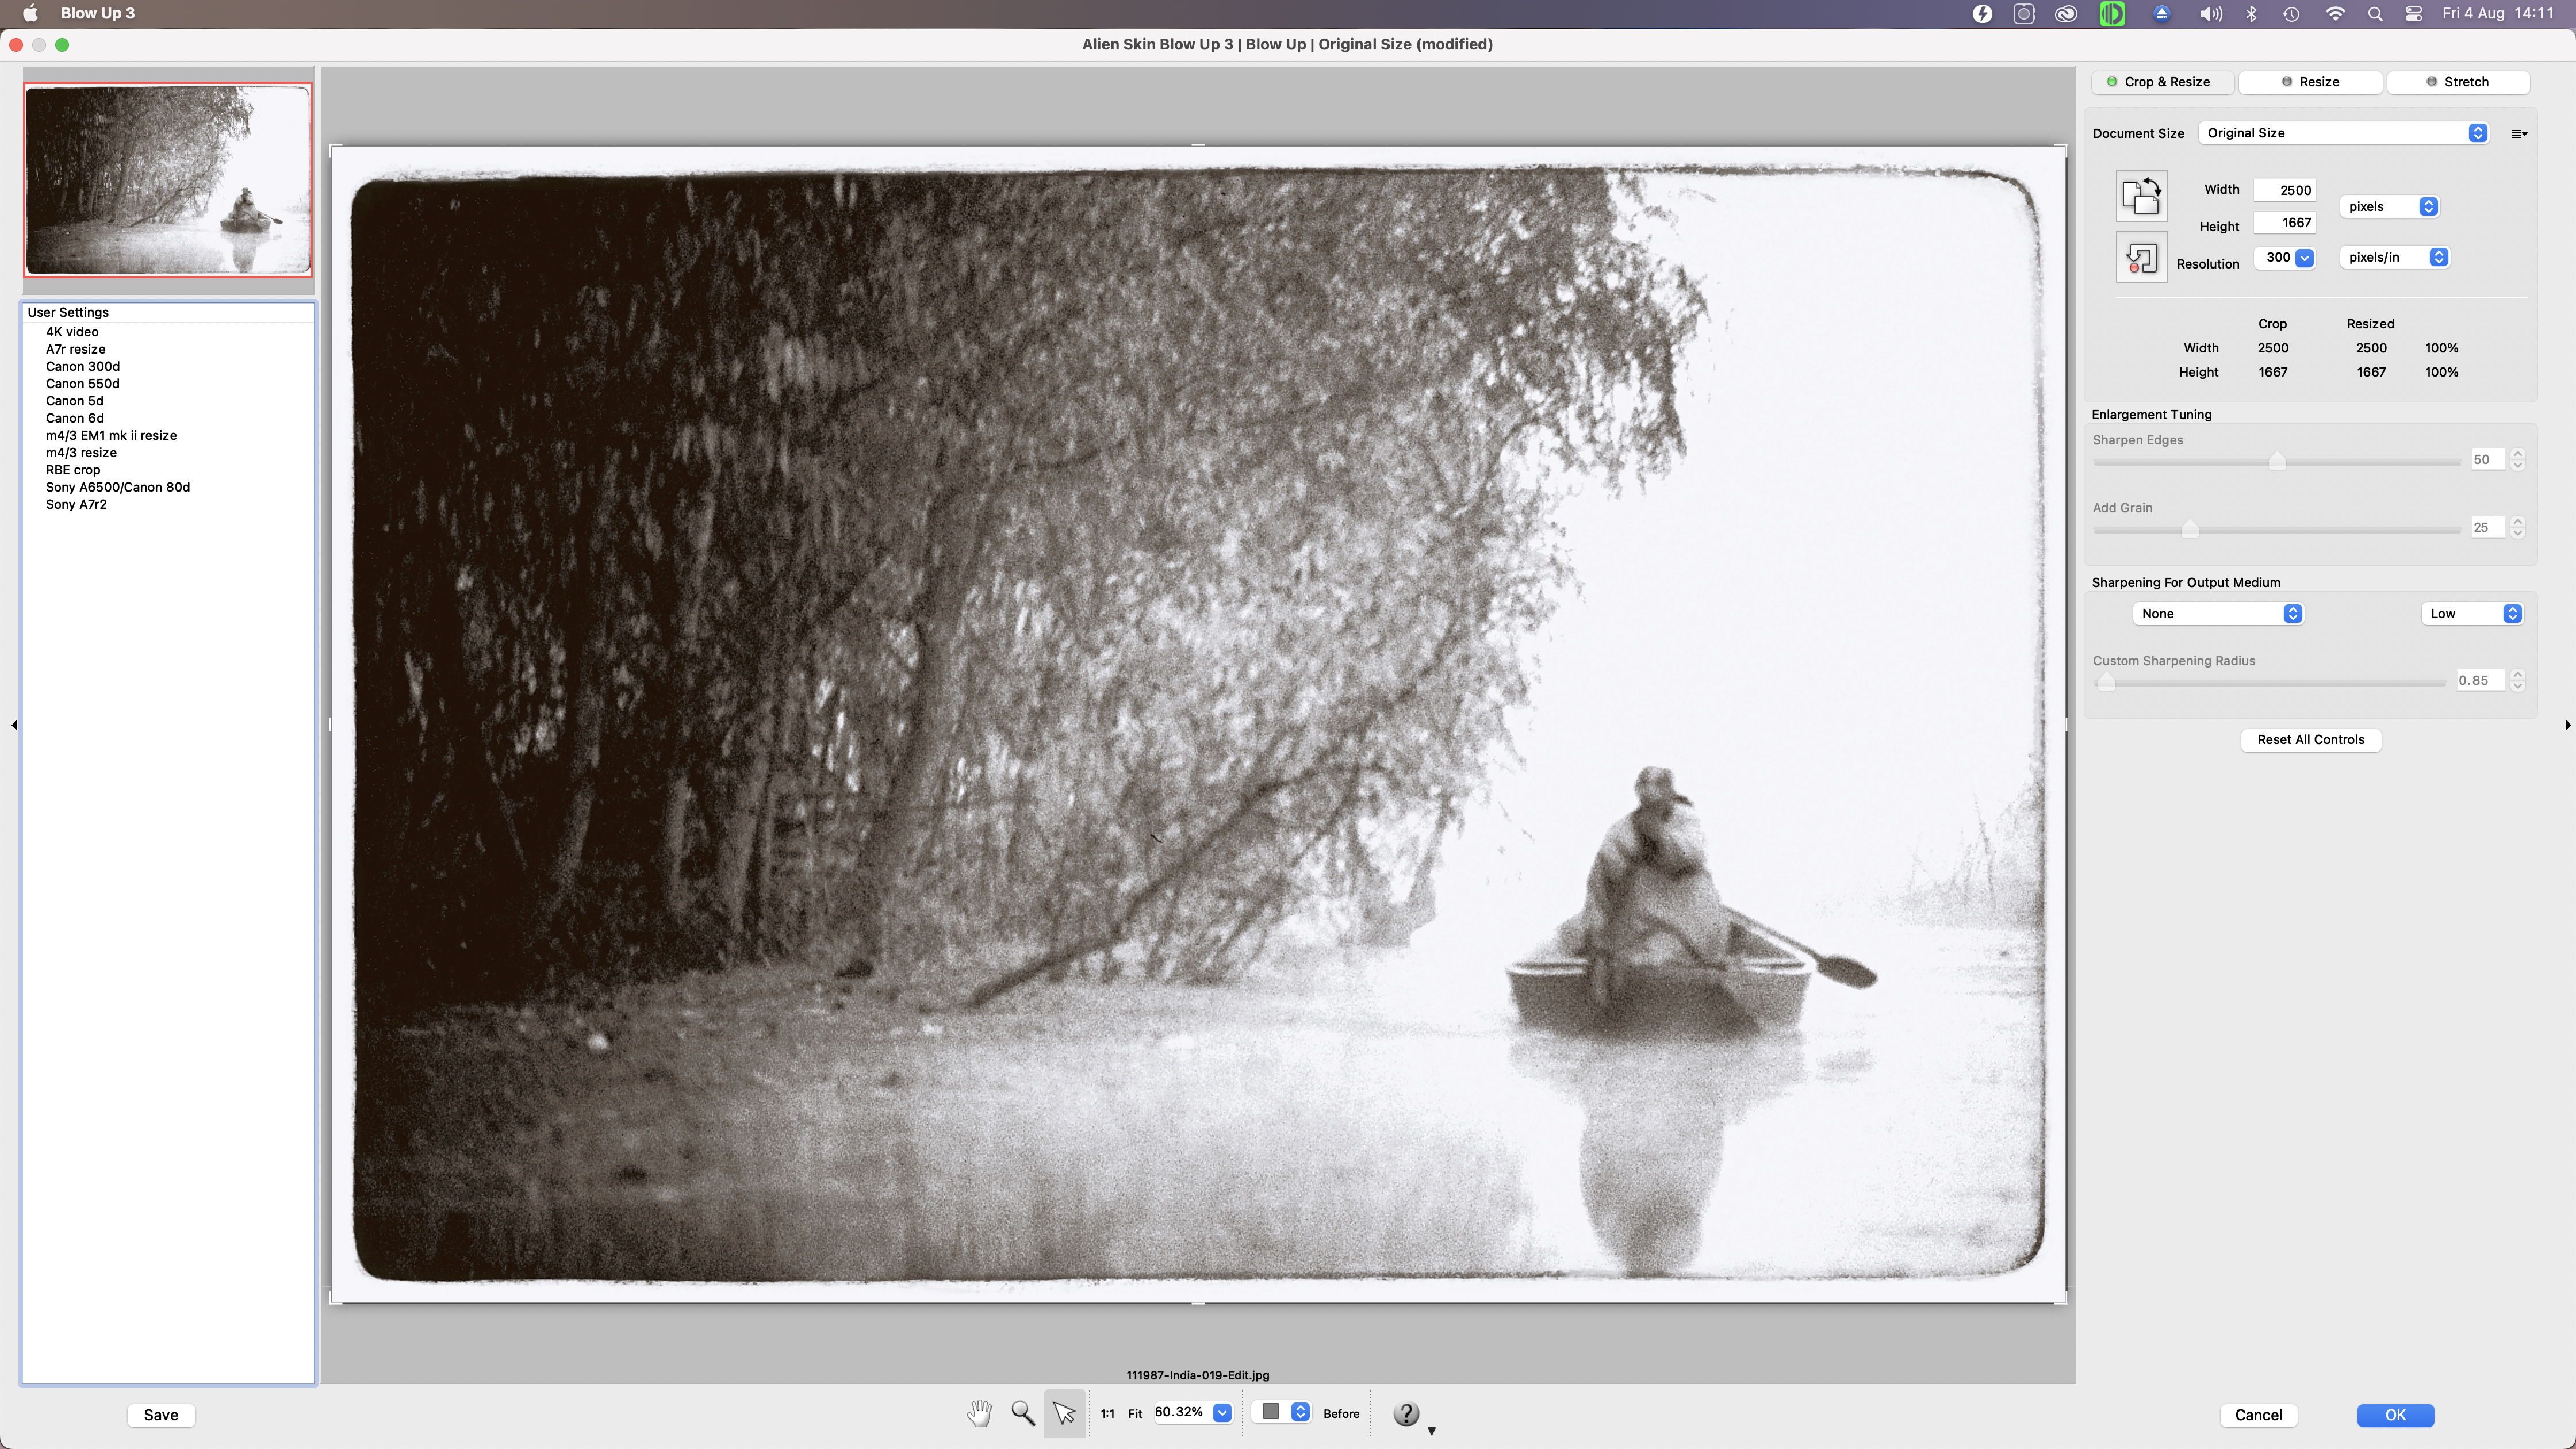
Blow Up 3 is one of several apps that can enlarge, and selectively crop and enlarge images with apparently no loss in image quality.
Lightroom Super Resolution is a part of its Enhance function in Lightroom.
The test will take a Canon EF 70-200mm f2.8 IS L lens and test it with the canon EF x2 extender ii and compare it to images taken without the converter, and then without the converter but enlarged using Blow UP and LightRoom Super Resolution. Then I’ll test the Olympus 40-150mm f2.8 Pro lens in the same way but using the Olympus m.Zuiko Digital 1.4 x Teleconverter MC-14.
Canon EF 70-200mm f2.8 IS L and Canon EF x2 Extender ii
The Canon Extender EF 2x ii shown next to the Canon EF 70-200mm f2.8 IS L lens. The extendinded lens leement of the converter are designed to be placed inside the body of the lens.
Canon EF 70-200mm f2.8 IS L with and without a teleconverter comparison using a lens chart wide open.
Canon EF 70-200mm f2.8 IS L with and without a teleconverter comparison using a lens chart f5.6.
First off we’ll look at the lens sharpness chart. Wide open with out the extender the centre of the chart is a little soft and is lacking contrast. When adding the teleconverter the results are a little softer. Stopping the lens down to f4 and f8 (with the extender) the results are better with a bit more sharpness and contrast. The shot without the teleconverter is still sharper than the one with. Finally two stops down from wide open is generally considered to be where optimum performance is found and here we see that f11 the 70-200 and teleconverter have attained their best result, but it is still softer and has less contrast than the 70-200mm on its own.
Comparing images taken with the Canon 70-200mm f2.8 IS L using a teleconverter, Blow Up 3 and Lightroom Super Resolution.
Lens charts don’t really tell the whole story so we’ll look at the results we got with Gazza the Galah. The camera was set to aperture priority at 100 ISO and the aperture was one stop down from wide open (f4 and f8 respectively). The photos were all taken from the same position with the camera on a tripod, and the results are interesting.
Obviously in the shot with the teleconverter Gaza is larger, and that is what we wanted to see.
The bokeh in the shot with the teleconverter looks smoother and more pleasing. All we are seeing is the magnification of the out of focus areas and it makes appear smoother.
The shot without the teleconverter has more fine detail.
The shutter speed without the teleconverter was 1/200 sec and with 1/50 sec so a light loss of exactly 2 stops.
Just as an afterthought I decided to see how this all stacked up against the Sigma 150-600 at 400mm. The Sigma delivers a much better performance that the Canon 70-200mm with teleconverter so no surprise there.
Comparing the image quality from the Canon 70-200mm f2.8 IS L lens with x2 teleconverter against the Sigma 150-600mm Contemporary set at 400mm.
Next I took the shots taken with the 70-200mm without the teleconverter and put them through Blow Up and Super Resolution and in both cases the results from the lens with the teleconverter were better.
Olympus m.Zuiko 40-150mm f2.8 with Olympus 1.4 Teleconverter MC-14
The Olympus MC-14 teleconverter.
Like the Canon Extender x2 the Olympus MC14 is designed to be used by a few of the Olympus Pro lenses, and they have room for that protruding lens assembly of the teleconverter to fit inside the lens body.
I basically ran the same tests as above and found that the Olympus combination was very consistent in that the teleconverter had only a marginal impact on image quality.When compared to a shot taken with Panasonic Leica 100-400mm set to 210mm the 100-400 resolves more fine detail.
Olympus 40-150mm f2.8 Pro with and without a teleconverter comparison using a lens chart with the lens wide open.
Olympus 40-150mm f2.8 Pro with and without a teleconverter comparison using a lens chart with the lens at f5.6.
Comparing the image quality of the Olympus 40-150mm f2.8 pro lens with the results from the Olympus x 1.4 teleconverter, Blow Up2 and Lightroom Super Resolution.
Comparing the image quality from the Olympus 40-150mm f2.8 pro with 1.4 x teleconverter with the Panasonic Leica 100-400mm lens at 210mm.
Looking at the results when run through Blow Up and Super Resolution we see that the results from the teleconverter were a tiny bit better with more micro contrast. The image produced by Lightroom’s Super Resolution look over sharpened withmoirés evident and artefacts in the shadow areas. The shot for the lens and teleconverter looks more pleasing.
Conclusion
The software solution was very disappointing and I would not go out of my way to buy Blow Up or Topaz Labs Gigapixel Ai. The Lightroom Super Resolution comes as part of Lightroom and I would only use it in dire situations.
The results from the teleconverters showed that they are worth having, but they won’t give the best image quality. This really depends upon three things:
The quality of the lens
That you are using a matched teleconverter
The magnification of the teleconverter. 1.4 teleconverters have less impact upon image quality than x2 teleconverters.
The best results were naturally from the lenses without teleconverters.
For the budget conscious photographer who has a good quality lens then it is certainly worth trying a matched teleconverter if you can’t afford a longer lens.
This is the second part of an ongoing series called “Birds On A Budget”. It really should be “Can You Do Wildlife Photography On A Limited Budget?”, but that’s not as catchy or succinct.
TLDR
When looking for secondhand cheaper alternatives for wildlife photography it is all too easy to get preoccupied with specifications sheets without looking at the whole picture. It can mean that just because Camera X does have a specific feature that Camera Y has then it must be inferior. Well let’s look at an example.
The cameras I’ve chosen to look at are the Canon EOS 80d and the Sony A6500. Both were introduced in 2016, both have 24Mp sensors, and both can be found second hand for about the same price. The 80d is a DSLR and is probably considered retro-tech now and the A6500 being mirrorless is seen as the more up to date technology. Let’s see how the specs compare.
Sony A6500
Canon EOS 80d
Introduced
December 2016
February 2016
Resolution
24 Megapixels
24 Megapixels
Camera type
Mirrorless interchangeable lens camera
DSLR
Sensor size
APSC (23.5 x 15.6mm)
APSC (22.5 x 15mm)
In Body Image Stabilisation
Yes
No
ISO range
100-256,000 which can be extended to 512,000
100-16,000 which can be extended to 25,600
Dynamic Range
13.67 EV
13.17 EV
Autofocus
425 AF points covering the whole sensor.
On sensor phase detect AF supplemented with contrast detect AF.
Multi area, centre zone and single point modes.
Tracking
Single AF
Continuous AF
Face detection
Live view
45 AF points clumped in the centre of the frame when using the optical viewfinder
Phase detect AF
Multi area, centre zone and single point modes
Tracking
Single AF
Continuous AF
Face detect in live view only
Live view AF with ‘Dual Pixel CMOS AF’ which means every pixel can be used for phase detect auto focus
Rear LCD panel
Tilting 3 inch touch screen with 921,600 dots
Fully articulating 3 inch touch screen with 1,040,000 dots
Viewfinder
Electronic viewfinder with 100% coverage with 1.07 magnification (0.71 x 35mm) and 2,359,296 dots.
Optical viewfinder with 100% coverage at 0.95 magnification.
Shutter speed range
30 sec – 1/4000 sec
30 sec – 1/8000 sec plus ‘B’
Built in flash
Yes
Yes
Flash synchronisation speed
1/160 sec
1/250 sec
Frames per second
11 frames per second in both mechanical and electronic shutter modes with no live view and 8 fps with live view.
7 frames per second using the optical viewfinder and 2.4 fps when using live view.
Buffer
100 frames in RAW or RAW + jpg
300 frames in jpg only
When using the optical viewfinder:
Unlimited frames at 7fps in jpg
24 frames in RAW
20 framesin RAW and jpg
When using live view:
Unlimited in jpg
Unlimited in RAW
36 images in RAW + jpg
Metering modes
Multi-zone
Centre weighted
Spot
Highlight weighted
Multi-zone
Centre weighted
Spot
Video
Available codecs AVCHD, XAVCS, H264, MP4
4K (3840 x 2160) 30p, 25p, 24p
HD (1920 x 1080) 120p, 100p, 60p, 50p, 30p, 25p, 24p
Available codecs MPEG-4, H264 with a choice of all I or IPB
HD (1920 x 1080) 60p, 50p, 30p, 25p, 24p
Storage
SD card (UHS-1)
SD card (UHS-1)
Connectivity
USB 2.0 (480 Mbit/sec)
3.5mm microphone port
Micro HDMI
WiFi – 802.11b/g/n + NFC
Remote control via a smartphone
Tethered shooting to a computer
USB 2.0 (480 Mbit/sec)
3.5mm microphone port
3.5mm headphone port
802.11/b/g/n with NFC
Wired remote control
Remote control via a smart phone
Tethered shooting to a computer
Battery
NP-FW50 battery with CIPA rating of 350
LP-E6N battery with a CIPA rating of 960
Weather sealing
Yes
Yes
Construction
Magnesium alloy
Composite construction with an alloy chassis with plastic shell
Weight
453g
730g
Dimensions
120 x 67 x 53mm
139 x 105 x 79mm
Other functions
Inbuilt Timelapse function
On the whole the Sony seems the better camera as it has an electronic viewfinder that provides realtime exposure feedback, better video capabilities, better ISO range, better dynamic range and In Body Image Stabilisation (IBIS) all in a smaller and lighter package.
Sony A6500 real world usage
The A6500 body is not overly small, but the button and dial placements leave a little to be desired. There are twin control dials but they are both on the rear of the camera meaning your thumb has to do double duty. To me the lack of a front dial around or near to the shutter button is a big handicap. Now when it comes to using Sony cameras this is not my first rodeo. I have an A7r and A7r ii so I am quite familiar with the idiosyncrasies of the menu system. But, having said that I still find them labyrinthine and illogically laid out and the paucity of physical buttons and dials means that menu diving on the A6500 is quite frequent.
There is only one SD slot on the A6500 and although I prefer 2 slots it is not a big consideration. The SD card slot is located in the battery compartment and this is major pain. Even when shooting handheld it is fiddly to change cards and shooting on a tripod makes it downright frustrating. Often I find myself having to take the battery out to access the SD card. Speaking of the the battery compartment the battery in itself is hopeless. If I go out for the day shooting photos then I have to take 2 spares and if I intend to shoot any video I take at least 4. Luckily they are readily available and reasonably priced.
The LCD EVF on the left side of the body is good – for its time it is nice and detailed while being responsive. The rear LCD is of the flip up variety. I prefer the fully articulated type but it’s no big deal and I can work with both. The quality of the screen is abysmal – it is very hard to see in bright sunshine and it becomes very dim when shooting 4K video making it all but useless. Sony claims it is a touch screen but it is very limited in function. It can only be used for selecting AF points and nothing else and the implementation of that is pretty poor as it is laggy when working well and down right unresponsive when it isn’t. I’ve been in situationswhere I’m repeatedly touching the screen and the focus point is not moving meaning I’ve lost the shot.
Speaking of autofocus it works very well. Having AF points spread over the whole sensor is great which means you can really concentrate on composition. The AF is very quick and locks on moving subjects. Another nice feature is that you can link spot metering to the active AF point. The electronic shutter is another feature that I really like and although the rolling shutter is quite pronounced when shooting moving subjects I like to use it with shy wildlife as it means I won’t disturb it. In Body Image Stabilisation (IBIS) is fantastic. While not as good as that on other cameras I’ve used (Olympus and Panasonic) it works well and is very welcome when shooting handheld video.
Image quality is impressive. Shooting RAW the files are very malleable in processing as long as you get your exposure right. The high ISO performance is quite impressive and the dynamic range is such that I don’t feel the need to blend exposures to get details in the shadows and highlights when shooting scenes with a high subject brightness range. When shooting video the story is a little complicated. The 4K is nice and detailed and looks very good, but it is only 8-bit and so can’t be pushed too much in post. The provision of flat profilesSLOG 2 and 3 is good to have when shooting contrasty scenes outside. Shooting HD the footage is softer and doesn’t look so good. It’s OK but I prefer to shoot 4k and downsize to HD on export. Focus peaking, zebras, and a live histogram are features that make shooting video easier and it is good to see them on the A6500.
All these points are well documented so why did I get the A6500? Well I’d switched from Canon full frame cameras to a Sony A7r ii a couple of years ago and I’ve really enjoyed the whole experience. Initially I was using adapted lenses but gradually I switched over to native Sony EF mount lenses with the exception of my 150-600mm. Just for giggles I started doing some bird photography with the A7r ii and I found myself using the crop mode a lot which gave me a 15 Mp image. After 18 months of doing this I thought well why not get a second hand A6500 and have a quicker camera that has electronic shutter and more importantly has 24 Mp. I was also toying with the idea of shooting more wildlife video and the A6500 fit the bill for that as well. Overall I persevere with the A6500 because I like the final image, but it is a real effort as I just find the camera so awkward to use.
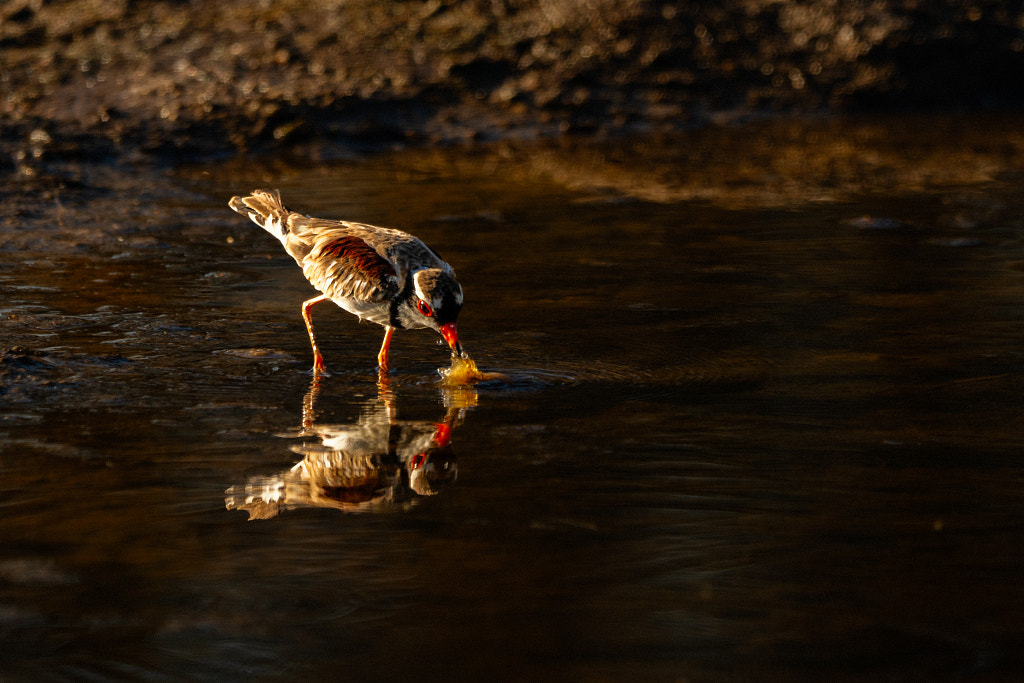
Nidoolyorong or Black-fronted Dotterel (Elseyornis melanops). Monger’s Crossing, York, Western Australia. Sony A6500 with Sigma MC-11 and Sigma 150-600mm f5-6.3 OS lens.
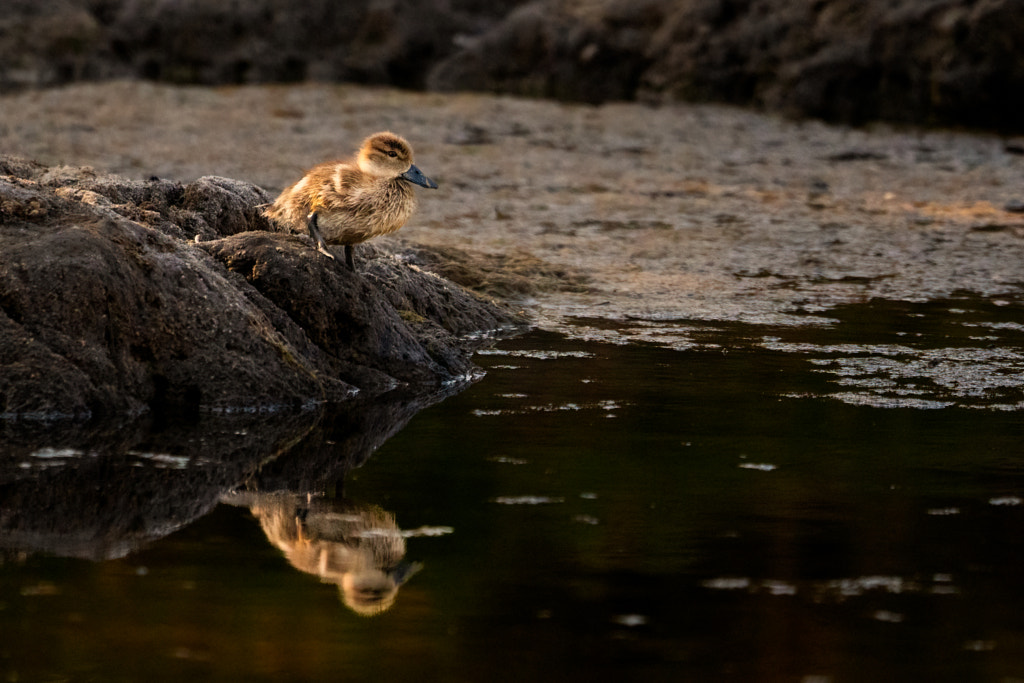
Pacific Black Duck (Anas superciliosa) duckling. Avon River, York, Western Australia. Sony Alpha a6500, Sigma MC-11, Sigma 150-600mm f/5-6.3 DG OS HSM Contemporary.
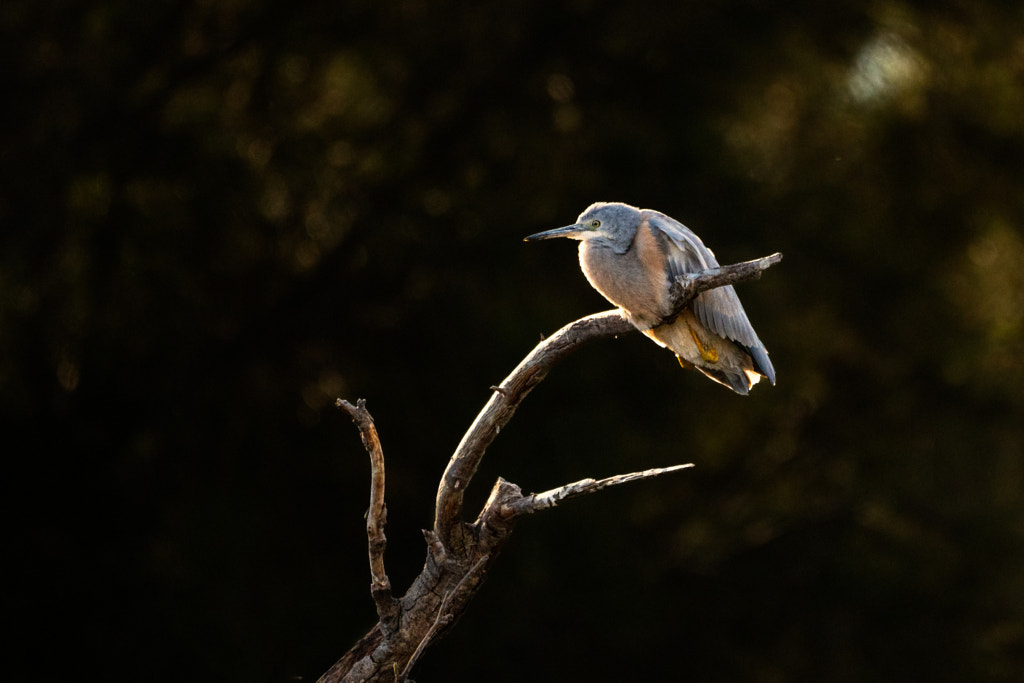
A juvenille White-faced Heron (Ardea novaehollandiae) roosting in a dead sheaoak tree. Monger’s Crossing, York, Western Australia. Sony A6500, Sigma MC-11 and Sigma 150-600mm f5-6.3 OS lens.
Canon EOS 80d real world use
During the later part of the Film Age (1822 to 2000) I used Olympus OM4s, but by 2003 I could no longer get them repaired and my father-in-law generously gave me a Canon EOS3 SLR. Whenever I pick up any Canon camera from the EOS 650 introduced in 1987 to the Canon EOS 5d iv introduced in 2016 I feel immediately familiar with the control layout, the handling and the operation of the camera. Canon, for all their faults, of which there are many, has always produced well sorted nice handling cameras. The 80d is no different. The camera fits perfectly in the hand, the buttons and dials are well laid out and intuitive to use. This attention to the user experience extends to the camera menus which are simply and logically laid out.
Like the Sony A6500 there is only one card slot, but it is positioned on the side of the handgrip behind its own door. It is easy to access under all scenarios. The battery is the venerable Canon LP-E6 and it lasts forever. Sure this is partly down to the fact that SLRs draw less power than mirrorless cameras, however, it is also gutsier at 7.2V, 1800mAh and 13Wh compared to 7.4V, 1080mAh and 7.3Wh of the Sony NP-FW50 which is in the A6500. The upside of this is that I’ve rarely used more than one battery for a full day of shooting.
The optical viewfinder is nice and large and clear. Although I now prefer EVFs because of the realtime exposure feedback the 80ds viewfinder is very pleasant to use. The rear LCD screen is of the fully articulated flippy flappy type which I really like not just for shooting video but also for shooting landscapes and macro in the vertical orientation.The screen has a teensy-weeny bit more resolution than the A6500s, but more importantly it is bright and clear when using in bright sunlight. It is also a touchscreen– you can control the camera, go through the menus and review images with it. While there is no joystick to select autofocus points you can use the screen to do this and it is responsive. While we’re talking about autofocus it helps to view it as two cameras in one body. Using it as a SLR with the optical viewfinder the 45 AF points are all centrally grouped. If when composing an image your subject is outside of that area then you have to focus and recompose. The autofocus is quick and with a well calibrated lens very accurate. When using the rear LCD screen in “Live View” the performance is like a mirrorless camera with every pixel on the sensor doing double duty as an AF point. The 80d has face detection that works well. Although how responsive this is will depend on the lens – those with STM motors work the best. I did consider just using the camera in the live view mode but there is a significant performance hit with the maximum frames per second of 7 reduces to 2.4. I also find it hard to track birds using the rear screen and a super telephoto lens. Another much missed feature is In Body Image Stabilisation so you have to depend upon the IS in the lens if it has it.
The image quality is good – a real leap up from the 18Mp sensor that Canon seemingly used forever. But with that said it is not as good as that in the A6500. The dynamic range of the Canon 80d is 13.17EV as opposed to the 13.67EVof the Sony as measured by DXO. The amount is paltry and in real life terms negligible. If we look at ISO performance and particularly noise then both cameras are fairly equal up to ISO 800. At 1600 the A6500 is about a stop better and at 3200 is 1 1/2 stops better. The highest maximum native ISO on the 80d is 16,000 and this can be extended to 25,600. The A6500 tops out natively at 256,000 which can be extended by a stop to 512,000. In reality the highest ISOs on both cameras aren’t much chop, on the 80d the furthest I’d go is 6400 and the A6500 can be used up to 12800. But having said this I am using Topaz DeNoise AI to clean the images up. Your tolerances to noise maybe a lot lower than mine. If you shoot RAW colour output is pretty much the same, you should be able to get the results you want in post. Shooting jpgs well if you like punchy reds and warmer looking images then you’ll prefer the Canon. For video the lack of 4k can be seen as a major drawback. I shoot 4k and then in post will often crop in because I’ll output the final file as HD. The HD video on the 80d is an improvement on the previous 18 and 20Mp sensors that Canon used. It is also better than the HD from the Sony. There is no flat profile on the camera, but I solved that by installing the Cinestyle Profile from Technicolor and I am getting great results. The video output is again 8-bit so can’t be pushed around too much in post.
When shooting video the lack of an EVF is a bit of hindrance, but, thankfully the rear LCD screen is of high quality. The touch screen implementation makes operating the camera a doddle. Another feature I really like is the ability to create a ‘My Menu’ spread over three pages and I’ve made one of the pages dedicated to video. The AF in video works much better than I expected but again this is really lens dependent. While it is quick to acquire and initially lock on it does have the annoying tendency to drift off the subject and onto the background. You need to keep taping the touch screen to maintain focus on the subject. Unfortunately Canon doesn’t provide any focus peaking for help with manual focusing and no zebras to warn about clipping. Also Canon’s pre-amps are not the best.
I bought the Canon EOS 80d with the sole intention of testing cameras at various price points to see how they’d fare for nature and wildlife photography. I fully intended to sell the camera once I’d finished with it. Now having used it for several months it has become one of my favourite cameras (my favourite being the Olympus EM 1 mk ii). The 80d is such a well thought out camera that it is above all fun to use to use. No it’s not a hybrid camera as the video implementation doesn’t perform well enough, but it is certainly an excellent tool for the photographer on a budget. It has certainly piqued my interest in the 90d which addresses some of the limitations of the 80d.
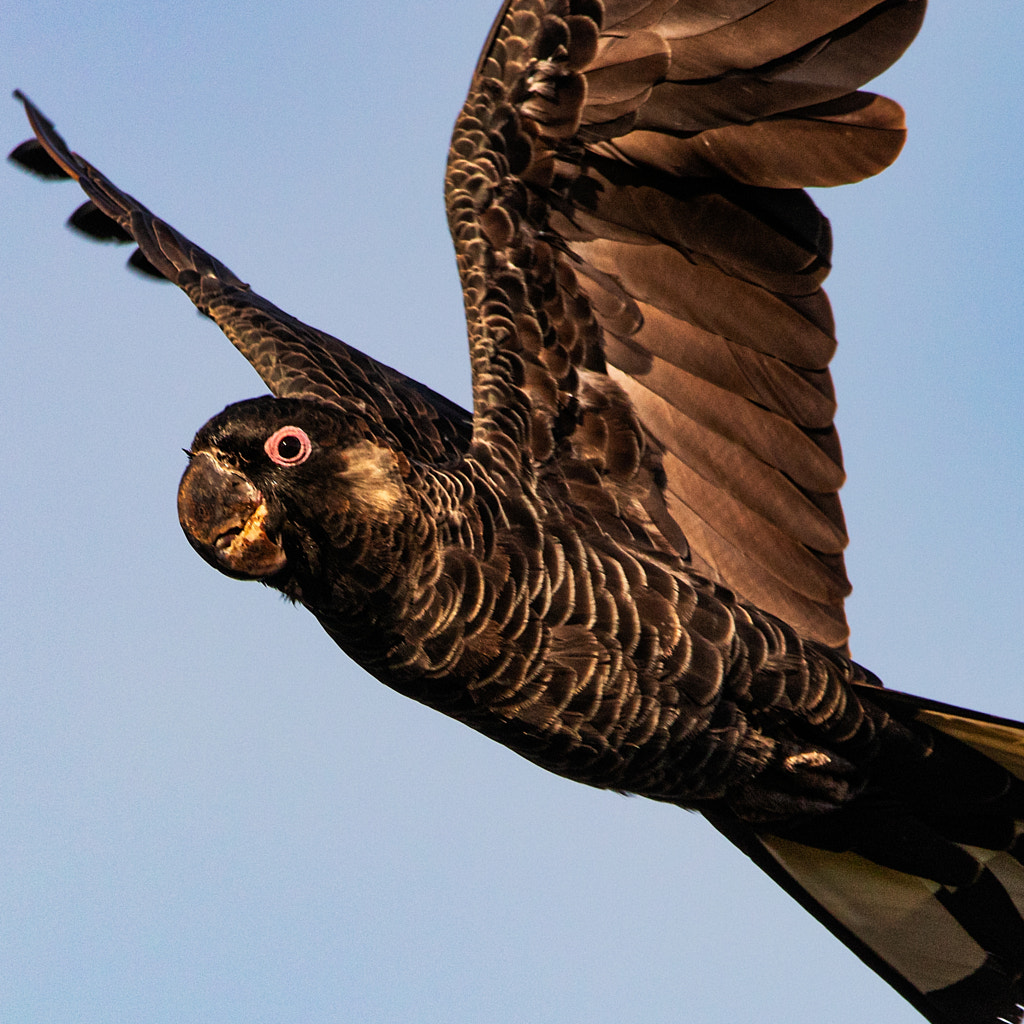
Ngoolyak or Carnaby’s Black-cockatoo (Calyptorhynchus latirostris). Yanchep National Park, Western Australia. Canon 80d with Sigma 150-600mm f5-6.3 OS lens.
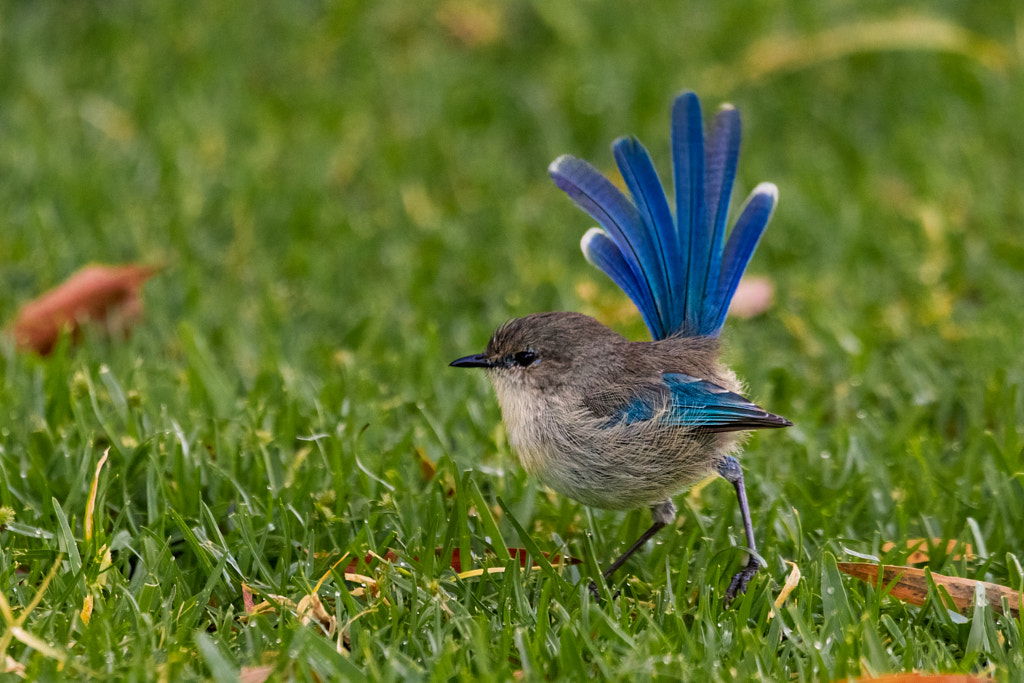
Djer-djer or Splendid Fairy-wren (Malurus splendens). Yanchep National Park, Western Australia. Canon 80d with Sigma 150-600mm f5-6.3 OS lens.
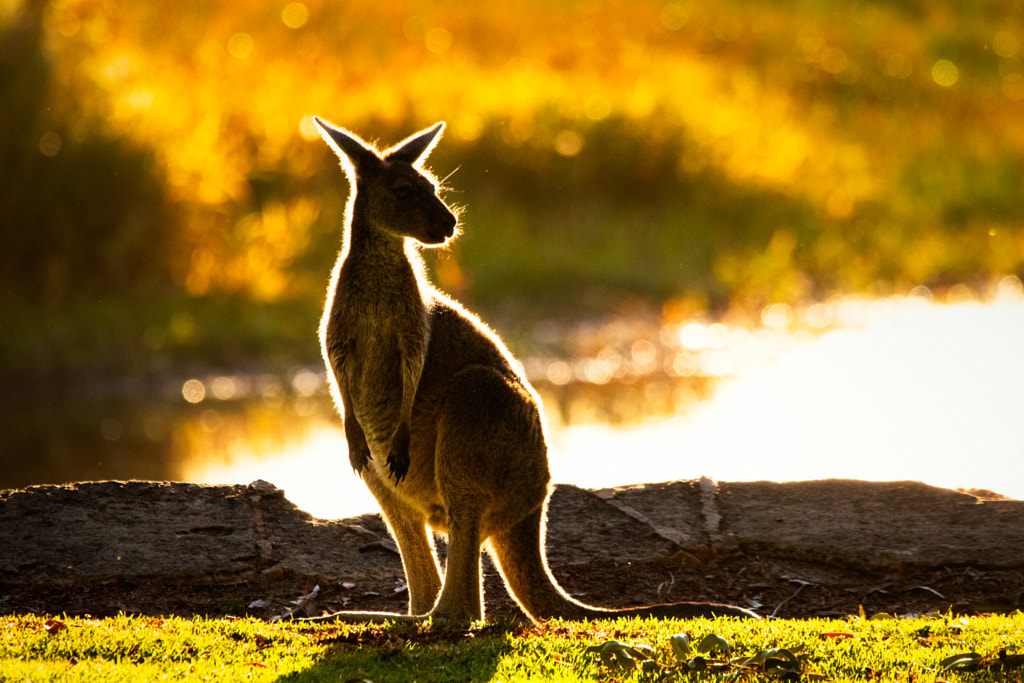
Yongka or Western-grey Kangaroo(Macropus fuliginosus). Yanchep National Park, Western Australia.
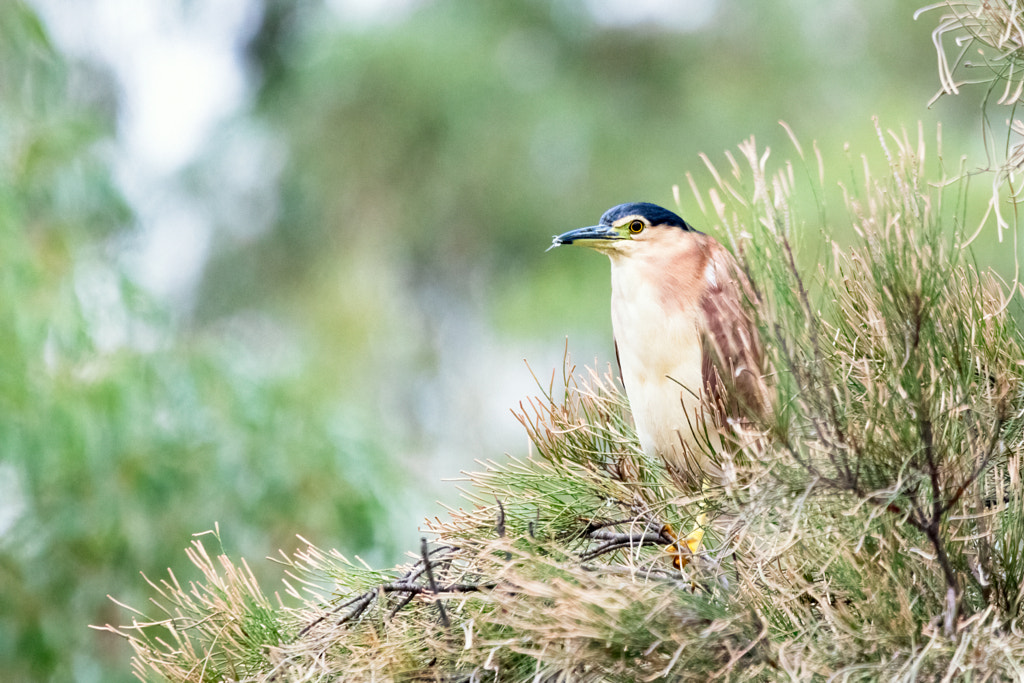
Ngalkaning or Nankeen Night Heron (Nycticorax caledonicus subsp mannillenis). York, Western Australia.
Conclusion
The thing that became very apparent when using both of these cameras is that user experience plays an important part. Canon and Sony have very different design philosophies. Sony is more a technology company and looks to throw as much technology into a product without any consideration of the users experience when using it. Canon take a conservative approach to technology – nothing cutting edge – and look to bundle it in a product that is pleasant to use and reliable. Both cameras are very suitable for nature and wildlife photography, but the user experience is very different. The technology of the A6500 is negated by poor design and handling. I feel I’m fighting the A6500 every inch of the way to get it to work and that is miserable. The 80d overcomes its shortcomings by being a joy to use – it disappears allowing me to concentrate on photography. Unfortunately when it comes to wildlife videography both are wanting. The Canon needs more technology in the form of 4k video, focus peaking and waveforms. The A6500 needs a better touchscreen, a better rear LCD panel and better menus to make it more useful.
So when buying a camera, whether it be new or second hand, while the specification sheet maybe useful as a guide I think more attention should be given to the ergonomics. What does it feel like in the hand? What’s it feel like to use? These are the questions that need to be addressed rather than how many megapixels or how much dynamic range.
The title is really an exercise in alliteration. It really should be “Can You Do Wildlife Photography On A Limited Budget?”, but that’s not as catchy or succinct. I used to think it was impossible. I thought to be a wildlife photographer you needed deep pockets to be able to afford the cameras and lenses. The photo review sites would have you believe that you need to drop unto $10K AUD on a camera body and up to $24K AUD on a lens to be in with a chance of taking a decent photo. Then you had to have the wonga to be able to travel to Africa, Antartica etc to actually find animals worthy of being photographed. About twenty years ago my sister tried to encourage me to enter the BBC Wildlife Photographer Of The Year competition my response was that I didn’t have the money for the equipment let alone alone being able to travel to a suitable location.
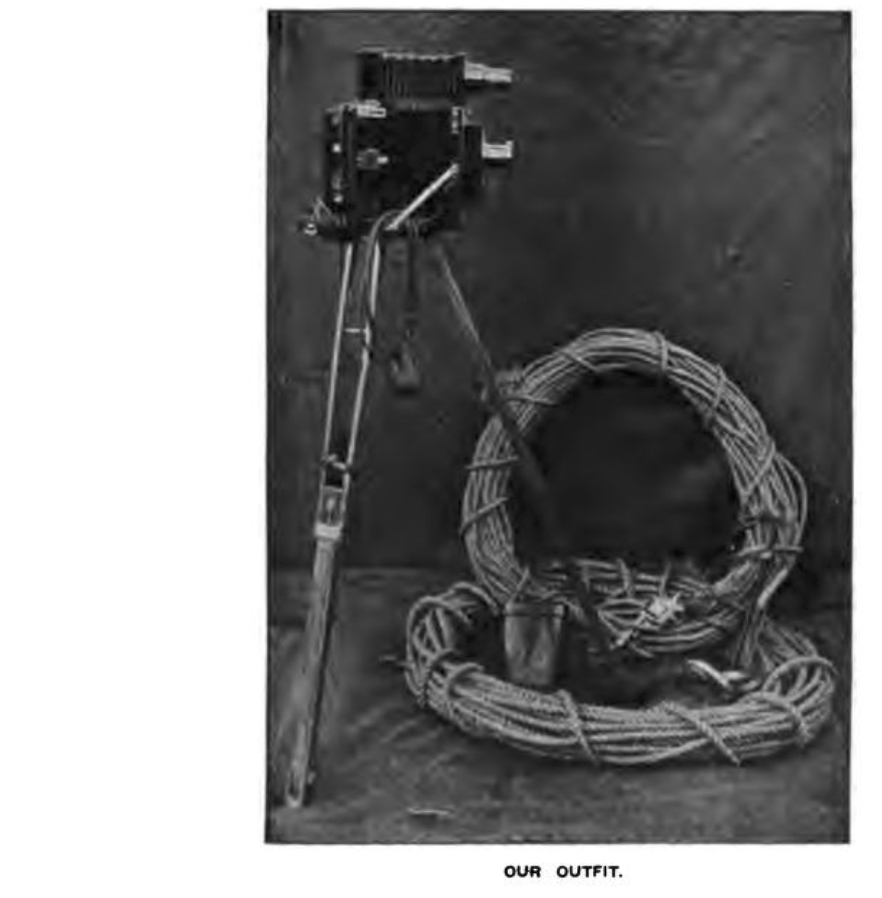
Richard and Cherry Kearton photographing a birds nest.
Twenty years later my views have radically changed. What changed them was the confluence of learning about two of the pioneers of wildlife photography and the digital camera revolution. The photographers were Cherry Kearton (1871-1927) and his brother Richard (1862-1928) the naturalist and writer. They were very early pioneers of wildlife photography and they published the first natural history book entirely illustrated with wild photographs in 1895. Their 1898 book “With Nature And A Camera: being the adventures of a field naturalist and an animal photographer” illustrated with 160 photos was a best seller and inspired many people to become wildlife photographers. A very young David Attenborough attended one of their film lectures and in an interview to The Guardian Newspaper said “It captured my imagination and made me dream of travelling to far-off places to film wild animals.” (Vidal, J; The Guardian 4th December 2021).In their book the two brothers list what it takes to be a wildlife photographer:
“The great points about successful natural history photography are: the possession of suitable apparatus to work with, an aptitude for taking care in stalking timid creatures and plenty of patience and determination to wait for and get what is wanted in spite of obstacles.”
p.334 Kearton, R and Kearton, C; With Nature and a Camera, 1898, Cassel, London.
The “suitable apparatus” was a half plate (4¾ × 6½ in or 120mm × 165mm) Dallmeyer camera with a pneumatically controlled silent shutter for still subjects and a large quantity of hemp rope for scaling cliffs.
The “suitable apparatus” was a half plate (4¾ × 6½ in or 120mm × 165mm) Dallmeyer camera with a pneumatically controlled silent shutter for still subjects and miniature plate camera (probably 3 1/4” x 4 1/4” glass plates with a 5 1/4” f8 lens) for birds in flight. There was no autofocus with bird recognition AI. No 40 fps. Nothing under 4Kg in weight and certainly no endless digital images on a memory card. The plates had a sensitivity of 2 to 25 ISO. They’d be lucky to carry a dozen glass plates and take one picture every 2 minutes. They initially started just photographing the fauna of their native Yorkshire in their days off often sleeping in hedges or barns. No luxury safaris with 5 star accommodation and the convenience of modern jet travel.
No memory cards giving unlimited shooting for the Keaton’s. This is a box of Ilford photographic glass plates.
The digital camera revolution has meant for the last twenty years camera and lens manufactures have brought out new products with amazing technological innovations every year. This has meant that the second hand market has been flooded with equipment as photographers unload their “obsolete” stuff so they can buy the new stuff only to do the same 12 months later. This now means that there is a wealth of extremely capable second hand equipment out there to suit every budget.
Advances in in digital photographic technology has meant that there is a plethora of second hand equipment for sale.
TLDR
Needs Versus Wants
This is quite important as it will help us decide on equipment and set a budget. For instance if all you want to do is post some photos on social media then pretty well any interchangeable lens DSLR or mirrorless camera released in the last 20 years will suffice. If you want to print photos up to A3 in size then a 12Mp camera is adequate. If HD video and 4K video are important then that sets another parameter. It’s nice to day dream about having top of the line equipment such as a Sony A1 and a Sony 600mm f4 lens, but that combination will set you back $27000 AUD new and won’t be had for thrift shop prices second hand. But, say you want to print up to A3 it is possible with a bit of careful shopping on EBay or GumTree to get a DSLR with an APSC sized sensor and a 75-300mm lens for less than $500 AUD second hand.
I basically find that deciding on the lens is the most important part of the exercise and you really should aim to put most of your budget to that. So what are we looking for?
Sensor size
Full frame (36x24mm)
APSC (23.6 x 15.7mm or 22.2 x 14.8mm [Canon cameras only])
Micro Four Thirds (17.3 x 13mm)
Minimum Focal length
400mm
300mm
300mm
Best Case Scenario
600mm
600mm
400mm
The focal length will determine how close you need to get to your subject. The shorter the focal length the closer you will have to get. Having said that a shorter focal length is not a handicap because you’ll have to learn bushcraft so you can approach animals and that is a very good skill to have in this game and it’ll also stand you in good stead if you get a longer lens later on down the track.
You can use zoom lenses or primes. A prime lens is a fixed focal length, whereas a zoom lenscovers a range of focal lengths such as 75-300mm, or 100-400, or 150-600mm. In theory a prime lens will give better image quality and have a larger maximum aperture value which will let more light in. The down sides are that primes are usually more expensive and being a fixed focal length means that if your subject gets too close (it does happen more often that you’d think) you won’t be able to take a picture. Zooms offer flexibility in that you’re not stuck at one focal length, but the trade off is that they’re not as optically good as primes at the cheaper end and the maximum aperture value isn’t as great meaning that you may have to stop shooting as the light goes down.
A comparison of the common camera sensor sizes.
Now as soon as you tell another photographer what you’re planning to do they will inevitably tell you that you should get a camera with a full frame sensor as you’ll get a whole heap of benefits over the other smaller sensors. Now if we just content ourselves with reading spec sheets maybe, but out in the real world other things come into play. You want to photograph a bird that is 20cm long and fill the frame with it, so that’ll mean getting 5m away from it. To do that with a full frame camera you’ll need a focal length of 800mm, with an APSC camera 600mm and with a micro four thirds camera 400mm. There is a magnification factor when comparing the focal lengths on the different sensor sizes. It is x1.5 (or 1.6 for Canon) for APSC and x2 for micro four thirds. We’ll look at this comparing three common focal length ranges for the three sensor sizes.
75-300mm
100-400mm
150-600mm
Full Frame (36x24mm)
75-300mm
100-400mm
150-600mm
APSC (23.6 x 15.7mm)
(22.2 x 14.8mm Canon cameras)
112-450mm full frame equivalent
120-480mm full frame equivalent when used on a Canon APSC camera
150-600mm full frame equivalent
160-640mm full frame equivalent when used on a Canon APSC camera
225-900mm full frame equivalent
240-960mm full frame equivalent when used on a Canon APSC camera
Micro Four Thirds (17.3 x 13mm)
150-600mm full frame equivalent
200-800mm full frame equivalent
300-1200mm full frame equivalent
So a smaller sensor will mean you don’t need very long lenses and that is good because they are expensive. Shorter lenses have the advantage of being lighter which is good when carrying stuff in the bush.
Canon EOS 300d body with Canon EF 75-300mm f4-5.6 IS lens.
I started my nature photography using a Canon EOS 300d with a Canon EF 75-300mm lens. The camera has an APSC sensor so that gave me almost enough reach to fill frame with my 20cm bird at 5m. It did me well until I decided that I wanted to invest more into the hobby. So if your budget is really tight I would recommend getting either a Canon of Nikon APSC camera and a 75-300mm lens as the bare minimum, and we’ll look at what’s available a bit later on.
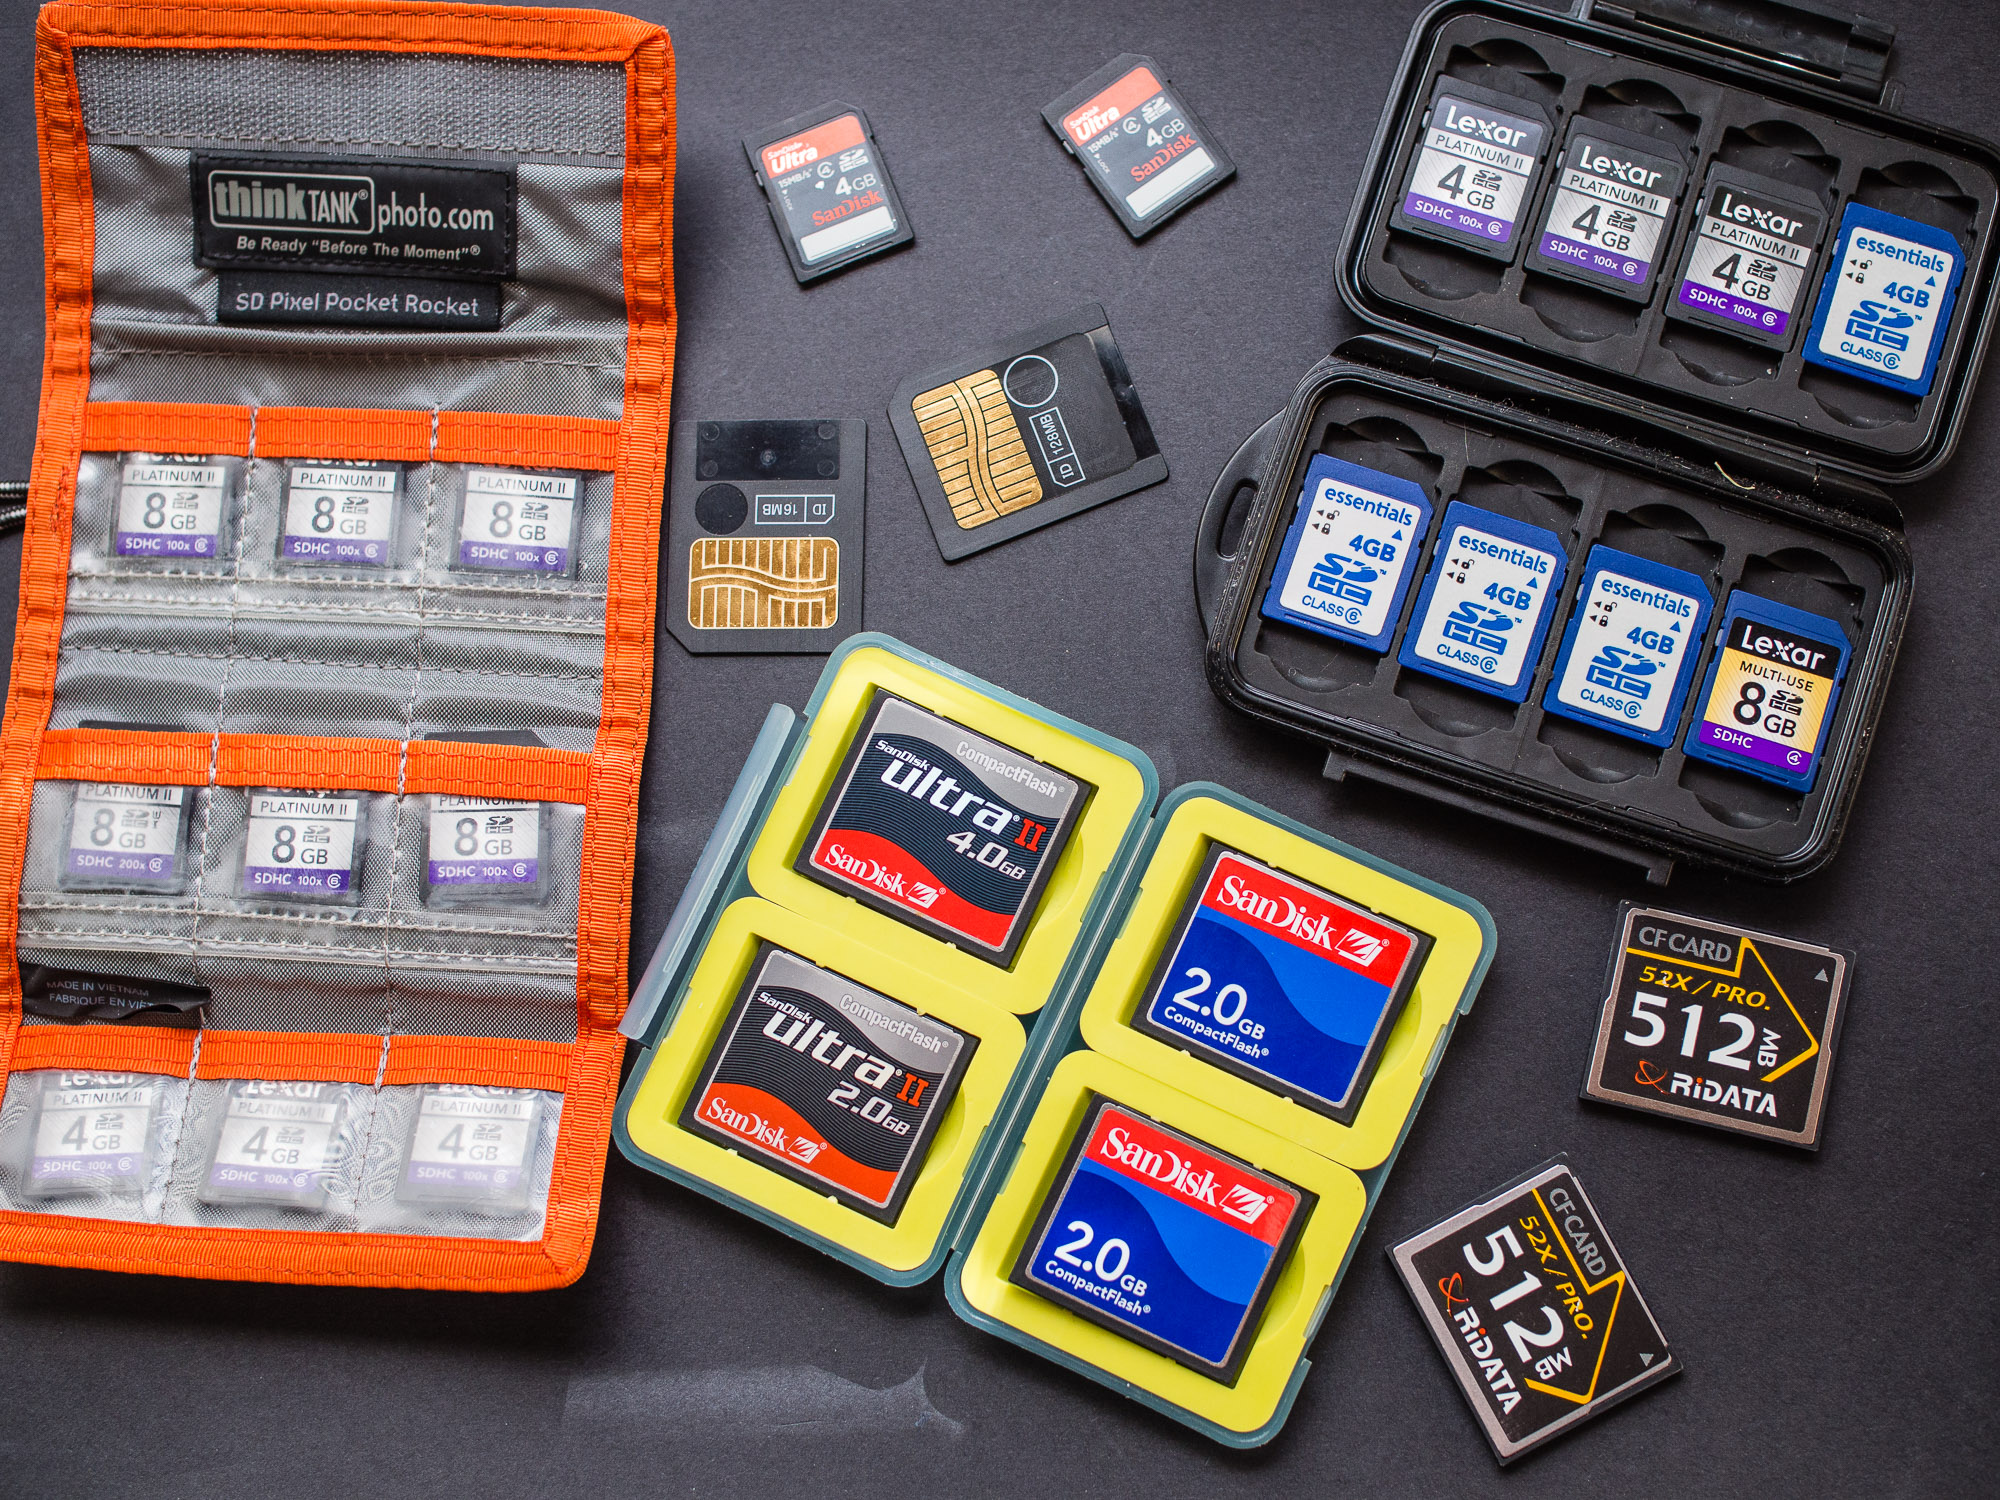
Memory cards are now very cheap. Develop a strategy for keeping them safe while working in the field.
The other thing to consider is that when you buy a camera and lens you also have to budget for batteries and memory cards. First things first; when looking at memory cards over the last 20-25 years there have been roughly ten types of memory card and many of them have gone obsolete so when buying a camera I would suggest that buying one with a commonly available card such as Secure Digital Card or SD Card. Similarly with batteries, make sure batteries are easily obtainable. With both cards and batteries try to buy the best you can afford and I’ll expand on this a bit further later on. Buying second hand also means that there is a chance where you’ll be able to buy the camera with spare batteries, a memory card, strap and possibly some form of bag as a package. Just make sure you’re getting things you actually want and are not paying more than if you to buy each item separately.
All the cameras I’ll be talking about are cameras I’ve owned or used. They’re not recommendations they are to give an idea of what’s about and where possible I’ll suggest equivalent models from other manufacturers.
Bargin Basement
You’ve got next to no money. OK a bit of a draw back, but not insurmountable. Back in the dim dark days of digital photography there existed a class of camera that you don’t hear much about now – the bridge camera. They are a cross between a point and shoot compact and an SLR. You get a wide range zoom lens with a small body. They were popular with enthusiasts in the early noughties as more serious cameras were way way expensive. Every manufacturer offered at least one some several at different price points. Sony and Panasonic still make a few models and they range in price from $500 to $2400 AUD new. But on the second hand market that’s where things get interesting. You can pick up something for less than $50.
What you are looking for is camera models with the terms “UltraZoom“, “superzoom” or “mega zoom” in the model name. Ideally look for something with at least an 8x zoom, better yet 10x or 15x. The more zoom the bigger your subject will be in the final image.
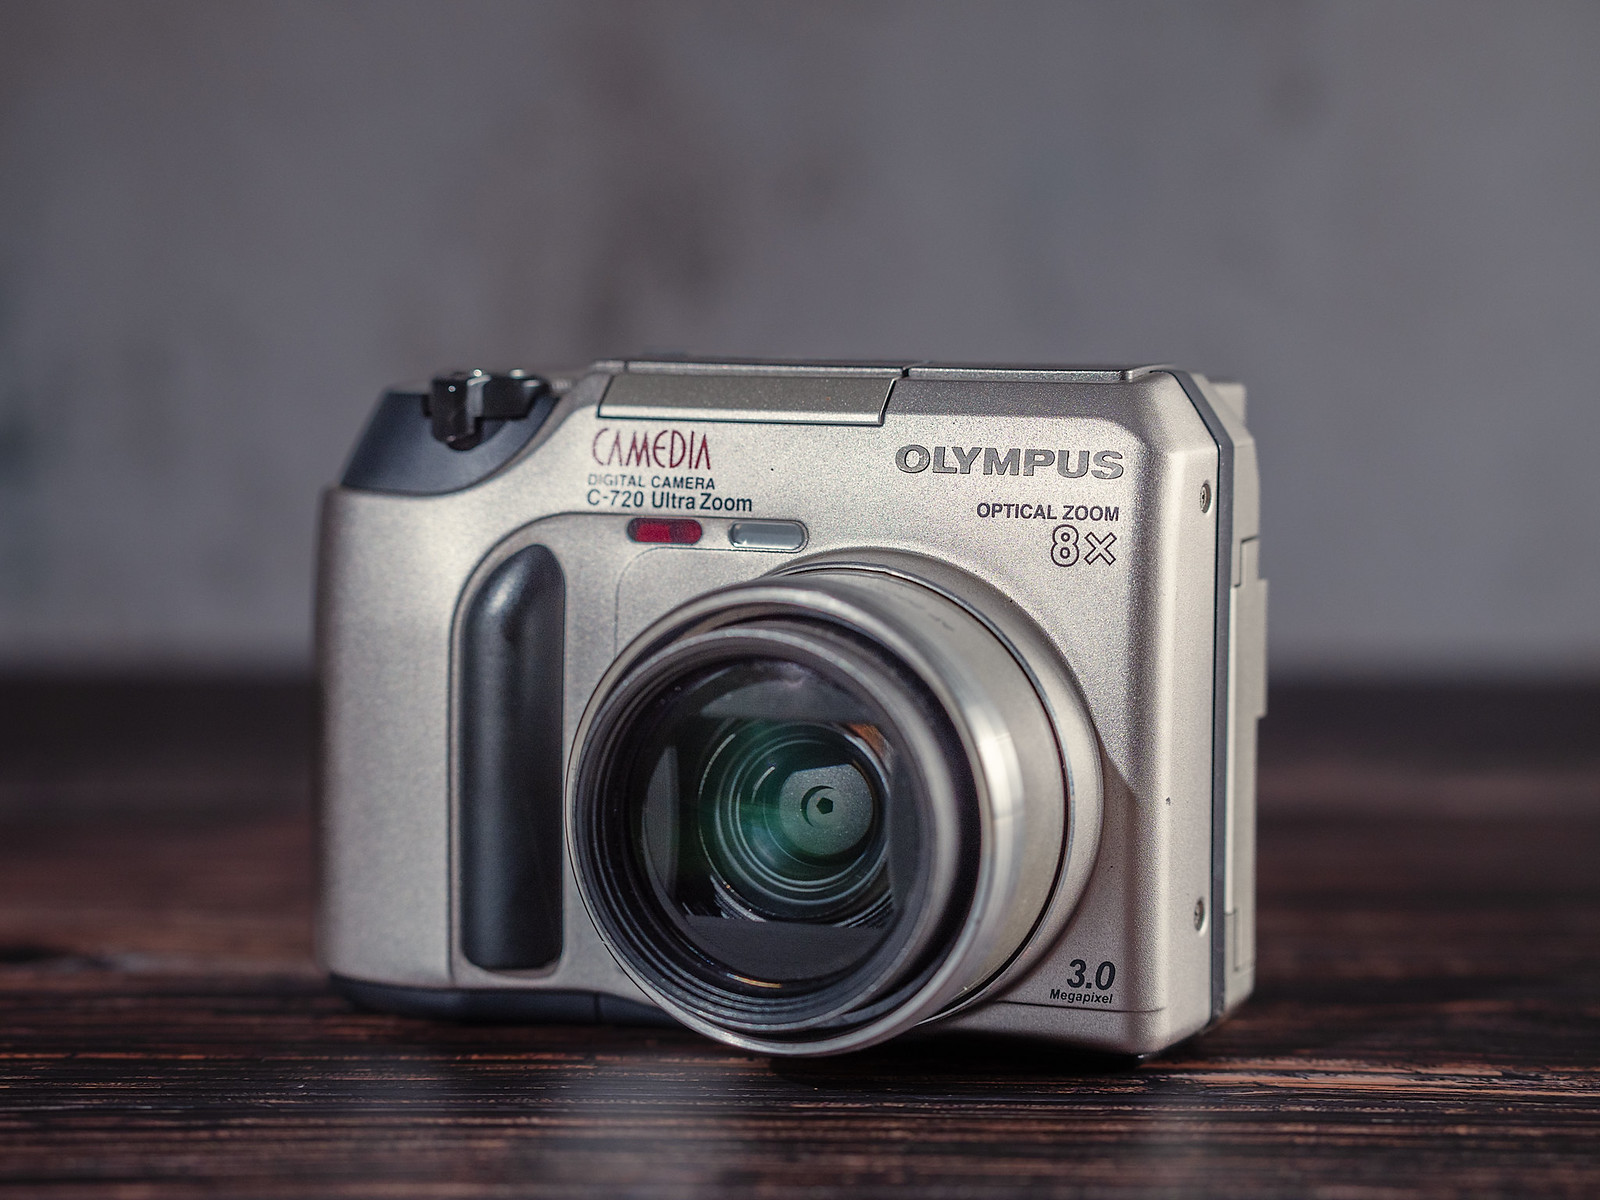
Olympus Camedia C-720 Ultra Zoom
Olympus Camedia C-720 UltraZoom bridge camera.
The Olympus C-720 was introduced in 2002 and is fairly typical of models from that era. It has a whopping 3 Megapixels and an 8x zoom range (24x if digital zoom is switched on but it is crap). It’s small, light, and cheap. Typically expect to pay about $15 to $35 AUD for one. What makes it ideal is that the camera runs off 4x AA batteries which are plentiful and cheap. The downsides are that it takes a SmartMedia memory card which while obsolete can still be bought. The downside is that you will probably spend more on the memory card than the camera. Another problem is that the largest capacity card is 128MB which can hold 14 photos at the best quality TIFF setting, 58 in SHQ jpg, 170 HQ, 196 in SQ1, and 206 in SQ2. The last two come at a smaller resolution. Although 3MP is a bit limiting you can print a postcard sized print comfortably and print an A4 sized print at a stretch.
In use it is not a speed demon, it takes about four seconds to power up. When shooting in sports mode with medium quality jpgs the camera can manage to shoot at 1 fps for a total of 15 frames. The autofocus is slow and very noisy. The top shutter speed is 1/1000 and the maximum ISO, or sensitivity, is 400. At 400 ISO the noise is bad and prevents you from recoding fine details. This is not a camera with which to take pictures of fast moving subjects in low light. But in good light, with a heap of patience and an understanding of the cameras limitations you can get some pictures. Whether you enjoy the process or not will depend upon your outlook.
Little Corellas taken with the Olympus C720UZ camera.
When light levels fall the inadequacies of the C720UZ are quite apparent. The noise patter prevents detailed images.
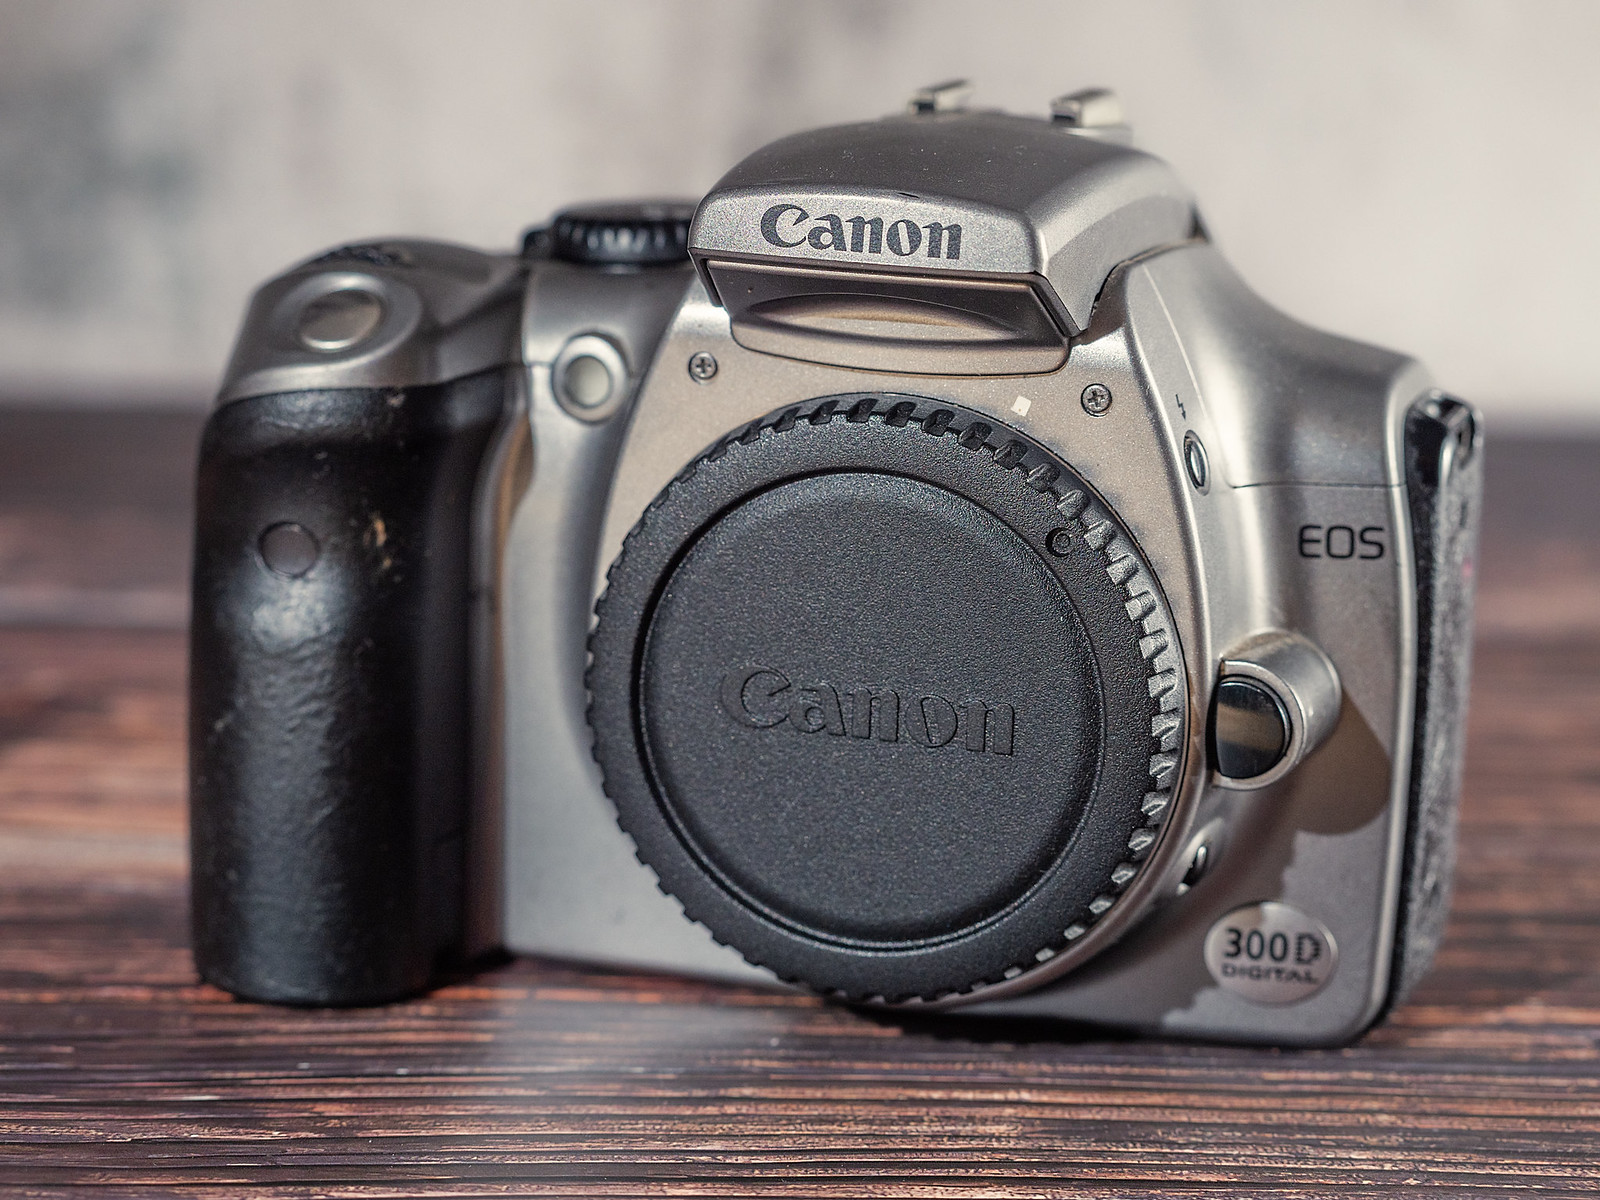
Canon EOS 300d with a 75-300mm lens
Canon EOS 300d body.
If you can swing to $250-300 AUD there are better alternatives than the very old bridge cameras. The Canon Canon EOS 300D (Canon EOS Digital Rebel in North America and the Canon EOS Kiss Digital in Japan) was the first real consumer budget DSLR when released back in 2003. For $60-100 you should be able to find a body only. I’d look to team this up with a 70-300mm zoom lens. With a bit of careful searching the combo should come in at under $300. Alternatives from that period going for around that are the Canon EOS 10d and the Nikon D100. They’ll be a little bit more money but they have slightly better features. The downside to them is that they were often used professionally and so they might not have much life left in them.
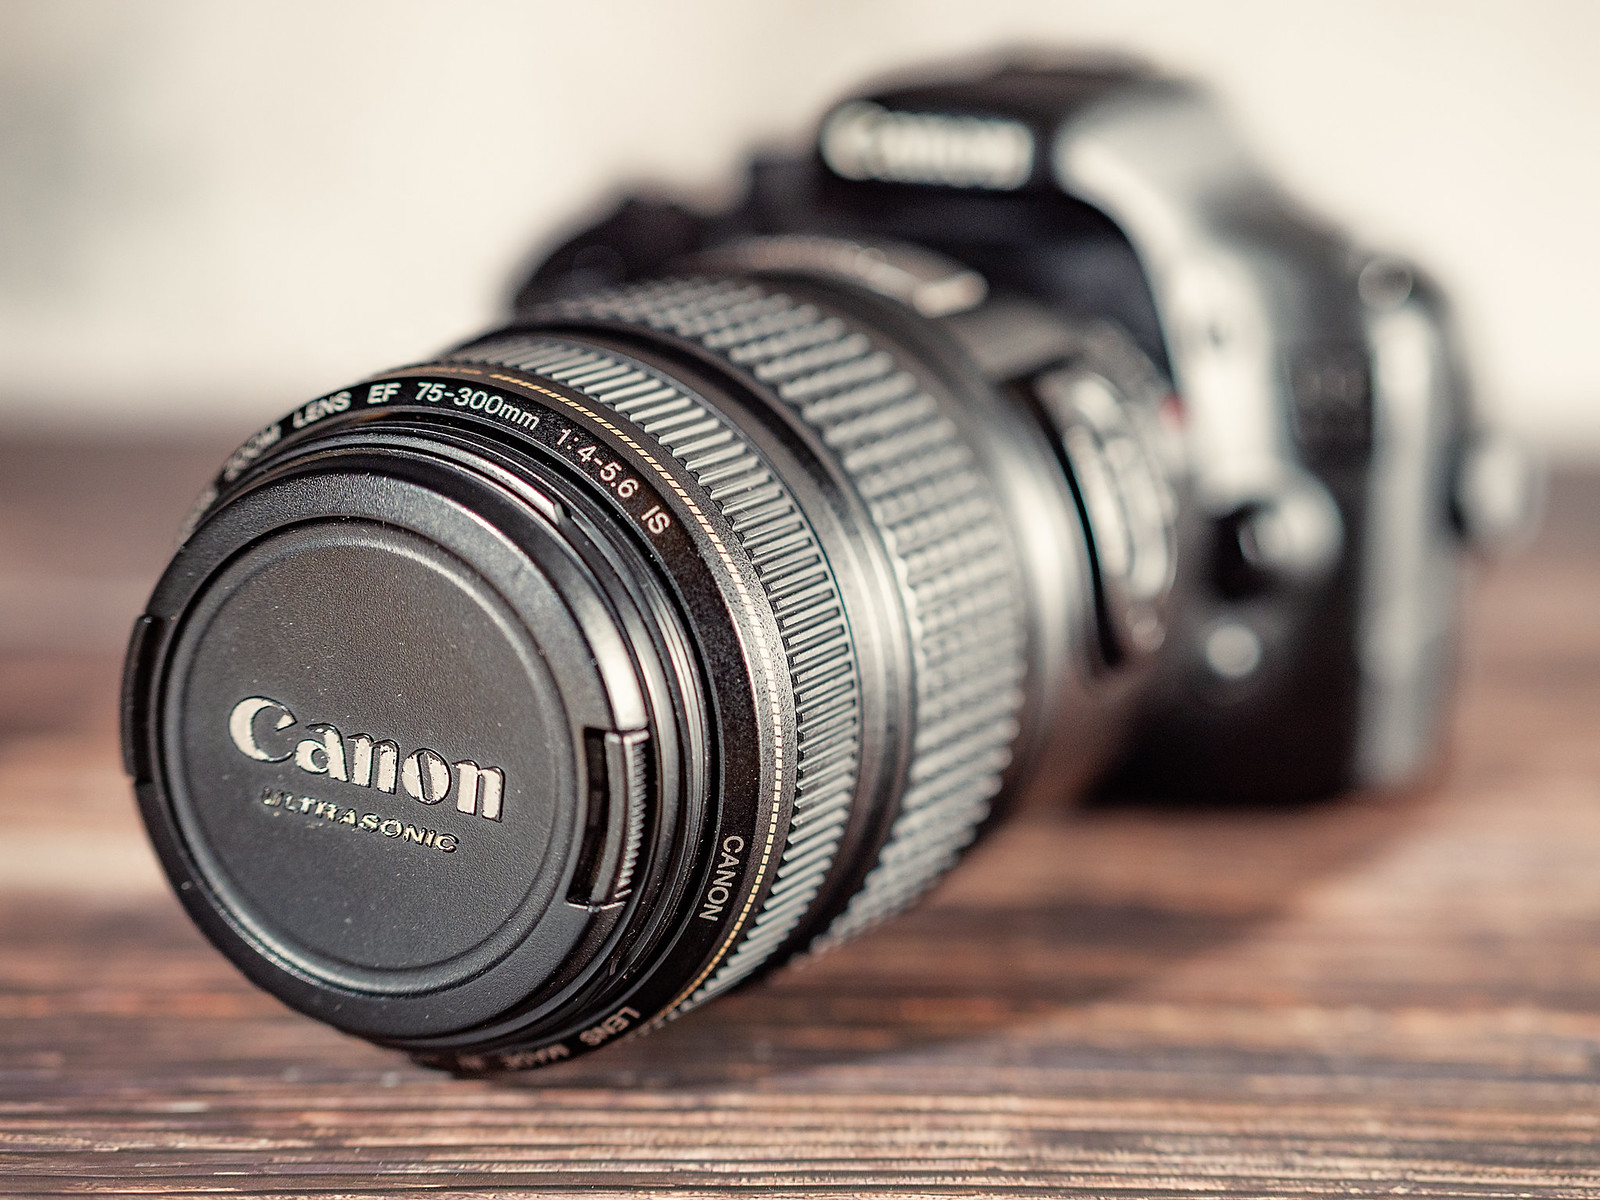
Canon EF 75-300mm f4-5.6 IS lens
So with the 300d what do you get for your money. Well you get a 6MP camera that takes Canon EF mount lenses – one of the biggest ecosystems of lenses in the world which means lots of choice at a variety of prices. Canon themselves have made an assortment of 75-300mm lenses over the last 30 years and you should be able to pick up something for $120 AUD and the one I’m looking at with Image Stabilisation for about $220. Sigma and Tamron are third party lens makers and you can find their versions for around the $100 mark.
The good points of the 300d are that it’s cheap, batteries (Canon BP-511a) and memory card (Compact Flash) are still available. The camera has a 6MP sensor that produces very nice A4 prints and it is very simple to use. The downside is that the camera was built to a budget and it is not possible to shoot in Continuous Autofocus when shooting RAW, the buffer is 2.5 frames per second for 4 frames, and the plastic body looks a bit tacky (but at least it feels solid). On the copy I have the rubber panels have gone a bit soft and sticky. To use Continuous AF you need to shoot in the Sports mode which is jpg only and you cannot adjust the exposure using exposure compensation in this mode. There is no being able to use the rear LCD screen to compose pictures on and there is no video mode. Maximum ISO is 1600 and the quality is ropey, but files can clean up quite well in image processing software.
The 70-300mm lenses at this price point are not going to win any awards for optical performance, but they will suffice to get you started. Irrespective of the manufacturer they all tend to be a little soft at the 300mm end and are not the fastest to find focus especially in low light, but they are capable of giving you a nice image if you don’t shoot wide open and keep the shutter speed up.
If you don’t want to buy Canon then at this price point look at the Nikon D100. Obviously you’ll have to substitute Nikon fit lenses as well.
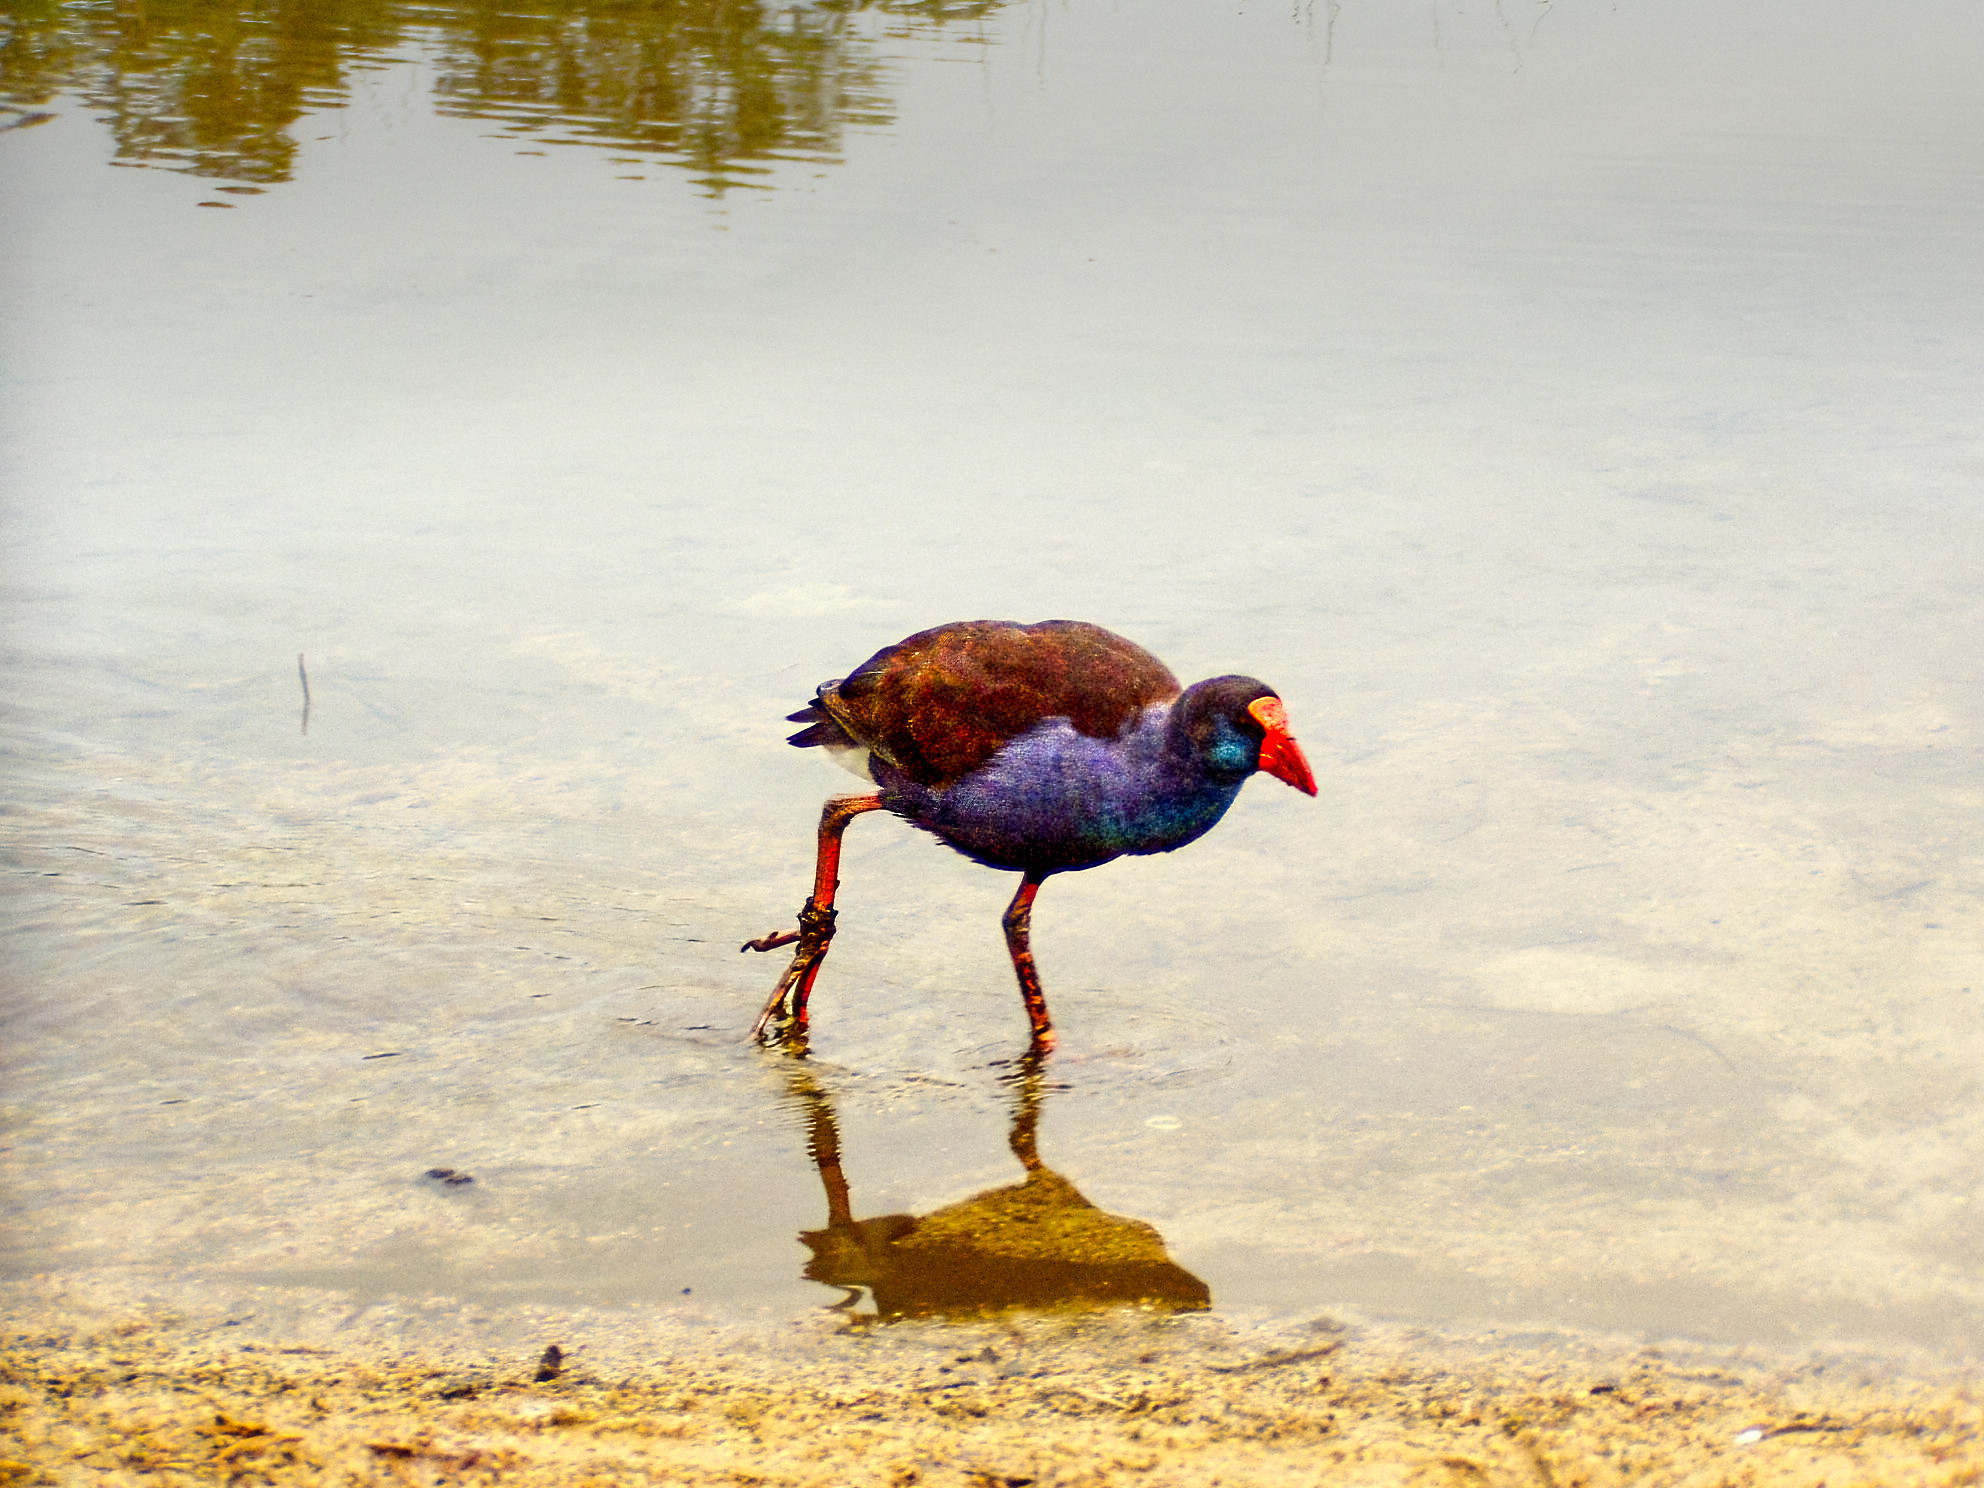
Australian Pelican at Woodman Point, Western Australia. Canon EOS 300d with Canon EF 75-300mm f4-5.6 IS.
Kadjinak or Grey Fantail (Rhipidura albiscapa). York, Western Australia.
Djidi-djidi or Willie Wagtail (Rhipidura leucophrys). York, Western Australia.
Djida or Yellow-rumped Thornbill (Acanthiza chrysorrhoa). York, Western Australia.
Koolbort or Singing Honeyeater (Gavicalis virescens). York, Western Australia.
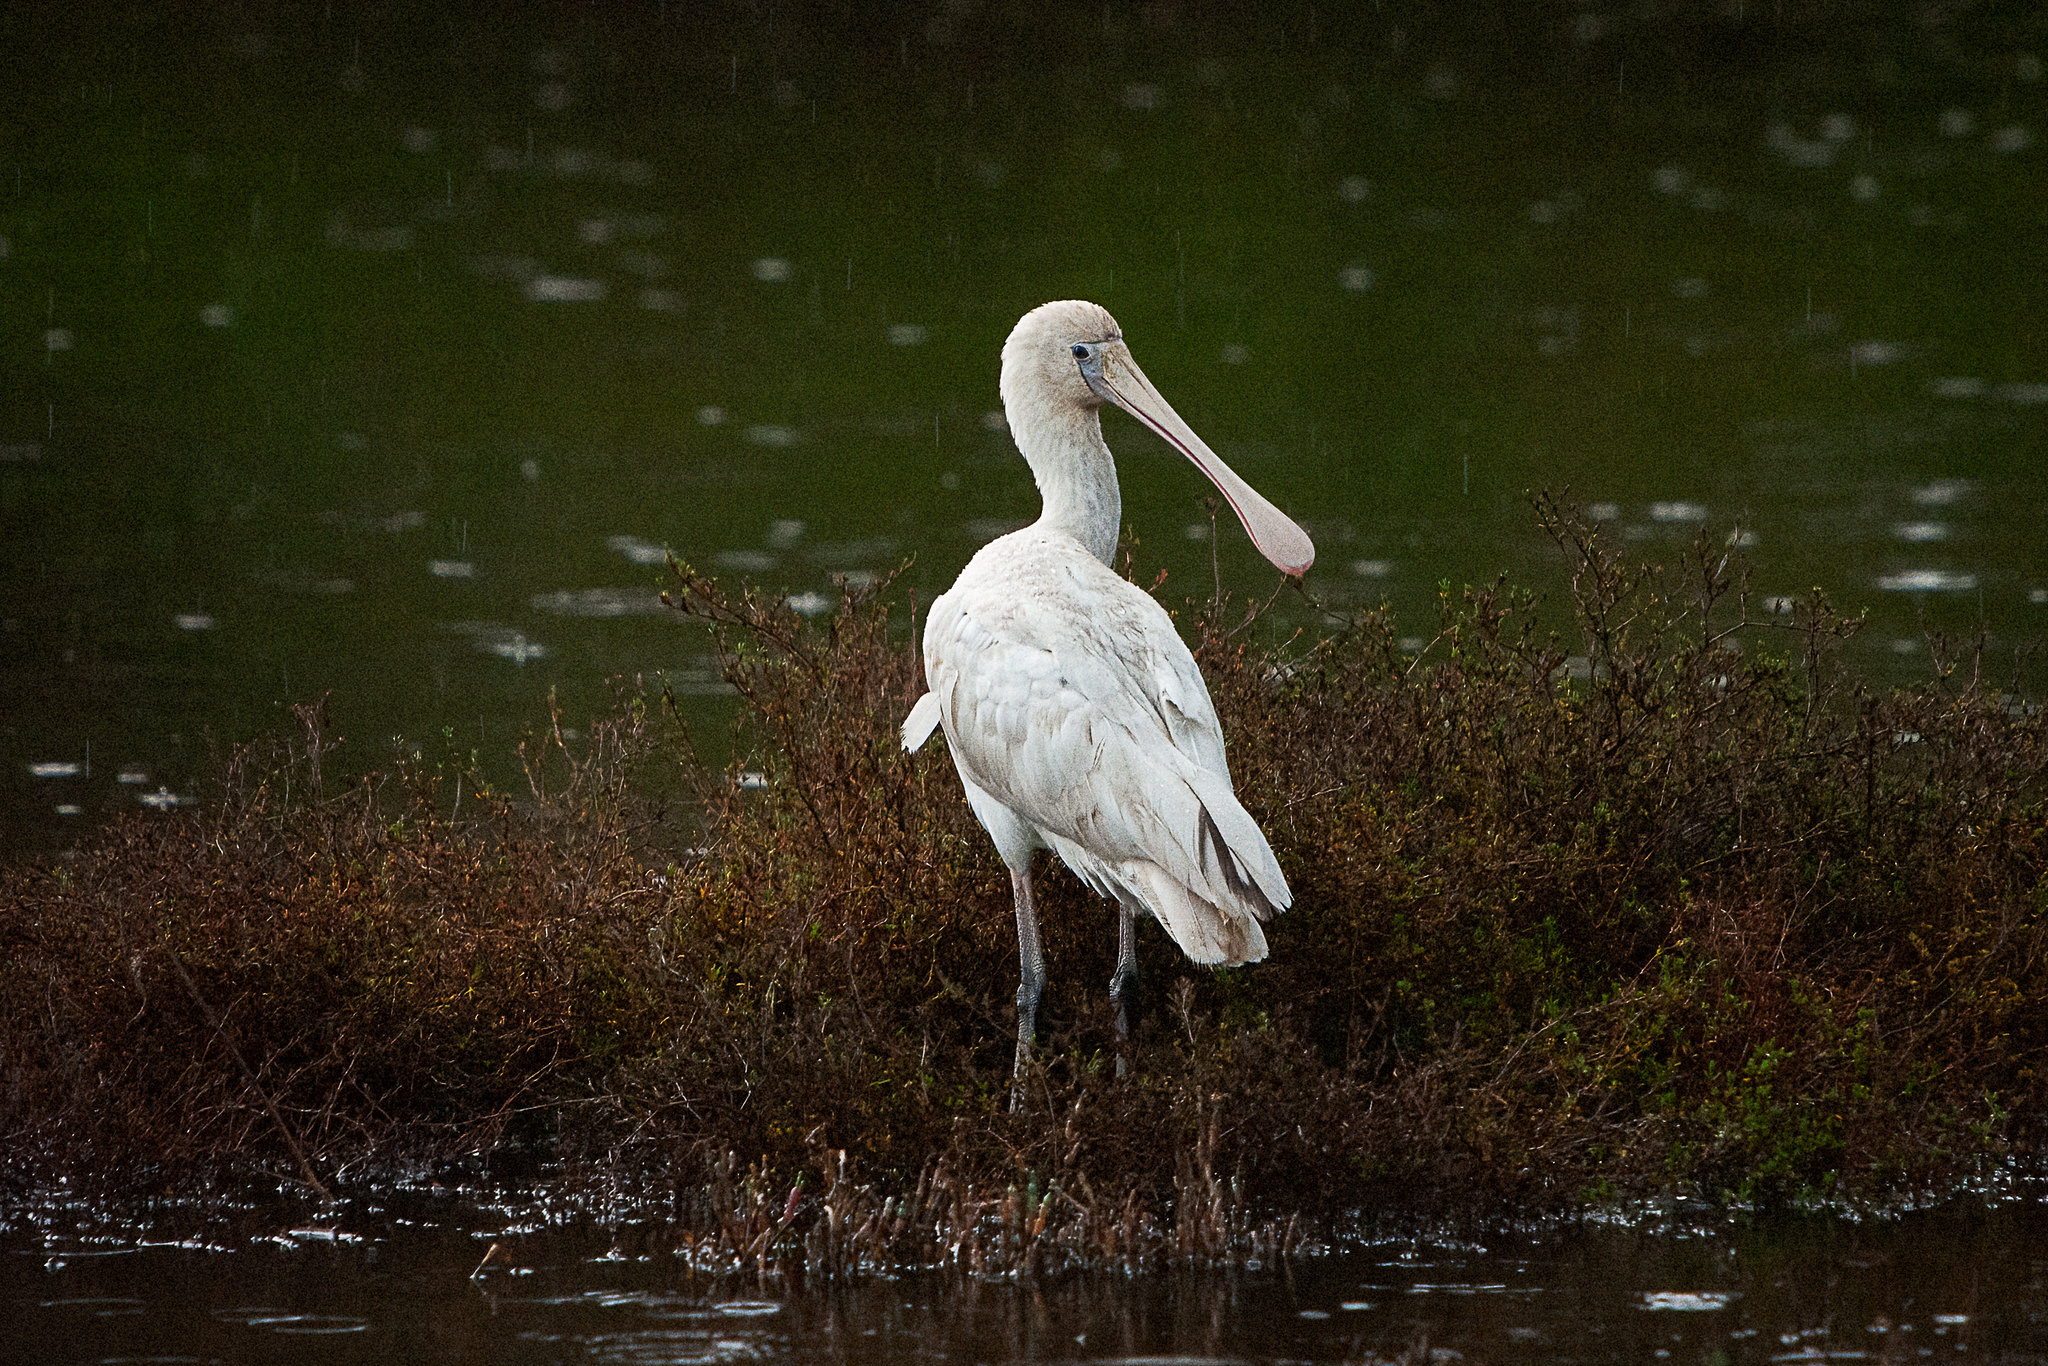
Kaaka-baaka or Yellow-billed Spoonbill (Platalea flavipes) in the rain. York, Western Australia.
Djangkang or Red Wattlebird (Anthochaera carunculata subs woodwardi). York, Western Australia.
Canon Eos 550d with a 75-300mm lens
Canon EOS 550d body.
If you can squeeze another $50-100 then a good option would be to go for something like the Canon EOS 550d. You have a substantial increase in resolution with an 18Mp sensor with better high ISO performance – now up to 6400 natively or 12800 by expansion. Continuous auto focusing in all shooting modes and the frame rate is increased to 3.7 frames per second with a buffer of 34 frames shooting jpg and 6 frames shooting RAW. The AF system has been beefed up a little and while still only having 9 centrally arranged focus points it has a cross type sensor in the centre with extra sensitivity. The camera uses SD cards which are cheap and easily found. The battery, the Canon LP-E8 is a bit of a down grade in terms of performance compared to BP-511a used in the 300d, but it is readily available and affordable. While being able to shoot 1080 video it is only really suitable for still subjects as the contrast based autofocus is is too slow to lock onto moving subjects. My first videos were shot with this camera and it is capable of producing a good result if you are prepared to manually focus. Other downsides are the limited buffer and the slow frame rate, the lack of a second control dial also makes using exposure compensation a little fiddly. I try and keep my ISO below 3200 as the chroma noise is quite intrusive and difficult to clean up without destroying fine details. But, having said all that this is a camera which is capable of producing very good results. Even though I now have other better cameras I still like to get the 550d out and use it because it is just fun to use.
Canon EOS 550d with Canon EF 75-300mm f4-5.6 IS lens.
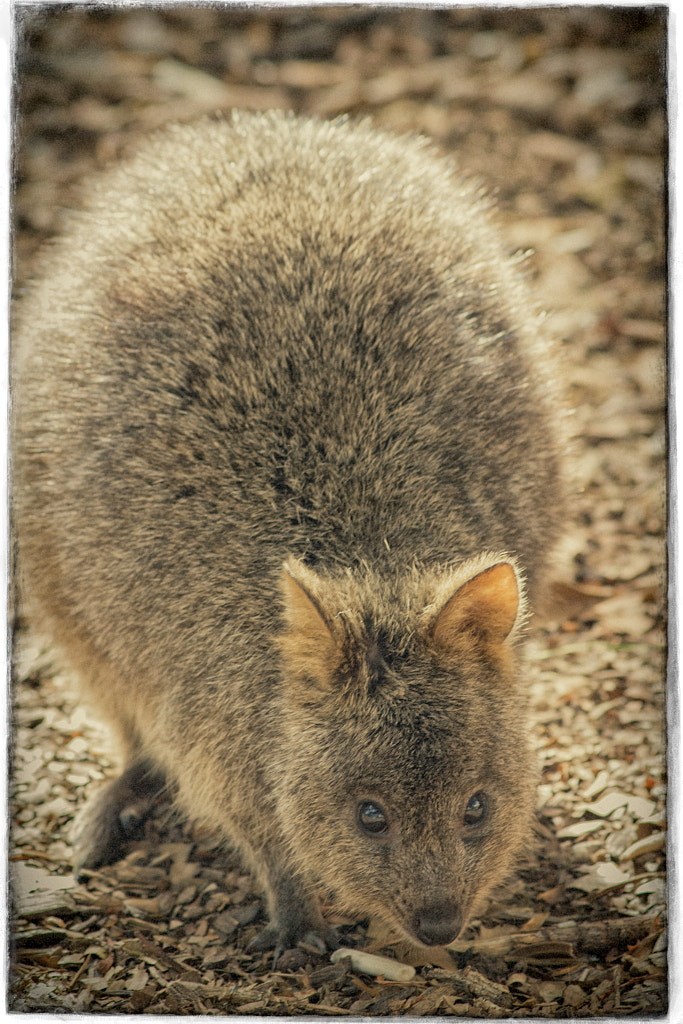
Quokkas are a small marsupial that inhabit Rottnest Island. Canon EOS 550d with Canon 75-300mm f4-5.6 IS lens.
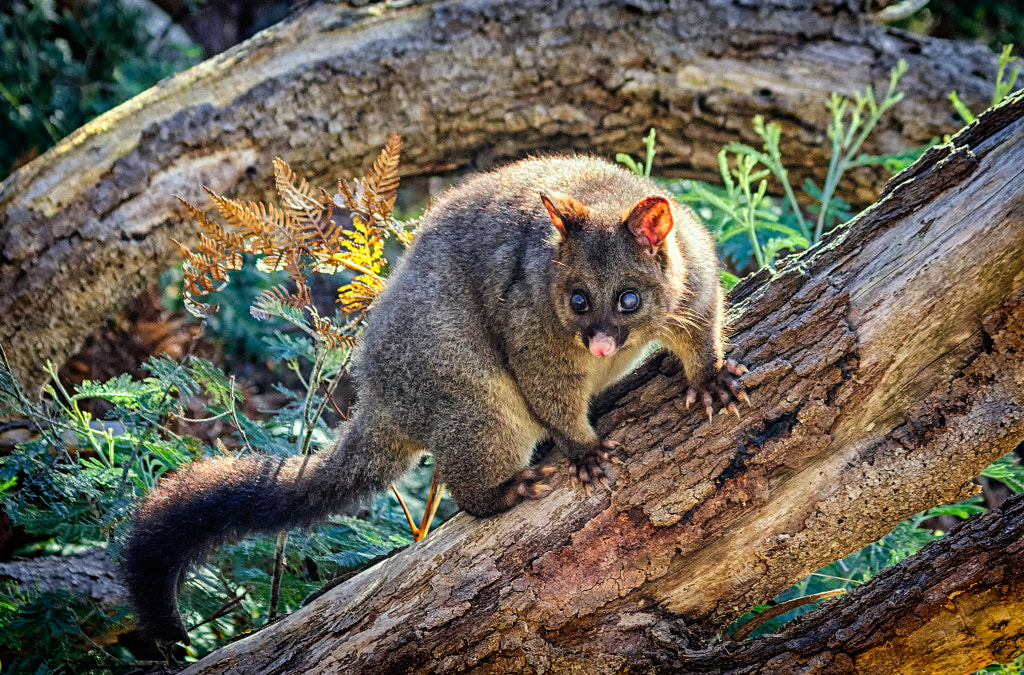
Brushtail Possum (Trichosurus vulpecula) at the Coal Mines Historic in Tasmania. Canon 550d with Canon 75-300mm f4-5.6 IS lens.
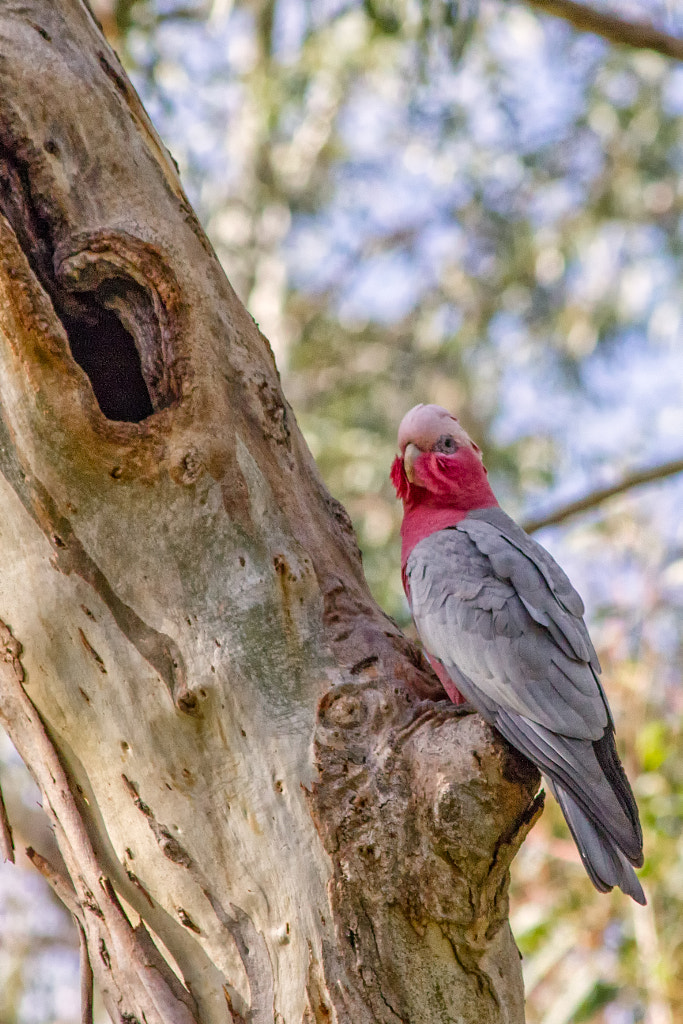
Like many cockatoos Galahs, Eolophus roseicapilla, nest in hollows in eucalypt trees. Woodbridge Riverside Park. Canon EOS 550d with Canon 75-300mm f4-5.6 IS lens
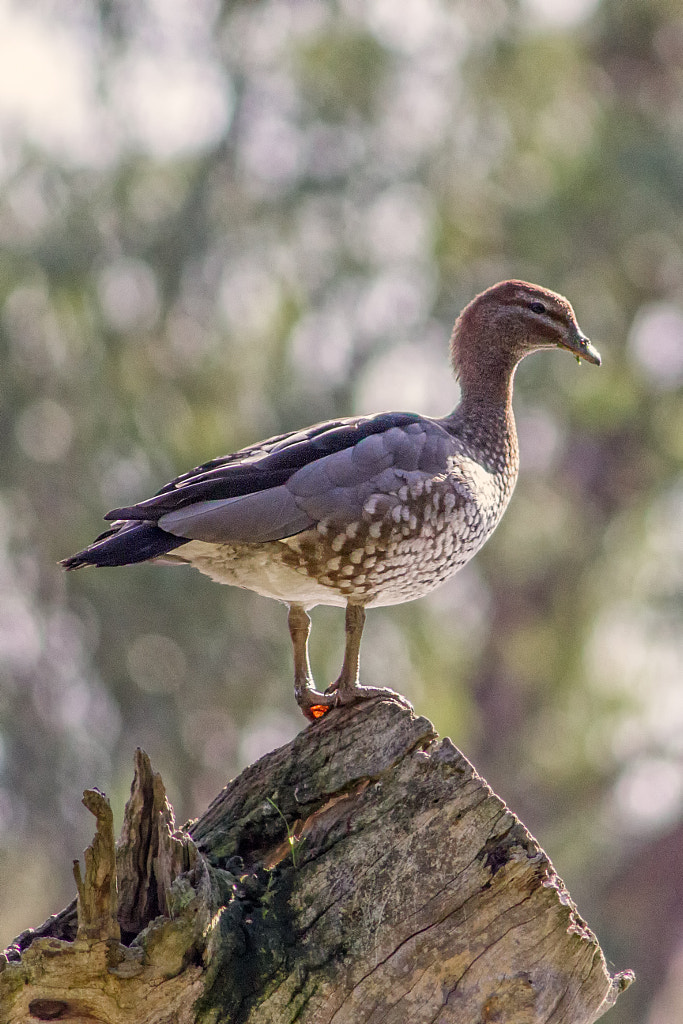
Maned Duck (Chenonetta jubata) also known as the Australian Wood Duck, Swan River, Woodbridge. Canon 550d with Canon EF 75-300mm f4-5.6 IS lens.
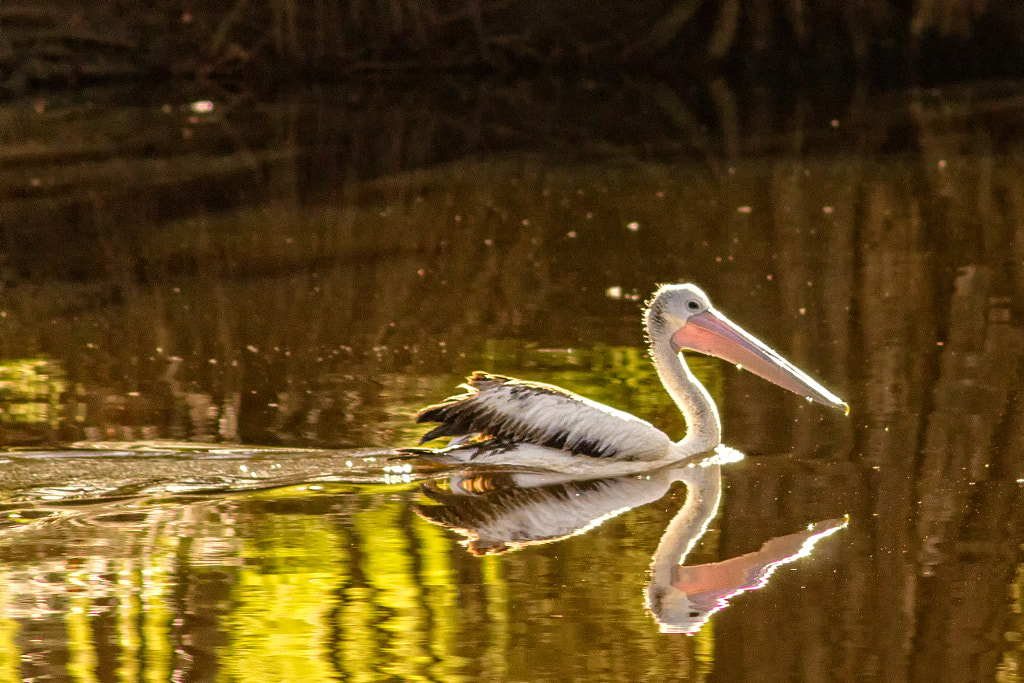
Australian pelican (Pelecanus conspicillatus), Swan River, Woodbridge. Canon EOS 550d with Canon 75-300mm f4-5.6 IS lens.
This would be a camera which would benefit with a better lens if you can afford it. Something like a Canon EF 300mm f4 (approx $500 on EBay) or a 400mm f5.6 (approx $600 on EBay). This would be a nice nimble set up that would give great results.
The Nikon equivalent to this camera would be the Nikon D5000 for about the same amount of money.
Summary
It is quite possible to put together a competent kit to photograph wildlife for less than $500 AUD. It won’t have all the bells and whistles of more modern high end cameras but you will be able to make it work. The limitations mainly are speed of operation and picture quality. Learning how to make up for the short comings will inevitably make you a far better photographer in the long run than having the latest and greatest camera will.

















You must be logged in to post a comment.