Bread And Butter Lens

20260417-Canon35mm-0224-Edit
The Canon EOS 30 film SLR with a Canon EF 35mm f2 lens mounted.


Regular readers may recall that I have been shooting film again and it has been great fun going out with a single camera and a single lens. My camera of choice is my Olympus OM4 with the Olympus OM Zuiko 35mm f2 lens. That combination is over forty years old and I’m a bit worried that it may give up the ghost because there will be no chance of repairing it. I had thought of getting another OM4 body or even the later OM4 Ti, but they are all getting on a bit. I do have another film camera body that I can use and that is the Canon EOS 30, also known as the Elan 7E in North America and EOS 7 in Japan. I’ve been using it with either my Canon EF 24-70mm f4 or my Canon EF 50mm f1.8. The zoom lens and camera combination is a bit on the heavy side heavy for an every day carry and while the 50mm was suitably lighter it’s not a focal length I particularly like. So I had the bright idea of buying a Canon EF 35mm f2 lens. They have the benefit of being small and light while being cheap second hand. So I scoured EBay and found that Map Cameras had a suitable copy rated as “B – Has been used preciously. Showing a few marks, scratches of cosmetic surface. Functions perfect.”. When it arrived it looked like it was new, there were no marks on the lens barrel, front and rear lens elements, and the mount looked pristine.


Canon EF 35mm f2 lens
The Canon EF 35mm f2 was part of Canon’s consumer range of lenses. Here it is shown with the 24mm f2.8 and 50mm f1.8 mk ii.


Canon introduced their autofocus EF lens mount in 1987 and it took them until October 1990 to introduce a basic 35mm lens – the EF 35mm f2 a no frills prosumer grade lens. It’s got a plastic body with a metal lens mount. There’s a focusing ring and a switch to put it into manual focus. The lens extends as you focus in and out, but, the front element doesn’t rotate which is a boon if you like to use polarising filters. It feels quite dense in the hand, but it doesn’t exude quality.


Canon EF 35mm f2 lens
It is a very no frills construction with a plastic body, manual focus switch and a rudimentary ribbed manual focus ring. You do get a focus scale for zone focusing and an infrared focus point. Which is all very welcome on a budget lens.

;


Canon EF 35mm f2 lens
It does have a metal lens mount which is always nice to see as many budget lenses have plastic mounts.


Specifications 

Focal Length 35mm
Maximum Aperture F/2
Angle of View (diagonal) 63° 26′ (for full-frame format)
Optical Construction 7 elements in 5 groups
Minimum Object Distance 0.25m
Maximum Magnification Ratio 0.23
Filter Size Φ52mm
Maximum Diameter Φ67.4mm
Length 42.5mm 
Weight 210g
Diaphragm Blade Number 5 straight blades
Minimum Aperture F/22
Standard Accessories Lens caps
Compatible Mounts Canon EF


EF35mm f2 - Canon Camera Museum 2025-07-28 16-18-22-Edit
The optical construction is very simple with 7 elements in 5 groups and no fancy glass elements.


Performance

Sharpness


20260501-Canon35mm-0001


20260501-Canon35mm-0004


20260501-Canon35mm-0002


20260501-Canon35mm-0003


Wide open the centre of the image is soft, but has reasonable contrast. The corners were far worse – low contrast mush. At first I thought I had a lens that was  decentered, but, when I checked all four corners they were equally bad so it was field curvature . This is, apart from a lens by Holga, the worst lens I’ve ever tested. Two stops down from wide open is where a lens traditionally hits optimum performance, well someone forgot to tell the Canon optical design team that as although there had been a slight improvement in the centre the corners were still very mushy. At f5.6 the centre of the frame is as good as it gets, but the corners still aren’t sharp and lack contrast. The best performing aperture is f8 in terms of the full field of view. By f16 diffraction starts to kick in degrading the image and that just gets worse at f22.

Now this is a 36 year old design for a consumer grade lens so is this performance to be expected. Well the Olympus OM Zuiko 35mm f2 was designed was introduced in 1972 a full 18 years before the Canon EF 35mm f2 and it has a better optical performance and better bokeh – more about that later. The only advantage the Canon has over the Olympus is that the Canon manages flare a lot better. We’re also told that primes are better than zooms so I compared the Canon EF 35mm f2 to my Canon EF 24-70mm f4 IS L at 35mm, and the zoom is better. Not surprising really. An old consumer grade design compare to a more modern professional grade. So I wouldn’t look to replace a good zoom lens with the Canon EF 35mm f2 unless you were considering some other metric of comparison such as size and weight.

Bokeh


20250918-Canon35mmf2-0225
Wide open the bokeh balls are bad. The transitions to out of focus areas are quite pleasant.


Wide open the Canon produces nice large round bokeh balls that have no onion rings – the lens has after all no aspheric elements. At the edges the balls take on a more elliptical shape caused by mechanical vignetting. As you stop the lens down to f2.8 the balls cease to be balls and become pentagonal thanks to the five straight aperture blades. They become defined the further you stop down.


20250918-Canon35mmf2-0226
Stopping down to f2.8 and the bokeh balls cease to be balls and take on a pentagonal shape thanks to the 5 straight blades of the aperture diaphragm.


Flare Resistance 


20250815-Canon35mmf2-0236-Edit


A specular light source within the frame will produce quite pronounced veiling and reflective flare. The effect becomes more pronounced as you stop down. It is a good argument for a lens hood, but Canon never supplied their non ‘L’ lenses with one, you had to buy it separately. It would be worth looking for a second lens that came with one. The diffraction spikes or sunstars are ugly with little definition. 

Chromatic aberration


Canon EF 35mm f2
Wide open there is axial chromatic aberration. Stopping down will fix the problem.


Axial chromatic aberration, also known as longitudinal chromatic aberration is present wide open with magenta and green fringing. This is difficult to remove in post, the best way to deal with it is to stop down.

Transverse or lateral chromatic aberration is present and considering the age of the design and the fact there are no fancy glass elements it does remarkably well. If using the lens on a digital camera this is easily dealt in post.

Distortion


Canon EF 35mm f2
Barrel distortion is present, it’s not too extreme – I’ve seen much worse. It is easily corrected if you shoot digital. You can also see the vignetting. This diminishes as you stop down and can also be fixed in post if working digitally. Personally I quite like a bit of vignetting and will often add it in post or in the darkroom.


As with most wide angle lenses there is barrel distortion, but it is very mild. Again shooting on digital this can be fixed by applying the profile for this lens.

Vignetting

There is some vignetting when shooting wide open and this clears up pretty quickly as you stop down. The Canon EF 35mm f2 lens profile in Lightroom also removes it.

Autofocus

When this lens was designed autofocus systems were a lot more primitive than they are now. Firstly these first generation auto focus lenses have according to Canon “an arc form drive for focusing. This is a conventional small motor unit, shaped to fit inside the curved barrel of a lens.”. Consequently they are slow and noisy. When I say say noisy I mean it. Racking the lens back and forth produces a sound that is akin to angry wasp trapped inside a bottle. It is very noticeable. There is no full-time manual focus, as found on later lenses that used USM and STM motors, you have to switch to manual focus using the switch on the lens barrel. Talking about manual focus there is a narrow ribbed focus ring and a focusing scale. While the lens is in AF mode the ring spins freely and does nothing. Throw the switch and the focus ring drives the lens elements back and forth. There are hard stops at either end so repeatable focus moves are possible. While not the most pleasant focusing ring to use it’s not unpleasant either. It gets the job done.

For stills this lens was made when a camera with seven AF points clustered in the centre of the frame was considered sophisticated. Single point AF was usually a matter of keeping the subject in the centre of the frame or focusing and recomposing. The AF on the lens is adequate, mostly it is accurate, but it can be a little slow and hunt in low light or with low contrast subjects. Continuous AF is much the same story.

This lens was not designed with video in mind, but I gave it a go.  I tried it on an 80d the Dual Pixel CMOS AF but it wasn’t the best performance. Finally I bunged the lens on my Sony A7r2 via a Metabones adapter and to some extent the AF was a little better but the lens really struggled and made some awful noises as it focused.


In Use


20250815-Canon35mmf2-0225-Edit


Moylan Silos


20260124-York-0244-Edit


Bing's Visit


From the above you’d think that this lens isn’t much chop. In photography there is a tendency to obsess about specifications and lens resolution charts, but they don’t tell the whole story. Wide angle retrofocus lens for SLRs don’t really perform well at close distances unless they have a floating rear element which the Canon EF 35mm f2 does not. That may explain some of the results. Also answer these two questions. How many times do you compose a photo with the main subject in the extreme corners? Short of very precise copy work how many images do you take that require corner to corner sharpness? I know I don’t do any of those two things. The attributes this lens brings to the table are that it is small and light and is sharp enough where it counts. It is ideal on a compact SLR as an everyday carry.  Although I primarily bought it to use on my film EOS 30 to date I’ve not done so preferring to use it on either my Canon 5d or 6d. It’s been a very pleasant experience and I’ve enjoyed using for landscape, urban landscape and street photography.


Smile


20251229-Perth-0224-Edit


20251229-Fremantle-0226-Edit


Conclusion


Canon EF 35mm f2 lens


If like me you want a small compact lens to walk around with on a film or digital Canon SLR and you aren’t bothered by not having a red ring, the best specs and best optical performance then this lens is perfect. There are loads of them out there which makes it easy to pick up a reasonably priced second hand example. If you want something to shoot video I’d look for the Canon 35mm f2 IS, the Canon 35mm f1.4 L, or a Sigma 35mm f1.4 Art. They will all have more modern motors which will make the autofocus experience more pleasurable. If you want to adapt the lens to shoot on a modern mirrorless again look for something more modern.


Canon EF 35mm f2 lens


OM System 100-400mm f5-6.3 II IS lens Redux

Untitled-1

Back in November 2025 I wrote about my experiences with the OM System 100-400 mk ii, and it is fair to say that they weren’t very positive. Since then a lot has happened and I’ve had a couple of requests for an update so here we go.

First of all I’d like to take the time to thank Aaron Harivel Product and Sales Specialist at OM Digital Solutions Australia for his help and patience in bringing this matter to a resolution. On 21st January 2026 I picked up a new copy of the lens.

My main problems with the original copy were that the autofocus was very bad – it just wouldn’t find focus or when it did it would not hold it. It was a very frustrating experience. My other cause for concern was that the lens was soft wide open and didn’t improve until I stopped down to f11. So I was interested to see whether the new copy was any better.


Optical Performance

I didn’t bother testing the lens at all focal lengths I just concentrated on the 400mm end. So pointing the lens at a test chart with the camera mounted on a tripod and using the self timer to trigger the electronic first curtain shutter I found that the new version wide open at f6.3 was softer than the first copy – only by a gnat’s whisker, but none the less it resolved less fine detail. But, more importantly the performance at f8 was way superior to that of the first lens even when that was stopped down to its best aperture of f11. Not ideal, but I can work with it if I can get the lens to focus accurately and consistently.

wide_open_centre


wide_open_corner


f8_centre


f8_corner


Autofocus


Laughing Dove


The day after I collected the lens I took it out and gave it a simple test – taking a sharp photo of a Laughing Dove sitting on a railing from a distance of about 10m. I fired a burst of shots using single point continuous auto focus and held my breath waiting for the buffer to clear before looking on the back screen of the camera. When I looked I saw to great relief that every shot was perfectly in focus – something the first copy could not achieve. I carried on walking along the riverbank taking photos of a variety of different birds in as many different lighting scenarios as I could find using either single point CAF or subject tracking and the lens performed flawlessly. The video I shot was also in focus. I’ve even tried it in combination with the 1.4x teleconverter and it works well in brighter light, but struggles a little bit when the light levels are low and lack contrast. It was better than I expected.


I’ve taken it out of subsequent occasions with the same results.


Kanyinak
Kanyinak or Sacred Kingfisher (Todirmphus sanctus). Northam, Western Australia.


Djakal-ngakal
Djakal-ngakal or Galah (Cacatua roseicapilla) fly past. York, Western Australia.


Djoowi
Djoowi or Tawny Frogmouth (Podargus strigoides). Lake Leschenaultia, Chidlow, Western Australia.


Doolor
Doolor or Silvereye (Zosterops lateralis). Lake Leschenaultia, Chidlow, Western Australia.


Koordji-koordji
Koordji-koordji or Australian Reed Warbler (Acrocephalus australis subspecies gouldi). Lake Leschenaultia, Chidlow, Western Australia.


In Summary

Well when I posted the original post about the first version and the accompanying YouTube video I was amazed at the supportive comments. Most people it seemed were happy with copy of the lens, but there quite a few who definitely had problems with theirs and were unhappy. In my first write up I recommended the Panasonic Leica 100-400mm over the OM version. I had a few comments from people who had the opposite experience to mine and felt that they could not share my recommendation. It would seem that there is quite a lot of sample variation with camera lenses, although this is my first problem in this regard in 40 years of photography.

All I can suggest is that you be persistent with your dealer or local distributor if your lens doesn’t function like it should and work to a satisfactory resolution.

As to how I feel about the lens now I have a satisfactory copy. Well I’ve got some exciting trips lined up this year and the lens will be coming with me.

Second Time’s A Charm…


… or is it?

OM System 100-400mm f5-6.3 II IS lens Review


20250829-OMSystem100-400-0236-Edit


This has been very difficult to write and has become a very long and drawn out affair and it shouldn’t have been.

I have, as regular visitors to the site may recall, been using the Panasonic Leica DG Vario-Elmar 100-400mm f4-6.3 lens for my wildlife photography since September 2018. I bought it because it was the only affordable quality long lens available in Micro Four Thirds at the time. Largely I have been very, very happy with it. The major nitpick I have is that although both Panasonic and Olympus/OM System are part of the Micro Four Thirds consortium and conform to certain protocols such as lens mounts, flash system standards, and autofocus compatibility some features are not cross brand compatible. Now when I got the lens I was primarily using a Panasonic Lumix G85 with which it mates up perfectly and an Olympus EM1 mk 1 which was close enough. But as I progressed with Olympus cameras some of the features such as Synch IS, autofocus while using Pro Capture, focus stacking and high resolution functions required complete compatibility and I was wanting to use them on a regular basis. When Olympus introduced the mk 1 version of the 100-400mm lens in 2020 it seemed weird as it wasn’t compatible with those features so I saw no need to change. So with the announcement in February 2025 OM System announced the OM System 100-400mm f5-6.3 II IS lens and that they had fixed some those issues I became very interested and bought it after watching and reading many, many positive reviews.


20250829-OMSystem100-400-0234-Edit


One of the things that has made this so difficult is because I keep making comparisons to the Panasonic 100-400mm mk I which I also own. In fact, it is probably more a comparison review than anything else, which is unfortunate as I wanted to make it a stand alone look at the OM System 100-400mm.


Panasonic Leica 100-400mm Lens
Comparisons with the Panasonic Leica DG Vario-Elmar 100-400mm f4-6.3 are inevitable considering they both share the same focal range and lens mount.


The Controversy 

When the original Olympus 100-400mm came out a lot people jumped on the fact that it was simply a rebadged SIGMA 100-400MM F/5-6.3 DG DN OS Contemporary Lens. The criticism mainly centred on the fact that it was firstly a lens designed for full frame cameras rather than specifically for Micro Four Thirds which meant some how that it was too large and heavy and undermined the original m4/3 ethos of being small and light. The second complaint was that the original Sigma lens sells for around half the price of the Olympus/OM System version so, therefore, customers were being ripped off by Olympus/OM System. When the  OM System 100-400mm f5-6.3 II IS lens was launched these same complaints were again raised. Well the truth is somewhat different. 


M.ZUIKODIGITALED100-400mm -Edit
Optical construction of the OM System 100-400mm lens.


Sigma100-400_2
The optical construction of the Sigma 100-400mm lens. Looking at this and the OM System one you can see the differences.


While both lenses may have been built by Sigma (and there is no definitive proof that the Olympus/OM System lens has been) there are some key differences. While they share the same focal length, aperture range, and thermally stable composite body the filter size of the Sigma is 67mm compared to 72mm of the OM System lens. The Sigma lens has a lens construction comprising of 22 elements in 16 groups with four FLD elements and one SLD element. The OM System 100-400mm lens has 21 elements in 15 groups with four ED elements, two HR elements and two Super HR elements. The OM System lens diaphragm has 9 circular blades while the Sigma has 7. The OM System lens has IPX1-rated weather-sealing and there is no rating for the Sigma. The OM System lens’ front element has a ZERO Coating which is a form of fluorine coating that repels water and smears keeping it clean.  The Sigma’s image stabilisation is four stops while the OM System’s is 5 on its own and it fully integrates with their cameras IBIS to give 7 stops of image stabilisation. 

At this point I think it is fair to say that the OM System lens is not a simple case of badge engineering, there are too many differences. Now I’m not saying that OM System didn’t contract Sigma to build the lens using their existing  SIGMA 100-400MM F/5-6.3 DG DN OS Contemporary Lens as a framework. What I am saying is that are sufficient differences in the specifications and they should be treated as entirely separate entities.

Vital Statistics

Focal Length  100-400mm (35mm equivalent 200-800mm)
Mount Micro Four Thirds
Lens Construction 21 elements in 15 groups with four ED elements, two HR elements and two Super HR elements
Lens Coating ZERO Coating
Angle of View 12° (wide) – 3.1° (tele)
Number of Diaphragm Blades 9 rounded blades
Maximum Aperture f/5.0 (wide) – f/6.3 (tele)
Minimum Aperture  F22
Minimum Focusing Distance 1.3m
Maximum Magnification Ratio 0.09x (wide) – 0.29x (tele)
Filter Size 72mm
Dimensions 86.4mm ⌀ × 205.6mm h
Weight 1,125g
Supplied Accessories lens hood
Weatherproof IPX1-rated weather-sealing – Dust-proof, Freeze-proof, Splash-proof
Lens Sync IS 5-Axis


20250829-OMSystem100-400-0224-Edit
The OM System 100-400mm is not part of the top tier PRO line of m.Zuiko lenses, but rather one of their consumer grade ones. Consequently it does not have the metal body nor MF Clutch / Snapshot Ring but rather a nondescript composite body that is strictly utilitarian. The zoom is of the external variety in that the lens barrel extends as you zoom through the focal range, but the focusing is internal and the front element does not rotate as the lens focuses. The mechanism feels sturdy with no hint of any flex or wobble. At the mount end there is a chromium plated brass mount which is surrounded by an “o” ring which provides a seal between the lens and camera body. Be aware that OM Systems OM1 mk i & ii, OM3 and OM5 mk i & ii have an IPX rating of 53 which means that they are protected against low pressure water streams from any angle and while not completely dust proof any ingress that does occur will not interfere with the operation of the camera. The lens is IPX1 rated which means that there is no information available about resistance to dust ingress and it is resistant to vertically dripping water equivalent to 1 mm rainfall per minute. So the camera body has more resistance than the lens. 


20250829-OMSystem100-400-0231-Edit
The chromium plated brass lens mount and the rubber “o” ring that provides some weather sealing.


The lens is quite a chunky beast and it also has considerable weight. It is when you compare it to the PanaLeica 100-400mm that this becomes really apparent. The PanaLeica is 34.1 mm shorter, 3mm in diameter smaller and 140g lighter while having a much more premium metal body that just exudes class. In comparison the OM System lens comes off as feeling lumpen and a little tacky.


20250830-OMSystem100-400-0237-Edit
The OM System lens extends as you zoom in. Fitted with the included lens hood it is quite a large lens.


When it comes to controls both lenses are pretty the same. A zoom ring, focus ring, zoom lock and switches for the AF function, focus limiter and image stabilisation. The OM System lens scores well here as the PanaLeica is plagued with an incredibly stiff zoom ring, but overall the PanaLeica gives to my mind a much better user experience.


20250829-OMSystem100-400-0242-Edit
The much lauded new tripod collar. I see it as a solution to a problem that never existed.


On launch there was a lot of fanfare about the new tripod collar. Yes it’s different from the one on the original version but you’d hardly call it innovative. I see it as a solution to a problem that never existed. I’m amazed that so many of the internet reviews went on and on about this giving scant attention to things like autofocus and optical performance. If you want to see a truly innovative approach to tripod collar design look at how Panasonic implemented theirs on the PanaLeica 100-400mm.


20250830-OMSystem100-400-0233-Edit
At its minimum focal length with the lens hood attached.


The OM System 100-400 includes a bayonet type lens hood in the box while the PanaLeica has a a two piece lens hood (a mini hood permanently attached to the body of the lens and a separate extension that attaches to it) and also throws in a lens pouch. To be honest I’ve never used it, but, it’s nice they’ve taken the effort to include it.

Performance


Sharpness


20250901-OMS100-400mmmk2-0293
The new you beaut lens chart.


At 100mm wide open at f5 the performance is even across the frame – a little soft and lacking contrast. At f5.6 the contrast improves a little but the sharpness remains the same. At f8 there is no improvement. At f11 the lens reaches it’s best performance and at f16 softness in the form of diffraction re-appears.


lenschart400wideopen


Best results from the lens came at 200mm, with the best results at f11.

At 400mm wide open at f6.3 at the centre of the image the lens is soft and lacking contrast and the corners match this. The results follow the progress of the shorter end with best performance at f11.


lenschart400f8


This is very disappointing as the lens is not capable of resolving fine feather detail wide open unless you stop down to f11 which makes the lens really unsuitable for low light or birds in flight as you’ll have to use very high ISOs to get high shutter speeds and that kills image quality.


lenschart400f11


Flare resistence


20250924-OMSystem100-400-0247-Edit


Over all flare resistance is very good – the lens coatings are working well to minimise veiling flare. There is some ghosting present – polygonal shapes and light streaks – and it starts to become intrusive at f8. The diffraction spikes are not pretty at all, but then you don’t buy a lens like this for the diffraction spikes.

Chromatic aberration

Transverse or lateral chromatic aberration is present, but it is very, very slight and you really have to pixel peep to find it or turn off the lens profile in your image editing software.

Axial chromatic aberration, also known as longitudinal chromatic aberration is virtually nonexistent, but that is to be expected with such a small maximum aperture.

Autofocus

If you think this has been a pretty damming review so far well all I can say is brace yourself as we haven’t dealt with the lens’s major short comings. Now before any of you complain about me having a faulty camera I tested the lens on an Olympus EM1, two different EM 1 mk 2s, and an EM 1x and got the same result. The lens and the cameras all had the latest firmware installed. 


20250901-OMS100-400mmmk2-0378
The bird on the slider test. The slider was set so that it travelled the 20cm of the slider in 20 seconds on a continuous loop.


At best using continuous autofocus on a slow moving target – me walking – I got 56% of the images in focus. Putting a stuffed toy bird on a slider and having it move back and forth 40% of the photos were in focus. At this point I contacted OM Systems Australia and sent the lens into them for recalibration. On getting it back the performance was actually worse with only 20% of photos in focus. The problem is that it seems to take ages for the lens to acquire focus and if it does it will momentarily grab focus for a couple of frames before drifting off again. The number of times where I’ve had a bird sitting just 5-10m away from me with a clear background and the camera and lens refuses to lock on to it. Frustration just doesn’t begin to express what I feel when that happens. Switch the lens over to the PanaLeica and there is no problem. Even the much cheaper OM System 75-300mm MKII lens performs better than the OM System 100-400 despite being a quarter of the price.


20250924-OMSystem100-400-0229
No matter what I tried the camera and lens combination would not focus on the bird. This Reed Warbler got fed up with waiting and took off.


When shooting video the situation is worse. It struggles to find focus and then will inexplicably drift off.

At the time of writing the lens is with OM System Australia for “evaluation”.

Image Stabilisation 


imagestabilisation


This is an area where the 100-400 excels. OM System claims that the optical stabilisation of the lens combines with the the in body image stabilisation of the camera body to give 5 axis stabilisation of 7 stops. Back in the days of yore when 35mm film SLRs were the norm there was the old adage of the minimum shutter speed you can hold is the reciprocal of the the focal length. So with the micro four thirds crop factor a focal length of 400mm is the full frame equivalent of 800mm and it would need a shutter speed of 1/800 sec to avoid camera shake. Now seven stops would take us down to a shutter speed of 1/6 sec and with my shake hands I could only get 1/13 or 6 stops and get a sharp image. Pretty impressive by anyone’s standards. The practical application of this is that for taking photos of birds I don’t often go below 1/500 sec so it seems overkill, but for video that is another matter entirely and it makes it possible to shoot handheld with this lens.

Minimum Focusing and Maximum Magnification Ratio


OM System 100-400mm f5-6.3 mkII lens
The minimum focusing distance of 1.3m at all focal lengths makes the OM System 100-400mm a very capable close up lens.


OM System 100-400mm f5-6.3 mkII lens
The minimum focusing distance of 1.3m at 400mm gives a Maximum Magnification Ratio of 0.29X.


Conclusion

Thomas Eisl in his review:

“When working with the 100 to 400 Mark  II in practice, one of the first things you will notice is the exceptional focusing performance…It is therefore highly suitable not just for wildlife photography, but also for professional wildlife film making.”

“The exceptional autofocus performance stems from full compatibility with the latest OM system autofocus technologies. This lens is swift enough for the speediest of all subjects and is definitely on par with OM system pro lenses in that regard.”

“Now to conclude the optical performance analysis, it is fair to state that the 100 to 400 M Ii delivers where it matters most and compromises, if existent at all, are very minimal. Overall, a lens capable of professional results, even under demanding conditions. No wonder that this is my most used super telephoto lens at the moment.”

“The OMS 100 to 400 F5 to F6.3 M II stands as a highly capable super telephoto zoom. Its robust yet portable construction, impressive image stabilization and swift autofocus cement its position as a reliable tool for demanding applications like sports and wildlife.”

“This lens delivers a performance that feels almost too good to be true both on paper and in the field.”

Mike Lane states that there is very little difference between the $2200 OM System 100-400mm f5-6.3 II IS lens and the $12,000 150-400mm F4.5 TC1.25X IS PRO.

Espen Helland says “I’m really impressed with the sharpness of the new lens, my photos at 400mm are tack sharp.” and “Though the 100-400mm chases with autofocus a little bit more than my 150-400mm f/4.5 it still performs really well.”

So with these glowing reviews I reflect on my own experience with supposedly the same lens. As it stands, I think that based upon my experience that the OM System 100-400 mk ii is actually unsuited to wildlife photography. The autofocus is incredibly poor and will just frustrate the hell out of you – well it certainly did me. When it does find focus at 400mm, which is where most bird photographers will use it, it is incapable of resolving any fine feather detail. Now it maybe that I just have higher standards than the other reviewers, but I highly doubt that. It maybe that camera and lens manufacturers make sure they send out perfect examples for review. Possible. I know that if I were sending out a product for critical evaluation I would definitely send the best of the best. More likely I just got a lemon. Now if that’s the case then why aren’t OM System looking to rectify the problem. At the time of writing their official line is no refund, no replacement and we’ll begrudgingly look at the lens , but won’t necessarily do anything. That leaves a very sour taste in my mouth and makes me want to change brand. Now OM System doesn’t have a very large market share, they are really struggling to break even (at the end of 2024 they were ¥1.2 billion or $120,000,000 AUD in the red) so alienating existing users seems like economic suicide.

Can I recommend the lens? In short no.

If you’re an Olympus/OM System camera user and not fussed about synch IS, the computational functions and the need for teleconverters then buy the PanaLeica 100-400 it is the much better lens in every way. If those functions and the use of teleconverters are important then I’d skip this lens and sell some body parts and get either the OM System 300mm or 150-400mm. Don’t waste your money on this lens.


190321-PanaLeica100-400-0224-Edit
Just buy the PanaLeica 100-400mm as it is the better lens.

A Steadying Influence

One of the great developments in camera design over the last few years has been in the area of image stabilisation. 

For me personally Synch IS (what Olympus/OM Systems call their combination of IS technologies) has meant that I seldom us a tripod anymore and that has been truly liberating. For video it is a different story. For short focal lengths I can just about handhold without inducing motion sickness in my viewers, but for long telephoto work just forget it, which is unfortunate as I do like filming wildlife. So I have taken to using a video tripod – a Sirui CT-3204 with Sirui VH-10X fluid head. The biggest problem is that it is heavy (3.56Kg) which is fine if I don’t want to walk far, but a real burden if I do. The other strike against it is that is awkward to use in the bush. So what has been happening is I make a decision – stills or video as a priority and more often than not it is stills and the tripod gets left behind in the car.


Too Heavy!!
Too Heavy!! My Sirui CT-3204 with Sirui VH-10X fluid head. While a great video tripod it is heavy (3.56Kg).


A little while ago I started thinking about monopods for video. I am no stranger to monopods I used to use them a lot for sports and events photography and I can’t remember a time when I’ve not had one. The one I have had for the last 25 years or so is the Manfrotto 679B with the stock Manfrotto 234RC head. A fantastic bit of kit but totally unsuited to video work. So as video was becoming more important (it was part of a unit I was teaching) I bought a Manfrotto 560b-1 monopod which featured a set of 3 feet at the bottom attached to the body of the monopod via ball joint with fluid cartridge. This means that horizontal pans are nice and smooth. The stock 234RC head meant that smooth vertical pans were impossible. Shortly after Manfrotto started making sets up with a better version of the monopod with a 500HLV video head so being a thrifty kind of person (my father would say I had deep pockets and short arms) I decided to get a second hand fluid head and found a cheap Manfrotto 700RC. For lighter set ups with short focal lengths it worked very well, but with the heavier longer focal lengths required for wildlife it just wasn’t up to snuff. So it was back to the tripod – or so I thought.


WimberleyMH-100Gimbal Head1
Exactly what I’m after. Shame about the price.


LefotoMPG-01
Looks like a direct copy of the Wimberley above. The price is more wallet friendly, but still a little on the steep side for me.


Fast forward a few months and I watched a video review on monopod heads and the reviewer talked very favourably about gimbal heads for monopods. In particular he raved about the Wimberley MH-100 Mono Gimbal Head. Now I’d never heard of it before and I quickly jumped online to find out more. It seemed to offer what I wanted in every way except price. $455 AUD, which was a bit much to take a punt on. So on looking around I found that Leofoto have their catchily named MPG-01 Mini Monopod Gimbal which was cheaper at $231 AUD but still too much to pay for an experiment. Further research turned up the Neewer GM39 Side Saddle Monopod Tilt Ball Head and that was a more reasonable $70 AUD. Now Neewer are one of the many Chinese photo accessory manufacturers that have sprung up in the last decade or so. Their products are generally what I would call cheap and cheerful. There are plenty of reviews out there that say the products are crap, but there also just as many that say they are good. I have used quite a few of their products and my experience has been largely positive. I like their LED video lights and replacement camera batteries. I’ve tried some of their filters and found them be not that great. So I decided to keep an open mind and try the monopod head.


Neewer GM39 Side Saddle Monopod Tilt Ball Head


I ordered the GM39 head off of the Neewer website and it arrived very promptly. The head was supplied in an eco friendly cardboard package with an Allen key, an Arca Swiss plate and a set of instructions in umpteen languages.


20250707-NeewerGM39gimbal-0227-Edit
The Neewer GM39 in all its glory.


First impressions were very good. The head appears on the surface as nicely finished in black anodised aluminium with the knurled knobs finished in grey. Quite smart. In the hand everything feels nice, solid and well put together. It has a compact low profile and weighs in at svelte 259g (without plate) and has a maximum load capacity of 4Kg. There are three knobs; one for tightening or loosening the Arca Swiss compatible clamp, one for adjusting the ball head, and one for the panning control. The base has a diameter  of 40mm with a 3/8” thread to allow mounting to a monopod or tripod. An interesting touch is that the base is cut so it will slide into an Arca Swiss quick release clamp. You can use the head with the clamp vertical as a traditional ball head, or you can rotate the clamp through 90º and use it as gimbal head.


20250707-NeewerGM39gimbal-0229-2-Edit
The base has a diameter  of 40mm with a 3/8” thread and it is also milled to be compatible with Arca Swiss type clamps.


20250707-NeewerGM39gimbal-0226-2-Edit
The standard of finish appears very good.


In Use


20250707-NeewerGM39gimbal-0228-Edit
The Neewer GM39’s Arca Swiss Type clamp.


On their website Neewer says that clamp on the GM39 is compatible with “most Arca Type QR plates” . That is my first bugbear. I’ve got numerous Arca plates knocking around and beside the one it came with it wasn’t compatible with those from Sirui, Smallrig or Sunwayfoto. Also the safety notches cut into the clamp to engage with the screw heads on the base to the quick release plate  don’t stop the plates from sliding out if clamp isn’t done up tight enough.


I decided to test the GM39 with the following four combinations:-

  • Canon EOS 6d with battery grip and Sigma 150-600mm Contemporary weighing in at 3.88Kg
  • Sony A6500 with Sigma 150-600mm Contemporary weighing in at 2.99Kg
  • Olympus EM1x with OM System 100-400mm weighing 2.47Kg
  • Panasonic G85 with battery grip and Panasonic Leica 100-400mm weighing 1.88Kg


20250716-NeewerGM39gimble-0224-Edit
Canon EOS 6d with battery grip and Sigma 150-600mm


20250716-NeewerGM39gimble-0228-Edit
Panasonic G85 with battery grip and Panasonic Leica 100-400mm


All of the combinations came in at under the 4Kg maximum load and yet it was impossible to cinch down the ball head to prevent movement, but more importantly there is no friction control. What I mean by friction control is that there is no way to control how the head moves – whether slowly or quickly which means that the camera and lens can flop about in an uncontrolled manner. Now I’m no engineer but looking at the ball it has a diameter of 20mm which is pretty small and that makes it hard to resist the torsional forces exerted by the heavy lenses. For example my Sunwayfoto FB-44II ball head has a 44mm diameter ball and that is hard pushed to lock down my Canon 6d and 150-600. With the included quick release plate it is possible to balance the G85 and EM1x combinations, with larger lenses you’ll need to buy a longer plate taking into consideration it is not compatible with all brands of Arca Swiss compatible QR plates.


20250716-NeewerGM39gimble-0230-Edit


The diameter of the base of the head is 40mm. This is something to be aware of. My Manfrotto 560B-1 has a head diameter of 34mm and everything is fine. My Manfrotto 679B has a head diameter 60mm and you have be careful when using the head in the gimbal mode that the release knob for the clamp is upper most or it will foul on the monopod and restrict your movement.

I tried using the GM39 on a tripod where I used its already installed ball head as a levelling base and and attaching it using the Arca Swiss rails that milled into it. It’s quite an interesting function and for the most part it does very well the only down side is that my head, a Sunwayfoto FB-44II is quite tall and having the GM39 on top of that makes it quite top heavy and unbalanced when using a long lens. This would be more suited to an inverted or low profile ball head.


20250716-NeewerGM39gimble-0232-Edit
The Neewer GM39 clamped onto a ball head on a tripod. This lets the ball head become a levelling head.


20250716-NeewerGM39gimble-0235-Edit
The problem being that it becomes a little top heavy and the weight of the camera and lens is not over the tripod’s axis so it all feels a little unbalanced.


Out in the field I used the GM39 primarily on my Manfrotto 560B-1 which has a fluid base that allows for smooth horizontal pans. So I had the gimbal set up  just to do the vertical pans. Despite some of the short comings mentioned above I found that it worked quite well. I particularly like the combined weight of 890g. This means I’m more inclined to take it with me. For photography I didn’t really use it much, but where I did use it a lot was with video. No it’s not a match for a proper video tripod and head but it is 2.6 Kg lighter than my Sirui CT-3204 with Sirui VH-10X fluid head. When using a combination of the GM39 on my monopod, Synch IS image stabilisation and correcting for camera movement in my video editing software I can get good results and that is all I wanted.


That's Better!!
That’s Better!! The Manfrotto 560b-1 monopod with Neewer GM39 is 0.89 Kg which is much easier to carry while walking through the bush.


Conclusion

On line I’ve read and watched reviews from people who have either really liked the Neewer GM39 Side Saddle Monopod Tilt Ball Head or hated it with a passion. It seems to be quite polarising. What do I feel about it? Well I think it’s important to understand it’s strengths and weaknesses. 

You can’t expect Wimberley MH-100 Mono Gimbal Head performance from a product that costs a sixth of the price. Both Wimberley and the Leofoto use a different mechanism that involves bearings mounted round a spindle and there is only up or down movement which would mean that it is easier to lock down the head when needed. This mechanism is then contained within the structure and not subjected to the ingress of dirt or water meaning better longevity.The GM39 has a freely rotating ball head that give 360º motion in any plane. The locking mechanism is cruder and the mechanism is open to the elements which means grit could enter it and cause malfunction.

Below I’ve listed the pros and cons as I see them:

Pros:

  • Cheap
  • Lightweight
  • Arca Swiss compatible

Cons:

  • It’s not possible to lock the head out or control the movement in the head
  • The camera and lens aren’t mounted over the axis of the monopod so can feel unbalanced in certain circumstances
  • The ball head could become easily fouled by ingress of dirt and water
  • The clamp is not completely Arca Swiss compatible which could make finding replacement plates or longer plates difficult.
  • Not the best choice for heavy camera and lens combinations

On using the GM 39 for a while I realised that there is nothing to stop you using an existing ball in this manner and so you don’t need to buy anything.


20250707-NeewerGM39gimbal-0231-Edit
As long as the ball head has a notch to one side to allow 90º positioning any ball head could be used as monopod gimbal.


From the above it would seem that I didn’t like the Neewer GM39 Side Saddle Monopod Tilt Ball Head and that is not correct. What I appreciate about it  is that it is cheap, light and does the job well enough. It works very well with my M4/3s setup. Whether it is right for you that I can’t answer, but what I can say is that the Neewer GM39 is cheap enough to take a punt on.


Sigma 23mm f1.4 DC DN Lens


Sigma 23mm f1.4 DC DN Lens
The Sigma 23mm f1.4 with the box it comes in. Inside the box are the lens, the end caps and a lenshood.


The Sigma 23mm f1.4 DC DN lens was introduced in April 2023 for APS-C cameras in Sony E, Leica L, Fujifilm X and Canon RF mounts and currently sells for $750 AUD. The focal length gives a full frame equivalent of 35mm and it joins the 16, 30, and 56mm lenses which means that there are now f1.4 primes in 24, 35, 45, and 85mm full frame equivalent focal lengths. I’m looking at the Sony E mount version which I bought in May 2024 primarily to use for video mounted to my Sony A6500. I’ve only recently started using it as a general purpose walk around lens.


Sigma 23mm f1.4 DC DN Lens
The Sigma 23mm f1.4 with the Sony A6500 camera.


Vital Statistics


Mount Sony E, Leica L, Fujifilm X, and Canon RF
Lens Construction 13 elements in 10 groups with 3 Special Low Dispersion glass and 2 aspherical elements
Angle of View 63.4º
Number of Diaphragm Blades 9 rounded blades
Minimum Aperture  f16
Minimum Focusing Distance 25cm
Maximum Magnification Ratio 1:7.3
Filter Size 52mm
Dimensions 65.8mm ⦰ x 78.9mm (h)
Weight 330g for Sony E mount version
Supplied Accessories Petal shaped lens hood


Sigma 23mm f1.4 DC DN Lens


The Sigma 23mm f1.4 DG DN is part of Sigma’s Contemporary line which means it has a utilitarian plastic body (or as Sima prefers to call it a Thermally Stable Composite). The only external control on the lens is the ribbed focusing ring which is of the “fly by wire type”. The lens is advertised as being dust and splash proof, but the only sealing is at the lens mount where there is an “O” ring seal. The lens mount itself is chromium plated brass for longevity. It is still good to see this as other manufacturers are tending to use plastic mounts on their budget lenses. The lens is supplied with a plastic petal shaped lens hood which feels very well made and it attaches by a bayonet fitting to the lens. It feels secure and well made.


Sigma 23mm f1.4 DC DN Lens
The only weather sealing is the rubber “o” ring on the lens mount.


Sigma 23mm f1.4 DC DN Lens
The petal shaped lenshood supplied with the lens is well designed and made. Thoughtful touches are the ribbing on the exterior to facilitate a firm grip when attaching and detaching it from the elns. The interior is also ribbed to prevent light bouncing off it and into the lens.


Physically the Sigma 23mm is quite a large lens. Not as big as the Sigma 16mm f1.4, but bigger than the Sony 28mm f2 and Sony 50mm f1.8. The weight of the lens is 330g – the Sony E mount version is the lightest at 330g and the Canon RF is the heaviest at 345g – and it contributes to the lens having a satisfying heft in the hand. The whole thing is well put together with no dodgy looking seams in the composite body or creaking and flexing when you give it a squeeze. While not part of Sigma’s more premium Art and Sports lines the Sigma 23mm feels a quality piece of kit. 


Sigma 23mm f1.4 DC DN Lens
The Sigma 23mm f1.4 while being a fairly chunky lens is smaller that the Sigma 16mm f1.4.


Sigma 23mm f1.4 DC DN Lens
When compared to the Sony 28mm f2 and 50mm f1.8 you can see the Sigma 23mm is quite a chunky beast.


Sigma 23mm f1.4 DC DN Lens
The Sigma 23mm f1.4 mounted on the Sony A6500 camera.


The Sigma 23mm f1.4 DG DN has an optical construction of 13 elements in 10 groups with 3 Super Low Dispersion (SLD) elements to reduce transverse chromatic aberration and 2 aspherical elements to provide correction of spherical aberration and field curvature. The diaphragm sports 9 rounded blades and while not having the eleven blades that the Art Series primes have this does produce nice bokeh effects – more about which later. The minimum focusing distance is 25cm measured from the sensor plane which gives a maximum magnification ratio of 1:7.3.


Sigma 23mm f1.4 DC DN Lens
The minimum focus distance is 25cm, which is measured from the sensor plane, and gives a maximum magnification ratio of 1:7.3.


Sigma 23mm f1.4 DC DN Lens


Optical Performance


Sigma 23mm f1.4 DC DN Lens


Sigma 23mm f1.4 DC DN Lens


Sigma 23mm f1.4 DC DN Lens


Sigma 23mm f1.4 DC DN Lens


Sigma 23mm f1.4 DC DN Lens


I must say I was quite impressed with the optical performance of the Sigma 23mm f1.4. Wide open the centre is sharp and the corners are a tiny bit softer and have less contrast. Stop down to f2 and things significantly improve. The centre gets even sharper and there is more contrast and the corners now match the centre. Quite something. This performance stays constant until f11 where diffraction starts to set in and the image softens.

Chromatic Aberration

  • Axial chromatic aberration, also known as longitudinal chromatic aberration is present when the lens is wide open, but it is very well controlled and barely noticeable. Stopping down fixes the problem.
  • Transverse or lateral chromatic aberration is present, but it is very slight and you really have to pixel peep to find it or turn off the lens profile.

There is some very slight barrel distortion present, but you have to turn off the built in lens profile to really see it.


Sigma 23mm f1.4 DC DN Lens
With the lens profile turned off the barrel distortion is visible. Switching the profile on reduces it rather than totally eliminating it.


When it comes to flare and diffraction spikes it is a bit of a mixed bag. The good is that there is no evidence of any veiling flare. Polygonal shapes and light streaks are visible. The diffraction spikes or sun stars are quite nice and defined.


Sigma 23mm f1.4 DC DN Lens
Reflected glare in the form of polygonal shapes and light streaks are evident at smaller apertures. The diffraction spikes or sun stars are quite nice and defined.


The nine curved diaphragm blades produce nice clean bokeh balls with no evidence of the soap bubble effect or onion rings at the centre of the frame when wide open. At the edges they take on a more elliptical shape. At f2.8 and beyond the circles start to take on a more polygonal shape. The rendering of the out of focus areas and the tonal transitions are beautifully smooth.


Sigma 23mm f1.4 DC DN Lens
Bokeh balls at f1.4. The are round at the centre of the frame and change to a more eliptical shape at the edges. There is no soap bubble effect and there are no onion rings.


Autofocus Performance


Sigma23AFtest


The complexity of modern autofocus systems in mirrorless cameras means that much will depend upon the AF settings you have made on your camera. A casing point is that when testing this lens on my A6500 the initial results looked very poor. So poor in fact that I put the lens on my A7r2 in APS-C mode and repeated them and the results were like night and day. A quick examination of the A6500’s menu found that I had previously been experimenting with the AF settings and hadn’t put them back to how they were. Once restored it was like looking at a totally different camera and lens combination.

Shooting stills I tested the lens by walking towards the camera with continuous AF set and the lens easily kept up with my movement. It was only when I got close up that there was any sign of hesitancy, but it still managed to find focus. Averaging out several test runs I was getting a hit rate of 93% with critical focus and 7% with acceptable focus. An impressive result.

Shooting video the results weren’t as positive and the lens had trouble keeping up with me as the target. But, when I mounted Gary the Galah to a slider and set it to a 10 second run while close to the camera the AF was very sticky and accurate.I would expect that the A6700 with its more sophisticated subject tracking AF system would yield a better result here. Focus pulls using touch to focus were very decisive with no overt hunting.

While we are talking about focusing I looked at the focus breathing it was very evident.


Verdict

Well after using the Sigma 23mm f1.4 DG DN for a year I can say that I have found it be a very capable lens. For video it is near perfect for filming talking head pieces for YouTube – which is what I mainly use it for. For photography it is a great carry around lens suitable for street photography and urban landscapes. I’d happily travel with it as my only lens as well. Does it have any short comings? Well if I were to nitpick some people might find that the lens makes the camera a little front heavy. It doesn’t bother me in the slightest, but these sorts of things can be a deal breaker for some.

Who should buy it? Well that depends upon which camera ecosystem you’re in. If you have an APS-C Canon RF camera and want a fast moderately wide lens then this is your only choice. For Sony and Fujifilm owners it is a little more nuanced. Both manufactures have their own version of this lens. Sony has the Zeiss 24mm f1.8 which retails for $1500 AUD. It can focus a little closer but has a slower maximum aperture and is getting a little long in the tooth. Fujifilm has two competitors. The XF 23mm f1.4 R LM WR lens which retails for $1500 AUD which has better close focusing and superior weather sealing. Then there is the XF 23mm F2 R WR at $640 which also focuses closer, has better weather sealing and is cheaper while having a slower maximum aperture. If you want a fast maximum aperture at a reasonable price then the Sigma can’t be beat.


Sample Images


2025 York Motor Cycle Festival


2025 York Motor Cycle Festival


20240522-Mundaring-0226-Edit


20240522-Mundaring-0227-Edit


20240612-Frida-0224-Edit


20250405-York-0227-Edit


20250405-York-0233-Edit


20250405-York-0234-Edit


20250405-York-0242-Edit


20250406-York-0225-Edit


Sigma 23mm f1.4 DC DN Lens
The Sigma 23mm f1.4 makes for a excellent lens for architectural studies.


Sigma 23mm f1.4 DC DN Lens


Sigma 23mm f1.4 DC DN Lens


Sigma 23mm f1.4 DC DN Lens


Reunited

Reunited, and it feels so good

Reunited ’cause we understood

There’s one perfect fit

And, sugar, this one is it

We both are so excited ’cause we’re reunited, hey, hey

Songwriters: Dino Fekaris / Frederick J. Perren


This is the first part of a two part series.


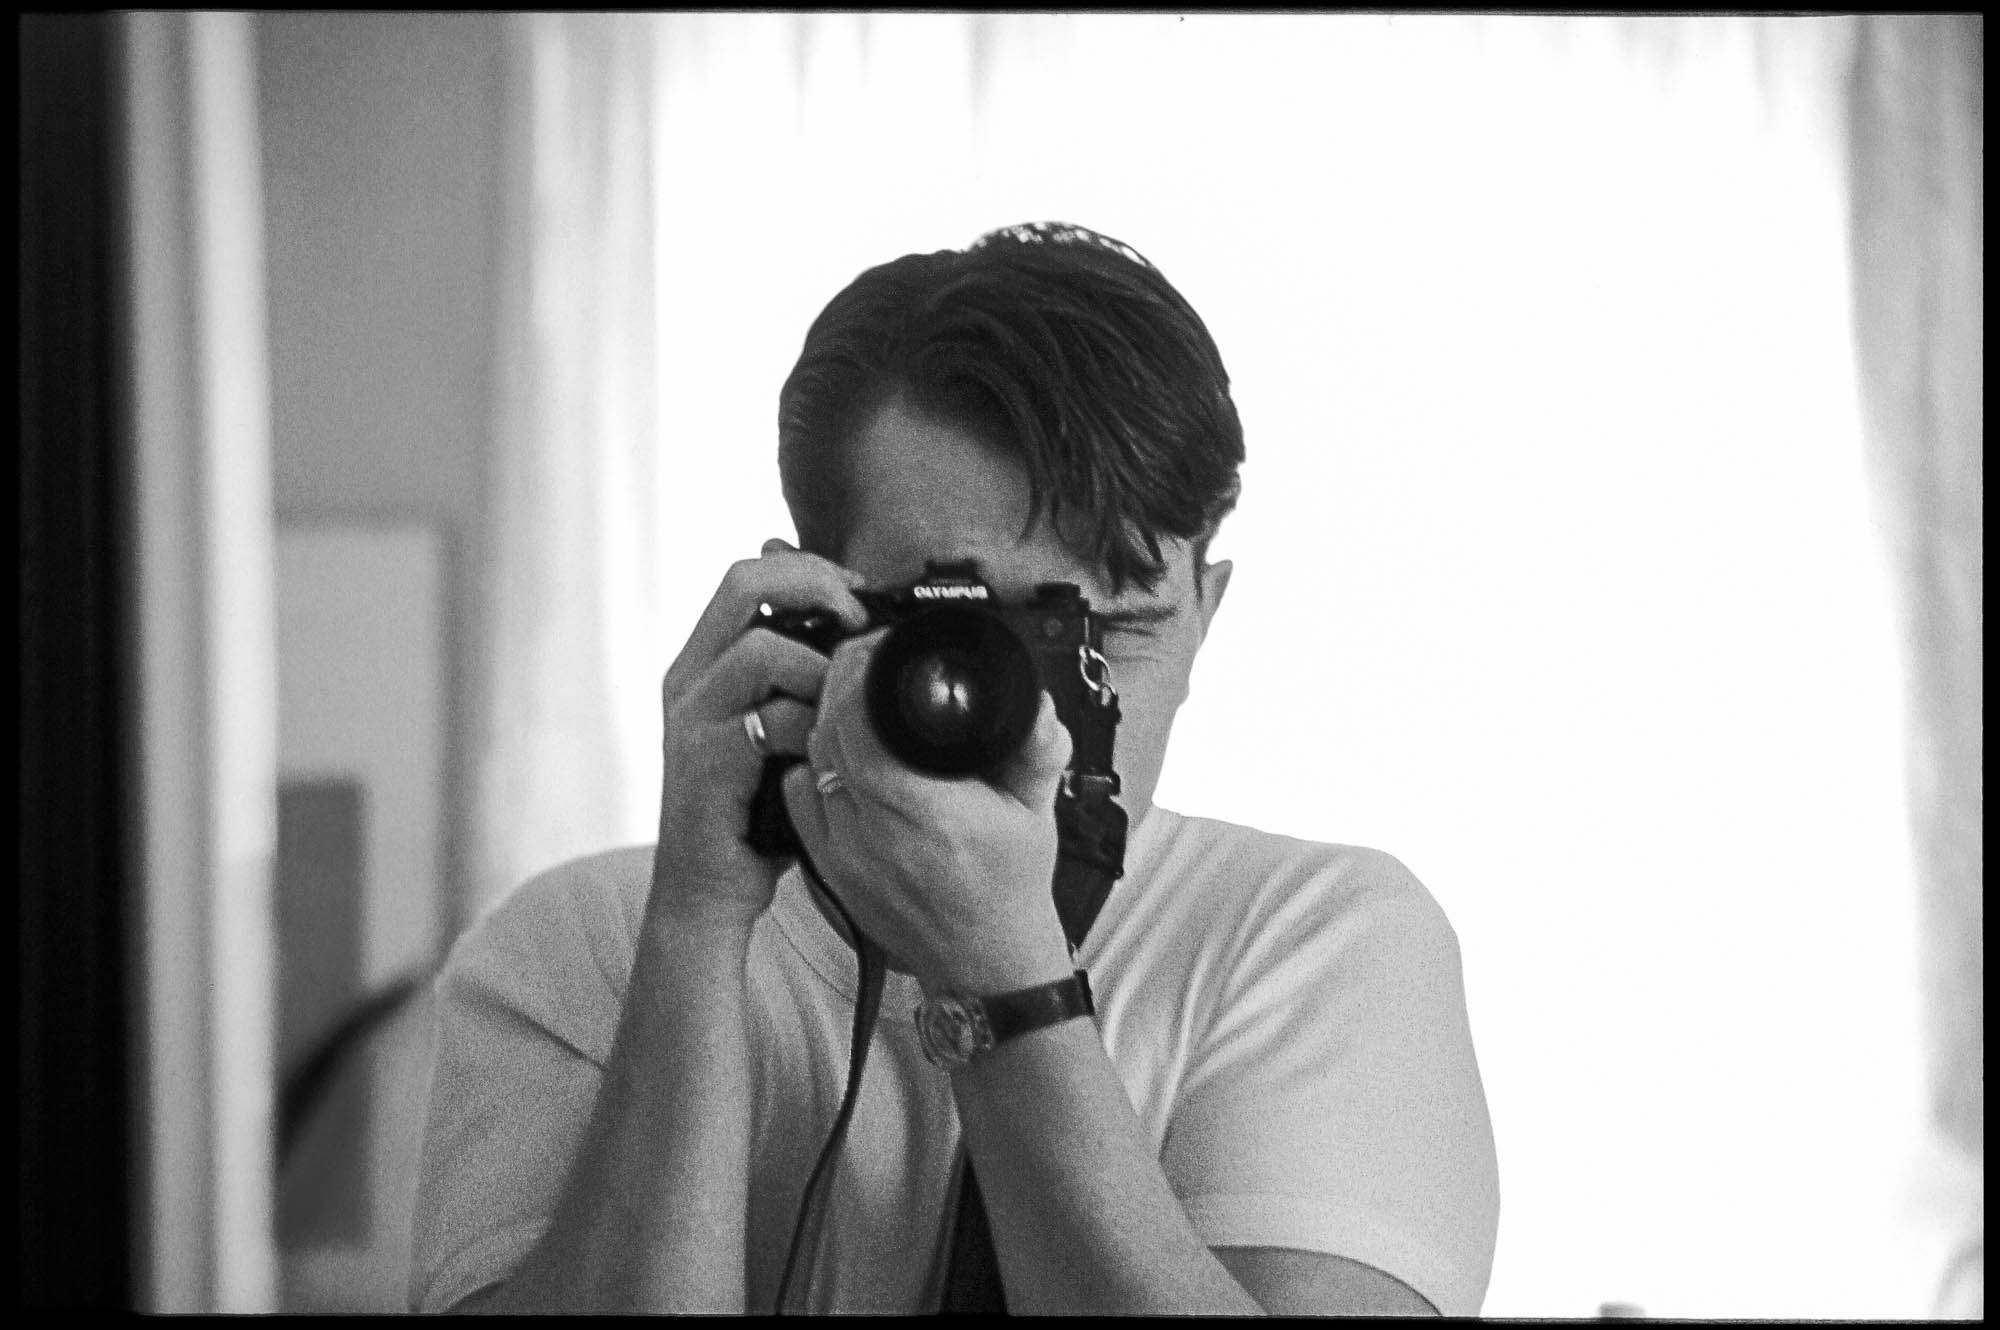
My earliest selfie, taken in 1987 just before we headed off to India. The camera is an Olympus OM4 with 35-105mm lens.


The camera that I have most enjoyed using is not a modern digital mirrorless one, nor is it a DSLR. It is a film SLR from the early 1980’s. What was so special about it? Well it never got in the way of me doing what I wanted. Some devices are designed in such a way that they impose upon you a certain way of working and you have to alter your thinking and behaviour to use them. This means you can’t use it intuitively and you have to take a moment to figure out how to use it. The device literally gets in the way. The best industrial design emphasises a mixture of function and haptics so that the object virtually disappears and you can just concentrate on the matter in hand. So what was this magical camera? It was the Olympus OM4.


Olympus OM 4 SLR


The OM4 was the successor to the OM2n as the flagship of the OM system when it was introduced in 1983 and remained so until it was superseded by the improved OM4 Ti in 1986. The OM system itself was the brainchild of Yoshihisa Maitani whose design philosophy was to produce low cost high quality cameras that were Leica like in image quality. They had to be small enough to carry everywhere and also be durable. The system had to be capable of handling any task from microscopy, macro, astronomy, photojournalism and wildlife. Above all he wanted it to be the “kind of camera that inspires increasing satisfaction as the photographer gets to know it better, it will gain a permanent place in his affections as an indispensable photographic tool”. Burrows, P., 2023, The man behind the Olympus OM camera: Yoshihisa Maitani, DigitalCamera World). It worked for me and as far as I was concerned the OM 4 was/is the perfect camera.


Olympus OM 4 SLR
Although looking very simple by todays standards this was a very sophisticated camera back in the 1980’s


What made it so good? The strong weatherproof body meant it could be taken anywhere (mine accompanied me to Moscow in winter, -30ºC outside, and to Malaysia, 40ºC and 100% humidity, without missing a beat. The enormous catalogue of high quality Olympus OM Zuiko lenses. The amazing for it’s time TTL flash control system that let you use off camera flash and control it from the camera. It was the first camera with a built in multi-spot exposure meter (2% field of view) which enabled you take take 8 spot readings and average them. This made it ideal for practitioners of Ansel Adams’ Zone System. Only two other manufacturers did this – the Hasselblad 205TCC and  the Rollei 6008. Another unique metering feature was the ability expose for highlights or shadows automatically at the touch of a button. The viewfinder was big and beautiful with a build in diopter correction with a range from +1 to -3 diopters. Then there was the shutter with its enormous range of of 240 seconds to 1/2000. It wasn’t just the specs that made it so good, it was the way it sat in your hand. It is a beautiful thing. Were there any downsides. Well there were actually as no camera is perfect. The first was the flash sync speed of 1/60 sec. It meant using fill in flash outside was nigh on impossible in bright conditions. The second was its insatiable appetite for SR44 batteries. It went through them like a trust fund baby goes through money. Thankfully there was a workaround and it was to switch the shutter speed dial to “B” when you weren’t using it. This would disable the electronics and prevent battery drain. You just have to remember to switch off the B setting when you go to use it again.


Olympus OM 4 SLR
It just felt so perfect in my hands.


I bought a second hand OM 4 in 1986 and I used it heavily until 2005 when the shutter gave up the ghost and jammed. I couldn’t get it repaired as there were no parts. I thought about replacing it as I had quite a selection of lenses, but I was transitioning to digital and Canon looked the way to go. I’ve been toying with the idea of shooting film again and I’d still got the use of a couple of film SLRs. The first being my wife’s Olympus OM40 and the second being my Canon EOS30. I didn’t gel with either camera as I didn’t find them enjoyable to use and I didn’t feel as if I had any incentive to try something else. The debate about AI in photography really spurred me on to think about film photography again and it was my 61st birthday coming up so I decided to buy myself a present in the form of an OM4. I searched on line extensively and eventually I found a very nice copy on EBay at Japan Seto Inland Sea Camera with an Olympus OM G.Zuiko 50mm f1.4 lens for a very good price. When it arrived I opened the box and took it out. Even after twenty years I could operate all the controls with my eyes closed. It felt so good – like seeing a long lost friend.


Olympus OM 4 SLR


So I’ve now got the camera and lenses and a sizeable stash of film in the freezer. I’ve got a couple of ideas for projects and I’m learning how to scan the negatives using a DSLR and macro lens. I’ll shoot a few rolls of film and get them developed by a lab and if all goes well, which I’m sure it will, I’ll get everything together to process the films at home. I’ve already decided I don’t want to run a full darkroom again so any printing I do will be via my inkjet printer.


The title for this blog and the lyrics come from the 1970’s hit for Peaches and Herb.

Focused


My earliest selfie – taken in September 1987 while I was staying with my in-laws just prior to departing for India and Nepal. The camera is an Olympus OM4 with an Olympus OM Zuiko 35-105mm lens. Originally shot on Ektachrome 200 but converted to black and white because of fading.


I’m of an age where I learning to use a camera meant learning to focus the lens. The first SLR camera I used was my brothers Praktica TL with a Domiplan 50mm f2.8 lens. A combination of a dim viewfinder, a very murky micro prism focusing screen and a slow lens made focusing anything that didn’t stay still a tricky affair. A little while later he upgraded to a fancy Praktica B200 – it had aperture priority, a top shutter speed of 1/1000 sec, and an LED shutter speed display in the viewfinder. It was according to my brother the dogs bollocks. So I borrowed it and his Pentcon 135mm f2.8 lens and went to photograph a rugby match at our local club. I shot two rolls of film (yep I really pushed the boat out) and was bitterly disappointed. I got about 1/2 dozen in focus pictures of the scrums and line outs but all the attempts at capturing the running play were out of focus. Things started to improve once I bought my own camera and lenses. Brighter viewfinder’s, better focusing screens and faster lenses made a huge difference as did constant practice. I stayed with manual focus until 2004 when I was given a Canon EOS 3 and then shortly after I went digital and bought a Canon 300d.


Canon EOS 300d
My first DSLR the Canon EOS 300d. It may have had auto focus but it was very primitive compared to what is available today.


The AF system in my Canon DSLRs was certainly good for the editorial photography I was then doing. Changing to the mirrorless M4/3 system was a bit of a shock as their first cameras had contrast detect autofocus which was great for anything that didn’t move, but absolutely pants for anything that did. This was one of the reasons why I didn’t give up on my Canon DSLRs (the other was to do with flash photography). The advent of the Olympus EM1 mk 1 in 2013 brought with it phase detect autofocus and that improved things drastically after a couple of firmware upgrades. A while later I bought a reconditioned EM1 mk 2 and the autofocus was better again. This is what I primarily use for most of nature photography where fast and accurate AF is vital to getting the shot. However, the progress of technology steadily marches on and we now see AI enhanced systems that can identify the subject and even pick out the eye. Initially I was sceptical, especially as those systems were in very expensive flagship cameras, but now I’ve had cause to change my viewpoint.


20240718-EM1X-0242-Edit
The Olympus OMD EM1x was the flagship camera of the Olympus m4/3 range when introduced. Twin processors allowed subject recognition autofocus tracking.


I’ve been lucky to get a long term loan of an Olympus EM1x which when it was launched, in 2019,  was one of the first cameras to have AI subject recognition, but on release this was limited to motorsports, trains and planes. At the end of 2020 a firmware update added bird detection and it was this that I was keen to try.  Before taking it out I watched a few videos on YouTube on how best to set this up for best effect and found that nearly everyone has their own ideas on how to do  this. So I just reset the camera and left it at its default settings as a starting place and I haven’t moved them since. How does it work? Well the short answer is that upon initially recognising a bird the camera places a white rectangle around it. When you activate the autofocus and it locks on it will do one of two things. If the bird is close enough it will place a green tracking box around the head focusing on the eye. If is too far away then it will place the green tracking box on the birds body.


20240717-EM1X-0224
On recognising a bird the camera puts a white rectangle around it.


20240717-EM1X-0225
Activate the autofocus and the camera will focus on the bird’s eye where possible.


20240717-EM1X-0227
When there is more than one bird the camera will put a rectangle around them all.


20240717-EM1X-0228
Activate the AF and it focuses on the nearest or largest bird.


When the bird detect AF firmware was launched it wasn’t well received. There were claims of unreliability and unpredictability. One of the major criticisms was that when there were lots of birds in the frame it would select all the birds, but that is not strictly true because when you activate the AF then it will track the one closest to the camera. The problem arises when all the birds are on the same focal plane. I have set bird AF to C1 of the custom settings with all the AF points active and if this situation arises I switch to C2 which has CAF set at a single point and I can then move that single point with the cameras joystick. It’s quick to change and I haven’t felt that the camera was stopping me take photos. The next criticism is that if the bird is in foliage or against a busy background the camera gets confused and focuses anywhere but the bird. Now when I read that I was a little concerned as I mainly photograph birds in woodland, but after several outings – even in very low light which makes things even harder – I found the camera again copes well and if it does get lost then switching to my C2 setting solves it. What really impressed me was on my first outing with the lens I was walking along the river to find some Nankeen Night Herons and the sun hadn’t quite come up when I spied a little pied cormorant perched in the lee of some trees drying out. It was a very busy background and very dark. The AF latched onto the bird and I managed to get a sequence of in focus shots before it eventually flew off. I’ve encountered similar situations before with my EM1 mk ii and it had a very hard time focusing if at all. Another shot I’m happy with is of a yellow-billed spoonbill flying along the course of the river with a background of trees and foliage. The EM1x’s AF locked onto the bird nicely enabling me to get the shot. Again the EM1 mk ii would’ve struggled in this situation.


Kakak
Against a busy background in dark conditions the EM1x locked onto this little pied cormorant with no problems.


Kakak
The AF kept tracking the bird as it flew off.


Kakak


Kaaka-baaka
This is a scenario that would have fooled my EM1 mk ii. The EM1x managed it with aplomb.


Were there any downsides? This is a little unfair, but the bird detection AF didn’t work in video mode, but Olympus themselves said it wouldn’t so I can’t complain. The video AF will sometimes drift rendering your subject out of focus. Again there are remedies such as using manual focus or single AF rather than Contiuos AF. I have shot a lot of video with it and I’m happy enough with the results, but I wouldn’t get this camera for it’s video capabilities as they are quite limited – C4K at 24p, 4K at 24/25/30p, HD at 24/25/30/50/60/100/120p with the last two having no continuous autofocus. The video at the bottom of the page was shot with a combination of the Olympus EM1x with the Panasonic 100-400mm f4-6.3 for the long lens work and an Olympus EM1 mk ii with Olympus 12-40mm f2.8 for the time lapse sequence and the wider shots.


Doornart
The autofocus wasn’t fooled by birds surrounded by foliage.


Ngalkaning
Shooting through foliage in low light conditions.


Kakak
Backlighting didn’t confuse the camera.


Djida
Small birds that move erratically, such as this Yellow-rumped Thornbill , were very problematic for my EM1 mk ii, the EM1x handles it well.


At launch the Olympus EM1x was a much disliked camera. People railed against its size, its price, the sensor and the viewfinder. DPReview complained that the EM1x’s phase detect autofocus was worse than the Panasonic G9’s contrast detect AF. But, if you are a wildlife photographer of limited fiscal means then the EM1x represents terrific value when bought second hand. Cameras with incredibly low shutter counts of just over a 1000 go for around $700USD.  That must make it the cheapest available camera with a pro spec and AI autofocus on the used market to date. This leaves me with a conundrum. What do I do when I have to give it back? Do I buy myself an EM1x? Or do I get a second hand OM System OM-1 now that the used price is heading rapidly towards the $1000USD mark. While the OM System OM1 will have better AF, better video capabilities it will require me buying different batteries, a new type of battery charger and faster SD cards all will push the cost up considerably. The EM1x uses the same batteries and cards as my current EM1 mk ii. Decisions decisions.


I’ve Got A Silver Nose


Olympus G_Zuiko 50mm f1.4 lens
Blimey it’s a silver nose!


A little while ago I got a new to me camera (more about that in a later entry) and it came with an Olympus OM Zuiko 50mm f1.4. Initially I wasn’t really interested in the lens at all as I already had a copy. However, on arrival I noticed that the front filter ring and the edge of the aperture ring were silver chrome and I realised that it was an Olympus “Silver Nose” lens. This realisation sent me down a rabbit hole looking at all the variations of Olympus lenses and the effects of lens coatings and trying to see which lens is better.


Olympus G_Zuiko 50mm f1.4 lens
First and third generation Olympus 50mm f1.4s.


Get online and look at the many forums that talk about classic film cameras and lenses you can find “Olympusphiles” (or should it be “Zuikoholics”) discussing/arguing about the merits of silver nose lenses and whether they are better than black nosed lenses. So what is a silver nose exactly? Well when Olympus launched its 35mm OM camera system at Photokina in 1972 the lenses all had the chromed filter rings and they were single coated, I think there were a couple of exceptions, but, I’ve not managed to confirm this one way or the other. These lenses stayed in production until roughly 1983/4 and were replaced by multi-coated lenses. The situation is not entirely clear cut as between 1972 and 2002, when production of OM Zuiko lenses ceased there were four generations where each iteration brought some improvement in either the optical performance, or manufacturing efficiency. The table below goes through the various changes each generation brought.


1st generation The original lenses released in 1972 and they have the characteristic silver nose. They also have a prefix letter in front of the Zuiko label that indicates the number of lens elements. My 50mm f1.4 is G.Zuiko which shows it has seven elements. The lens elements are single coated.
2nd generation This was largely just a cosmetic change where the silver nose was dropped in favour of the so-called black nose.
3rd generation The letter prefix is dropped and replaced with Zuiko. MC which indicates the lens is multi coated which makes the lens appear sharper.
4th generation The MC designation ceases and construction was changed to cementing the lens elements in place.


To further aid in identification Olympus OM lenses have a code indicating place and date of manufacture. Pre 1983 this code is found underneath the rubber focusing ring and accessing it is a destructive process. After 1983 the code was printed on the light baffle retaining ring in the lens mount. Having said this I have a 1984 35-105mm f3.5-4.5 that doesn’t have this. An example of this code can be found on my 21mm f3.5 which has the code TNMA. The first two letters are the factory where the lens was made, in this case Tatsuno-Machi. The third letter is the year 1993, and the fourth letter is October. If you would like more information about these codes then I would suggest looking at Konrad Beck’s entry on photo.net.

To further understand what a silver nosed lens is we need to talk a little about lens coatings. This is going to be very brief as it is such a complicated subject.  Simply put lens coatings are thin layers of minerals applied to a lens surface to improve optical performance by reducing reflections and improving the transmission of light through the glass element. The effects of lens coatings was discovered by accident in 1886 by John William Strutt, 3rd Baron Rayleigh. He observed that a new lens he had acquired didn’t transmit as much light as an older version he had which was a bit tarnished. It was found that by controlling the material used, examples being magnesium fluoride and calcium fluoride amongst others and its thickness meant you could fine tune the characteristics of a lens. Initially this was done in a single coating. Zeiss pioneered multi-coating in 1935, but it wasn’t until a collaboration with Pentax in the early 1970’s until the process bore fruition with the launch of Pentax’s Super Multi Coating, or SMC and Zeiss’ T* coating. The first multi-coated lens for an SLR was the Pentax 50mm f1.4 Takumar in 1972. These multiple layers of minerals increase the amount of light transmitted through the lens, cut down on flare, and improves the contrast which all adds to the apparent sharpness of the lens. The need for multi-coated was accentuated by the increased take up colour film.


Olympus G_Zuiko 50mm f1.4 lens
That orange coloured coating is not radio-active. The thorium glass used for some of the elements is the radio active bit.


A little known fact about the silver nose 50mm f1.4 is that it is mildly radioactive. Most people attribute this to the lens coating which is incorrect. There is no thorium in the coating, it is in the glass used in the lens elements. This was done to increase the refractive index of the glass so as to reduce chromatic aberration. With age the thorium glass discolours and developes a yellowish tinge. People often mistake the yellow hue of lens coatings for this but the only way to find out is to hold your lens up to a plane white illuminated background and look through it. If the image has a yellowish brown tint then the thorium has started to degrade. This can be reversed by exposure to UV light. Is thorium glass dangerous? Well only if you grind up the glass and either inhale it or digest it. To put this into context you are exposed to more radiation when you eat a banana. Having said that for the sake of my love spuds I’m not going to walk around all day with this in my trouser pocket. The use of radioactive materials in glass was phased out by the 1980’s mainly as a health and safety precaution for the people who made the lens elements – they  came into contact with a lot of thorium glass dust when grinding and polishing the lens elements. Another reason was that lens manufacturers had discovered they could get better results by using magnesium fluoride and calcium fluoride.

In the end it is all very bewildering. So I decided to take a more practical approach and compare my first generation Olympus OM G.Zuiko 50mm f1.4 to my third generation Olympus OM Zuiko MC 50mm f1.4 and see which one I thought was better.


Physical Properties


Irrespective of the version the Olympus 50mm f1.4 has seven elements in six groups.


Olympus OM G.Zuiko 50mm f1.4 Olympus OM Zuiko MC 50mm f1.4
Focal length 50mm 50mm
Angle of view 43º 43º
Minimum focusing distance 45cm 45cm
Maximum magnification 0.15x 0.15x
Lens construction 7 elements in 6 groups 7 elements in 6 groups
Lens coatings Single coated Multi-coated
Maximum aperture f1.4 f1.4
Minimum aperture f16 f16
Diaphragm 8 curved blades 8 curved blades
Focusing Manual focus with a straight helicoid Manual focus with a straight helicoid
Filter size 49mm 49mm
Dimensions 36mm (h) x 60mm ⌀ 40mm (h) x 60mm ⌀
Weight 227g 229g

Apart from the cosmetics the only differences are the lens coatings, the length and the weight. Both lenses have that loverly dense feel with glass inside the metal barrel. The focusing is beautifully buttery smooth with a throw of 180º and the aperture ring is click stopped in one whole stop intervals. They are wonderfully tactile – I just can’t help fondle them.


Optical Performance


f1_4 sharpness


f2.8sharpness


f4sharpness


f8sharpness
Wide open both lenses were very noticeably soft in the centre and at the corners with the MC version having a bit more contrast. The silver nose had very pronounced chromatic aberration while on the MC version it was more controlled. By f2.8 the MC version’s chromatic aberration has cleared up completely. In the centre of the frame both lenses have improved sharpness and contrast. In the corners the MC has improved sharpness and contrast while the silver nose shows no improvement in sharpness but the contrast is slightly better. At f4 the silver nose is now equal in performance to the MC version in all areas except for chromatic aberration where it is still present. At f8 both lenses have reached their best optical performance and the CA has cleared up in the silver nose. By f11 both lenses are starting to show the effect of diffraction and at f16both lenses are quite soft and CA has returned.


Olympus G_Zuiko 50mm f1.4 lens


Olympus OM Zuiko MC 50mm f1.4
Olympus G_Zuiko 50mm f1.4 lens


Olympus OM Zuiko MC 50mm f1.4


You don’t buy an f1.4 lens and not be concerned about the quality of the bokeh. Well given both lens have the same lens construction and aperture configuration they are all but identical. Misshapen cat eye bokeh at f1.4 throughout the frame. Polygonal bokeh balls as you stop down. More importantly the transitions from in focus to out of focus are nice and smooth.

In terms of optical aberration both lenses exhibit mild barrel distortion and produce vignetting. Stop down to f4 and the vignetting disappears.


Olympus G_Zuiko 50mm f1.4 lens
At f2.8 with a specular light source in the frame the OM G.Zuiko 50mm f1.4 is prone to flare. Note the veiling flare and the relections of the lens elements. The effect gets more pronounced as you stop down.


Olympus OM Zuiko MC 50mm f1.4
At f2.8 with a specular light source in the frame the OM Zuiko MC 50mm f1.4 is also prone to flare.The MC handles the flare better than the earlier silver nose. What is interesting is the change in colour of the rflections, from yellow orange to green. This is the change in colour of the lens coatings.

That leaves us with flare resistance. Well it should come as no surprise that the later multi-coated version is better than the single coated, but the difference isn’t as marked as you’d expect. Both lenses are prone to veiling glare which which reduces contrast and dynamic range. Lens flare and reflective glare is also present in both lenses – this is where light is reflected off the lens elements and bounces around the lens internals until it hits the film/sensor. The colourful  polygons that are often seen is light reflected off of the rear of the lens diaphragm. The more you stop down the worse they become. Changing your composition so specular highlights aren’t visible in the frame and/or using a lens hood can fix the problem. On the subject of lens flares we should also talk about diffraction spikes or sun stars – well they aren’t very special being poorly defined. This all sounds pretty damming, but we shouldn’t compare these lenses to their modern counterparts. A lot has happened in lens design and manufacture in the last 40-50 years. You buy these old lenses if you are looking for character.


Olympus G_Zuiko 50mm f1.4 lens
Olympus G_Zuiko 50mm f1.4 lens at f16. The diffraction spikes aren’t that thrilling.


Olympus OM Zuiko 50mm 1.4 test
Olympus OM Zuiko MC 50mm 1.4 shooting into the sun at f16. Note the ghosting, the veiled flare and lack lustre diffraction spikes.


Conclusion


Olympus G_Zuiko 50mm f1.4 lens


Which one of these lenses would I recommend? Well I didn’t buy either of these lenses intentionally. Both of them came bundled with a camera body that I bought – the Olympus OM Zuiko MC 50mm f1.4 came with an OM4 that I bought in 1986 and the Olympus OM G.Zuiko 50mm f1.4 came with a camera body I bought last month. Now if you were to ask me which Olympus OM Zuiko 50mm f1.4 is the best I’d have to say neither of these. It is generally acknowledged that the best version is a 4th generation one with a serial number higher than 1,100,000. 

The argument that single coated lenses are inferior to multi coated lenses doesn’t take into account what the photographer actually wants from a lens. Generally single coated lenses are favoured for black and white film photography as the lack of contrast and flatter look suit the medium especially if you do your own printing in a darkroom. Multi-coated lenses give stronger colours, more contrast, and reduced flare which makes them more suitable for coloured photography. But it’s not that hard and fast. Some colour photographers like a more muted palate, lower contrast and lens flare as they think it adds character so favour the use of single coated lenses, indeed they are also popular with cinematographers for the same reason. If you like punchy high contrast black and white look at multi-coated lenses.

Oh and if someone offers to sell you silver nose 50mm f1.4 and says they are rare, well Olympus churned these lenses out by the barrel load. To give some perspective my silver nose has a serial number of 347876 and my MC version is 800260 – that’s a difference of 452, 384 lenses.


Sample Images

All images below were taken with the Olympus OM G.Zuiko 50mm f1.4 mounted on a Sony A7r via Fotodiox OM to E adapter.


The Stromalites
The Stromalites Jazz Trio perfom at the York Mill.


York Mill
The main gates at the York Mill.


The Book Nook
The Book Nook second hand bookshop at the York Mill.


York Mill
Doors on a wall. York Mill.


20240328-Mundaring-0224-Edit
The Naked Butcher. Becareful when you ask for 1/2Kg of sausages.


20240328-Mundaring-0228-Edit
The Railways Heritage Trail, Mundaring.


20240328-Mundaring-0232-Edit
The little people at Mundaring Sculpture Park.


20240407-York-0226-Edit
Coils


20240413-York-0229-Edit
Dayzies on Avon Terrace.


20240415-York-0235-Edit-2
York Mill at sunset.


20240415-York-0237-Edit
The River Avon in the evening light.


20240415-York-0239-Edit
Holy Trinity York bathed in the light from the setting sun. Even thought the sun is not in the frame notice the lens flare.


20240418-York-0225-Edit
Knackered Bedford.

Baby, You So Nice…

…I’d like to do the same thing twice, yeah!

Baby, you so nice

I’d like to do the same thing twice

I love you so much, so-o-o

Bob & Rita Marley 1978


A review of the Sigma 16mm f/1.4 DC DN lens for Sony E mount


Sigma 16mm 1.4 for Sony E
The Sigma 16mm f1.4 DC DN lens mounted on a Sony A6500.


Have you ever bought something so wonderful that you’d wished you done it twice? Back in March 2020 I wrote about my experiences with the excellent Sigma 16mm f/1.4 DC DN lens for m4/3. It’s become the mainstay of my video work and is more or less permanently attached to my Panasonic G85. At the beginning of this year I got a Sony A6500 second hand for wildlife photography, but I couldn’t really gel with it using it like that, but I have come to like the 4K video out of it so I thought I’d look for a secondhand Sigma 16mm f1.4 to put on it. Now the astute among you may see a flaw with my thinking here, which is that on a m4/3 camera the Sigma 16mm lens has a 68.1º angle of view which equates to focal length of 32mm on 35mm full frame. Put the lens on the APSC A6500 and the angle of view becomes 83.2° or the equivalent of a 24mm lens on a full frame camera which is considerably wider. I knew that when I purchased it and I quite like the 24mm focal length for general photography and it’s a good focal length for “talking head” videos.

When I wrote about the micro four thirds version I wrote:

“So how come this lens is so lardy I hear you all ask. Well this lens wasn’t designed for micro four thirds, it was initially designed for the Sony 6000 series cameras with an APS sized sensor where it equates to being a 24mm in full frame terms. To get a wide angle lens that’s fast and a good optical performance means lots of glass and glass is heavy, and this lens is large and heavy for APS format cameras.”

Well having got the lens on my A6500 it’s still a big heavy lens, but, (spoiler alert) it’s bloody brilliant at what it does and worth the size and weight penalty.


Sigma 16mm 1.4 for Sony E
The Sigma 16mm f1.4 compared to the Sony 50mm f1.8 and the Sony 28mm f2.


Vital Statistics

Diagonal angle of view 83.2º
Optical construction 16 elements in 13 groups
Diaphragm 9 rounded blades
Minimum aperture F1.4
Maximum aperture F16
Minimum focusing distance 25cm
maximum magnification ratio 0.07X
Filter diameter 67mm
Dimensions ⌀ 72.2mm x 92.3mm (H)
Weight 405g
Internal focusing Yes


Sigma 16mm 1.4 for Sony E
The lens mount is made of chrome plated brass and there is an ‘O’ ring to provide sealing when mounted on the camera


In the hand the Sigma 16mm feels very dense and substantial. The lens body is made out of what Sigma calls a Thermally Stable Composite (TSC) which is substantially stronger than conventional polycarbonates while having similar thermal expansion properties to aluminium. The lens mount is made of chromium plated brass which should ensure a long life. The Sigma 16mm is advertised as being dust and splash proof but on closer reading of Sigma’s spec sheet there is only one seal and that is at the lens mount. The lens comes with a bayonet mount petal lens hood which has a ribbed grip to make attaching and detaching easier. There is a ribbed rubber focus ring of the fly by wire type – while it feels smooth and easy to use there no hard stops at the minimum and maximum focusing distances. There are no other controls or switches which means if you want to switch between AF and manual focus you will have to use the camera controls for that.


20200106-Sigma16mm-0224


The Sigma 16mm has an optical construction of 16 elements in 13 groups with 3 FLD (“F” Low Dispersion) glass elements, which offers performance equivalent to fluorite which exhibits less chromatic aberration than those utilising a traditional flint glass. There are 2 SLD (Special Low Dispersion) glass elements which also help to minimise chromatic aberration and 2 ASPH moulded glass aspherical elements which work to reduce optical aberrations. According to Sigma’s website the ASPH elements are polished with a tolerance of under 10 nanometers or 0.000001 millimetres which according to Sigma reduces onion ring bokeh. 


Optical Performance 


Sigma 16mm 1.4 for Sony E
Diffraction spikes, veiling flare and ghosting.


The optical performance of the Sony lens is a little different to that of the M4/3 version and the simple reason is that the M4/3 sensor crops the image circle that the lens produces more than the APSC sensor so it can avoid the dodgy areas. But the reality is that those “dodgy” areas are still pretty good. In the centre of the frame wide open at f1.4 the images lacks contrast and appears a little soft. Stop down to f2 and the contrast and sharpness improve and at f4 you get the best results. In the corners at f1.4 the image is rendered a little softer than the centre but by f4 the corners match the centre of the frame. Diffraction starts to set in at f11 and is really noticeable at f16.


Sigma 16mm 1.4 for Sony E
With lens corrections turned off there is quite prominent barrel distortion and some vignetting.


Without lens profiles applied there is severe barrel distortion and vignetting. Once the profile is applied all is good at the expense of a little corner sharpness. There is some axial or longitudinal chromatic aberration when the lens is wide open at f1.4. The fringing clears up when you stop the lens down. When it comes to transverse or lateral chromatic aberration you  have to look really hard to find it and what little there is is easily corrected in post. Lens flare is well controlled with only a hint of veiling flare and some mild ghosting. A lens hood is included to help prevent this. Diffraction spikes or “sunstars” are not good, not bad, just OK.


Sigma 16mm 1.4 for Sony E


In terms of bokeh the 9 aperture blades create nice round balls in the centre of the frame, they become slightly elliptical towards the edges. Onion rings are present within the balls and there is a soap bubble effect at the edges of the balls. Looking at the focus transitions they are nice and smooth.


20231224-York-0224-2


Autofocus Performance

For stills shooting wide open at f1.4 at 11 fps with continuous autofocus with lock on focus and balanced priory shutter release the best result out of a sequence of 40 frames was only 9 were critically in focus. Switching to 3 fps with lock on focus set to AF priority a sequence of 20 frames had all of them in perfectly in focus. The inference is that the Sigma 16mm is quick to focus providing you have the right menu settings.


20231221-Sigma16sony-0243-2-Edit
3 fps with lock on focus set to AF priority a sequence of 20 frames had all of them in perfectly in focus


Sigma 16mm 1.4 for Sony E
Dancing Jesus on a slider. 10fps for 5 seconds with continuous AF with lock on tracking with lens at f1.4. There was a 98% hit rate.


For video the auto focus worked really well – it was responsive, smooth and accurate. Really tracking a person walking around presented no difficulties. To make things harder I tried mounting a stuffed toy to a slider at the minimum focusing distance having it move fairly rapidly and it managed this very well. I tried a smaller subject, this time Dancing Jesus, which also wobbled as it moved and again the autofocus did a good job of tracking the subject.

Talking of video I tested for focus breathing and there is only a slight amount which should make the video crowd very happy.


Verdict


Sigma 16mm 1.4 for Sony E


I absolutely love the micro four thirds version and use it constantly. I approached this review with a little trepidation because I thought that putting it in front of a larger APSC sensor would reveal  the Sigma 16mm’s flaws. I needn’t have worried. This is an excellent lens and I would have been happy paying the full retail price for it, but having bought it second hand for just over half the full retail price and I’m over the moon. If you’re on a budget and want a wide angle lens for Sony E mount, Canon M, Fujifilm X, Nikon Z and the L Mount Alliance then you should definitely consider this lens especially if you can find one secondhand.