I’m feeling really deficient in the focal length department. After my trip to the Baigup Wetlands I’ve realised that if I want a picture of a Crake I’m going to need a longer lens. At the moment I’m capped at 600mm on full frame, 800mm full frame equivalent on Micro Four Thirds, and 960mm full frame equivalent on APSC sized sensors. Unfortunately I’m handicapped by the fact that I don’t have a spare $35,000 AUD lying around or camera to put the lens on or I’d get the Canon RF 1200mm f/8L IS USM. More affordable at $4000 is the OM System M.Zuiko Digital ED 150-600mm f5.0-6.3, but even that is currently beyond my budget.
The mighty Sigma 150-600mm Contemporary lens.
The Canon Extender EF 2x ii is a matched teleconverter and is designed to only fit certain Canon L lenses. Note how the lens elements stand proud of the lens mount.
So my solution was to use my Sigma 150-600mm lens with a Canon x2 teleconverter on my Canon 80d which would give me the full frame equivalent of 1920mm. That is serious reach in anybodies book, but will it work? The first thing to consider is whether the Canon teleconverter will actually fit on the Sigma lens. If you look at the photo you can see that the lenses of the teleconverter protrude beyond the lens mount and into the lens. Would there be enough room in the Sigma 150-600 to accommodate this. The answer was a resounding “YES!”. The next question was would it autofocus. The problem is that on DSLRs the autofocus mechanismuses a sensor in the bottom of the mirror box that requires a sub mirror behind the main mirror to reflect some light onto it. If light levels are too low then the system just doesn’t work and the camera can’t autofocus. So that means a lens with a minimum aperture of f8 won’t autofocus. Having said that if we use ‘live view’ the mirror is moved out of the way and on Canon cameras Canon uses ‘dual pixel autofocus’ where every pixel on the sensor can function as an AF point. So in theory it should autofocus. That is good because the minimum aperture of the Sigma 150-600mm at 600mm is f6.3, slap a 2x teleconverter on and that becomes f12.6. So I set up a target in the back garden to try it out. Lo and behold the camera failed to autofocus when using the viewfinder, so OK I knew that was going to happen, but using live view it did.
The next thing to consider was image quality. When using a teleconverter image, and especially 2x teleconverters, image quality takes a serious hit – the image becomes notably softer. The answer to this is to stop down. After a bit of experimentation stopping down to f16 improved sharpness slightly, but it means using incredibly high ISOs which has impact upon the image quality. I figured that I’d run the images through Topaz DeNoise AI and hope that I’d get something decent.
A suitable test target. After experimentation an aperture of f16 was found to produce the best results.
Now I just needed to test this out on a live subject. Luckily our back garden is frequented by lots of birds, so I set the camera on a sturdy tripod and just waited. The results were that using live view and dual pixel autofocus the camera would definitely focus, it’s just it does it very, VERY slowly. I managed to get some photos, but the bird had to sit in one place for quite a while and this was with good light levels in the middle of the day. It wouldn’t be practical for a subject in the shade at dawn. I tried to manually focus but I couldn’t move the focus ring in small enough increments to achieve fine focus. The best results were achieved with birds that were about 5m away. I tried on Ring-necked Parrots that were further away and there was huge hit to image quality, the picture were just not critically sharp.
This Willy Wagtail was obliging enough to sit around for a few seconds. It is mandatory that every Australian garden should have at least one Willy Wagtail.
A leucistic zebra finch happily riding the rotary washing line.
This distant shot of Ring-necked Parrots shows a pronounced hit on image quality. Viewing the image at 100% shows the feather detail has gone to mush.
The Exposure Triange. All values have a reciprocal relationship.
Reciprocity in photography is where if you make one change to the exposure triangle – shutter speed, ISO, aperture – then you have to change one of the others by a corresponding amount to compensate for it. So if I have an exposure value of 1/125 sec, f4, ISO 400 and I want a shutter speed of 1/1000 then I’d either have to open the aperture to f1 or increase the ISO to 6400 or a combination of the two. The problem with wildlife photography is that it is often done in low light and has a need to use fast shutter speeds as the critters won’t sit still for very long. It is surprising to see how much a bird moves while sitting on a stick. This was my problem the other day when I returned to Northam to have another go at getting a photos of an Australian Spotted Crake (Porzana fluminea) .
Common Sandpiper, Actitis hypoleucos. Northam, Western Australia. Exposure: 1/200 sec, f6.3 ISO 10000. Topaz DeNoise AI saved the day!
As regular readers may remember in a previous post I said that I didn’t have a long enough lens for my usual Micro Four Thirds camera – the Olympus EM1x. My lens is a 100-400mm which gives me a reach of 800mm in 35mmm full frame terms. The lens won’t take a teleconverter and even if it did that would entail a further loss of light and image quality. So after some thought I decided to use my Canon 80d and Sigma 150-600mm lens which would give a reach equivalent to 960mm. Not a lot more but sometimes you’ve got to take all you can get. So with that we headed off to Northam and I sat on the river bank waiting for that elusive little spotty bird to make an appearance. My big problem was light – well to be more precise the lack of it. I warmed up with shots of a Common Sandpiper with an exposure value of 1/200, f6.3, ISO 10,000. I was lucky as the Sandpiper was content to sit still. When I did finally get a glimpse of the Australian Spotted Crake it was in deep shade so I had to drop the shutter speed to 1/60. I couldn’t open the lens up any more as I was wide open and I couldn’t use a higher ISO as I’d reached the limit. I shot several bursts in the hope I’d get at least one sharp image. A quick look at the rear LCD panel gave me a bit of hope for a result. By now the bird had taken itself back into the undergrowth not to emerge again. After waiting for a while we continued walking down the river to see if anything else was about.
Wayan or White-faced Heron (Ardea novaehollandiae). Northam, Western Australia. Even in the open 1/250 sec, f6.3, ISO 5000.
Djandjarak or Black-winged Stilt (Himantopus himantopus). Northam, Western Australia. Exposure: 1/160 sec, f6.3, ISO 3200.
Nidoolyorong or Black-fronted Dotterel (Elseyornis melanops). Northam, Western Australia. Now we’re talking, light levels are starting to improve. Exposure: 1/500 sec, f7.1, ISO 2000.
Bambon or Rufous Whistler (Pachycephala rufiventris). Northam, Western Australia. Exposure: 1/500 sec, f6.3, ISO 200.
Ngalkaning or Nankeen Night Heron AKA Rufous Night Heron (Nycticorax caledonicus subsp mannillenis). Northam, Western Australia. A bit on the dark side under the bridge so 1/250, f6.3, ISO 8000.
Getting home and looking at the photos none of the images of the Spotted Crake were sharp, there was motion blur and grain the size of golfballs. I tried every trick I know to try and rescue the images. But, as my dad used to say “No matter how hard you polish a turd it will always be a turd”. That flipping bird has become my nemesis. On the positive side I did get the nicest images of a Sacred Kingfisher that I’ve ever taken.
Kanyinak or Sacred Kingfisher (Todiramphus sanctus). Northam, Western Australia. Exposure: 1/1000 sec, f6.3, ISO 1250.
This last twelve months I have started using 35mm film again. Initially I had the lab where I got my film developed scan the negatives. The results were absolutely diabolical – and this was from one of what is considered the better labs in Western Australia. So I needed a scanner. The market had changed considerably since I bought my last one in 2005. Canon and Nikon have exited the market and Epson has only the V850 flatbed (only $1600 AUD “cough”!) available in Australia. What is available at more reasonable prices are the Plustek range, which seem to be largely differentiated by the software bundled with them. While the price is attractive they are somewhat under specified. The advertised maximum resolution of 7200 dpi is somewhat optimistic as it really doesn’t resolve more that 3200 dpi in real terms. The density measurement of 3.6 D is pretty mediocre and they are incredibly slow in in use. I then figured the second hand market was the place to look. Back in the day the undisputed market leader for consumer dedicated 35mm film scanners was Nikon. Now Nikon stopped production in 2009 so I thought a late model with USB connection would be the way to go and the Nikon Coolscan 5000 seemed to fit the bill with a true resolution of 4000 dpi, autofocus lens, adapters available for scanning whole rolls of film, and a density measurement of 4.8 D (anything over 4 is the mutts nuts). Unfortunately the current film resurgence has meant that these are selling for $1800-2100 AUD for a working model.
I had an ask around and was quickly informed that camera scanning was very popular. I watched a load of YouTube videos on the subject and saw everything from DIY Frankenscanners to very swish $6500 setups. I dipped my toe into the pool by making a negative holder from a scrap of matt board, an LED light diffused by tracing paper as the light source and set up a camera with a macro lens on a tripod. With a lot of trial and error (mostly error) I got some reasonable results – better than those I got from the lab. This was encouraging and it gave some idea of what I was looking for. I didn’t want to have to set up a camera on a tripod and then align the negative so it was parallel to the camera sensor plane and centred on the axis of the lens. It had to be compact and quick to set up and breakdown. Most importantly it had to work with one of the camera and lens combinations I already owned. Perusing the inter webs I found two set ups that fit the bill:
The Valoi Easy 35 at $380 AUD for a complete scanning solution
In crudest terms both are just a tube that attaches to your lens and at the other end is a film holder and an LED light source. Both offer a wide range of compatibility with different cameras and lenses. The Valoi looked very slick and well designed, the JJC looked a little more rudimentary. I plumped for the JJC as I wasn’t sure at that stage how much use it would get.
JJC Film Digitising Adapter And LED Light Set
The kit comprises of several short threaded tubes and step down rings.
In the box you get a series of short threaded tubes, several step down rings, a negative holder, a holder for mounted slides, a holder for the negative and slide holders, an LED light, a diffusion panel and a USB power cable with switch. There is a comprehensive instruction sheet and a sheet detailing the necessary combination of parts needed for each camera and lens combination. It was all very straightforward and I was up and running in a couple of minutes.
The LED light is powered via USB. It has no battery.
The build quality is OK. It’s made out of plastic, but it fits together quite well. The negative holder does a good job of holding the film flat. The only thing I don’t particularly like is that the step down rings bind very tightly to the filter threads of my lenses and it can be a bit of a struggle to remove them.
All assembled and mounted on a camera.
Before we get to results we must deal with the elephant in the room – lens compatibility. JJC list a total of 15 compatible macro lenses from Canon, Nikon, Sony, Olympus and Laowa covering micro four thirds, APSC, and full frame. Initially I used the lenses from the list – my Canon EF 100mm f2.8 IS L on my Canon 6d, and my Olympus 60mm f2.8 and EM1 mk ii. Both camera have a 20 Mp sensor and both worked very well. What I really wanted to use was my Sony A7r2 and Sigma 105mm f2.8, but the lens is not officially supported. I tried various combinations of the tubes until I found one that worked – a combination of large tubes listed for the Canon EF 100mm f2.8 L macro with the step down ring for the Nikkor Z MC 105mm macro. It delivered excellent results. So if your lens is not listed then it could be worth playing around with the tubes. Do you have to use a macro lens? For best results I’d say yes. It’s not just close focusing capability that’s important. Field curvature is as well. In simple terms an ordinary lens when photographing a flat object ie a film negative cannot bring the whole subject into focus. The centre is sharp and then that sharpness falls off towards the edges of the camera sensor. Macro lenses have inbuilt correction to achieve a flat film plane ie where the image is sharp across the whole frame. Some would say stop down and the problem goes away, and to an extent that could work depending on how acute the field curvature is because if you stop down too far then the diffraction kicks in and the image softens. Having said that if you don’t have access to a macro lens then there is nothing to stop you using a 50mm lens with 2 x 25mm extension tubes to see how you get on. Personally if you’ve got a mirrorless camera I’d look on EBay for a second hand manual focus macro lens and get an adapter so you can mount it on your camera. You don’t need autofocus to scan film.
Mounted on a Sigma 105mm f2.8 DG DN macro lens for Sony E mount. The lens is not on the JJC list of supported lenses, but playing around with the tubes and step down rings I was able to find a combination that worked.
Results. Well I compared the results from my three camera and lens combinations with some images I’d scanned using my oldCanoscan 9900f. On comparing them all the camera scans were better than the flatbed scanner. There was more detail in the highlights, there was finer detail in the whole image, subtle tonal roll off, and the images weren’t over sharpened.
This is an image I shot on slide film in 1986 and scanned using a Canoscan 9950f flatbed scanner.
Now viewed at 200%
Sony A7r2 with Sigma 105mm macro lens. 42Mp. Viewed at 200%.
Canon EOS6d with Canon 100mm macro lens. 20Mp Viewed at 200%.
Olympus EM1 mk ii with 60mm f2.8 macro lens. High Res mode. Equivalent to 80 Mp. Viewed at 200%.
Olympus EM1 mk ii with 60mm f2.8 macro lens. 20 Mp. Viewed at 200%.
A section of an Ilford SFX negative scanned with the Canoscan 9950f viewed at 200%
The same negative scanned with the Sony A7rii and Sigma 105mm macro. There is more fine detail and a much gentler roll off of tones with greater dynamic range.
This is a section of an Ilford FP4 negative scanned by the Canoscan 9950f and viewed at 200%.
The same negative at 200% shot with the Sony A7rii and Sigma 105. Again note the finer detail and tonal range of the image. The camera is able to extract more information out of a negative.
Now you’ve got a memory card full of digitised film what happens next. Well I’m using Adobe Lightroom so I ingest the images into the Lightroom catalogue. What happens next depends upon the film stock. With black and white or slide film no special software is required and you can process entirely in Lightroom. It’s really not difficult. With black and white just invert the tonal curve and with colour slide it’s just a case of making small scale adjustments to the colour balance, unless the slide is old and experienced a colour shift then the adjustments are bigger and you may have to do contrast masking. With colour negative things are harder due to the orange colour masking. Now it is possible to do this manually yourself, but you’ll save yourself a lot of time and frustration if you get a Lightroom plugin to do it for you. I tried once doing it myself because I once considered myself a fairly competent colour darkroom worker. I mean with with red areas appearing cyan, greens appearing magenta, and blues appearing yellow, and vice versa just how hard could it be? After an hour of chasing my tail on one negative I happily plonked down the money for Negative Lab Pro. It’s easy to use and the money is well spent as it preserves sanity.
Conclusion
Ilford XP1 scanned with the Olympus EM1 mk ii and 60mm macro at the native 20Mp of the camera.
Six months and a couple of dozen films in how do I feel about camera scanning? Well to be honest if I could get a modern version of the Nikon Coolscan 5000 with up to date software, drivers and a USB C interface I’d buy it in a heartbeat (Nikon are you listening?). The reality is that there isn’t and it is unlikely to happen. So I guess I’m a camera scanner with reservations. With a good macro lens and good post processing skills it is a viable alternative to the dedicated film scanner and is streets ahead of what flatbed scanners can achieve.
Ilford XP2 scanned with the Olympus EM1 mk ii and 60mm lens at 20Mp.
As to JJC Film Digitising Adapter And LED Light Set I think it is good as a low cost entry to camera scanning.
Pros
Cheap – $130 AUD from Amazon
Quick to set up and quick to scan
Easy to use
Adapts well to a range of lenses and cameras
Better results than a flatbed scanner when using a camera with around 24Mp
Good documentation making it easy to get started
Cons
It can only scan 35mm film
On paper it is only compatible with a limited number of lenses
Black and white negatives and slide film can be processed with no special software, but colour negative will require a plugin such as Negative Lab Pro
Expensive if you don’t own a digital camera and macro lens
The negative and slide holders are sloppy as is the holder insertion slot on the LED. They wobble and rotate as you feed the film through. Also the locating notches on the holders are not accurate so it is not a quick or smooth process when you put the film through and it requires fiddling with to ensure accurate framing
For the time being I’ll continue using it and work around some of the quirks as the price was right. Let’s put it another way. My lab charges $11 to scan a roll of film. Scan 12 rolls of film and the scanner has paid for itself.
Ilford Delta 400 scanned with a Canon 6d and Canon EF 100mm macro lens.
Sitting on the banks of the River Avon in Northam waiting for the first light of the sun to seep into the shadows and herald the start of a new day. The birds on the sandbanks and in the trees are just beginning to stir. I was there to photograph Black-fronted Dotterels.
Kaaka-baaka or Yellow-billed Spoonbill (Platalea flavipes). Northam, Western Australia.
As the sun’s light filtered through the trees it created a beautiful chiaroscuro that Renaissance artists could only dream about. The Black-winged Stilts and the Yellow-billed Spoonbills were literally glowing against the dark background. Light like this is magical and you can see why it was used in so many religious paintings. The oft given advice about photographing birds and other animals is to always have the sun at your back. If you do this then you miss the opportunity to create something dramatic. You have to act fast as the light doesn’t hang around and no sooner than you are aware of it it is gone. That’s what happened on this morning. From just a faint hintand then it floods in and the shadows disappear.
Djandjarak or Black-winged Stilt (Himantopus himantopus subsp. leucocephalus). Northam, Western Australia.
The Black-fronted Dotterels didn’t put in an appearance until I started walking back to the car. They obviously like a lie in. Although the light was past its best I still photographed them picking insects and small crustaceans from the mud and sand. It was after all what I gone to Northam for.
Nidoolyorong or Black-fronted Dotterel (Elseyornis melanops). Northam, Western Australia.
Things were just winding down for the evening when the Beloved Significant Other announced that there was a raptor eating a bird in our drive. I ran and grabbed the the first camera to hand with a long lens attached – my Canon 80d with Sigma 150-600mm lens. Using the dustbins as cover I managed to get quite close. I wasn’t sure what I was looking at in terms of species – at first I thought it was a Peregrine Falcon (Falco peregrinus) but I wasn’t entirely convinced. I did know what it was eating – a Laughing Dove (Streptopelia senegalensis) as there are plenty of them in the neighbourhood. It was quite a nervous bird constantly scanning the environment between mouthfuls. Like most raptors it had merely stunned its prey and it was a bit hard to watch as the dove squirmed about while being eaten. It died when the contents of the chest cavity were removed. But that’s nature for you – incredibly beautiful but undoubtedly cruel.
Djili-djili or Collared Sparrowhawk (Accipiter cirrhocehalus) eating a laughing dove (Streptopelia senegalensis) in our driveway.
All the best bits have been eaten.
I didn’t look at the photos until the morning. First off I marvelled at how well the 80d coped. It was the last stages of dusk and quite dark which meant using ISO 12800. The files were incredibly noisy but they cleaned up very well in Topaz DeNoise AI. The autofocus system on the 80d is very primitive compared to modern mirrorless cameras that now have bird detect autofocus, but it did a great job with only a couple of frames out of the 200 I shot being out of focus.
The Canon 80d – it maybe getting on a bit, but it is a very capable camera.
The Sigma 150-600mm f5-6.3 DG Contemporary lens. It offers a real bang for the buck.
What was the bird? Well it wasn’t a Peregrine Falcon, but aCollared Sparrowhawk (Accipiter cirrhocephalus).
This last year seems to have gone in a blur, it only seems like yesterday that I was writing the blog entry for the best of 2023.
These are my favourite photos from the past year. They’re not technically the best, but they are what made me happy. 2023 marked quite a departure from previous years. I didn’t do very much wildflower photography and I started dabbling with film again.
Red-backed Kingfisher, Todiramphus pyrrhopygius. York, Western Australia.
Karkany or Brown goshawk (Accipiter fasciatus) basking in the dawn light. York, Western Australia.
Ngalkaning or Nankeen Night Heron (Nycticorax caledonicus subsp mannillenis). York, Western Australia.
Doolor or Silvereye (Zosterops lateralis). York, Western Australia.
Western Inland Hunter, Austrogomphus collaris. York, Western Australia.
Black Shouldered Kite, Elanus axillaris). York, Western Australia.
Bulland or Great Egret, Ardea alba. Samphire Cove Nature Reserve, Westerm Australia.
Yoondoordo or Eastern Osprey (Pandion haliaetus). Island Point Reserve, Western Australia.Delyip or Red-capped Parrot (Platycercus spurius). Samphire Cove Nature Reserve, Westerm Australia.
Boodalang or Australian Pelican (Pelecanus conspicillatus). Alcoa Wellard Wetlands, Western Australia.
A female Red-winged Fairy-wren (Malurus elegans) called Djoordjilya by the indigenous Nyoongar. . Nannup, Western Australia.
Bandiny or New Holland Honeyeater (Phylidonyris novaehollandiae). Lake Leschenaultia, Western Australia.
Masked Lapwing, Vanellus mile, and White-bellied Sea-eagle
Zebra Orchid, Caladenia cairnsiana. Williams, Western Australia.
Leopard Orchid, Thelymitra benthamiana.
Koobanmokin or Red-capped Robin (Petroica goodenovil). Avon Trail, York, Western Australia.
Kanyinak or Sacred Kingfisher (Todiramphus sanctus). Avon Walk Trail, York, Western Australia.
Diliboort or Magpie-lark (Grallina cyanoleuca). Avon Walk Trail, York, Western Australia.
Djandjarak or Black-winged Stilt (Himantopus himantopus subsp. leucocephalus). Northam, Western Australia.
Kaaka-baaka or Yellow-billed Spoonbill (Platalea flavipes). Northam, Western Australia.
Djili-djili or Collared Sparrowhawk (Accipiter cirrhocehalus) eating laughing dove (Streptopelia senegalensis) in our driveway.
My most used digital cameras in descending order were:
Olympus EM1 mk ii
Olympus EM1x
Canon EOS 6d – used only for camera scanning
Canon EOS 80d
Sony A7r2
My most used lenses in descending order were:
Panasonic Leica 100-400mm f4-6.3
Sigma 150-600mm f4.5-6.3
Canon EF 100mm f2.8 L macro – used only for camera scanning
Olympus 40-150mm f2.8 with x1.4 teleconverter
So what will 2025 bring? Well hopefully we’ll be going interstate again and there is the prospect of an overseas trip. Closer to home I’ve got an idea for a couple of projects. Predominantly I shall be using digital in the form of my Micro Four Thirds system, but I will continue to shoot film as I’m enjoying it so much.
Thanks to everyone who has followed the blog this year, and I hope that you will join me for 2025.
Kadar or Musk Duck (Biziura lobat), Lake Leschenaultia, Western Australia. Canon EOS 30 with Sigma 150-600mm and Ilford Delta 3200.
Can you shoot wildlife using film? Well the obvious answer is yes. People took wildlife photos using film for a lot longer than they have using digital. Cherry Kearton (1871-1927) and his brother Richard (1862-1928) the naturalist and writer were very early pioneers of wildlife photography and they published the first natural history book entirely illustrated with wild photographs in 1895. Their 1898 book “With Nature And A Camera: being the adventures of a field naturalist and an animal photographer” illustrated with 160 photos was a best seller and inspired many people to become wildlife photographers. Other notable wildlife photographers from the film days include Eric Hoskins, Stephen Dalton and Heather Angel. “Hold on” I hear you say “they shot film because that was what available”. It’s a valid point, so can you shoot wildlife on film in 2024? The answer is yes, but it’s not as simple as it once was.
The film stock I’ve chosen for photographing wildlife.
Back in the 1990’s and early 2000’s there were a lot of high speed film emulsions. Kodak had Ektar 1000 in colour negative, Ektachrome 400 slide film which could be pushed to 1600 ISO and TMax P3200 in black and white. Ilford had its Delta 3200 black and white emulsion. Fuji had Fujicolour 1600 colour negative film, FujiChrome Provia 1600 which was a colour reversal film and Neopan 1600 Professional black and white film. Agfa (there’s a blast from the past) had a couple of 1000 ISO C41 film stocks and a 1000 ISO slide film. 3M made an E6 1000 ISO film which was sold under several trade names. Sakura, later Konica, had a 3200 ISO colour negative emulsion. Now in 2024 the situation is very different.There are no E6 films, only 2 colour negative films, but they are 800 ISO, and two black and white emulsions nominally rated at 3200. Camera and lens wise, well the secondhand market is your friend and top of the line cameras such as Nikon’s F4 or F5 can be picked up quite cheaply (although that is a relative term) as can Canon’s EOS1. Lenses aren’t difficult to come by, but their prices haven’t dropped like those of the camera bodies as they can still be used on DSLRs.
The Canon EOS30 is an enthusiast level 35mm SLR that is a very capable camera for shooting wildlife.
The Sigma 150-600mm f5-6.3 DG Contemporary lens is a relatively inexpensive lens that is excellent for photographing wildlife.
The parameters I set for myself with this project was that I had to use stuff that I already had, so while there are camera bodies more suited to shooting wildlife that have better autofocus and higher frame rates I stuck with my Canon EOS 30. Lens wise my Sigma 160-600 was the obvious choice. I did briefly think about using my Olympus OM cameras, but I didn’t have a suitable lens and I didn’t want to have to hunt around for a good copy of the hard to find Olympus OM 600 mm f/6.5. Also I didn’t fancy trying to find focus with my ageing eyes. So the Canon and Sigma combination won out.
The elephant in the room is the cost of film and developing. This is the major consideration. The following prices are for Australia as this is where I live. Kodak Portra 800 is $37 for 36 exp, Ilford Delta 3200 is $18, Kodak TMAX P3200 is $30, and Lomo 800 can cost as much as $48 for a single roll, but multipacks of 3 36 exp rolls can be bought for $140. The cost of processing is $10 for C41 and $18 for D76 (black and white). Those prices are for developing and cutting and sleeving. Now my Canon EOS 30 can shoot at 4 frames per second, so machine gunning birds in flight would see you get through a roll every 9 seconds at a cost of more than $1 per shot. Typically when I go out in the morning for three hours or so I’ll shoot around 3-4000 frames with my digital cameras so when I decided to undertake this project I decided that I’d only shoot a maximum of two rolls on an outing. Using my Canon EOS 30 meant that after finishing the film I could switch the body to my Canon 80d so I could make the most of the morning. I know that by developing your own film you can reduce the costs, and I’m hoping to do this in the future.
All the photos below are the full frame, and you can look at them larger by clicking on the image.
Djindjokoor, Brown Honeyeater, Lichmera indistincta. York, Western Australia.
Djindjokoor or Brown Honeyeater (Lichmera indistincta). York, Western Australia.
Kool-boort or Singing Honeyeater (Gavicalis virescens). York, Western Australia.
Kanyinak or Sacred Kingfisher (Todirmphus sanctus). Kodak Portra 800.
Caspian Tern, Hydrprogne caspia. Heirisson Island, Western Australia.
Bulland or Great Egret, Ardea alba. Heirisson Island, Western Australia.
So after a few months what can I say? Well the first thing that really stuck out was the grain. Many photographers complain bitterly about noise in images, but that ain’t got nothing on the grain in these fast emulsions. Funnily enough I wasn’t too bothered with it in the black and white shots on Ilford Delta 3200 as I quite like the look. I had a Tri-X 400 pushed 2 stops developed in Rodinol phase many years ago which might explain that foible. The shots taken on Kodak Portra 800 were a bit different. I suppose I’d just become used to noise free images up to 1600 ISO on my digital cameras. Having said that I’ve got used to it and I quite like the results.
Digitising the negatives was an interesting experience. To keep costs down I scanned the images myself using a DSLR and a macro lens. The learning curve has been a bit on the steep side, especially for the colour negatives, and I’m still not sure whether I’m happy with the results or not. If I were to continue with this, and I think at this stage I will, I’ll probably get a dedicated film scanner. The reason being that while scanning using a camera was quite quick, about 1/2 an hour for a roll of 36, it was the faffing around in Lightroom and Photoshop that took a lot more time.
Was I happy with the final results? Yes. I think that it is an interesting exercise as it makes you really think. Firstly which film stock to use. The Ilford Delta 3200 is great for low light and misty atmospheric conditions. It’s not a film to use if getting the maximum feather detail is your aim. The Kodak Portra 800 is best suited to brighter conditions with a nice light. When shooting digital I use shutter priority and and auto ISO which means I can just concentrate on the composition. With film the ISO is not a variable, once you’ve loaded the film and start using it at that ISO you’re committed to that for the whole roll. The net result is that I have to be very aware of what my exposure is all the time. This is not a bad thing as it makes me more engaged with whole picture taking process. Were there any downsides beside the expense? Yes. I found that using film made me be a lot more conservative in my photos. I was not so inclined to experiment. Shooting birds in flight I’d only take 2 or 3 frames, whereas on digital I’d think nothing of taking 20 or 30 frames as I’d want to be sure of getting the wings in the perfect position. I’ve just become accustomed to subject tracking and have become quite reliant on it. Going back to an autofocus system developed in the 1990’s was a bit of a shock. It wasn’t as positive or sticky which meant there were a lot of out of focus pictures. I missed having a histogram in my viewfinder and the lack of instant feedback of the LCD screen. This meant I had to remember how much exposure compensation to give for a black bird on a very dark background or a backlit white egret. Having to wait a couple of weeks for the films to come back from the lab was a lesson in deferred gratification.
Would I give up digital and convert solely to film? Is my name Rothschild? No. I don’t see it as a binary choice. In many ways digital is a better medium for wildlife photography. It gives you more freedom – you can shoot in incredibly low light and you don’t have the feeling a meter is running as you take photos. Film does have its place as a creative alternative, if you are after a specific look or mood then it is ideal.
Not The Wild West Show, but the York Show. We’ve lived in York for nearly twenty years and this was the first time I’d been. The York Show is your typical Australian country town agricultural fair. There are displays of livestock, trade stands for agricultural machinery, arts and crafts exhibitions and awards, and most importantly for the kids a bit of a fun fair with a fireworks display in the evening. I didn’t really know what to expect, so I took my Olympus OM40 and two lenses – a 35 and a 135. I loaded up with Ilford XP2 and decided to photograph anything that took my fancy. The show was held in September and it’s taken me this long to get the film developed and scanned. The following are just a few of my favourites from the day.
The York Agricultural Society presents the 2024 York Show.
Laughing clowns sideshow attraction at the York Agricultural Show.
Getting Crazy On The Waltzers. Enjoying the thrills of a fairground ride.
Be-ewe-tiful!
Queuing for a coffee at the York Agricultural Show.
Contestants try their luck on the fairground shooting gallery,
Everyone stopped to admire the ponies. York Agricultural Show.
The queue at the entrance to recreation grounds where the York Agricultural Show is held.
“Now which one shall I have?”. The Plushy Wall at the York Agricultural Show.
Start Them Young. Trying out the latest John Deer. York Agricultural Show.
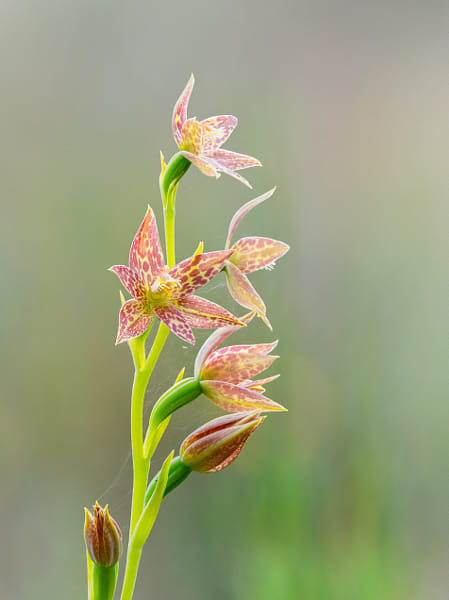
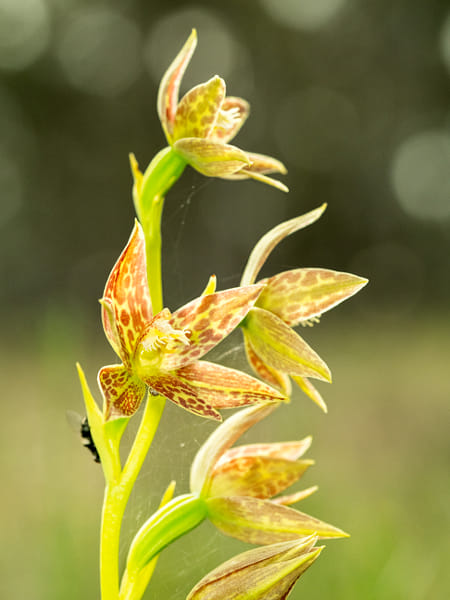
My last wander about the local Wandoo forest didn’t yield anything much. The only plants worth getting the camera out for were some Leopard Orchids. So I did my usual full length portrait using my 40-150mm f2.8 plus MC-14 teleconverter with focus stacking. Then a tighter “head and shoulders” shot with the 60mm f2.8 macro and flash. I finished up with really tight detail shot at close to 1:1 again with the 60mm macro.
Leopard Orchid, Thelymitra benthamiana. A 10 shot focus stack using the Olympus EM1 mk ii, Olympus 40-150mm f28 lens and the the Olympus MC-14 teleconverter. File assembled in Photoshop.
If you look closely at the main flower there is a spider peeping out and the fly on the edge of plant is caught in its web. Leopard Orchid, Thelymitra benthamiana.
In the past I’ve used OM Workspace to do the focus stacks, but after it’s latest update it has become so slow – glaciers move quicker. So I decided to to do the stack using Adobe Lightroom and Photoshop. To say it was much faster would be a massive understatement, but the final result was a lot better as well. For the life of me I can’t work out why camera manufacturers software is so bad. It should be better as they know all the features of the cameras and how to get the best out of them. This isn’t just a whinge directed at OM Systems. Canon’s DPP is absolutely appalling as well. Adobe would’t have such a stranglehold on the market if the camera manufacturers could develop good software.




You must be logged in to post a comment.