Birds On A Budget

The title is really an exercise in alliteration. It really should be “Can You Do Wildlife Photography On A Limited Budget?”, but that’s not as catchy or succinct. I used to think it was impossible. I thought to be a wildlife photographer you needed deep pockets to be able to afford the cameras and lenses. The photo review sites would have you believe that you need to drop unto $10K AUD on a camera body and up to $24K AUD on a lens to be in with a chance of taking a decent photo. Then you had to have the wonga to be able to travel to Africa, Antartica etc to actually find animals worthy of being photographed. About twenty years ago my sister tried to encourage me to enter the BBC Wildlife Photographer Of The Year competition my response was that I didn’t have the money for the equipment let alone alone being able to travel to a suitable location.


Richard and Cherry Kearton photographing a birds nest.


Twenty years later my views have radically changed. What changed them was the confluence of learning about two of the pioneers of wildlife photography and the digital camera revolution. The photographers were Cherry Kearton (1871-1927) and his brother Richard (1862-1928) the naturalist and writer. They were very early pioneers of wildlife photography and they published the first natural history book entirely illustrated with wild photographs in 1895. Their 1898 book “With Nature And A Camera: being the adventures of a field naturalist and an animal photographer” illustrated with 160 photos was a best seller and inspired many people to become wildlife photographers. A very young David Attenborough attended one of their film lectures and in an interview to The Guardian Newspaper said “It captured my imagination and made me dream of travelling to far-off places to film wild animals.” (Vidal, J; The Guardian 4th December 2021).  In their book the two brothers list what it takes to be a wildlife photographer:

“The great points about successful natural history photography are: the possession of suitable apparatus to work with, an aptitude for taking care in stalking timid creatures and plenty of patience and determination to wait for and get what is wanted in spite of obstacles.”

p.334 Kearton, R and Kearton, C; With Nature and a Camera, 1898, Cassel, London.
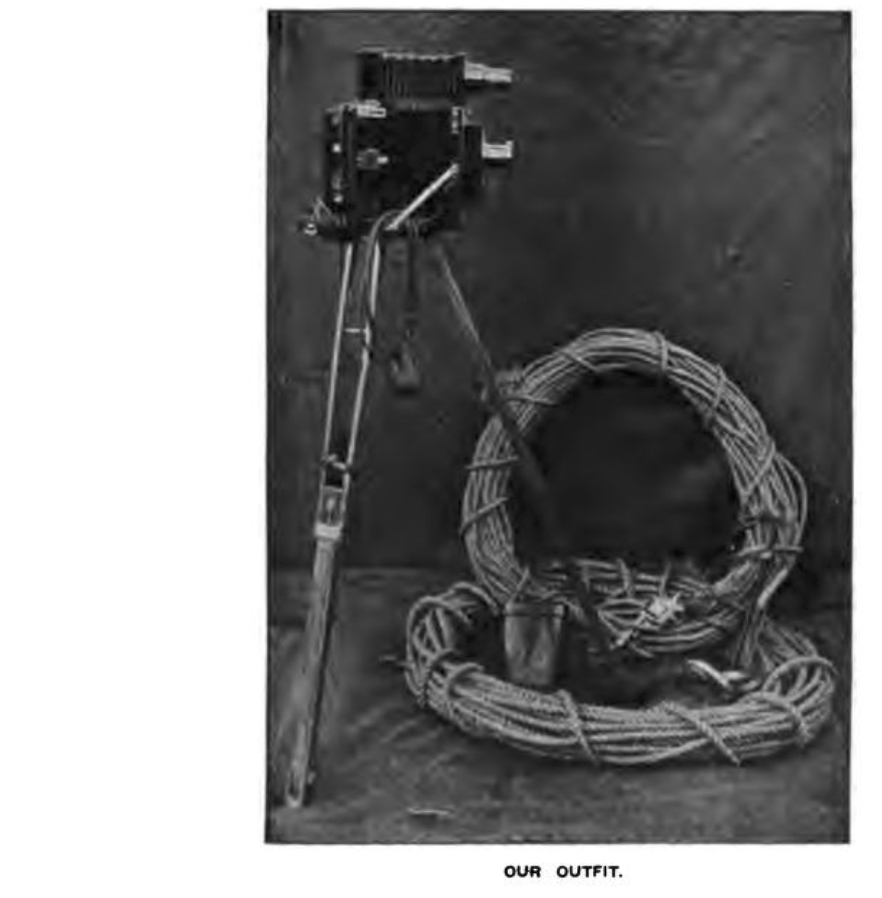
 

The “suitable apparatus” was a half plate (4¾ × 6½ in or 120mm × 165mm) Dallmeyer camera with a pneumatically controlled silent shutter for still subjects and a large quantity of hemp rope for scaling cliffs.


The “suitable apparatus” was a half plate (4¾ × 6½ in or 120mm × 165mm) Dallmeyer camera with a pneumatically controlled silent shutter for still subjects and miniature plate camera (probably 3 1/4” x 4 1/4” glass plates with a 5 1/4” f8 lens) for birds in flight. There was no autofocus with bird recognition AI. No 40 fps. Nothing under 4Kg in weight and certainly no endless digital images on a memory card. The plates had a sensitivity of 2 to 25 ISO. They’d be lucky to carry a dozen glass plates and take one picture every 2 minutes. They initially started just photographing the fauna of their native Yorkshire in their days off often sleeping in hedges or barns. No luxury safaris with 5 star accommodation and the convenience of modern jet travel.


No memory cards giving unlimited shooting for the Keaton’s. This is a box of Ilford photographic glass plates.


The digital camera revolution has meant for the last twenty years camera and lens manufactures have brought out new products with amazing technological innovations every year. This has meant that the second hand market has been flooded with equipment as photographers unload their “obsolete” stuff so they can buy the new stuff only to do the same 12 months later. This now means that there is a wealth of extremely capable second hand equipment out there to suit every budget.
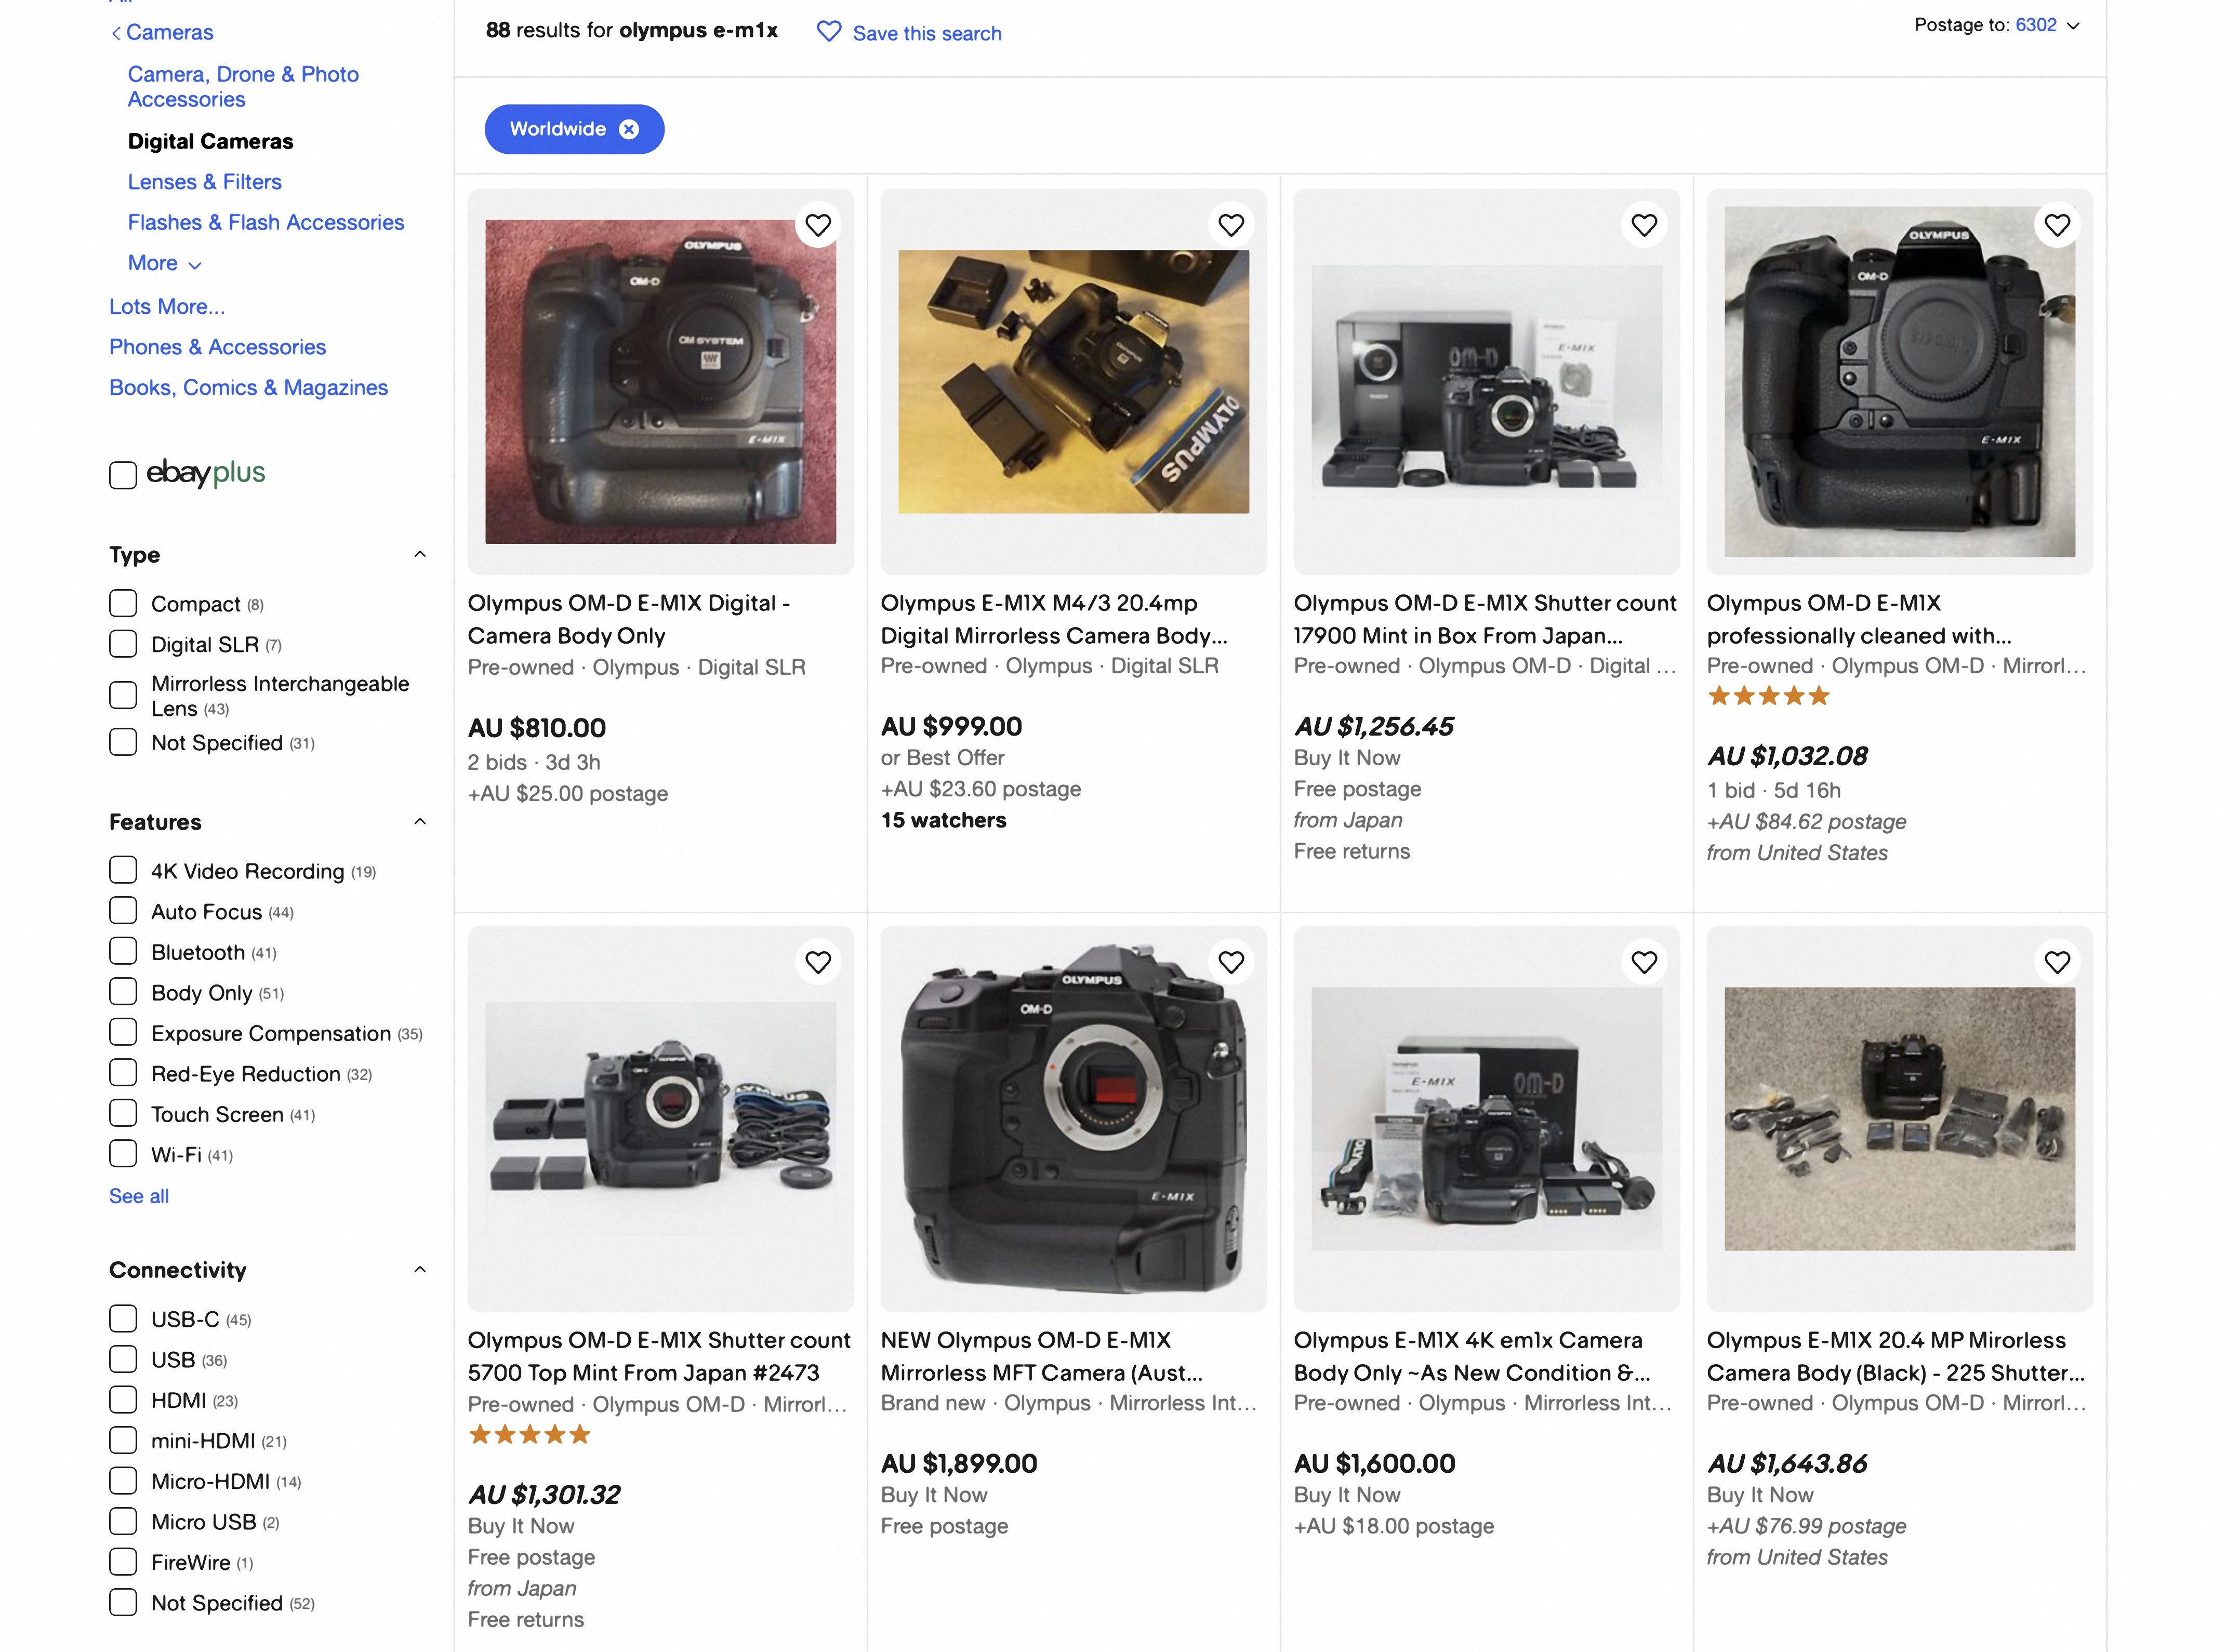
 

Advances in in digital photographic technology has meant that there is a plethora of second hand equipment for sale.


TLDR


Needs Versus Wants

This is quite important as it will help us decide on equipment and set a budget. For instance if all you want to do is post some photos on social media then pretty well any interchangeable lens DSLR or mirrorless camera released in the last 20 years will suffice. If you want to print photos up to A3 in size then a 12Mp camera is adequate. If HD video and 4K video are important then that sets another parameter. It’s nice to day dream about having top of the line equipment such as a Sony A1 and a Sony 600mm f4 lens, but that combination will set you back $27000 AUD new and won’t be had for thrift shop prices second hand. But, say you want to print up to A3 it is possible with a bit of careful shopping on EBay or GumTree to get a DSLR with an APSC sized sensor and a 75-300mm lens for less than  $500 AUD second hand.

I basically find that deciding on the lens is the most important part of the exercise and you really should aim to put most of your budget to that. So what are we looking for?


Sensor size Full frame (36x24mm) APSC (23.6 x 15.7mm or 22.2 x 14.8mm [Canon cameras only]) Micro Four Thirds (17.3 x 13mm)
Minimum Focal length 400mm 300mm  300mm
Best Case Scenario 600mm 600mm 400mm


The focal length will determine how close you need to get to your subject. The shorter the focal length the closer you will have to get. Having said that a shorter focal length is not a handicap because you’ll have to learn bushcraft so you can approach animals and that is a very good skill to have in this game and it’ll also stand you in good stead if you get a longer lens later on down the track. 

You can use zoom lenses or primes. A prime lens is a fixed focal length, whereas a zoom lens  covers a range of focal lengths such as 75-300mm, or 100-400, or 150-600mm. In theory a prime lens will give better image quality and have a larger maximum aperture value which will let more light in. The down sides are that primes are usually more expensive and being a fixed focal length means that if your subject gets too close (it does happen more often that you’d think) you won’t be able to take a picture. Zooms offer flexibility in that you’re not stuck at one focal length, but the trade off is that they’re not as optically good as primes at the cheaper end and the maximum aperture value isn’t as great meaning that you may have to stop shooting as the light goes down.


A comparison of the common camera sensor sizes.


Now as soon as you tell another photographer what you’re planning to do they will inevitably tell you that you should get a camera with a full frame sensor as you’ll get a whole heap of benefits over the other smaller sensors. Now if we just content ourselves with reading spec sheets maybe, but out in the real world other things come into play. You want to photograph a bird that is 20cm long and fill the frame with it, so that’ll mean getting 5m away from it. To do that with a full frame camera you’ll need a focal length of 800mm, with an APSC camera 600mm and with a micro four thirds camera 400mm. There is a magnification factor when comparing the focal lengths on the different sensor sizes. It is x1.5 (or 1.6 for Canon) for APSC and x2 for micro four thirds. We’ll look at this comparing three common focal length ranges for the three sensor sizes.


75-300mm 100-400mm 150-600mm
Full Frame (36x24mm) 75-300mm 100-400mm 150-600mm
APSC (23.6 x 15.7mm)

(22.2 x 14.8mm Canon cameras)

112-450mm full frame equivalent

120-480mm full frame equivalent when used on a Canon APSC camera

150-600mm full frame equivalent

160-640mm full frame equivalent when used on a Canon APSC camera

225-900mm full frame equivalent

240-960mm full frame equivalent when used on a Canon APSC camera

Micro Four Thirds (17.3 x 13mm) 150-600mm full frame equivalent 200-800mm full frame equivalent 300-1200mm full frame equivalent


So a smaller sensor will mean you don’t need very long lenses and that is good because they are expensive. Shorter lenses have the advantage of being lighter which is good when carrying stuff in the bush.


Canon EOS 300d
Canon EOS 300d body with Canon EF 75-300mm f4-5.6 IS lens.


I started my nature photography using a Canon EOS 300d with a Canon EF 75-300mm lens. The camera has an APSC sensor so that gave me almost enough reach to fill frame with my 20cm bird at 5m. It did me well until I decided that I wanted to invest more into the hobby. So if your budget is really tight I would recommend getting either a Canon of Nikon APSC camera and a 75-300mm lens as the bare minimum, and we’ll look at what’s available a bit later on.
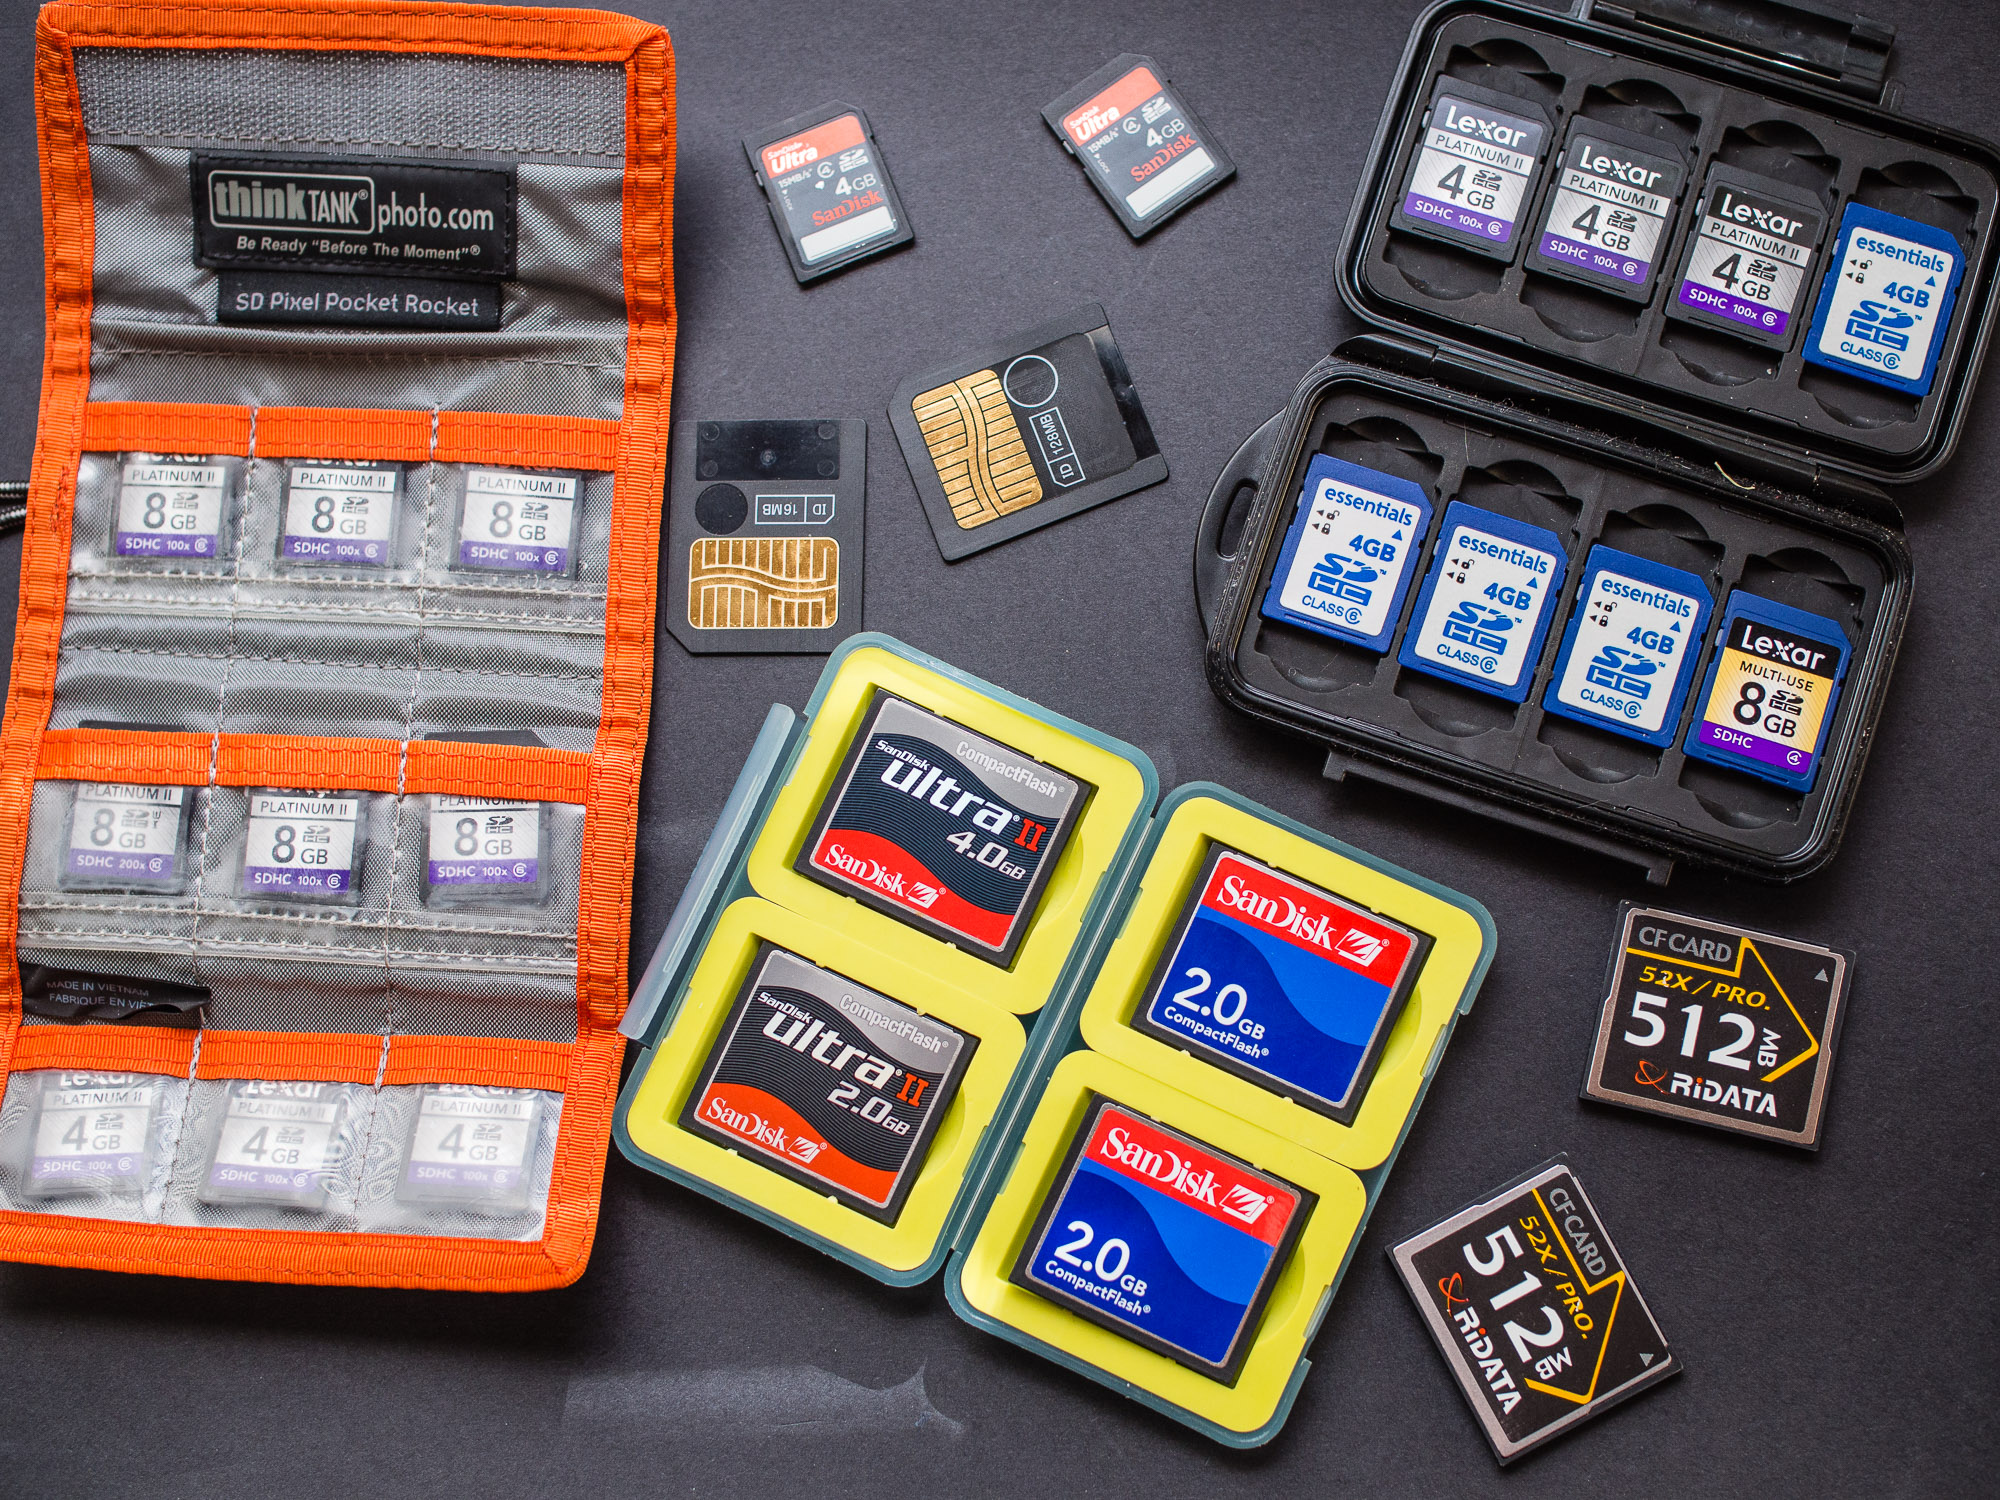
 

Memory cards are now very cheap. Develop a strategy for keeping them safe while working in the field.


The other thing to consider is that when you buy a camera and lens you also have to budget for batteries and memory cards. First things first; when looking at memory cards over the last 20-25 years there have been roughly ten types of memory card and many of them have gone obsolete so when buying a camera I would suggest that buying one with a commonly available card such as Secure Digital Card or SD Card. Similarly with batteries, make sure batteries are easily obtainable. With both cards and batteries try to buy the best you can afford and I’ll expand on this a bit further later on. Buying second hand also means that there is a chance where you’ll be able to buy the camera with spare batteries, a memory card, strap and possibly some form of bag as a package. Just make sure you’re getting things you actually want and are not paying more than if you to buy each item separately.

All the cameras I’ll be talking about are cameras I’ve owned or used. They’re not recommendations they are to give an idea of what’s about and where possible I’ll suggest equivalent models from other manufacturers.


Bargin Basement

You’ve got next to no money. OK a bit of a draw back, but not insurmountable. Back in the dim dark days of digital photography there existed a class of camera that you don’t hear much about now – the bridge camera. They are a cross between a point and shoot compact and an SLR. You get a wide range zoom lens with a small body. They were popular with enthusiasts in the early noughties as more serious cameras were way way expensive. Every manufacturer offered at least one some several at different price points. Sony and Panasonic still make a few models and they range in price from $500 to $2400 AUD new. But on the second hand market that’s where things get interesting. You can pick up something for less than $50. 

What you are looking for is camera models with the terms “UltraZoom“, “superzoom” or “mega zoom” in the model name. Ideally look for something with at least an 8x zoom, better yet 10x or 15x. The more zoom the bigger your subject will be in the final image.


Olympus Camedia C-720 Ultra Zoom
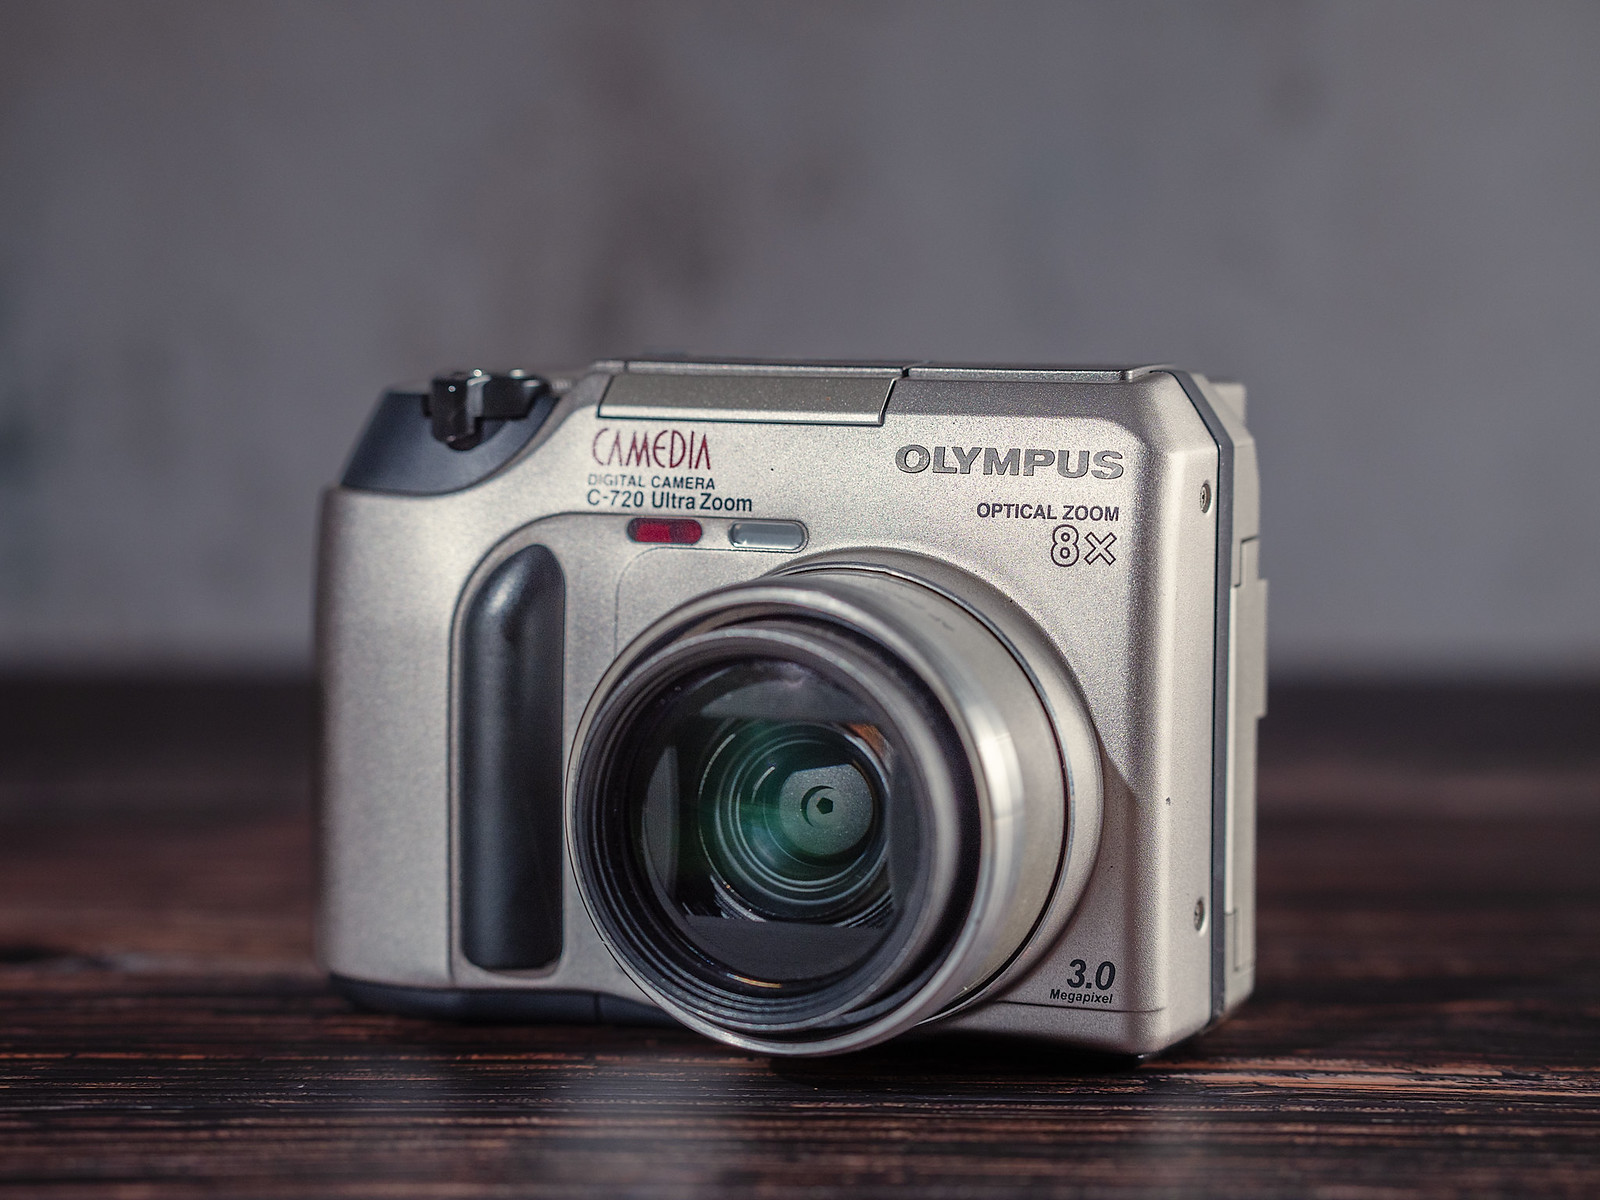
 

Olympus C-720
Olympus Camedia C-720 UltraZoom bridge camera.


The Olympus C-720 was introduced in 2002 and is fairly typical of models from that era. It has a whopping 3 Megapixels and an 8x zoom range (24x if digital zoom is switched on but it is crap). It’s small, light, and cheap. Typically expect to pay about $15 to $35 AUD for one. What makes it ideal is that the camera runs off 4x AA batteries which are plentiful and cheap. The downsides are that it takes a SmartMedia memory card which while obsolete can still be bought. The downside is that you will probably spend more on the memory card than the camera. Another problem is that the largest capacity card is 128MB which can hold 14 photos at the best quality TIFF setting, 58 in SHQ jpg, 170 HQ, 196 in SQ1, and 206 in SQ2. The last two come at a smaller resolution. Although 3MP is a bit limiting you can print a postcard sized print comfortably and print an A4 sized print at a stretch.


Olympus C-720


In use it is not a speed demon, it takes about four seconds to power up. When shooting in sports mode with medium quality jpgs the camera can manage to shoot at 1 fps for a total of 15 frames. The autofocus is slow and very noisy. The top shutter speed is 1/1000 and the maximum ISO, or sensitivity, is 400.  At 400 ISO the noise is bad and prevents you from recoding fine details. This is not a camera with which to take pictures of fast moving subjects in low light. But in good light, with a heap of patience and an understanding of the cameras limitations you can get some pictures. Whether you enjoy the process or not will depend upon your outlook.

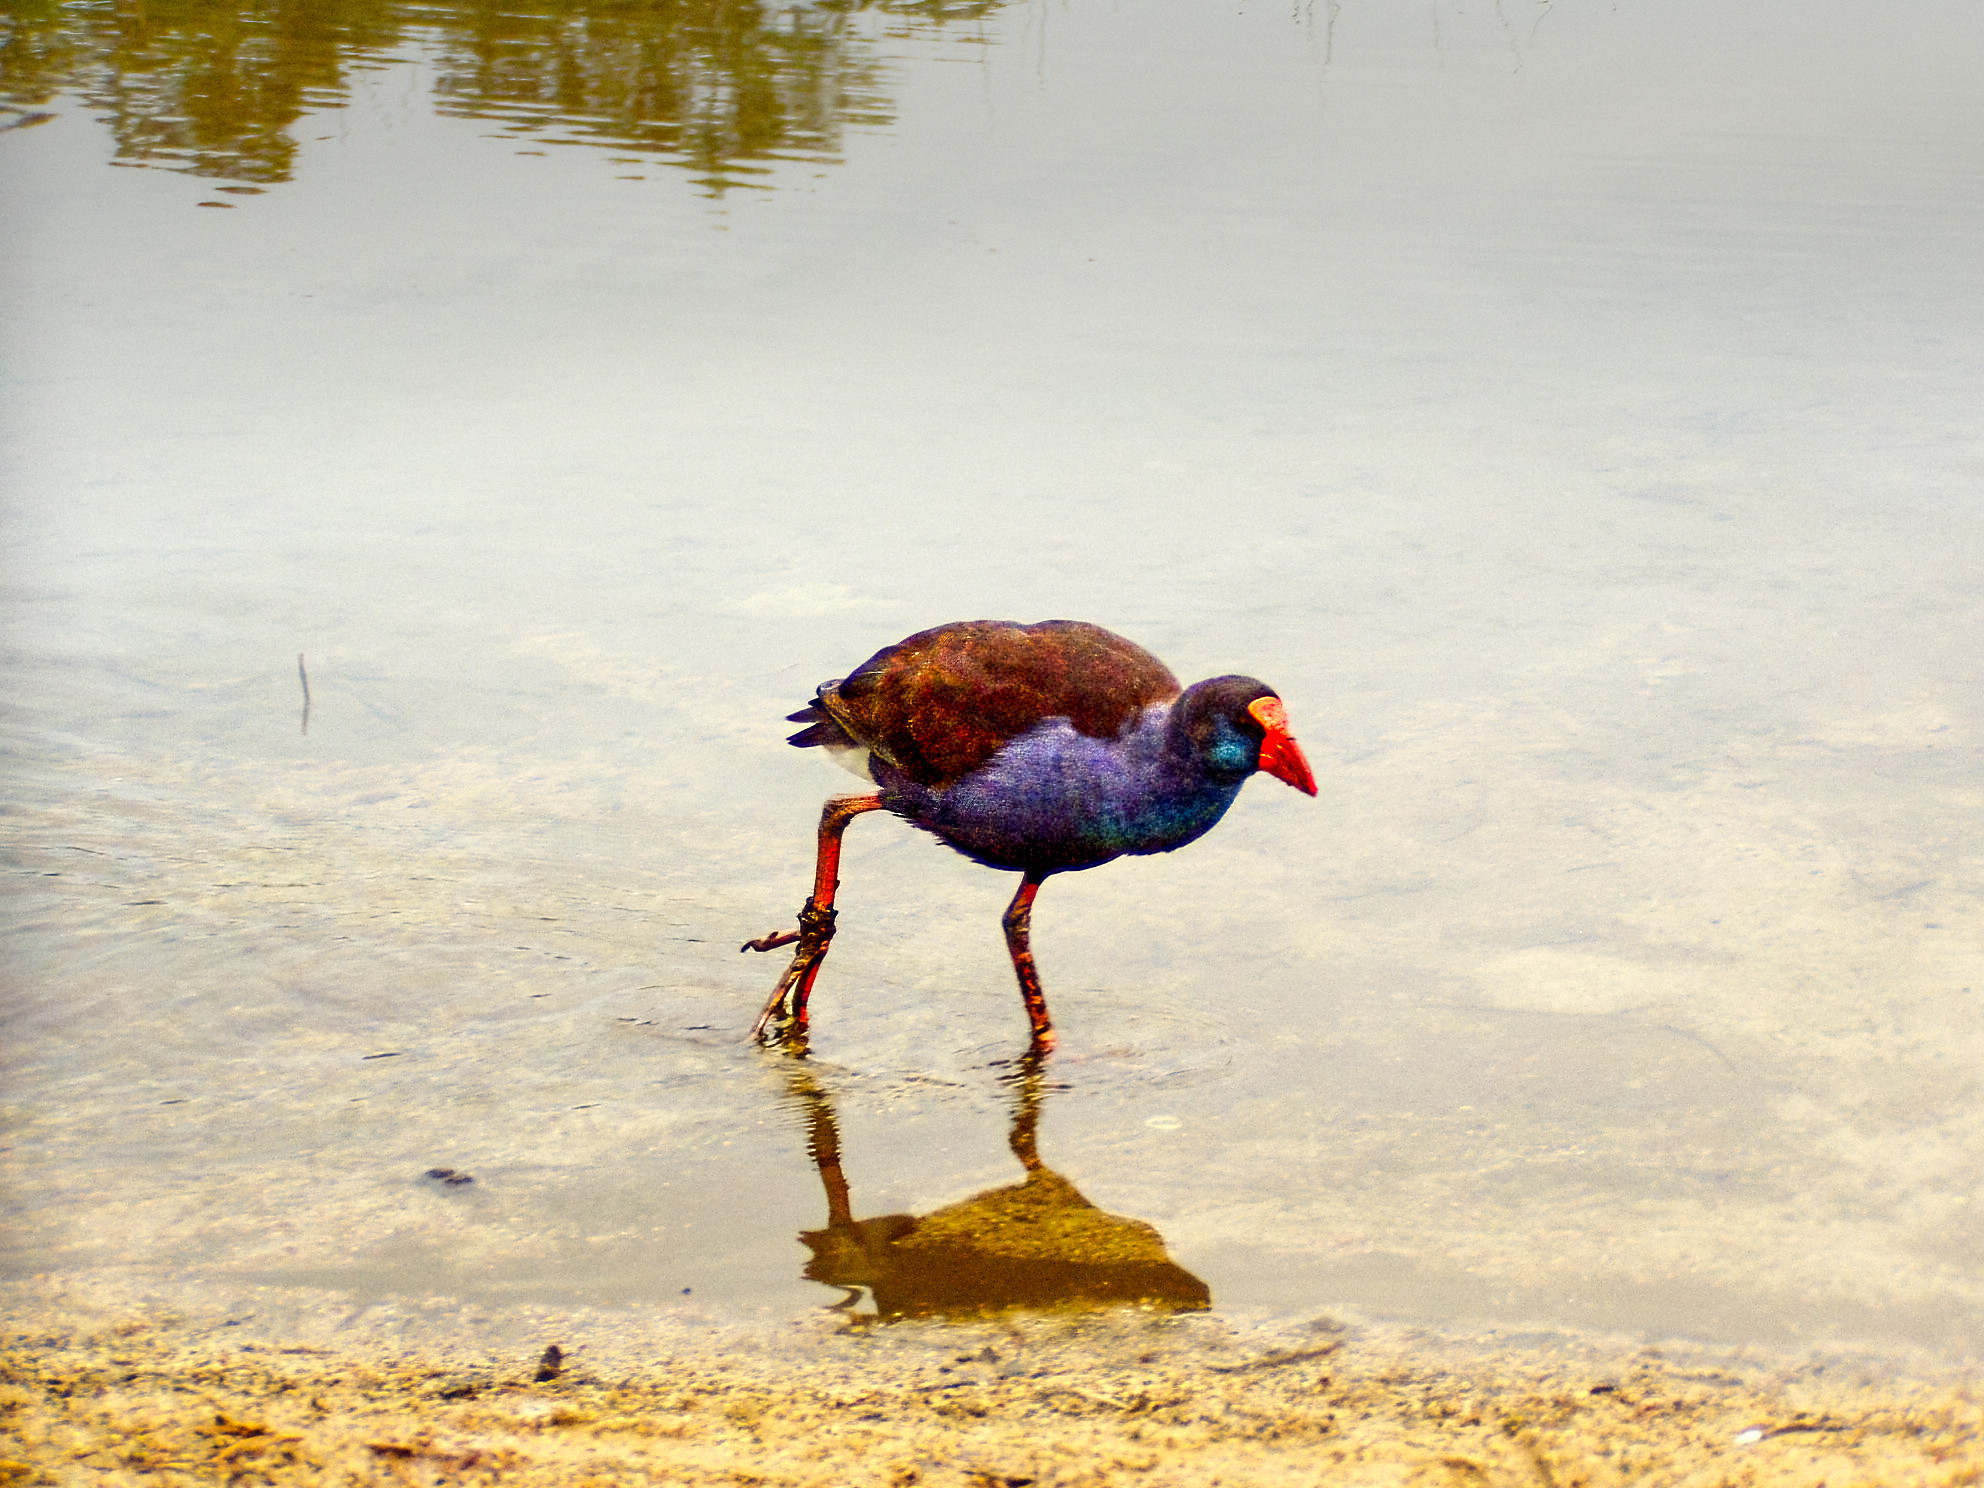
 

011231-York-0224
Little Corellas taken with the Olympus C720UZ camera.


Kwirlam
When light levels fall the inadequacies of the C720UZ are quite apparent. The noise patter prevents detailed images.


Canon EOS 300d with a 75-300mm lens
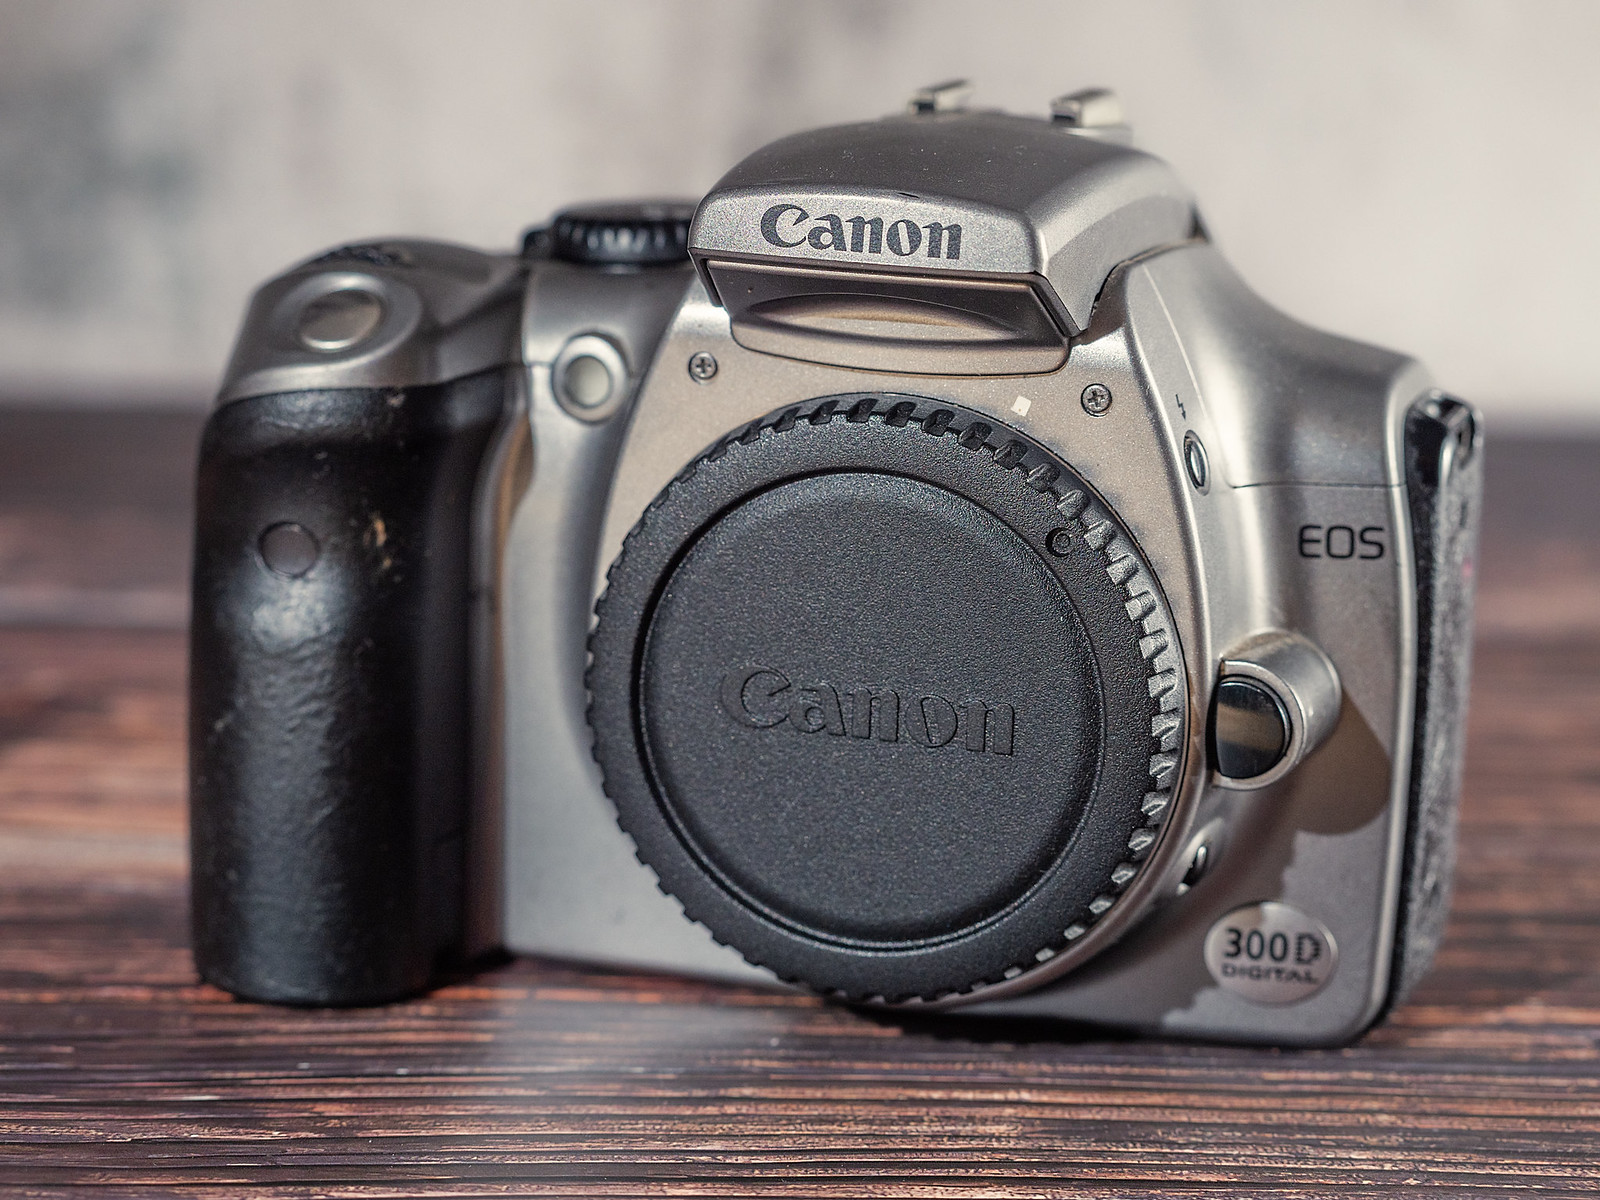
Canon EOS 300d
Canon EOS 300d body.


If you can swing to $250-300 AUD there are better alternatives than the very old bridge cameras. The Canon Canon EOS 300D (Canon EOS Digital Rebel in North America and the Canon EOS Kiss Digital in Japan) was the first real consumer budget DSLR when released back in 2003. For $60-100 you should be able to find a body only. I’d look to team this up with a  70-300mm zoom lens. With a bit of careful searching the combo should come in at under $300. Alternatives from that period going for around that are the Canon EOS 10d and the Nikon D100. They’ll be a little bit more money but they have slightly better features. The downside to them is that they were often used professionally and so they might not have much life left in them.


Canon EF 75-300mm f4-5.6 IS lens


So with the 300d what do you get for your money. Well you get a 6MP camera that takes Canon EF mount lenses – one of the biggest ecosystems of lenses in the world which means lots of choice at a variety of prices. Canon themselves have made an assortment of 75-300mm lenses over the last 30 years and you should be able to pick up something for $120 AUD and the one I’m looking at with Image Stabilisation for about $220. Sigma and Tamron are third party lens makers and you can find their versions for around the $100 mark.

The good points of the 300d are that it’s cheap, batteries (Canon BP-511a) and memory card (Compact Flash) are still available. The camera has a 6MP sensor that produces very nice A4 prints and it is very simple to use. The downside is that the camera was built to a budget and it is not possible to shoot in Continuous Autofocus when shooting RAW, the buffer is 2.5 frames per second for 4 frames, and the plastic body looks a bit tacky (but at least it feels solid). On the copy I have the rubber panels have gone a bit soft and sticky.  To use Continuous AF you need to shoot in the Sports mode which is jpg only and you cannot adjust the exposure using exposure compensation in this mode. There is no being able to use the rear LCD screen to compose pictures on and there is no video mode. Maximum ISO is 1600 and the quality is  ropey, but files can clean up quite well in image processing software.

The 70-300mm lenses at this price point are not going to win any awards for optical performance, but they will suffice to get you started. Irrespective of the manufacturer they all tend to be a little soft at the 300mm end and are not the fastest to find focus especially in low light, but they are capable of giving you a nice image if you don’t shoot wide open and keep the shutter speed up.

If you don’t want to buy Canon then at this price point look at the Nikon D100. Obviously you’ll have to substitute Nikon fit lenses as well.


Woodman Point
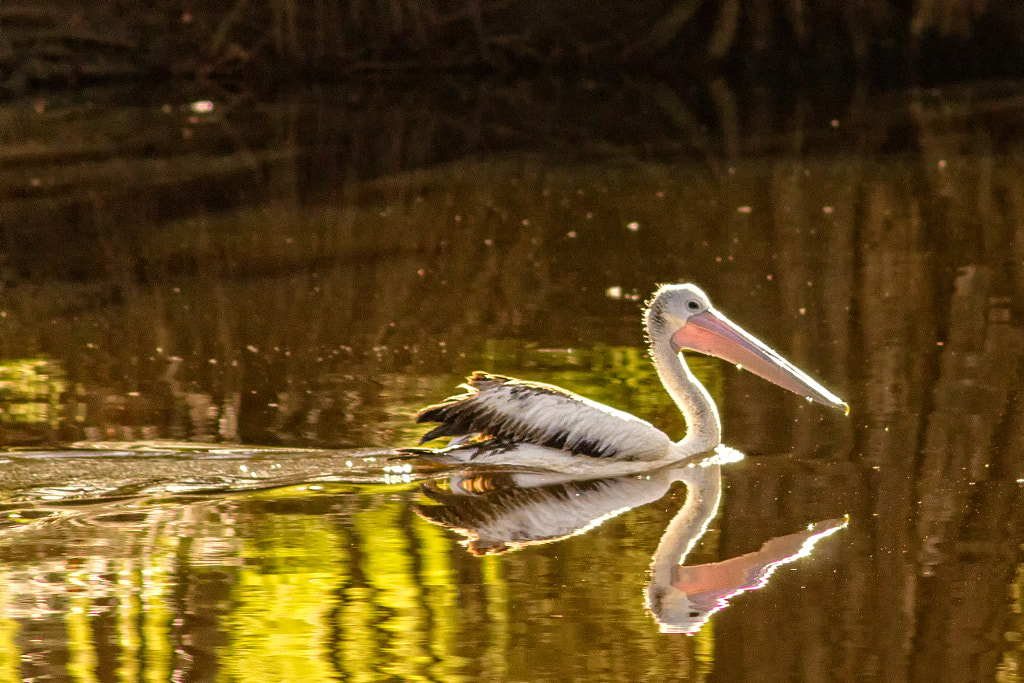
Australian Pelican at Woodman Point, Western Australia. Canon EOS 300d with Canon EF 75-300mm f4-5.6 IS.


Kadjinak
Kadjinak or Grey Fantail (Rhipidura albiscapa). York, Western Australia.


Djidi-djidi
Djidi-djidi or Willie Wagtail (Rhipidura leucophrys). York, Western Australia.


Djida
Djida or Yellow-rumped Thornbill (Acanthiza chrysorrhoa). York, Western Australia.


Koolbort
Koolbort or Singing Honeyeater (Gavicalis virescens). York, Western Australia.


Rainy Day On The River
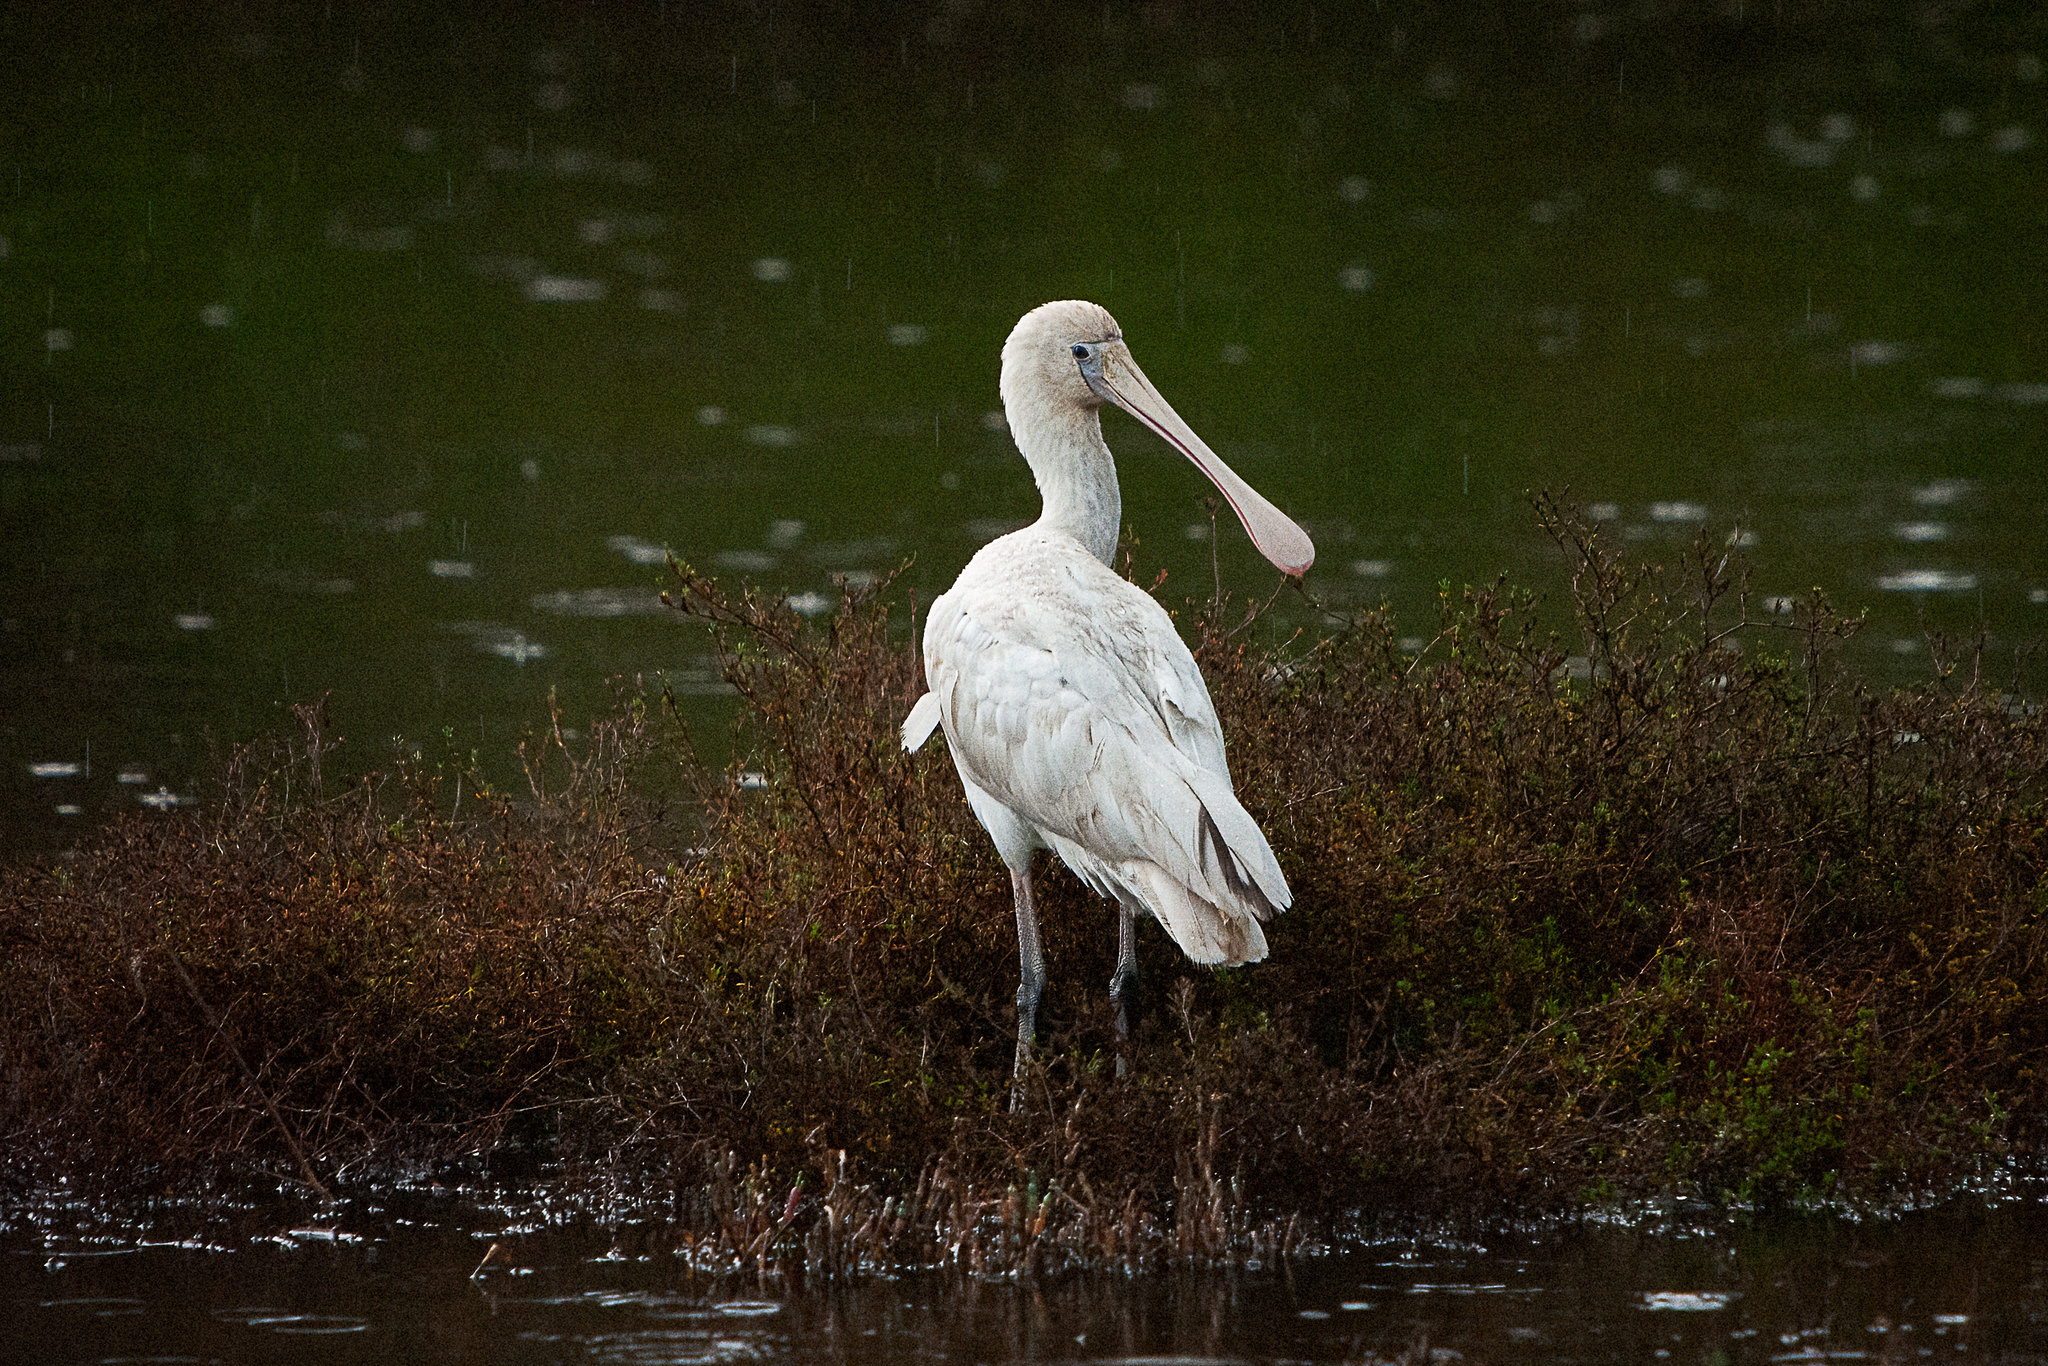
Kaaka-baaka or Yellow-billed Spoonbill (Platalea flavipes) in the rain. York, Western Australia.


Djangkang
Djangkang or Red Wattlebird (Anthochaera carunculata subs woodwardi). York, Western Australia.


Canon Eos 550d with a 75-300mm lens


Canon EOS 550d
Canon EOS 550d body.


If you can squeeze another $50-100 then a good option would be to go for something like the Canon EOS 550d. You have a substantial increase in resolution with an 18Mp sensor with better high ISO performance – now up to 6400 natively or 12800 by expansion. Continuous auto focusing in all shooting modes and the frame rate is increased to 3.7 frames per second with a buffer of 34 frames shooting jpg and 6 frames shooting RAW. The AF system has been beefed up a little and while  still only having 9 centrally arranged focus points  it has a cross type sensor in the centre with extra sensitivity. The camera uses SD cards which are cheap and easily found. The battery, the Canon LP-E8 is a bit of a down grade in terms of performance compared to BP-511a used in the 300d, but it is readily available and affordable. While being able to shoot 1080 video it is only really suitable for still subjects as the contrast based autofocus is is too slow to lock onto moving subjects. My first videos were shot with this camera and it is capable of producing a good result if you are prepared to manually focus. Other downsides are the limited buffer and the slow frame rate, the lack of a second control dial also makes using exposure compensation a little fiddly. I try and keep my ISO below 3200 as the chroma noise is quite intrusive and difficult to clean up without destroying fine details. But, having said all that this is a camera which is capable of producing very good results. Even though I now have other better cameras I still like to get the 550d out and use it because it is just fun to use.
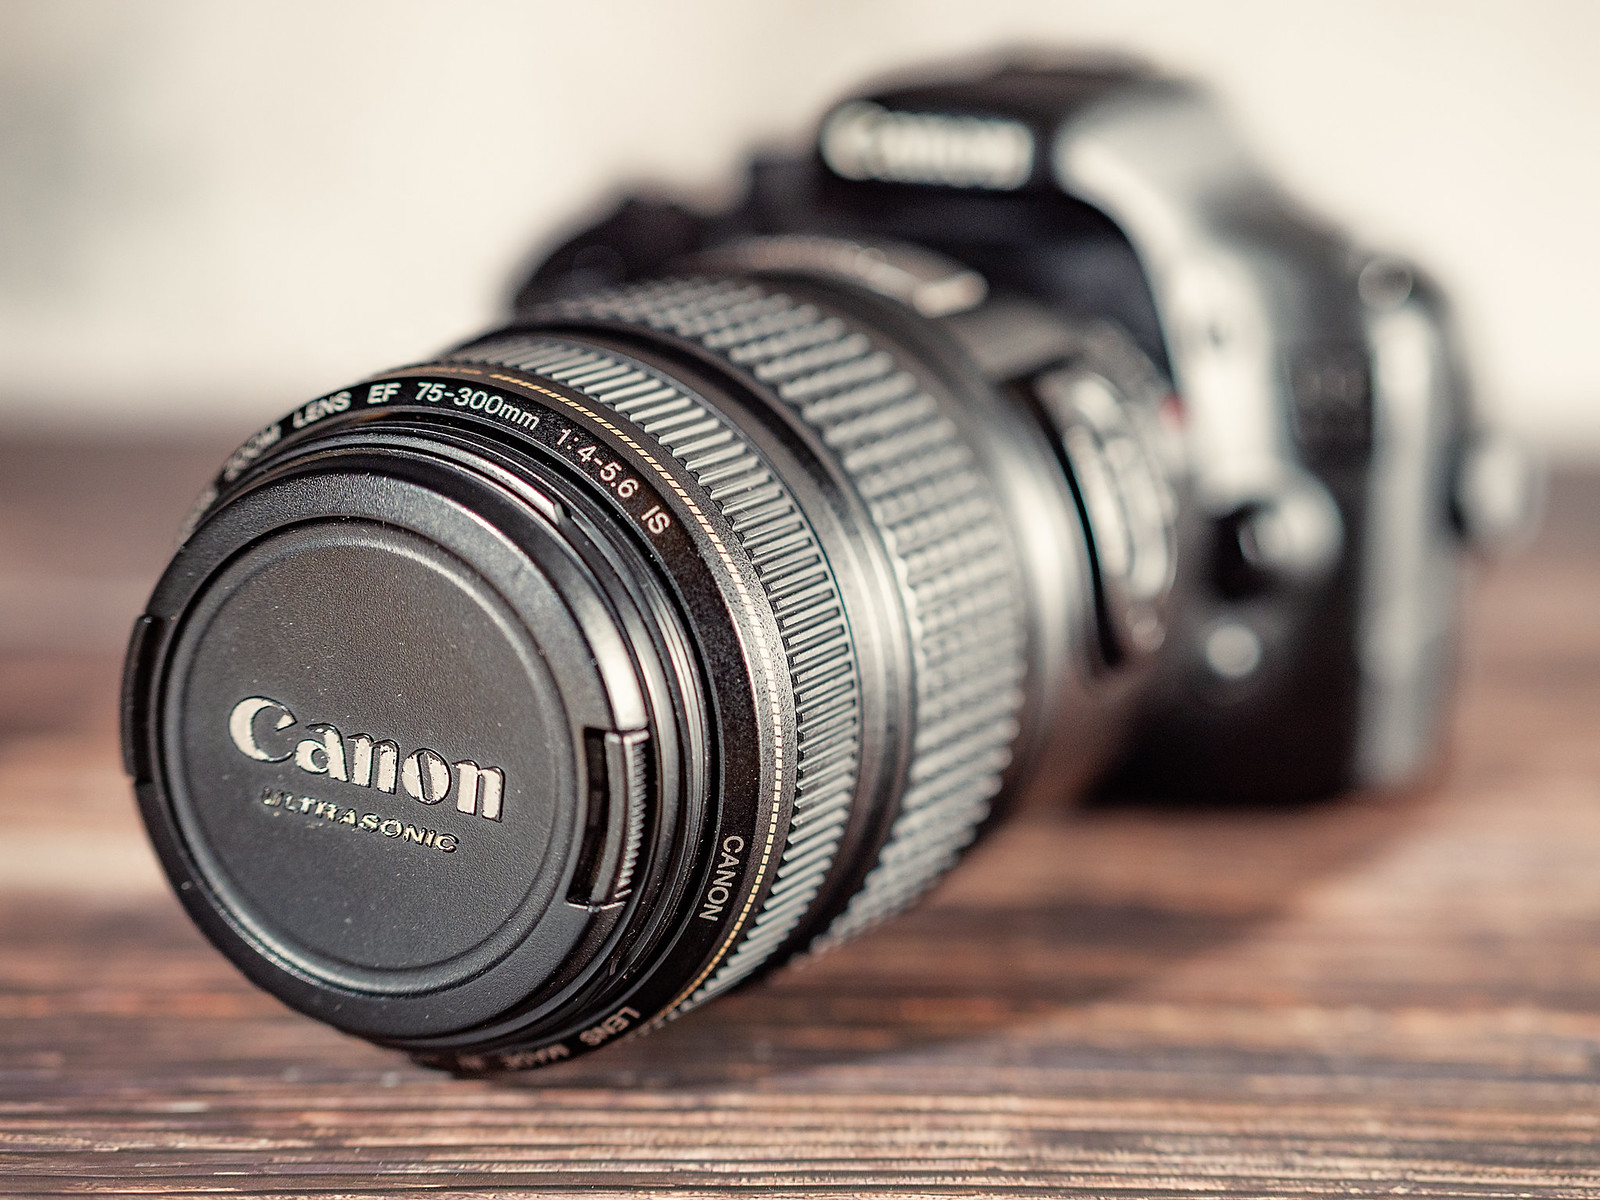
 

Canon EOS 550d
Canon EOS 550d with Canon EF 75-300mm f4-5.6 IS lens.


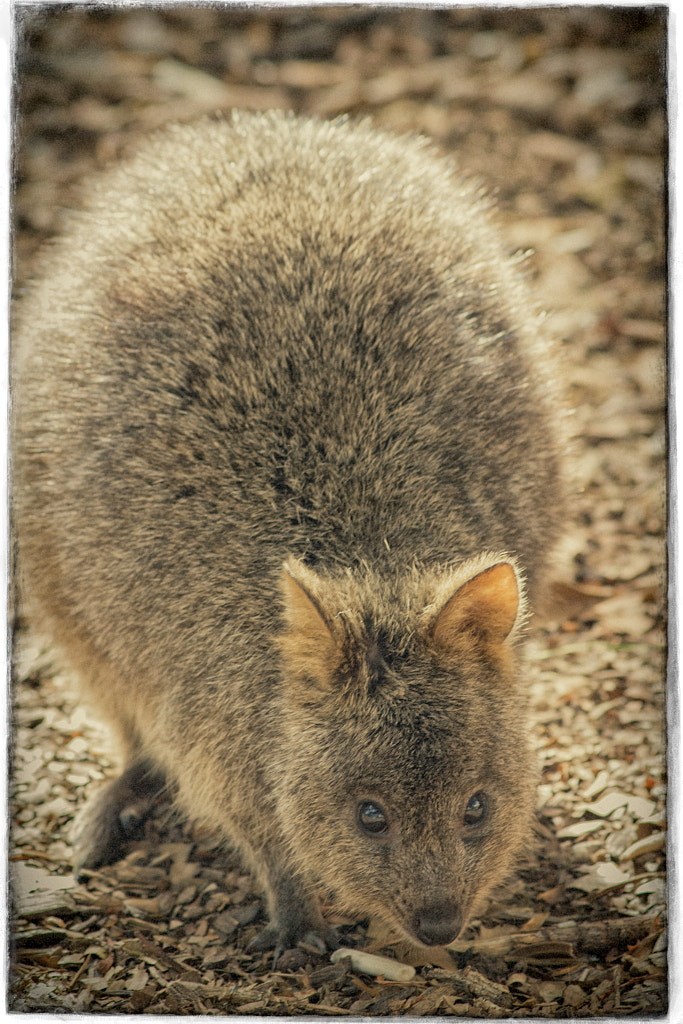
Rottnest Island - Perth's summer island playground by Paul Amyes on 500px.com
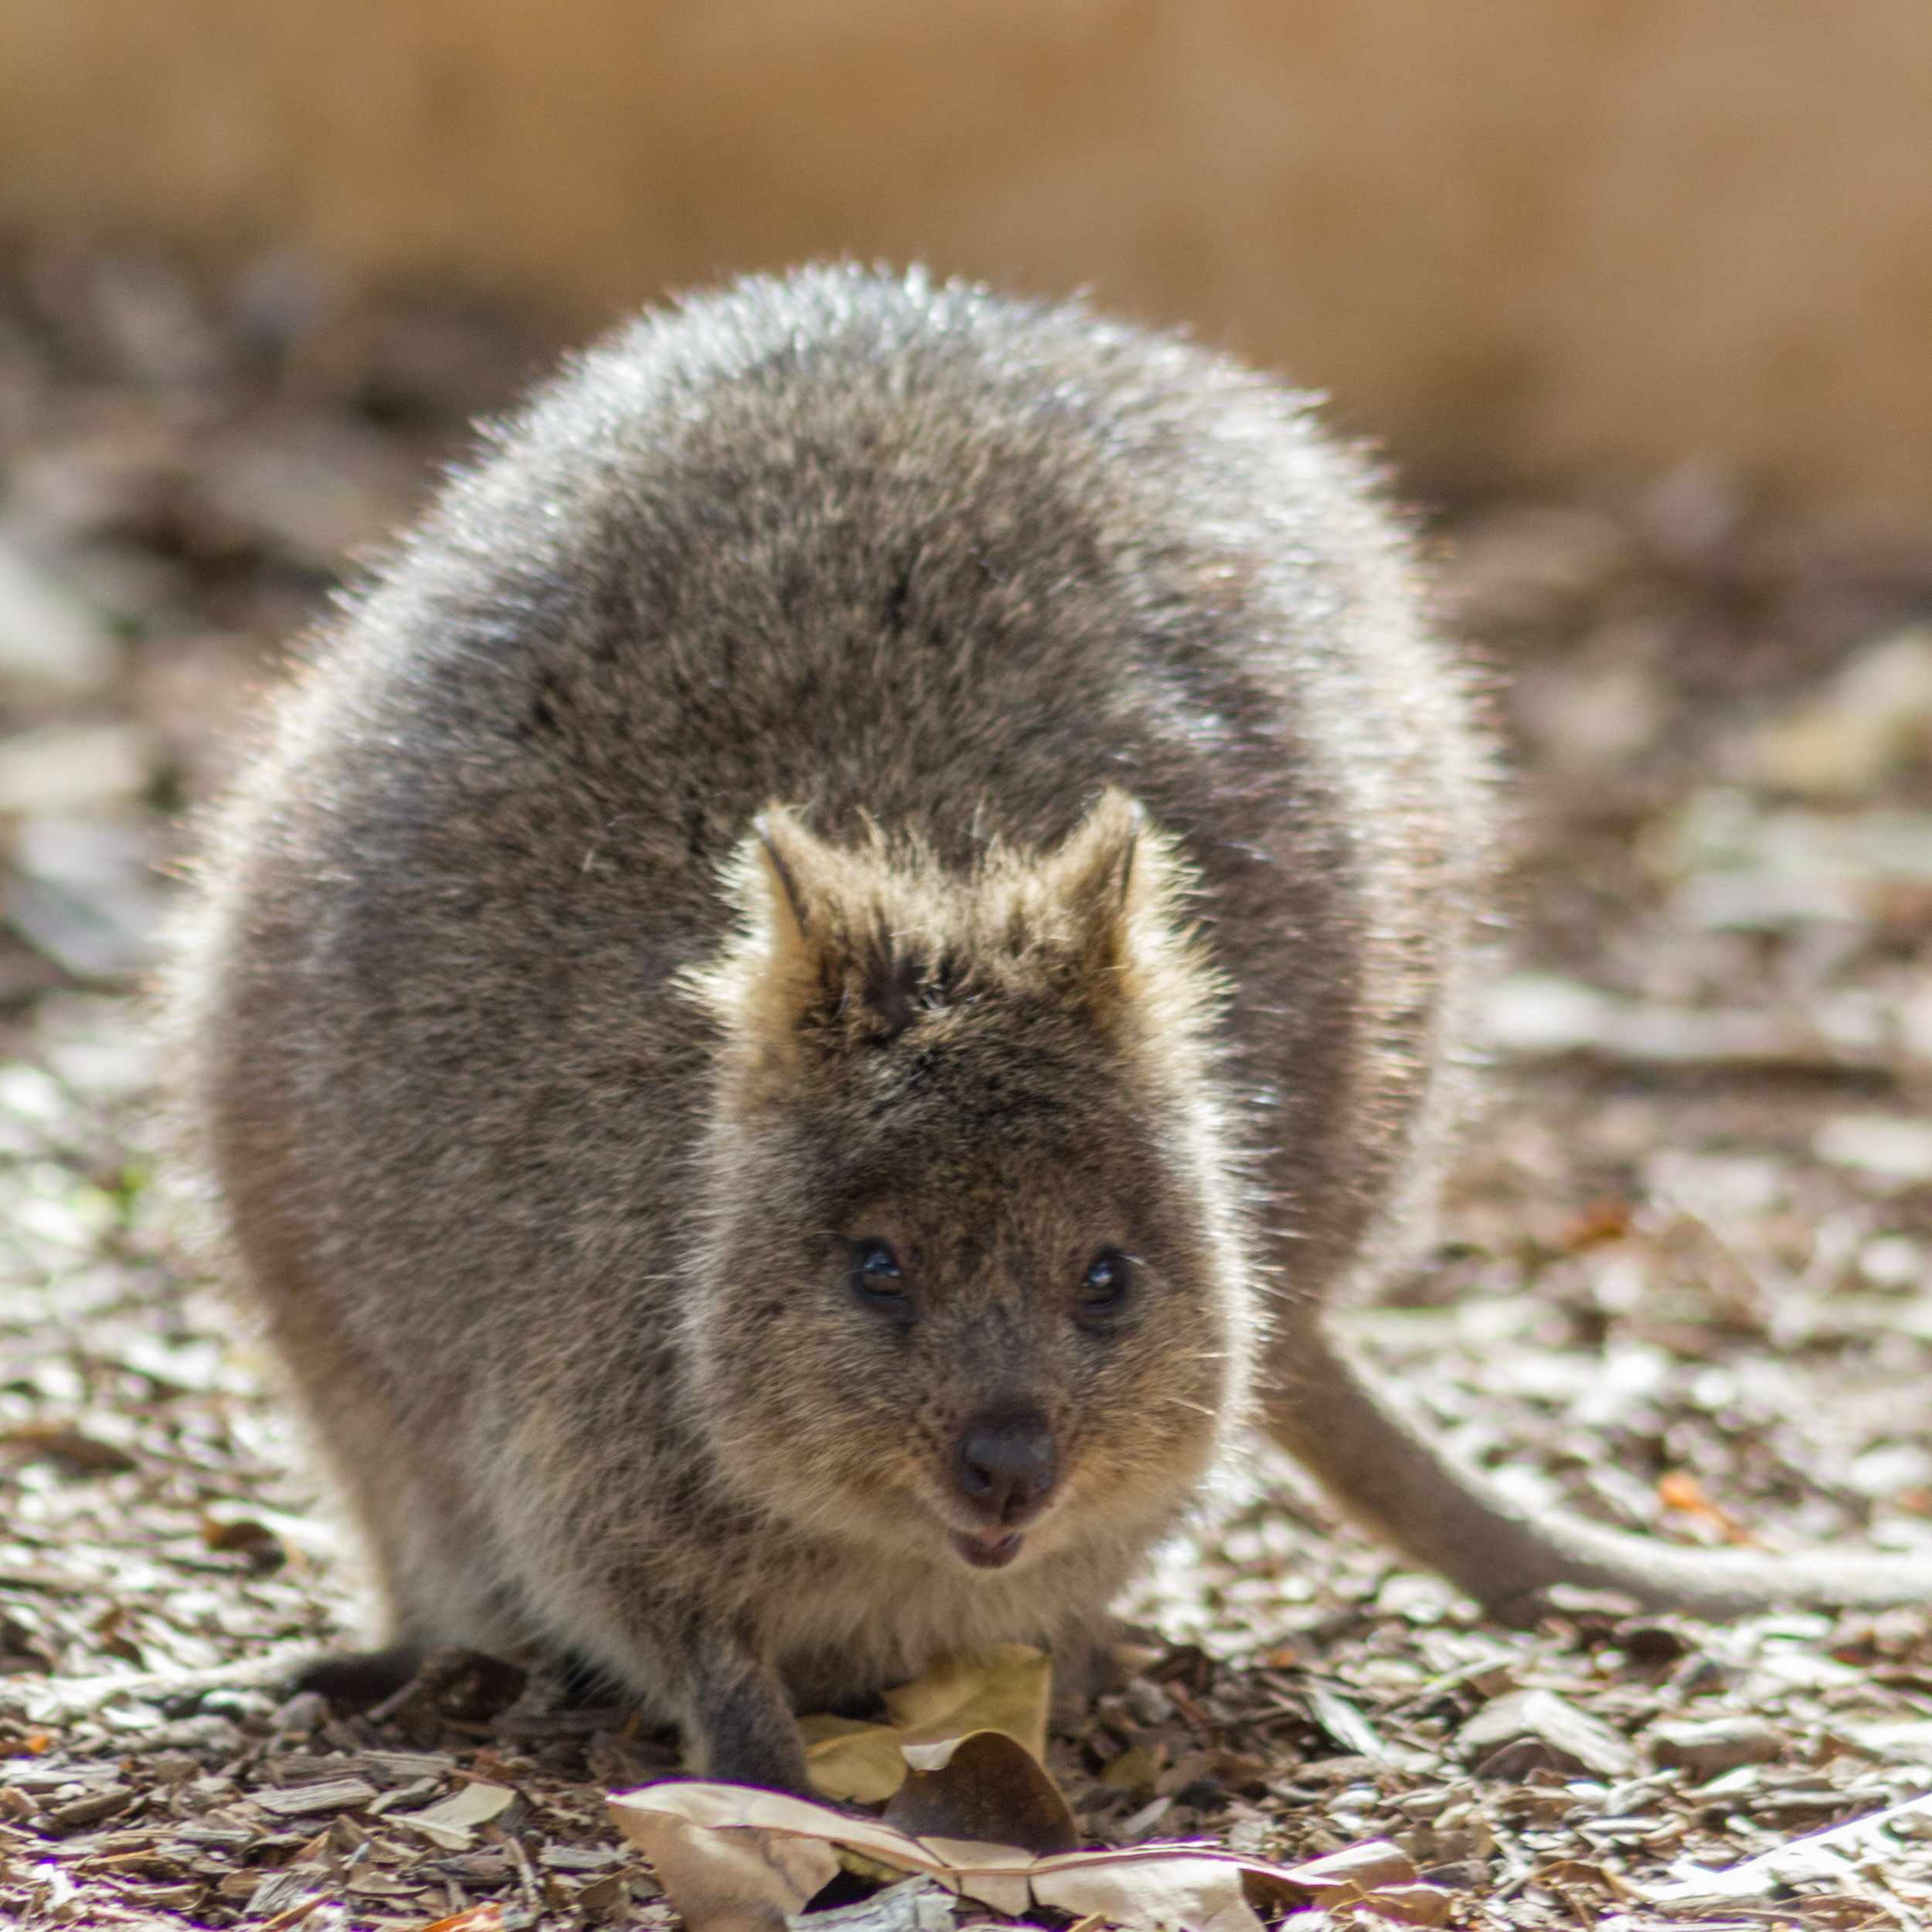
Quokkas are a small marsupial that inhabit Rottnest Island. Canon EOS 550d with Canon 75-300mm f4-5.6 IS lens.


Brushtail Possum by Paul Amyes on 500px.com
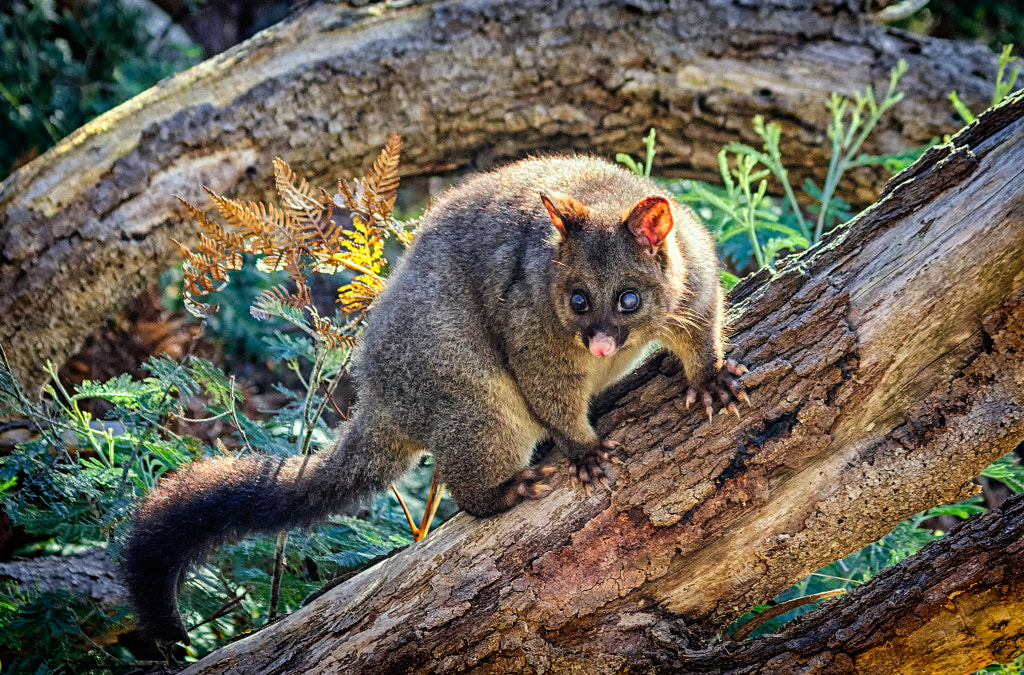
Brushtail Possum (Trichosurus vulpecula) at the Coal Mines Historic in Tasmania. Canon 550d with Canon 75-300mm f4-5.6 IS lens.


John George Walk Trail by Paul Amyes on 500px.com
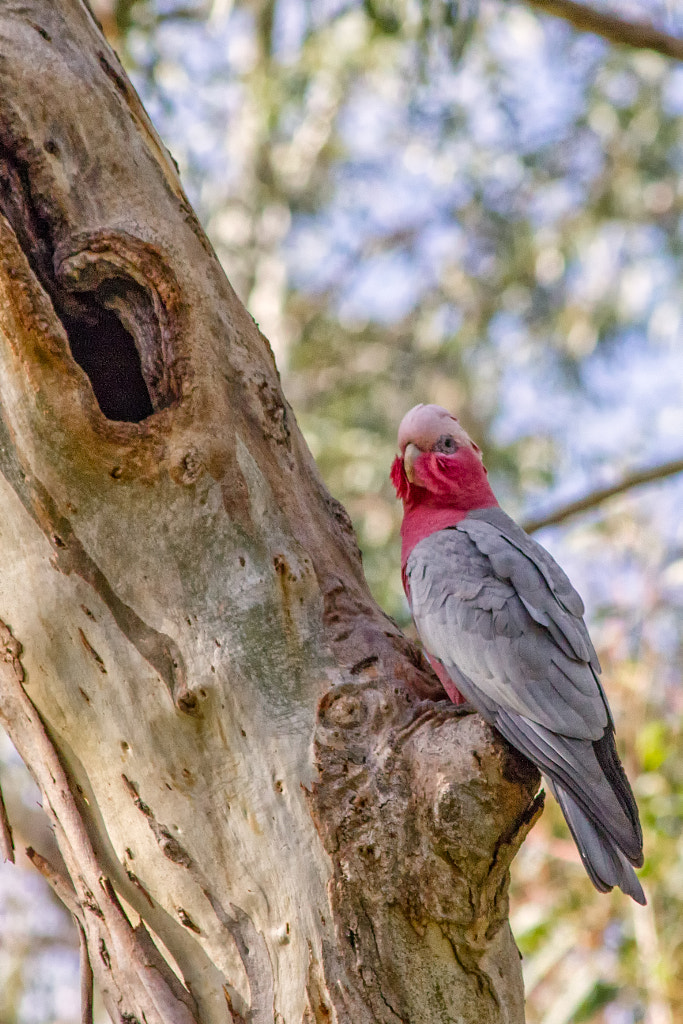
Like many cockatoos Galahs, Eolophus roseicapilla, nest in hollows in eucalypt trees. Woodbridge Riverside Park. Canon EOS 550d with Canon 75-300mm f4-5.6 IS lens


John George Walk Trail by Paul Amyes on 500px.com
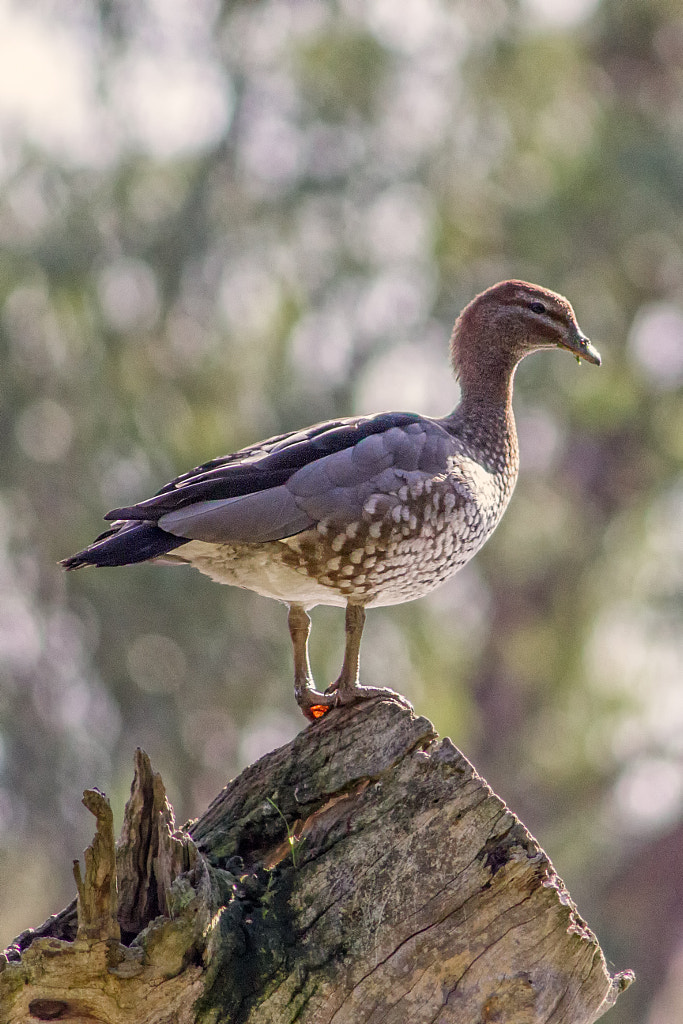
Maned Duck (Chenonetta jubata) also known as the Australian Wood Duck, Swan River, Woodbridge. Canon 550d with Canon EF 75-300mm f4-5.6 IS lens.


John George Walk Trail by Paul Amyes on 500px.com
Australian pelican (Pelecanus conspicillatus), Swan River, Woodbridge. Canon EOS 550d with Canon 75-300mm f4-5.6 IS lens.


This would be a camera which would benefit with a better lens if you can afford it. Something like a Canon EF 300mm f4 (approx $500 on EBay) or a 400mm f5.6 (approx $600 on EBay). This would be a nice nimble set up that would give great results.

The Nikon equivalent to this camera would be the Nikon D5000 for about the same amount of money.


Summary

It is quite possible to put together a competent kit to photograph wildlife for less than $500 AUD. It won’t have all the bells and whistles of more modern high end cameras but you will be able to make it work. The limitations mainly are speed of operation and picture quality. Learning how to make up for the short comings will inevitably make you a far better photographer in the long run than having the latest and greatest camera will.

BIF

White Faced Herron by Paul Amyes on 500px.com
BIF or bird in flight. White faced heron, Egretta novaehollandiae, Wilson Inlet, Denmark, Western Australia. Olympus EM1 mk I with Panasonic 100-400mm lens.


I’m not talking about the Oscars but Birds In Flight. I’m finding this a very troublesome aspect of nature photography. 

If you listen to bird photographers talk this is the holy grail and if you take a picture of a bird in a tree it is derisively called a bird on a stick and is seen to have no merit at all. In fact BIF is now considered such an important part of photography that with each new camera launch the manufacturers herald its new bird tracking autofocus capabilities. These cameras are now capable of shooting incredibly high frame rates in excess of 20 frames per second which encourages photographers to just machine gun the subject – the so called spray and pray – in the hope of capturing something interesting. So why do I feel this troublesome. Well this technology doesn’t come cheap and the fact is that you have to be seriously minted and committed to bird photography to afford the equipment. The Sony A1, the Nikon Z9 and the Canon R3 are all around $9-10,000 AUD. Slap on a suitable long fast prime lens like a 600mm f4 and you have a package that will set you back a cool $30,000 AUD. Predominantly I shoot with Olympus’ cameras and their newly released camera plus their top wildlife lens will set you back around $15,000. So as you can see it’s not for the faint hearted or the financially embarrassed. 


Yellow-billed Spoonbill (Platalea flavipes) by Paul Amyes on 500px.com
A Yellow-billed Spoonbill (Platalea flavipes) flying back to its nest on the Avon River. Canon EOS 550d with a Canon EF 70-200mm f2.8 IS L lens.


So does this state of affairs mean that unless you are wealthy you shouldn’t take up nature/wildlife photography? No because I happen to believe that it is the skill of the photographer that makes great photos and not the size of their bank account. Nothing beats going out into the field and spending time getting to know your subject and the environment they live in. The more time you spend out there the more picture taking opportunities you will have.


Yoondoordo by Paul Amyes on 500px.com
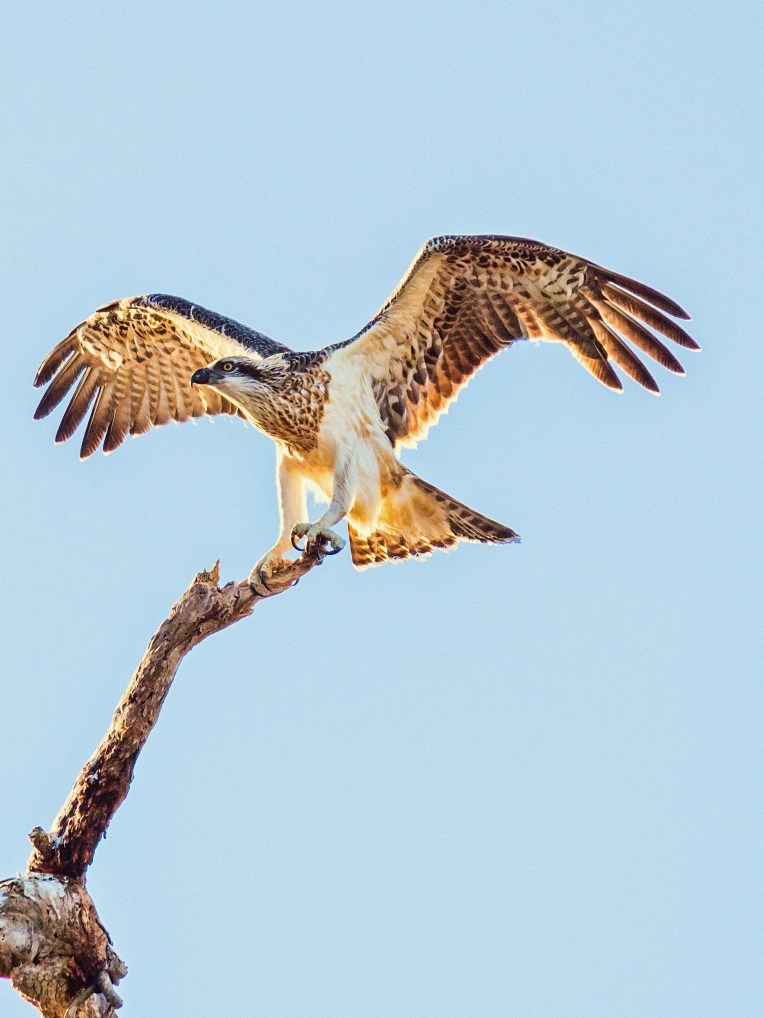
The Eastern Osprey (Pandion cristatus) is known to the Nyoongar people of the south west of Western Australia as yoondoordo. Oyster Bay, Lower King, Western Australia. Olympus OMD EM1 mk ii with Panasonic 100-400mm lens.

Secondly don’t obsess about equipment. Get what you can afford. Any camera with interchangeable lenses with a long lens is capable of excellent results. What matters is that you spend time with your camera and learn how it works. Eric Hoskins, 1908-91, was a pioneer in bird photography. He worked with what would now be considered very primitive – large format single shot cameras with no metering, no auto focusing and slow film emulsions (10 ISO) – yet he changed the face of bird photography with his use of flash and he enabled people to see birds in a way that they’d never seen before. Buy stuff second hand. Take advantage of the well heeled enthusiasts who have to have the latest and greatest. They change their equipment like I change my socks and often sell off perfectly good equipment for far less than they paid for it.


Great Egret In Flight by Paul Amyes on 500px.com
Blue sky. Check. Bird in flight. Check. A great egret (Ardea alba modesta) flying over the Creery Wetlands Nature Reserve in Western Australia. Olympus OMD EM1 mk ii with Panasonic 100-400mm lens.


Thirdly there is more to nature/wildlife photography than birds in flight. I find endless pictures of birds flying across a blue sky boring. I like to see animal’s behaviour – feeding, building nests, rearing young, mating rituals etc. Show the animal in its environment.


Kooljak by Paul Amyes on 500px.com
Kooljak is the Nyoongar name for the Black swan (Cygnus atratus), Toodyay, Western Australia.

Fourthly you don’t have to go on expensive safaris to take pictures of animals. Thanks to the power of the internet what can be found in your backyard is interesting to people in different countries so capitalise on what you have close to home because the skills you learn will pay off in spades if you are able to go on a trip of a life time to somewhere exotic.


We Have Lift Off! by Paul Amyes on 500px.com
A Western Corella flies amongst the tree tops along the Avon River in York.


The shots below were taken at Tomato Lake which is in a park in one of Perth’s suburbs. The camera used was second hand with an older adapted lens with adequate autofocus. A few hours of being prepared to sit in mosquito ridden undergrowth by a lake gave me the chance to take some photos that I’m happy with and enjoy myself.


Ngalganing by Paul Amyes on 500px.com

An immature Nankeen Night Heron, , Nycticorax caledonicus subsp mannillenis.


Mimal by Paul Amyes on 500px.com

Australian Darter, often called Snake Bird, Anhinga melanogaster subsp. novaehollandiae.


Yellow-billed Spoonbill by Paul Amyes on 500px.com

Yellow-billed Spoonbill, Platalea regia.

Is Bigger Better?

A visual representation of the differences in sensor size.

Since 2011 I have been primarily a micro four thirds (m43) shooter supplemented by occasional full frame usage. Until about 18 months ago I was very happy with my choice. I accepted that the benefit of a lighter more portable camera system would come at the cost of reduced megapixel count, reduced dynamic range, and high ISO performance that was less than stellar. But now I have this desire to return as it were to the full frame fold. The reason why is that I sell prints and I felt that if I had a camera with better dynamic range  and more megapixels then I would generate more sales. This belief was what was really behind my recent dalliance with the 42Mp Sony A7r ii.

Canon EOS 550D with EF75-300mm f/4-5.6 IS USM lens. Exposure: 1/100, f8 at ISO 400.


Olympus EM 1 mk ii with Panasonic Leica 100-400mm lens.


Sony A7r with Olympus OM Zuiko 135mm f2.8 lens. Exposure: 1/1000 sec, f4, at ISO 200.


Canon EOS 6d with Canon EF100mm f/2.8L Macro IS USM lens. Exposure: 1/100 s at f/11.0 at ISO 1600.

The other day I started going through my statement for print sales for this year and surprisingly I’d had a very good year which buoyed me up considerably. When I started looking closely at what images had sold and what they were taken with I made a startling discovery. Full frame made up 26%, APSC came in at 26% and m43 took 48%. In terms of Megapixels:

  • 36 Mp + 6.66%
  • 20 Mp 33.33%
  • 18 Mp 26.66%
  • 16 Mp 6.66%
  • 12 Mp 13.33%

Intrigued I decided to look at print sales going back to 2004 when I went digital and the results were as follows:-

  • Full frame 34%
  • APSC 14%
  • m43 37.5 %
  • Compact cameras 5.5%
  • Mobile phone 1.5%
  • Scanned film 7.5%

My two best selling prints of all time were taken with a Panasonic Lumix FX-01 which was introduced all the way back in 2004 had a sensor that measured 6.4mm x 4.8mm and had a whopping 6.4 Mp of resolution. It also suffered badly from noise at anything beyond 100 ISO and had a very limited dynamic range.


Panasonic Lumix FX-01


Panasonic FX-01


Dropped from use. The Panasonic FX-01 was a 6Mp camera introduced in 2004.


Moving beyond prints sales to look at PR and editorial work I’ve never once had a complaint about image quality or size. So do all these buyers of my images know something that I don’t? Well I think that they’re not looking at the images as photographers, they are looking at the subject and how it makes them feel. When photographers look at images they see all the technical deficiencies and then think they need better cameras and lenses. When we look at new gear we always see the promise of more resolution, more frames per second, more dynamic range. The manufacturers know that we’re easily seduced by bigger numbers and they play to our insecurities.

So in the light of this do I need a bigger and better camera? Need – no. Want – yes. But needs and wants are two different things. What I’ve got is perfectly adequate and so perhaps the answer to generating more sales is, therefore, taking more pictures with appealing content.

Olympus m.Zuiko 45mm f1.2 Pro Lens


As usual there is a video for those that prefer or the full written piece is below.


The Olympus m.Zuiko 45mm f1.2 PRO lens mounted on an EM1 mk ii.

The Olympus m.Zuiko 45mm f1.2 Pro Lens was announced in by Olympus back in October 2017 as one of their trio of f1.2 lenses. The others being the 17mm and 25mm. According to Olympus they were designed to “have beautiful defocusing effects” and “beautiful feathered bokeh to make your image stand out” (https://shop.olympus.com.au/m-zuiko-ed-45mm-f1-2-pro). In the case of the 45mm (and I suspect the other two) the lens is designed so that spherical aberration is not fully corrected. This means that as light rays enter the lens only those that pass through the centre of the lens are made to come together at the focus point. The rays at the edges focus slightly in front of that point and this causes the bokeh to have a gentle roll off – the so-called “feathered bokeh”. Olympus themselves claim this matches “classic” older lens designs. At this point it should be noted that spherical aberration and chromatic aberration are different. Spherical aberration occurs when a single wavelength of light or colour cannot be focused whereas chromatic aberration occurs when a lens cannot focus the red, green, and blue wavelengths on a single point. Although Olympus claims to match the performance of older classic lenses they have chosen a lens design that is very different from them.


Lens Construction and Build Quality

Olympus 45mm f1.2 lens has 14 elements in 10 groups with one ED element, four HR element, and one aspherical element.


Focal Length 45mm (90mm in full frame equvalence)
Angle of view 27º
Minimum focusing distance 50cm
Maximum magnification 0.1 X
Lens construction 14 elements in 10 groups with one ED element, four HR element, and one aspherical element
Maximum aperture F1.2
Minimum aperture f16
Diaphragm 9 curved blades
Focusing Auto focus – yes, MSC mechanism making fast and silent AF possible in video mode.

Manual focusing – the focusing ring can be pulled back to engage a clutch mechanism with hard stops at each end.

Filter size 62mm
Dimensions 85mm (h) x 70mm ⌀
Weight 410g
Other features Hermetic sealing making the lens dust proof, splash proof, and freeze proof. 60529 IPX1 IP rating.


The lens mount of the Olympus 45mm f1.2 lens. The mount has an ‘o’ ring that contributes to its 60529 IPX1 IP rating.


To see how this differs from an older classic design lets compare it to Olympus OM Zuiko 50mm f1.4 which was first produced in 1971 and remained in production until 1984. 


Olympus OM Zuiko MC 50mm f1.4


Focal length 50mm 
Angle of view On 35mm 43º, on micro four thirds 21º
Minimum focusing distance 45cm
Maximum magnification 0.15 X
Lens construction 7 elements in 6 groups
Maximum aperture f1.4
Minimum aperture f16
Diaphragm 8 curved blades
Focusing Manual focus with a straight helicoid
Filter size 49mm
Dimensions 36mm (h) x 60mm ⌀
Weight 230g


The 45mm f1.2 dwarves the f1.8 version.


Comparing the Olympus 45mm f1.2 to the Canon EF 50mm f1.8. On their respective bodies they both offer a similar field of view.


The 45mm f1.2 mounted on an Olympus EM1 mk i compared to the Voigtänder 75mm f2.5 Color-Heliar mounted on a Sony A7r. Both a ideal focal lengths for portraiture.

Physically this is a large lens. It dwarfs my Olympus 50mm f1.4, my Canon EF 50mm f1.8 and my Sony FE 50mm f1.8. It is a smidge larger than the Olympus m.Zuiko 12-40 f2.8 Pro and 27g heavier. The 45mm f1.2 follows the look of the other lenses in the Pro line and it also has a L-Fn button which can be programmed to various functions on Olympus cameras. In the hand the lens is reassuringly solid, it has that dense feeling that quality optics have. The focusing ring is nice and large and has the same ribbing that all the other lenses have in the Pro line. Like the other Pro lenses the 45mm f1.2 enables manual focusing by pulling back the focusing ring to engage a clutch to give a nice smooth focus throw of about 110º that has hard stops at either end. Combined with focus peaking this makes for manual focusing nirvana. As to what the lens is made out of this is hard to say, the lens mount is chrome plated brass, parts of the lens barrel have a metallic feel, and other parts feel plastic. Is this a problem? I don’t think so. For certain applications metals can be a poor choice and high quality engineering plastics such as ABS make better sense. In fact Sigma makes a big deal out of the use of their Thermally Stable Composite (TSC) which is substantially stronger than conventional polycarbonates while having similar thermal expansion properties to aluminium. Bottom line the 45mm f1.2 feels nice in the hand and is easy on the eye.


Optical Performance


The Olympus m.Zuiko 45mm f1.2 PRO lens is sharp wide open.


Lens sharpness test at f1.2 and f4. Click on the image to see it larger.

Image sharpness in the centre of the frame wide open is good and reaches its best at f4. The corners wide open are less sharp than the centre, however, by f2.8 the sharpness and contrast improves considerably and the lens reaches optimum sharpness at f4. By f8 the image starts to soften due to diffraction. Vignetting is also present wide open but this disappears at f4. There is a minute amount of pincushion distortion present, but unless you are shooting very demanding architectural work then it is largely unnoticeable. Chromatic aberration is present on high contrast edges, but it is very slight and easily removed in post. Longitudinal chromatic aberration is also present, but it too is very slight and not painfully obvious which is good as it is quite difficult to get rid of in post. All this is managed using firmware corrections. I like to turn these off using RAWTherapee to see how much correction is going on beneath the hood so to speak. The amount of vignetting is greater than the corrected images but it still clears up by f4. The pincushion distortion is also more evident. All in all the firmware corrections plus topnotch lens design make a lens that performs very well.


Chromatic aberration is well controlled and what little there is is easily fixed in post.


Longitudinal Chromatic aberration.


With regard to resistance to lens flare pointing the 45mm f1.2 at a very point light source shows it is quite prone to ghosting flare – images of the lens diaphragm as colourful bright spots. This is more evident on lenses with complex constructions with lots of lens elements. The red blobs in the photo are not lens defects. They are caused by light being reflected  off of the sensor surface back onto the rear element. As each pixel is reflected it causes a grid pattern. Unfortunately the smaller lens flange distances on mirrorless cameras means this phenomena is more apparent than on a DSLR with their great lens flange distance.


The Olympus 45mm f1.2 is quite prone to flare so it is advisable to use the included lens hood.


The Olympus 45mm f1.2 is quite prone to flare so it is advisable to use the included lens hood. At f16 the sun stars are quite pronounced.


f1.2 bokeh balls test. In the centre of the frame nice round and smooth bokeh balls with no evidence of any onion rings. At the edgeges you can see cats eye shapped balls. Click on the image to see it larger.

Olympus make great claims about the bokeh, or more importantly the feathered bokeh of this lens. Up until the announcement of this line of lenses I’d never heard the term feather bokeh before and to be honest I’m not all that sure about what it is and how that you quantify it. I guess in simple terms Olympus means that edges of the bokeh balls are not harsh and to quantify how feathered they are we’ll have to make some comparisons. At f1.2 the centre of the frame has nice round bokeh balls with no evidence of any onion rings. Onion rings occur with the use of ground aspheric lens elements. Basically the grinding process leaves a series of ridges which can be seen with a defocused point source. The biggest problem with them is that for most people they go unseen, but once seen they can’t be unseen. At the edges of the frame there is cats eye shaped bokeh – this is caused by mechanical vignetting from the lens barrel.  At f5.6 I was quite surprised to see star burst effects forming around specular highlights, I was expecting them to start appearing at the f11 mark. By f16 the bokeh balls in the corners have become spherical.

So the question is what to compare the Olympus 45mm f1.2 to? The most obvious contender is the 45mm f1.8. In their advertising blurb for the f1.2 Olympus compare the lens on an Old EM1 mk ii to a full frame DSLR with 85mm lens. Interestingly having made such a bid deal about the bokeh the only comparison is made with weight so I’ve decided to make the comparison using weight and bokeh quality with the Canon EF 50mm f1.8 on a Canon EOS550d. The 50mm lens has an equivalent focal length of 80mm in full frame terms. The nearest full frame equivalent I’ve got on hand is the Cosina Voigtländer 75mm f2.5 Color-Heliar on a Sony A7r2. Finally as I’ve already talked about the Olympus OM Zuiko 50mm f1.4 I’ll add it to the list with it mounted to the Olympus EM 1 mk ii. The older Olympus and the Canon and Voigtländer are also considered classic lens designs.

Olympus OMD EM1 mk ii with Olympus 45mm f1.2 Pro lens 984g
Olympus OMD EM1 mk ii with Olympus 45mm f1.8 737g
Canon EOS550d with Canon EF 50mm f1.8 mk ii 601g
Sony A7r2 with Voigtländer 75mm f2.5 Color-Heliar 932g
Olympus OMD EM1 mk ii with Olympus OM Zuiko 50mm f1.4 980g

So the Olympus 45mm f1.2 combo is the heaviest. Lets look at the bokeh. With the three Olympus lenses I’ll just compare the lenses at widest aperture of the slowest lens. With the other two I’m going take equivalency into account so 45mm f1.2 on the Olympus is roughly equivalent to 50mm f1.8 on the APSC sensor and the Olympus’ f1.2 is equivalent to f2.5 on the full frame sensor. 


Bokeh comparison between Olympus 45mm f1.2 and the Olympus 45mm f1.8. Click on the image to see it larger.


First cab off the rank is the Olympus m.Zuiko 45mm f1.8 lens. It has an optical construction of 9 elements in 8 groups, weighs in at 116g and has a 37mm filter thread. This little lens is an absolute gem and I use it a lot to do both stills and video product shots. It currently retails for $1300 AUD less than the f1.2. Wide open at f1.8 there is vey little to distinguish it from the more expensive lens at f1.8. So I would have to say unless you absolutely need an aperture of f1.2 then save your money.


Bokeh comparison between the Olympus 45mm f1.2 and the Olympus OM 50mm f1.4 at f1.4. Click on the image to see it larger.


The Olympus OM Zuiko 50mm f1.4 was introduced way back in 1972 with the original OM1. The lens used here is the revamped version with improved coatings that came out in 1984.  The lens construction is very simple with 7 elements in 6 groups and no fancy glass. Wide open it is not the sharpest lens and the bokeh balls are irregularly shaped, but stop it down to f2 and the bokeh is just as good as the 45mm f1.2 at f2. It’s possible to pick this lens up for about $100 on eBay and for $150 you can get it with a film SLR such as an OM1 or 2.


Bokeh comparison between the Olympus 45mm f1.2 at f1.2 and the Canon EF 50mm f1.8 at f1.8. Click on the image to see it larger.


When you put the Canon EF 50mm f1.8 on an APS-C camera such as my EOS550d it has a focal length that is equivalent to 80mm on full frame. It has a simple double-gauss design of 6 elements in 5 groups. This model is the mk ii version which was introduced in 1991 and is sometimes called the “plastic fantastic” because of its plastic body and lens mount. At the edges and in the corners of the frame the Canon has more pronounced cats eye bokeh, but at the centre it is nice and round. Thanks to only having a diaphragm consisting of 5 blades the bokeh becomes polygonal as it is stopped down. No longer in production it can be picked up for around $60 on eBay or you could really push the boat and buy the latest version which retails for $200 AUD. 


Bokeh comparison between the Olympus 45mm f1.2 at f1.2 and the Voigtländer 75mm f2.5 Color-Heliar at f2.5. Click on the image to see it larger.


The last lens is the Voigtländer 75mm f2.5 Color-Heliar mounted on a full frame body.The original Heliar design was developed in 1900 by Dr. Hans Harting as a symmetrical 5-element variant of the simple anastigmatic and well colour-corrected Cooke triplet. In 1902 the design was revised correcting astigmatism, curvature and coma better than the original design. That new design was asymmetrical six elements in five groups. In 1950 Dr. A.W. Tronnier refined the design even further to produce the Color-Heliar. When Cosina revitalised and relaunched the Voigtländer line they revived the Heliar concept with the 75mm f2.5 Color-Heliar. Cosina wanted to recreate the German optical aesthetic and engineering quality from the 1950s. The lens construction by modern standards is pretty basic with 6 elements in 5 groups and the 10 aperture blades bodes well for nice bokeh. Wide open at f2.5 it has the same depth of field characteristics as the Olympus at f1.2. It is not as sharp as the Olympus wide open but the tonal transitions are very smooth. The bokeh balls are nice and round at the centre, but at the edges and corners they take on the elliptical cats eye shape. This lens is longer in production and for a while it was possible to pick one up for around the $300 mark second hand, but the interest in adapting classic lens to mirrorless cameras has seen prices rise to almost $700.


Auto Focus Performance


the reluctant bull terrier test


Shooting stills the AF is very quick and accurate. Using the reluctant bull terrier test I shot a sequence of 25 frames using continuous autofocus  at 10 frames per second with an EM1 mk i which does not have the latest iteration of Olympus’ on sensor phase detection AF. At f4 all the shots were in focus. Switching out the mk i for the mk ii with its better AF systemI shot a 71 frame sequence at f2 at 10 frames a second and only 6 frames were slightly soft.

Shooting video on the Olympus EM 1 mk ii using face tracking the camera and lens responds quickly and smoothly without hesitation. Many m4/3 users shoot video using Panasonics cameras so I put the 45mm f1.2 on my G85 and set it it use face tracking. The results were dismal. There was a lot of hunting, and if and when the camera acquired focus it would quickly drift off. Having had good success with the EM1 I can only put this down to Panasonic’s use of DFD contrast based autofocus and not the lens.


Conclusion


The fantastic  little 45mm f1.8 is only $500 new and is just as sharp. The only place where it is found wanting is the maximum aperture.


There is no doubt that the Olympus m.Zuiko 45mm f1.2 PRO lens is a very good lens. It is well built and optically performs very well. The only thing that counts against it is its price when compared to other options. In the last quarter of 2020 Olympus ran a promotion in many parts of the world enabling purchasers of the EM1 to claim a free lens from the f1.2 trinity. If you were one of those and chose the 45mm then you got a great lens and I hope that you really enjoy it. If you are a committed Micro Four Thirds user and were wanting to purchase this lens today at the street price of $1800 I would suggest that your money could be better spent. The fantastic  little 45mm f1.8 is only $500 new and is just as sharp. The only place where it is found wanting is the maximum aperture. If you are not so wedded to the idea of 45mm but just wanted a fast short telephoto then I’d seriously consider the Sigma 56mm f1.4 which at $750 is great value and a seriously good performer.

If you are just getting into photography and want a camera and lens combo that gives enormous creative control over depth of field then you’ve got to look at full frame cameras ($1800 will get you a new one less if second hand) and pick up an 85mm f1.8 where Canon, Sony and Nikon all have offerings between $600-900 new. 

For video the 45mm f1.2 is a nice option as on the right camera it can autofocus extremely well and the the provision of a manual focus clutch that gives hard stops makes it very useful for manual focus pulls. If autofocus isn’t important to you then there are a huge number of older classic f1.2 and f1.4 lenses that can be picked up very cheaply.


Example Images


Wide open the Olympus m.Zuiko 45mm f1.2 PRO lens gives a nice please rendition with gentle tonal transitions.


The close focusing capabilities of the Olympus 45mm f1.2 are impressive and couple this with pleasing bokeh it makes for a very nice lens with which to do product photography or still life.


The Olympus 45mm f1.2 also makes for a good lens for equine portraits.


Frida at 45mm f1.2.


Taken at the minimum focusing distance of 50cm.

Backyard Birds

Well it seems that the COVID-19 restrictions have been in place for an age. Here in Western Australia the social distancing requirements aren’t as strict as some places, but we still aren’t able to go where we want and do what we want. It makes me more appreciative of what my parents went through growing up in the Great Depression and then after that the Second World War. But anyway to keep myself from going totally mad I’ve been working on a few projects. This one is to document all the birds that come into our backyard. I’ve not got them all by any means. Some are very elusive and just don’t want their photos taken for some reason. Can’t imagine why. Here is a selection form the last couple of weeks.


Backyard Birds by Paul Amyes on 500px.com
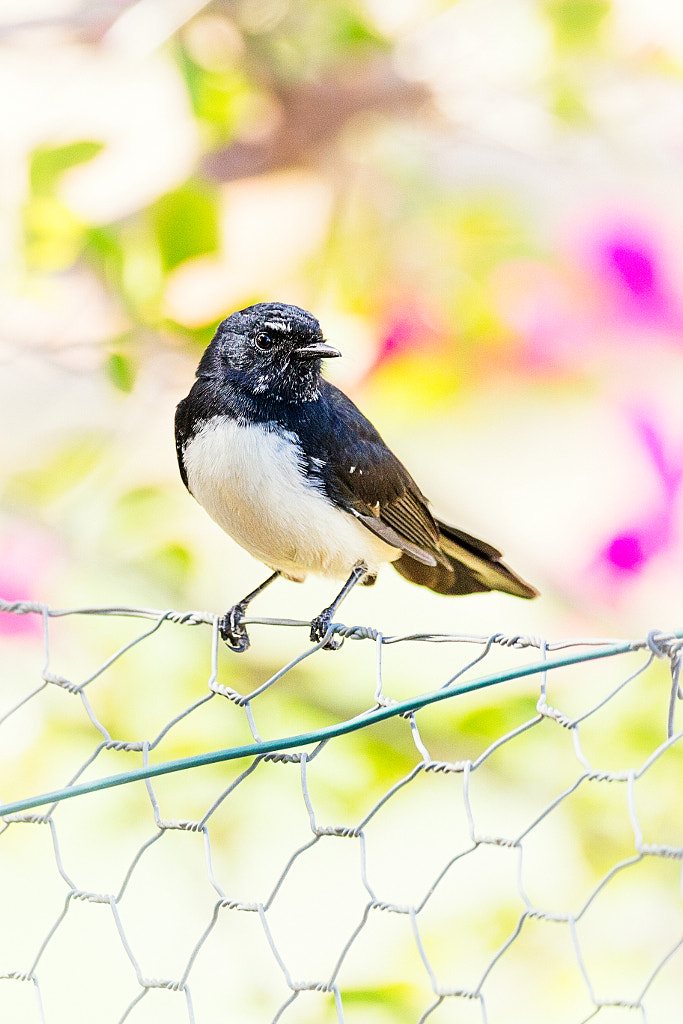
Willie Wagtail on the back fence. York, Western Australia. Canon EOS 6d with Sigma 150-600mm f5-6.3 Contemporary lens. Exposure: 1/500 sec, f7.1 at ISO 1600.


Backyard Birds by Paul Amyes on 500px.com
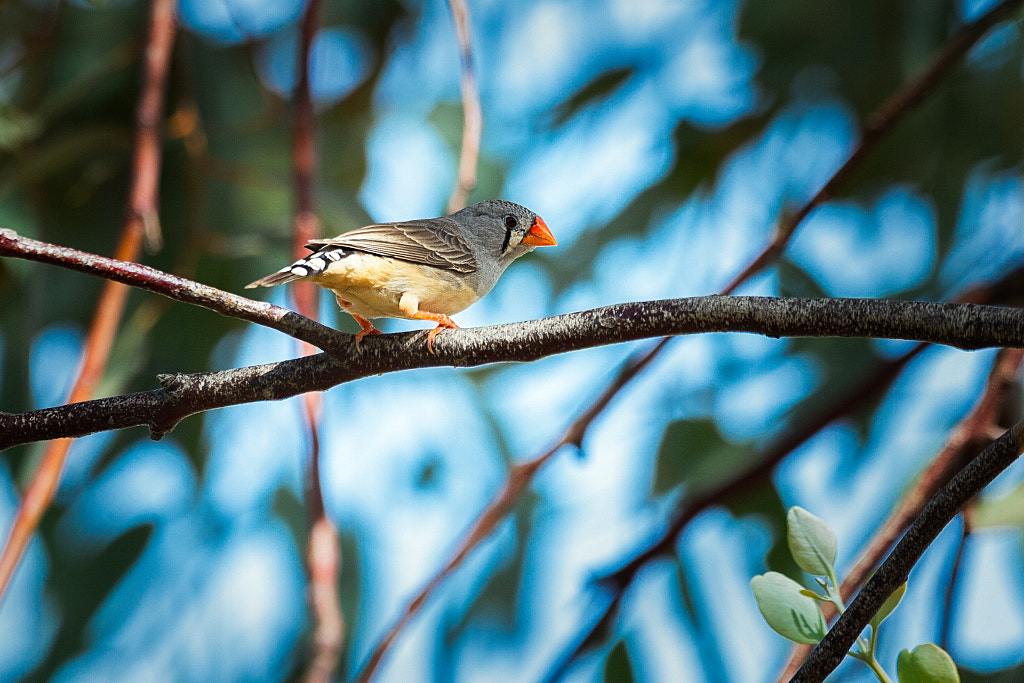
Zebra finch, Taeniopygia guttata. York, Western Australia. Canon EOS 6d with Sigma 150-600mm f5-6.3 Contemporary lens. Exposure: 1/500 sec, f6.3 at ISO 400.


White-cheeked Honeyeater by Paul Amyes on 500px.com
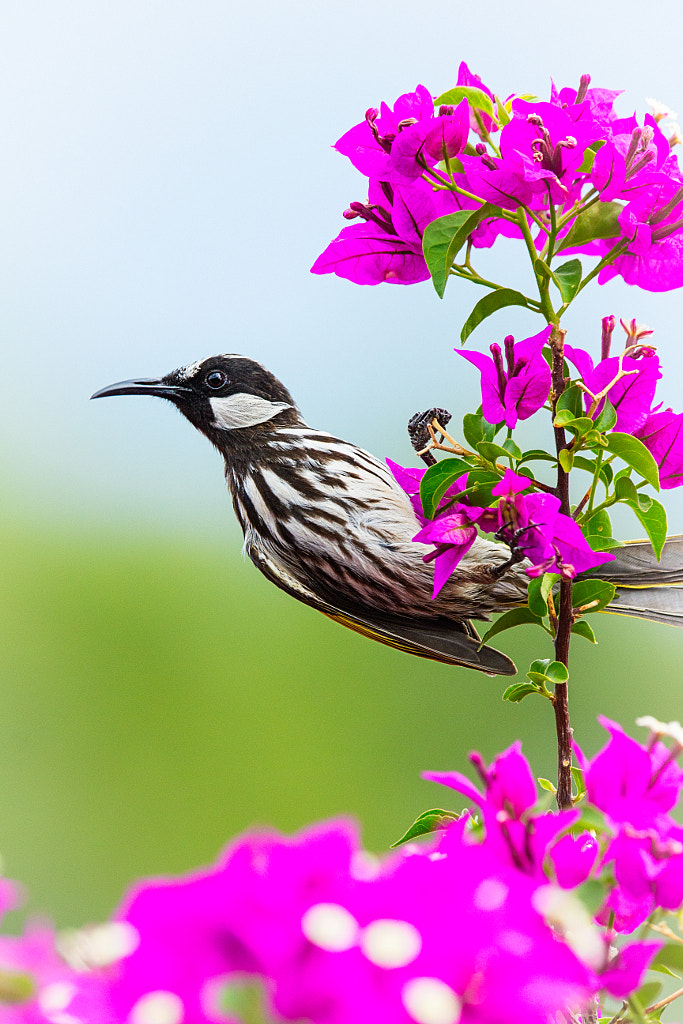
White-cheeked Honeyeater, W, in my back garden. York, Western Australia. Canon EOS550d with Sigma 150-600mm f/5-6.3 DG OS HSM Contemporary lens. Exposure: 1/500 sec, f7.1 at ISO 500.


Backyard Birds by Paul Amyes on 500px.com
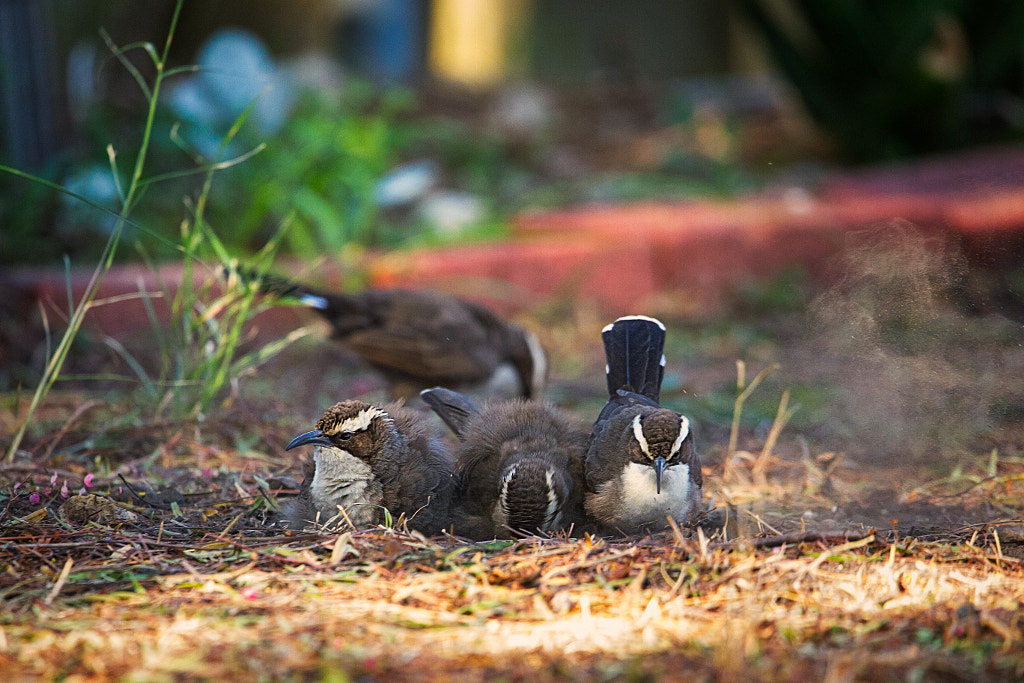
White browed babblers (White) breaking the social distancing rules by communal dust bathing. York, Western Australia. Canon EOS 6d with Sigma 150-600mm f5-6.3 lens. Exposure: 1/500 sec, f6.3 at ISO 5000.


Brown Honeyeater by Paul Amyes on 500px.com
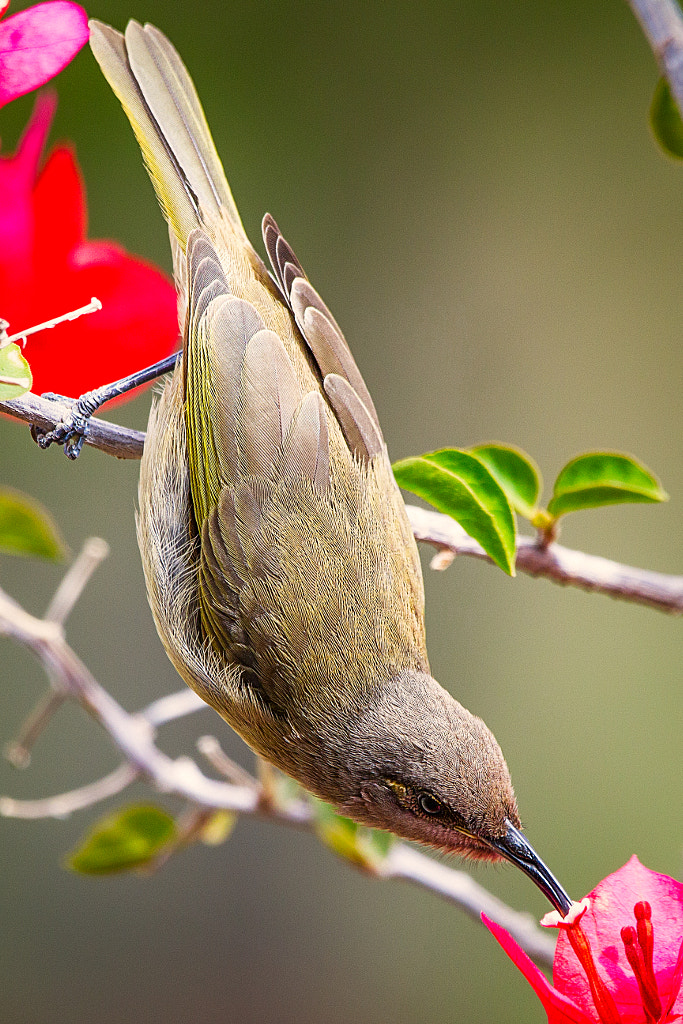
Brown Honeyeater, Brown, in my back garden. York, Western Australia. Canon EOS 550d with Sigma 150-600mm f5-6.3 lens. Exposure: 1/500 sec, f6.3 at ISO 320.


Backyard Birds by Paul Amyes on 500px.com
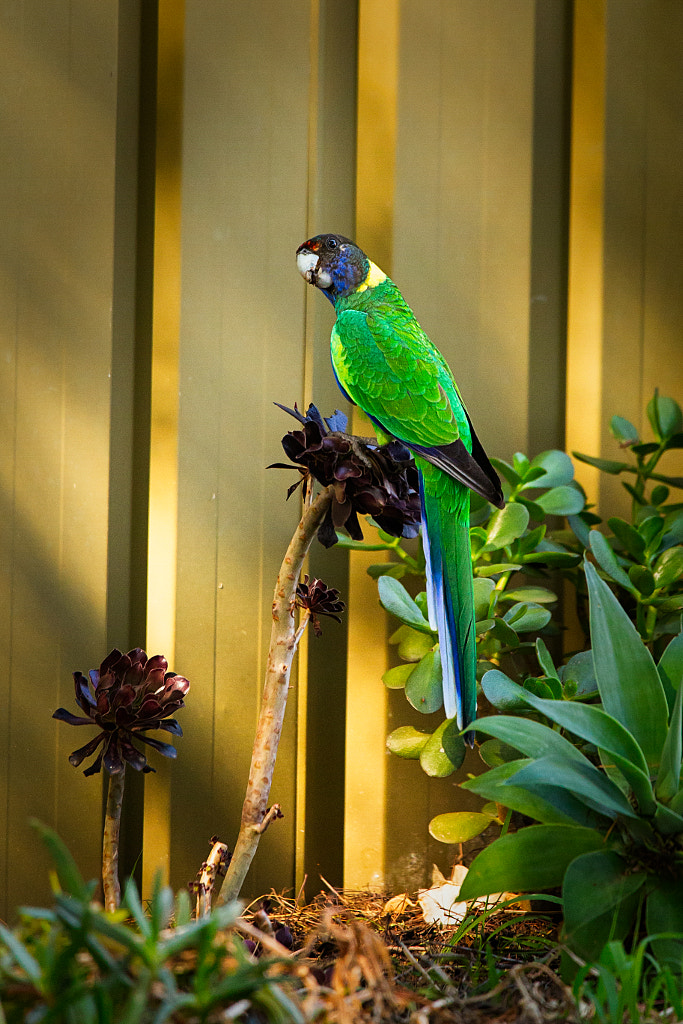
Australian Ringneck aka twenty-eight parrot,Aus. York, Western Australia. Canon EOS 6d with Sigma 150-600mm lens. Exposure: 1/500 sec, f6.3, at ISO 6400.

Well that’s it for this week. Stay safe, keep positive and try and keep busy.

What A Whopper!

The Sigma 150-600mm f5-6.3 DG OS Contemporary lens is part of Sigma’s Global Vision line of lenses. It offers an inexpensive way of getting into wildlife photography.


Not so long ago I looked at the the Panasonic Leica DG Vario-Elmar 100-400 f4-6.3 ASPH Power OIS lens for micro four thirds, well today I’m looking at an alternative lens for APS and full frame cameras – the Sigma 150-600mm f5-6.3 DG OS Contemporary lens. Now confusingly Sigma make two versions of the 150-600 and they are labelled the Sport and Contemporary. The-Digital-Picture.com has put up a good article explaining the difference between the two. The main ones are price and weight with the Contemporary being a 1Kg lighter and $1200 AUD cheaper. This is quite a significant difference and I for one prefer a lighter lens and a heavier wallet. The Contemporary is part of Sigma’s Global Vision line of lenses and is thus compatible with the Sigma TC-1401 1.4x Teleconverter which allows auto focus to work to a maximum of f8 while wide open if your camera supports this feature. This is an interesting option as it allows a reach of 860mm on full frame and a humongous 1376mm on an APSC sensor which is impressive reach for a lens and converter costing less than $2000 AUD. I didn’t happen to look at this option because none of my Canon DSLRs allow f8 auto focusing. shuttermuse.com has an article on f8 focusing with extenders or teleconverters and a list of compatible Canon DSLRs. This does not apply to the mirrorless R and RP which have f11 auto focusing.


Lens mounts available Canon EF

Nikon F

Sigma SA

Focal length 150-600mm
Angle of view 4.1° – 16.4°
Aperture range f5/6.3 to f22/27
Filter size 95mm
Minimum focusing distance 2.8 metres
Maximum magnification 1:4.9
Focusing Silent HSM with internal focusing and manual override
Aperture blades 9
Lens construction 20 elements in 14 groups with 1 FLD and 3 SLD elements
Image stabilisation Yes – 3 stops equivalent
Length 26cm
Diameter 10.5cm
Weight 1.93Kg without lens hood and tripod collar.


Fully extended to the 600mm focal length the lens is a beast. There is no sign of any wobble in the zoom extension.

Physically this is a large lens, it stands head and shoulders above my Canon 70-200mm f2.8 IS L lens which in itself quite a large lens. The 150-600 is also 500g heavier. At 2.1 Kg with lens hood and tripod collar attached it definitely has heft to it. Interestingly Sigma refer to it as a lightweight lens, I suppose it’s all a matter of perspective as the Panasonic Leica 100-400 is 0.985 Kg so the Sigma feels gargantuan compared to it while the Canon EF 600 mm f4L IS is over 3Kg so the Sigma then seems svelte and compact. The lens body is made out of what Sigma calls a Thermally Stable Composite (TSC) which is substantially stronger than conventional polycarbonates while having similar thermal expansion properties to aluminium. The lens mount is made of chromium plated brass which should ensure a long life. All in all it feels a well made and rugged lens, it may feel like plastic but the TSC body feels substantial and gives the impression of being very durable with no creaking or flexing. The Sigma 150-600 is advertised as being dust and splash proof but on closer reading of Sigma’s spec sheet there is only one seal and that is at the lens mount. If you want better then you’ll have to spring for the Sports version.


The Canon EF lens mount is made of chromium plated brass.

When looking at the lens from the front there is a large ribbed rubber zoom ring that has a long throw of about 160º. The action is smooth and feels not too tight nor too loose. As you rotate the zoom ring the lens barrel extends by 8cm. The extension feels secure with no slop or wobble. Just behind the zoom ring on the lefthand side is a zoom lock switch which can lock the zoom ring at the 150mm focal length to prevent zoom creep while carrying the lens. The focusing ring is narrow ribbed rubber and allows you to manually adjust focus while the lens is in the autofocus mode. There are no hard stops which might concern you if you were to use the lens for video. Behind the focusing ring is a panel of four switches and they are:

  • An AF switch allowing to choose between AF, MF and MO (Manual Override)
  • A focus limiter switch allowing a choice of full range, 10m to ∞, and 2.8 to 10m.
  • An optical stabilisation switch that gives a choice of off, on and a panning mode.
  • A custom switch that allows you to select two custom modes that can be programmed using the Sigma FD-11 USB Dock


There are three switches on the lens barrel. One fotr focus modes, the second a focus limiter and the third is for the optical stabilisation.


The focus distance scale is behind a window just below the the focus ring.

Above the switches is a window showing the focusing scale and then behind that is the lens collar. The lens collar allows you to turn the camera from horizontal to vertical while mounted on a tripod, but, unfortunately there are no detents to allow you to do this while looking through the viewfinder of the camera, you have to align the marks on the collar with those on the lens body. The tripod collar can be detached and thoughtfully Sigma provide a cosmetic rubber ring to slide over the lugs that hold the collar in place. The lens comes with a large plastic lens hood the size of a flower pot, it seems sturdy enough and bayonets into place and a nice touch  is that is ribbed internally to prevent reflections. The 150-600 has a 95mm filter thread which means filters will be expensive and potentially hard to get. In terms of accessories Sigma provide a nice well padded lens case, a shoulder strap for it and a Sigma branded camera strap. Like all Sigma lenses you get a lot for the money you spend. Nice one Sigma!

The 150-600 has a 95mm filter thread which means filters will be the size of dinner plates, be expensive and potentially hard to get.

I tested the lens on a Canon EOS 6d and an EOS 550d to see how it would perform on both crop and full frame cameras. In terms of AF performance as neither of those cameras have what can be considered state of the art AF systems, in fact it is over twelve years old, the lens did very well. The single point AF using the centre point was fast and precise and well capable of fixing on small birds amongst foliage. In terms of continuous AF on the EOS 550d the camera was the limitation being only able to shoot 6 frame bursts in RAW, but out of my six shots when tracking my dog trotting five of the six would be in focus. The 6d is able to shoot 4.5 frames per second for 15 frames and on the trotting bull terrier test it managed 12 frames in focus.


This slideshow requires JavaScript.

When it came to BIF (birds in flight not fisticuffs) the AF was more than capable of focusing on and tracking medium to large birds. It really struggled with small birds especially swallows. Put it on a better camera and I’m sure you’d get better results.


Australian White Ibis, by Paul Amyes on 500px.com
Australian white ibis, Threskiornis molucca, Herdsman Lake, Western Australia.


My primary use for a lens like this is handheld bird photography, and as such I didn’t really give the image stabilisation a workout as I seldom use a shutter speed below 1/500 sec. But messing around at home in the house and garden I figured it was good for three stops. Mind you I do have steady hands so your experience may differ from mine.


The optical construction of the lens is twenty elements in fourteen groups with 1 FLD and 3 SLD elements. The FLD (“F” Low Dispersion) glass element, which offers performance equivalent to fluorite.  Canon and other manufacturers have used synthetically grown crystals of calcium fluoride components in lenses to aid apochromatic design, and to reduce light dispersion so lenses made from it exhibit less chromatic aberration. What Sigma has done is use newer glasses and computer-aided design to render the use of fluorite crystals unnecessary. Sigma claim that the FLD element is “highly transparent, its refractive index and dispersion are extremely low as compared to conventional types of glass. It offers characteristics very similar to those of fluorite, which is valued for its anomalous dispersion. These characteristics minimize residual chromatic aberration (secondary spectrum), which cannot be corrected by ordinary optical glass, while helping to produce sharp, high-contrast images.” (https://sigmaphoto.com.au). The three SLD (Special Low Dispersion) glass elements also help to minimize chromatic aberration. To help achieve attractive out of focus transitions there are nine rounded aperture blades which should help achieve nice round bokeh balls when shooting specular highlights.


In terms of optical performance well I’ll deal with full frame and crop separately. First up using the lens on the crop framed 550d. At 150mm the centre of the lens wide open was sharp and contrasty and stayed A as such until f22 when it softened due to the effects of diffraction. At the edges the peak performance was attained at f11 and remained until f22 when it softened again. At 600mm the centre wide open was a little soft and lacking in contrast. This improved by f8 and then deteriorated at f22. The edges weren’t so good – wide open they were soft and lacking contrast and remained so until f22 when they got worse. As for vignetting well at the short end wide open it was apparent, about 1/2 to 1 stop and this disappeared by f8. It was the same story at the long end. Throughout the focal range there is slight pin cushion distortion and some chromatic aberration can also be seen. Open the files up in Lightroom and apply the lens profile and things improve nicely. On the full frame 6d the story is the same except for the vignetting which is naturally worse at around 1-1 1/2 stops which is totally understandable as you are using the whole frame rather than just the central part of the lens coverage.


100 % crop from the centre of a New Holland Honeyeater to show how detail is rendered by the Sigma 150-600mm f5-6.3 Contemporary lens.


What’s all this mean in real life. Well if we look at the image for the New Holland Honeyeater which I took at a distance of around 3.5 to 4 metres and then enlarge the section around the head you can see that there is nice feather detail and that the eye is sharper than a very sharp thing. To get much better you’d have to spend an awful lot of money and if we look at the Canon 600mm f4 lens I mentioned earlier that has an eye watering price of $18,500 AUD which is over 11 times the cost of the Sigma. Personally I know that if I plonked $18 K down on a lens I’d be heading for the divorce court which would make the Canon a doubly expensive lens. So for what it costs the Sigma is amazing value.

Below are some examples of bird photography shot with the lens on both a Canon EOS 6d and 550d.


Welcome Swallow by Paul Amyes on 500px.com
Welcome Swallow, Hirundo neoxxena, Herdsman Lake, Western Australia. Canon 6d with Sigma 150-600mm Contemporary. Exposure: 1/500 sec, f7.1 at ISO 250.


Red Capped Robin, by Paul Amyes on 500px.com
Red capped robin, Petroica goodenovi, Avon Walk Trail, York, Western Australia. Canon 550d with Sigma 150-600mm Contemporary lens. Exposure: 1/500, f6.3 at ISO 160.


Chestnut-rumped Thornbill by Paul Amyes on 500px.com
Chestnut-rumped Thornbill (Acanthiza uropygialis), York, Western Australia. canon 550d with Sigma 150-600mm Contemporary lens. Exposure: 1/1000 sec, f6.3 at ISO 320.


Mistletoebird, by Paul Amyes on 500px.com
Mistletoebird, Dicaeum hirundinaceum. The Nyoongar name is Minnijit. York, Western Australia. Canon 6d with Sigma 150-600mm Contemporary lens. Exposure: 1/1000 sec, f8 at ISO 1600.

So would I recommend the lens? Yes without hesitation. It performs very well and is sold at a very good price and you can’t argue with that.

Hanging Around

Ringneck Parrot by Paul Amyes on 500px.com
An Australian Ringneck parrot also called a twenty-eight parrot(Barnardius zonarius subspecies semitorquatus) feeding on white cedar berries. York, Western Australia. Canon EOS 550d with Sigma 150-600mm f4-6.6 OS lens. Exposure: 1/1000, f8 at ISO 5000.

On holiday – more to come later.


American Style

Nankeen Kestral by Paul Amyes on 500px.com
Nankeen Kestrel with prey at Marwick’s Barn in York, Western Australia. Canon EOS 550d with Sigma 150-600mm f4-6.3 OS. Exposure: 1/1000 sec, f6.3 at ISO 320.


The other day I’d been up on Mount Brown (which is a grand name for a moderately sized hill) looking for interesting birds to photograph. The conditions were great, but the birds uncooperative so I gave up and started driving home. At the bottom of the hill I caught out of the corner of my eye a nankeen kestrel hunting on an empty block. It swooped down into the long grass and quickly took off again obviously holding something. So I did something I’d never thought that I’d do. I’ve just been really getting into this bird photography malarkey and have been watching YouTube videos for tips. Mostly British videos, but the occasional American one. I’d noticed that quite a few of the American ones had the photographers driving around looking for birds and photographing then from the car. Well I started to follow this bird in the car. It didn’t go far. It landed on the power lines outside of Marwick’s Barn obviously to catch its breath. It obviously decided that the power lines was no place to deal with the kicking and struggling mouse so it moved to the top of a nearby power pole. So I pulled up on to the dirt shoulder and hanging out of the driver’s side window I photographed madly.


Nankeen Kestral by Paul Amyes on 500px.com
Nankeen Kestrel with prey at Marwick’s Barn in York, Western Australia.

There were no niceties, the kestrel didn’t even both to dispatch its prey before eating – it just pulled the mouse apart. I continued snapping frantically. When everything was finished the kestrel noticed the sound of the camera and gave me a hard stare. Rumbled! With a look of disdain it flew off.


Nankeen Kestral by Paul Amyes on 500px.com
Nankeen Kestrel with prey at Marwick’s Barn in York, Western Australia.


Marwick's Shed by Paul Amyes on 500px.com
Marwick’s Shed also called Marwick’s Barn. Constructed from 1876. Was used for transporting supplies to the goldfields prior to the completion of the Perth-Coolgardie railway line. Olympus OMD EM10 mk I with Olympus 17mm f2.8 lens. Exposure: 1/400, f8 at ISO 200.


“I Like To Watch”

"I Like To Watch" by Paul Amyes on 500px.com
Nankeen Kestrel (Falco cenchroides cenchroides) sitting on the street lamp outside our house. Canon EOS550d with 70-200mm f2.8 IS L + x2 extender. Exposure: 1/4000, f8, ISO 1600.