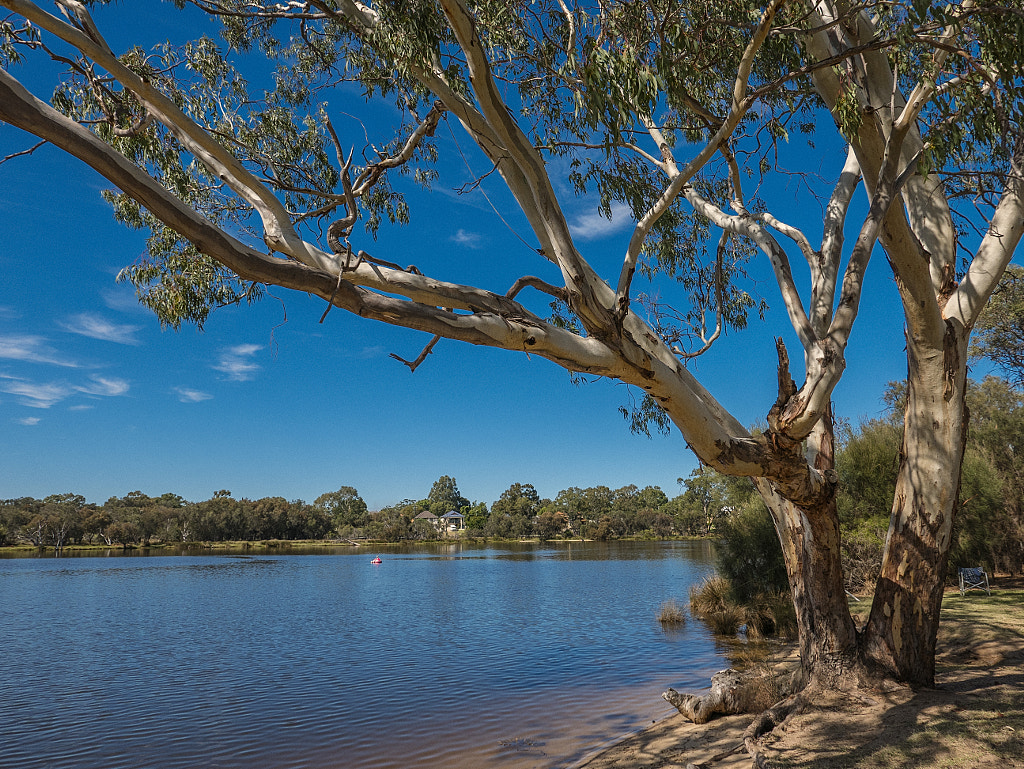
A tranquil spot by the Swan River at Ashfield Flats in Western Australia.
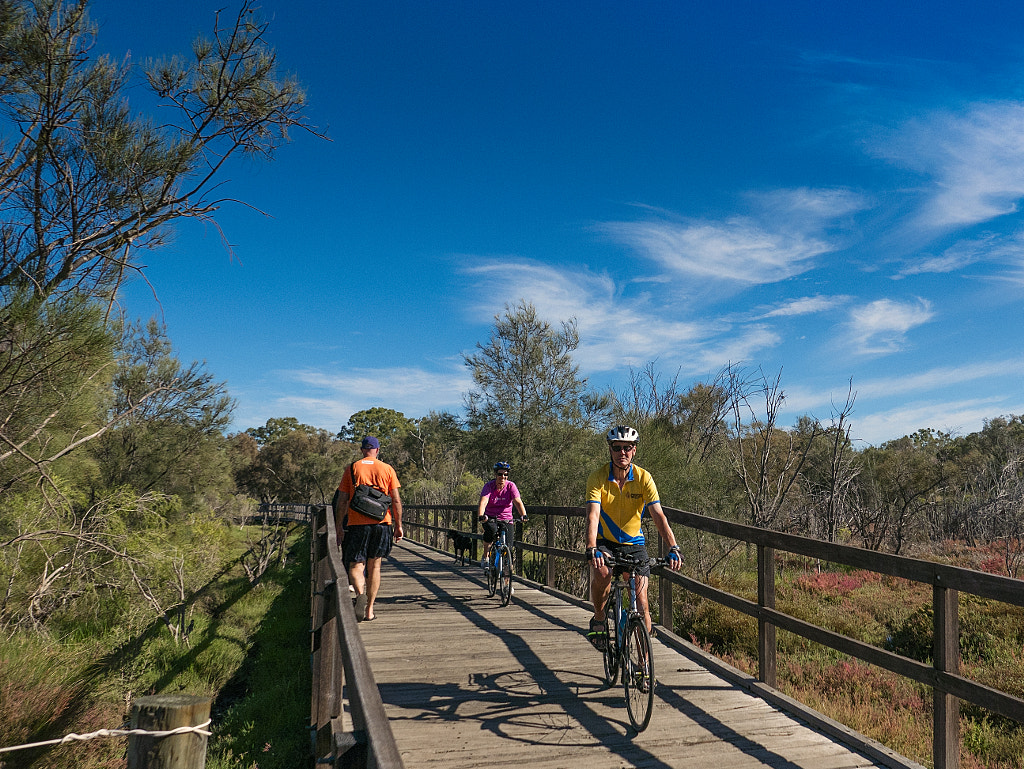
The dual use paths along the river at Ashfield are popular with cyclists and walkers alike
This 6Km walk takes you through the area between Sandy Beach Reserve and Claughton Reserve. Heading out westwards from Sandy Beach Reserve the walk takes you through areas of open grassland and salt marsh interspersed with stands of paperbarks and bulrushes. When you get to Claughton Reserve you will see grasslands and mature flooded gums. At the weekends it is a popular recreational area attracting walkers, cyclists, and various paddle sports.
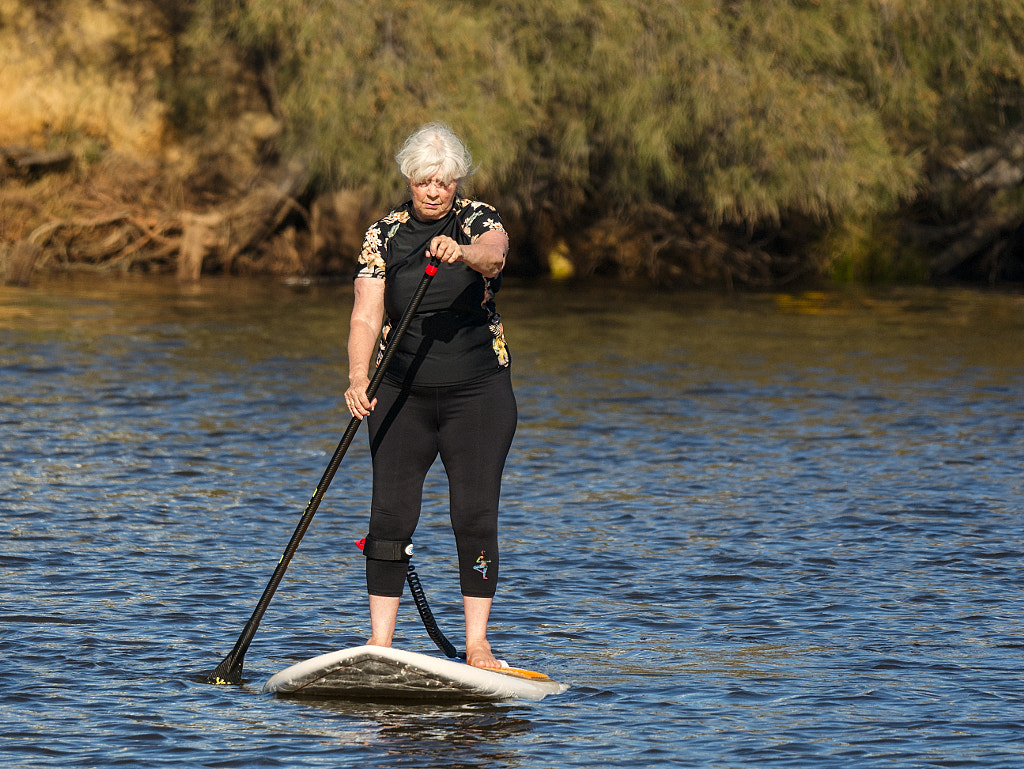
The Swan River by Ashfiled Flats is a popular location for canoeists and stand up paddle boarders.
The best time to visit and see wildlife is early morning midweek and take time to explore the stands of trees and scrub off of the trail. What can you expect to see? Well EBird Australia have a list of 95 different species that have been recorded in the area. Birds that are regularly seen include:
Pacific Black Duck
White-faced Heron
Red Wattle Bird
Singing Honeyeater
Brown Honeyeater
Great Egret
Black-shouldered Kite
Nankeen Kestrel
Galah
Australian Ringneck
Sacred Kingfisher
Magpie-lark
Black-faced Cuckoo-shrike
Grey Butcherbird
Richard’s Pipit
Welcome Swallow
Silvereye
On my visit I managed to spot 18 different species on a busy Saturday morning so I was happy with that and I’ll try and get back earlier in the morning midweek next time.
Great egret (Ardea alba modesta) fishing at Ashfield Flats, Western Australia.
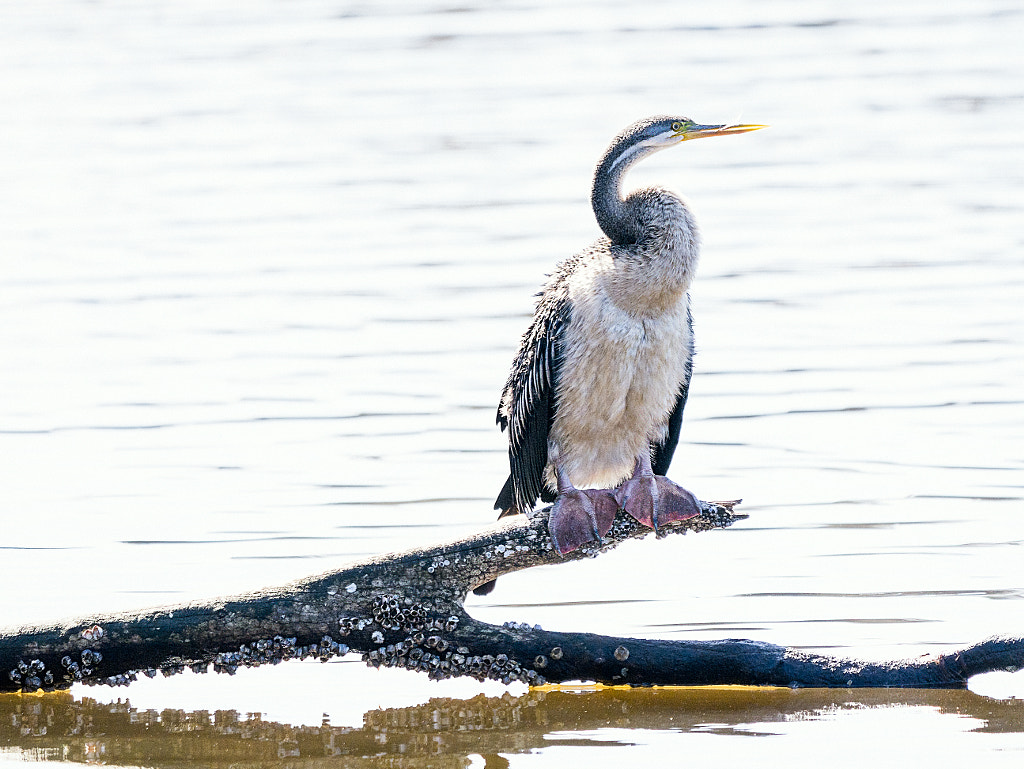
Australian Pied Cormorant,Phalacrocorax various. Ashfield Flats, Western Australia.
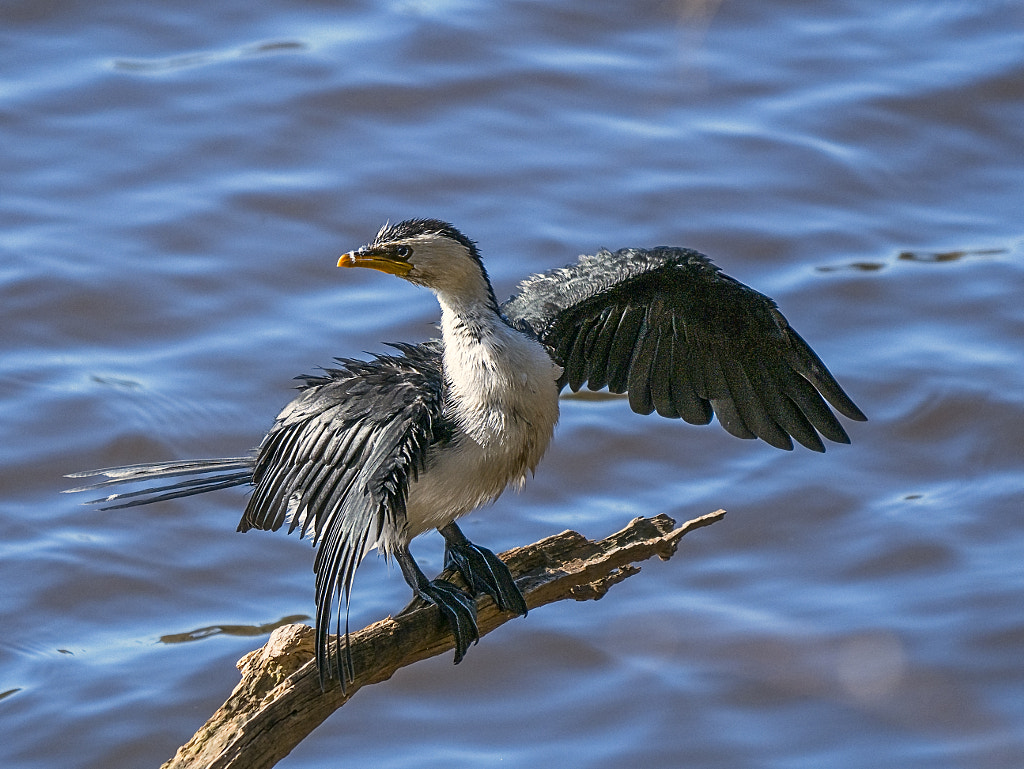
Little pied cormorant, Microcarbo melanoleucos, drying out in the sun. Ashfield Flats, Western Australia.
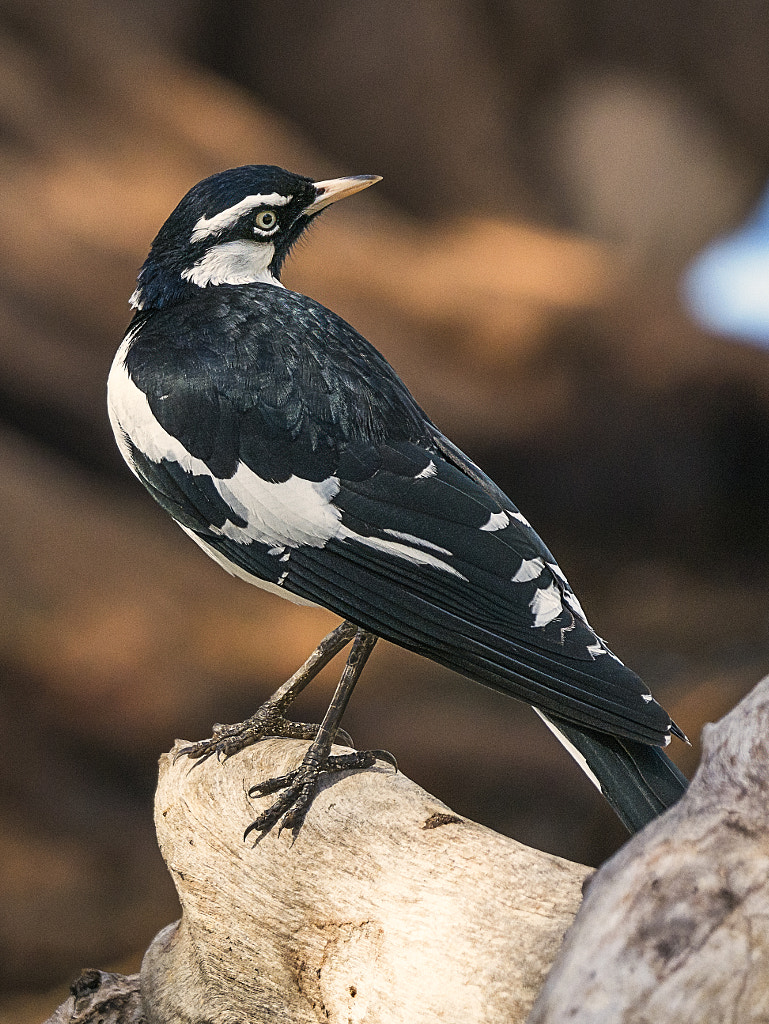
Magpie-lark, Grallina cyanoleuca. Ashfielde Flats, Western Australia.
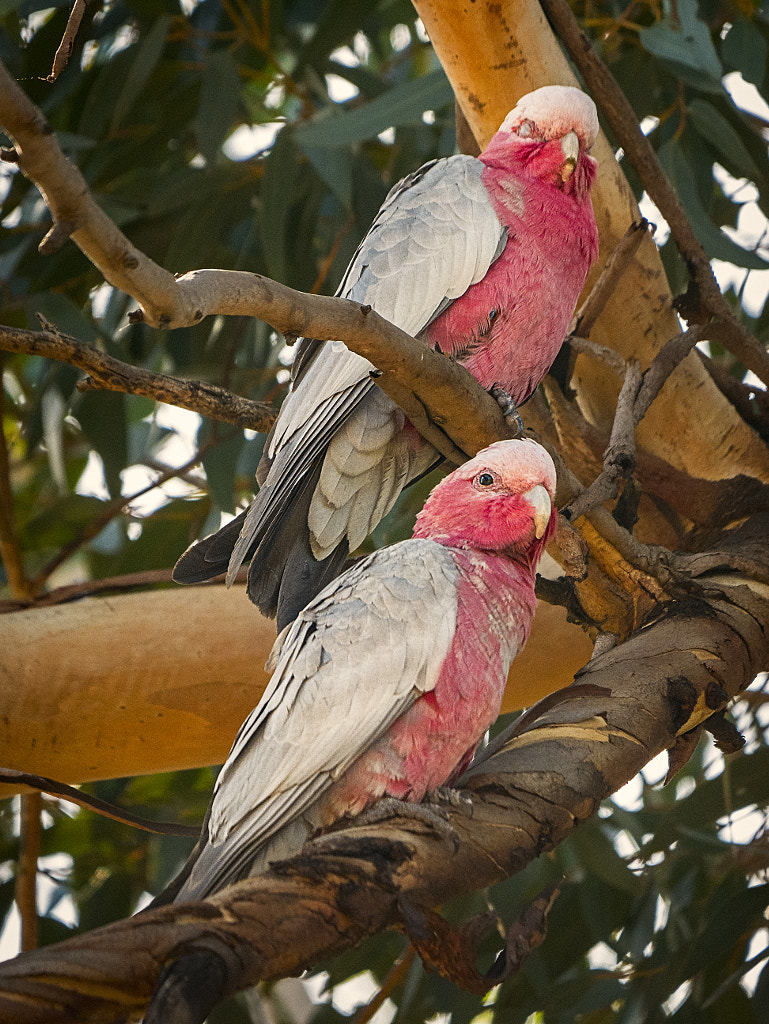
A pair of Galahs, Eolophus roseicapilla, at Ashfield Fats, Western Australia.
Singing Honeyeater, Lichenostomus virescens virescens. Ashfield Flats, Western Australia.
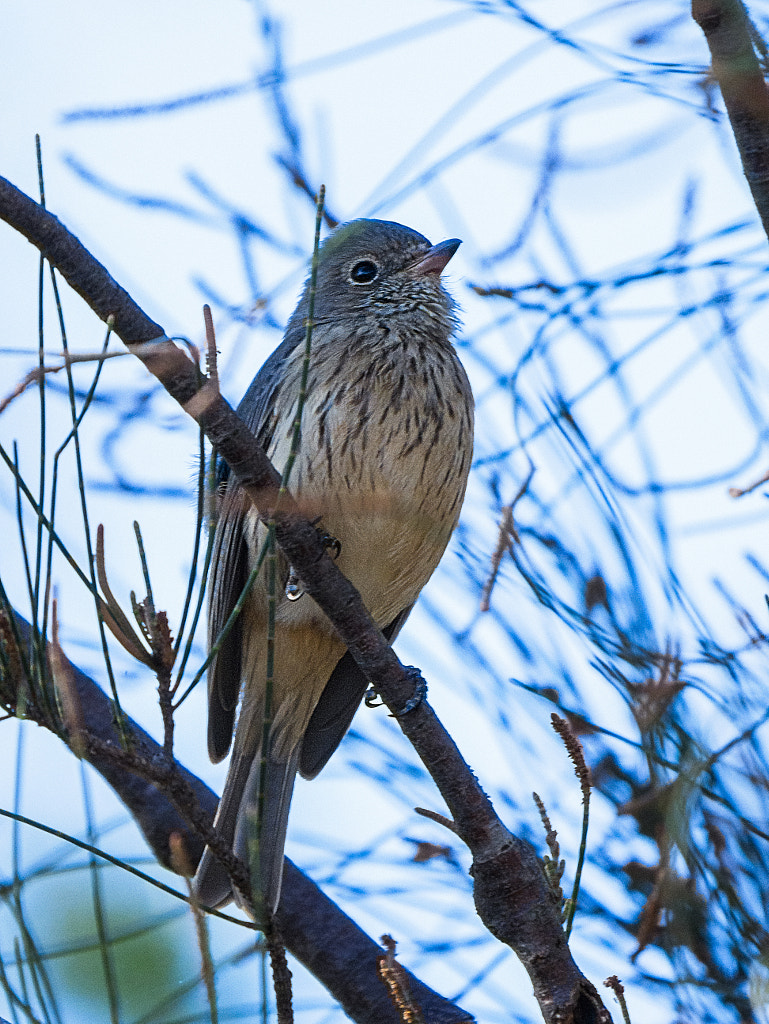
A female Rufous Whistler, Pachycephala rufiventris, at Ashfield Flats, Western Australia.
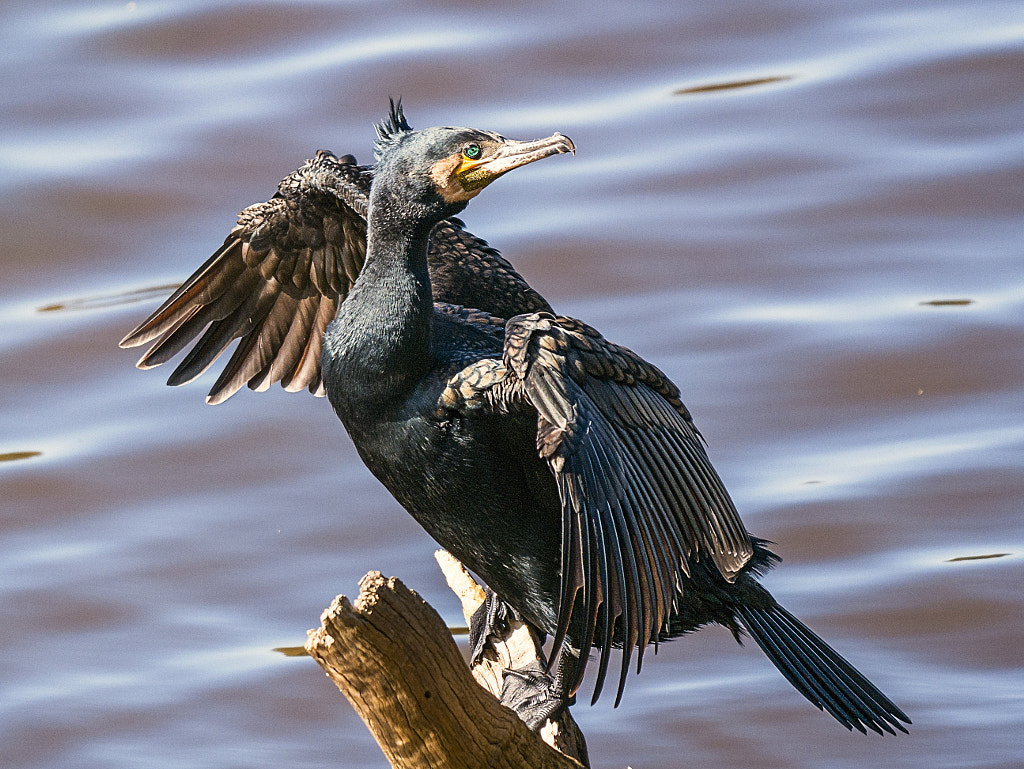
Karbanga or great cormorant (Phalacrocorax carbo subsp. carboides) , sunning itself. Ashfield Flats, Western Australia.
A male Rufous Whistler, Pachycephala rufiventris, singing. Ashfield Flats, Western Australia.
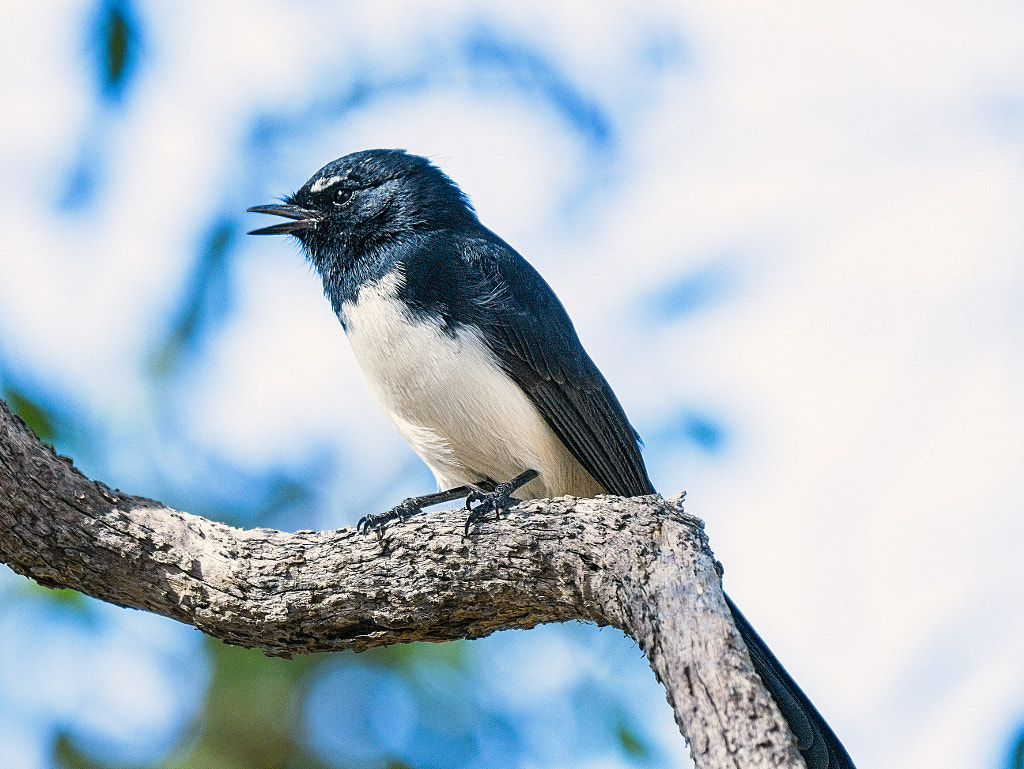
Willie Wagtail, Rhipidura leucophrys leucophrys, singing. Ashfield Flats, Western Australia.
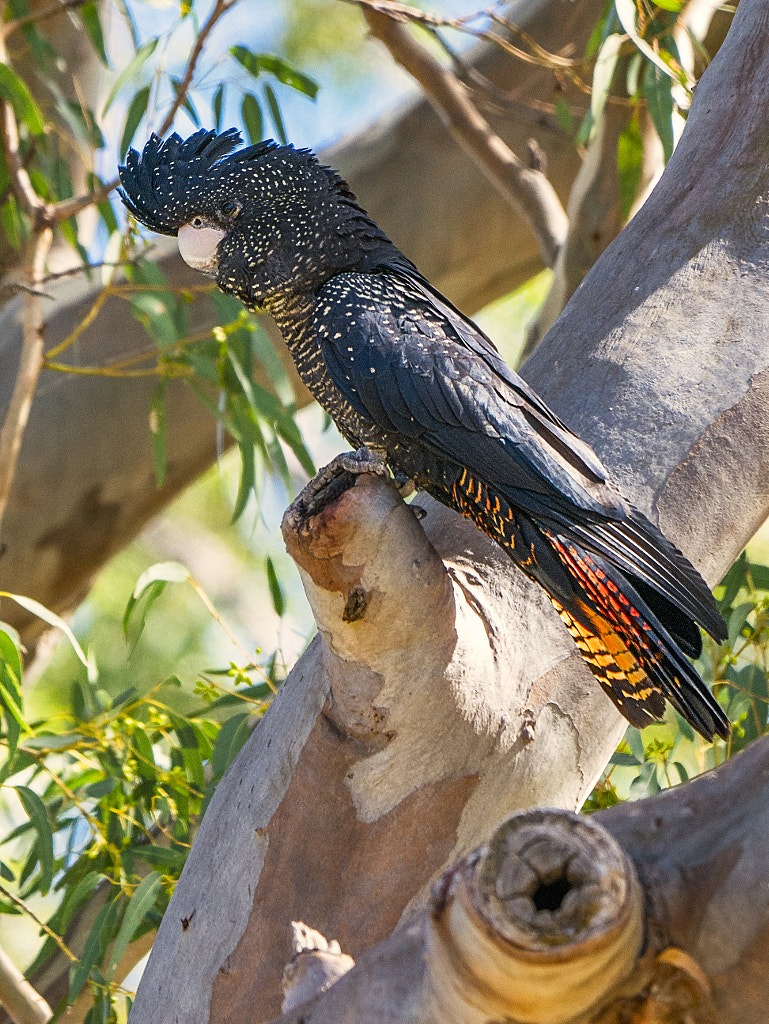
Red-tailed Black Cockatoo, Calyptorhynchus banksii subs samueli. Ashfield Flats, Western Australia.
As usual there is a video for those that prefer or the full written piece is below.
The Olympus m.Zuiko 45mm f1.2 PRO lens mounted on an EM1 mk ii.
The Olympus m.Zuiko 45mm f1.2 Pro Lens was announced in by Olympus back in October 2017 as one of their trio of f1.2 lenses. The others being the 17mm and 25mm. According to Olympus they were designed to “have beautiful defocusing effects” and “beautiful feathered bokeh to make your image stand out” (https://shop.olympus.com.au/m-zuiko-ed-45mm-f1-2-pro). In the case of the 45mm (and I suspect the other two) the lens is designed so that spherical aberration is not fully corrected. This means that as light rays enter the lens only those that pass through the centre of the lens are made to come together at the focus point. The rays at the edges focus slightly in front of that point and this causes the bokeh to have a gentle roll off – the so-called “feathered bokeh”. Olympus themselves claim this matches “classic” older lens designs. At this point it should be noted that spherical aberration and chromatic aberration are different. Spherical aberration occurs when a single wavelength of light or colour cannot be focused whereas chromatic aberration occurs when a lens cannot focus the red, green, and blue wavelengths on a single point. Although Olympus claims to match the performance of older classic lenses they have chosen a lens design that is very different from them.
Lens Construction and Build Quality
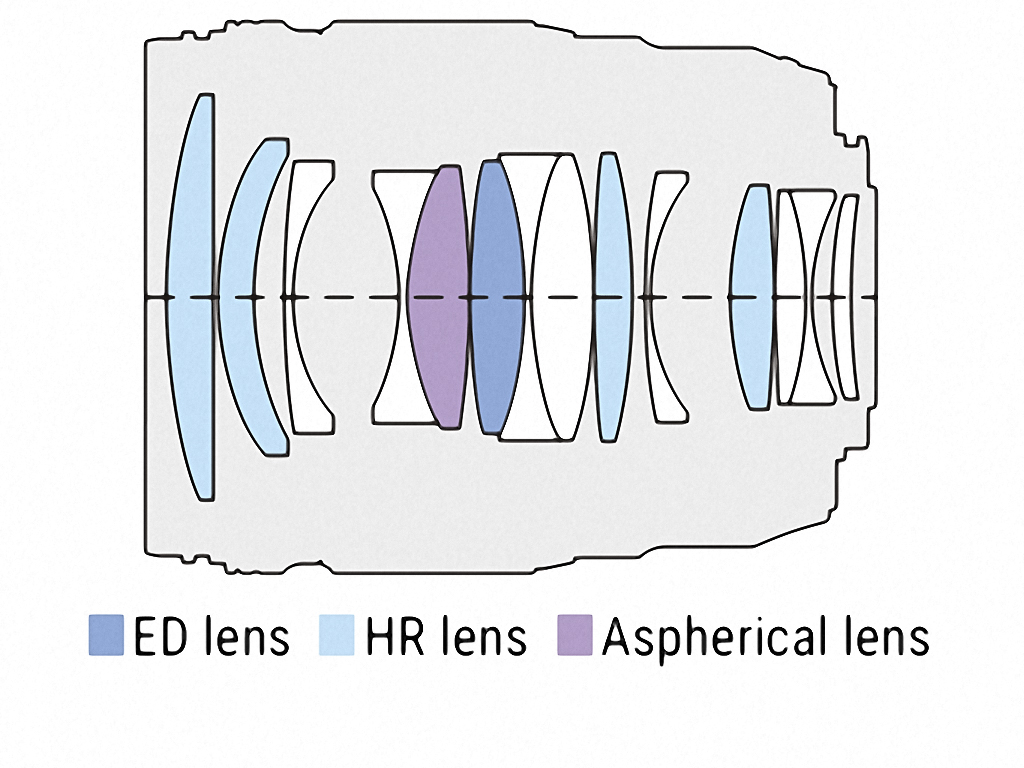
Olympus 45mm f1.2 lens has 14 elements in 10 groups with one ED element, four HR element, and one aspherical element.
Focal Length
45mm (90mm in full frame equvalence)
Angle of view
27º
Minimum focusing distance
50cm
Maximum magnification
0.1 X
Lens construction
14 elements in 10 groups with one ED element, four HR element, and one aspherical element
Maximum aperture
F1.2
Minimum aperture
f16
Diaphragm
9 curved blades
Focusing
Auto focus – yes, MSC mechanism making fast and silent AF possible in video mode.
Manual focusing – the focusing ring can be pulled back to engage a clutch mechanism with hard stops at each end.
Filter size
62mm
Dimensions
85mm (h) x 70mm ⌀
Weight
410g
Other features
Hermetic sealing making the lens dust proof, splash proof, and freeze proof. 60529 IPX1 IP rating.
The lens mount of the Olympus 45mm f1.2 lens. The mount has an ‘o’ ring that contributes to its 60529 IPX1 IP rating.
To see how this differs from an older classic design lets compare it to Olympus OM Zuiko 50mm f1.4 which was first produced in 1971 and remained in production until 1984.
Olympus OM Zuiko MC 50mm f1.4
Focal length
50mm
Angle of view
On 35mm 43º, on micro four thirds 21º
Minimum focusing distance
45cm
Maximum magnification
0.15 X
Lens construction
7 elements in 6 groups
Maximum aperture
f1.4
Minimum aperture
f16
Diaphragm
8 curved blades
Focusing
Manual focus with a straight helicoid
Filter size
49mm
Dimensions
36mm (h) x 60mm ⌀
Weight
230g
The 45mm f1.2 dwarves the f1.8 version.
Comparing the Olympus 45mm f1.2 to the Canon EF 50mm f1.8. On their respective bodies they both offer a similar field of view.
The 45mm f1.2 mounted on an Olympus EM1 mk i compared to the Voigtänder 75mm f2.5 Color-Heliar mounted on a Sony A7r. Both a ideal focal lengths for portraiture.
Physically this is a large lens. It dwarfs my Olympus 50mm f1.4, my Canon EF 50mm f1.8 and my Sony FE 50mm f1.8. It is a smidge larger than the Olympus m.Zuiko 12-40 f2.8 Pro and 27g heavier. The 45mm f1.2 follows the look of the other lenses in the Pro line and it also has a L-Fn button which can be programmed to various functions on Olympus cameras. In the hand the lens is reassuringly solid, it has that dense feeling that quality optics have. The focusing ring is nice and large and has the same ribbing that all the other lenses have in the Pro line. Like the other Pro lenses the 45mm f1.2 enables manual focusing by pulling back the focusing ring to engage a clutch to give a nice smooth focus throw of about 110º that has hard stops at either end. Combined with focus peaking this makes for manual focusing nirvana. As to what the lens is made out of this is hard to say, the lens mount is chrome plated brass, parts of the lens barrel have a metallic feel, and other parts feel plastic. Is this a problem? I don’t think so. For certain applications metals can be a poor choice and high quality engineering plastics such as ABS make better sense. In fact Sigma makes a big deal out of the use of their Thermally Stable Composite (TSC) which is substantially stronger than conventional polycarbonates while having similar thermal expansion properties to aluminium. Bottom line the 45mm f1.2 feels nice in the hand and is easy on the eye.
Optical Performance
The Olympus m.Zuiko 45mm f1.2 PRO lens is sharp wide open.
Lens sharpness test at f1.2 and f4. Click on the image to see it larger.
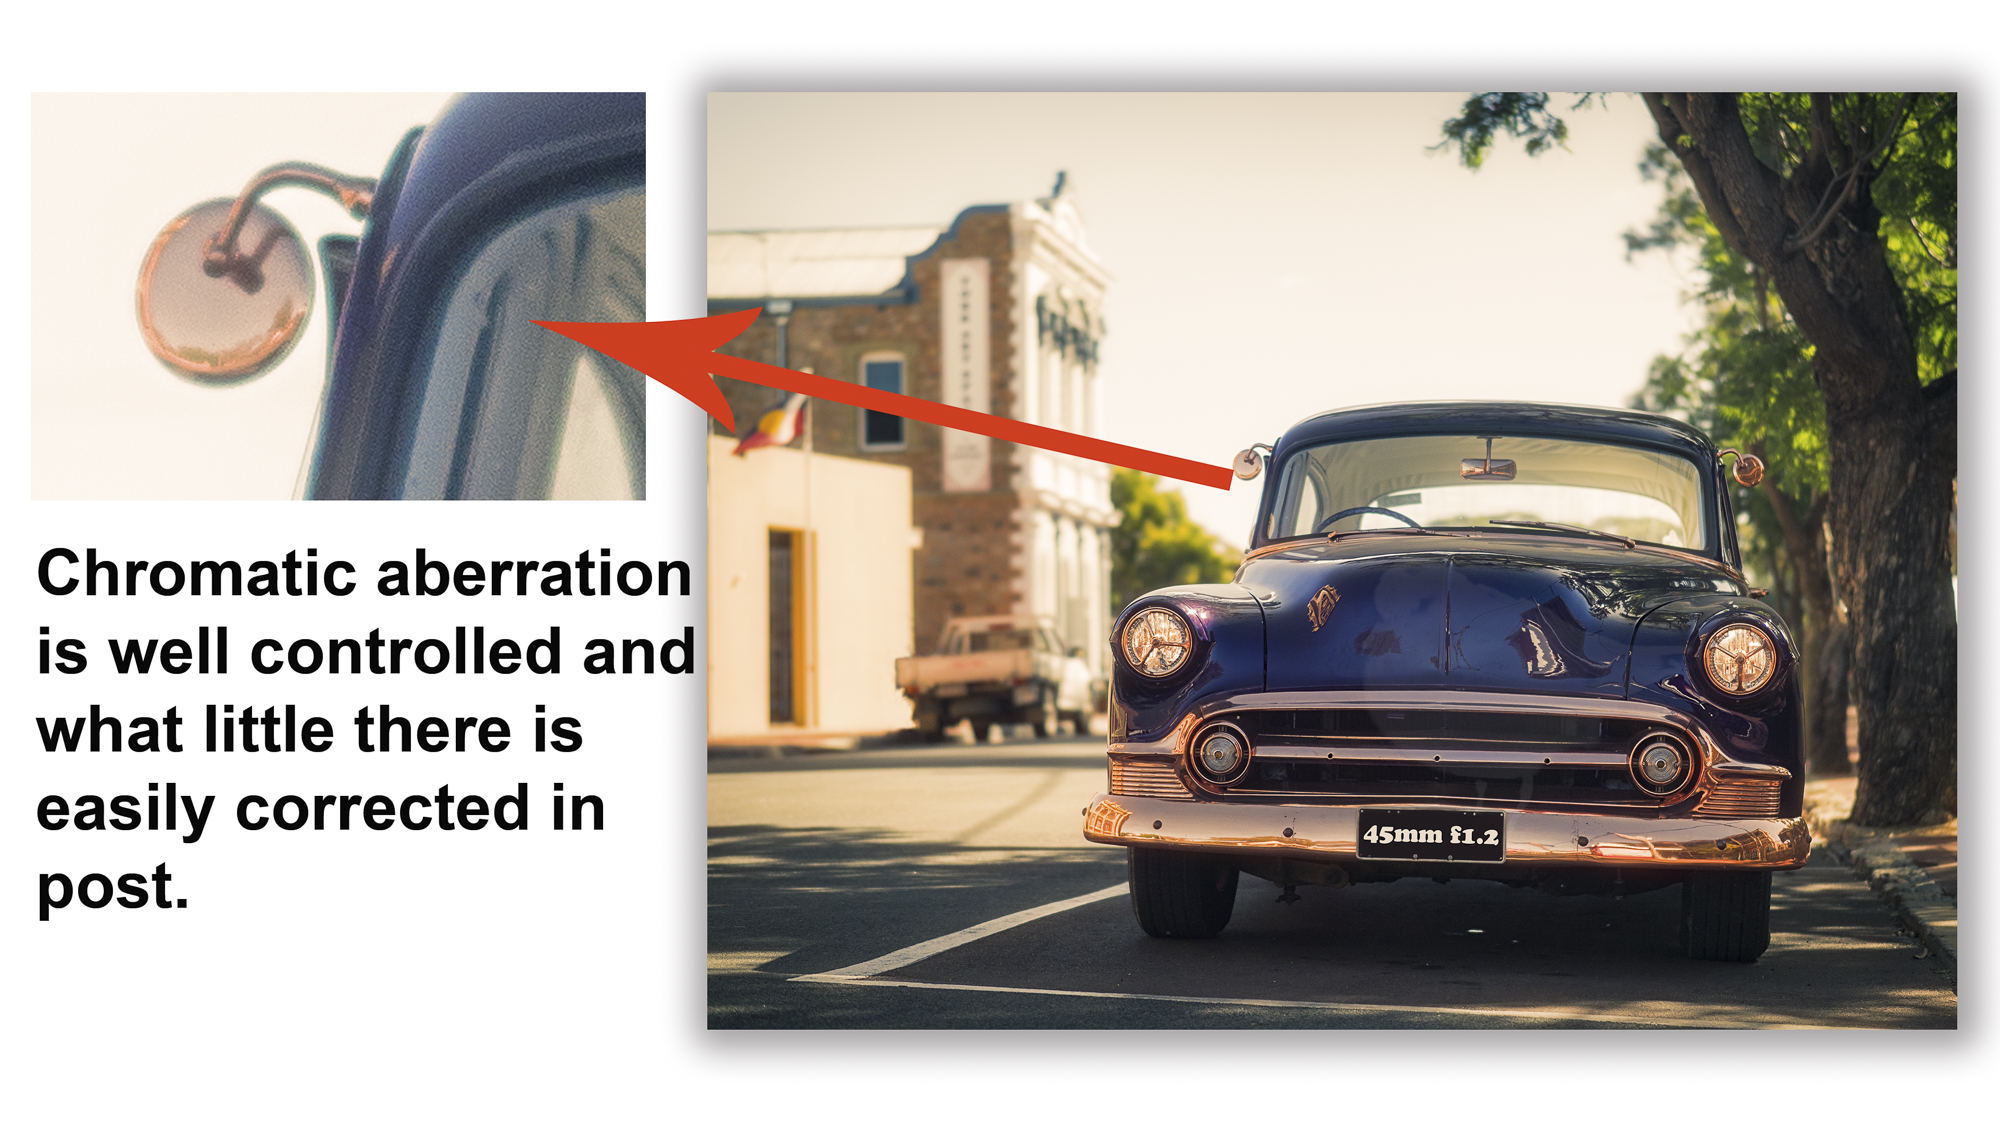
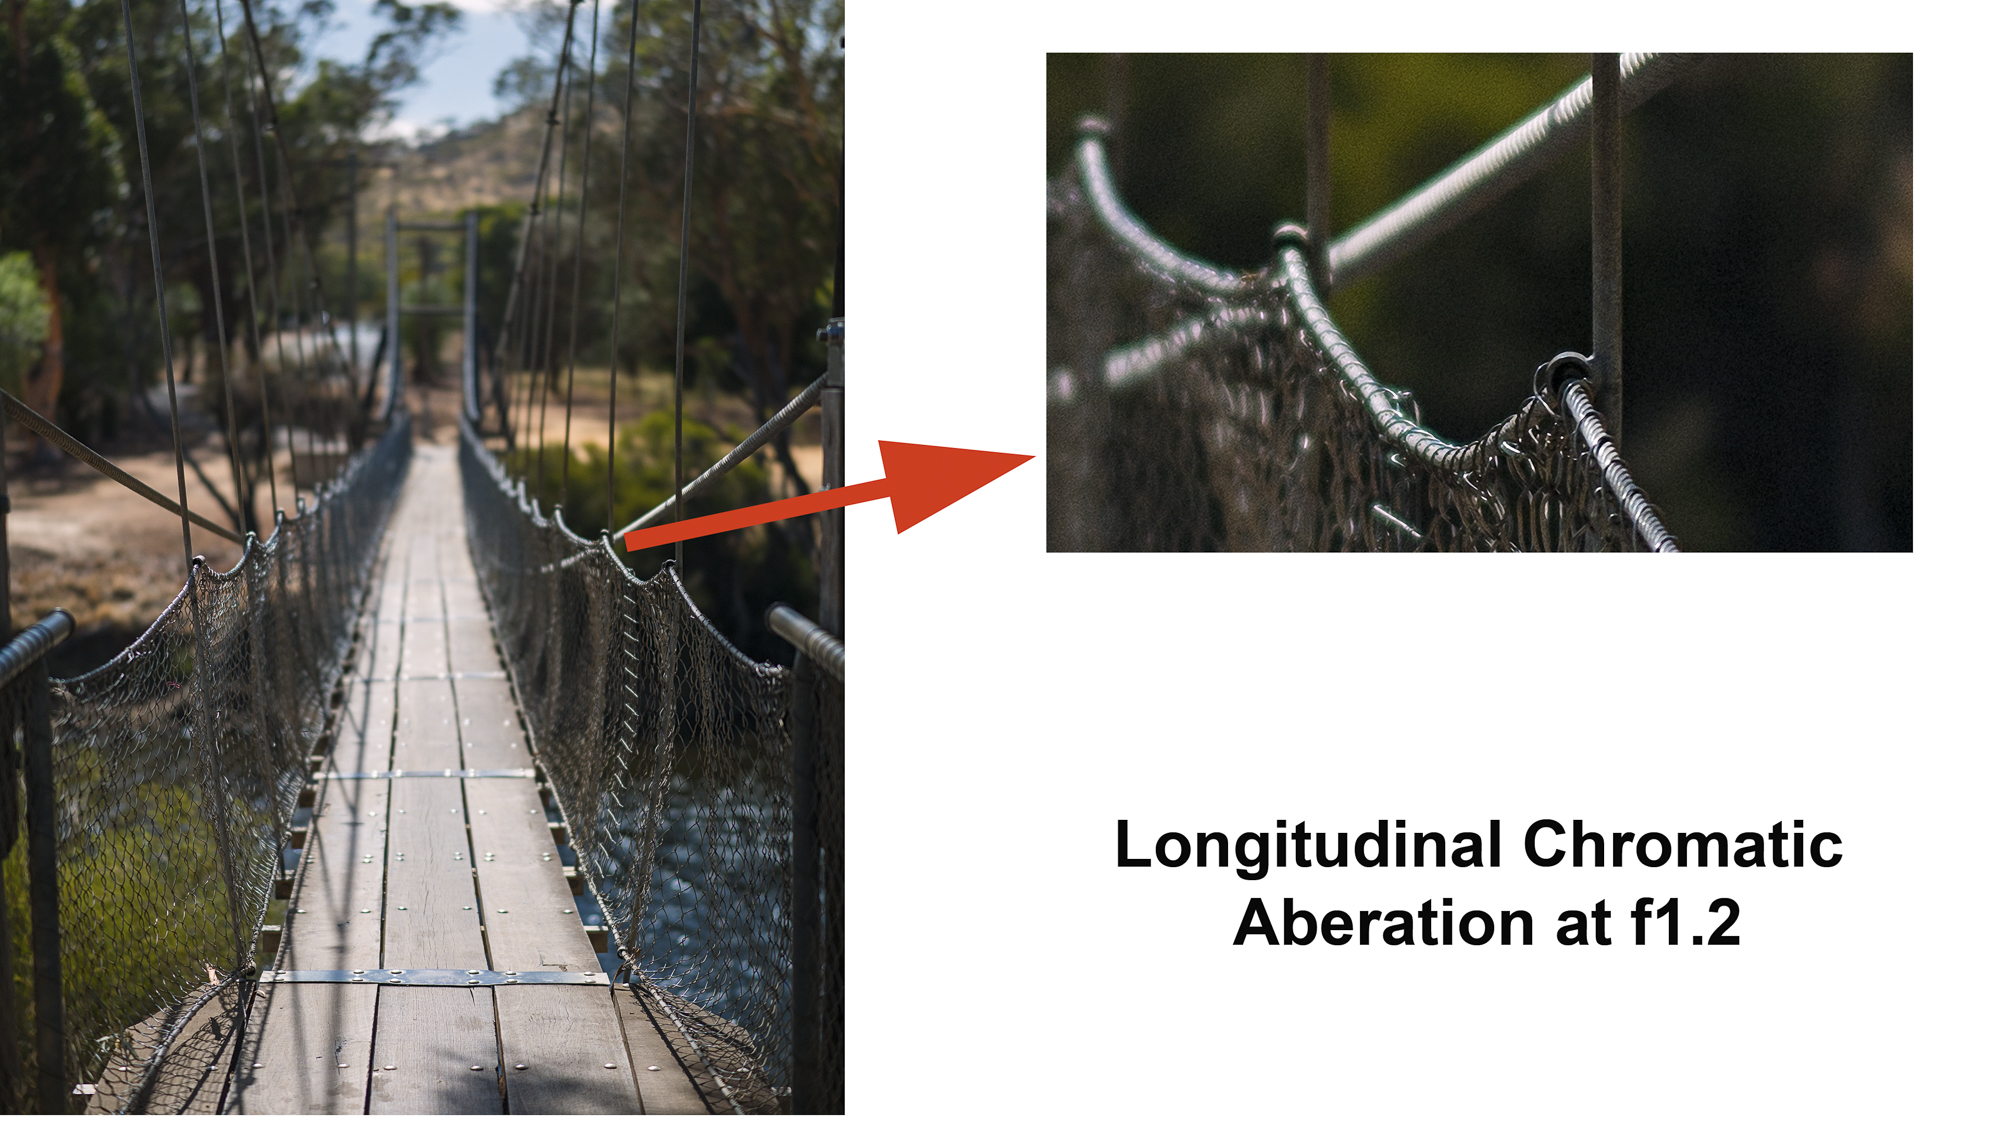
Image sharpness in the centre of the frame wide open is good and reaches its best at f4. The corners wide open are less sharp than the centre, however, by f2.8 the sharpness and contrast improves considerably and the lens reaches optimum sharpness at f4. By f8 the image starts to soften due to diffraction. Vignetting is also present wide open but this disappears at f4. There is a minute amount of pincushion distortion present, but unless you are shooting very demanding architectural work then it is largely unnoticeable. Chromatic aberration is present on high contrast edges, but it is very slight and easily removed in post. Longitudinal chromatic aberration is also present, but it too is very slight and not painfully obvious which is good as it is quite difficult to get rid of in post. All this is managed using firmware corrections. I like to turn these off using RAWTherapee to see how much correction is going on beneath the hood so to speak. The amount of vignetting is greater than the corrected images but it still clears up by f4. The pincushion distortion is also more evident. All in all the firmware corrections plus topnotch lens design make a lens that performs very well.
Chromatic aberration is well controlled and what little there is is easily fixed in post.
Longitudinal Chromatic aberration.
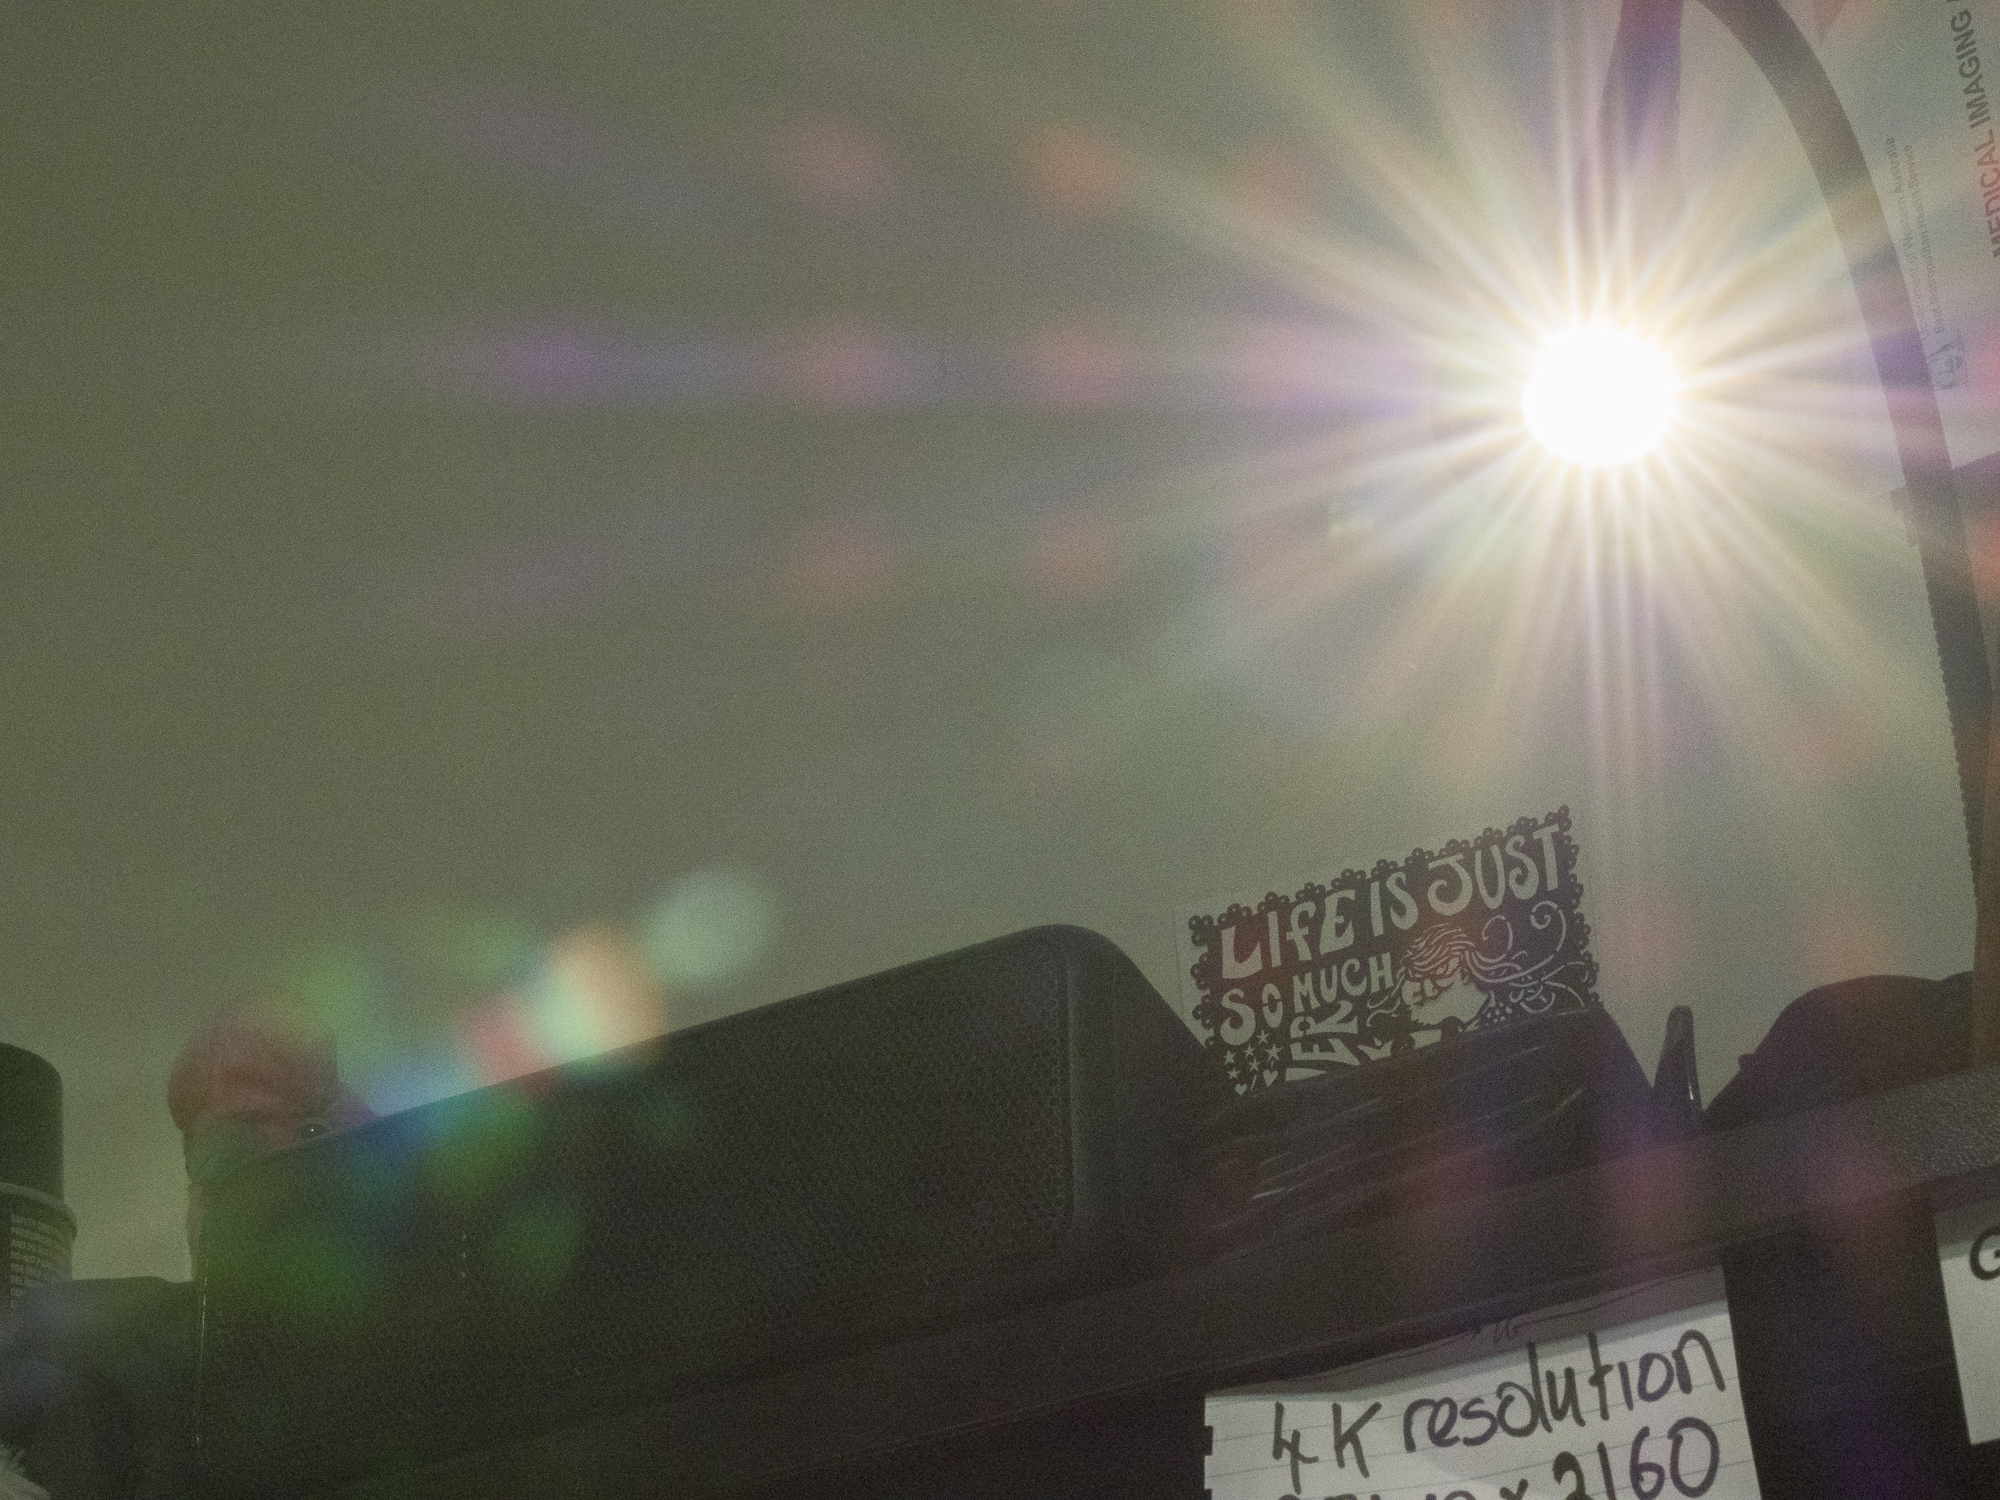
With regard to resistance to lens flare pointing the 45mm f1.2 at a very point light source shows it is quite prone to ghosting flare – images of the lens diaphragm as colourful bright spots. This is more evident on lenses with complex constructions with lots of lens elements. The red blobs in the photo are not lens defects. They are caused by light being reflectedoff of the sensor surface back onto the rear element. As each pixel is reflected it causes a grid pattern. Unfortunately the smaller lens flange distances on mirrorless cameras means this phenomena is more apparent than on a DSLR with their great lens flange distance.
The Olympus 45mm f1.2 is quite prone to flare so it is advisable to use the included lens hood.
The Olympus 45mm f1.2 is quite prone to flare so it is advisable to use the included lens hood. At f16 the sun stars are quite pronounced.
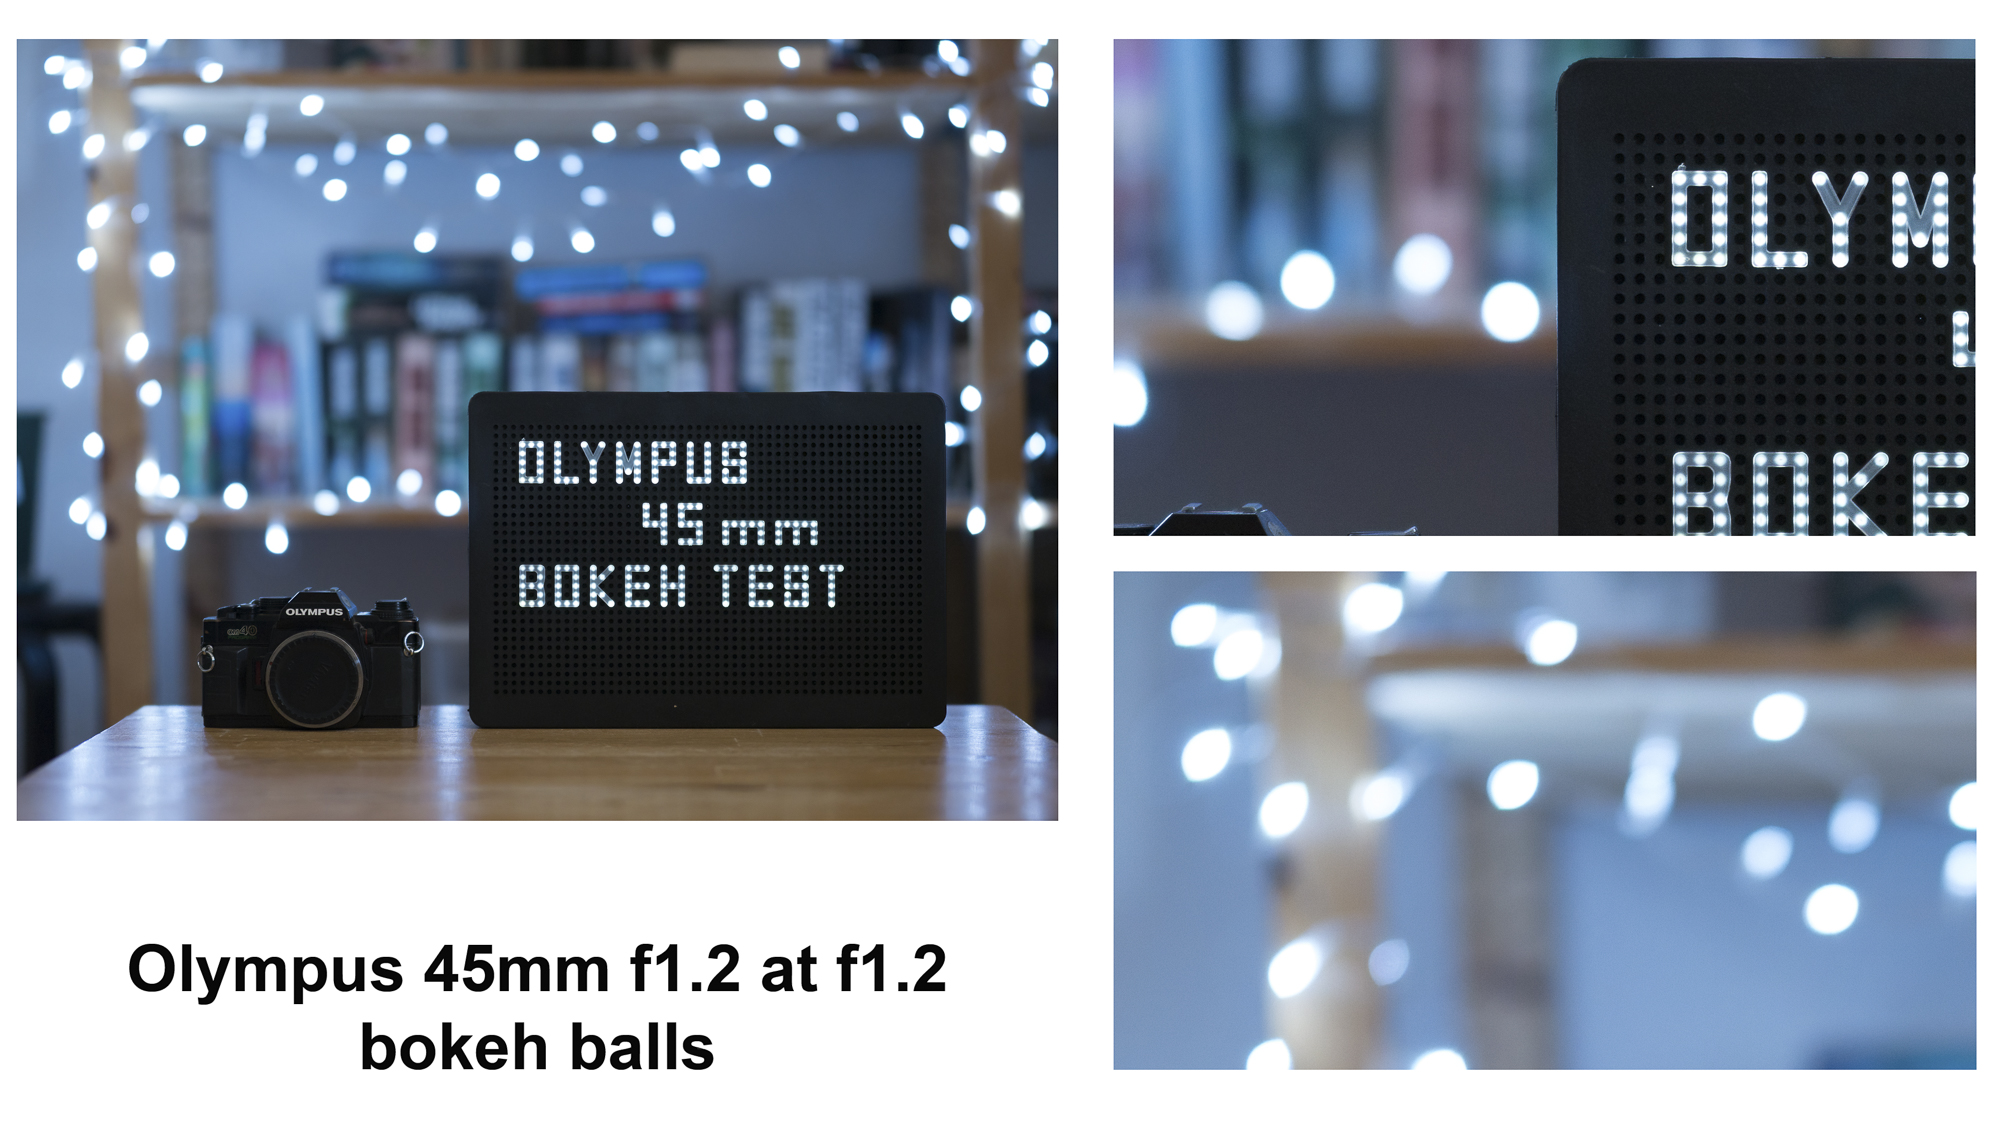
f1.2 bokeh balls test. In the centre of the frame nice round and smooth bokeh balls with no evidence of any onion rings. At the edgeges you can see cats eye shapped balls. Click on the image to see it larger.
Olympus make great claims about the bokeh, or more importantly the feathered bokeh of this lens. Up until the announcement of this line of lenses I’d never heard the term feather bokeh before and to be honest I’m not all that sure about what it is and how that you quantify it. I guess in simple terms Olympus means that edges of the bokeh balls are not harsh and to quantify how feathered they are we’ll have to make some comparisons. At f1.2 the centre of the frame has nice round bokeh balls with no evidence of any onion rings. Onion rings occur with the use of ground aspheric lens elements. Basically the grinding process leaves a series of ridges which can be seen with a defocused point source. The biggest problem with them is that for most people they go unseen, but once seen they can’t be unseen. At the edges of the frame there is cats eye shaped bokeh – this is caused by mechanical vignetting from the lens barrel.At f5.6 I was quite surprised to see star burst effects forming around specular highlights, I was expecting them to start appearing at the f11 mark. By f16 the bokeh balls in the corners have become spherical.
So the question is what to compare the Olympus 45mm f1.2 to? The most obvious contender is the 45mm f1.8. In their advertising blurb for the f1.2 Olympus compare the lens on an Old EM1 mk ii to a full frame DSLR with 85mm lens. Interestingly having made such a bid deal about the bokeh the only comparison is made with weight so I’ve decided to make the comparison using weight and bokeh quality with the Canon EF 50mm f1.8 on a Canon EOS550d. The 50mm lens has an equivalent focal length of 80mm in full frame terms. The nearest full frame equivalent I’ve got on hand is the Cosina Voigtländer 75mm f2.5 Color-Heliar on a Sony A7r2. Finally as I’ve already talked about the Olympus OM Zuiko 50mm f1.4 I’ll add it to the list with it mounted to the Olympus EM 1 mk ii. The older Olympus and the Canon and Voigtländer are also considered classic lens designs.
Olympus OMD EM1 mk ii with Olympus 45mm f1.2 Pro lens
984g
Olympus OMD EM1 mk ii with Olympus 45mm f1.8
737g
Canon EOS550d with Canon EF 50mm f1.8 mk ii
601g
Sony A7r2 with Voigtländer 75mm f2.5 Color-Heliar
932g
Olympus OMD EM1 mk ii with Olympus OM Zuiko 50mm f1.4
980g
So the Olympus 45mm f1.2 combo is the heaviest. Lets look at the bokeh. With the three Olympus lenses I’ll just compare the lenses at widest aperture of the slowest lens. With the other two I’m going take equivalency into account so 45mm f1.2 on the Olympus is roughly equivalent to 50mm f1.8 on the APSC sensor and the Olympus’ f1.2 is equivalent to f2.5 on the full frame sensor.
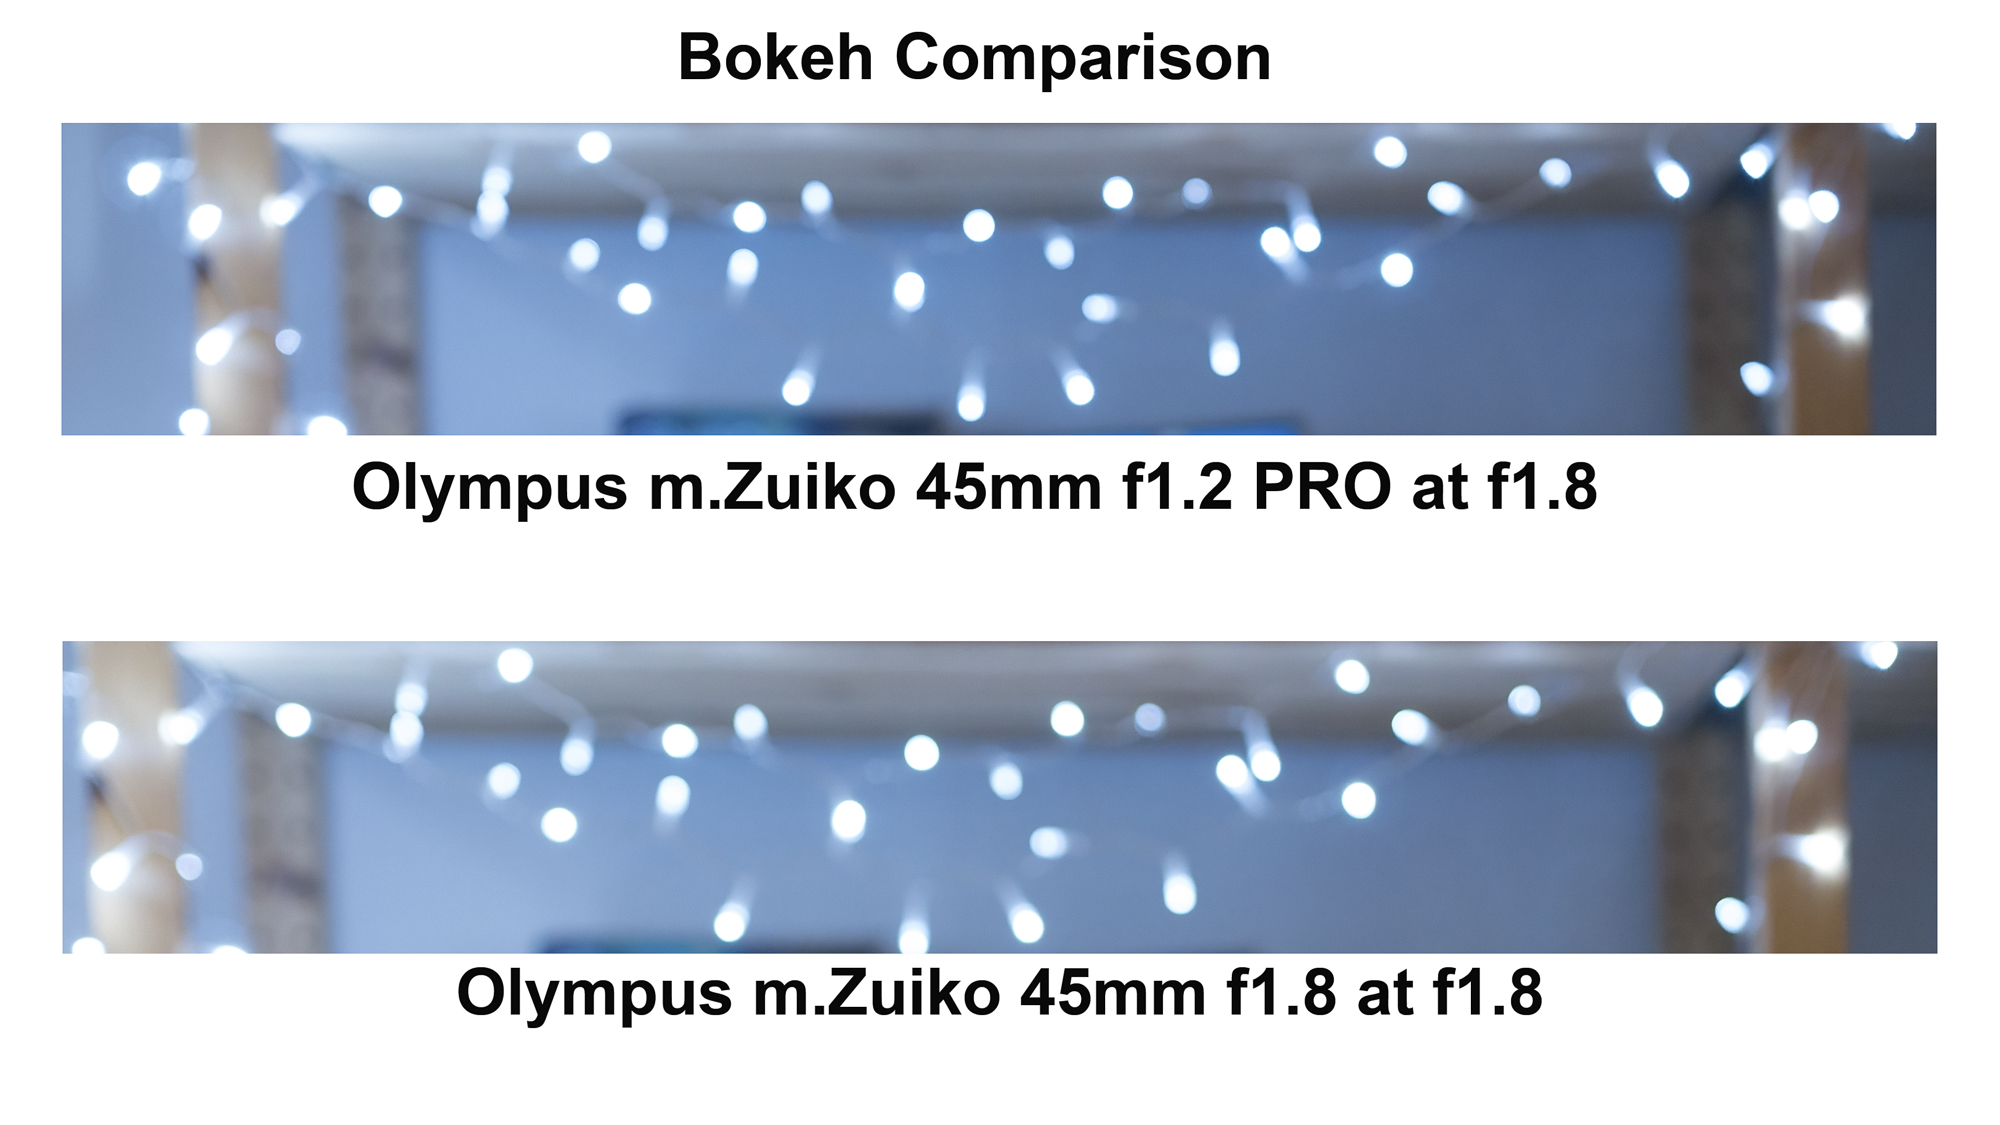
Bokeh comparison between Olympus 45mm f1.2 and the Olympus 45mm f1.8. Click on the image to see it larger.
First cab off the rank is the Olympus m.Zuiko 45mm f1.8 lens. It has an optical construction of 9 elements in 8 groups, weighs in at 116g and has a 37mm filter thread. This little lens is an absolute gem and I use it a lot to do both stills and video product shots. It currently retails for $1300 AUD less than the f1.2. Wide open at f1.8 there is vey little to distinguish it from the more expensive lens at f1.8. So I would have to say unless you absolutely need an aperture of f1.2 then save your money.
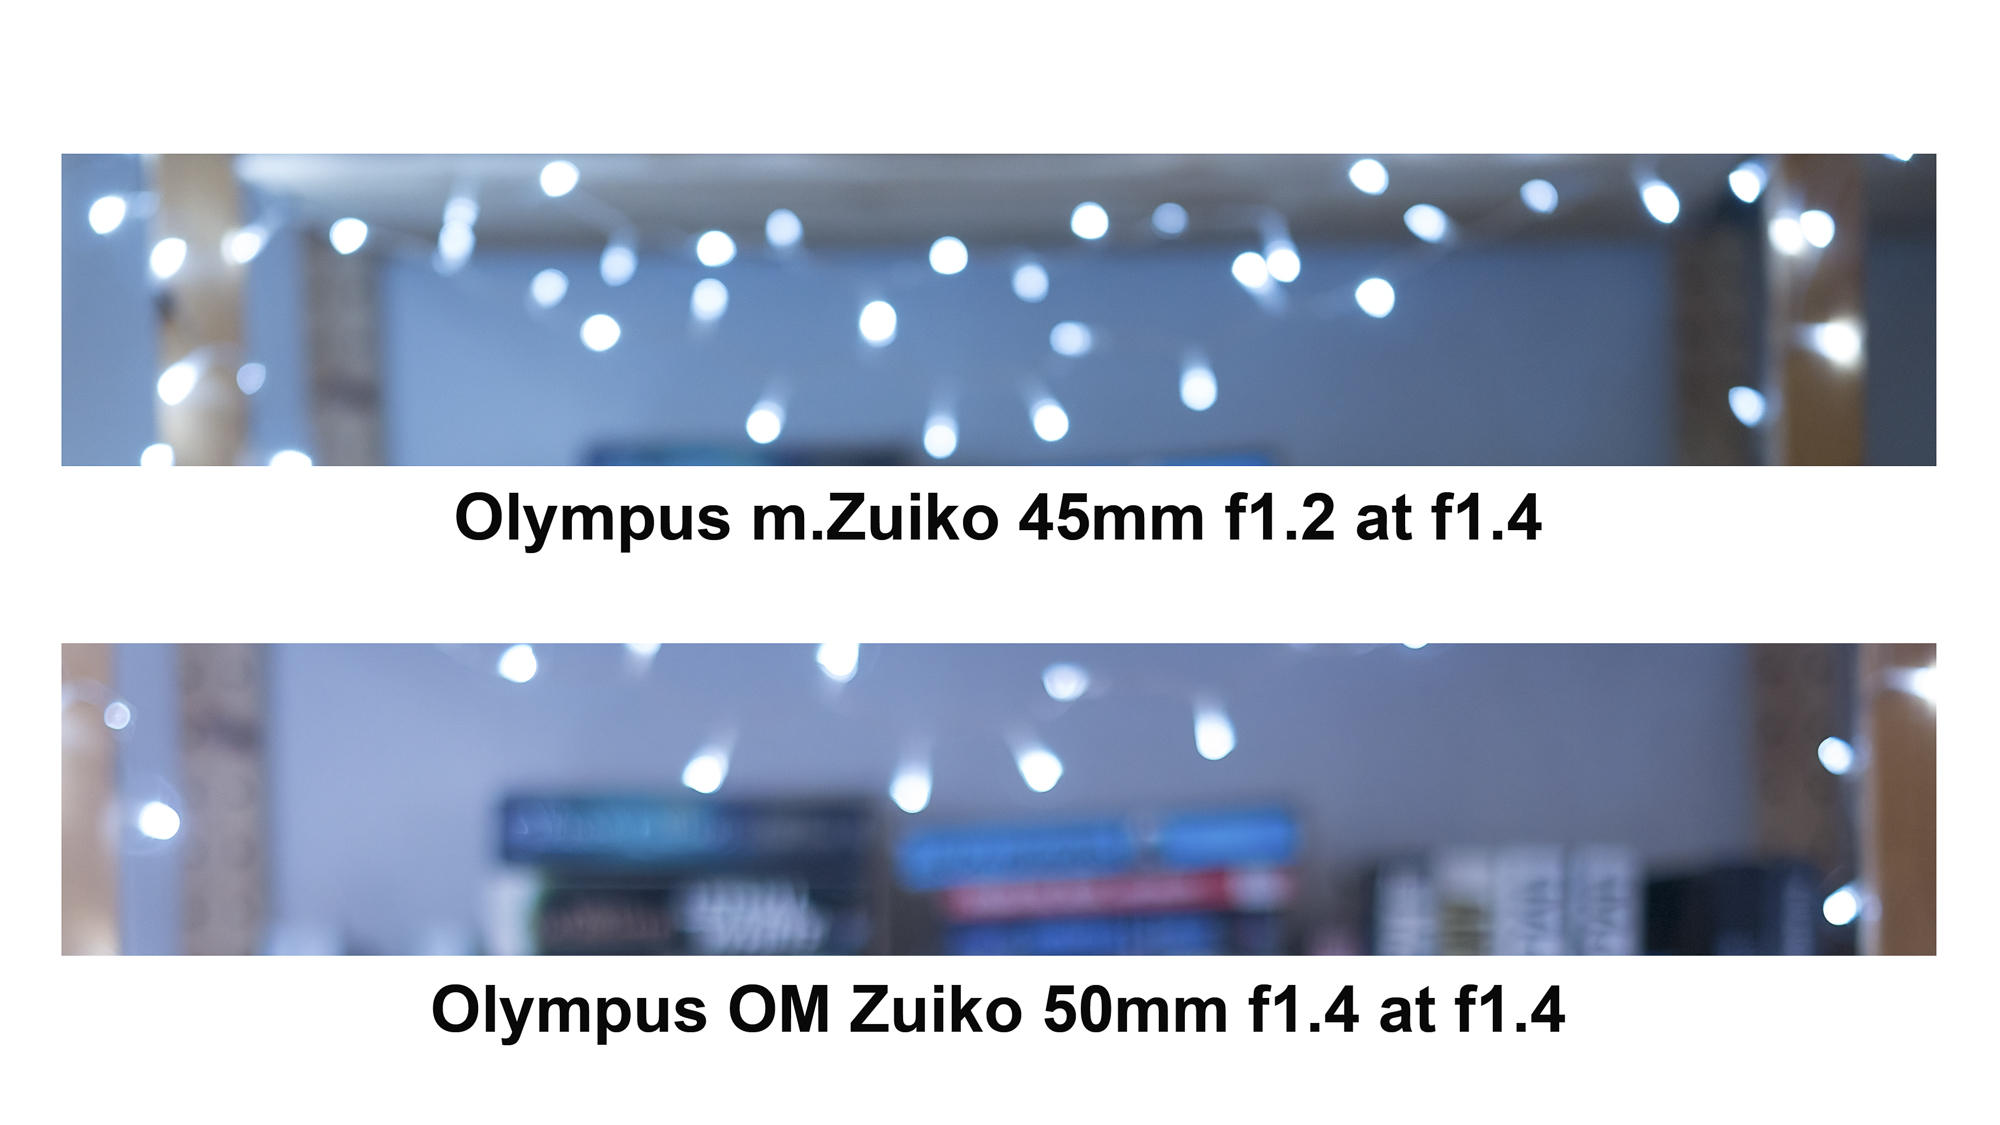
Bokeh comparison between the Olympus 45mm f1.2 and the Olympus OM 50mm f1.4 at f1.4. Click on the image to see it larger.
The Olympus OM Zuiko 50mm f1.4 was introduced way back in 1972 with the original OM1. The lens used here is the revamped version with improved coatings that came out in 1984.The lens construction is very simple with 7 elements in 6 groups and no fancy glass. Wide open it is not the sharpest lens and the bokeh balls are irregularly shaped, but stop it down to f2 and the bokeh is just as good as the 45mm f1.2 at f2. It’s possible to pick this lens up for about $100 on eBay and for $150 you can get it with a film SLR such as an OM1 or 2.
Bokeh comparison between the Olympus 45mm f1.2 at f1.2 and the Canon EF 50mm f1.8 at f1.8. Click on the image to see it larger.
When you put the Canon EF 50mm f1.8 on an APS-C camera such as my EOS550d it has a focal length that is equivalent to 80mm on full frame. It has a simple double-gauss design of 6 elements in 5 groups. This model is the mk ii version which was introduced in 1991 and is sometimes called the “plastic fantastic” because of its plastic body and lens mount. At the edges and in the corners of the frame the Canon has more pronounced cats eye bokeh, but at the centre it is nice and round. Thanks to only having a diaphragm consisting of 5 blades the bokeh becomes polygonal as it is stopped down. No longer in production it can be picked up for around $60 on eBay or you could really push the boat and buy the latest version which retails for $200 AUD.
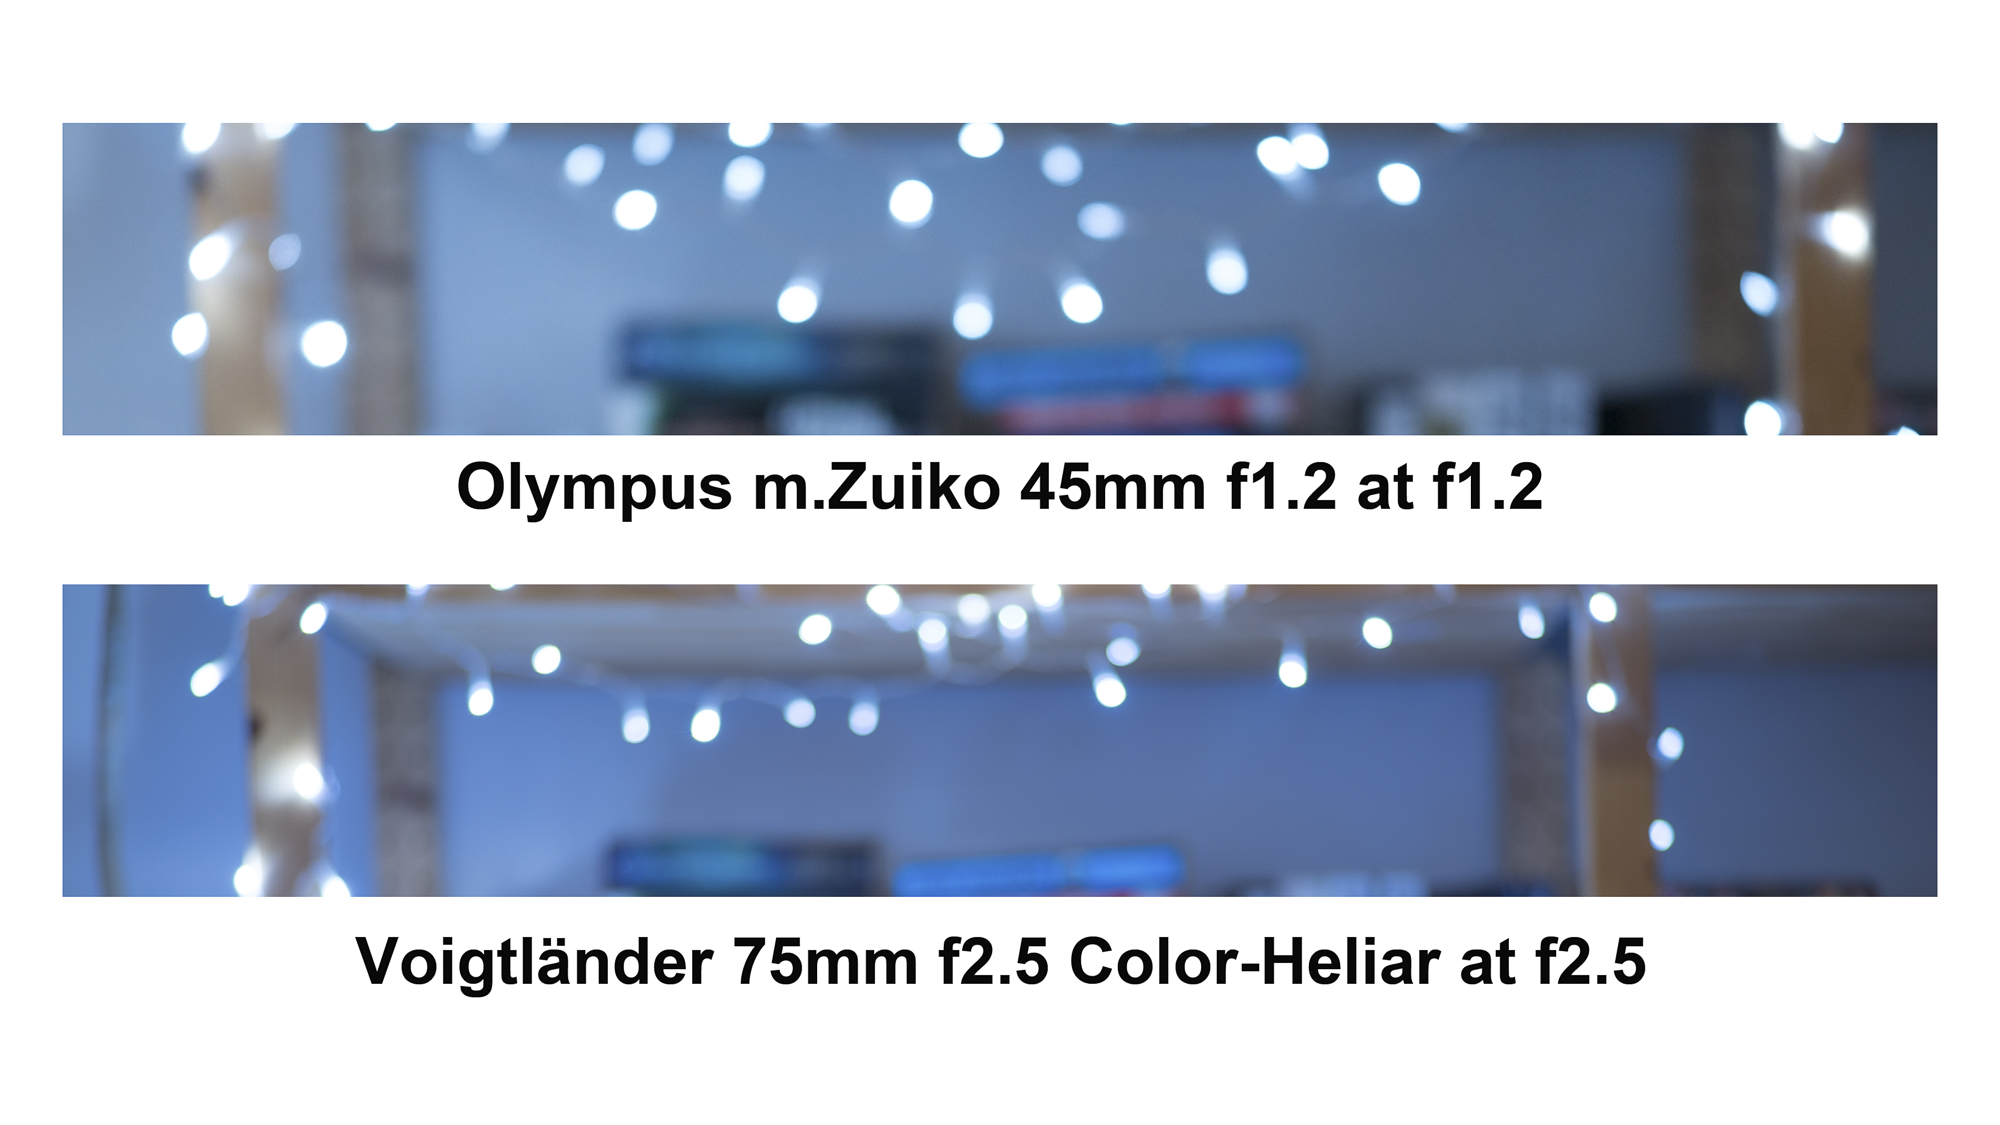
Bokeh comparison between the Olympus 45mm f1.2 at f1.2 and the Voigtländer 75mm f2.5 Color-Heliar at f2.5. Click on the image to see it larger.
The last lens is the Voigtländer 75mm f2.5 Color-Heliar mounted on a full frame body.The original Heliar design was developed in 1900 by Dr. Hans Harting as a symmetrical 5-element variant of the simple anastigmatic and well colour-corrected Cooke triplet. In 1902 the design was revised correcting astigmatism, curvature and coma better than the original design. That new design was asymmetrical six elements in five groups. In 1950 Dr. A.W. Tronnier refined the design even further to produce the Color-Heliar. When Cosina revitalised and relaunched the Voigtländer line they revived the Heliar concept with the 75mm f2.5 Color-Heliar. Cosina wanted to recreate the German optical aesthetic and engineering quality from the 1950s. The lens construction by modern standards is pretty basic with 6 elements in 5 groups and the 10 aperture blades bodes well for nice bokeh. Wide open at f2.5 it has the same depth of field characteristics as the Olympus at f1.2. It is not as sharp as the Olympus wide open but the tonal transitions are very smooth. The bokeh balls are nice and round at the centre, but at the edges and corners they take on the elliptical cats eye shape. This lens is longer in production and for a while it was possible to pick one up for around the $300 mark second hand, but the interest in adapting classic lens to mirrorless cameras has seen prices rise to almost $700.
Auto Focus Performance
the reluctant bull terrier test
Shooting stills the AF is very quick and accurate. Using the reluctant bull terrier test I shot a sequence of 25 frames using continuous autofocusat 10 frames per second with an EM1 mk i which does not have the latest iteration of Olympus’ on sensor phase detection AF. At f4 all the shots were in focus. Switching out the mk i for the mk ii with its better AF systemI shot a 71 frame sequence at f2 at 10 frames a second and only 6 frames were slightly soft.
Shooting video on the Olympus EM 1 mk ii using face tracking the camera and lens responds quickly and smoothly without hesitation. Many m4/3 users shoot video using Panasonics cameras so I put the 45mm f1.2 on my G85 and set it it use face tracking. The results were dismal. There was a lot of hunting, and if and when the camera acquired focus it would quickly drift off. Having had good success with the EM1 I can only put this down to Panasonic’s use of DFD contrast based autofocus and not the lens.
Conclusion
The fantastic little 45mm f1.8 is only $500 new and is just as sharp. The only place where it is found wanting is the maximum aperture.
There is no doubt that the Olympus m.Zuiko 45mm f1.2 PRO lens is a very good lens. It is well built and optically performs very well. The only thing that counts against it is its price when compared to other options. In the last quarter of 2020 Olympus ran a promotion in many parts of the world enabling purchasers of the EM1 to claim a free lens from the f1.2 trinity. If you were one of those and chose the 45mm then you got a great lens and I hope that you really enjoy it. If you are a committed Micro Four Thirds user and were wanting to purchase this lens today at the street price of $1800 I would suggest that your money could be better spent. The fantasticlittle 45mm f1.8 is only $500 new and is just as sharp. The only place where it is found wanting is the maximum aperture. If you are not so wedded to the idea of 45mm but just wanted a fast short telephoto then I’d seriously consider the Sigma 56mm f1.4 which at $750 is great value and a seriously good performer.
If you are just getting into photography and want a camera and lens combo that gives enormous creative control over depth of field then you’ve got to look at full frame cameras ($1800 will get you a new one less if second hand) and pick up an 85mm f1.8 where Canon, Sony and Nikon all have offerings between $600-900 new.
For video the 45mm f1.2 is a nice option as on the right camera it can autofocus extremely well and the the provision of a manual focus clutch that gives hard stops makes it very useful for manual focus pulls. If autofocus isn’t important to you then there are a huge number of older classic f1.2 and f1.4 lenses that can be picked up very cheaply.
Example Images
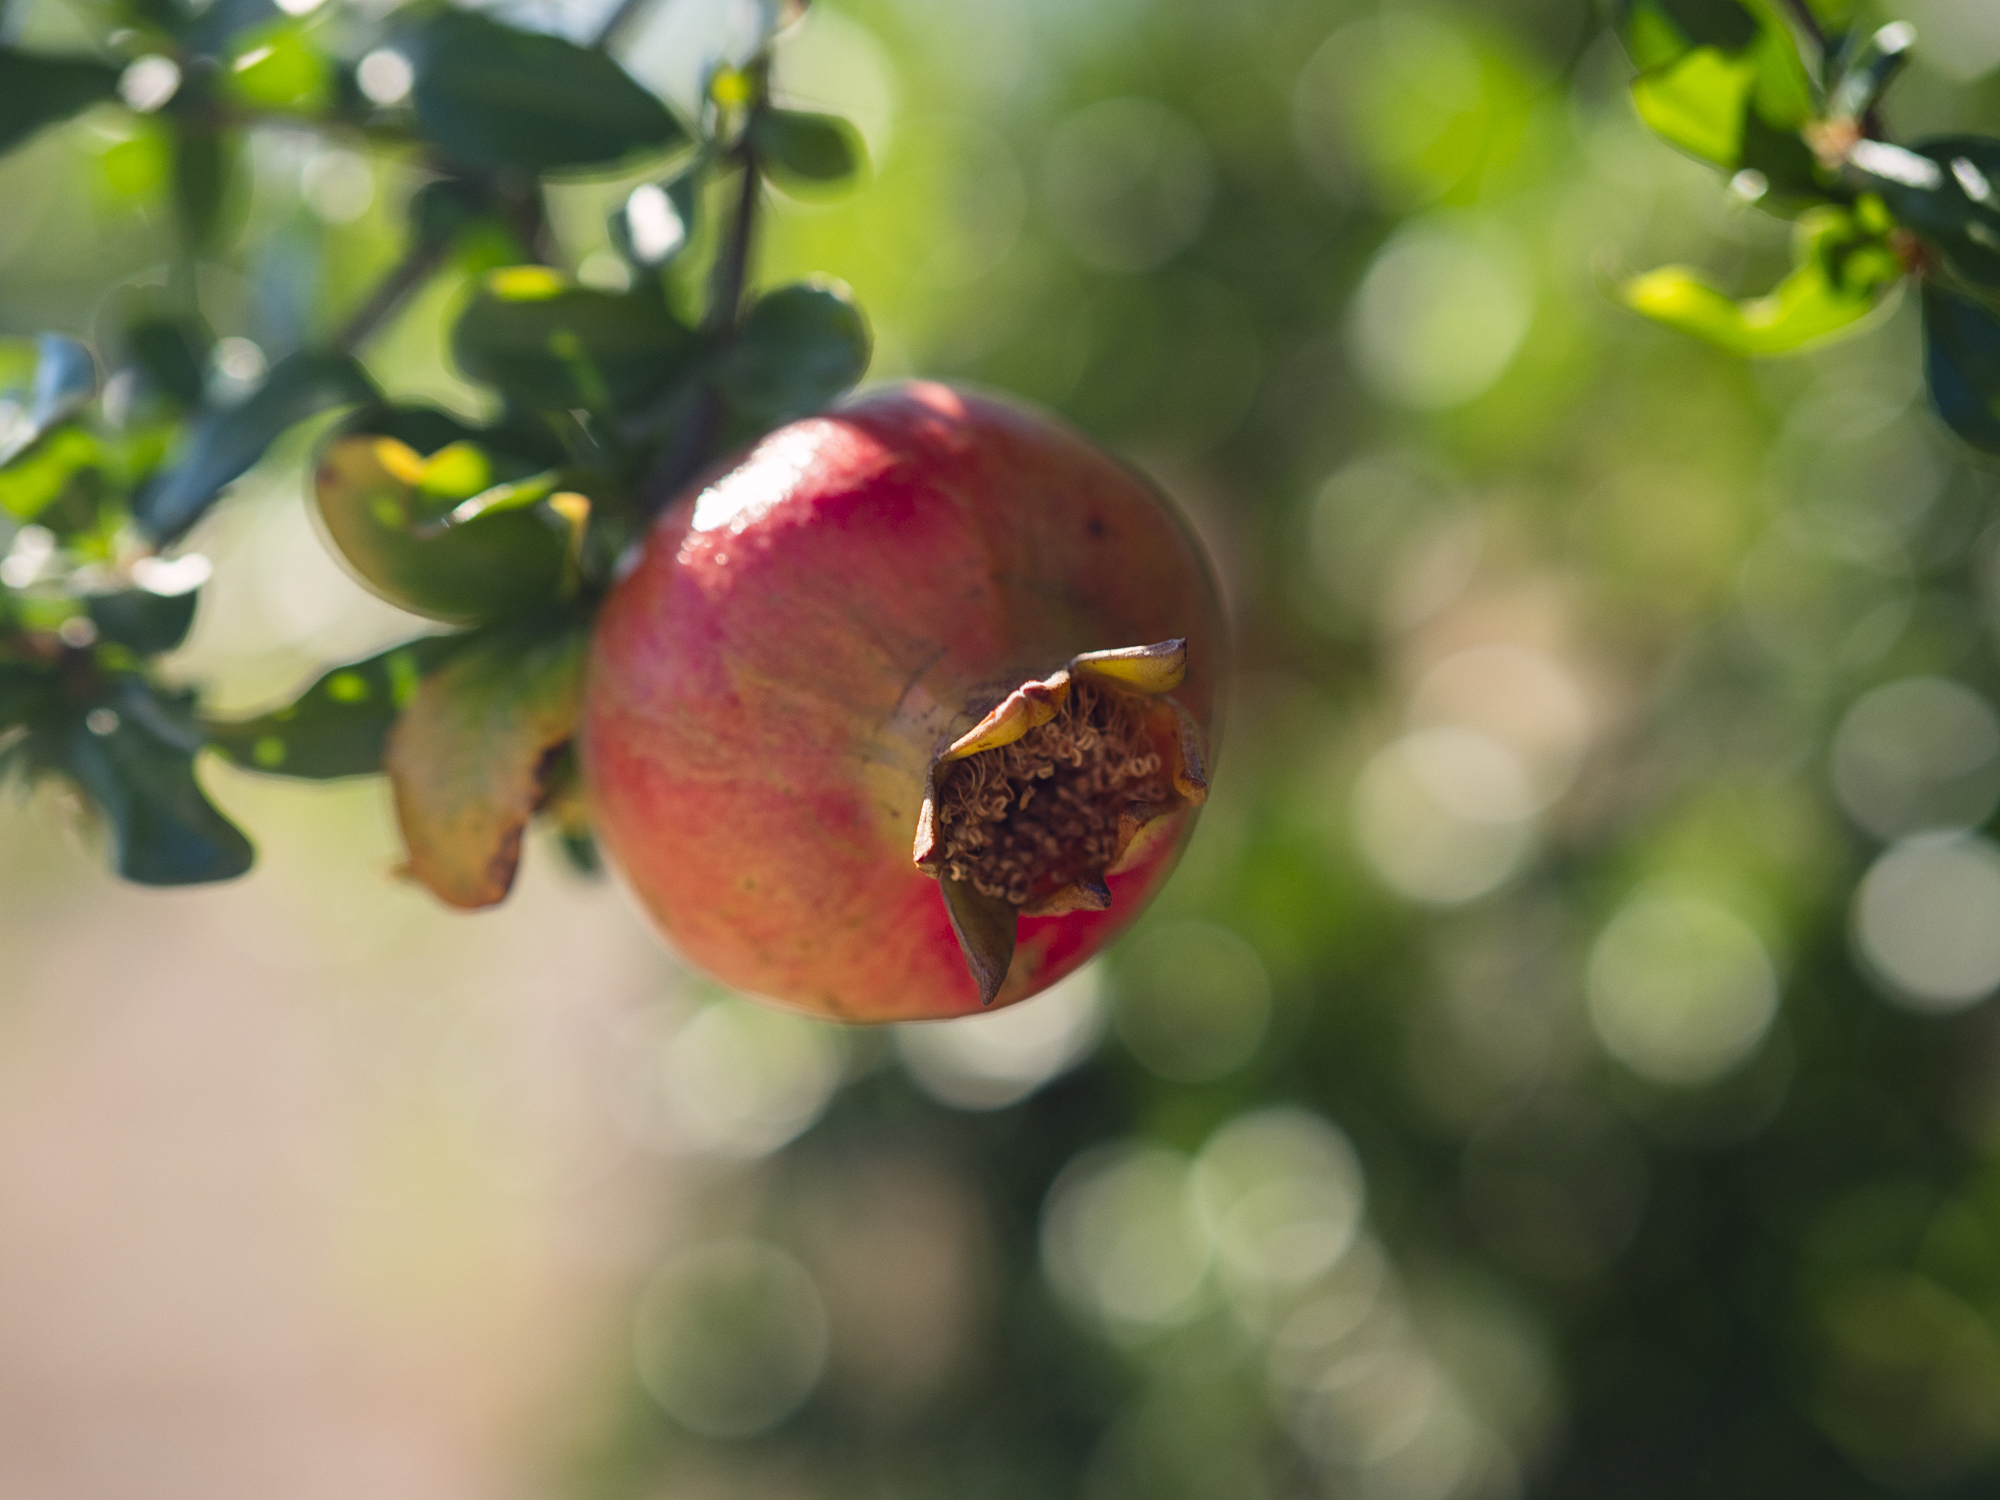
Wide open the Olympus m.Zuiko 45mm f1.2 PRO lens gives a nice please rendition with gentle tonal transitions.
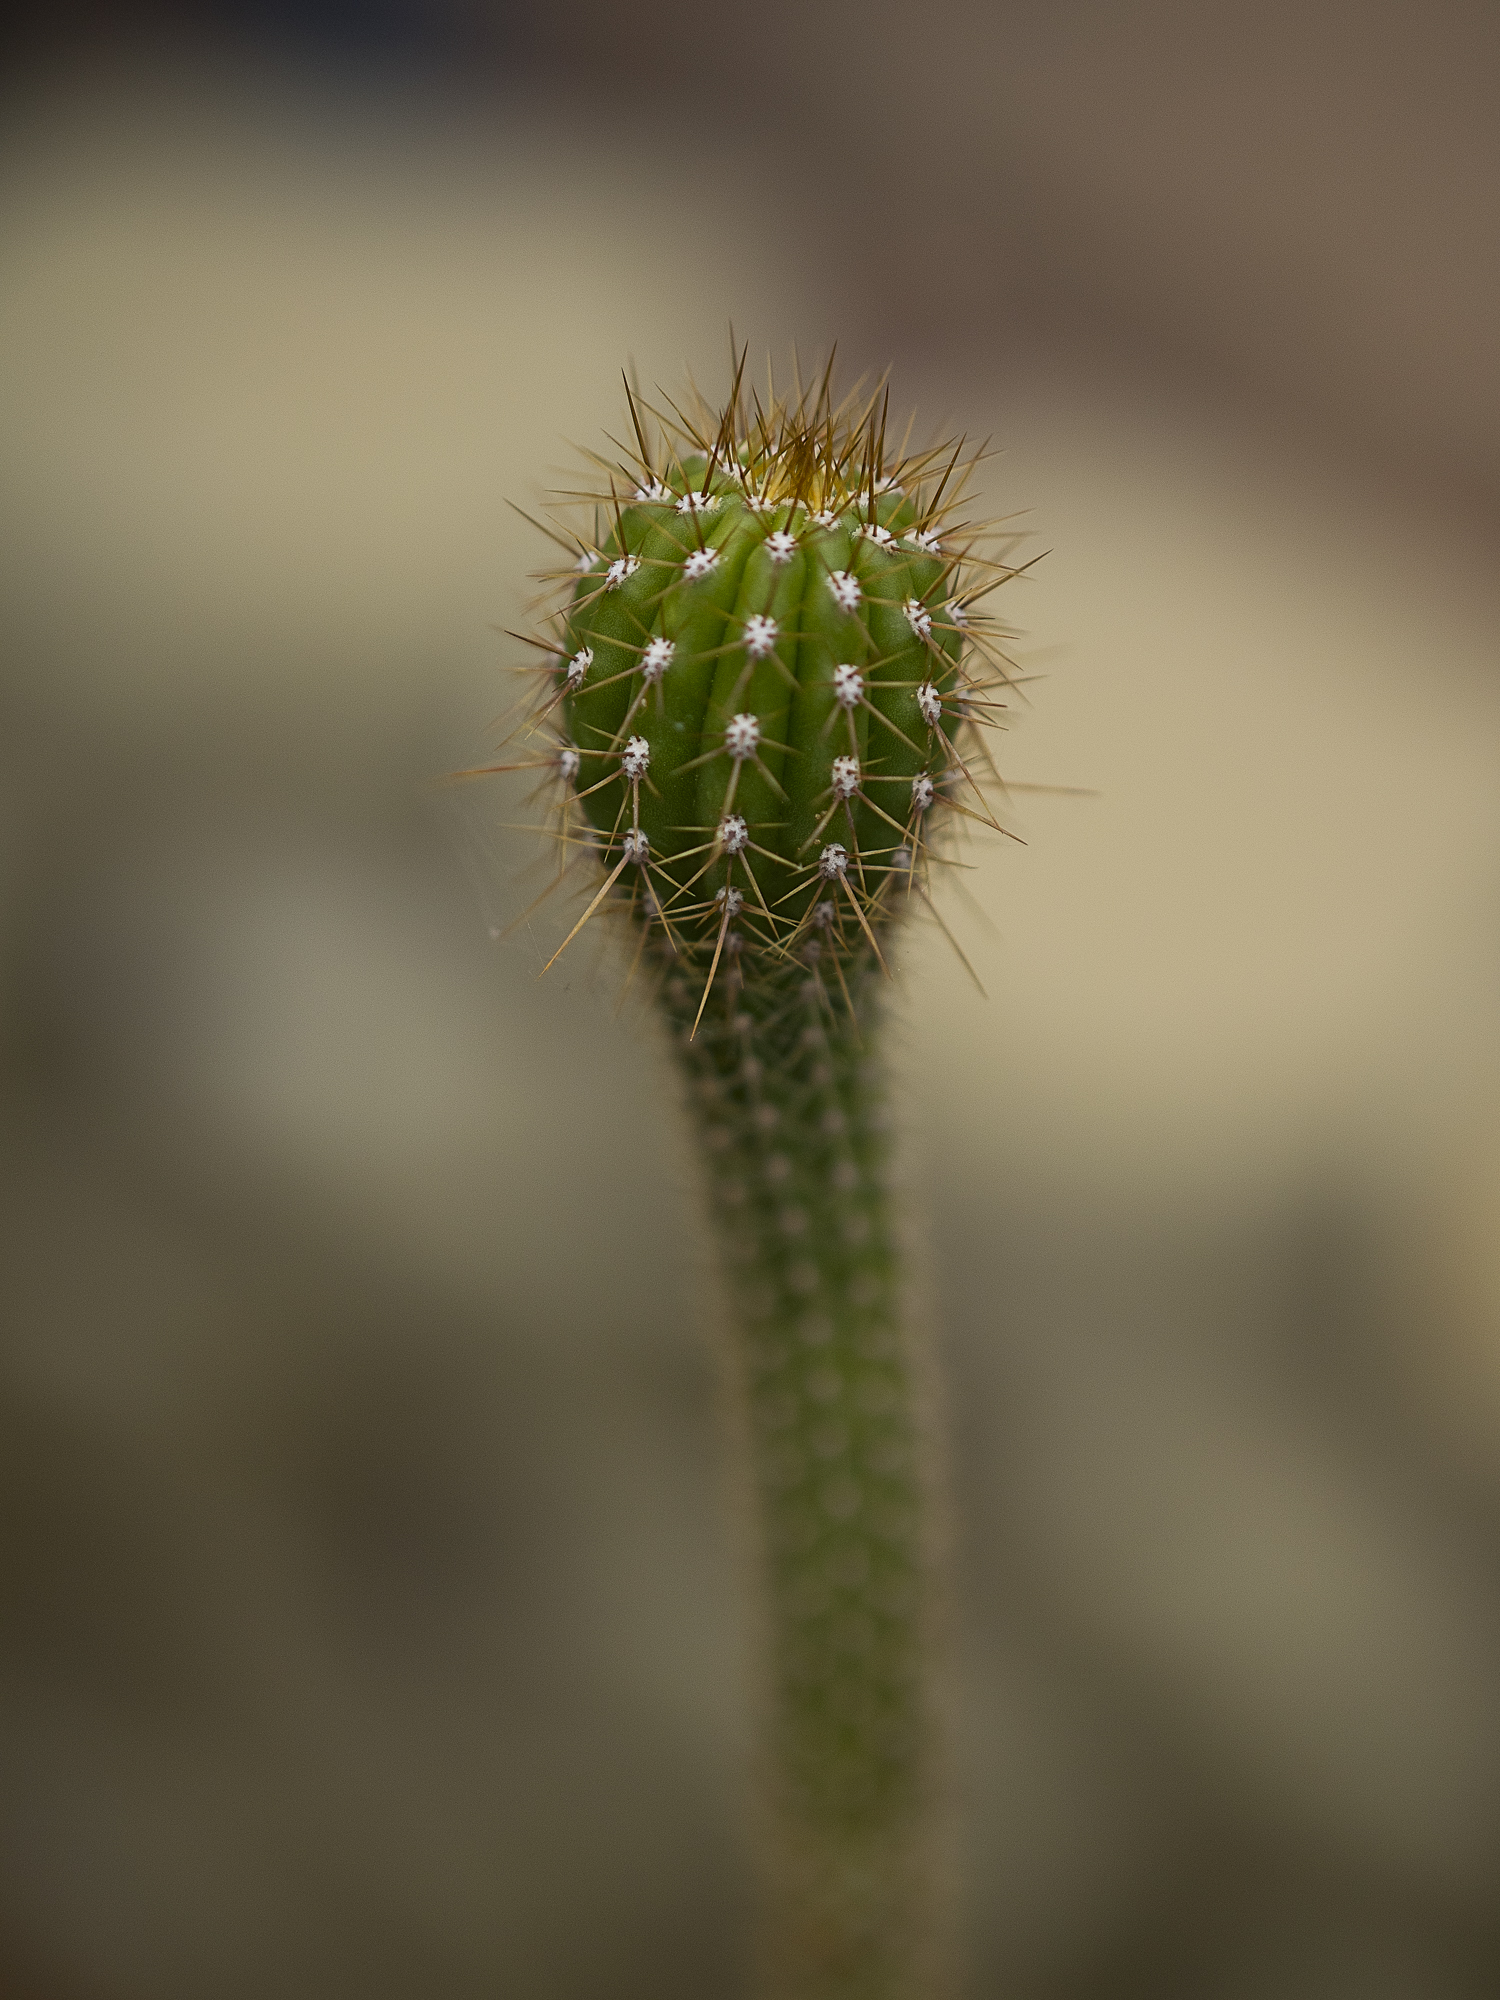
The close focusing capabilities of the Olympus 45mm f1.2 are impressive and couple this with pleasing bokeh it makes for a very nice lens with which to do product photography or still life.
The Olympus 45mm f1.2 also makes for a good lens for equine portraits.
The Olympus FC-WR flash controller mounted on an Olympus OMD EM1 mark 2 and the FR-WR connected to an Olympus FL-600R speedlight.
When Olympus launched their wireless radio controlled flash system there were howls of derision from the combined blogosphere and photographic forums. Mainly it went along the lines of Olympus had lost the plot in charging so much for something that others were offering so cheaply.If all you want to do is take portraits with a couple of off camera speedlights then there maybe something to this argument. Let’s make a quick comparison.
So that is quite some difference – $794 AUD is a lot of money. Then the Godox fans will tell that the system is much more flexible because if you change camera system all you have to do is change the wireless trigger to one that is dedicated to your new system and you can keep using your existing speedlights. On the face of it it this quite a compelling argument. But this really doesn’t tell the whole story as it assumes that you have no existing flash equipment and that all you want to do is shoot basic lighting set ups with either TTL or full manual control. Now a lot of people who are attracted to Olympus cameras aren’t just attracted by the small size of micro four thirds but also by the advanced features that the cameras have such as focus stacking, keystone compensation, High Res Shot Mode, Live Bulb, Live Time, Live Composite, multi exposure, art filters, picture modes, and interval shooting. Plus Godox doesn’t offer a TTL enabled flash such as the Olympus Twin Flash STF-8 for macro and close up photography.
Using the Olympus STF-8 close up flash as part of a multi flash set up controlled by the Olympus FR-WR and FC-WR.
Regular readers will know that I do a lot of wildflower photography, product shots and the occasional portrait all using flash. I realised I wanted to use more complex lighting arrangements and so I decided to put together a system based around the existing flash units I already had – an Olympus FL-600R, an Olympus STF-8, 2 Metz 44AF-1’s, and a Metz 64AF-1. To that end I bought an Olympus FC-WR wireless commander and three Olympus FR-WR Wireless Radio Flash Receivers ($285 AUD each). Still not a super cheap option, but one that gives me a lot of scope. Now when I started this because the system was not well received there were next to no reviews of it and I didn’t know if everything I had, particularly the Metz units would work. Also I wanted to know whether they would also work with my Panasonic G85. So this was a real voyage of discovery
As I progressed with this I realised that I didn’t just want to write a review, but that I’d also say how to use the equipment in various modes across both Olympus and Panasonic cameras using third party flashguns so that prospective users can find all this information out without having to take a punt like I did. As usual I’ve provided the information in both video and written formats.
So with all that preliminary guff stated (phew!!) lets dig in by looking at the Commander and Receivers themselves first.
FC-WR Commander
Specifications
Maximum communication distance
Approx. 30 m
Frequency
2.4 GHz band
Number of channels
15 (in the commander mode; with automatic channel setting function)
Number of groups
3; maximum number of flash units; unlimited
Flash control modes
TTL / MANUAL / FP TTL / FP MANUAL / Off
Flash compensation
±5 EV (Increment: 1/3 EV or 1/2 EV)
Manual flash power settings
From 1/1 to 1/128 (Increment: 1/3 EV or 1/2 EV)
Power supply
AAA alkaline dry-cell batteries x 2 / AAA NiMH batteries x 2
Continuous usage duration
Approx. 6.4 hours (when using AAA alkaline dry-cell batteries)
Operable temperature / humidity
From -10 to 40℃ (14 to 104°F) / From 30 to 90%
Dimensions
Approx. 59.5 (W) x 51.0 (H) x 67.4 (D) mm
Weight
Approx. 73 g (excluding batteries)
Firstly the WR in designation is Olympus speak for the fact that the commander has a degree of weather resistance. This is a huge positive for me as I shoot a lot of stuff outside in all weathers. Olympus doesn’t specify the degree of water resistance, but says the unit will operate in temperatures ranging from -10 to 40ºC and humidity up to 90%. I didn’t throw it in a bucket of water but I have used it out in the rain on several occasions with no functional problems, and when I opened up the battery compartment it was dry so that’s all good.
The FC-WR uses AAA batteries. This was a bit of a disappointment and I would have liked AA as it means I only have to carry one type of battery and AAs last longer. However in practice I’m still using the first set of AAAs, and I suppose the use of them keeps the size down.
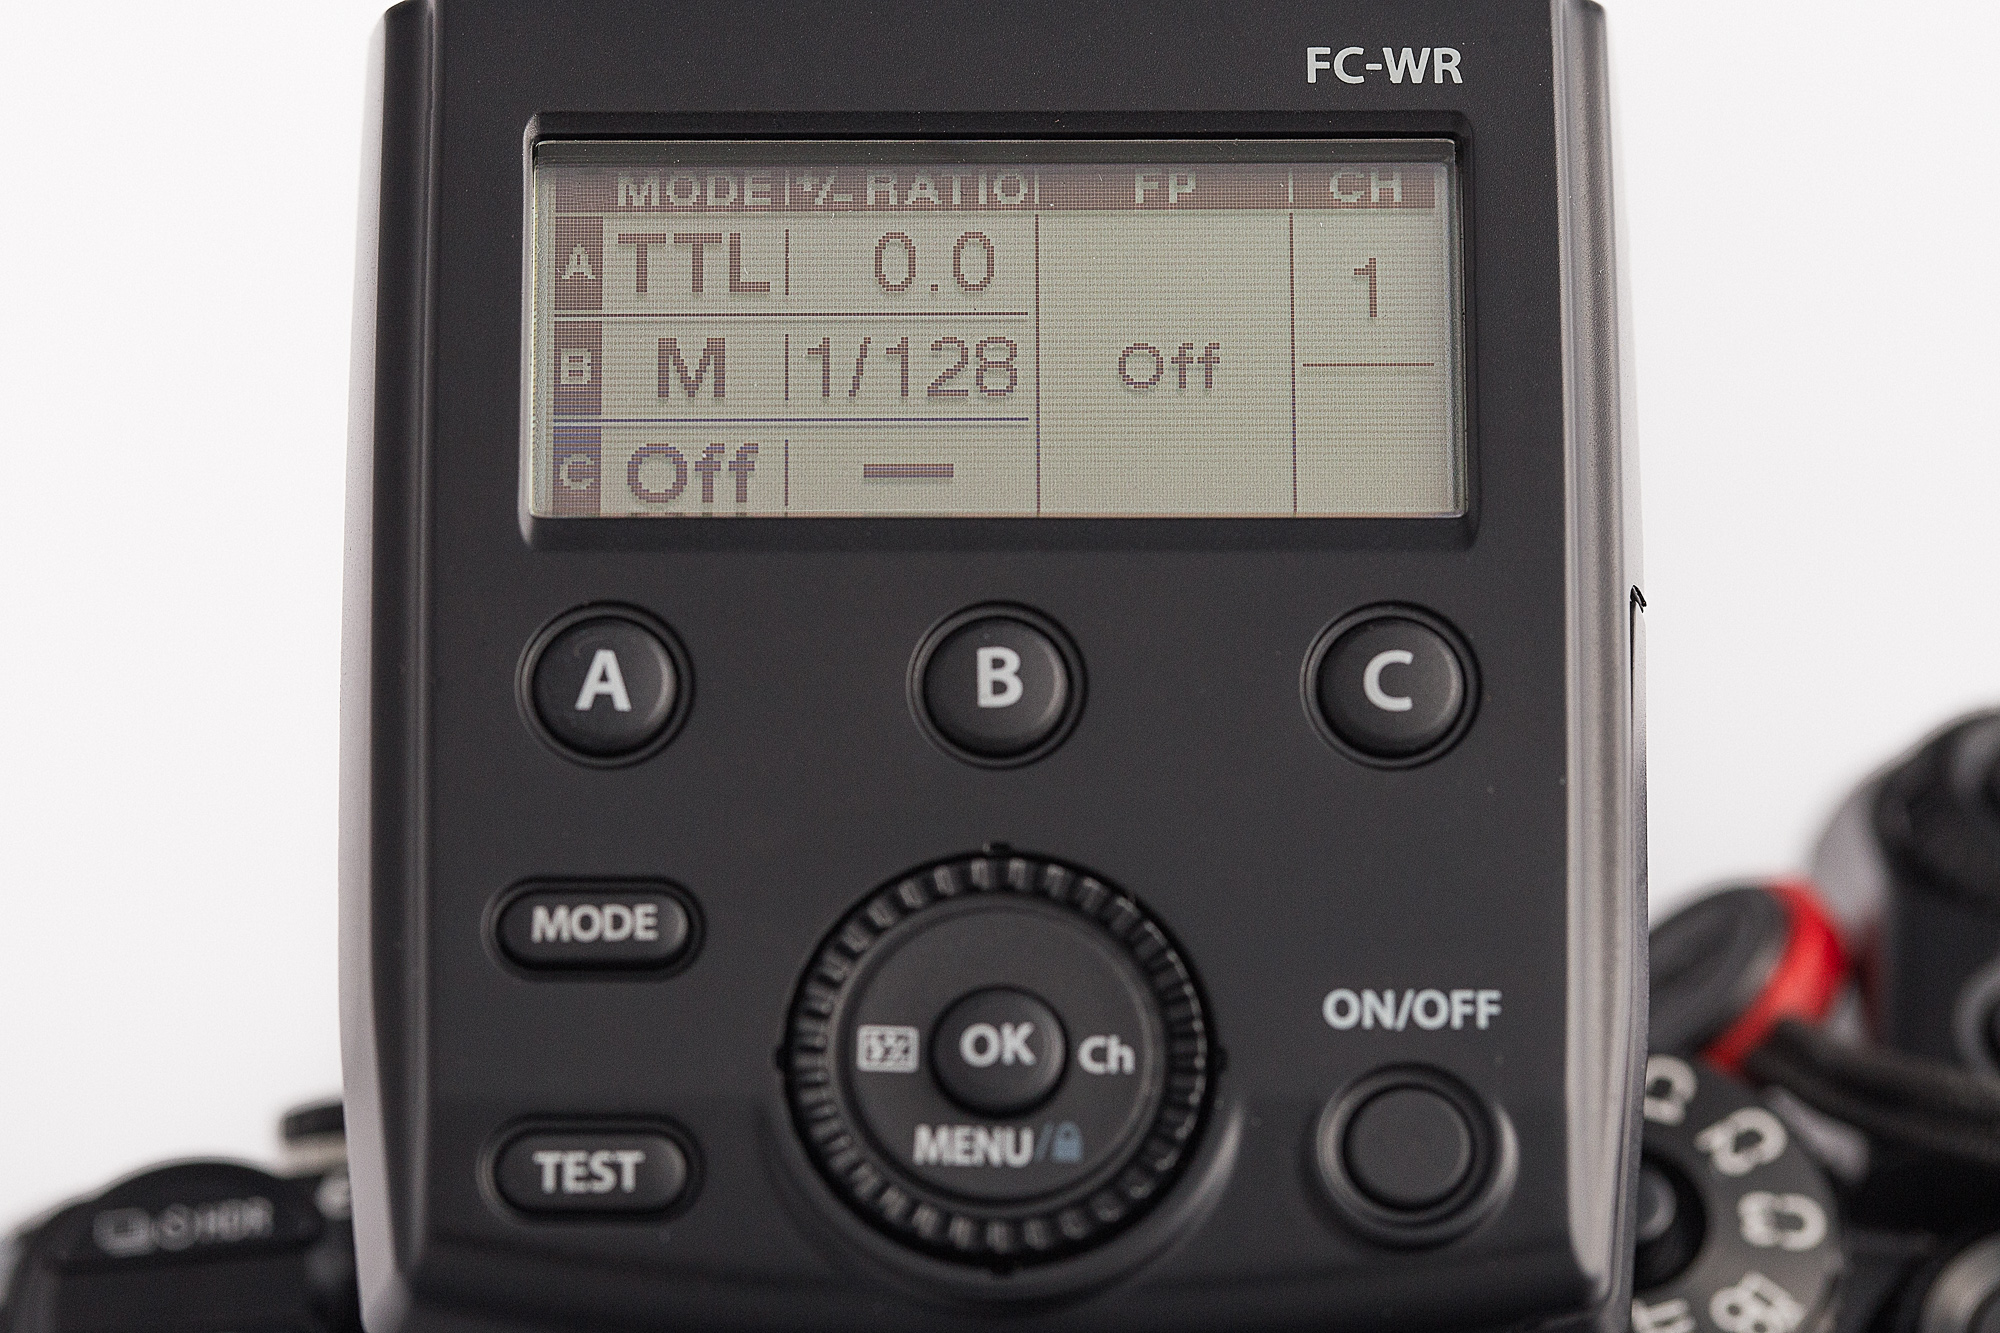
Olympus FC-WR, showing the information panel and the various controls.
Physically the FC-WR is made of sturdy plastic which doesn’t creak or flex if you give it a squeeze. The door to the batter compartment is on a sprung hinge and slides to lock and open. It fits well and there is some initial resistance to moving so there won’t be any accidental opening. On the base is a locking hotshot with the standard m4/3 pins providing electrical contact. On the to is a large LCD screen which gives all the necessary info and is backlit.Underneath that are three buttons – one each for the the three groups. Then there is a mode button, a test button, a dial and rocker switch surrounding the OK button and finally the on/off button. A nice touch is that if you turn off your camera the FC-WR automatically switches off, and if you restart your camera within 10 minutes it will automatically switch back on. Any longer and you have to press the on/off button.
To use it is simplicity itself. First select the group or flashgun you want to control, press the button followed by the mode button. Select between TTL, manual or off. Use the right side rocker switch to move to the +/- ratio to select either flash compensation for TTL mode or the power levels for manual mode. Another press of the rocker switch and you can select whether you want high speed flash sync or FP mode in Olympus speak. A final press of the rocker switch lets you select the channel that you want all this to occur on.
AAA alkaline dry-cell batteries x 2 / AAA NiMH batteries x 2
Continuous usage duration
Approx. 6.4 hours (when using AAA alkaline dry-cell batteries)
Operable temperature / humidity
From -10 to 40℃ (14 to 104°F) / From 30 to 90%
Dimensions
Approx. 59.1 (W) x 46.1 (H) x 51.0 (D) mm
Weight
Approx. 75 g (excluding batteries)
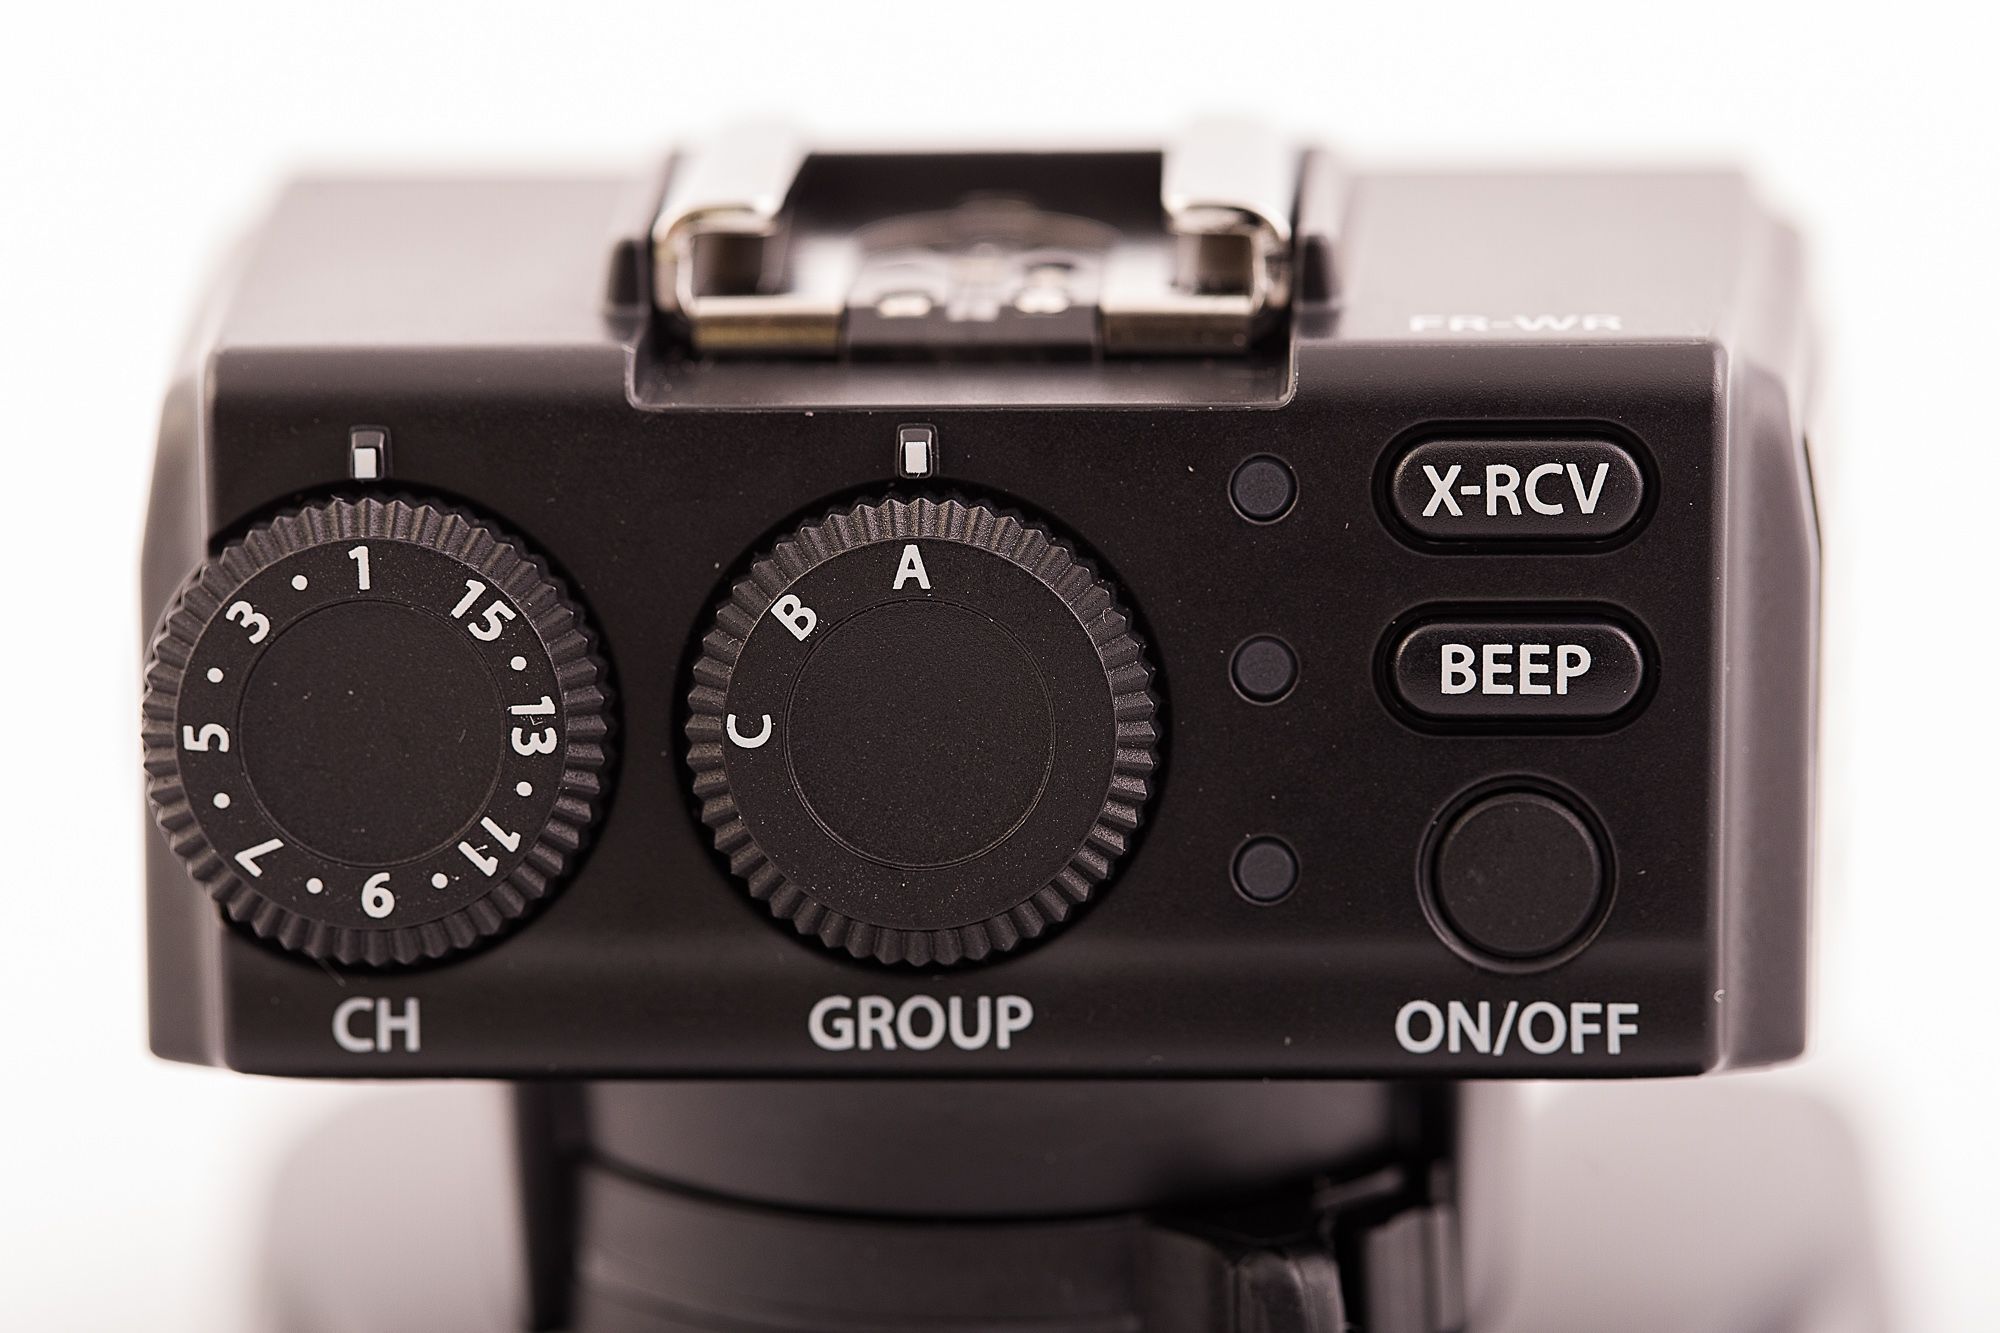
Olympus FR-WR showing the controls on the rear of the unit.
In terms of construction what I said about the the commander applies here. On top of the receiver is a standard four thirds protocol hot shoe. On the base there is a locking cold shoe with 1/4 20 mount. On the left side (looking from the front) is a pc sync socket – does anyone actually use these any more? – which would allow you to tigger a studio mono block or power pack. On the other side is the battery compartment which takes two AA cells.On the back panel is a dial that enables you to select channels (1-15) and beside it another dial for selecting channels. Then there are three buttons which are from the bottom the on/off switch. The neat little touch with this is if you are using an Olympus brand flash then switching off the receiver will switch off the flash. In the middle is a button for switching the beep on and off. I leave it on as it gives me an audible indication of when everything has recharged. Finally at the top is the X-RCV button. This allows you to either control the flash from the commander unit or from the flash itself. I choose to control the flash via the commander unit as I find that more convenient.
Usage Scenarios
Standard Mode
The Radio triggers work with both Olympus and Panasonic cameras and with third party flashes. It also works with the Olympus ST-F8 as part of a multi flash set up, but you will have to cobble together something to hold the FR-WR and ST-F8 body off of the camera.
Using the Olympus STF-8 close up flash as part of a multi flash set up controlled by the Olympus FR-WR and FC-WR.
FP Mode or High Speed Sync
FP mode or high speed sync is a function of the flashgun and not the camera. So if your flash supports it it you can use it. I got it work with the Metz 64AF-1 and the Olympus FL 600-R using both Panasonic and Olympus cameras.
Focus Stacking or Bracketing
The focus stacking feature found on Olympus cameras imposes certain operating restrictions:
Uses the electronic shutter
The flash sync speed is 1/50th sec or longer
You can’t use TTL flash you have to manually adjust the power settings of the flash to get correct exposure
When you set operating parameters for focus stacking in the camera menu remember to allow a a delay between shots that allows for the flash to recycle. I’ve found four seconds to be sufficient. Having set that up switch on the FC-WR and it automatically selects manual flash mode and the camera selects the the flash sync speed. This worked with both the Olympus and Metz flashes on only the Olympus cameras. Panasonic’s focus stacking function is video based (4K capture) and not stills like that of the Olympus.
The original shot with no focus stacking.The end result of the in camera focus stacking. Twelve shots taken at a different focusing distance and then merged in camera. The camera always applies a slight crop when doing this.
High Res Mode
In many ways this is similar to the focus stacking mode mentioned previously.It requires an electronic shutter set at 1/50th sec or longer and the flash to be set manually. This worked well with both the Olympus and Metz flash guns. I didn’t test this with a Panasonic camera as my G85 doesn’t have this function.
Conclusion
The Olympus FC-WR flash controller mounted on an Olympus OMD EM1 mark 2 and the FR-WR connected to an Olympus FL-600R speedlight.
Lets get the niggly issue out of the way first. Yes the system is expensive and I wish that it was a little cheaper. Having said that you get rock solid dependability. I found that the Godox units were somewhat flaky at times – occasional misfires where the flash didn’t go off. I like dependability and I’m prepared to spend a little more to get it.
The good stuff. I like the fact that the operation of the constituent parts is seamless even when using the advanced Olympus camera features. The build quality and the weather resistance is excellent, Olympus do a really good job in making small equipment that can handle all the vagaries that life can dish out. The fact that this works with Panasonic cameras is great. Cross compatibility was another factor that brought me into the micro four thirds system. If you want full frame these should work with Panasonic’s full frame offerings as they also share the m4/3 protocols for flash. I say “should” as I’ve not tested it and cannot find anything online to confirm one way or the other. The fact that you can use it with third party speedlights is a huge bonus.
If you are a micro four thirds user and want a rock solid off camera flash solution that gives you access to multi-flash set ups even with specialist close-up equipment using the specialist in camera features such as focus stacking or high res mode then I think its worth spending the cash.
I have written and made videos about several aspects of the Olympus flash system and these are:
Grand Master Flash : using Hahnel Captur manual radio triggers on Olympus m4/3 cameras. Probably made redundant by this article, but still relevant if you want a reliable affordable system and are willing to forego TTL control.
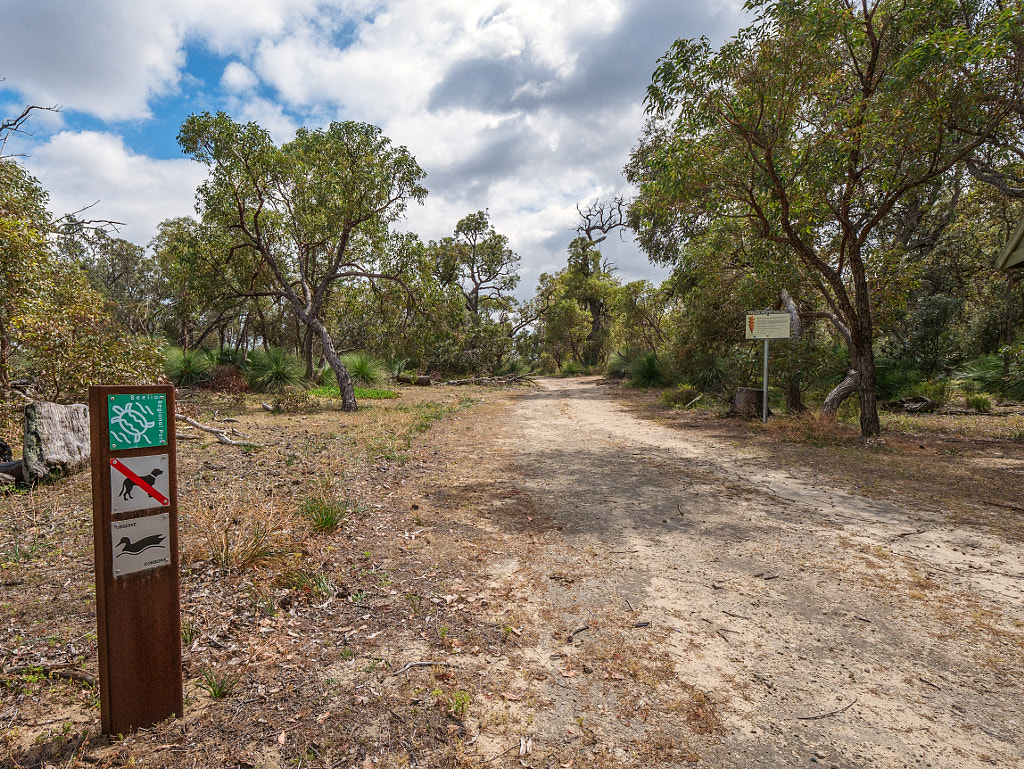
Once inside the reserve the walk trail is clearly signposted making it easy to enjoy the walk.
In my last blog post I gave a bit of a mauling to Forrestdale Lake as I found the whole nature walk experience quite unsatisfactory and frustrating. I mentioned that it was part of the Forrestdale and Thomsons Lakes Ramsar Site and that the experience at Thomsons Lake was much better. So this week I’ve decided to put up an excerpt about Thomsons Lake from my book Perth’s Best Bush, Coast and City Walks 2nd Edition. The Department of Commerce and Financial Affairs would have me remind you this book would make aperfect Christmas gift for anyone interested in walking in the Perth Metro Area and can be bought at all good bookstores or online for the bargain price of $29.99.
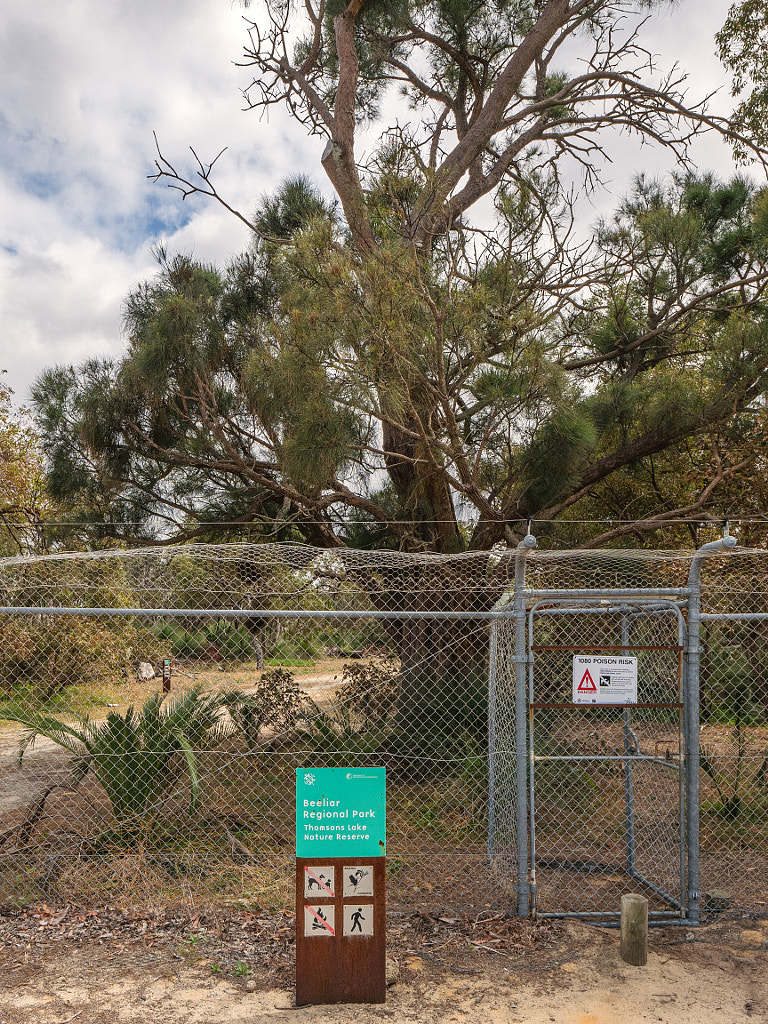
The entrance to Thomsons Lake reassembles that of a high security compound with its high electrified fence. This is to keep feral animals such as cats, dogs, and foxes out.
Grade: Medium
Time: 2 hours
Distance: 6.56Km
Season: Autumn, spring and summer. In late November the land around the lake can still be flooded. January to March and the lake dries up.
Where is it? 25Km south of Perth in Beeliar. Drive down the Kwinana Freeway and take the Russell Road exit.
Public Transport: Catch the 525 bus to Russell Rd After Hammond Rd (Stop Number 23864) and then walk 1.5Km to Thomsons Lake.
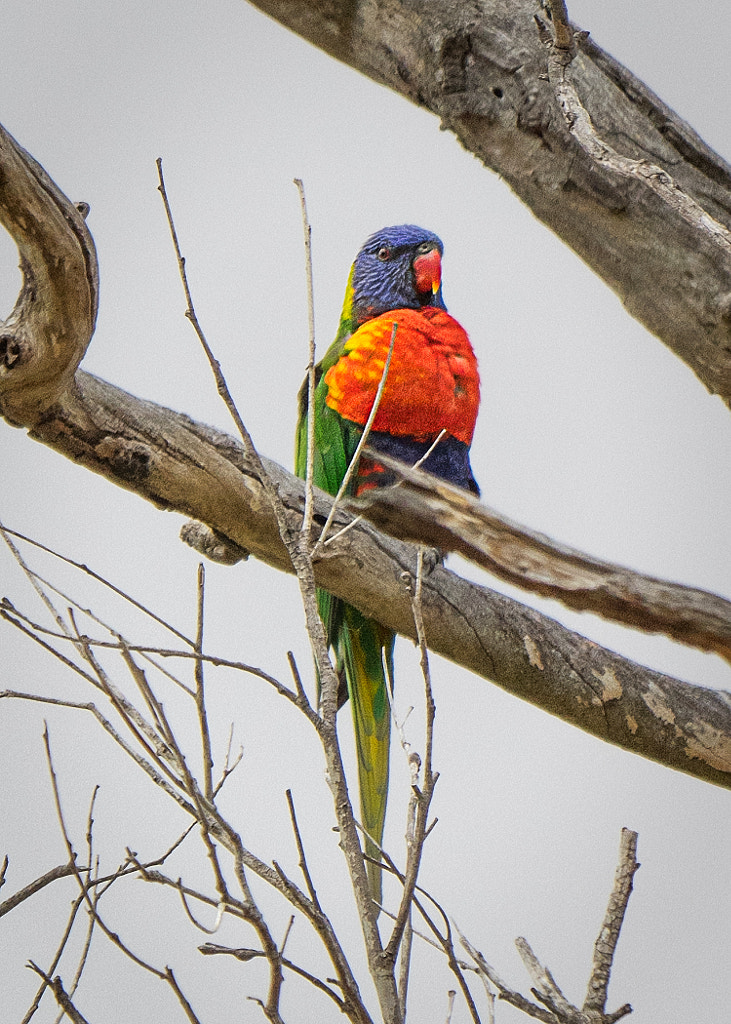
Rainbow Lorikeet, Trichoglossus moluccanus. Thomsons Lake, Western Australia.
Thomsons Lake (aka Jilbup Lake) is perhaps one of the most important freshwater lakes on the Swan Coastal Plain. Since the days of first European settlement 75% of the coastal plain has been drained for urban development. Thomsons Lake is an A class nature reserve of 509 ha of wetland. The lake supports around 10,000 waterbirds, of which are more than 1% of the world’s population of long toed stints (Calidris subminuta) which is a small wading bird that migrates from northern Asia to winter in Australia. The park is home to more than 50 species of waterbird, 86 species of “bush bird”, 9 species of frogs, 23 species of reptiles, 6 species of mammal and 15 species of ground orchid. Consequently getting into the park is like entering a maximum security prison, the reserve is encircled by 9.2 km of 2 m high electrified fence.
Australian painted lady (Vanessa kershawi). Thomsons Lake, Western Australia.
This walk ostensibly takes you around the lake’s shoreline, but as you walk round you pass through several distinct eco-systems. On the higher ground is the jarrah / banksia woodland of the coastal plain, there is a zone of flooded gums and swamp paperbarks, and particularly on the eastern side of the lake is a thick belt of rushes and grasses. Tiger snakes are common in wetlands and areas with an abundance of prey such as Thomsons Lake can support large populations. Their venom is very potent and the mortality rate for people who do not receive treatment is over 60%. Thankfully they are a shy creature and it is unlikely you will see one, but it pays to watch where you put your feet when walking through long grass at the lakeside.
Western Gerygone (Gerygone fusca). Lakesided Walk – Thomsons Lake
From the car park enter through the double gate, there is an information board just inside on your right. Walk along the track and after 170m you reach a fork in the track take the left down to the lakeside. At the lake turn right.
During winter and spring this area is prone to flooding – I walked here in early November after a wet winter and I thought I was in a remake of the 1951 movie “The African Queen”. The water was knee deep in places and wellingtons would have been more appropriate than the walking shoes I had on. If you are here in late spring in the wet look in the mud at your feet carefully. You might notice small things hoping about. When I first noticed I thought they were just bugs but on closer inspection they were very small black frogs- smaller than a little finger nail. The bush on the lakeside of the path starts to thin out in places and using the cover of the reeds it is possible to move closer to the waterbirds on the lake shore and observe them.
The path dries out here and you return to a mixed woodland of flooded gum and jarrah.
At the Thomsons Lake Drainage Pumping Station you come to a crossroads. The left turning takes you down to the lake and when I went down I noticed a lot of quenda (southern brown bandicoot, Isoodon obesulus fusciventer) diggings along the path edge. As I got closer to the water I started to see the quenda in the long grass. Unfortunately they were too quick for me to take a photograph of them. Carry on straight over at the cross roads to continue the walk.
Another of the park’s access points, keep following the path you are on.
Turn right and follow the path back to where you parked your car.
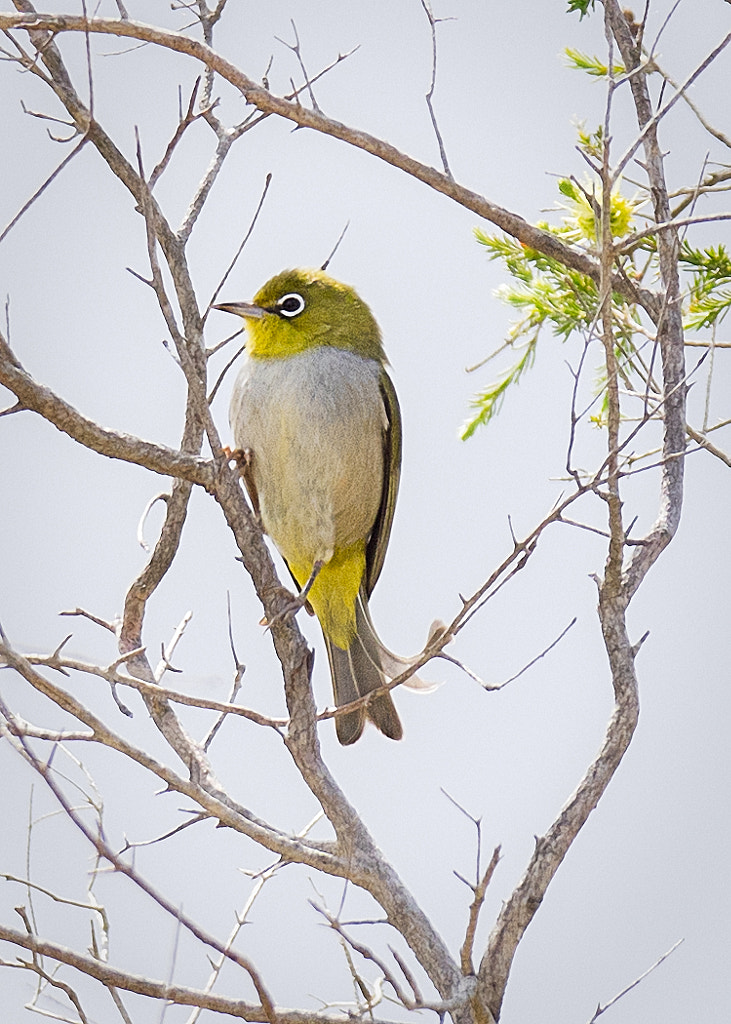
Silvereye, Zosterops lateralis. Thomsons Lake, Western Australia.
In winter and spring the track can be covered in water in places. A good excuse to break out the wellies.
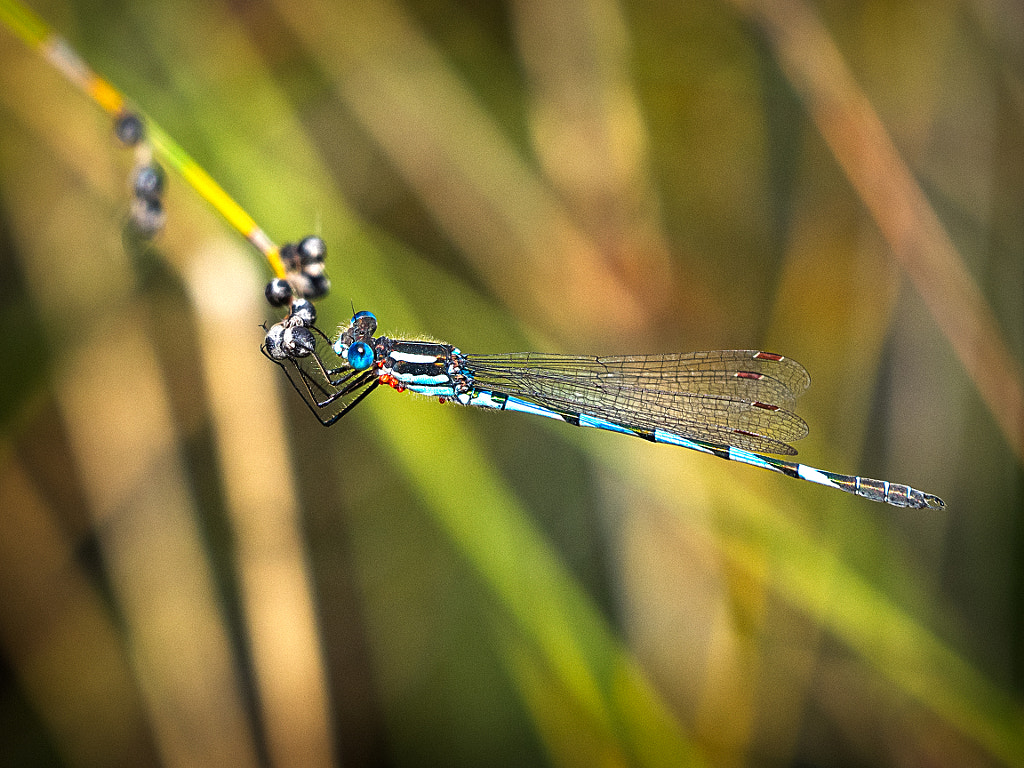
Blue Ringtail, Austrolestes annulosus. Thomsons Lake, Western Australia.
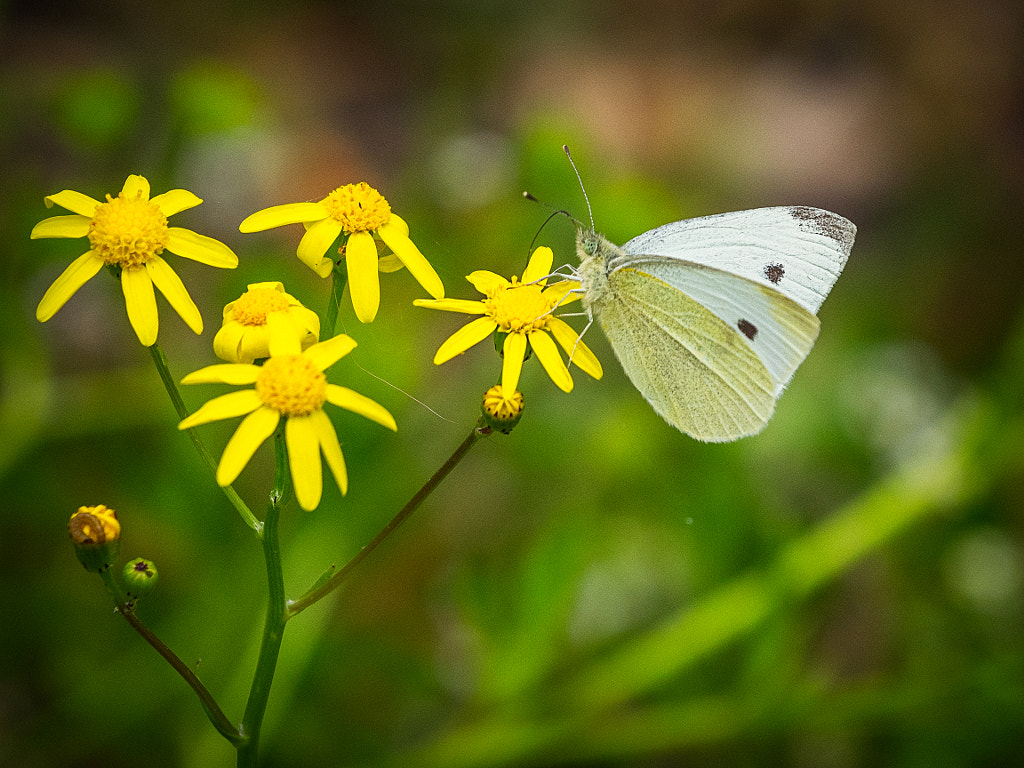
Small White (Pieris rapae). Thomsons Lake, Western Australia.
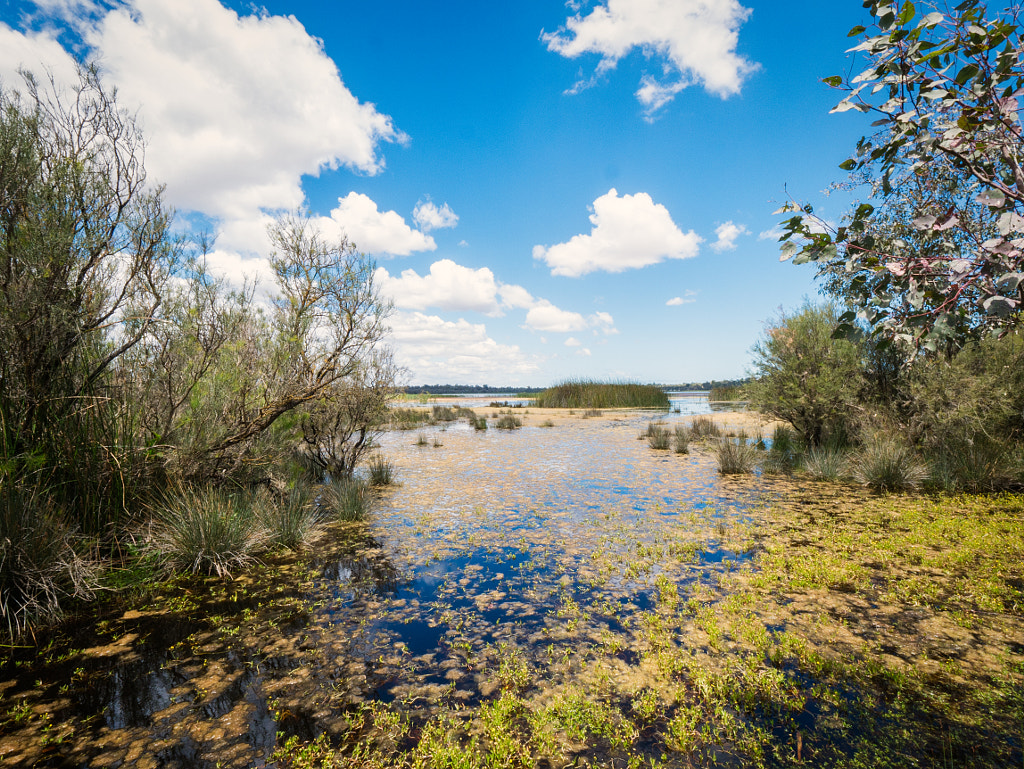
Thomson’s Lake is one of the most important freshwater lakes on the Swan Coastal Plain. It is an A Class nature reserve of 5099 hectares that supports 50 species of waterbird, 86 species of bushbird, 9 species of frogs, 23 species of reptiles, 6 species of mamals, and 15 species of ground orchids.
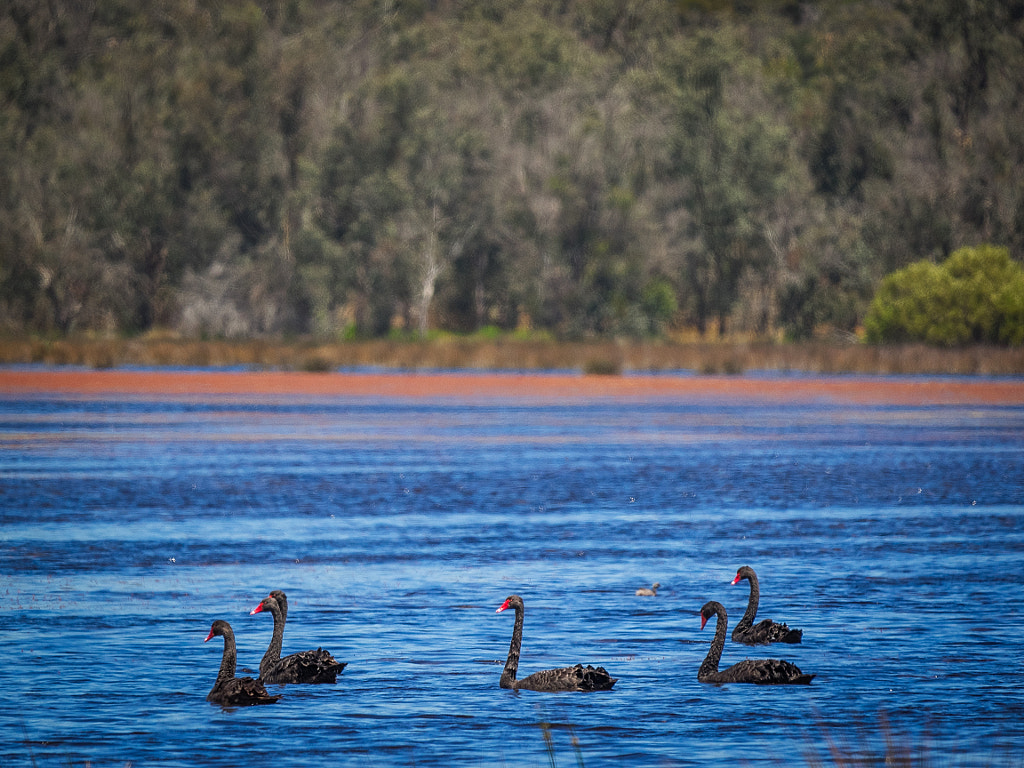
Black swans, Cygnus atratus. Thomsons Lake, Western Australia.
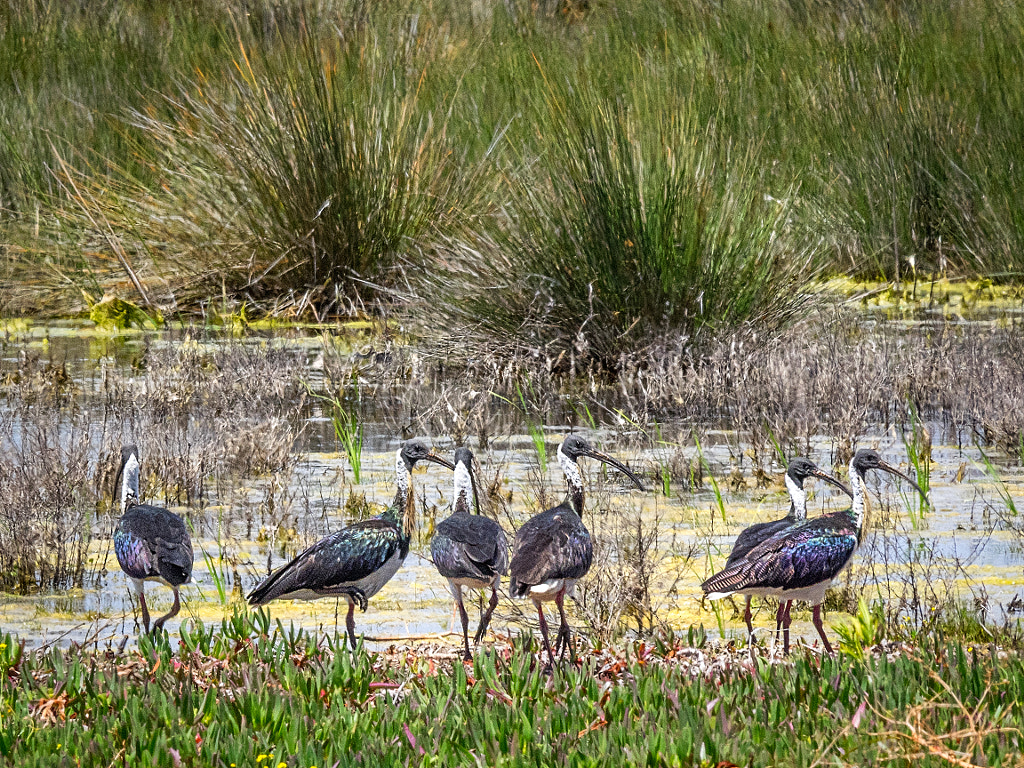
Straw-necked Ibis, Threskiornis spinicollis. Thomsons Lake, Western Australia.
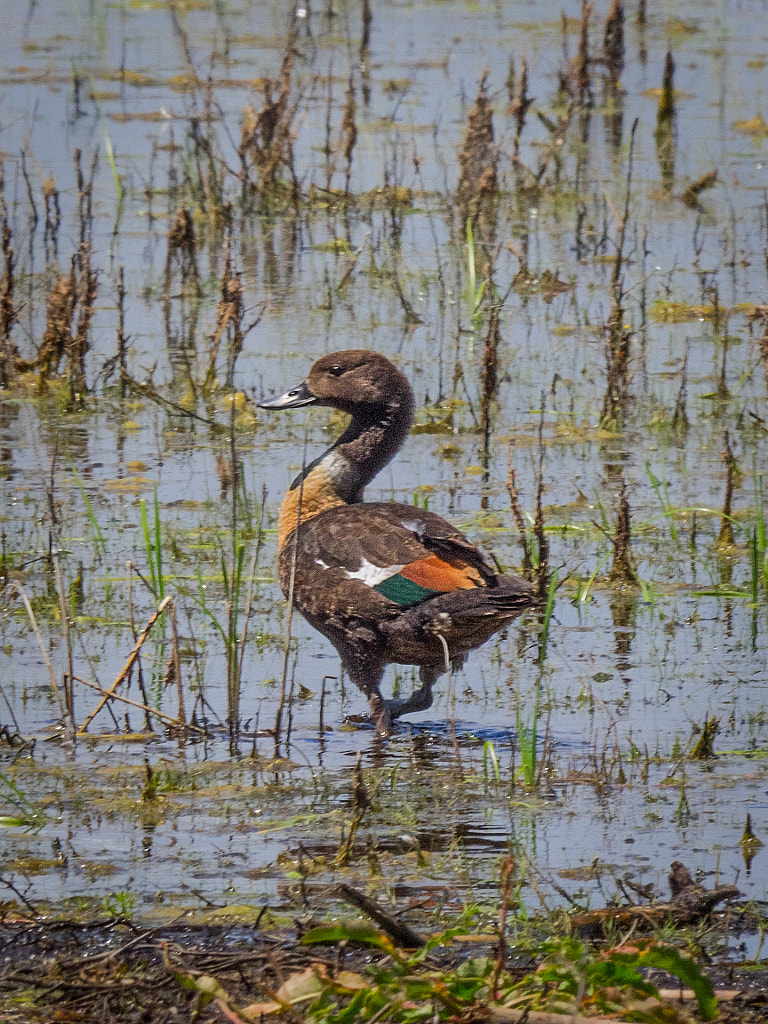
Australian Shelduck, Tadorna tadornoides. Thomsons Lake, Western Australia.
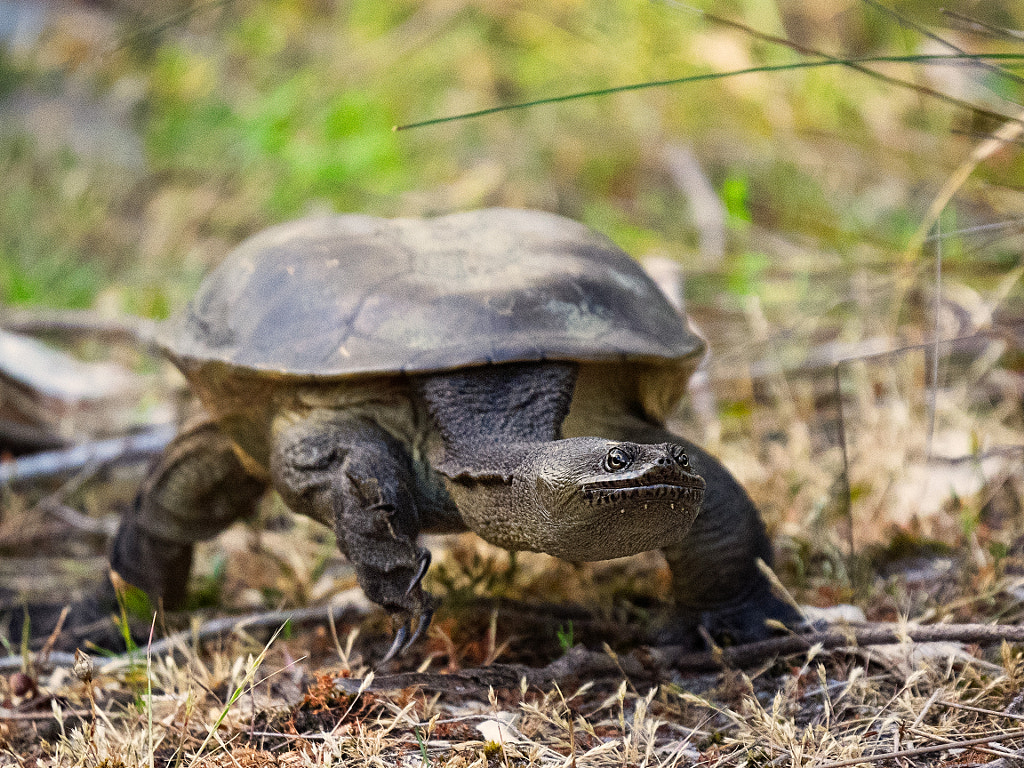
Choonya is the Nyoongar name for the Long-necked turtle, aka the oblong turtle (Chelodina oblonga). Thomsons Lake, Western Australia.
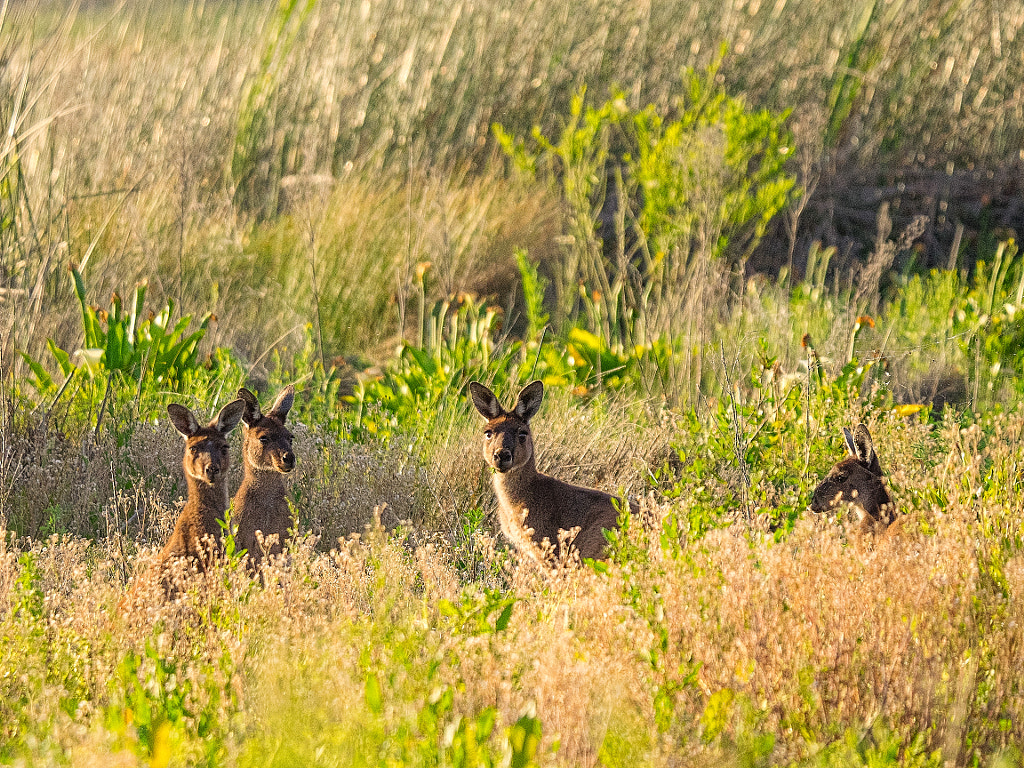
Sundown Mob*. Kangaroos out grazing in the evening at Thomsons Lake, Western Australia. * the collective term for a group of Kangaroos is “mob”.
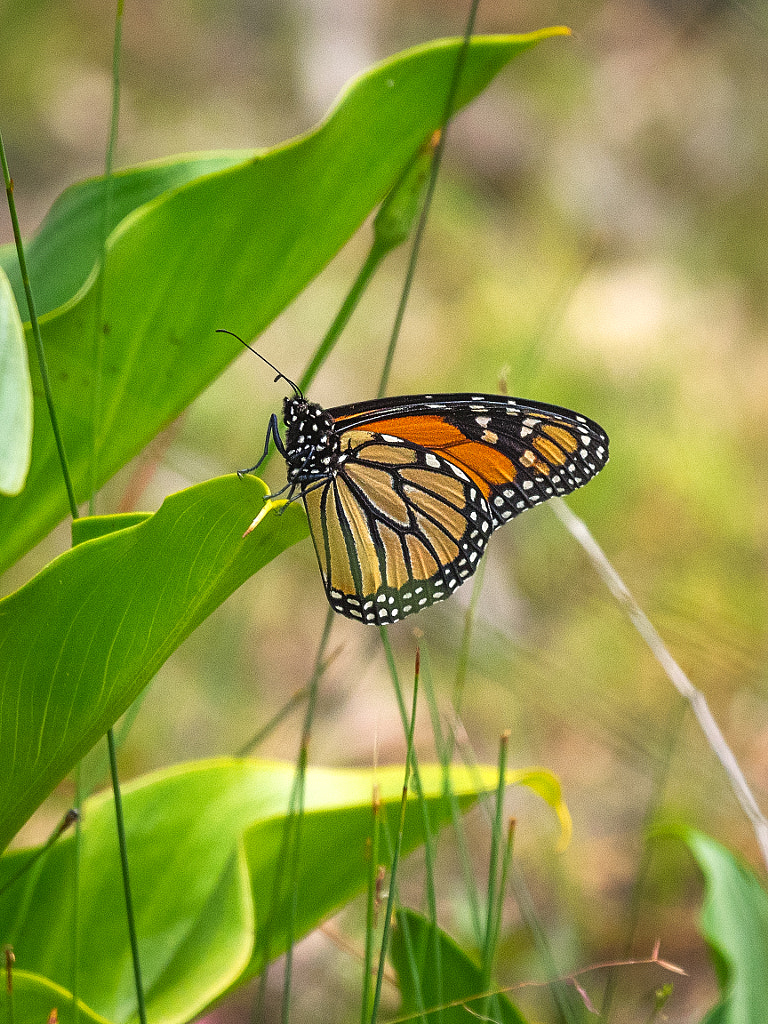
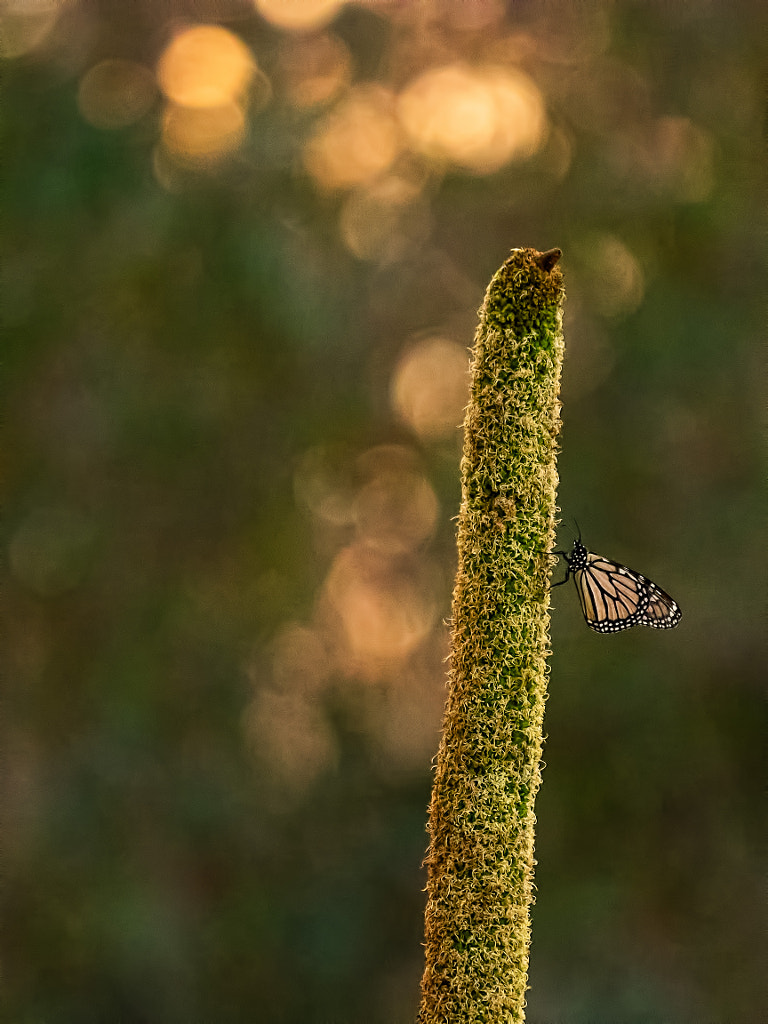
This Monarch butterfly, Danaus plexippus, prepares to roost for the night on a grass tree (Xanthorrhea preissii) flower spike. Thomsons Lake, Western Australia.
As I mentioned before this is an excerpt from my latest walking guide to Perth. It would make a wonderful Christmas present for anyone with an interest in walking.
Well the garden has sprung into action like a very springy thing. The bees are busy with all the flowers, butterflies are flitting from bloom to bloom. The birds are getting really active. The usual inhabitants, the White Browed Babblers and the New Holland Honeyeaters are in a frenzy of nest building/repairs and generally chasing each other round the garden. We’ve got a new family moved in. A pair of Rufous Whistlers have built a nest in our peppercorn tree and can be regularly seen foraging for insects in the garden beds. The other day there was a commotion – all the small birds were squawking loudly. At first I thought it was the neighbours cat, but when I went outside to have a look I saw this blur descend out of the skies, level off just before hitting the ground and dash back up onto the TV aerial. It was a Nankeen Kestrel feeding off of small skinks and geckos that were foolish enough to sun themselves. The kestrel spent about 30 minutes repeating the behaviour until it flew off. Who needs to go on a wildlife safari with all this happening.
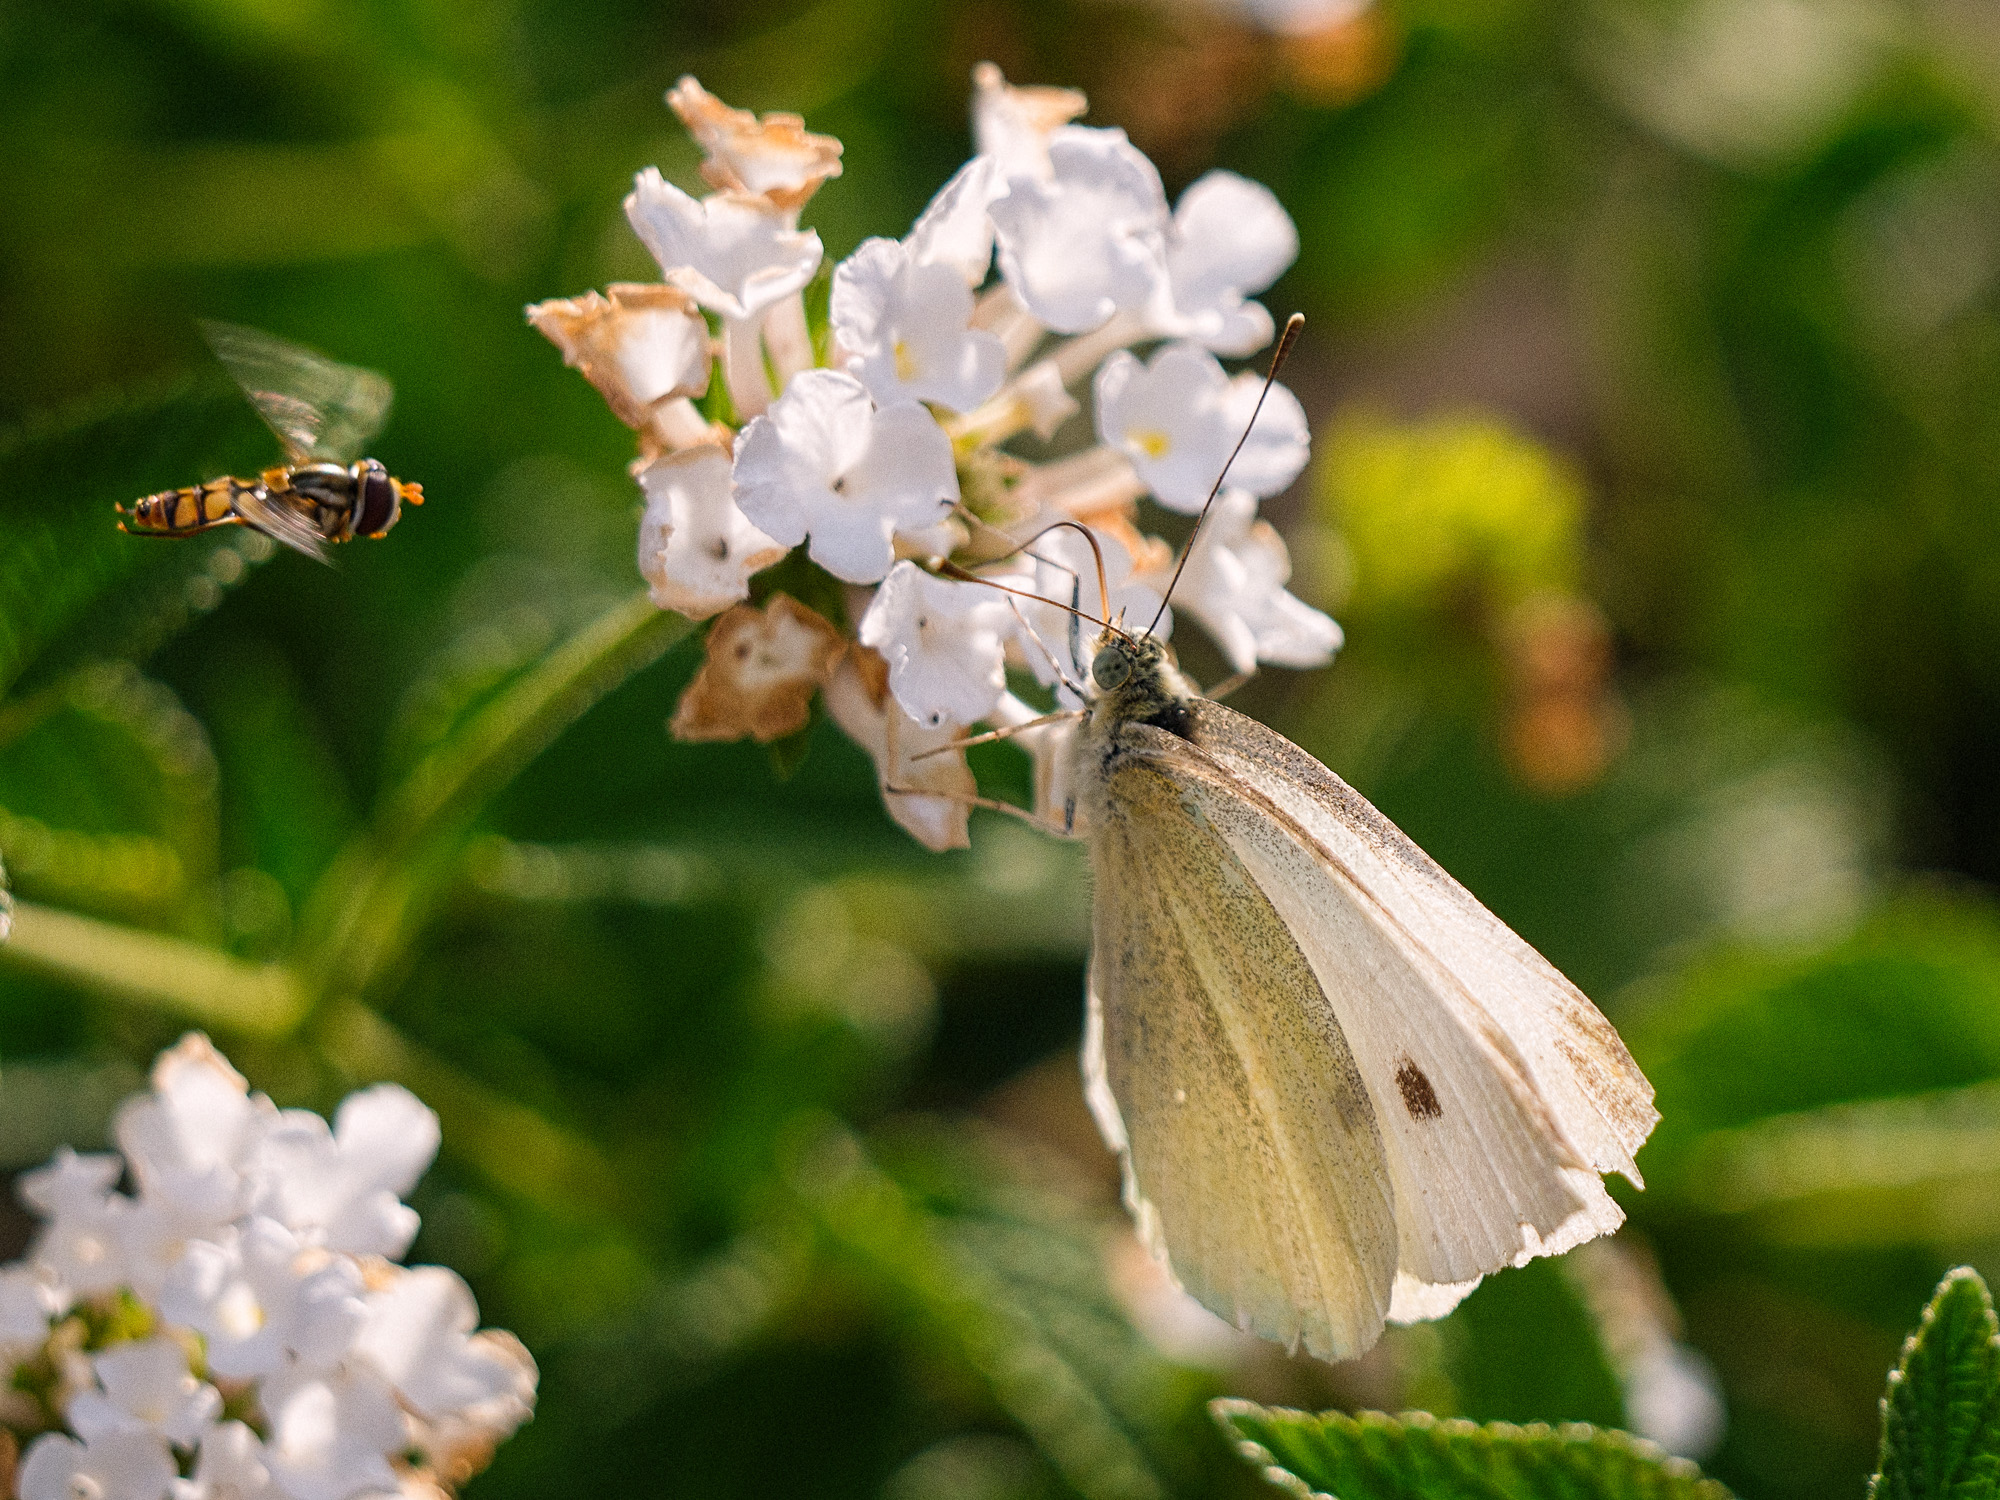
Although considered a pest the cabbage white butterfly (Pieris rapae) is the most conspicuous butterfly in Western Australia and is a sure sign that spring has arrived.
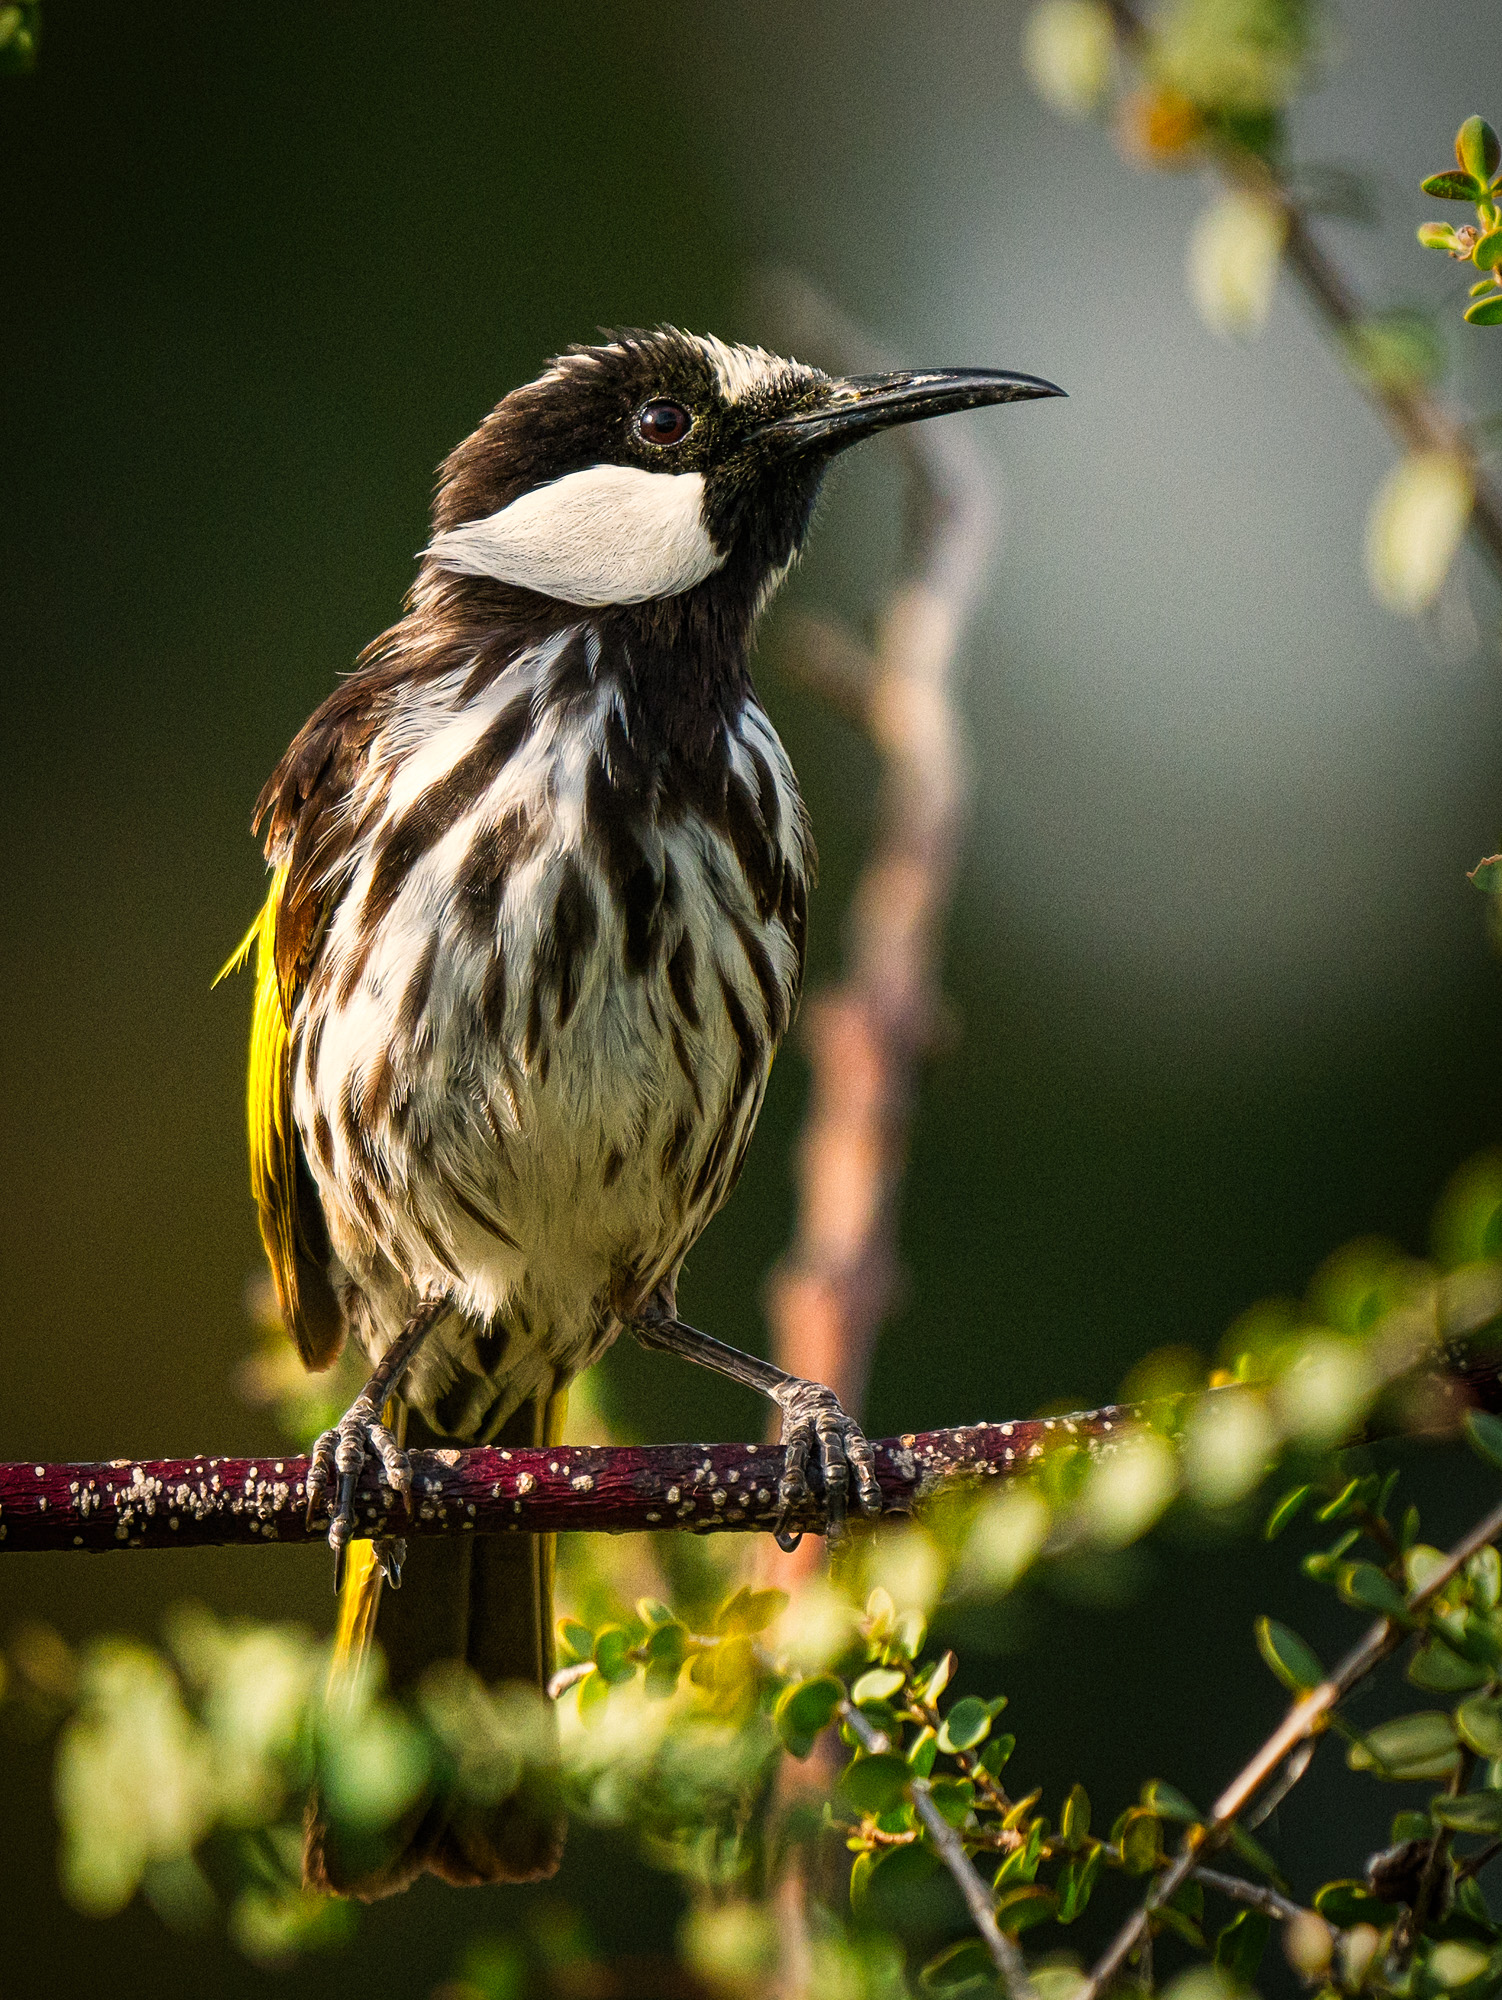
The eponymous New Holland Honeyeaters can be seen feeding off the Geraldton Wax and grevilleas. They are quite territorial and aggressive and they chase each other around incessantly.
One of ever increasing number of White Browed Babblers eating grubs.
The rufous whistlers have made a nest in our peppercorn tree and can be regularly seen foraging in the garden for insects.
A Nankeen Kestrel (Falco cenchroides cenchroides) perching on our TV aerial watching for prey. York, Western Australia.
A Buchanan’s Snake-eyed Skink (Cryptoblepharus buchananii) sunning itself on the trellis of our patio.
* today’s blog title is a quote from the 1975 film Royal Flash which I went and saw on release at the Chichester fleapit I mean Granada Cinema. It was a spectacularly bad film and its only redeeming feature was that it gave work to some actors who would have otherwise been unemployed. The Observer’s review of it said “leaves one breathless not so much with enchantment as with boredom”. It shows how bad it is in that it has never been resurrected as a cult classic that only connoisseurs could enjoy. That I can quote lines from the film is testimony to the fact that I grew up in a town where there was very little in the way of entertainment for young people.
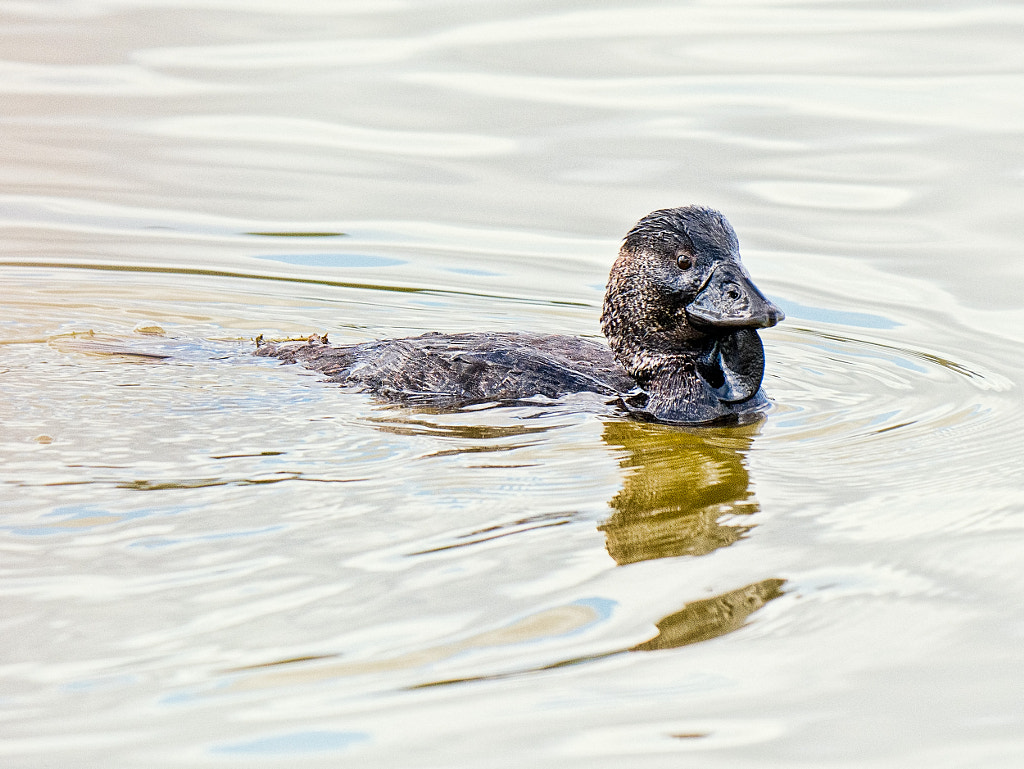
A male musk duck (Biziura lobata) swiming on Lake Goollelal in Yellagonga Regional Park, Western Australia
Now it is fair to say that Australia is home to some pretty strange animals. One only has to look at the Platypus, the echidna and even the humble kangaroo. To my mind one of the strangest is the musk duck (Biziura lobata). They can be found on fresh water lakes in the southwest corner of Western Australia.
What makes them so strange? Well to start with they don’t quack like a duck. They emit a sound that is more akin to a demented sonar. They are rarely seen on land and are reluctant fliers. On the water they float very low in the water often giving the impression that just their head is above the waterline. They are prolific underwater swimmers staying under for as long as a minute and diving up to a depth of 6m and demonstrate incredible agility as they do so. In appearance they are a very dark grey to black, have a stiff tail and broad heavy bill. The males are considerably larger than the females and weigh over 3Kg while the females can weigh up to 1.5 Kg. This makes them the second heaviest diving duck in the world. The males also have a strange leathery lobe under the bill, and in the breeding season they have a very strong musk odour hence the name. The courting behaviour of the males is quite striking – they strike the surface of the water with their feet then immediately after make a couple of clucking sounds followed by a lot of whistles and a grunt. This is repeated very five seconds or so for as long as half an hour. The first time I encountered this was at Lake Seppings in Albany. I heard these odd splashes and weird sounds repeatedly coming from just beyond the reed beds but couldn’t see what was causing the commotion. As I continued walking the reeds parted sufficiently and with the help of standing on a nearby bench I was able to see what was going on. It really is quite a performance and once seen never forgotten. In Perth Musk Ducks can be seen on both lakes in the Yellagonga Regional Park and Herdsman Lake. Hard to see at first so listen for the strange noise and you’ll soon find them.
They are not hunted as they are not considered nice enough to eat and the only thing that threatens their status is the clearing and draining of wetlands.
Originally what is now Lake Claremont was a swamp with a series of small pools edged with reeds and then surrounded by paperbark trees. There was abundant plant an animal life and it was an important hunting and gathering place for the Mooro clan of the Nyoongar in the warmer months of the year.
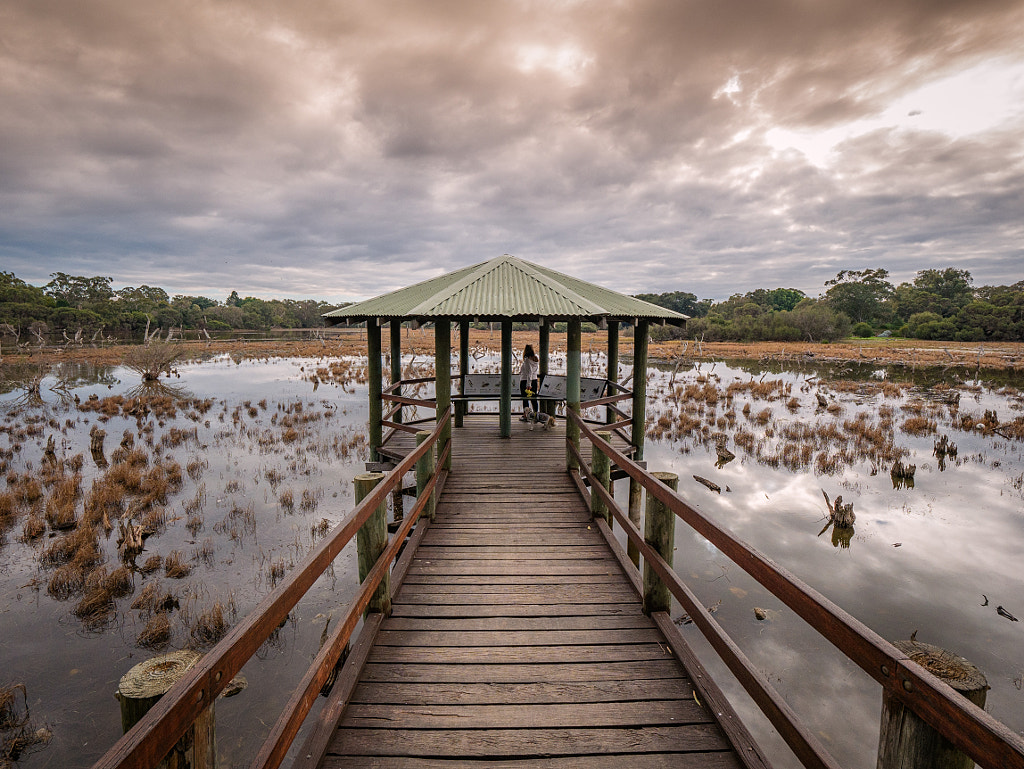
The bird observation platform allows visitors to watch the birds in the grasses and reeds at Lake Claremont.
In 1831 European settlers began to clear the land for farming and by the 1890’s there were market gardens and a then state of the art dairy farm. Things looked good and the area prospered. However, this state of affairs was short lived as by the turn of the Twentieth Century the water level rose and the farms were flooded and a permanent lake which rises and falls with the seasons was formed. In the 1950’s Claremont Town Council reclaimed large areas for a rubbish tip and renamed it Lake Claremont in the process. In the 1960’s it was decided to beautify the lake and its surrounds. Sections were infilled to create a golf course and the school playing fields. In time two small bird sanctuary islands were created and there has been a move to manage the the lake in a more ecological manner. The Friends of Lake Claremont are an enthusiastic and very active bunch of local residents and volunteers who have undertaken to assist in the conservation and enhancement of Lake Claremont. There activities have been crucial in weed eradication programs and revegetation projects working in tandem with pupils fromScotch College and Graylands Primary School. They also have annual public events including Clean Up Australia Day, National Tree Day and Celebrate Lake Claremont Day (community fair). More details can be found on their website.
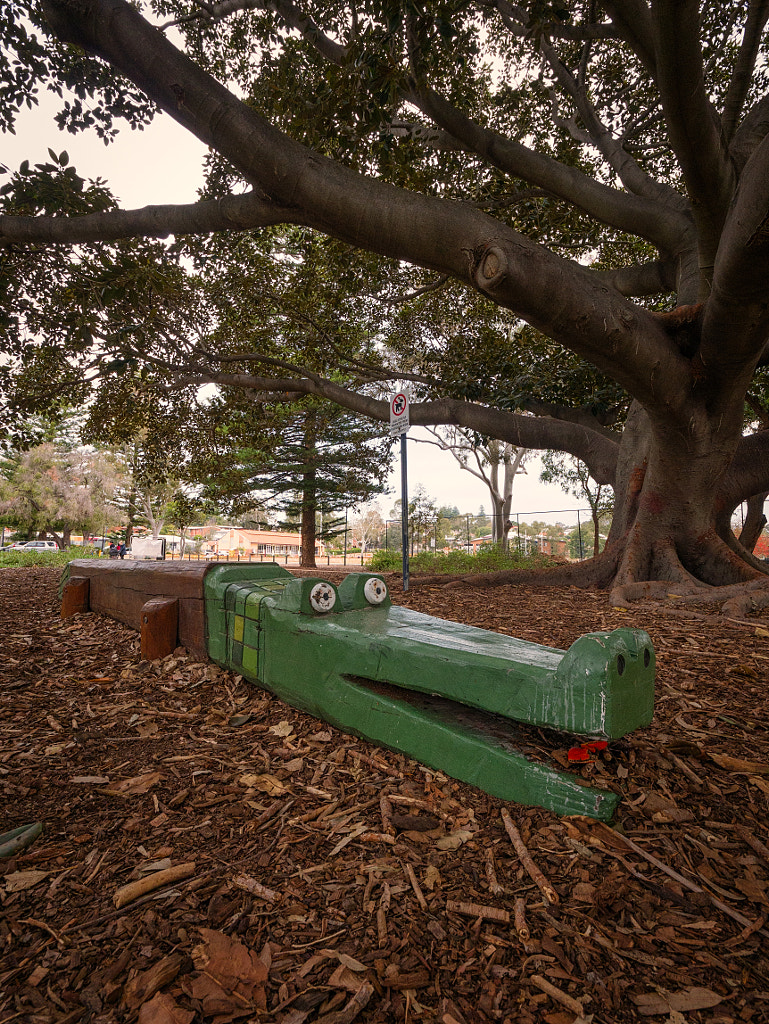
The infamous Lake Claremont crocodile. Lake Claremont, Western Australia.
So that was then and this is now. What does the lake offer today? Well the wetlands of the Swan Coastal Plain are internationally acknowledged as a bio-diversity hotspot having a greater number of endemic species than most other regions in Australia. Since colonisation three quarters of the wetlands have been drained for urban development. Those that remain are adversely effected by the introduction of feral animals and plants. In this context Lake Claremont is like a biosphere. In the past ten years or so eBird Australia has listed 116 species of bird that can be found on or around the lake which makes it somewhat of a birders paradise. The path around the lake and the bird observation platform make it easy to spot birds all year round. To make it so that you know what you are looking for you can down load an illustrated brochure listing the birds from the Town of Claremont website.
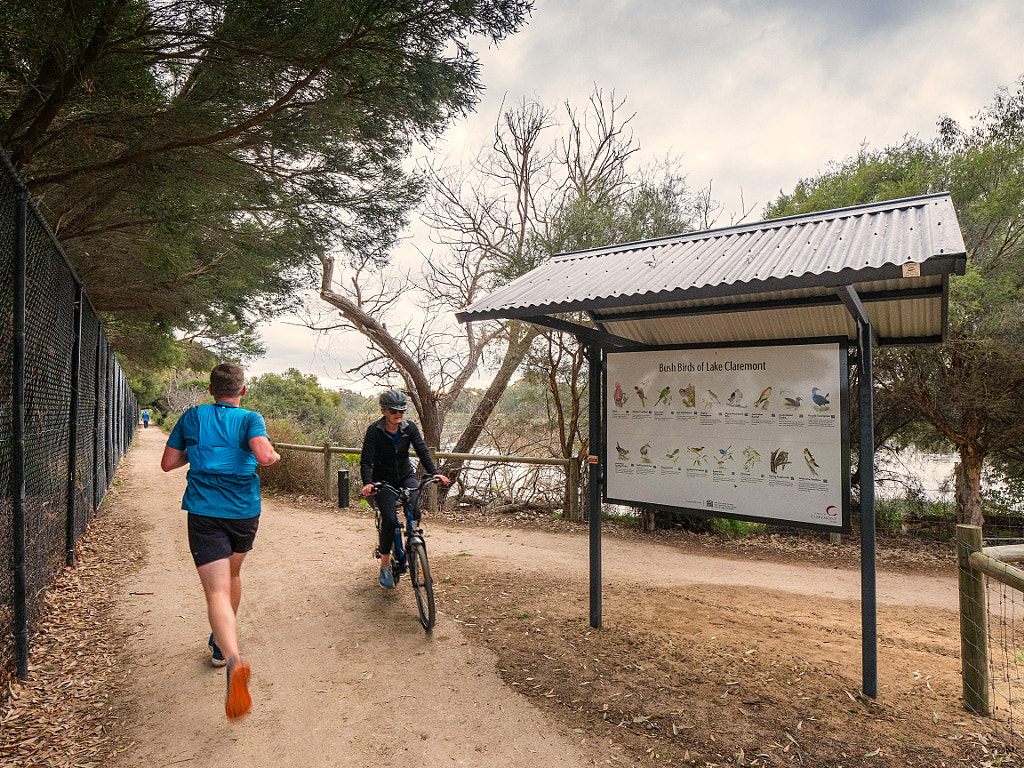
Lake Claremont has a dual use path around its edge which is popular with runners and cyclists.
In addition to the nature based activities there is a 3 Km dual use path that circumnavigates the lake which is very popular with walkers, runners and cyclists. Dogs are welcome on a lead. The walk is enjoyable all year round and if you start the car park and head off in a clockwise direction then you can stop at the TeeBox Cafe shortly before returning to the car park. For the youngsters who need to burn off some energy before looking at the ducks there are two playgrounds. If dad doesn’t care for looking at the ducks then he has the option of playing a quick nine holes of golf.
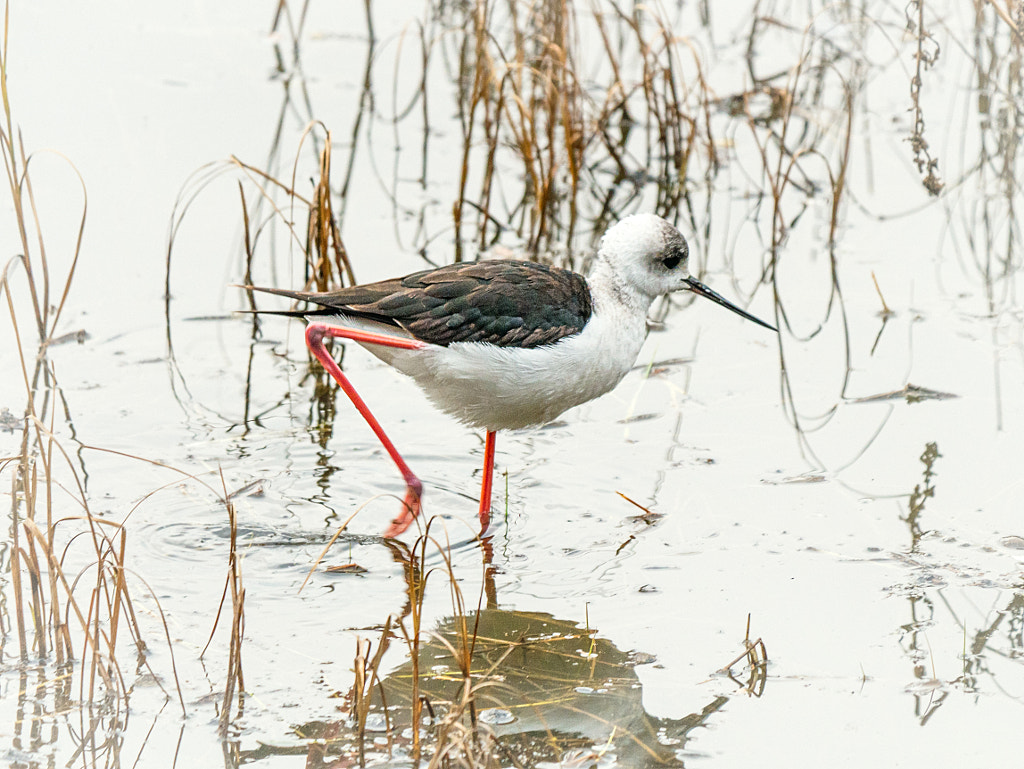
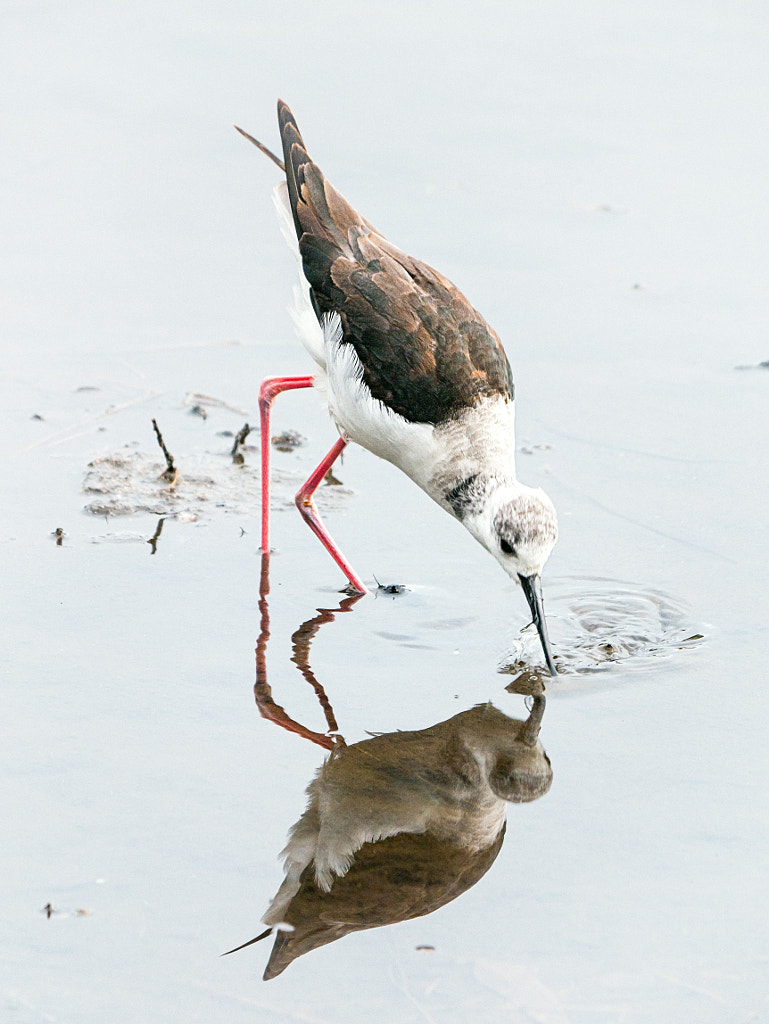
A juvenile pied stilt (Himantopus himantopus) at Lake Claremont, Western Australia.
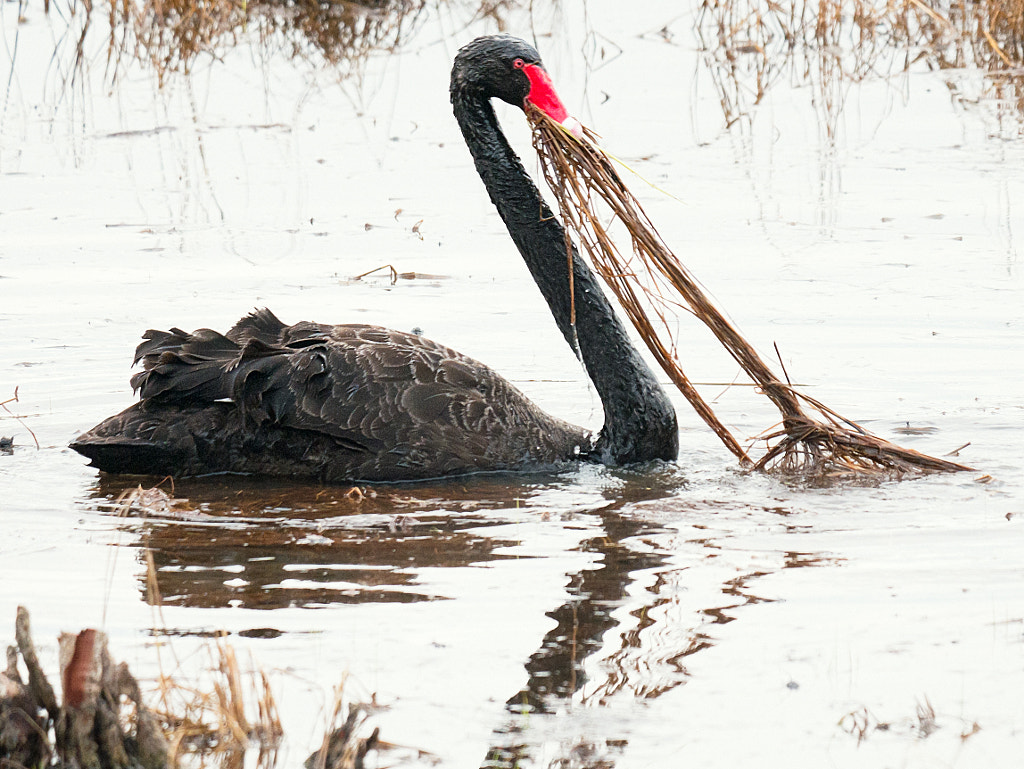
A black swan (black ) gathering nesting material at Lake Claremont, Western Australia.
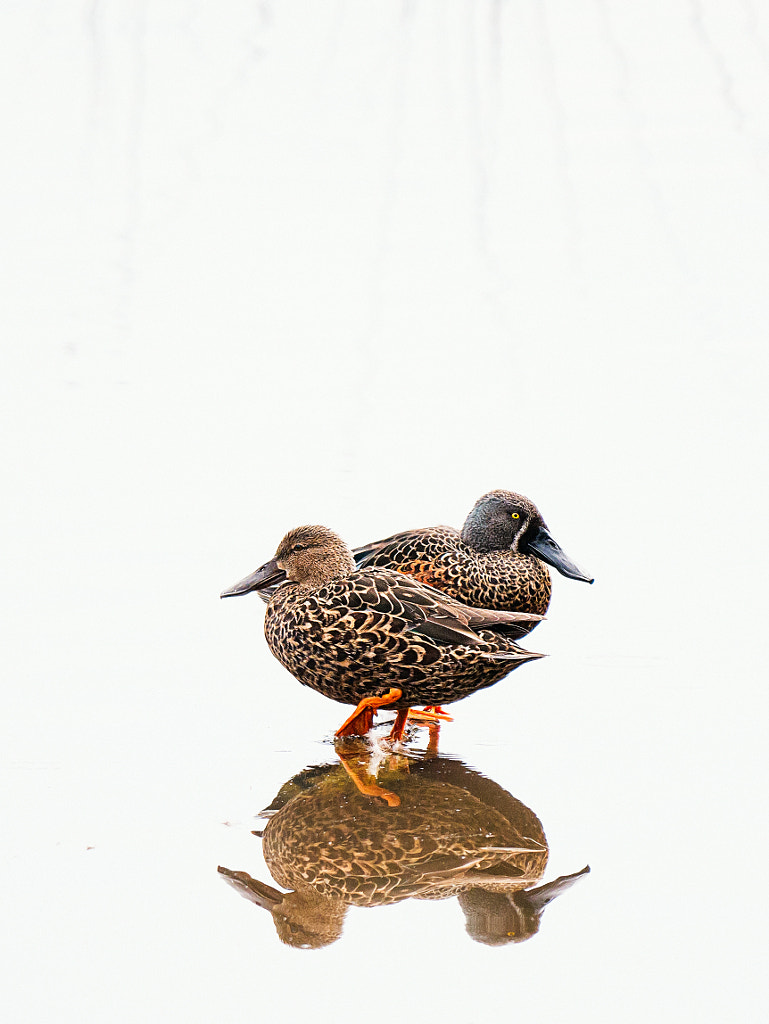
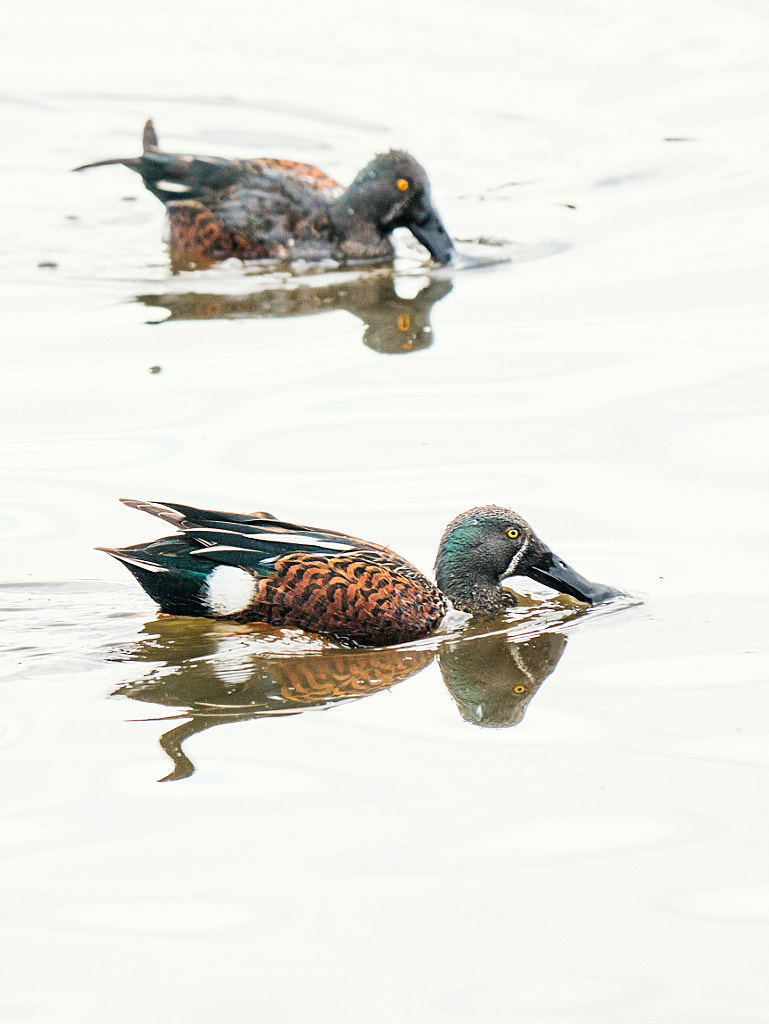
A pair of Australian Shovelers (Australian) at Lake Claremont, Western Australia.
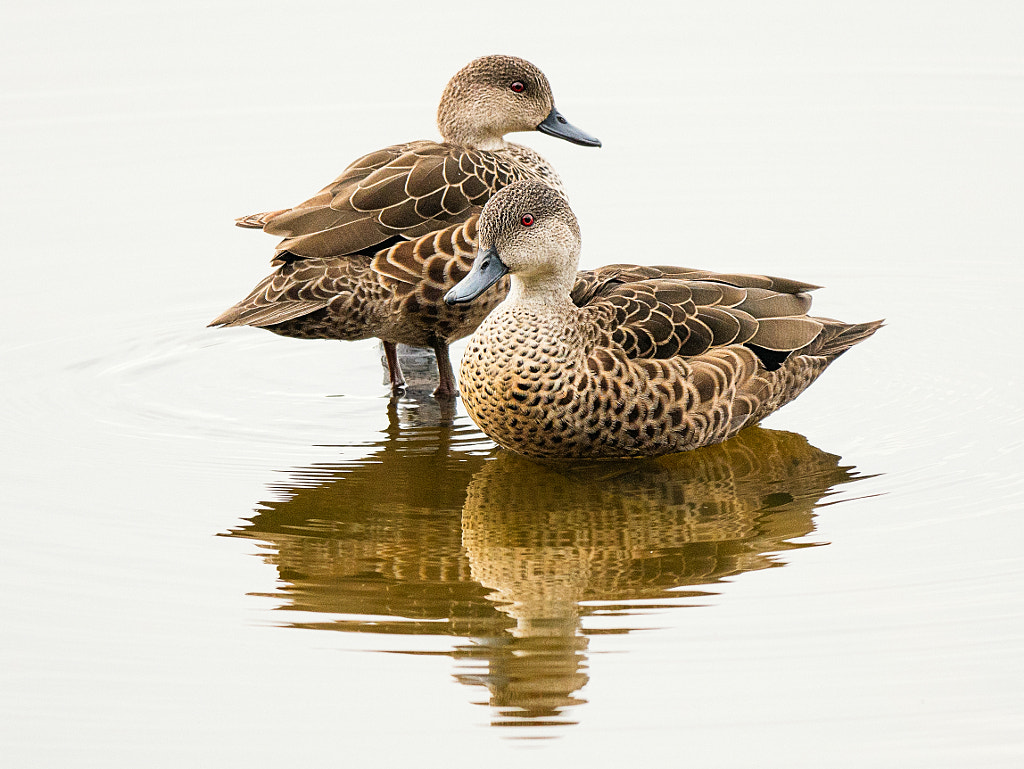
A pair of grey teals (Anas gracilis) at Lake Claremont in Western Australia.
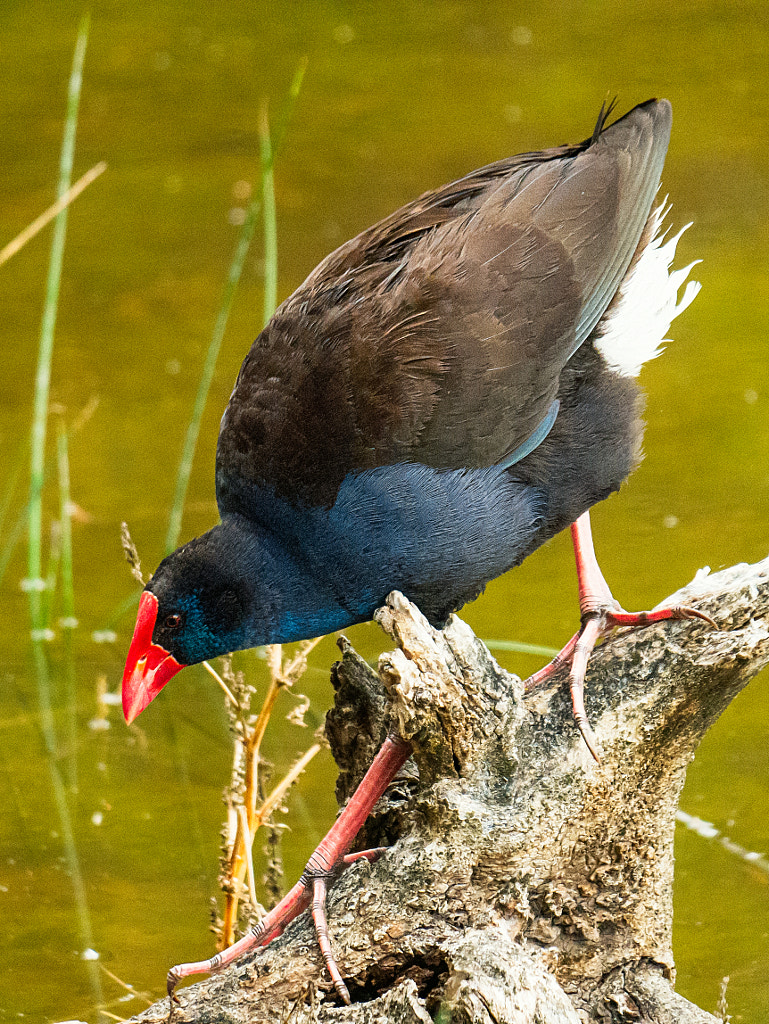
A purple swamp hen (Purple), Lake Claremont, Western Australia.
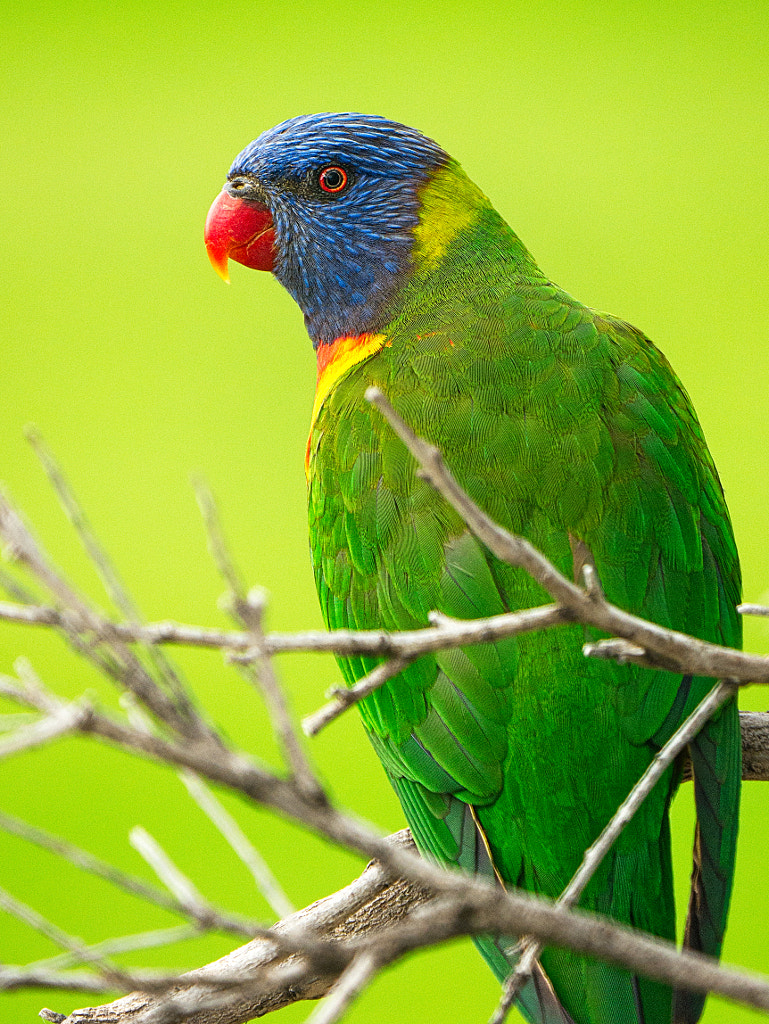
Rainbow lorikeets (Rain) were introduced to Western Australiafrom the eastern states of Australia. Lake Claremont, Western Australia.
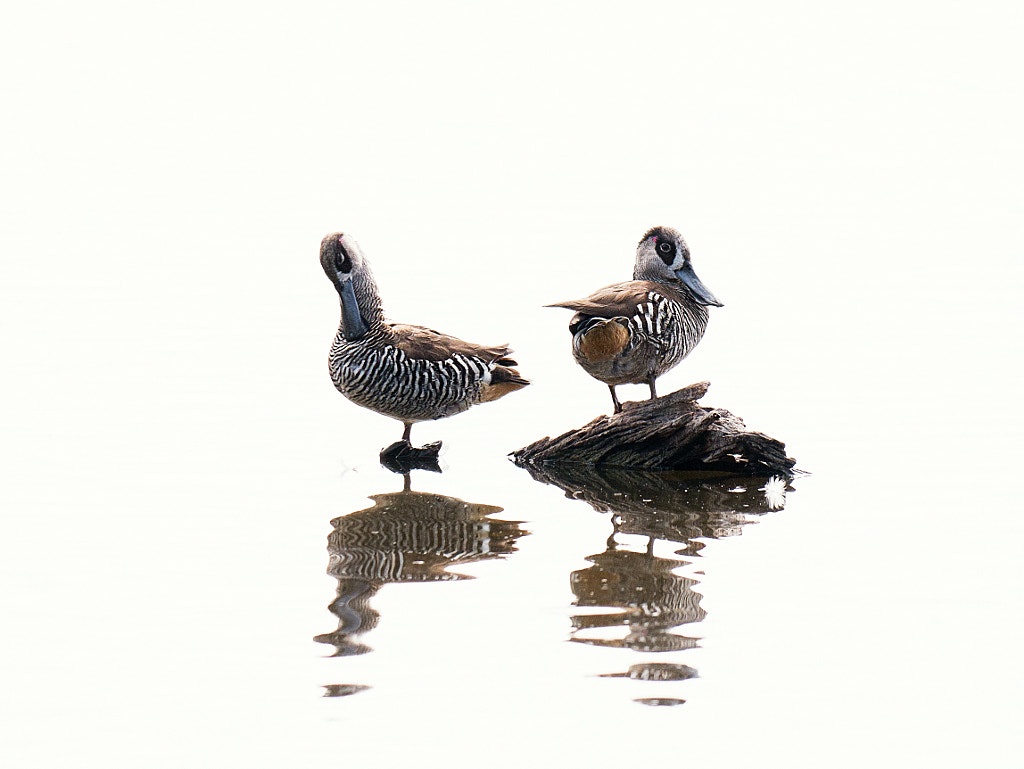
Pink-eared ducks (Malacorhynchus membranaceus) at Lake Claremont in Western Australia.
Called Dit by the Nyoongar this juvenile pied stilt (Himantopus himantopus) feeds at Lake Claremont, Western Australia.
Bardoongooba called Australian Shovelers (Anas rhynchotis) by European settlers can be readily seen on Lake Claremont.
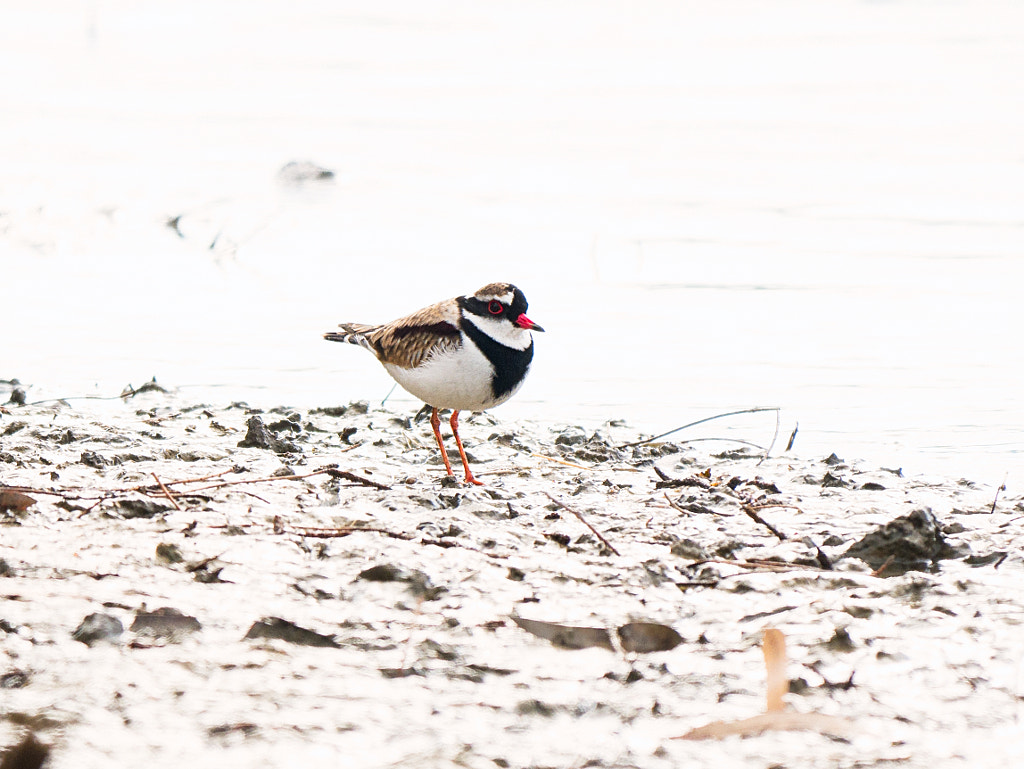
Black-fronted Dotterel (Elseyornis melanops), Avon River, Northam, Western Australia. Panasonic Lumix G85 with Panasonic Leica 100-400mm f4-6.3 lens. Exposure: 1/500 sec, f6.3 at ISO 250.
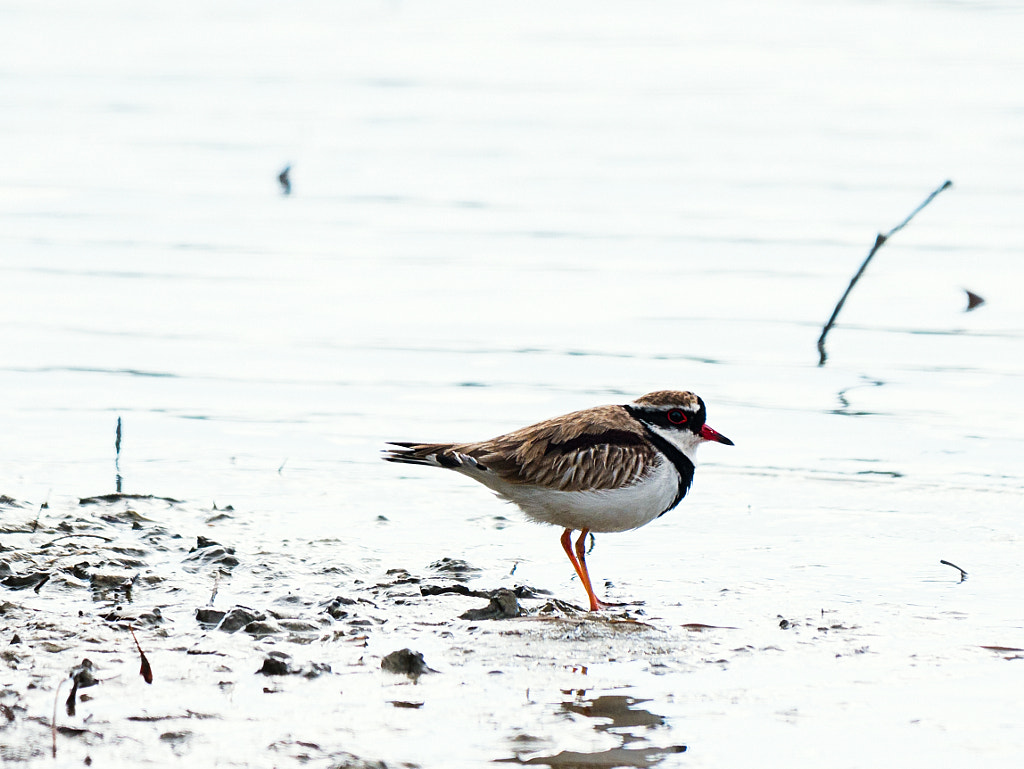
What do you do when you’ve got 2 hours to kill while in the Wheatbelt metropolis of Northam? Go looking for Black-fronted Dotterels that’s what! These busy little birds can be found on the muddy shoreline looking for insects and small molluscs.
Black-fronted Dotterel (Elseyornis melanops), Avon River, Northam, Western Australia. Panasonic Lumix G85 with Panasonic Leica 100-400mm f4-6.3 lens. Exposure: 1/500 sec, f6.3 at ISO 250.
Like many people at this time I’ve had my movements curtailed. Where I live we are allowed out locally for exercise so I’ve been going out for walks along the river to photograph and video the birds that can be found there. This is the third time I’ve tried to video wildlife and it is very hard.I don’t work from a hide so I have to set up quickly and quietly and often the birds will move on before I can get filming. Shooting mainly just after dawn or just before sunset has meant using high ISOs and made focusing difficult. But, the more you do it the better you get. The purpose of the video was to make something, learn something new and help keep me thinking positive thoughts during this time.
Just out of interest I’ll put the stills up below. They were shot on either a Canon EOS6d with the Sigma 150-600mm f4.5-6.3 Contemporary lens or the Olympus OMD EM1 mk ii with the Panasonic Leica 100-400mm f4-6.3 lens. I wonder if you can tell the difference at web size without enlarging to 100% or checking the EXIF data?
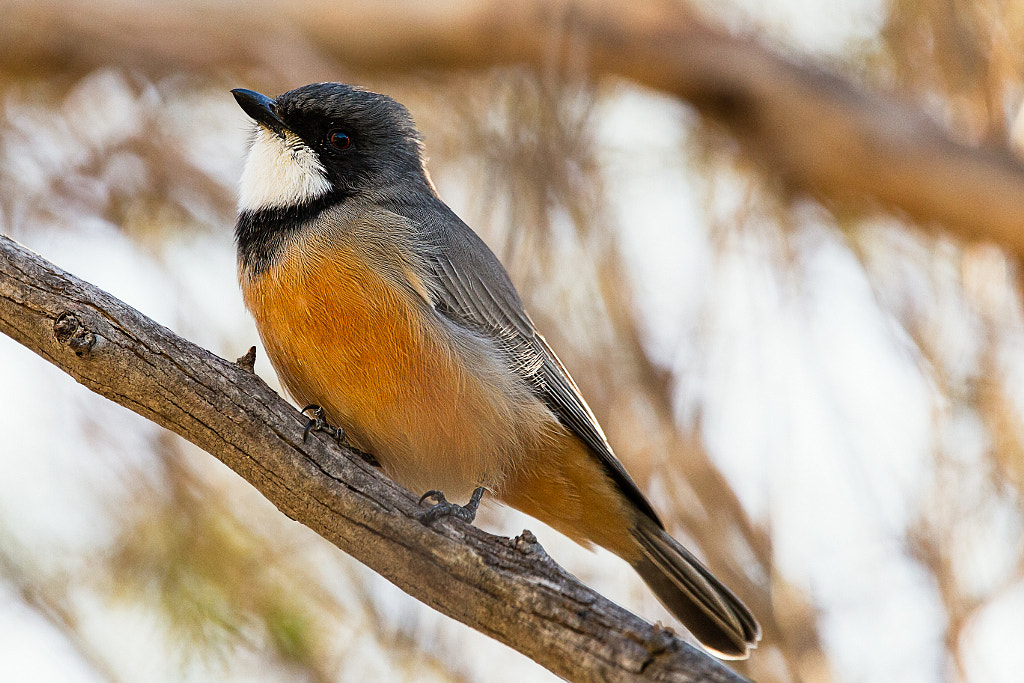
A male Rufous Whistler (Pachycephala rufiventris). York, Western Australia.
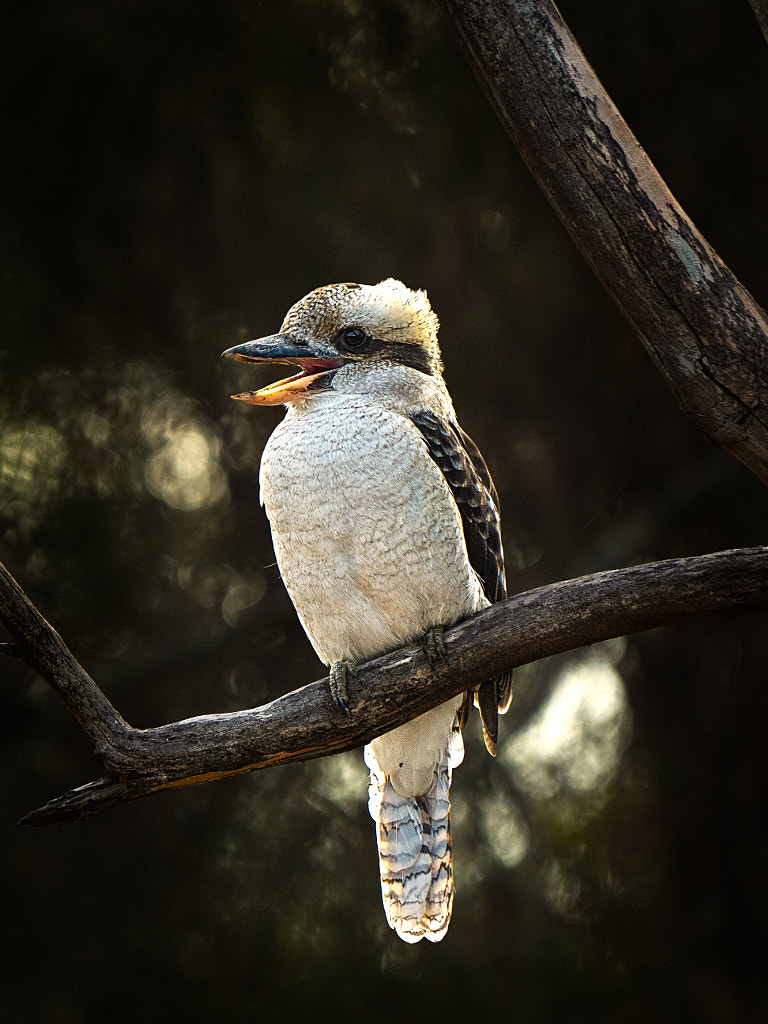
Laughing kookaburra, dacelo novaeguineae. York, Western Australia
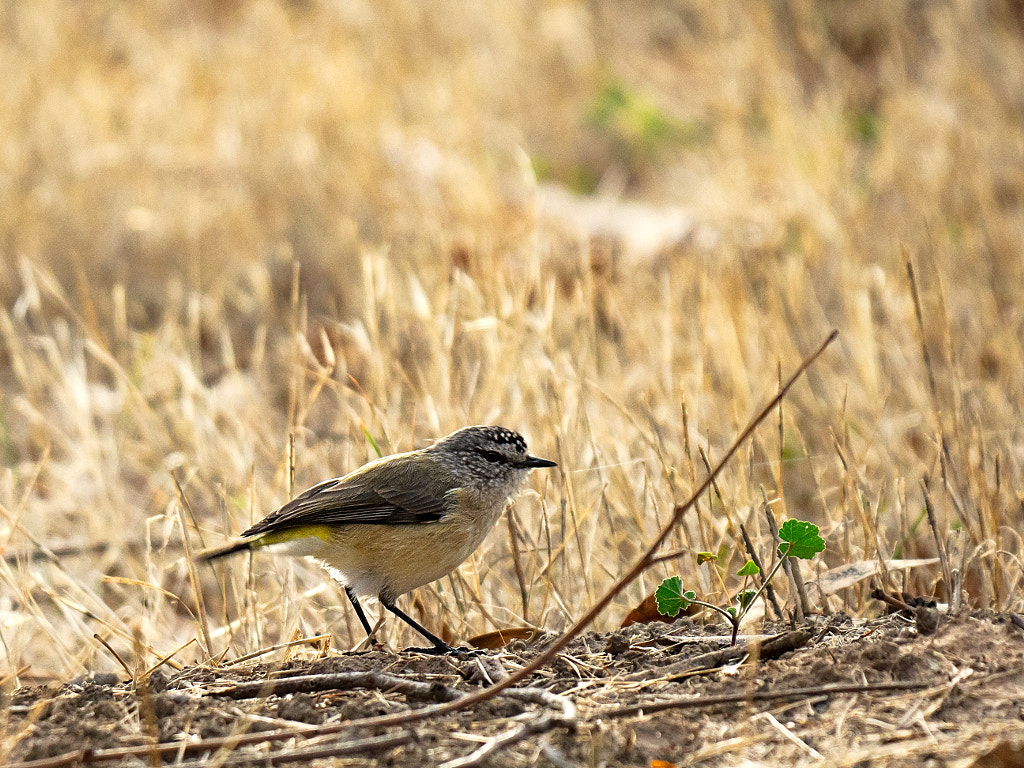
Yellow Rumped Thornbill, Acanthiza chrysorrhoa, York, Western Australia.
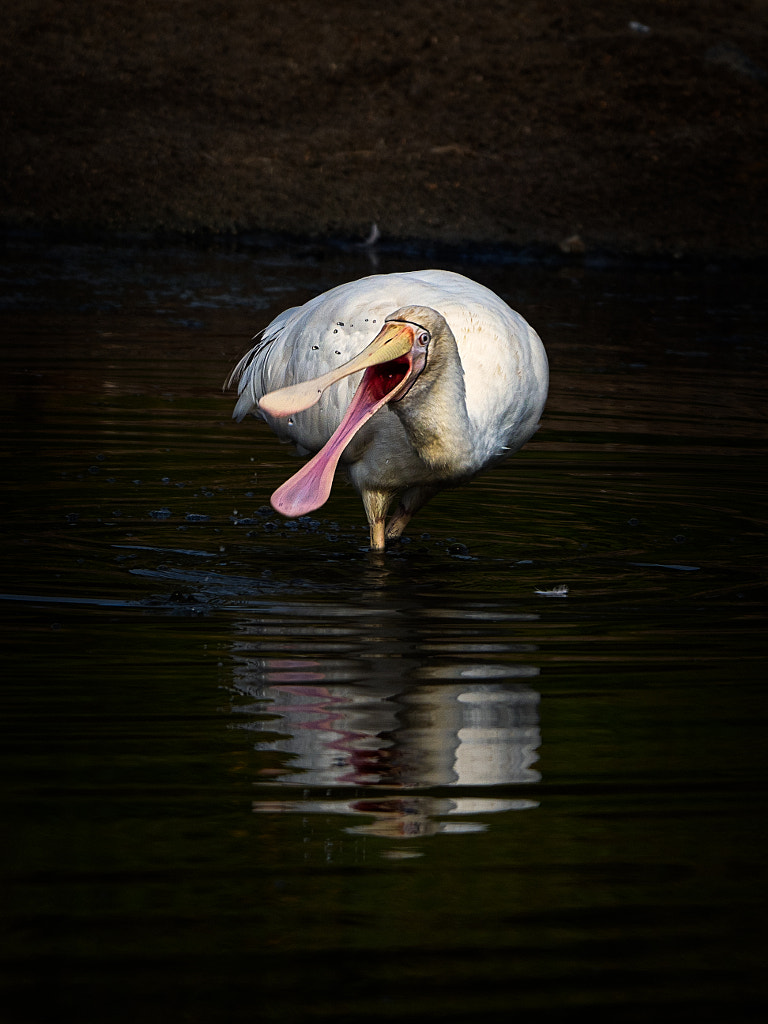
Yellow-billed Spoonbill (Platalea flavipes), Avon River, York, Western Australia.
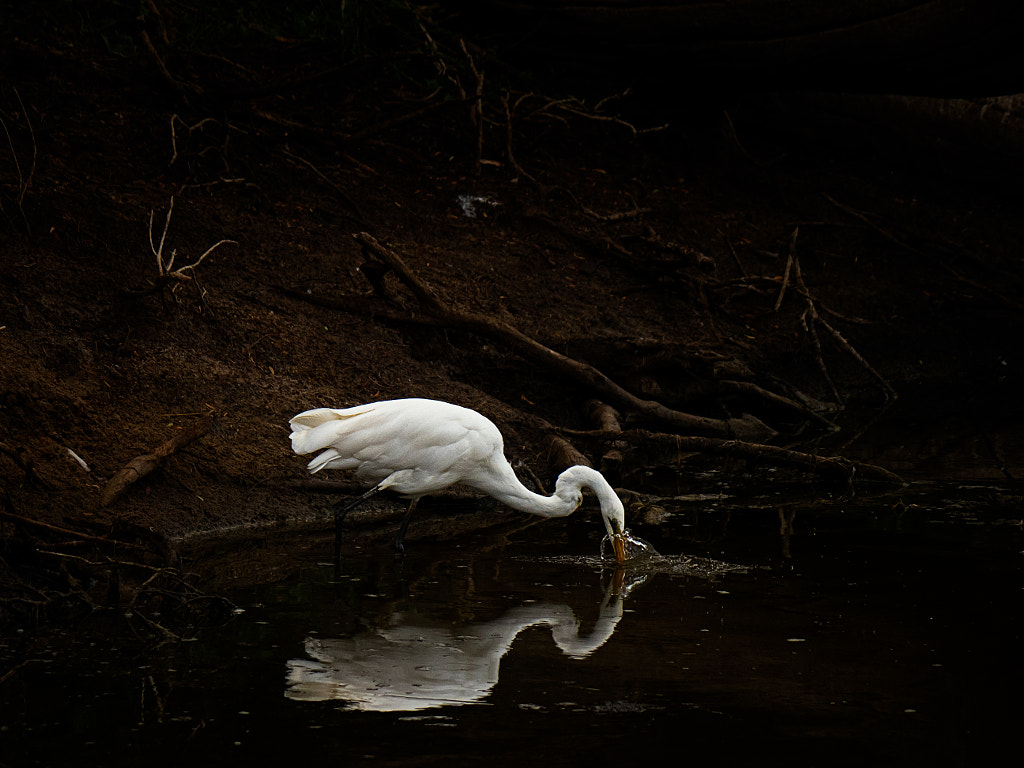
Great egret, Ardea alba, feeding on the Avon River. York Western Australia
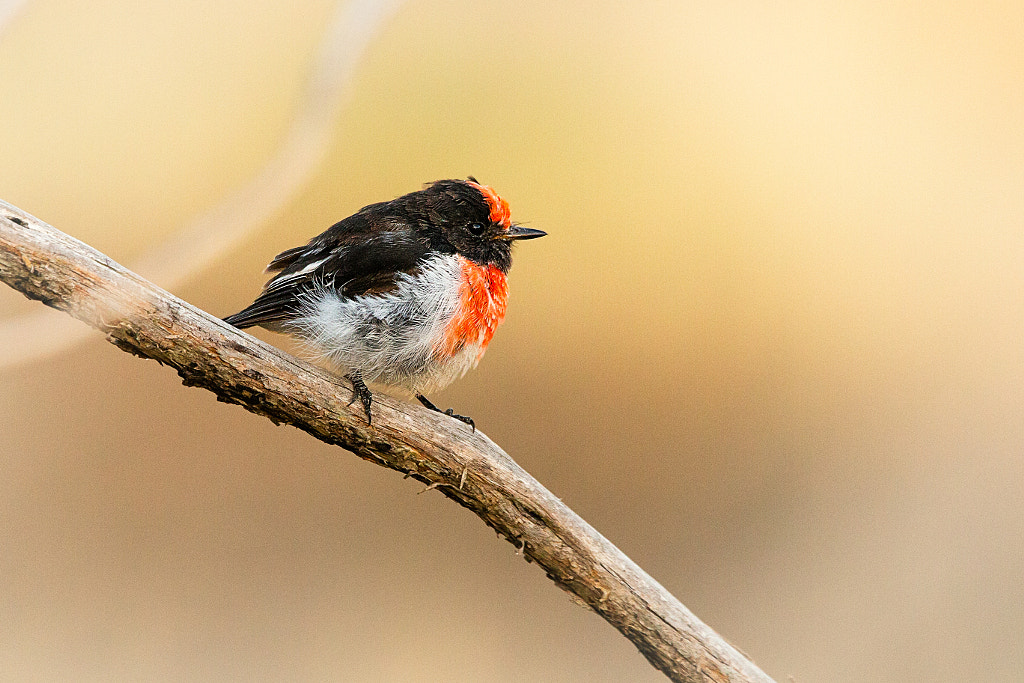
Tatty robin. Red-capped Robin (Petroica goodenovii), York, Western Australia.
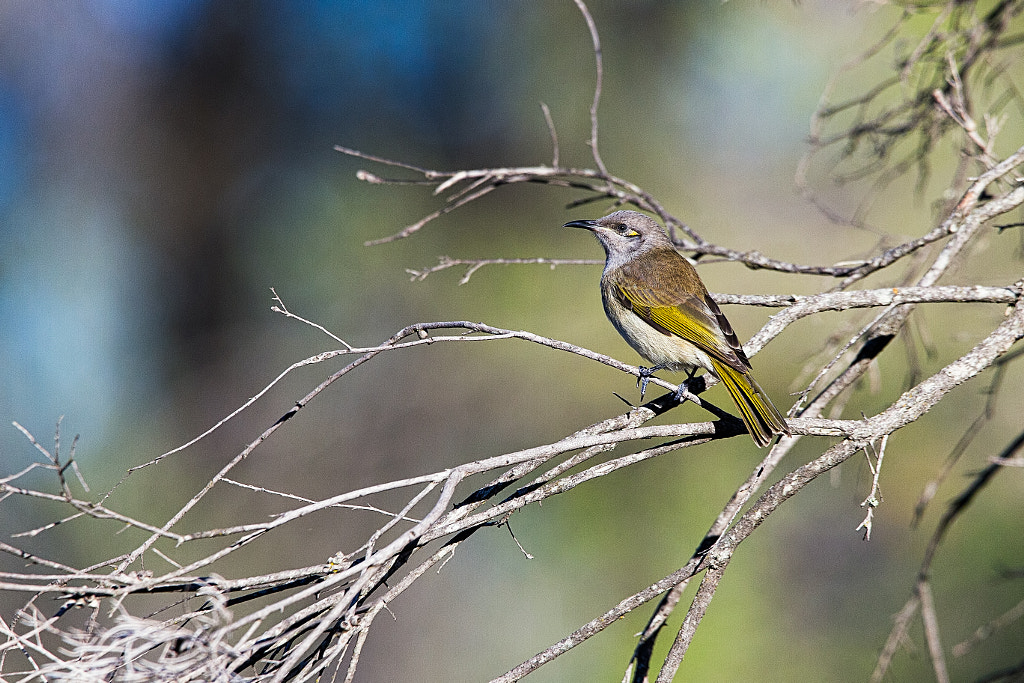
Brown Honeyeater, Lichmera indistincta, York, Western Australia.
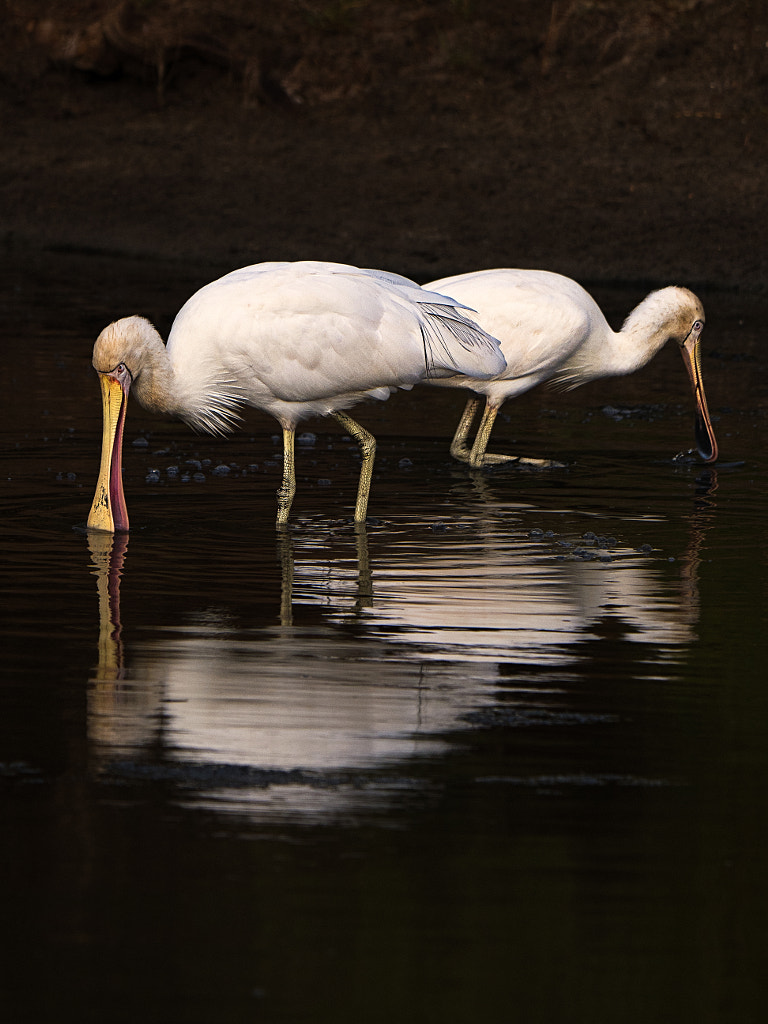
A pair of Yellow-billed Spoonbill (Platalea flavipes) feeding on the Avon River in York, Western Australia.
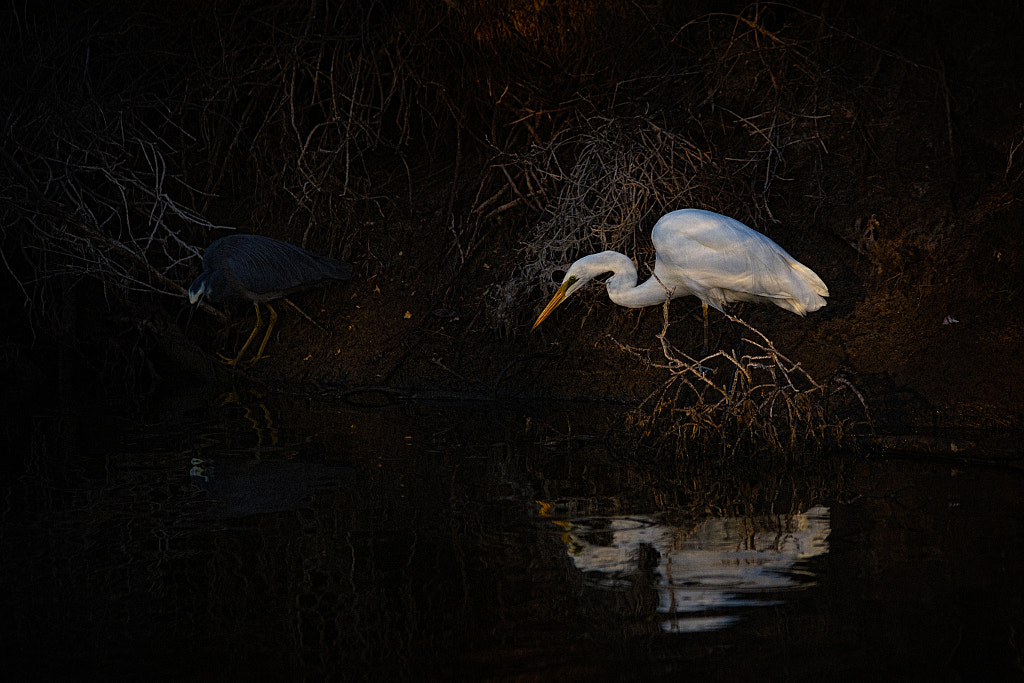
A great egret (Ardea alba) and a white faced heron (Egretta novaeholladiae) hunting in the early morning light on the bank of the Avon River in York, Western Australia.
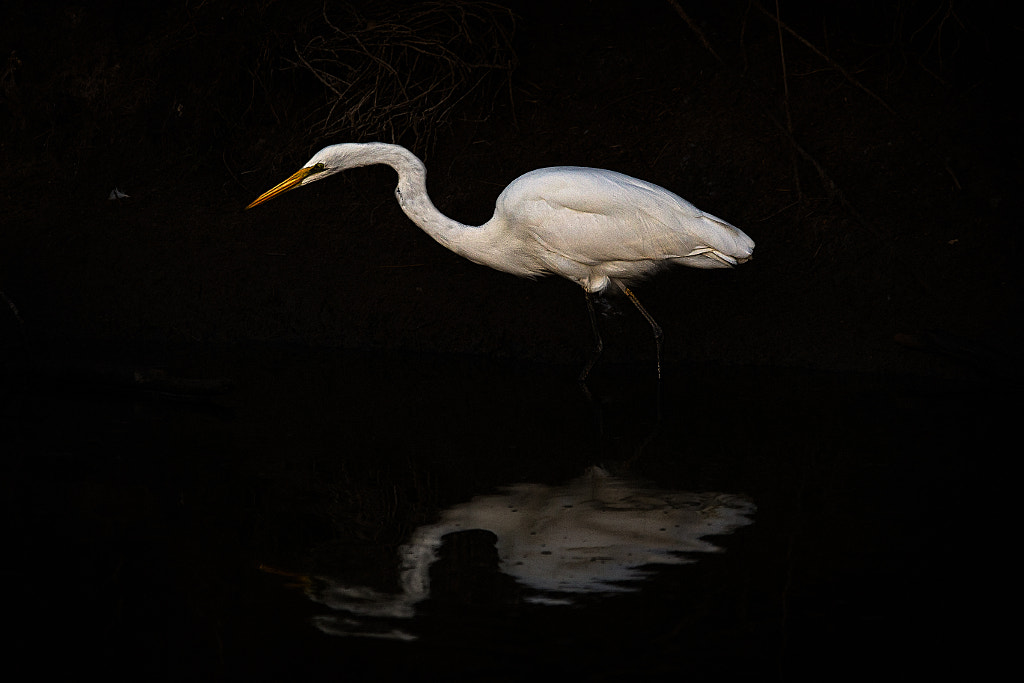
A great egret (Ardea alba) hunting in the early morning light on the bank of the Avon River in York, Western Australia.
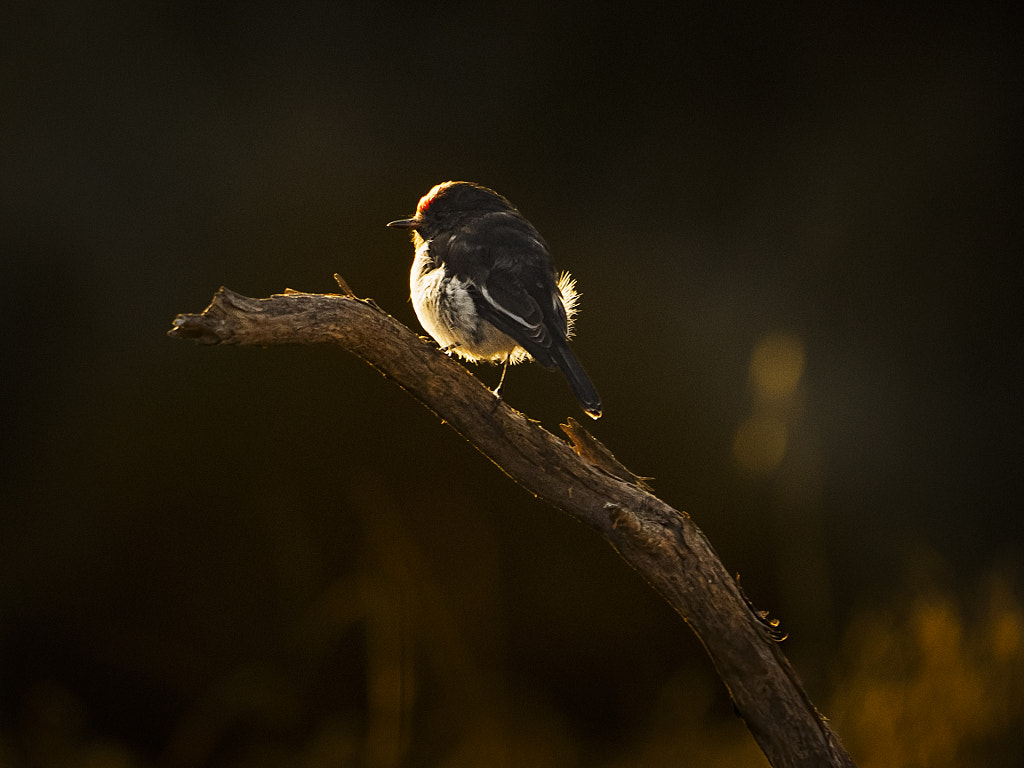
Red-capped Robin (Petroica goodenovii), York, Western Australia.




















You must be logged in to post a comment.