The Pen Is Mightier Than The dSLR

The Olympus Pen EP-5
The Olympus Pen EP5 compared to the EP2. The family resemblance is obvious, but the EP5 is a much more refined product.

Perhaps a bit of hyperbole but depending on you your usage the Olympus Pen series of cameras could suit you better than a dSLR.I mentioned in my blog post Olym-Puss that I had got an EP5 and I thought that I would write about my experiences with it. This is not a review, it’s a little late as the camera is probably about to be discontinued as it is being heavily discounted. So if you want a cheap second body for your m4/3 system or a newbie considering dabbling your toes into the m4/3 pool then it would be a good choice.

The Olympus Pen EP-5
The camera has a flip-up touch screen that is nice and clear which is just as well for unless you pony up for an optional LCD viewfinder it’s all you’ve got.

A little history. Regular readers will know that I’ve had a long-term relationship with Olympus cameras since I bought my first in 1982. I ceased to use them long after the company dropped the OM range of film cameras and I could no longer get them repaired as there were no longer any available parts. I moved over to Canon, not because I thought that they were any better than other brands but because my father in law very generously gave me a Canon EOS3 film camera and two zooms that were surplus to his requirements and I stayed with the brand well into the digital age. While I liked the results my 5d gave me, the user experience was somewhat bland and dissatisfying, so when Olympus announced the micro four thirds concept with Panasonic in 2009 and unveiled its first camera the Pen EP1 I was intrigued. I found a local dealer and had a long look at one. The camera felt lovely in the hand but there were two major problems that stopped me buying one:

  • there was no viewfinder just a rear LCD screen and that was for me at the time a major sticking point
  • I was financially embarrassed at the time and so could not afford it.

In 2010 Olympus released the EP2 which had provision for an optional LCD view finder. So my major objection to owning one had been overcome. In 2011 I was kindly given an EP2 kit consisting of the body, the LCD viewfinder, a 14-42 kit lens and the 17mm f2.8 pancake lens. I was smitten, it quickly became my favourite camera. The 12Mp sensor was not the greatest, but the experience of using it made want to wring the last drop of image quality out of it. I still have it and use it.

Busking
Busking in Salamanca, Hobart. I intend primarily the camera to be used for street photography and travel with small primes.

In 2012 Olympus announced the OMD EM5 a camera that harked back to my beloved OM4 film cameras. The major features of that camera were the new 16Mp sensor and the 5 axis in body image stabilisation (IBIS). This camera ignited the imagination of the photographic community and it was a deserved success for the company. A year later the Pen EP-5 hit the market and it was essentially an EM5 without the built in viewfinder. Unfortunately the camera was poorly received, and after the website DPReview gave it savage write-up exposing the problem of shutter shock sales tanked and rumours have since circulated that the EP5 would be the last premium Pen camera. So given that why would I recommend one? Well Olympus was stung into action and issued a firmware release for the camera which enabled an anti shock setting, which is a kind of ersatz electronic first shutter and this helped enormously, in fact it inclusion makes it an entirely different camera. This and the same 16 MP sensor as the Olympus OM-D E-M5, an improved 5-axis in-body image stabilization, 9 frames per second continuous shooting, and a tilting rear touch screen, a HDR bracketing mode, a minimum shutter speed of 1/8000 sec, a maximum shutter speed of 60 seconds, focus peaking to assist manual focus, and built in Wi-Fi for connection to smart phone or tablet. Put this into a beautifully crafted body that feels absolutely lovely in the hand (confession time – I know its wrong but I could just sit and fondle the EP5 for hours on end) with a bloody good sensor and you have a delicious photo taking experience.

Mount Wellington
Mount Wellington viewed from the rivulet. No HDR here folks just one exposure and a good dynamic range from the sensor.

Talking of the sensor, the 16Mp sensor used by Olympus has as many conspiracies about its origins as the birth of President Obama does. Some believe it made by Panasonic and others by Sony. I don’t give two hoots as to who made it, all I know is that it is packed full of goodness. For a small sensor the dynamic range is impressive and you can pull up shadows and recover highlights nicely. There is noise at the base level ISO of 200, but it doesn’t look too digital, some would say it has an organic quality akin to that of film. I wish this aspect were better as I do a lot of copy work of paintings and illustrations and feel that the ability to render fine detail is a little compromised. The Olympus True Picture imaging processor gives this beautiful colours that Olympus is famous for and it would be entirely possible to just shoot jpg with it and get excellent results straight out of the camera. When I got the camera I thought that primarily I’d use it as a street and travel camera with a small prime like the afore-mentioned 17mm f2.8 or the wonderful 25mm f1.8. I have changed my mind on that and use it for landscape and macro work. Noise is well controlled up to 3200 and the sensor handles long exposures very well.

Moonrise
Blue Moon. Long exposures such as this cause no problems.

The AF system is largely good. Single point AF is faster than a whippet on ICE and being a contrast detect system reading straight off of the sensor there are no front or back focus issues which makes using fast glass wide open incredibly accurate. It’s so good that I’ve not bothered using face detect or eye detect AF modes. The continuous focusing with subject tracking is absolutely pants, a sports beast this camera ain’t, but having said that I have photographed the local surfers using ordinary continuous AF and set to the low frame rate of 4.5 fps it does a very good job using the cheap but sweet 40-150mm lens. The touch screen enables you to select an AF point and trigger the shutter making tripod work for landscapes, and architecture a sublime experience. While on the subject of tripods it’s a shame the tripod bush is not located on the lens axis, no big deal if you don’t shoot panoramas or stitch, but it is an inconvenience if like me you do.

Park Beach Surf #1
The continuous AF was able to keep up with this surfer using the cheap 40-150mm f4-5.6 lens.

IBIS is bloody fantastic. In fact it is so good there must be magic involved. This makes handheld macro and telephoto work a delight. Shooting in low light with static subjects is a breeze. With moving subjects bump the ISO and deal with the grain once you go over 3200.

Cabbage White Butterfly
A cabbage white butterfly (Pieris rapae) on a lavender flower. A combination of IBIS and HSS flash makes macro a breeze.

Video performance leaves a lot to be desired. Lets be honest and up front here. Olympus suck big time when it comes to the implementation of video and the EP5 is not an exception to this. The codec is nasty and not good for any subject that has a lot of movement or fine detail and it is NTSC centric only offering 30fps. There is 1080, 720 and VGA, the best quality 1080 is 24MBps which is not really going to cut the mustard if video is your thing. The video clip below was shot with the EP5 and clearly shows its short comings. I’m seriously hoping that since the release of the EM5 ii and with Australian cinematographer John Brawley on board as a tester and advisor that the video side of things will improve in later models.


So to sum up. The EP5 is a very fine camera. Now it is being discounted at the $400 AUD mark it is a steal. If you already have a m4/3 camera system snap one up as a second body. If you are m4/3 curious then get one and explore the world of mirrorless photography. I bought mine as a back up to my EM10, the EM10 has now been relegated to back up duties, or occasions where I need a built in viewfinder. This is a camera which on release should have got a lot of love. Unfortunately Olympus shot themselves in the foot by releasing it with such an obvious shutter shock problem. I think had they sorted the camera properly prior to release it would have sold like hot cakes. Now the problem is fixed and it is at bargain prices I think it should go on to become a cult classic. I think about buying another Canon dSLR but honestly now I’ve gone mirrorless with all that entails I can’t go back.

The Olympus Pen EP-5
The Olympus Pen EP-5 compared with the OMD EM-10.

Olym – Puss

Ziggy
Peter’s cat Ziggy. Olympus Pen E-P5 with OLYMPUS M.25mm F1.8 lens. Exposure: 1/25 s at f/2.0 ISO 3200

The Olympus Pen EP-5 never received a lot of love on the inter webs forums. Essentially an OMD EM-5 without the viewfinder it was plagued on release by severe shutter shock which caused photos exposed within a shutter speed range of 1/80 – 1/200th of a second were subject to blur induced by the shutter closing. A great shame as that sealed its fate and the camera didn’t sell very well. Olympus to their credit did do a firmware release that solved the problem and I’ve been using one now for a couple of months and have found it to be an extremely capable camera. What makes the EP-5 currently a very attractive camera is that here in Australia it is now being sold for $400 – 450 depending on the retailer and the kit being offered. Will it take over as my main m4/3s camera? Maybe. For video yes as it allows me to plug an external microphone into it which my EM-10 doesn’t. For stills the EM-10 wins my affections at the present because of the built in EVF and the live composite and time-lapse features. As I use it more I’ll post some of my findings.

ActionCam!


Regular readers will have noticed that since Christmas that I have been putting up video and stills that had been taken with a fish eye lens. For a while I was considering purchasing a suitable lens for either my Canon or Olympus systems as I had been intrigued by the effect. I was also very mindful that having bought such an item I would quickly tire of it and see it as a gimmick and so feel I had wasted my money. So when Dick Smiths (a popular chain of electronic stores here in Australia) offered the Sony HDR-AS20 ActionCam for $120 AUD just before Christmas I bought one seeing it as an affordable way of trying out extreme wide-angle photography and videography.


So what are my feelings about the camera. Well I do believe every photographer should have one of these cameras. They open up a world of creative photography. The lens is outside of the protective case pretty decent. It has a 170º field of view which is roughly equivalent to a 17mm on a full frame 35mm camera, a minimum focusing distance of 30cm (12 inches), a fixed aperture of f2.8 and is pan focus. There is obvious barrel distortion and some chromatic aberration. The distortion is all part of the look of fish eye lenses and the CA can be easily fixed in still images in apps such as Lightroom with a single click. The camera only produces jpegs, which bright and contrasty without too many artefacts. There is no control over sharpening and there are only two pictures styles, normal and underwater. You can’t control the ISO, the shutter speed nor the white balance. All being said it produces nice files and the exposures and white balance were largely spot on requiring minimal adjustments in post. For video the Steadyshot image stabilisation while being software based produces impressive results and was one of the major selection criteria for me when purchasing the camera. It’s not got the best video codec in the world nor the best bit rate and compression but it edits reasonably well as long as you don’t push it too far. A very nice feature is that the supplied software for the camera is embedded as firmware so that you don’t have to mess around with downloads or install discs. So what’s not to like – well the optical quality of the lens port on the protective case is pretty appalling, the supplied software is pretty flakey and crashes a lot on my relatively new iMac. No matter what I tried I couldn’t get the WiFi function to work using either my Sony Android phone or iPad. The Sony mount system isn’t as comprehensive nor widely as available as that of the GoPro alternatives. No problem just get an inexpensive adapter and then you can use anything made for GoPro. A real annoyance is that Sony have made it very difficult to plug in an exterior microphone. You can’t use one with the LCD case nor the standard protective housing. The one you can use it with means you loose the LCD and the protection.


The Endeavour
The Australian National Maritime Museum’s magnificent replica of Captain Cook’s HMB Endeavour docked at Hobart in Tasmania.


Overall I’m very happy with the camera and have had a load of fun using it. The only thing is that it is totally addictive and I keep coming up with ideas for shots which inevitably means I have to buy another mount for it. Luckily they are cheap, but I have quickly acquired a bag full of them.


Shoreline
The beach at Verona Sands. The minimum focusing distance is 30cm which allows you to get very close up to subjects.


Lady Franklin Museum "Ancanthe"
Sunrise at the The Lady Franklin Museum in Ancanthe Park, Lenah Valley. The auto white balance and exposure handled this scene very nicely.

Quite a few scenes in this video were shot with the Sony HDR-AS20. I was surprised that the camera proved parrot proof!


The Future Is Now

Over the last few months I have been sharing about some of the features that I have found interesting with the Olympus m4/3s system. To me personally the remote control of flash and the wireless control of the camera are exciting, not necessarily in the form that they’re in now but in what they herald for the future. I know I talk a lot about the old days but I think its important to know where we have come from in order to understand the potential of modern equipment. I am as I keep saying a very promiscuous photographer – I rarely stick to any genre for long and photograph what gives me pleasure and interest.  At the moment I’m taking photos of the wildlife we find in our garden to document it because my wife has joined gardens for wildlife and because I’m lazy and like taking photos close to home, The following are just some photos of birds that can be found in the garden.

Pink and Grey Galah
Pink and Grey Galah or Eolophus roseicapilla, the most common Australian cockatoo.


Noisy Miner Bird
The appropriately named the noisy miner bird, Manorina melanocephala leachi, is a vocal species with a large range of songs, calls, scoldings and alarms, and almost constant vocalizations particularly from young birds.

With the modern technology we have at our disposal taking these pics was straight forward. When we look at the work of pioneer ornithological photographer Eric Hosking and see the amount of kit he had to set up to take similar types of photos it is quite staggering. Examples of Hosking’s work can be seen here.

Eric Hoskins pioneer ornithological photographer and possibly the worlds first professional wildlife photographer.

Now an EM-10, a telephoto zoom, a couple of flash lights and an iPad takes the place of a van load of stuff. I decided to put the kit to the test and then Mother Nature sank my plans. Here in the island paradise of Tasmania we are in the middle of what is laughingly called summer. The last few days it has been sheeting down and blowing a gale. In fact the weather has been so bad that 120mm rain fell overnight and this morning on my daily perambulation I had to wear a fleece and a soft shell water proof. As you can imagine the local wildlife isn’t too keen at putting in an appearance and I doubt that any equipment setup outside would last long. So in place of the local wildlife you’ve got me showing you how to do a hi-tech selfie. My wife would probably say that there is no difference as I’m pretty feral!

OK having done this what have I learnt? Well first of all using WiFi and the RC function uses power like a trust fund baby spends money. Setting up is easy but the amount of control offered by the Olympus Image Share App is very basic. You can control the exposure but you can’t get access to the Olympus Super Control Panel and that means that you still have to access the camera itself if you want to change your lighting ratios or switch from TTL to manual or vice versa. Although the camera is connected to the iPad via WiFi you still have to physically touch the screen to trigger the camera. So in future what would I like to see, well to start I’d like to have access to the SCP via the app so I’ve got more control over the camera and lights. Secondly I’d like to have more options to trigger the camera. At the moment I can’t use the ioShutter™ as my Olympus cameras have a proprietary connection to allow the use of a remote cable, so I’d certainly welcome either Olympus or the makers of ioShutter to make a remote that allows me to trigger the camera via sound or with a light trigger. I really think that we’re just at the very start of connectivity when it comes to cameras. Back in August 2012 I wrote about shooting using my Canon EOS5d tethered via a USB cable to a laptop and using Lightroom. Now I can do the same and more but wirelessly using a mobile phone or tablet. I hoping that in 2 or 3 years time we’ll see the functions I’ve talked about here.

A Flash of Inspiration – part 2

Apologies firstly for the lateness of this follow-up piece – I’ve been having problems with my internet connection and also the technical support at my provider, iiNet, managed to disable my computer with a piece of remote login software. Anyway after a few anxious days  thanks to Apple support,  a re-install of OS X and then all my other software and I’m back in business. Secondly I’d like to apologise for the sound quality on the video. I had to use the reference sound recorded on camera for the soundtrack because the cable from my mic to my external recorder went bung. Technologically speaking it has been a trying week at the world headquarters of Paul Amyes Photography (PAP).

I would also appreciate some feedback. If enough people think it would be beneficial I am prepared to re-publish this and the last article as a free iBook available through the Apple iTunes store. Obviously the material would be mainly written and with photographic illustration and not have the video content you see here. So please let me know if this is something you’d like to see.

A Flash of Inspiration – part 1


20141112-Flash_Test-6311


Camera systems are often measured by their range of lenses and flash units consequently it is Canon and Nikon that are the benchmarks. But when it comes to flash Canikon actually use a lot of Olympus technology. So before we get to the review of the FL-600R we’ll have a look at just what Olympus pioneered in flash photography and how that relates to its current M4/3 system.

One of the reasons why I first bought into the Olympus OM system back in 1983 was the flash system. For its day it was revolutionary and Canon and Nikon didn’t have anything like it. The OM2 was the first camera to have TTL metered flash. For those who have only ever known TTL flash you won’t believe how significant this was. It meant an end to worrying about guide numbers and subject distance, of getting lots of washed out looking images or hopelessly under exposed shots where the metering cell in the flash was confused by the amount of light reflecting back at it. All of a sudden we were able to get accurate flash exposures time after time. In 1986 Olympus launched the OM4Ti and the F280 flash gun. This combination was the first time full flash synchronisation at all shutter speeds on a camera with a focal plane shutter. Instead of firing a single light emission when the flash was used in conjunction with a shutter speed higher than the flash sync speed of 1/60 sec the F280 fired a series of short bursts starting when the first shutter curtain opened and finishing when the second closed. This was a big deal to wedding photographers as it meant that getting TTL high speed sync meant that fill flash was easy and didn’t involve spending a fortune on medium format cameras who were equipped with lenses that had leaf shutters.

With the M4/3 system Olympus is able to offer advanced flash features, and the good news is that these features (with some exceptions) are largely carried over to other cameras made by the Micro Four Thirds Consortium and that means Panasonic and Leica can use the same flash units. Using flash in M4/3s is very straight forward, the problem is Olympus seems unable to communicate that and continues their bad habit of poor instructions and obtuse menus. So help I’ll quickly run through using the system with both on camera and off camera flash. There are 3 different metering modes for flash:

i) manual flash – which is a bit of an oxymoron as there is no metering

ii) auto flash – this is where the flash out is controlled by a sensor on the body of the flash unit. The flash fires at full power and the sensor measures the amount of light reflected back from the subject and quenches the flash emission. The results on camera can be quite good, but its biggest failing is when the flash is being used off camera.

iii) TTL metering – this where the light from the flash is metered as it is reflected back through the lens. It offers the most convenient form of flash usage, but suffers from all the problems of any reflective metering system i.e. it can be fooled by excessively dark or light subjects. Olympus have tuned their metering system to protect the highlights for jpg users so the images can look under exposed. This is where the flash exposure compensation settings come in handy, and I’ll get around to explaining that shortly.

On Camera Flash

20141112-Flash_Test-6310


To get the most bang for you buck with the Olympus flash system I would suggest making the following changes to how your camera is set up. Go into the main camera menu and scroll through till you get to the cog wheel icon. This is the “Custom Menu” selection. Activate it and scroll down to Custom Menu F and here you can set the following settings:

i) The flash sync speed. I set this to the fastest that is available, which on my EM-10 is 1/250 sec. Although the flash guns like the FL-600R and FL-36R can’t use this setting the pop up flash or the little flash accessory that comes with all Olympus models without can. It is very handy for a little bit of fill flash on bright days.

ii)Next you have a slow limit for when you use aperture priority mode. I like to use slow sync flash for creative effects so I have mine set to 30 seconds, but you may just want to limit the shutter speed to what you can comfortably hand hold. The range goes from 1/250 sec to 30 seconds.

iii) The most important setting. Whether you have Exposure Compensation and Flash Exposure Compensation linked. I choose to have this set as off. The reason why is I shoot primarily in aperture priority and use exposure compensation to make adjustments to the image in tricky lighting. But when using flash being able to use these separately adds another creative string to your bow. The reason is that you are then able to alter your flash exposure and your ambient light exposure separately. I do a lot of shots where I mix daylight and flash and there are times when I want the flash to the main light (or key light) and day light (or ambient light) to be the fill light. If come from using the Canon flash system you’ll definitely want to do this, if you are used to Nikon then leave them linked.

The Olympus flash system is controlled through a combination of the controls on the flash unit and through menu choices in the Olympus Super Control Panel (SCP). The controls on the flash can vary from very simple with just a couple of buttons to push or have quite a sophisticated menu system, it all depends upon the model flash. My Metz 44AF-1 has a grand total of five buttons and no LCD screen while the FL-600R has four buttons, a dial and a rocker switch to make changes through a menu system using an LCD display. Thankfully after a few choices initially the main controls are then managed via the SCP. Herein lies Olympus’ problem – the default factory setting for any of Olympus’ m4/3 camera is not to have the SCP enabled and their instruction books are so poorly written that it isn’t very clear how to do this. Personally I feel that the Live Control Panel, which is the default setting should be abandoned and the SCP should be the only interface to control the most frequently used settings. I also feel that some of the flash control settings aren’t needed and the menu could be simplified. Prior to using m4/3 I used the Canon EOS system and its flash system when used in conjunction with a fully dedicated flash and the Quick menu was simple to use and very intuitive. When I first started working with m4/3 and looked at the flash system my first reaction was to not use it and keep using the Canon cameras for flash. With time I have now switched to using m4/3 for everything. To change to the SCP, if you have not already done so, switch your camera on and press the OK button. This brings up the LCP. Press info and this changes to the SCP as shown below.


EM-10 Super Control Panel
The Super Control Pannel with the flash setting selected.


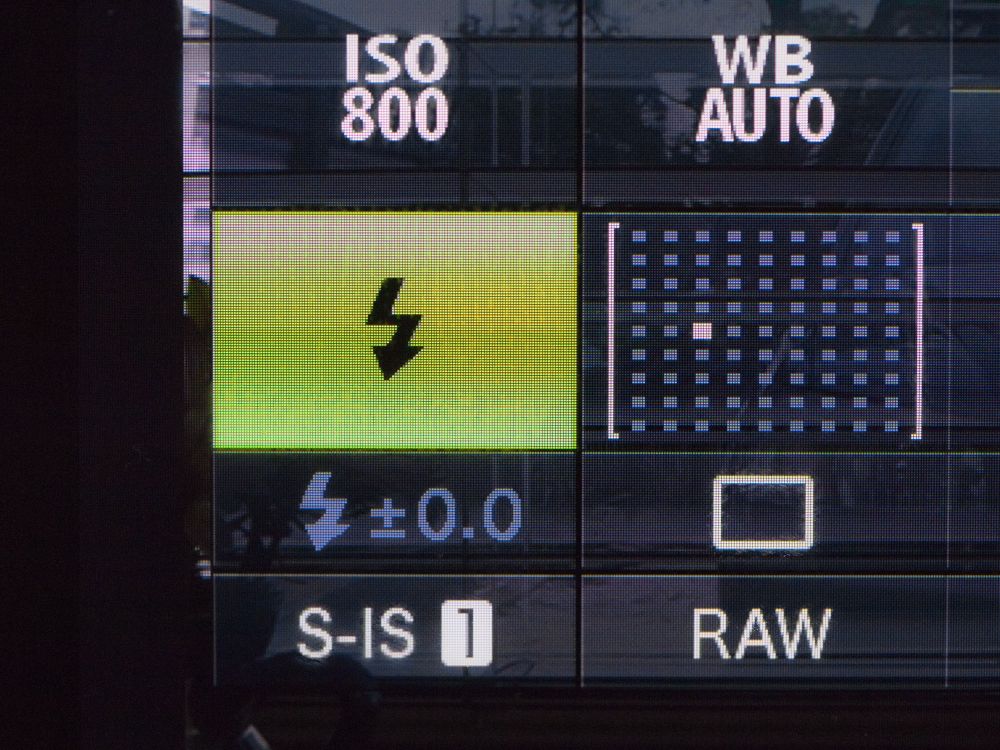
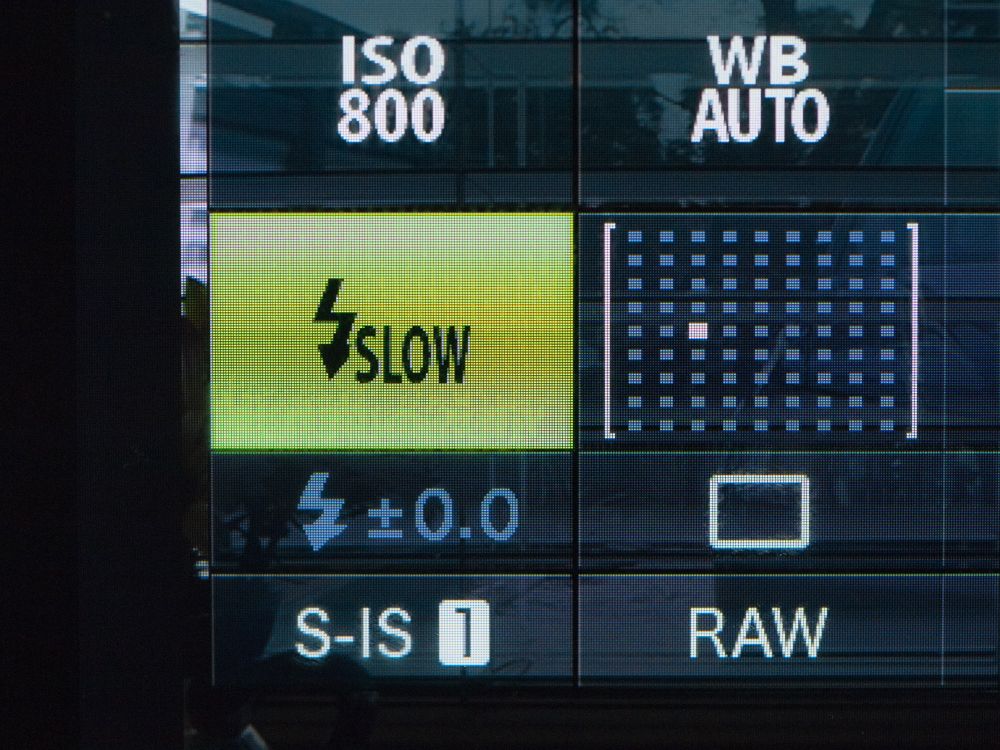
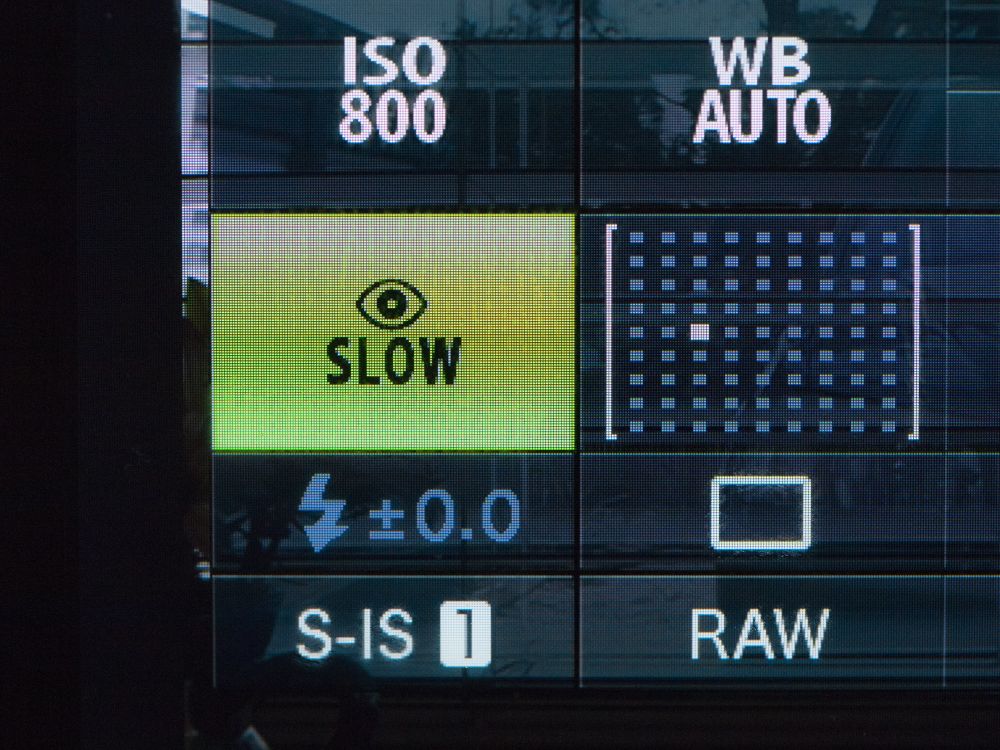
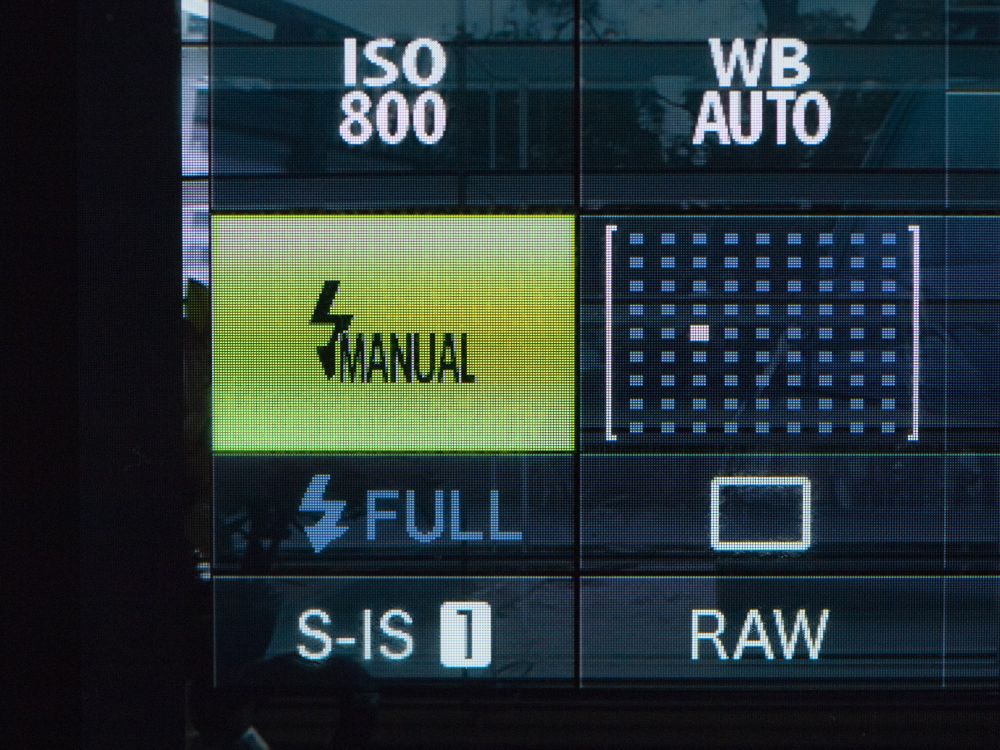
If you select the flash section in the SCP as is highlighted above you can cycle through the various flash options.


Auto TTL
Auto TTL

Auto TTL. Here the flash fires automatically when there is low light or the subject is backlit.


Fill Flash
TTL Fill Flash


TTL Fill Flash. This is where the flash fires irrespectively of lighting conditions.


Red Eye Reduction
Red Eye Reduction

TTL Auto with red eye reduction. If you are shooting portraits with the flash on the camera this is the mode to use.


Slow Speed Sync
Slow Speed Sync

Slow speed flash for shutter speeds 60 sec to 1/200


Slow Speed Synch with Redeye Reduction


Slow speed sync with red eye reduction.


Slow Spped Sync 2nd Curtain
Slow Speed Sync on the 2nd Curtain

Slow speed sync with second curtain synchronisation. This means with moving subjects the light trail is behind the subject rather than in front of it as occurs with normal slow speed sync.


Manual
Manual


Manual – this is where the photographer decides to control the flash by either increasing or decreasing the out put. 1 is full power, 1/2 is half power, 1/4 etc. Manual mode must also be selected on the flashgun.


Flash off
Flash off


When shooting in TTL mode the meter reads the amount of light reflected back off of the subject to determine the “correct” exposure. As mentioned previously the problem with reflective meeting is that certain tones or surfaces can fool the meter into over or under exposure. This can be corrected for in the SCP by using the flash exposure compensation. The photographer takes an initial photo and reviews it on the LCD, I prefer to do this using the histogram, others swear by the shadow and highlight blinkies. The flash out put can be adjusted by up to + or – 3 stops. The adjustment just effects the flash output and not the global exposure value. This can also be used for creative effect particularly when shooting portraits outside in strong sunlight. Using full TTL flash when combined with the sunlight can give an unnatural look as there will be no shadows on the face, dialling in -1 or 1 1/3 stops preserves the shadows but allows us to see into them. It can also give a pleasing catchlight in the subjects eyes.

Honey Bee
Honey bee on a lavender flower. Olympus EM-10 with OLYMPUS M.60mm F2.8 Macro and Olympus FL-600R cash gun. Exposure aperture priority with high speed flash sync 1/640 s at f/4.0 ISO 400.

The non TTL modes of the flash must be selected on the flashgun itself. If you are using the Olympus FL-50R, the FL-36R or the FL-600R (and certain other third party models) you can shoot in FP mode in either TTL or manual modes. This means that you can shoot at shutter speeds higher than the maximum synchronisation speed (between 1/180 and 1/250 depending upon camera model) all the way up to your maximum shutter speed of 1/4000 sec (or 1/8000 for the EM-1). This a boon for shooting portraits out doors using fill flash. However, as with anything in photography there is no such thing as free lunch and the trade off for this is a reduction in the flashes output. Shooting a head and shoulders portrait with a 45mm lens using the FL-50R, the FL-36R or the FL-600R and you should be fine. Full length portraiture and you could be struggling.


Off Camera Flash

20140902-Oly_Flash-001
An Olympus dedicated Metz flash set up on a lighting stand ready to be triggered by an the RC mode on an Olympus camera.


Olympus provides two ways of using flash off of the camera:

i) Olympus Flash Extension Cable FL-CB05, which at $144 AUD is ludicrously expensive. I bought an Aputure AP-TLO TTL cable for $25 AUD including postage off of Ebay. This is handy if you want to use a flash bracket to just get the flash away from the axis of the lens so as to prevent red eye or you want to do some close up or macro work and don’t want to buy a separate flash for it. If you are using an Olympus flashgun you will have to change the custom settings for the flash to enable this.

ii) Remote Control or RC mode. As long as you have a model that was introduced after June 2011 when the EP-3 was announced and an Olympus Flash with the letter “R” at the end of the model number or a third party unit fully compatible with current Olympus TTL protocols including wireless, then you are good to go.

Generally there is a lot of confusion about the RC mode because it is also referred to as wireless by Olympus and people assume therefore it a radio trigger. In fact the system works off a near invisible flash pulse from the control flash. This has a couple of downsides. The first being that the sensor on the remote or slave flash must have line of sight communication with the master control unit so this limits where you can put the remote and precludes the use of certain types of light modifiers. Secondly The range isn’t very great. Olympus says that it is 5-7m depending upon the “local conditions”. What I have found that you’ll only get 7m inside, outside in very bright sunlight the performance is very much reduced and in some cases will not work at all.

To use RC mode, first you have to go into Shooting Menu 2 in the main camera menu and turn it on. This now enables the flash control menu in the Super Control Panel. To access it you either need to pop up the built in flash on your camera, or if you don’t have one then put in your accessory flash FL-LM2 in the camera hot shoe or use a larger external flash that has RC controller capabilities. Then access the SCP panel as normal.


Control of on camera flash

The blinking camera icon is for controlling the onboard flash. It can be set to TTL, manual ( full power down to 1/64) and off. I generally leave it as off because when I use RC mode I don’t want the onboard flash contributing to the exposure. Even though it says off the flash still emits a series of pulses of nearly invisible light to transmit information to the slave flash units.


RC FP high speed sync

The FP box is highlighted here. The choices are FP or high speed sync (remember that this is a function of the flash and so your flash must have this ability to use it), and normal flash sync. Underneath is an icon that looks like the camera is shaking because it has had an electric shock. That sets the the intensity of the light pulse of the commander unit (Low, Medium, and High) I leave mine at high all the time as it is then one less thing to worry about.


Setting RC Channel

It is important to ensure that both your RC controller and your slave flashes are set to the same channel. In the event of several m4/3 users wanting to all shoot with RC flash at the same time you can set up so you use a different channel.


RC TTL control

You can have three groups of flash and although Olympus states that technically you are not limited to how many flashguns can be in a group they also say that three is probably the limit due to “interference” (page 36 of the English instruction manual for the FL-36R). Here I have A and B activated in TTL mode.


RC Manual Control

You can also use the manual exposure for flash in RC mode and you can set the power output via this panel. This is a very nice feature if you have your lights set up on stands you don’t have to keep walking over to the light and fiddling with it you can do the adjustment from your camera.


RC Auto Control

RC Auto lets you trigger the flashes remotely but the metering is done by a cell on the flash and it measures the light reflected back from the subject. Not a mode I could see myself using as it is quite an imprecise way of working and TTL or Manual offer far more control and consistent results.


So although it seems complicated the Olympus flash system offers an impressive range of features that allows for creative lighting techniques. With a small range of lighting modifiers such as diffusers, bounce cards, umbrellas etc you are able to produce “professional” looking photos.

The video below is a summary of the above.

The next part of this will look at the FL600-R flashgun and how to specifically use that in conjunction with a m4/3 camera.

Shelter From The Storm*

Shelter From The Storm
A mosquito shelters from the wind and rain on a leopard orchid. Dodges Ferry, Tasmania. Olympus EM-10 with OLYMPUS M.60mm F2.8 Macro lens and Metz 44-AF1 flash. Exposure: Manual mode 1/180 s at f/8.0 ISO 200.

I first got my Olympus 60mm macro in May 2013 and wrote about it here. It is an amazing lens, but I was using it initially on an Olympus Pen EP-2 with the less than stellar 12Mp sensor I really wasn’t seeing what the lens was capable of. The picture of the mosquito on the Leopard orchid above was taken with the same lens but now mounted to an OMD EM-10 with the latest iteration of the 16Mp sensor. Tripod mounted and using flash I can now see how much detail the lens is able to resolve – you can see the hairs on the leg of the mosquito. Up until this morning when I processed the shot I never knew that mosquitos have hairy legs.

Lepopard Orchid
Leopard orchid (Diuris pardina), Dodges Ferry, Tasmania. Olympus EM-10 with OLYMPUS M.60mm F2.8 Macro and Metz 44-AF1 flash. Exposure: manual mode 1/180 s at f/8.0 ISO 200.

The other thing that I’m really taken with is the Olympus flash system. When I migrated from Canon I was particularly concerned about the flash capabilities and it was one of the reasons why I held onto my Canon kit. Now I have two dedicated speedlites for my Olympus kit, a Metz 44-AF1 (which I really do like) and a newer Olympus FL-600R (which I’m still getting to grips with and will be the subject of a separate blog entry a little later on). Like most things Olympus when you initially use the flash system the choices offered are quite daunting, but once you’ve set everything up it really is quite easy to use. The remote control for off camera flash is very sophisticated and make it very easy to get good results. Its only down fall is that it is radio controlled and there are no reliable third-party TTL radio controlled flash triggers. The day they arrive the Canon equipment will go.

Trip The Light Fantastic
My Olympus EM-10 tricked out for macro flash using a Custom Brackets Mini-RC, a Metz 44-AF! flash, an Aputure TTL sync cable and a cheap Chinese no name flash modifier.

The above shot shows how I had my camera set up to take the shots of the leopard orchids. The flash and the camera are mounted to a Custom Brackets Mini-RC via Manfotto quick release plates which makes setting things up a quick and easy affair. The TTL cable is by Aputure and was only $30 and the flash modifier is a cheap Chinese no name knock off of a Rogue FlashBender that I got off eBay for $5 including postage. What I like about it is that it is easy to use either handheld or tripod mounted.

As usual clicking on a photo will take you through to my online gallery.

* Apologies to Bob Dylan

SHELTER FROM THE STORM BOB DYLAN from Rita Giuliana on Vimeo.

Eeeeeeeeeeeeeeeeek!!!!!!!

Wood Scorpion
Cercophonius squama, commonly known as the forest scorpion or wood scorpion, is found over much of Australia. It is, however the species of scorpion found in Tasmania.

I opened the door the other morning to find this little fella sitting on the door step.  Photographed with the Olympus EM-10, Olympus Zuiko 60mm f2.8 macro and the Olympus FL-600R (which I’m currently testing and I’ll be writing about it and the Olympus and m4/3 flash system). Exposure 1/30 s at f/8.0 at ISO 3200 aperture priority mode with -1 stop FEC. No animals and more importantly me, were hurt in the making of this photograph.

Out Walking The Dog

Looking out over the Tasman Bridge over the Derwent River from the top of Rosny Hill.

Nothing of earth shattering importance this week. I took the faithful hound up to Rosny Hill for a walk. It was a beautiful saturday afternoon, and the track was quiet enough so she could run off the lead. All I had to do was just walk and look. I had my Panasonic LX5 with me so I just took some quick and dirty HDR panoramas.

Looking across the Derwent from Rosny Hill at Mount Wellington.

When I got home I just dropped them into Adobe Lightroom. First I did the HDR conversions using HDR Efex Pro2, and then I did the panoramic stitching in Photoshop CS5. Nothing complicated, just a few minutes on each.

Looking across Kangaroo Bay at Bellerive and Clarence Yacht Club. from Rosny Hill.

The dog enjoyed herself, I could tell for when we got home she went to bed. As the great canine philosopher, Snoopy, said “A tired puppy is a happy puppy”.