The Olympus 25mm f1.8 standard lens. Small but beautifully formed. Olympus even give you a lenshood!
The other day I was sitting at my desk just idly surfing the net when a courier van pulls up and leaves a small box. Once unwrapped it revealed an even smaller box containing the Olympus m.Zuiko Digital 25mm f1.8 lens. Now for a long time I’ve always believed that every photographer should own a fastish standard lens. In fact I also believe that if should ever find yourself in the photographic doldrums then just committing to use a standard lens for a period of 12 months will see your photography improve no end. I had one for my OM film system (and still have and use it) and I have one for my Canon EOS digital kit, but a little while back I had a dalliance with film range finder cameras and I eschewed the fast 50mm in favour of a pancake 35mm moderate wide-angle. In fact I was so smitten with the focal length that when I adopted the m4/3 system the Olympus 17mm f2.8 pancake was a must have, and if I look through my Lightroom catalogue over half the picture I’ve taken with my Pen and OMD have been with that lens. So now I’m in possession of a fast standard again.
No obvious lens distortion.
My initial impressions are that although it has a plastic body it is well made, although not as well made as say the 60mm f2.8 macro. It continues with the clean modern lines that Olympus adopted with the launch of the EM-5 and it feels well-balanced on both my EP-2 and EM-10. The other small thing that makes feel very positive about the lens is that Olympus have finally stopped being tight and are including lens hoods. The hood is hard plastic and bayonets securely on to the lens after the front cosmetic rim of the lens has been removed. Nice – a good lens should have a lens hood to get the best out of it. After a couple of days of shooting stills out and about I found that the focal length took a little adjusting to, it is a bit narrow for my tastes, but I quickly adapted and started looking for subjects that would play into its strengths.
DOF comparison 1 Olympus Zuiko 25mm f1.8 lens wide open at f1.8DOF comparison 2 Olympus Zuiko 25mm f1.8 lens at f8DOF comparison 3 Olympus Zuiko 25mm f1.8 lens at f22
So optically how did it fare? Very well. There is no distortion worth talking about and although shooting wide open there is some slight chromatic aberration but this disappears very quickly and by f4 it is gone. Sharpness is good with the centre of the lens performing very well wide open with some softening towards the corners again things improve quickly as you stop down, but get down past f11 and things start to soften up again as diffraction rears its ugly head. Diffraction isn’t a fault of the lens it is a problem with the size of the sensor, and all sensor and film sizes suffer from it. The lens isn’t what I would call “clinically” sharp in the way a lot of modern lenses are, it renders nicely and has a nice fall off from sharp edges to the out of focus areas. I’m not by any means a bokeh slut but this lens does render out of focus specular highlights in a very pleasing way. It made me want to go out and look for images that would give me those velvety smooth transitions.
Decentering test on the Olympus 25mm f1.8 at f1.8.Decentering test on the Olympus 25mm f1.8 at f5.6.Beachside Bully Run. The autofocus is quick and accurate and was able to track my dog running erratically on the beach.
The lens focuses insanely quickly on the EM-10, which is as it should be on the latest generation of m4/3 cameras and is no slouch on my first generation EP-2. The worrier of DPReview now obsess over centring and on the micro four thirds forum the hysteria regarding the Olympus 25mm is something to behold. A few people there are expecting lens perfection from this lens and unfortunately no lens is perfect. Does the lens suffer excessively from being de-centred – well according my exhaustive testing of just one sample lens the answer is no. The lens is well within acceptable and I have seen much worse on lenses that cost ten times the amount this one does. My advice is that if you spend all day shooting pictures of brick walls and sheets of newspaper right way up and upside down then blow the resulting shots up to 3 or 400 % and then worry continually that you have a bad copy, or your rate of return rate of “faulty” products is so high that the customer service people know who is on the line just from the sound of your voice then you need a new hobby, therapy or both. Life is short, hobbies are supposed to bring enjoyment and fulfilment not create endless gear angst.
White flowers with bokeh balls. Dodges Ferry, Tasmania.Tea StrainersBanoffee pie Banjo’s Bakery, Hobart, Tasmania.Liberal Party Hobart, Tasmania.Coffee Lovers Hobart, Tasmania.On location filming at the Bellerive Yacht Club with the Olympus EM-10 and 25mm f1.8 lens.
For video the lens is a very good choice. I shot the video clip below to test the lens’ resistance to flare, how it coped with continuous focus in video, close focusing and bokeh rendition.
Now there are some lenses which are so good that people buy into the system just to have a copy of that lens. Is the Olympus 25mm one of those? The short answer is no, but that is a disservice to this lens. It is a very capable performer and I think it should be given serious consideration by anyone who is already invested in the micro four thirds system. I really must say I was pleasantly surprised at how well the 25mm performed. It’s not the fastest lens, it’s not the most expensive, nor is it the cheapest. There are other m4/3 lens that are optically superlative and there are those whose performance is less than stellar to put it mildly. The Olympus m.Zuiko Digital 25mm f1.8 lens is a “Goldilocks” lens – just right.
Ouch! Don’t headbutt the buildings – it hurts.Blowing in the Wind Bellerive Yacht Club, Tasmania.The SS Kosciusko part of the facade of the Waterfront Hotel in Bellerive.Looking out over the marina at Bellerive Yacht Club.Stool Samples Hobart, Tasmania.
On the last weekend of our trip to Tasmania we got the weekend paper and saw they were running a video competition on the theme “Why I Love Tasmania”. Bugger! If I’d known I would have taken a lot more kit, recorded in 1080, used an external recorder with better microphones and written a proper story board and script. Why didn’t I find out about this at the beginning of the trip. Ah well I thought you’ve got to be in it to win it and I put together a short video with what I had shot on my Olympus EP-2 with the SEMA-1 mic which is only marginally better than the built in camera mic, and the four lenses that I always carry when on holiday – the Olympus 17mm f2.8, the 12-50mm f3.5-6.3, the 40-150mm f4-5.6 and the 60mm f2.8 macro. This trip was the first trip I’d taken my tripod, thankfully with a fluid head, and my video monopod (which I happen to think is one of the best accessories I have bought for doing run and gun video). In my wildest dreams I don’t expect to do well in the competition let alone win it, but it was a bit of a larff doing it and it was good experience to work to a deadline on a project.
The EM-10 fitted with the Olympus m4/3 Zuiko 12-50 f3.5-6.3 lens. A good walk around combination for stills and video.
It has been a very exciting two weeks here at Paul Amyes Photography Towers. A little note from the Fed-Ex man turned up in the mail box saying he wanted to deliver me something. To say I was perplexed was an understatement as I hadn’t been bashing the plastic in an orgy of online shopping. So I dutifully walked up to the depot (its only 500m) up the road, and collected it. On getting it home I found inside a was a shiny new Olympus OM-D EM-10 (which shall just be referred to as the EM-10 henceforth) and an offer to have for long-term testing and evaluation. Woooohooo! A new toy to play with.
The EM-10 is smaller than the EP-2 with the VF2 viewfinder attached.
So two weeks later I’m siting down and trying to marshal my thoughts about the experience thus far. I think that I should give a little background. My first 35mm camera was an Olympus XA2 and since then I have owned OM1, 2, 4, 20, and 40’s, an XA4, an AF10, a C720 UZ and more recently an EP-2. I was shooting weddings professionally with my OM4 up until 2005 when one sad day it broke down and the repairman said there were no more parts to fix it. I then had an expensive dalliance with Canon, which no matter how hard I tried I could not turn into fully fledged relationship because the spark just wasn’t there. I’ve used other cameras and I really enjoyed them – Voigtlander Bessas, Pentax 645, Panaonic LX-5 all spring to mind, but I have to confess that the EM-10 is the first camera I’ve ever used that has made me want to hurl it across the room and then jump up and down on the pieces in sheer frustration. My EP-2 is my all time favourite camera to use. I accept its idiosyncrasies and can work round them because the whole process is so enjoyable. I use it as my travel camera and for multimedia projects. The EM-10 I thought would be an ideal replacement.
The pop up flash can also act as a remote control for off camera speedlites.
Well lets talk about the good stuff. The camera looks drop dead gorgeous and it feels just right in the hands. My father always used to say that I had hands like bunches of bananas yet this small camera feels just right. In fact it such a tactile experience I’ve found that I often just pick it up to fondle and just hold. I know, I know it just sounds so wrong, but for me a camera has to actually feel good in the hand. I like cameras that become transparent and don’t get in the way of taking photos.
Portrait of my bully, Frida, using m4/3 Olympus 17mm f2.8 on the Olympus EM-10. Exposure 1/100 sec, f2.8 ISO 1600.
Olympus when they introduced the 16Mp sensor with the EM-5 were onto a sure-fire winner. Its origins were, and still are hotly debated on internet forums and while most accept that it is from Sony a few diehards are like the Birthers in the US arguing that it comes from Panasonic. Personally I don’t care where it comes from, all I know is that the latest iteration in the EM-10 is very good. The dynamic range and the pixel amount are just about perfect for my needs. If you want more details then DXO or DPReview can shed more light on the technical aspects.
Using the built in pop up flash as in RC mode to controll a Metz 44AF1 speedlite.
I very much like the EVF. When I bought the C720 UZ in 2002 I was convinced that EVFs were the future. The EVF in the EM-10 is not the same as the one in the flagship EM-1 or in the VF4, but it is better than the VF2 and the one in the EM-5. It is crisp, has a good refresh rate, and I find that I can focus manually quite accurately which is better than I can say for the viewfinders on many dSLRs. Where my EP-2 used to frustrate me was that I could not use the viewfinder and a flash, it had to be either or. I like having the EVF built in to the camera. Speaking of flash the EM-10 is the first in the series to have a pop up flash. I can’t see myself using it as a flash, but it can be used as a remote control for off camera flashguns and in that mode it works excellently and I can see myself using the function a lot when I start photographing orchids in spring. The rear screen is nice, it is the first tilt and touch screen that I’ve used and I like both features. The aspect ratio of the screen is 3:2 rather than 4:3 so you have black bars at the edges when shooting in the native 4:3 format. In the strong Aussie sun the screen is hard to see, I think this to do with it being a LCD rather than an OLED as in the other OMDs.
The 3 axis IBIS is a down grade from the previous models 5, but it works very well and the video below demonstrates that. With my 17mm f2.8 I’m able to get sharp images at 1 second which I find amazing. It works very well in video mode in conjunction with digital image stabilisation and it possible to capture steady video without the need for a rig or monopod. Many have poo pooed the video quality of Olympus cameras as being not suitable for serious work because there is only 30fps and a maximum bit rate of 24Mb/s in 1080p. Well I would have to say that while I do shoot a fair bit of video it is only destined for YouTube or converting to SD for DVDs that my elderly relies can play. So for those purposes it is more than adequate. The video clips below are straight out of the camera, nothing has been done to them apart from adding subtitles and a sound track. I’ve uploaded them to YouTube in 1080 so you can see what the camera actually produces. Any artefacts you may see will be a result of the compression YouTube uses. The only thing about the video function I don’t like is that there is nowhere to plug an external mic or recorder in. Yup no accessory port under the hot shoe and no 3.5mm socket. Bad Olympus, very bad!
Ok as I have just started with a fault I’ll move on to them. I like shooting HDR panoramas. I know many will consider that as a crime against humanity, but I like doing it. The EM-10 has both HDR and panorama modes. Can they be used in conjunction? NO! Ah well back to shooting them manually. I’ve programed the function button on my 12-50mm lens to turn exposure bracketing on. Nice it means I don’t have to delve deeply through the notorious Olympus menus. Not so nice is that the bracketing is still limited to 3 frame at -1, 0, and +1 EV. Come on Olympus it is 2014, your sensor has great dynamic range lets at least have 2 stop intervals.
While the EM-10 has both a HDR mode and panoramic function they cannot be used together. This handheld panorama is made up of 12 frames put together in CS5 and HDR Efex Pro 2. The 3 axis stabilisation works very well and makes this sort of work a doddle.
Focus peaking is a very nice feature and it works very well, but as a default straight out of the box it will only work with native m4/3 lenses that have electronic contacts in the lens mount. I searched the manual and there is no mention of focus peaking with legacy glass. I searched the internet high and low and there seemed to be a great deal of confusion as to whether focus peaking could be activated with old lenses. After some fiddling around I found that if you assign a button to activate it you can use it with adapted lenses. Hoorah! But you can’t use it in video. Boo!
Nodding Jesus. Using legacy glass on the EM-10 is a breeze with the new focus peaking function. Shot wide open on an Olympus Zuiko 50mm f1.4 lens.
Speaking of the manual it deserves special mention. It should be held up as an example to all consumer manufacturers as an example of how not to write a manual. I wanted to test the new live composite function. I shoot a lot of night photos and this looked like it could really be good and save time faffing around in Photoshop with blending layers. Did the instructions tell you how to use it? No. Did Olympus Australia’s website shed any light on how to use it? No. After searching for ½ a day on the internet I found a photo forum in Singapore where one of its members had posted some shots using the function and enough information for me to work it out. Unfortunately since then the local farmers have been burning off their fields and the Avon Valley is choking to death on the smoke haze which means no clear night skies. Hopefully in the next couple of weeks I’ll be able to see the stars and photograph them.
I won’t say any more at the moment as I want to use the camera some more. However, I find the EM-10 to be a curious beast. Olympus is going after the first time DSLR buyer with this model, you know the people who buy something like a Canon Rebel or the Nikon equivalent because they want to be able take better pictures while on holiday, or photograph the kids sports day etc. Well both Canon and Nikon know that market very well and they sell their cameras by the boat load because they are relatively cheap, easy to use and can still satisfy the user as their skills grow. The EM-10 is a bit more expensive but thanks to the awful menu structure Olympus insists on continuing to use and poor instructions it is not easy to use. I have a feeling that there will be a lot of EM-10s for sale on EBay in six months time with a lot of frustrated buyers being either put off photography as a whole or buying something from Canikon. I think it is a great shame. The EM-10 could have the makings of a great camera, the sensor is terrific, it looks great, it handles well, but the user interface is absolutely appalling. I’m all for giving people the option of custom configuration, but on a camera targeted at the beginner who doesn’t know their f stops from their ISOs it is not as it just adds to confusion with such a frustrating UI. The EM-10 is like the curates egg – good in parts.
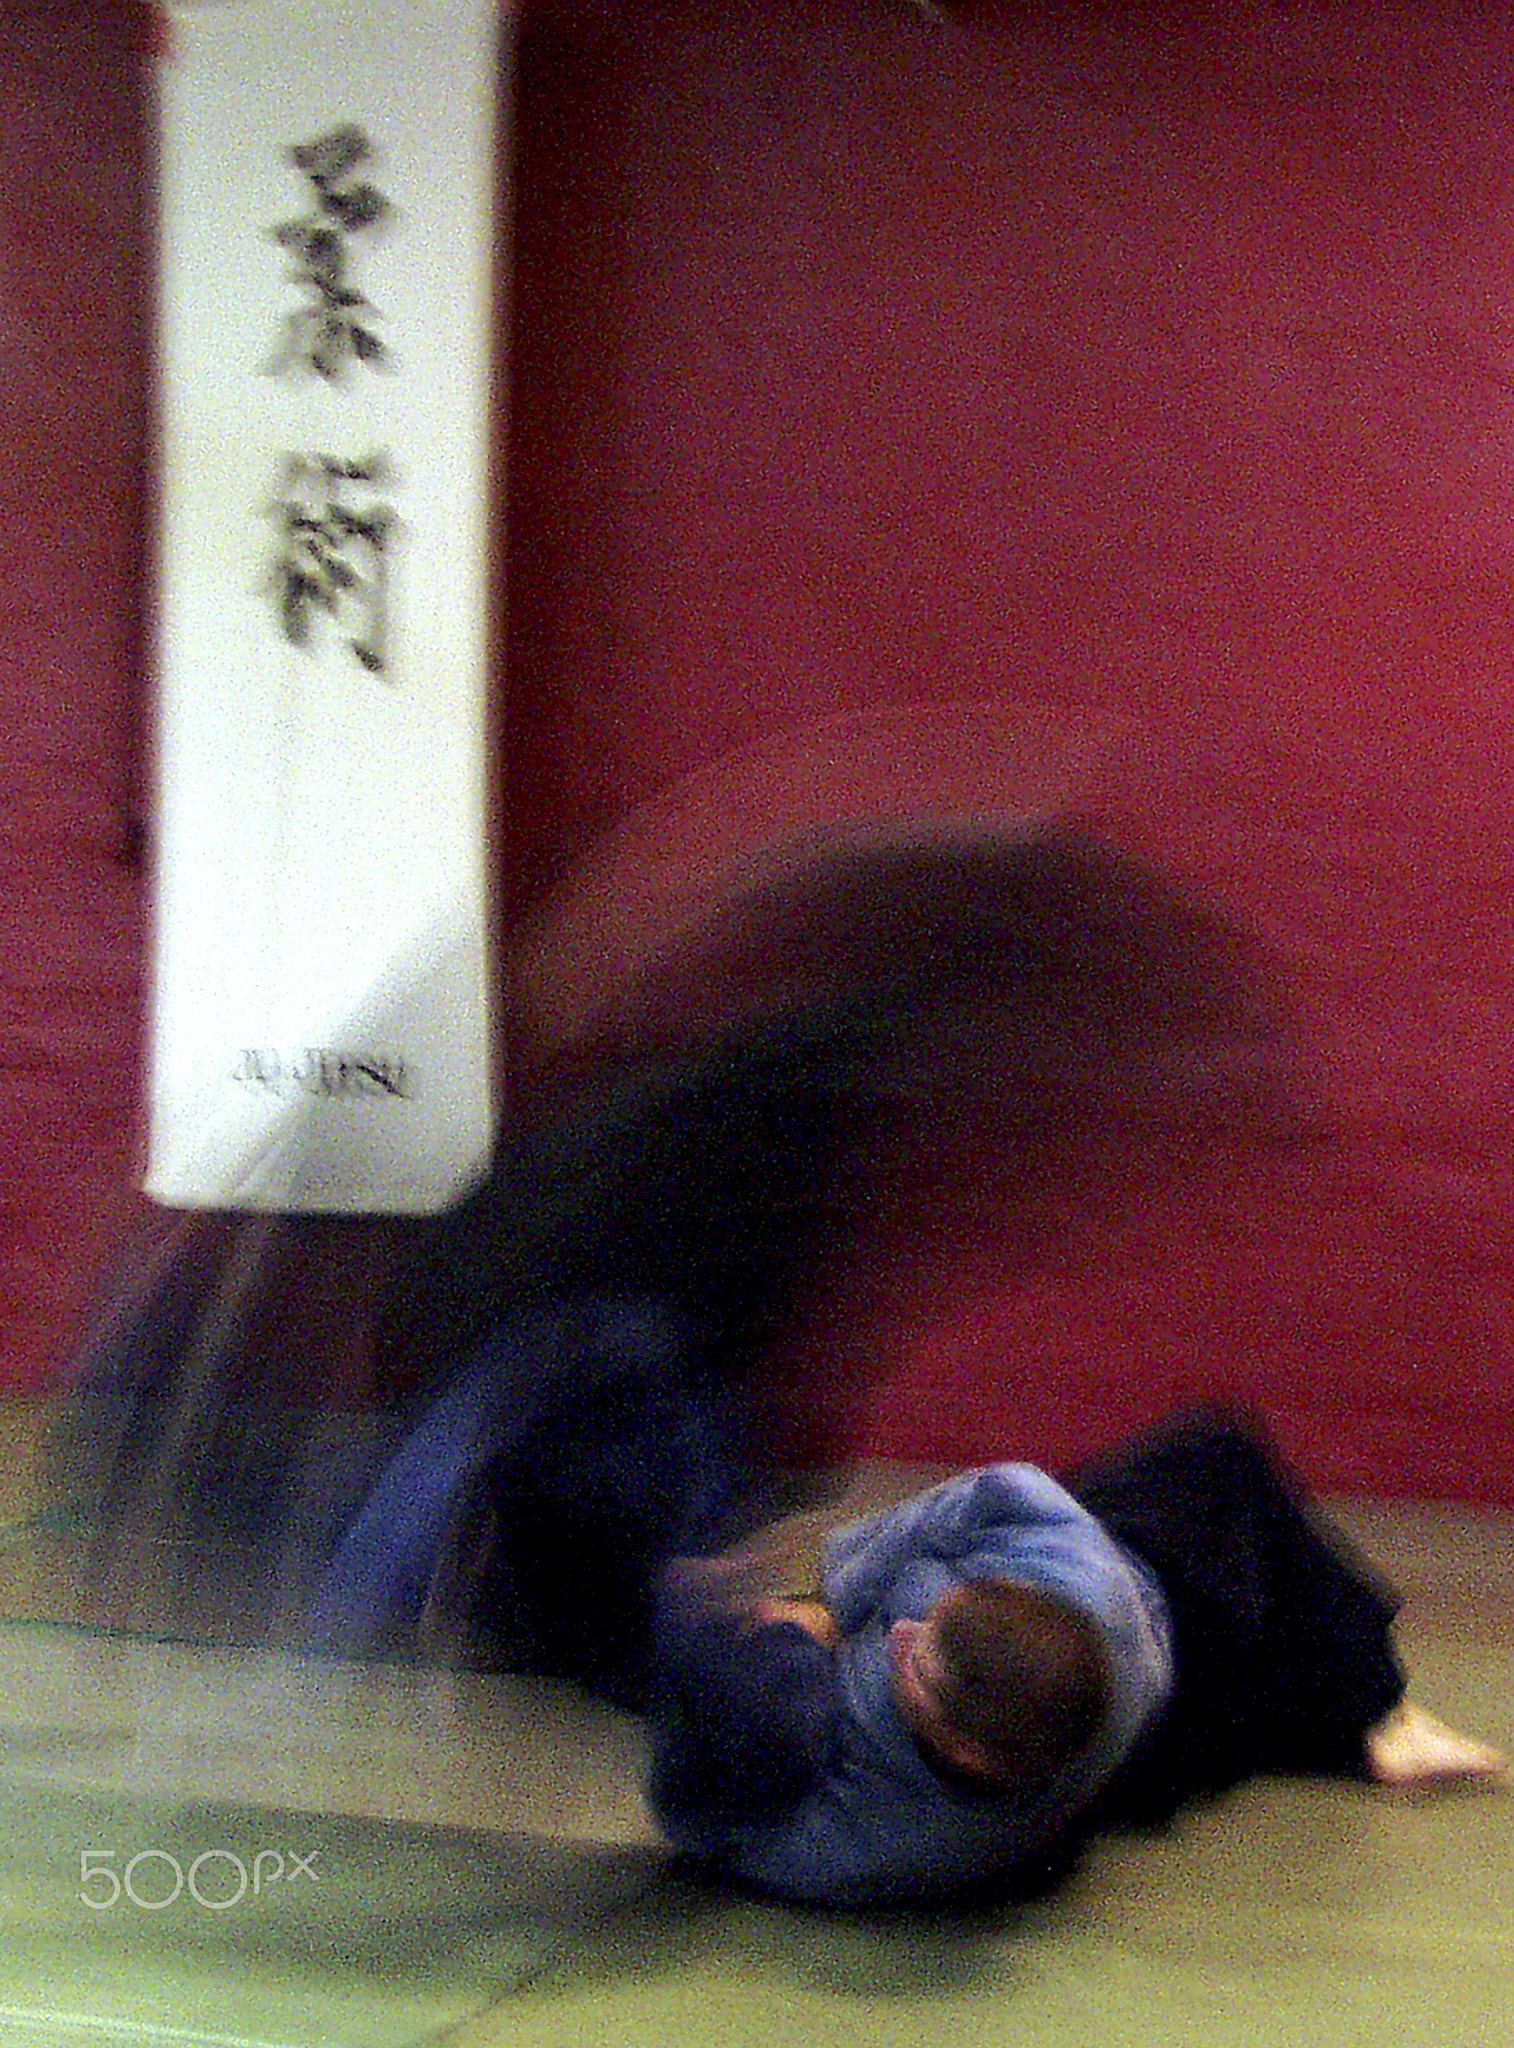
Sutemi waza from Yōseikan Aikido. Taken on Olympus C-720 Ultra Zoom with slow sync flash edited using Photoshop Elements 2 and Genuine Fractuals
Currently in photography there are several sacred cows and you’d think that from the amount of chatter these subjects generated that they were the be all and end all of photography. Thankfully for the actual art form of photography they are mostly irrelevant. These sacred cows are:
megapixels
dynamic range
sensor size
lens sharpness
My feeling is that these topics are so hotly debated is because now in this digital age it is easy to quantify these values numerically and the bigger the number the better. There is no doubt about it a great big spreadsheet of impressive looking numbers must be right after all. This is why the website http://www.dxomark.com has become a sacred text among the denizens of the internet fora and its proclamations and pronouncements can lift a camera or lens to photographic nirvana or condemn it to the lowest reaches of hell. Well having ruffled a few feathers with the piece on sensor size and depth of field this weeks entry is going to cause the DXO fundamentalists to really froth at the mouth in holy indignation.
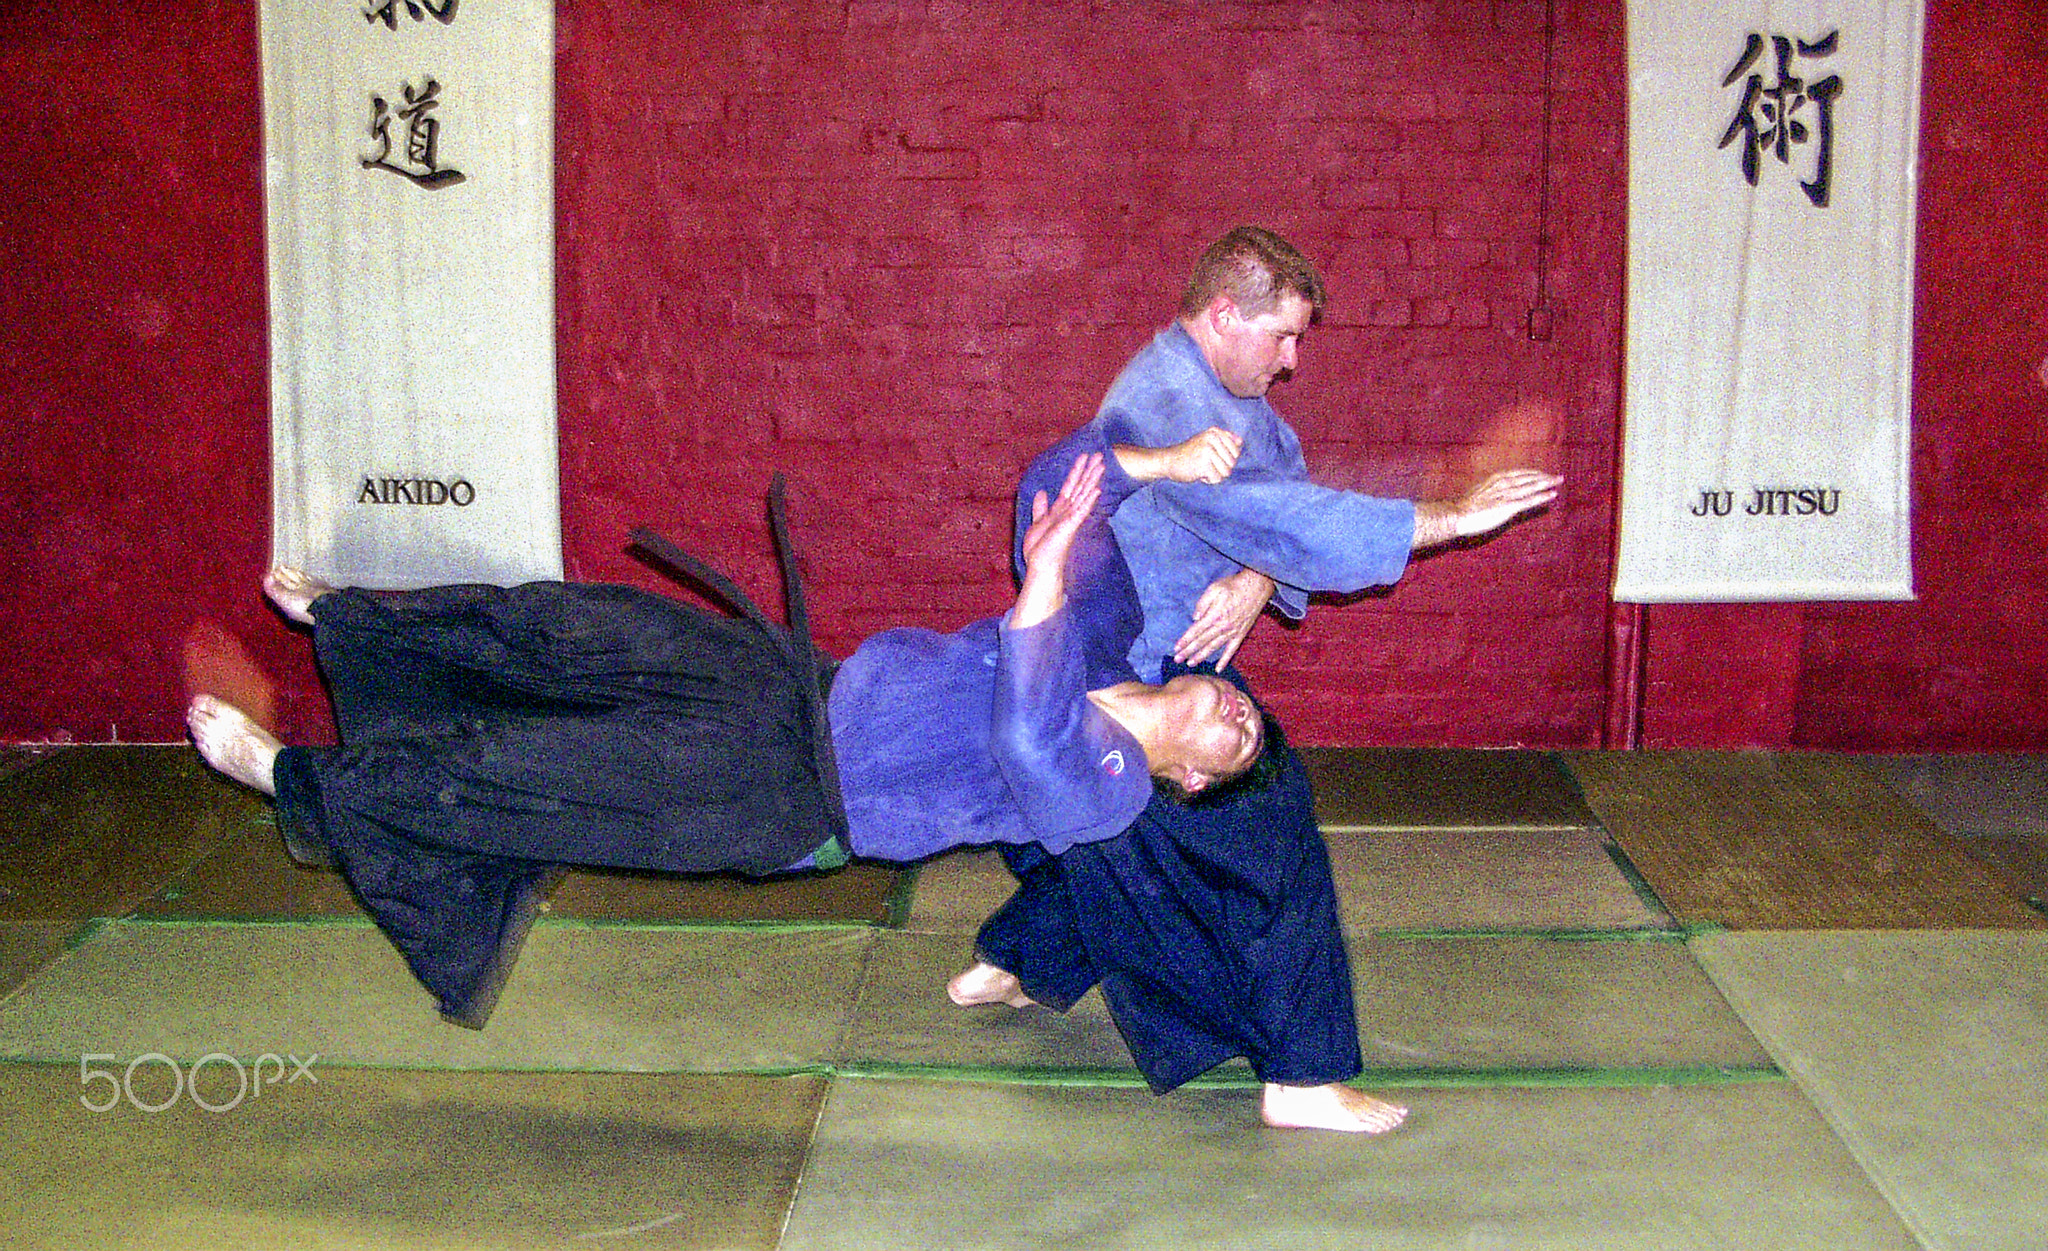
Ura Tai Otoshi from Yoseikan Aikido as taught by Shihan Jan de Jong. Shot using an Olympus C-720 Ultra using slow sync flash. Edited using Photoshop Elements 2 and Genuine Fractuals
Lens sharpness is something to be coveted. After all Leica, Zeiss, Schneider, Rodenstock, Canon and Nikon have made an art form of it. Those who worship at the high altar of lens sharpness are prepared to spend the equivalent of the GDP of a small African nation on the lenses that have the highest DXO score. The Carl Zeiss Distagon T* Otus 1.4/55 ZF.2 Nikon has a DXO score of 45 while the lowly Canon EF 50mm f/1.8 II only has a rating of 25. So the Otus is nearly twice as good as the plastic fantastic Canon. Phwoaaaaarrrrr forum domination and photographic greatness here I come, I’ll go out and buy one straight away. The Australian list price for the Zeiss is $4474 while the Canon is $135, so the Zeiss must be 33 times better. Er no. To quote DXO “The DxOMark Score shows the performance of a lens, mounted on a given camera body, for its optimal focal length/aperture combination and for defined exposure conditions.” So the lens has been mounted to a camera on an optical bench shooting a 2D lens chart at an aperture that is guaranteed to give the best results in carefully controlled lighting. So in other words it does not reflect real world usage unless your photographic interests lie in shooting charts or brick walls with a camera on a heavy tripod so you can orgasm over how sharp the image is at the edges. Shoot a complex 3D object in rapidly changing light conditions at sub optimal aperture settings and these ratings really don’t mean anything.
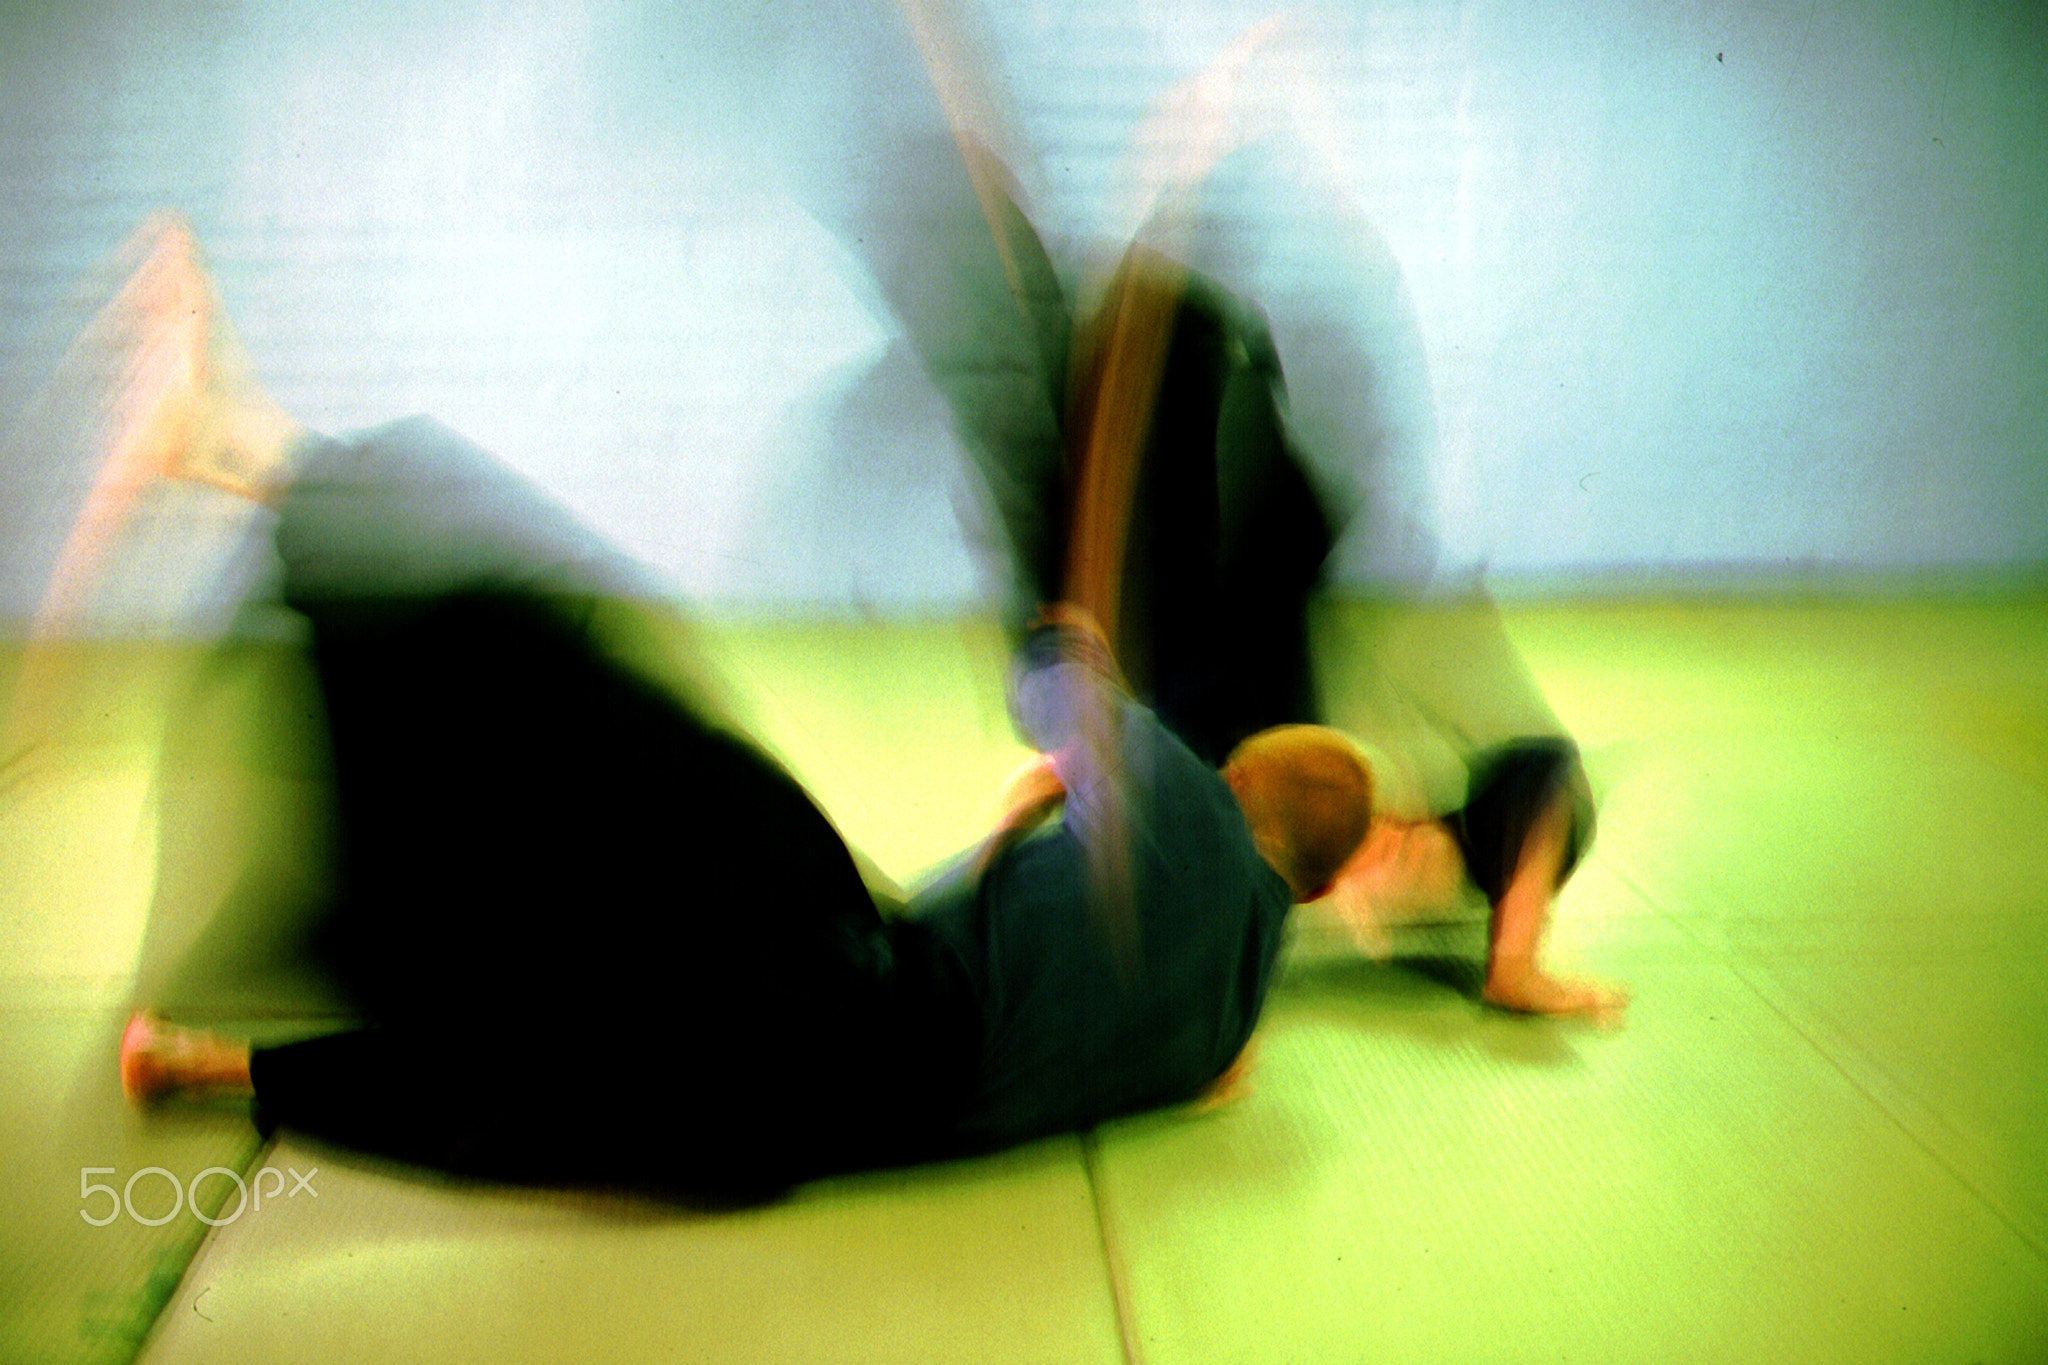
A sacrice throw from Yoseikan Aikido. Taken using an Olympus OM 4 with a Zuiko 35-105 lens on Fujichrome 400 pushed to 800 ISO. Scanned using an Olypus ES-10 scanner and edited using Adobe Photoshop Elements 2 and Genuine Fractuals.
There is no doubt that lenses have become a lot sharper over recent years, but I find it amusing to see that they have become so sharp that they are now unflattering for portraiture as they show every blemish and pore. So much so that photographers are now spending time and money on lessening the sharpness (blurring if you will) on portraits. Don’t you think that is ironic? I’ll spend a fortune on a very sharp lens that is so clinically sharp that no-one likes the results so I’ll spend some more money on a Photoshop plugin to blur it.
A famous quote and often mis-quoted as nobody can really tell you the context in which Cartier-Bresson said it. If we forget the Marxist definition of bourgeois and just concentrate on the dictionary definition we get:
“belonging to or characteristic of the middle class, typically with reference to its perceived materialistic values or conventional attitudes: a rich, bored, bourgeois family | these views will shock the bourgeois critics.”
I would hazard a guess that dear old Henri was stirring a bit when he said it and meant something along the lines that sharpness in a photograph is a very conventional and staid way of judging it and doesn’t look at its other qualities. How can I be sure, well I can’t but he also said:
“It is an illusion that photos are made with the camera, they are made with the eye, heart & head.” – Henri Cartier-Bresson
So I think it is more than likely to assume that Cartier-Bresson felt that there is a lot more to photography than technical perfection.
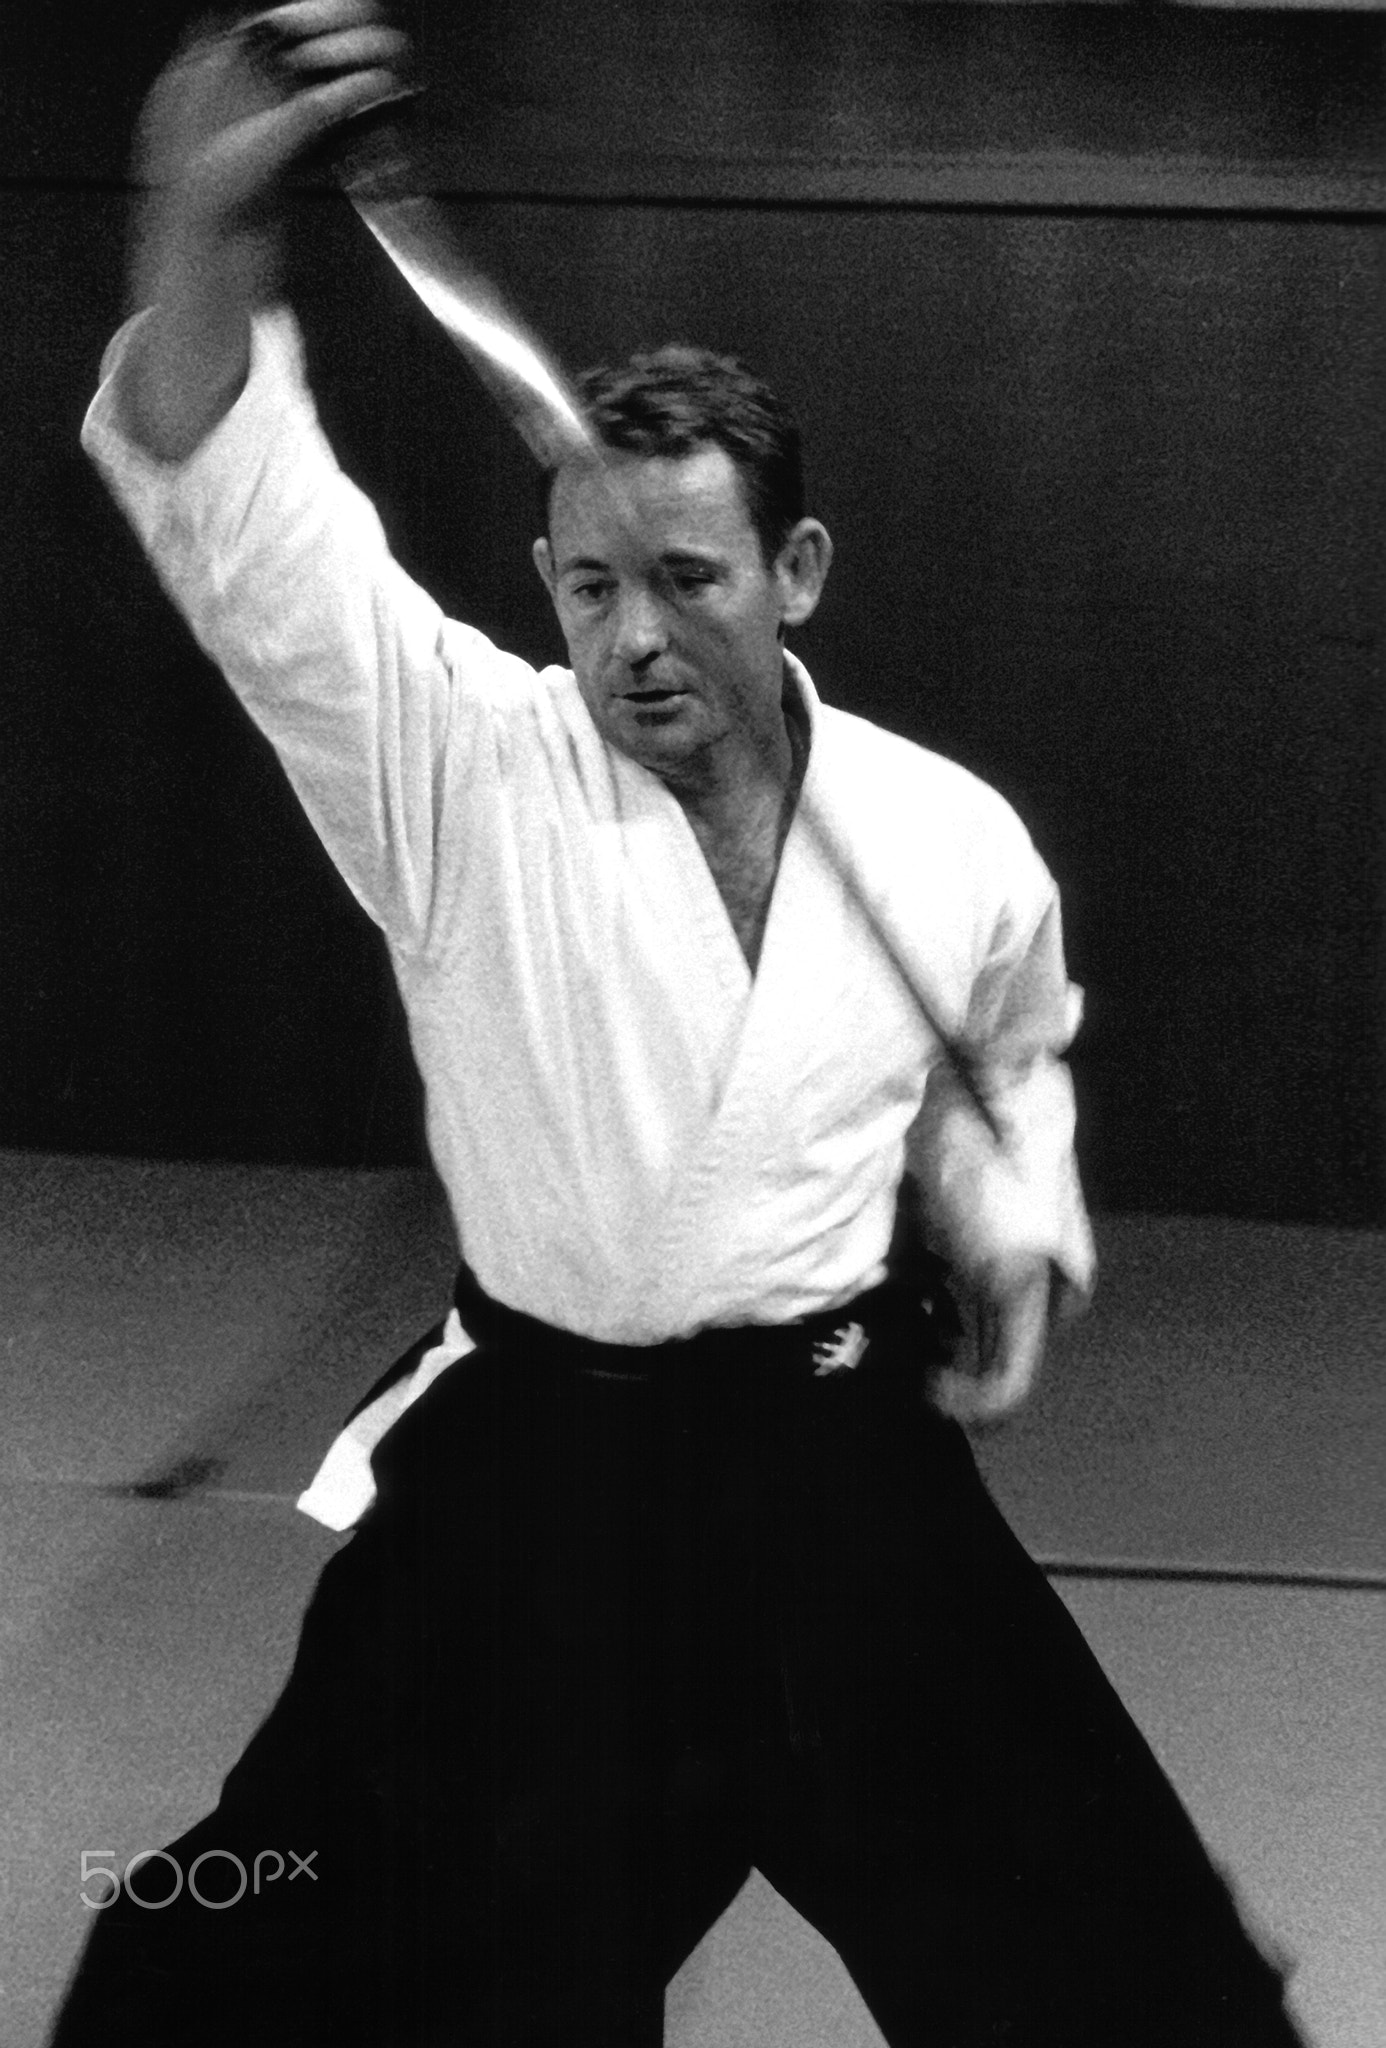
The Japanese art of sword drawing. Taken with an Olympus OM 4 with a Tamron 28 mm lens, using Ifford Delta 3200. Scanned using an Olypus ES-10 scanner and edited using Adobe Photoshop Elements 2 and Genuine Fractuals.
So by now you’ll have read this and seen some photos I made years ago of some people practicing Aikido and Iado, both Japanese martial arts. You’ll also have noticed that there is a lot of blurred movement and very little sharpness. The reason why is that I wanted to capture the beauty of the flowing energy that is involved in them and I felt that while static shots might capture the technical aspects of the techniques being demonstrated they don’t capture the nature of the philosophy behind them nor the dynamism. I like to feel that these are photos “made with the eye, heart & head” rather than the clinical gaze of the optically perfect lens. This is for me where the beauty of any art lies, not in technique but in the expression of ideas and emotions. None of the equipment used in the making of those photographs warrants a mention on DXOMark so I guess that gives them a score of zero. The equipment HCB used also isn’t on the DXO charts, and guess what quite a few of his pictures are blurred because he often relied on zone focusing and didn’t get it right, but I’d sooner have one of his pictures on my wall than a lens test chart any day.
Mary is the tree spirit that lives in the wandoo forest outside of York, Western Australia. Canon EOS300d, Canon EF18-55 lens, 550EX speedlite.
The other day I was rootling around in the darker recesses of my photo files when I came upon this image. I remember taking it very clearly, this painted tree is visible from the York road and as I set up my camera on its tripod people driving thought I must have been operating a speed camera and slowed down as they passed. The shot was taken on my first dSLR, a Canon EOS300d with its kit lens and a 550EX speedlite. Prehistoric equipment in today’s terms. Only 6Mp, a sensor that should be used above 400 ISO, and features that were serious crippled so as not to steal sales from the Canon EOS10d. Why did I buy the camera? Well it was the first sub $2000 AUD dSLR in Australia. Now you can get so much more for $500. Technology marches on at a relentless pace. Seeing this shot made me get the camera out again, and just for old times sake I shot the photos of the cameras in last weeks blog entry with it. Processing them in Lightroom was a revelation, they came up looking quite good. So I went back to the original RAW file for Mary and processed it Lightroom and finished off in Snapseed. The result was much better than when I first processed it using Canon RAW processor and Photoshop Elements 4. It just goes to show that newer software can breathe new life into older images. I’ve decided to keep the 300d out for a while longer and shoot stuff for the web with it.
As always clicking on the photo will take you through to my gallery.
Comparing the sizes of full frame, APSc and m4/3 cameras and lenses.
Internet forums are full of self-proclaimed experts spouting absolute crap about things they know nothing about. Unless you were hiding out in a cave with Osama Bin Laden or not visited the home of countless pointless photographic brand based crusades that is otherwise known as dpreview.com you maybe aware of this hot topic that has spawned a thousand fevered posts and countless character assassinations. If not it goes like this: equivalence is the idea that the size of the camera format effects focal length, depth of field, and exposure, and that when talking about equipment one should express this in terms relating to 35mm equivalents. These arguments became particularly prevalent when Olympus and Panasonic started to have some success with their micro four thirds format. The people express this idea most fervently are those who have sold two of their children and a kidney on Ebay to fund the purchase of a so-called full-frame dSLR and they want to let everyone who uses a smaller format that they are using an inferior product. Usually these arguments go like this:
m4/3 user: Hey I’ve just got my self a new lens, it’s the Olympus 45mm f1.9. It’s a lovely lens, wide open it produces very portraits wide open.
Full framer: It’s not a 45mm f1.8 it is a 90mm f3.8. It cannot render out of focus backgrounds and the smaller sensor needs more light and therefore longer exposures or higher ISO. A proper photographer would use an 85mm f1.2 on a full frame camera.
The argument will typically degenerate and lead to insults and other full frame users diving in to bolster the argument with lots of spurious mathematical equations, graphs and claims of mental deficiency on the part of any smaller format user and maybe even casting doubts on the mental faculties of their parents as well. So what is all this about then and why are people getting so hot under the collar?
Equivalence is not a new thing, it didn’t come with digital, it was a known fact back in the dim dark ages of film, and then funnily enough 35mm film was seen as the miniature inferior format. In those far off times a lot of professional work, and when I use the term professional I mean done for money, was shot using large format, the smallest was 5×4 inches and the largest practical was 10×8 inches. The next step down was medium format where a roll of film was used that was nominally 6cm wide, the popular sizes were 6×7, 6×6 and 6×4.5 cm. Small format, or miniature format was 35mm and smaller. It wasn’t until the advent of modern electronics and a significant breakthrough with tabular grain film in the 1980’s that 35mm really took off as a format. The ease of use that automation made with sharper finer grained films that made many professional photographers and advanced amateurs take up using 35mm and by the end of the 1990’s the larger formats had become niche products for specialised uses.
Professional photographers were well aware of equivalence. A 10×8 camera with a 300mm lens has the same angle of view as a 5×4 camera with 150mm, a 6x6cm camera with 80mm and a 35mm camera with a 50mm. As most working photographers ran more than one format and some three or more favourite angles of view would be duplicated across the systems. So for 5×4 a photographer may have a 90mm, a 150, and a 300. His/her 6×6 system would then have a 55, 80 and 150mm lenses, and the 35mm system 35, 50 and 100mm lens all giving roughly the same angles of view.
Factors that influence depth of field are:
format size
focal length
distance to subject
magnification
lens aperture
From this we can, therefore assume that the larger the format size , the longer the focal length, the closer to the subject, the larger the lens aperture, and the greater the magnification the less the depth of field. So that is clear then. Well no because when we talk about depth of field it is also important to remember that what we are really talking about is acceptable sharpness because a lens can only render one single distance in focus (the plane of critical focus) and objects at other distances to the front and rear will have diminishing sharpness the further they are away from that point. The reality of this is that for most normal usage part of the scene will be acceptably sharp both in front of and behind the point of critical focus, and this zone will be formed that 1/3 of it is in front of the subject and 2/3 behind. This zone can be shallow with only a small part of the scene appearing to be sharp, or it can be deep with the apparent sharpness seemingly covering everything. Seems simple so far, well it gets more complicated because you can break these relationships. As magnification increases the depth of field decreases and the zone of apparent sharpness also shifts from the one-third in front and two-thirds to the rear to an equidistant amount front and rear. Also once you start playing with the plane of the lens in relation to the sensor and subject then everything can go a bit strange. Typically one of the problems that plagued large format shooters was that of getting enough depth of field. Large sensor, small depth of field, not much chop if you’re a landscape shooter. Well using the Scheimpflug rule you can place the plane of focus wherever you want in a scene by positioning the plane of the lens to be parallel with the plane of the subject by tilting the camera front, if that does not completely achieve what you want then you tilt the sensor plane as well so that the planes of the subject, lens and sensor form an intersecting point and this will mean that the subject plane will then be completely sharp while shooting wide open. Working the other way round you can diminish the zone of sharpness by swinging and tilting the camera front. This is not the sole prerogative of large format camera, tilt and shift lenses are available in medium format, 35mm, APS and even m4/3 . The other thing that throws a spanner in the works for depth of field is that the size of the output and viewing distance plays a big part. Simply put big print viewed at a distance and apparent sharpness is reduced.
12mm .v. 24mm
To test the theory I decided to print out an A3 sized lens resolution test chart and this was then set up on an easel in my garden. A tripod was then set up 1.8 metres away from the easel. The cameras tested were the Olympus EP-2 and the Canon EOS5d, both having roughly the same number of megapixels. Choosing lenses was somewhat problematic although I have a set of professional grade fast aperture constant zooms for my 5d I don’t for the EP-2. The lenses used were for the Canon an EF 24mm f2.8, a Sigma 105 f2.8 macro and an 75-300mm f/4-5.6 IS USM. For the Olympus the lenses were a Zuiko 12-50mm f3.5-6.3, a Zuiko 60mm f2.8 macro, and a Zuiko 40-150mm f4-5.6. Each camera was mounted on the tripod in turn and set to shoot large quality jpegs in aperture priority, image stabilisation where appropriate was switched off and the self timer was used to prevent any camera shake. The lens was focused on the chart. None of the images have been processed in any way and the full-sized images can be seen by clicking on any of the composite shots below where you’ll be taken to my Flickr account. At the 24mm and equivalent view the DOF was pretty much equal, although I suspect that there maybe more apparent differences at apertures of f2 and wider, but I wasn’t able to test that. The comparison between the two short telephoto macro lenses highlighted the most difference and at wide open at f2.8 the Olympus manages to resolve some background detail while the Canon doesn’t at all. At the equivalent of 300mm at f5.6 there is very little discernible difference, but that changes at f8 and smaller where the m4/3 camera starts to resolve more detail.
Zuiko 60mm .v. Sigma 105mm150mm .v. 300mm
So what happens to exposure. Doesn’t that change? The short answer is no. When I got my first medium format camera, a secondhand Mamiya C330 Professional , it had no built in metering and the handheld Weston meter that came with it had obviously been dropped and no longer worked properly so I used my Olympus OM1n as a meter and guess what? It worked! Much later when working in the studio with studio flash I determined the exposure with my flash meter and would often make exposures with different format cameras but the exposure value remained the same and the images were correctly exposed. Memory is a fine thing, but I wanted to make definitely sure so I decided to run a quick test comparing full frame, to APS-c, m4/3 and compact camera with a sensor measuring 8.07 x 5.56 mm. The test was simple each camera would use a lens of as near as possible field of view equivalent to 105mm on full frame. The ISO was set to 200, and the shutter speed was set to the maximum synch speed so as not to let ambient light interfere with the result. White balance was set to flash, and pictures settings were natural and the images recorded as fine jpegs. A Canon 550EX speedlite was mounted on a light stand, set on manual to 1/2 power and fired at the test scene through an umbrella diffuser and was triggered by a synch cord. The flash output was measured with my Minolta flash meter which is accurate to 1/10 of a stop, the aperture required for correct exposure was f7.7, each cameras lens was set to the nearest corresponding value which was f7.1. All images are straight out of the camera without any processing. Each cameras image was opened up large in Lightroom 3 and screen shot was taken of the image showing the histogram. Looking at the histogram shows that there’s barely any discernible difference between each cameras recording of the scene.
So what does all this mean? Well the full framer is right in that a 45mm lens on m4/3 does have an angle of view equal to a 90mm on a 35mm sensor. As to the inability to have shallow depth of field that is wrong, it is definitely possible to minimise depth of field but we are talking about subjective differences here as there is that nebulous term “acceptable sharpness” and then it depends on how big you print, and how close you are when you view it. Personally when I take a head and shoulders portrait of someone I like to have from the tip of the nose to the ears in focus as I like to be able to see who I’m looking at. Shooting at 85mm f1.2 the depth of field can be measured in millimetres and so the iris of the eye might be in focus but the rest is just blur. This is just a matter of taste. If you were shooting landscapes using wide-angle lenses then there is little to choose between m4/3s and full frame, and in fact I might go as far to say that the smaller camera has the advantage being smaller and lighter. As to the matter of the smaller format needing more light to form an image that is just plain wrong.
So is the 35mm dSLR superior to m4/3? Yes and no. Infuriating aren’t I! It all depends upon your photographic priorities. If you want to squeeze every last ounce of image quality out of a scene then 10×8 or whole plate large format film cameras either contact printed or drum scanned cannot be beat. Hopeless though for getting shots of the rug rats playing at the park, expensive to run, not very portable and definitely not conducive to spontaneity. Want something you take anywhere and be able to upload images to the web, well your phone cam is your best bet. My Olympus EP-2 is my favourite go anywhere camera. I can rig it up to be like a dSLR by adding its optional electronic viewfinder when I want to use a long lens, put on the 17mm f2.8 pancake lens and it fits in my jacket pocket, put on a mic, a loupe, put it in its cage or rig and its a great little video camera. It perfect for lightweight travel. Out walking the dog or shopping then chances are I’ve got my Panasonic LX-5. My Canon EOS5d is the original 13Mp version and I still keep for certain things and for certain lenses that I just don’t want to give up. There are no absolutes, pick your camera for what you need not what other people think that you should use.
Head of Janus, Vatican museum, Rome by Loudon Dodd
I am holed up in the command centre of the vast global entity that is Paul Amyes Photography taking shelter from the heat of the Aussie sun and pondering what 2014 will bring while my minions work hard to bring about my plans for global domination. Actually the end of the year and the beginning of the next are very good for such musings, so good that the Romans actually had a god of transitions, beginnings and endings, he was called Janus and January was named after him. He is depicted as having two faces, one looking to the past and the other looking to the future. This has led to the whole idea of making New Year’s resolutions whereby a person makes a promise to make an act of self-improvement commencing on the start of the New Year.
“Now is the accepted time to make your regular annual good resolutions. Next week you can begin paving hell with them as usual.”
Mark Twain
Photography is a very broad church and people do it for all sorts of reasons and one of the attractions is that equipment has a fetishistic appeal. There is something about cameras and lenses that makes us lust after them, day-dream incessantly, continuously peruse websites looking to put together the ultimate camera system. The term fetish means “an inanimate object worshipped for its supposed magical powers or because it is considered to be inhabited by a spirit” and camera equipment is certainly worshipped, which implies a religion, which explains the virulent brand wars that flare up on online forums such as dpreview.com. It is probably just as well that this is online for if the protagonists were ever to meet in actual life ethnic cleansing based upon camera brand would surely be the result. Then look at the magical powers that are imbued by certain lenses. Oh if only you had a Leica 50mm Noctilux f/0.95, a Canon 85mm f1.2 L or a Nikkor 400mm f/2.8G IF ED VR then you could truly ascend to the astounding heights of photographic greatness as you’d never ever take a bad picture again.*
“Good resolutions are simply checks that men draw on a bank where they have no account.”
Oscar Wilde
Three bodies, seven lenses, two flashes, flash meter, filters, cables, flash triggers, and reflectors. It is a hernia inducing load.
From reading the forums it seems that a lot of people spend the equivalent of a small third world nations GDP in trying to get the ultimate image quality only never to see those images ever displayed larger than a low res web image or to never to take the equipment out because it is too heavy and cumbersome. I often wonder at how many millions of dollars worth of photographic equipment lies in the back of cupboards unused.** Before the mob assembles and proclaims me a sanctimonious, holier-than-thou, self-satisfied, smug, pietistic, moralizing, unctuous, mealy-mouthed, hypocritical prig and lynches me I would like to say that I am guilty of all the above (except for the bit of fantasying about a Nikkor – ugh!). Now at the grand old age of 50 and after nearly 30 of them practicing photography in one form or other I now realise that no one piece of equipment that I’ve bought has made me a better photographer.***
“The old year has gone. Let the dead past bury its own dead. The New Year has taken possession of the clock of time. All hail the duties and possibilities of the coming twelve months!”
E. P. Powell
Getting back to our two faced friend Janus and looking back over 2013 I can see that going out and taking photos, working on projects and showing them has made me feel photographically satisfied. So if like me you’re sitting at home wondering what 2014 will bring might I suggest a modest proposal? Instead of buying gear and hanging out on gear forums use your photography budget to travel somewhere photographically interesting, or hire some models, or devise a project and do an exhibition or publish a book. Set goals that are realistic, I’ve been wishing National Geographic and Magnum will come knocking for years now to no avail, and write them down. Then break down those those goals into their key components and then work out a time frame in which you can complete them. Looking forward to 2014 I have an idea of where I want to go and a rough idea of how to get there. It gives me something to look forward to, something to work towards and will give me a sense of accomplishment when I achieve it.
“Where there is no vision, the people perish…”
Proverbs 29:18
Yours truly working happily on Frenchman Peak.
* I bought a Canon 70-200mm f2.8 L several years ago and I’m still taking rubbish. Can I get my money back?
** There’s no way I’m admitting to what lies in the darkest recesses of my cupboards, nor its financial cost. My wife sometimes reads this blog and there’s no way I will incriminate myself.
*** Actually one item did make me a better photographer, it was a tripod.
In my last entry I mentioned that I would be going to Esperance, on the the south coast of Western Australia (next stop Antarctica!) and I’ve now returned home and have chance to process the pictures and reflect on the experience.
Twilight Beach, Esperance, Western Australia. Olympus EP2 and OLYMPUS M.12-50mm F3.5-6.3 lens.
Firstly I would like to say that this was not a photographic expedition, it was a holiday with a major focus on bush walking. Walking has been a big part of my life since my mid teens and I feel it is an excellent way to explore, to reconnect with myself and nature, and see things I might otherwise not see. Generally my long suffering partner is encouraging in my photographic endeavours but the one area which is an exception is when bushwalking as she hates hanging around while I fiddle around taking pictures. Fair enough. In 1986 we went to the Greek Island of Thira, more popularly known as Santorini. I took two SLRs, flash, filter system and a swag of lenses and fifty rolls of film in a shoulder bag. We decided to walk round the island, it is only small, but very quickly I wished that I had not got that stupid bag with me. It was a salutary lesson and ever since I’ve explored light weight alternatives and different ways of carrying. So my camera of choice was my Olympus EP-2. The EP-2 packs into a small bag (20cm x 18cm x 10 cm) and in that I can fit the camera, six batteries, 72GB of SD cards, two polarising filters, two variable neutral density filters, a SEMA-1 microphone and two zoom lenses that gives me the full frame equivalent of 24 – 300 mm coverage. I’ve found that I can shoot multiple exposure panoramics handheld and get reasonable results. The big let down for this trip was that I took no camera support so the handheld video footage I shot has been filed in the bin.
Lake Warden Wetlands Reserve, Esperance, Western Australia. Olympus EP-2 with OLYMPUS M.12-50mm F3.5-6.3 lens. Image created in Lightroom 3 with Niksoft HDR Efx Pro 2 and Silver Efx Pro 2.
Who, What, Where, When and Why
Esperance is a medium sized Aussie country town and is blessed with 16 beaches that are picture perfect and excellent for all manner of beach pursuits and are widely reputed to be the best in Australia. All but one of them are dog friendly. It is quite an isolated place and it is therefore very likely that you’ll able to get a beach to yourself. We didn’t go for the beaches but for Cape Le Grand National Park.
A bit of history about the area. Twenty thousand years ago the indigenous people of the south west of what is now Western Australia, the Wudjari group of the Nyoongar, inhabited the land they called “Kepakurl” or the place where the sea lies like a boomerang. It was a region blessed with a good climate, plenty of water and an abundance of wildlife and consequently they did not feel the need to roam very far. In 1627 a Dutch ship, the Gulden Zeepaerdt, captained by François Thijssen, sailed through the islands off the coast and so began the colonial era. In 1792 the next European visitors were two French ships, the Recherche and l’Esperance, under the command of Admiral Antoine Bruni d’Entrecasteaux, took shelter from a storm which nearly wrecked both ships. One of the crew, an officer by the name of Le Grand had spotted the anchorage and so it was named after him. In 1802 Matthew Flinders on HMS Investigator was charting the southern coastline of Australia and sailed through the Bay of Isles claiming it for King and country before those “Johnny foreigner” types could claim it for themselves. While sheltering from a storm he and his crew explored the area and named Lucky Bay, because they found safe anchorage there, and Thistle Cove after a Mr Thistle who was one of the crew. In the 1870’s the townsite of Esperance was established and the rest as they say is history.
Thistle Cove, Cape Le Grand National Park, Western Australia. Olympus EP-2 with OLYMPUS M.12-50mm F3.5-6.3 lens. HDR panorama of 12 shots blended using a combination of Photoshop CS5 and Niksoft HDR Efex Pro 2.
Cape Le Grand National Park is 631 km (392 miles) south-east of Perth and 56 km (35 miles) east of Esperance. Established in 1966 the park covers an area of 31,801 hectares (78,600 acres) and is made up of coastal heathland made up of dense thickets of showy banksia (Banksia speciosa) on the sand flats and scrub banksia (Banksia pulchella) on the gravel outcrops. This is punctuated by granite and gneiss peaks. There are beautiful bays with the most amazing white beaches where the sand squeaks underfoot, and the sea is the most breathtaking turquoise blue in colour. The most spectacular scenery is found in the south eastern corner of the park where is a chain of peaks that includes Mount Le Grand, Frenchman Peak and Mississippi Hill.
A mother and Joey from the famous mob of kangaroos that frequent the beach at Lucky Bay in Cape Le Grand National Park. Olympus EP-2 with OLYMPUS M.40-150mm F4.0-5.6 R lens. Exposure 1/4000 s at f/5.6 ISO 200.
All up the park is home to 1169 different species of animal and plant. The native mammals include western pygmy-possum, quenda, black flanked wallaby, bush rats, and honey possums. The park is a bit of a twitcher’s paradise with 110 species of birds and while there we saw a white-bellied sea-eagle, numerous types of wattlebirds, a wedged tailed eagle, emu, cuckoo shrikes, crested pigeon, and bronze wings.
Lucky Bay, Cape Le Grand National Park, Western Australia. Olympus E-P2, OLYMPUS M.12-50mm F3.5-6.3 lens, and circular polarising filter. Exposure 1/200 s at f/8.0 ISO 100.
There are a number of walks to do. The Coastal Trail is a 15Km (9.3 miles) one way trail that takes about 8 hours to complete. It has also been divided up into four sections. We chose to walk from Lucky Bay to Thistle Cove. Lucky Bay is famed as having the most beautiful beaches in Australia and somewhat incongruously you can as we did see kangaroos on the sandy beach. There is a campsite there with gas barbecues, toilets, picnic areas, water, and shade shelters. We chose to stay in Esperance rather than camp this time. The walk trail is clearly marked out and takes you round the headland giving views over the bays and inlets. I saw a pod of six dolphins playing in on of the inlets and I stayed and watched them until they decided to swim back out to sea. As you get to Thistle Cove there is a picnic table in the lee of a large rock that looks like an enormous mitten standing on end which provides a bit of necessary shade while you sit and take in your surroundings. Matthew Flinders thought that Thistle Cove was even better than Lucky Bay, I’m not sure I would agree but it is a very beautiful spot.
Frenchman Peak is a 262 metre granite outcrop that is part of a chain in the south-west of Cape Le Grand National Park. Olympus EP-2 with OLYMPUS M.12-50mm F3.5-6.3 lens. 15 exposure HDR panoramic created with a combination of Photoshop CS5 and Niksoft HDR Efx Pro2.
As mentioned earlier there are several peaks to bag; Mount Le Grand at 345 metres (1132 feet), Mississippi Hill 180 metres (590 feet), and Frenchman Peak at 262 metres(860 feet). Frenchman Peak was our choice as it has a clearly marked track to the top which is 3km or 1.8 miles return which is graded as hard and not recommended on wet and/or windy day. The peak did not get its name from the early French explorers but rather from explorer and prominent colonist John Forrest who passed through the area in 1870, in search of good country for pasture. The peak got its name because his brother, surveyor Alexander Forrest, thought its profile resembled a man wearing a Frenchman’s cap. The Aboriginal name for the peak was Mandooboornup and was a significant site for them. The Department of Parks and Wildlife who administer the park describe the route as being up the easy angled east slope. A better description to my mind would be up the not as hard east slope. At times the pitch of the slope is very steep, but thankfully the rock surface is very grippy in the dry and given a good pair of shoes and plenty of time it is very doable. The result is worth it as you’ll be rewarded with be rewarded with magnificent panoramic views of the park and islands in the Recherche Archipelago. The top of the peak has been eroded to form deep arch or cave which is not immediately obvious from looking up from the base and swallows make their nests in its walls and can be seen chasing insects as you climb up. The cave was formed 40 million years ago in the Eocene when sea levels were 300 metres (984 feet) higher than they are now and the top of the peak was under water. I don’t know about you but the geologic timescale just boggles my mind.
The walktrail up Frenchman Peak is a hard steep 3Km return walk. Cape Le Grand National Park.Views of the park and islands in the Recherche Archipelago from the top of Frenchman Peak. Cape Le Grand National Park, Western Australia. Olympus EP-2 with OLYMPUS M.12-50mm F3.5-6.3 lens.The cave on top of Frenchman Peak, Cape Le Grand National Park.
Did we enjoy our visits? Are the Kennedy’s gun shy? We will certainly visit again and aim to spend more time in the park, but we will go earlier in the spring so we can see more of the wildflowers and maybe even see some whales.
One of the famous kangaroos that frequent the beach at Lucky Bay in Cape Le Grand National Park. Olympus EP-2 with OLYMPUS M.40-150mm F4.0-5.6 R lens. Exposure: 1/2500 s at f/5.6 at ISO 200.
As always clicking on an image will take you through to my gallery for print purchases.
Apian Activity. Canon EOS 550d, Sigma 105 f2.8 macro, Canon 430EX Speedlite with Stofen Omni-bounce off camera. Exposure 1/200 s at f/8.0 ISO
This year has been a very busy one for the bees. Despite what the calendars say is the official start of spring in reality here in the Avon Valley it arrived four weeks early this year with everything kicking off. I said in a previous post that most of the orchids were out early, well where there are flowers there are bees and the early start has kept them very busy. Not only have they been very busy feeding and pollinating flowers they have been busy swarming. I’ve never seen so many swarms. In one week I saw four flying around as I took the dog out on her morning walks. One particularly memorable formed in Avon Terrace, which is Yorks main drag, and made its way up the street causing chaos as people tried to avoid it before it settled on a TV aerial on the back of a caravan.
Bee Swarm
The swarm in the picture above was on a blind corner on the river walk trail and I nearly walked into it. As it was I got stung several times on the face. Despite the drama of the swarms I’ve had a lot of fun this spring just photographing the bees in my garden and here are some of the shots that I’ve taken.
Bee gathering pollen on an apricot blossom. Canon EOS 550d Sigma 105mm f2.8 macro with Canon 430EX speedlite fitted with a Stofen Omni-bounce on a flash bracket. Exposure 1/50 s at f/5.6 ISO 200.Pure Nectar. A bee feeding on the nectar from a bottle brush tree. York, Western Australia. Canon EOS5d, Sigma 105mm f2.8 macro lens, Canon Speedlite 550EX with Stofen Omnibounce on a flash bracket.Cleared For Landing. Canon EOS5d Sigma 105mm f2.8 macro lens and Canon 550EX speedlite fitted with a Stofen Omni-bounce on a flash bracket. Exposure 1/125 s at f/11.0 ISO 200.
As far as photographic technique goes it is fairly simple. I shot these using a Canon EOS550d or an EOS5d with a Sigma 105mm f2.8 macro lens. I mounted my flash on Custom Brackets Mini-RC with a Stofen Omni-Bounce as diffuser, and I connected the flash to the camera via a TTL cable and shot in aperture priority setting -1 stop exposure compensation so that the flash light is the main source as light (or key) and the ambient is the fill. The High Speed Sync function is also selected. I then select an aperture to give me sufficient depth of field – around f8 or f11. The ISO is set to give me a shutter speed of above 1/100th sec. I don’t worry about the speed of the bees when they move as the flash freezes the motion with its very short duration. Easy peasy. At this point I should point out that when doing this you should keep your mouth shut as you don’t want to be stung on the tongue and if the bees start getting upset you should back off a bit to allow them to settle. Also if you are allergic to bee stings might I suggest butterflies it may be safer.








You must be logged in to post a comment.