Voigtländer 15mm f4.5 Super wide-Heliar

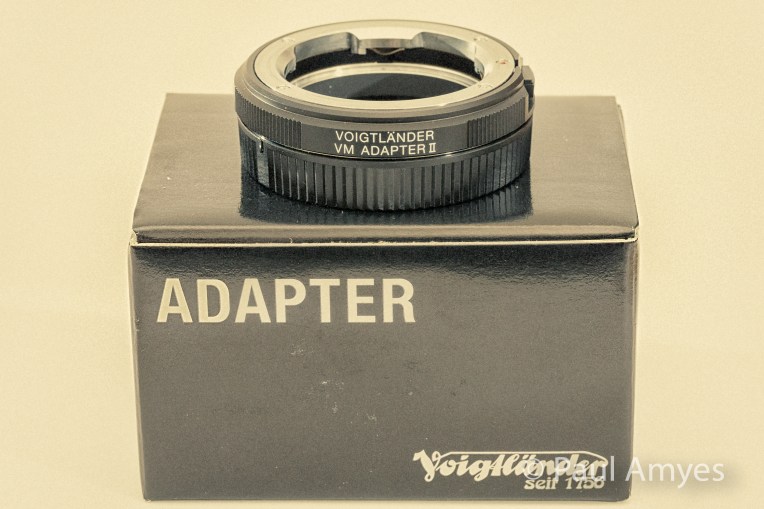
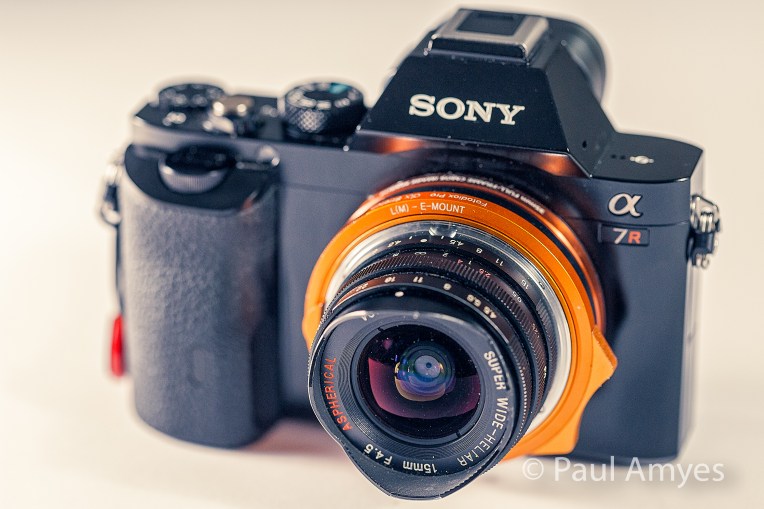
Cosina Voigtlander 15mm f4.5 Super Wide-Heliar lens mounted to a Sony A7r via a Voigtlander VM Adapter II. and Voigtlander L39 to M mount adapter.

I’ve been meaning to write a review of this lens for a long time – well over a year in fact – and it has proven difficult for a number of reasons which will become apparent as we proceed. In an ideal world all lenses would be wonderful for every possible use we put them to, and to be fair with modern lens their computer aided design makes this happen for the most part. Things get sketchy when we are dealing with older designs on modern digital cameras. High resolution digital imaging has placed a great deal of strain on lenses. With film only a few people had the time, ability, resources and inclination to examine the optical performance of lenses. This was largely the province of a few magazines (remember them?) and they would accompany a review with a couple of graphs which would reference the resolving capabilities with fine grains low ISO black and white films developed in special developers designed to minimise grain and maximise acutance. Now anyone can open up an image in Photoshop and zoom into 200% and see a lenses faults. This is why Canon, Nikon and independents such as Sigma are going through their catalogue of lenses and updating them, and this need for optical improvements explains why lenses are getting bigger, heavier and more expensive. Back to the matter at hand. The video below is the short version.


Cosina Voigtlander 15mm f4.5 Super Wide-Heliar Lens.

The Voigtländer 15mm f4.5 Aspherical Super wide-Heliar to give its full name is really the antithesis of modern lens design. It is small, light, affordable and not heavily optically corrected. But having said that this is the lens that really put Cosina’s re-launch of the Voigtländer brand on the radar of photographers. I can remember when this lens first came out a friend of mine borrowed one and ran around madly shooting roll after roll of film with a silly look on his face enthusing about it wildly. Up until then the widest lens in Leica M mount was the Zeiss 15mm f8 Hologon of which only 225 were made and currently change hands for around the $10,000 USD for one in mint condition.

The Voigtländer 15mm f4.5 is now discontinued but can be obtained as new old stock for approximately $600 USD, or second-hand on Ebay for around the $400 USD mark at the time of writing.
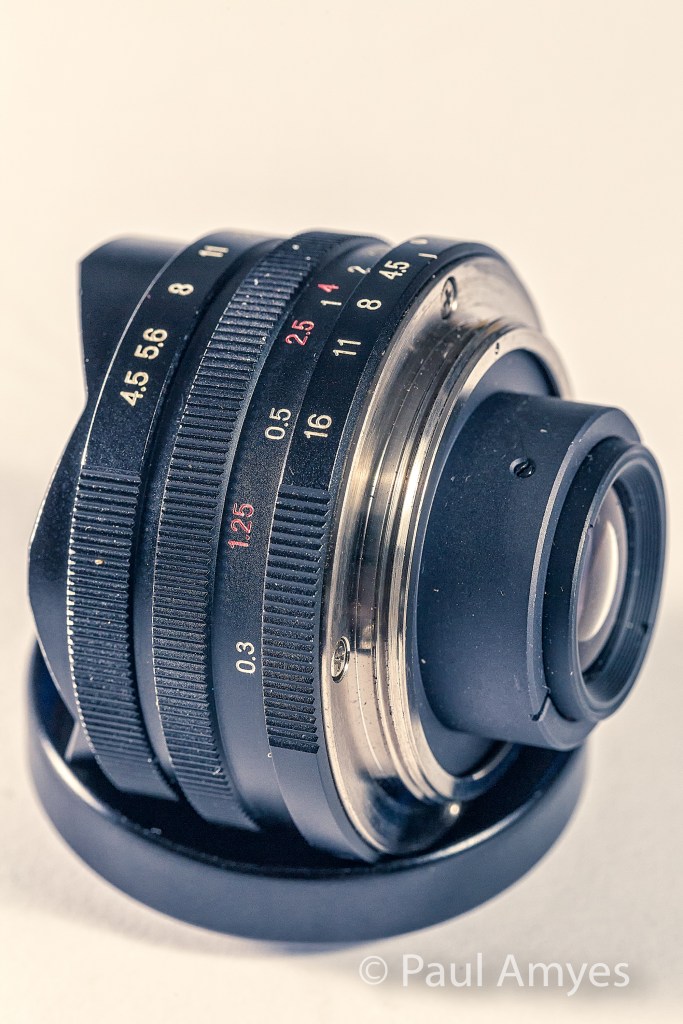
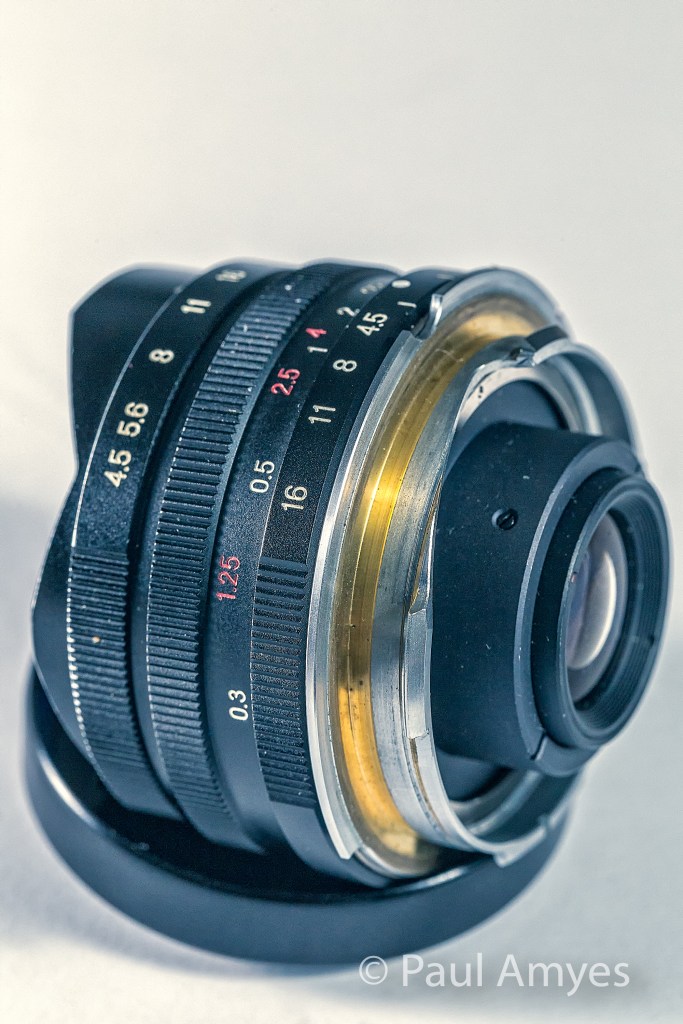
 

Cosina Voigtlander 15mm f4.5 Super Wide-Heliar lens showing the Leica L39 screw mount.


Cosina Voigtlander 15mm f4.5 Super Wide-Heliar lens showing the Voigtlander L39 to M mount adapter.


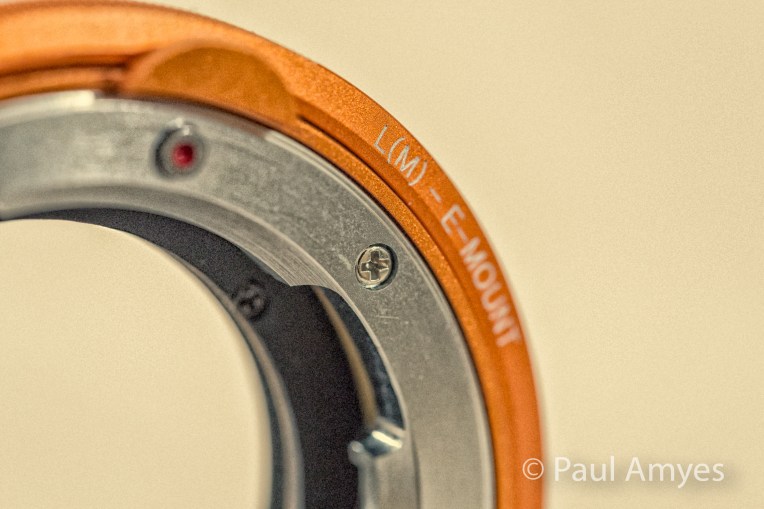
Cosina Voigtlander 15mm f4.5 Super Wide-Heliar lens showing the Voigtlander VM adapter II Sony E mount adapter.


Specifications

Mount – Leica thread or L39
Angle of view – 110º
Lens construction – 8 elements in 6 groups with one aspherical element
Number of aperture blades – 10
Aperture range f4.5 – f22 in half click stops
Minimum focusing distance – 29.85cm or 11.75 inches
Weight – 113g or 4oz
Diameter 49.6mm or 1.94 inches
Length – 30.7mm or 1.2 inches
Filter thread – N/A
Lens hood – built in tulip style
Rangefinder coupling – no

The lens is very well made – up to Cosina’s very high standards and it has, despite its diminutive size a solid feel and satisfying heft. The aperture ring is at the front of the lens, as is usual with rangefinder lenses, and turns nicely with satisfying half stop click indents. The focusing action is very smooth and has an approximate 100º throw. I found that I tended to use hyper focal distances to zone focus the lens in use as the short focal length means that the DOF is immense. The lens has a very clearly marked scale to make this easy. An aperture of f8 means that everything from 0.5m to infinity is in focus. Conversely lovers of shallow depth of field should really be looking elsewhere.


Test Results

Cosina Voigtlander 15mm f4.5 Super Wide-Heliar lens mounted to a Sony A7r via a Voigtlander VM Adapter II.


Cosina Voigtlander 15mm f4.5 Super Wide-Heliar lens mounted to a Sony A7r via a Voigtlander VM Adapter II.


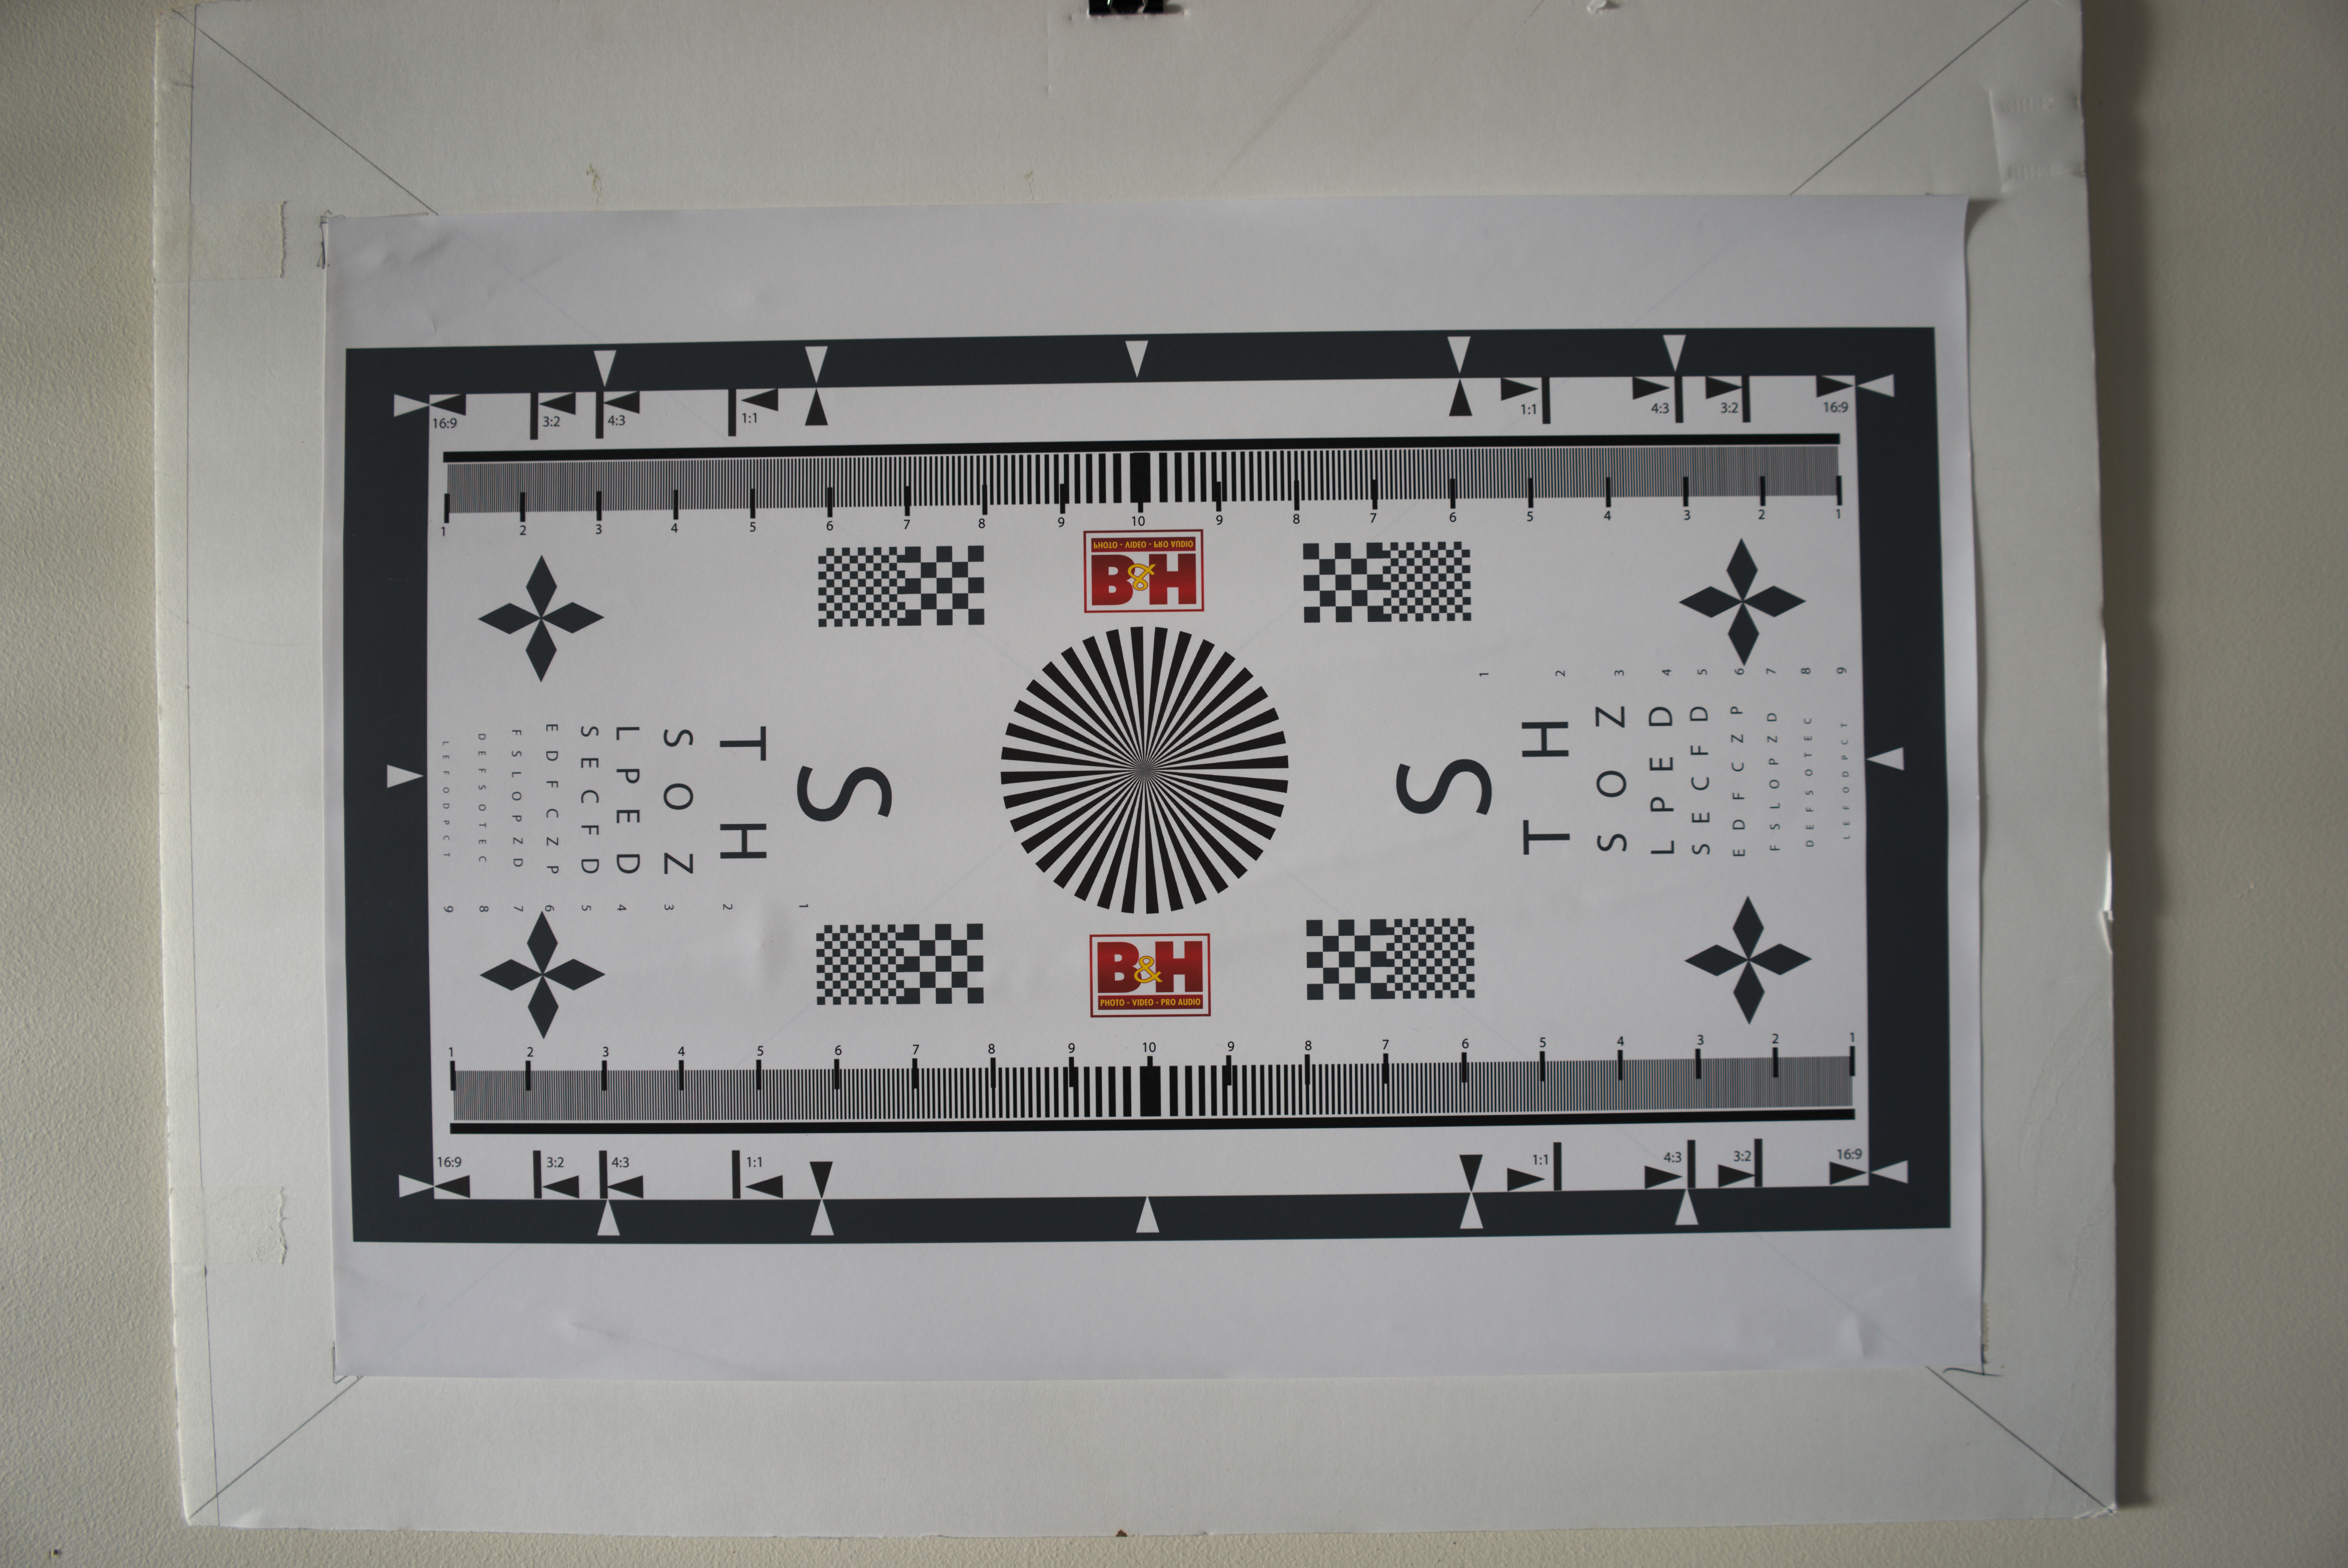
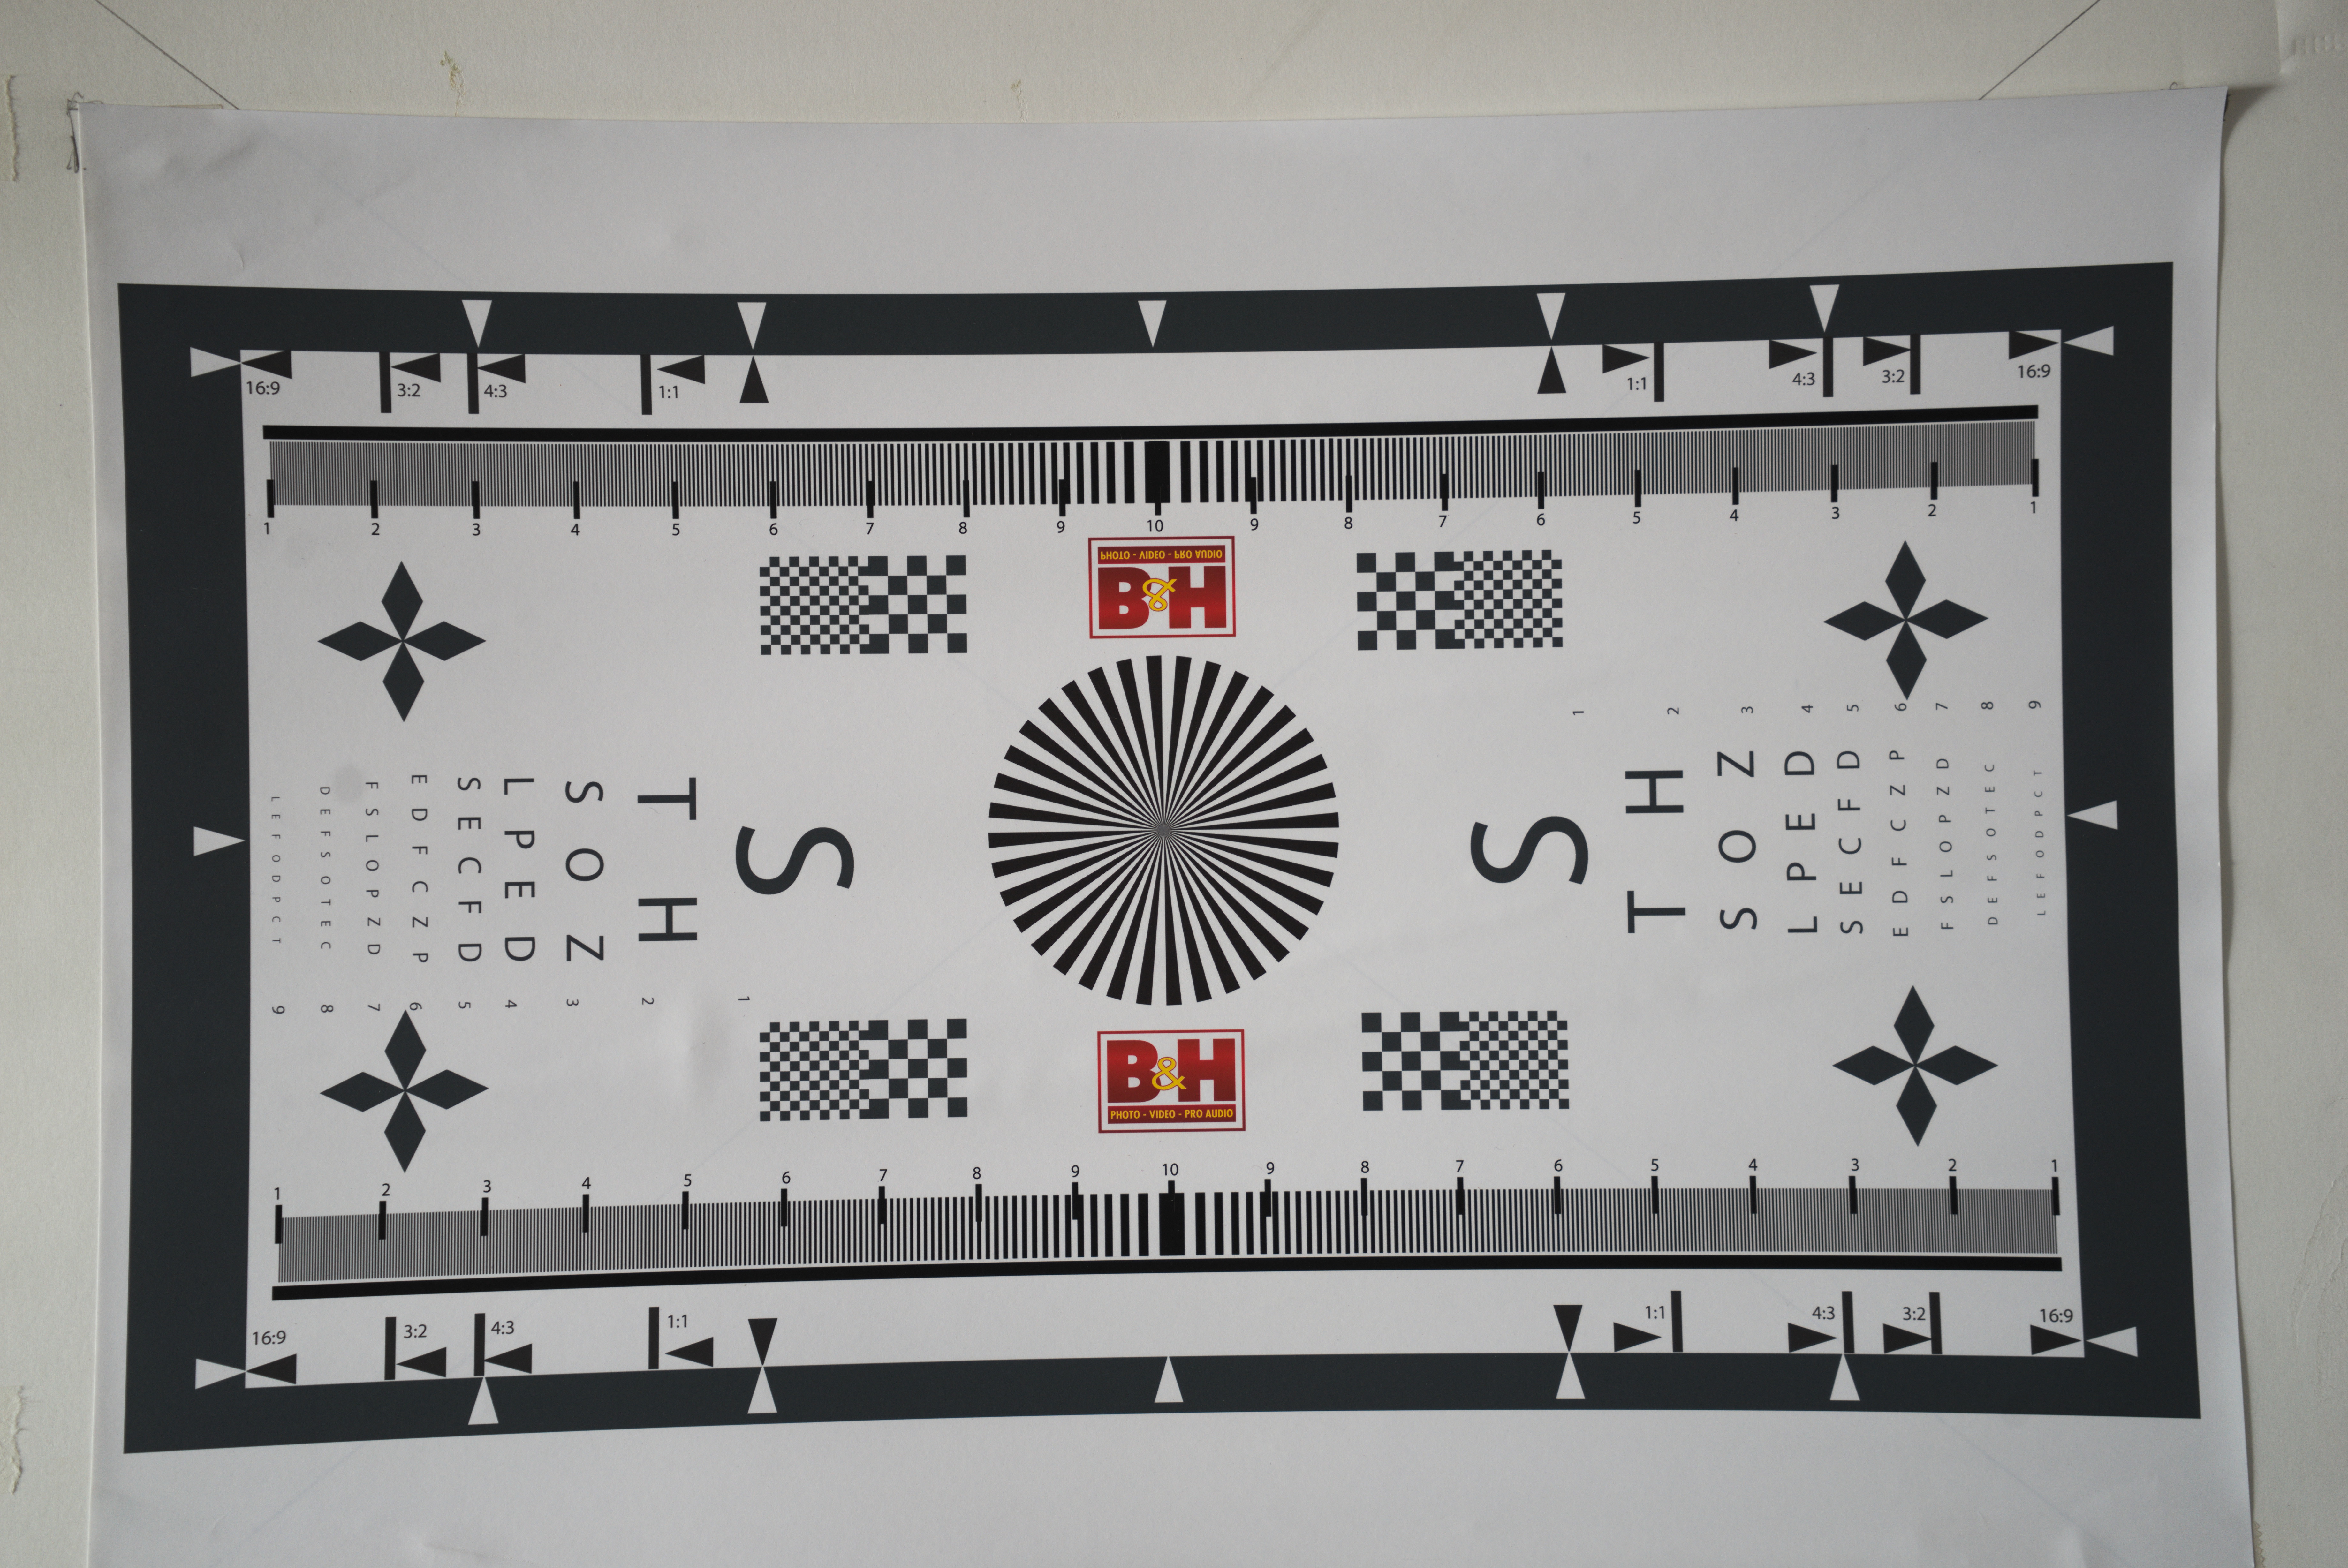
Years ago Clint Eastwood made a film called “The “Good, The Bad, The Ugly” (a movie which had the coolest theme tune ever, actually that is an exaggeration as everyone knows Shaft had the coolest, but it’s a close run thing) well this lens is all three. Good, bad and ugly. The good comes when you use the lens as intended on a film rangefinder body. The bad when you mount it on a digital m4/3s body and the ugly when you put in from of the A7r’s 36Mp sensor. This lens is one of the worst I’ve ever had on a digital camera – the worst was a $20 25 mm f/8 Holga lens in m4/3s mount which I tried using on my Olympus EP2 several years ago, but that is, as they say, another story. My friend who I mentioned earlier abused Kodak Tri-X by pushing it, developing in Rodinal and then lith printed the results. He wouldn’t have noticed what I’m about to describe. So this is how it was on the Sony A7r.Right from the get go there is obvious barrel distortion. Wide open there is considerable vignetting which has a very obvious magenta cast. No matter how far you stop down this does not go away (kind of like Mormon missionaries on your doorstep). Wide open the centre sharpness is quite good and remains so until f22 when diffraction rears its ugly head. The corners are smeared and out of focus, things improve a little by f11 but they never get to the level of sharpness of the centre of the lens. Chromatic aberration is also present throughout the aperture range. Flare for such a wide lens is remarkably well controlled and lovers of sunstars should be happy as the 10 aperture blades produce nice results.
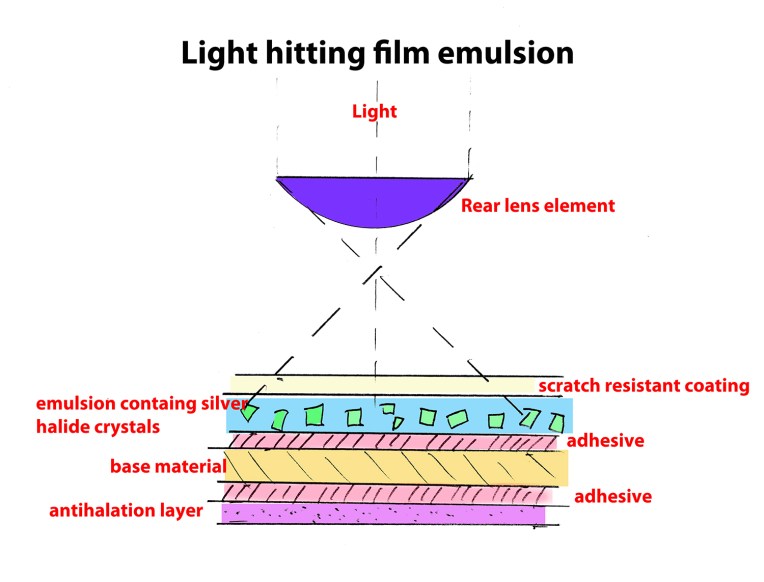
 

With film the light-sensitive silver halide crystals don’t care at which angle light hits them.

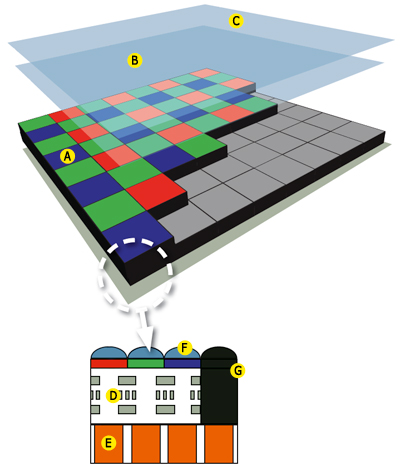
The reasons for this are that Voigtländer 15mm was designed for use with film and the silver halide crystals in the film emulsion did not care at what angle lights hits them to provide the necessary reaction to form the latent image. But with a digital sensor it is a whole different ball game because the sensor is no longer just a gelatine substrate coated with an emulsion containing silver halide crystals it is a complex sandwich of filters, lenses and electronic componentry as the schematics  show. For best performance the light needs to enter micro lenses at 90º, when the incidence of the light is severely off perpendicular then not all of it reaches the pixel at the bottom of its well this can cause vignetting, smearing with loss of detail, and severe colour fringing. This is what stopped Leica initially developing a digital range finder. Kodak developed a special sensor with offset micro lenses for Leica to help overcome this along with in camera software correction the digital M became a reality.
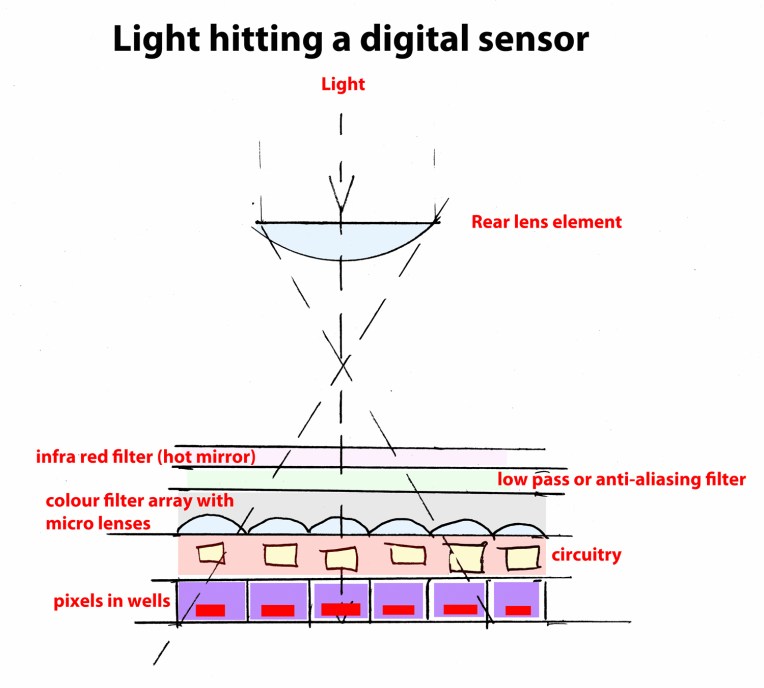
For light to hit the pixel in its well it needs to travel as near to perpendicular to the sensor plane as possible.

In Use

For stills photography the 15mm f4.5 could be a consideration if you don’t have the current fixation of razor sharpness corner to corner i.e. if the hero of your shot is central to the frame and you don’t mind loss of sharpness at the edges. Working in monochrome would help get rid of the magenta cast of the edges as well. Have said that the magenta cast and vignetting are removable in post, the accompanying video shows how this can be done in Lightroom. In the gallery of example pictures below I’ve left the magenta cast in some of the photos so you can see what it looks like. If you’d like to see the photos larger they can be seen here.

This slideshow requires JavaScript.

Video is another matter. Ideally this lens should be perfect for vlogging on a Sony A7 but the smearing, colour cast and vignetting make it quite unsuitable. Also it has no filter threads so it is impossible to use a variable neutral density filter which further adds to its unsuitability.

Conclusion


To be completely fair we are demonstrating uses for this lens that it was never designed for. With film and optical/chemical printing it is an amazing lens at very cheap price. When looking at it from a digital imaging point of view, whether stills or video, it really can’t be recommended unless you already own it and are prepared to put up with its short comings. If you are looking for an ultra wide the are better options available such as the Laowa 15mm f/2 Zero-D Lens.
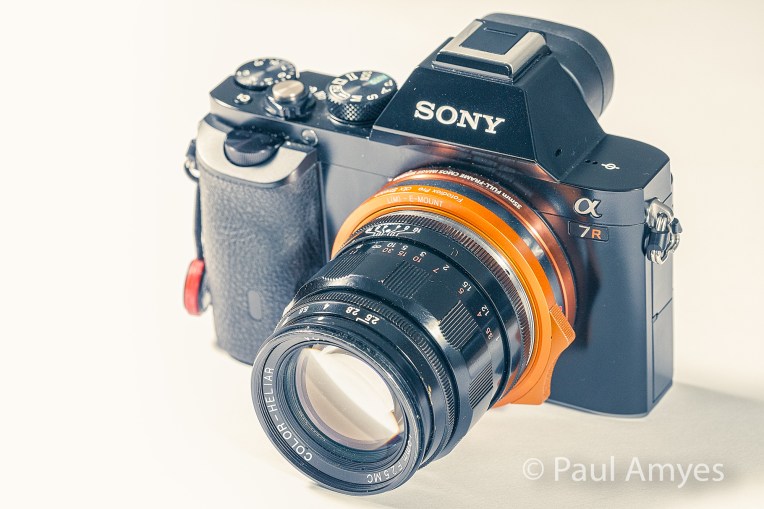
Voigtländer 75mm f2.5 Color-Heliar


The above video is the short version. If you would like to see the test images for image quality larger please click on the photos.


Cosina Voigtlander 75mm f2.5 Color Heliar mounted on a Sony A7r via a Fotodiox DLX Stretch adapter.

This L39 or Leica Thread Mount (LTM) short telephoto lens was one of the first lenses release with the launch of Cosina’s Voigtländer branded camera line. It was discontinued in 2010 with the introduction of the 75mm f1.8 Heliar Classic in August of 2010. The 75mm f2.5 can still be purchased as new old stock from some resellers ( Cameraquest being one of them) for $689 USD or second-hand on eBay for around $300. I bought this lens new in 2004 and put a LTM to M adapter on it to use with a Bessa R2.

Cosina Voigtlander 75mm f2.5 Color Heliar showing the native L39 mount.


Cosina Voigtlander 75mm f2.5 Color Heliar showing the Voigtlander Leica L to Leica M adapter.


Cosina Voigtlander 75mm f2.5 Color Heliar showing the Voigtlander Leica M to Sony E mount adapter.


The original Heliar design was developed in 1900 by Dr. Hans Harting as a symmetrical 5-element variant of the simple anastigmatic and well color-corrected Cooke triplet. In 1902 the design was revised correcting astigmatism, curvature and coma better than the original design. That new design was asymmetrical six elements in five groups. In 1950 Dr. A.W. Tronnier refined the design even further to produce the Color-Heliar. When Cosina revitalised and relaunched the Voigtländer line they revived the Heliar concept with the 75mm f2.5 Color-Heliar. Cosina wanted to recreate the German optical aesthetic and engineering quality. This modern lens has a definite 1950’s look with its beautiful all metal construction. The scalloped focusing ring and ribbed aperture ring aid grip and the focusing ring is nicely dampened and has a throw of approximately 90º. The aperture ring has full and half click stops. The lens comes with a lens hood and it as well as the lens cap are made of brass. The lens hood is a push on fit over the lens hood, a particularly nice touch is the strip of velvet inside the cap to increase the friction between it and the lens hood. The gloss black finish does tend to wear but as it does so it creates a wonderful patina with the brass showing through.


Specifications

Mount – L39
Six elements in 5 groups
Aperture blades – 10
Aperture range – f2.5 -16
Angle of view on 35mm – 32º
Closest focusing distance – 1m
Filter size – 43mm
Length 64.5mm
Diameter – 55.5mm
Weight – 230g

Image Quality


Cosina Voigtlander 75mm f2.5 Color Heliar mounted on a Sony A7r via a Fotodiox DLX Stretch adapter. Shot wide open at f2.5.


Cosina Voigtlander 75mm f2.5 Color Heliar mounted on a Sony A7r via a Fotodiox DLX Stretch adapter. Shot at f5.6.

Vignetting is present at f2.5, but by f5,6 it has completely disappeared. Lateral or transverse chromatic aberration is present throughout the aperture range, but it is well controlled and very slight. It is easy to remove in Lightroom as is the slight pincushion distortion using the lens correction profiles. Wide open the centre is very sharp and contrasty while the edges are a little softer and less contrasty. At f5.6 the corners are as sharp and contrasty as the centre. Diffraction starts to kick in at f11 and decreases the optical quality. There is focus shift as the lens stops down and the lens breathes when focusing.


In Use

The minimum focusing distance of 1 metre does preclude its use for head and shoulders portraits unless you use something like the Fotodiox DLX Stretch or the Voigtlander VM/E Close Focus Adapter  which gives 4mm of extension and allows focusing as close as 0.65m. For half-length portraits the lens renders the background out of focus beautifully when shot slightly stopped down at f2.8 with lovely tonal transitions. This makes it a great lens for street photography and events. The fly in the ointment is that the total depth of field for 1.5m distance using an aperture of f2.8 is just 0.07m or 7 cm or 2.77 inches and the focus peaking on my A7r is not sensitive enough to make accurate focusing possible 100% of the time so I have to use the focus magnifier to punch in and fine adjust.

Now according to the pixel peepers on the forums at DPReview it is impossible to shoot moving subjects with anything less that a Nikon D5 or a Canon 1DX Mkii. In fact I get a an attack of hysterical laughter every time some one makes a post about wanting to take pictures of their young children and they are pushed towards those cameras with fast eye wateringly expensive fast primes. I digress. It is possible to shoot moving subjects with manual focus lenses and the A7r. At a recent Medieval Fayre I was able to shoot some action sequences of mounted archers and re-enactments of combat using a mixture and sometimes a combination of pre-focusing and follow focus. Stopping down to f5.6 and f8 gave a little leeway with focusing and smooth focusing action definitely helped. The whole experience of going out with a camera, two small lenses (the other was Voigtländer 15mm f4.5 Super Wide-Heliar), a couple of batteries, and an extra memory card was extremely liberating and made the whole experience fun.

Conclusion

The Voigtländer 75mm f2.5 Color-Heliar is not a sexy fast aperture lens and this is why it was replaced by the 75mm f1.8 Heliar Classic. Consequently it is ignored by many people which is a great shame as it is a very well made and well performing short telephoto lens. If you like candid portraiture then it is a no-brainer.


Sample Photos

Fremantle council has gone a bit overboard with the double yellow lines.


Reading about the history of migration outside the Maritime Museum in Fremantle, Western Australia.


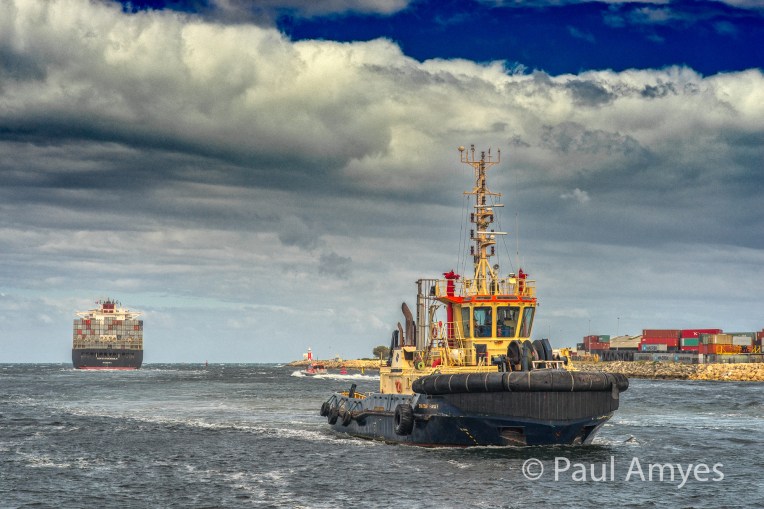
The Svitzer Eagle tug boat returns to Fremantle Harbour after escorting to Conti Stockholm out to sea.


A dog waiting for its owner outside the Beverley Hotel. Beverley Western Australia.


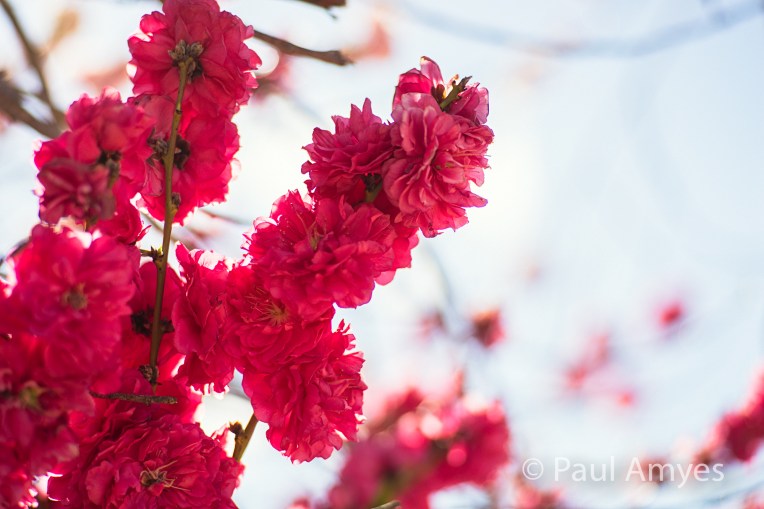
Close up of some ornamental blossom using the Cosina Voigtlander 75mm f2.5 Color-Heliar and the Fotodiox DX Stretch.


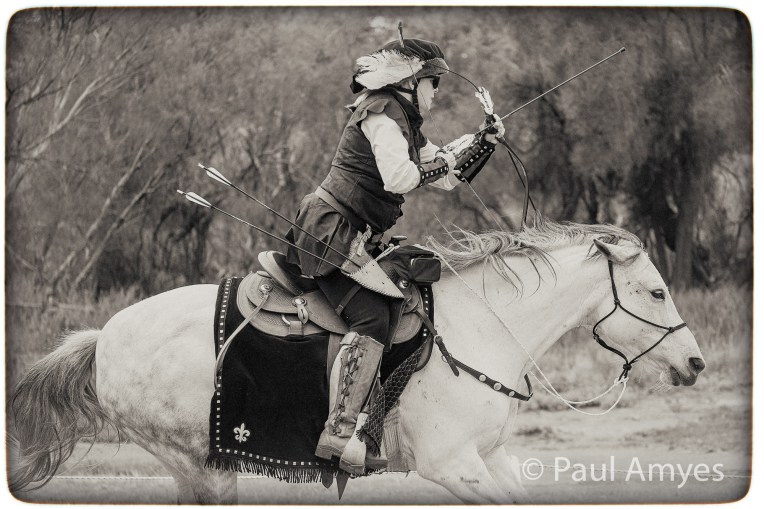
Mounted archery demonstration at the 2017 York Medieval Fayre. Western Australia.


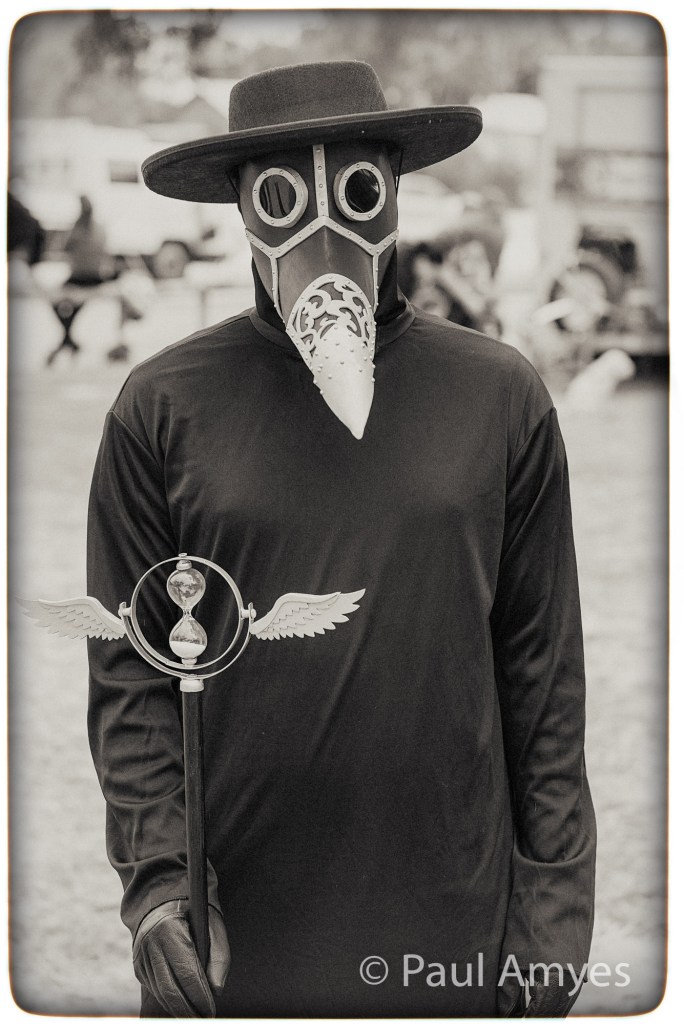
The plague doctor carrying out his duties at the 2017 York Medieval Fayre. Western Australia.


Pie Melons or Citrullus lanatus (Thunb.) Matsum. & Nakai are an introduced pest in Western Australia.


York Motor Show 2016. Avon Terrace, York, Western Australia.


An old Mercedes truck sits in a paddock slowly rusting. Quairading, Western Australia.


Cosina Voigtländer 35mm f2.5 Color Skopar Lens

A close up of the 35mm f2.5 Color Skopar. The clearly marked aperture ring, the focus distance and the hyperfocal settings mean that it is a great for street photography as it is a breeze to use zone focusing.


The above video is a shortened version of this entry.


Cosina are a Japanese lens manufacturer who produce lenses under their own and under companies names. In 1999 they leased the licensing of the Voigtländer name and started making camera bodies and lenses. Sadly they have stopped making cameras but are still making lenses in the following mounts:

VM – or Leica M
Sony E Mount or Nex
M4/3
Nikon F

There is no need to worry about Cosina’s ability to manufacturer lenses as Carl Zeiss has them make many of their lenses.


The Cosina Voigtlander 35mm f2.5 Color Skopar lens is very small and compact. The optional vented lens hood practically doubles its size.


This article is about the 35/2.5 P type II VM mount MC version. Which is a way of saying that there have been several versions of this lens with different mounts and lens coatings and this model was introduced in February 2004, I purchased it new that year, and it is still in production. Physically the lens is similar in styling to the Leica pe-aspheric 35mm f2 Sumicron right down to the inclusion of the finger tab on the focusing ring. The vented lens hood is an optional but essential extra, so if purchasing new budget for it, if buying second-hand look for a copy with it included. Readers not familiar with range finders may scoff at the design of the lens hood but the design was necessary so that the hood would not obstruct the view through the viewfinder. Not necessary when adapting the lens to the Sony A7 cameras but it does make the lens look cooler. Yes my copy has a dented lens hood, the lens has been very well used over the years. It also shows that a lens hood provides more protection against damage than a filter ever could.


Optical construction of the Cosina Voigtländer 35mm f2.5 Color Skopar Lens P type II VM mount MC showing 7 elements in 5 groups.


The Cosina Voigtlander 35mm f2.5 Color Skopar lens can be adapted to mount on the Sony A7 and A9 series of cameras by means of an adapter such as the Fotodiox DLX Stretch Leica M to Sony Nex adapter.

Lens Vital Statistics


The construction is all metal and for such a tiny lens it has a reasonable heft and feels very dense. So as you can see this is truly a “pancake” lens and makes a very nice all day walk around pairing with a Sony A7. Street and landscape photographers rejoice! The lens also has marked on its barrel along with the focusing scale depth of field markings, this makes zone focusing and setting the hyperfocal distance a breeze. Set at an aperture of f22 everything from 1 metre to infinity will be in focus. The focusing ring has a smooth throw of around 90º coupled with the afore-mentioned finger tab and focusing while the camera is at eye level is just so easy. The aperture ring while admittedly very thin has two tabs on it opposite each other that help you find the ring by touch and adjust without taking your eye from the viewfinder. So while it would be easy to dismiss the lens because of its retro styling these little inclusions show that this is a lens that is meant to be used. To use it on anything other than an M mount camera you will need an adapter.


Mounted to my Sony A7r how does it perform? Unsurprisingly for a pancake lens vignetting is quite apparent wide open at f2.5 along with a magenta colour cast along the edges and in the corners of the frame. The vignetting is a result of the optical design, the magenta cast the result of putting a true 35mm lens in front of a digital sensor designed to use retro-focused lens designs. The lens was designed for film so it didn’t matter that the rear element was so close to the film plane as the silver halide crystals in the emulsion didn’t care whether the light rays were hitting them perpendicularly or not. Digital sensors do require the light rays to hit perpendicular to the sensor plane, if they don’t you get light fall off, smearing and colour fringing. The Sony A7 cameras because they are mirrorless designs have micro lenses on the sensor that help pick up the light rays at acute angles, but the camera needs to know what the lens is before any correction can be applied. This lens has no electronic communication with the camera so the cast remains. The performance of the lens improves considerably as the lens is stopped down, so the vignetting is all but gone by f8 but the magenta fringing continues throughout the aperture range. Happily the colour cast can be removed in post. If you use Adobe Lightroom there are correction profiles for the Voigtländer lenses – the video accompanying this article shows how they work. If you use other processing software have a look at Cornerfix which is a little app that allows you to build lens profiles.


At f2.5 vignetting is very apparent. It is also apparent that there is a magenta colour cast in the corners and along the edges caused by the proximity of the lens’ rear element to the camera sensor.


By f8 it has all but disappeared. The magenta cast remains throughout the aperture range.


When it comes to distortion – there is some barrel distortion, but that is easily fixed in post as is the small amount of chromatic aberration. Sharpness at f2.5 in the centre of the images is very good with nice edge contrast befitting a modern multi-coated lens. The edges are considerably softer with less contrast. The wide angled rangefinder lens in front of a digital sensor problem comes into play here. A lot of people will complain that there is smearing of detail, and that is true it does happen (Spoiler Alert!) and wait until you see my review of the CV 15mm f4.5 as that has it in spades, but with this moderate wide-angle and it’s fairly sedate maximum aperture of f2.5 the light rays are not being forced to hit the sensor at extreme angles so there is no visible evidence of detail smearing in the corners of an image. Like most lenses used on a 35mm sensor diffraction sets in at f16, it’s not disastrous. Diffraction is not like falling off of a cliff – at f11 everything is sharp then at f16 everything is out of focus. No there is a slight loss of edge definition which is a little more noticeable at f22. Flare is well controlled, but I would still recommend the lens hood and the 10 aperture blades produce nice sun stars.


100% enlargements from the centre and edges of the frame. Click on the image to see larger.

My verdict.

Well lets look at pricing first. B&H Photo sell this puppy new for just over $400 USD sans lens hood at the time of writing. There are dealers on eBay that sell them for $350 USD and second-hand copies can be found starting at just over the $200 USD mark. This is not a sexy fast aperture lens and the price reflects that. There are only 7 lens elements with no fancy shapes. What you are getting is very compact moderately wide angled lens with a modest maximum aperture of f2.5. It is well designed and for stills photography is a delight to use. For video it is possible to use it, but the focus throw is a little on the short side, the small size makes operating the lens a little harder while filming and the small filter size makes the use of variable neutral density filters a little cumbersome. It is not a lens that lens snobs would consider, but it is a very fine workman like tool that I won’t ever sell because it is well made, functions well and is optically very consistent. If you like manual lenses and see one at a good price buy one. Like the many people who left reviews on the B&H web page you won’t be disappointed.


Examples

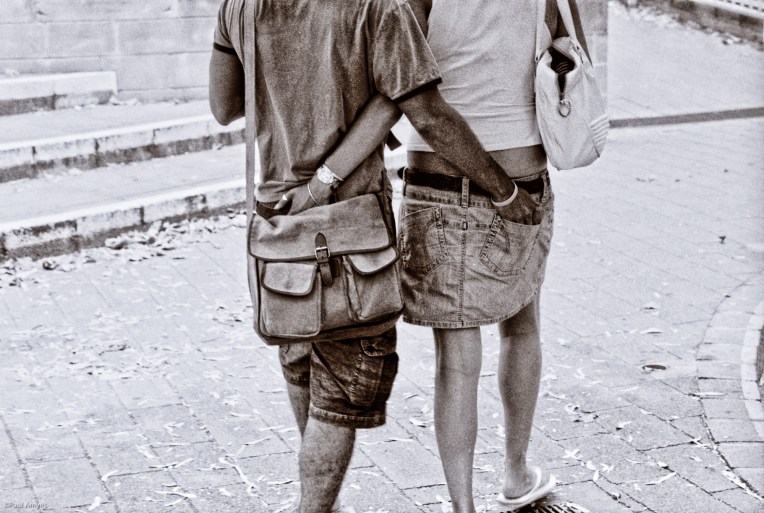
Young lovers walk arm in arm through Northbridge in Perth, Western Australia. Voigtlander Bessa R2 with 35mm f2.5 Color Skopar with red filter and Ilford Delta 400.


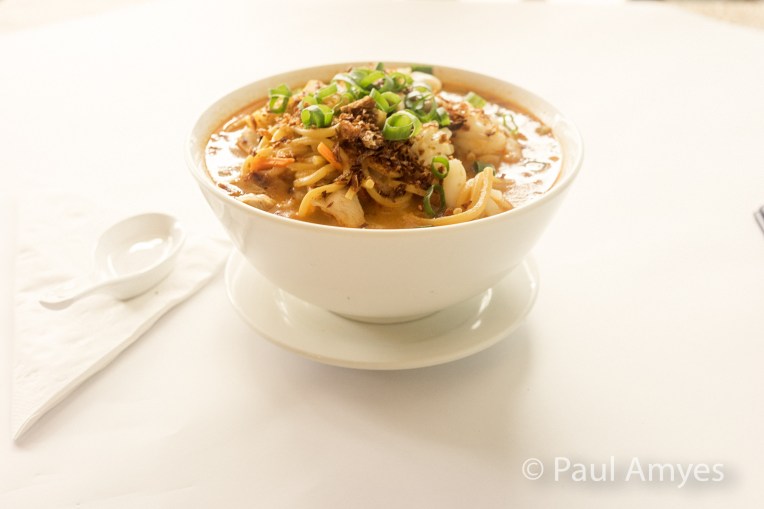
Curry Laksa – one of life’s essentials. Golden York Chinese Restaurant, York, Western Australia. The Fotodiox DLX Stretch adapter is extended to give a minimum focusing distance of 30 cm instead of the usual 70cm.


Testing the Voigtlander 35mm f2.5 Color Skopar on the Sony A7r. Mount Brown, York, Western Australia.


Young kids on the Avon Walk Trail in York, Western Australia.


St Mary’s Cathedral in Perth, Western Australia. Veiling flare with the 35mm f2.5 Color Skopar. While resistant to flare it is possible induce it even when using a lens hood.


The vintage Shell petrol pump outside the York Motor Museum on Avon Terrace in York, Western Australia.


Jules Cafe on Avon Terrace in York, is a friendly alternative cafe well patronised by locals and tourists alike. Distortion is very well controlled and corner to corner sharpness at f8 is good.

Hell Or High Water

Hell or high water is the new motto for the Avon Descent and was adopted because recent years have seen decreasing amounts of rainfall falling and competitors have had to carry their craft where there was insufficient water. This year, 2017 and the 45th occasion of the race, the water levels were high which meant potentially new records could be set. The Avon Descent was first held in 1973, and there were only forty-nine competitors. This year there were 370 competitors with many coming from interstate and overseas. In more ways than one it deserves the title the “world’s greatest white water event”. The 124 km or 77 mile two day event starts at Northam and finishes at the Riverside Garden in Bayswater with an over night stop at the Boral Campsite just outside Toodyay. For the majority of entrants the aim is just to complete the course, but for the elite athletes it is a chance of competing in a unique endurance race.

The beauty of this race is that you can pick out a few vantage points from a list put out by the race organisers on their website and follow the whole event documenting the whole story rather than just getting an isolated snap shot. In previous years I’d covered the race for magazines shooting stills and then writing the story. This year I had intended to cover the entire event from start to finish and it was to be first time I’d covered it shooting video. Having planned my weekend around the race it was time to check the maps and the approximate timings for each stage. For instance there was no point heading to the first stage after the start as I would not have had time to get there by car, park, and then walk along the river to find a good location to set up. Also I had to think about the weather conditions, because at some of the viewing points you are bussed in and that would mean I’d have to carry everything with me. As the forecast for the weekend was a cold start it was thermals, and fleece. he key was light layers that could be added or taken off as conditions permitted. Camera and lens choice was hard, and I found it difficult to make a decision. For the Friday shots I could work from the back of the car and it was all to be people shots around Northam and for the sake of mobility using either a monopod or a gimbal. In the end I decided to use the Sony A7r and with Olympus OM Zuiko lenses – the 20mm, 50mm and 135mm. This and the gimbal went in a belt pack. Saturday involved shooting at three sites and I wanted to shoot some time-lapse as well as video footage. So I chose the Olympus OMD EM 1 with 40-150mm f2.8 lens for the video work and the EM10 with 12-40mm f2.8 for the time-lapse. I couldn’t set up a tripod at the start as I was going to shoot on the swing bridge so I used a monopod for the video and for the time-lapse I clamped the Syrp Genie Mini to the bridge safety barrier with a Manfrotto super clamp. All this went into my photo back pack. Sunday was the biggest problem with no car access to Bells Rapids everything had to be carried. So I took the Canon EOS6d with 24-70mm, 70-200 and a x2 converter. I’d also need plenty of batteries and memory cards as there would be no nipping back to the car. I decided to carry all this in pouches on a belt as I needed to be able to scramble up some rocks to get a good vantage point. At Bells I mounted the camera on a tripod but at the finish line I shot just using a monopod.

The race happens on the first weekend of August every year. It kicked off on the Friday with the competitor registration at the Northam Swimming Pool and then their craft were taken down to the race marshalling area on the banks of the river. Late in afternoon and into the evening was the Avon River Festival with a huge fireworks display on the Avon River, stage shows featuring a variety of local talent, a family fun zone, rides for all the family, sideshow alley and roving entertainment, a community street parade, markets for avid shoppers, and food. On Saturday morning the event kicked off proper. As I arrived I could see hot air balloons drifting lazily above the river. The power craft were away quickly and smoothly and then it was the turn of the paddle craft. I was surprised to see that someone was competing for the first time on a Stand Up Paddleboard (SUP). Barely had half the paddle craft left than the news came through that the first power craft had reached Toodyay. It was going to be a very fast race with little hope of getting shots of the power craft. I spent a total of an hour and half standing on the swing bridge -it is a wire suspension bridge that bounces a lot, the police constable standing next to me complained of feeling seasick from the constant motion. It didn’t effect me but it really made me glad that I had the in body stabilisation activated on the cameras. After the start I went to Williamson Weir stayed there for an hour and a half. The Weir is man-made and its concrete lip and rock wall are hazardous to boat and paddler alike so around half the competitors choose to portage around it. Thankfully the other half run it and you get the thrills and spills with plenty of encouragement from the watching crowd. Finishing up in Toodyay for the day is great. There is always a great vibe with a tremendous crowd and a party like atmosphere. When I got there the town was packed and in full on carnival mode. It took an age to find some parking and get down to the river. Here there was a team change over area, and along the riverside were lots of anxious looking paddlers all staring up river for any sign of their team mates. As the first canoes started to come round the corner and pass under the timing gate they got their first sight of their team mates and their faces would burst into a huge grin of relief. The spectators would burst into rapturous cheers as the fresh team-mate paddled away heading for the Boral Campsite that marked the halfway point and the end of day one.

I couldn’t face getting up at 4;30am in the dark and freezing cold to get to the start at Boral Camp for day two so I just headed out a bit later and went straight to Bells Rapids in Walyunga National Park. You have to leave the car at the nearby state equestrian centre and then you taken in by bus. From there it was a quick walk to what I call the media rock. It’s a nice big rock that juts out into the river which gives a good view of the competitors coming under the bridge and through the rapids. I got there just as the TV crews were claiming their spots and setting up. I squeezed onto the end closest to the bank and put my tripod up to mark my territory. When the press photographers arrived they gave us a filthy look, but as they were shooting hand-held they didn’t need as much space. A little while later a hopeful photo enthusiast asked if could join us on the rock, one of the guys I know from the papers said it was OK if he didn’t talk about equipment – his or ours – and if he did he’d get thrown in the river. He decided that he couldn’t not talk about kit and took himself off somewhere else. After a couple of hours I knew that I’d have to get my skates on if I was to get to the finish line.

The finish line is in Bayswater a suburb of Perth. A huge screen had been put up and there was a live commentary being given. I positioned myself by the finish line as I find that the images taken as the paddlers beach their boats and walk ashore tells a very powerful story. It does not seem to matter whether they are newbie’s in their first race or veterans each face has a similar look etched upon it. It is a mixture of pain from the sheer physical effort, relief from finishing, and disbelief that it is all over. Some will swear that they will never do it again, but most know that even as they hit the finish line that they will be back next year.

So now a week later, I’ve edited the 50Gb of footage and made a 7 minute clip. As I write this I’m thinking about how things went and what I would change if I were to do it again. Well to start with I wouldn’t bother with the Sony. It produces very nice images, but the screen is terrible. It is winter here and the days aren’t as bright as they can be, but the Sony’s rear LCD panel is virtually unusable. The other thing that puts me off is that the user interface isn’t very intuitive and so adjusting some settings in a hurry is a pain in the nethers. The OMD EM1 mk i is constantly a surprise when shooting video. The touch screen is a pleasure to use and the phase detect auto focus does very well. It is tempting to run off and get a mk ii for the 4K and the improved focusing. The Canon EOS 6d was the surprise, the autofocus is crap, but Technicolor’s CineStyle Profile and Canon’s superb lenses produce gorgeous images. All it needs is a flippy flappy touch screen and dual pixel auto focus and it would be perfect. “The 6d mk ii has that!” I hear you say, but (and there is always a but) the mk ii’s video compression is worse than the mk i. What Canon give they take away! There is always the EOS 80d. I might try to hire one for the next project I shoot. I wish I’d used the gimbal more instead of the monopod, accepting the fact that I couldn’t use it for the long lens shots. Sound could be a lot better – it is the aspect of video I always struggle with. I’m also beginning to think that I’ve out grown iMovie – a better editor would give me some more options. I’ve downloaded DaVinci Resolve to give that a whirl on my next project. In many ways I’m no different to the competitors in the race – I’m already starting to plan for next year!

Bleedin’ Taters*

The secret to time lapsing is having a comfortable chair to sit in while you wait for the shoot to finish.

Got up at “stupid o’clock” the other morning to try out a new bit of time lapsing equipment. Streuth it was cold, and as I drove down to Monger’s Crossing I mused that the brass monkey would be tucked up at home in bed if he was sensible. A Swedish friend of mine once told me that there’s no such thing as cold weather just poor clothing choices. Well I took Matts’ advice to heart and I had more layers  than an onion.  On reaching the river it was dark and foggy, not the most photogenic conditions, but I thought for the purpose of this test it would be OK.  So I set  up the camera and sat down to wait for it to shoot one frame every twenty seconds for one hour.

The Canon EOS 550d and Sigma 17-50mm f2.8 OS on the Syrp Genie Mini pan and tilt kit.The observant will have noticed that the camera is held together with gaffer tape.

I tried watching a video on my iPod but it was so cold that the battery ran flat real quick so I thought I’d take a few pictures of my companions on the river bank.


A yellow billed spoon bill searching for food on a cold and misty morning on the banks of the River Avon. York, Western Australia.


A white-faced heron wading on the banks of the River Avon on a misty winter’s morning. York, Western Australia.

As to the time-lapse, well bearing in mind it was just a test to see how it worked, well it was a reasonable first attempt. The only downside was that the camera sensor was filthy and that meant a lot of cloning in Photoshop.


* English is pretty confusing at the best of times for non native speakers. “Taters in mould” is Cockney rhyming slang for cold.

Guns and Roses


On the weekend of 19th-21st May 2017 I travelled with my significant other to the teeming Wheatbelt metropolis of Narrogin as she had entered the annual “Guns and Roses” croquet tournament put on by the Narrogin Croquet Club. Twelve of Western Australia’s best players (the “Guns”) would partner eighteen lesser ranked players (the “Roses”). Each “rose” would get the opportunity to play with a different “gun” at each round. The idea, which seems an excellent one I might add, is that inexperienced players can learn off of top players.  My role in this was the self-given task of producing a video documenting the proceedings.

Video is a fairly new medium for me, I’ve been playing around with it but I’ve really not got to grips with it. This was to be a complex multi day project and it wasn’t helped by the fact that it was bitterly cold and there was intermittent heavy rain (yes dear reader we do have cold wet weather in Australia). I ended up using my Olympus OMD EM1 mk i with the Olympus m.Zuiko 40-150mm f2.8 lens as the main camera, an Olympus Pen EP5 with the Olympus m.Zuiko 12-40mm f2.8 for wide shots, a Leica D-Lux for time lapses, and my iPhone for social video in the evenings. For sound I used shot-gun microphones (a Rode VideoMicro on the EM1 and a Rode VideoMic Pro on the EP5) to record straight into the cameras. No external audio recorder was used as I felt I had my hands full enough. By the end of the weekend I had got through nine batteries and ten 16Gb SD cards. The EM1 was used on a tripod (a Manfrotto MDEVE 755XB with Manfrotto MV500AH Fluid Video Head), the EP5 was on a video monopod (Manfrotto 562B-1 Fluid Video Monopod), and the Leica D-Lux was on a photo tripod (a very old Manfrotto 190 tripod fitted with an equally old ball head).

What I learnt from this exercise was:

  • the weather sealing on both the EM1 and the two lenses works very well. At times I got soaked in the rain and the camera just kept going with no adverse effects.
  • I should have used an audio recorder to get better sound and record some general background noise.
  • the 40-150mm f2.8 is not parfocal  (it is not sold as such) and the autofocus kept drifting and in some cases would not lock on at all. Trying to focus on the night games using just the rear screen and no peaking was hard. Either a camera that has focus peaking in video mode or a monitor that allows it would be really good.
  • I shot most of the footage at 1080 at 25fps except for that on the EP5 which only shoots 1080 at 30fps. I used Toast Titanium’s video converter to reconfigure it as 1080 25fps. On the whole it worked out well, but on two clips that I really wanted it dropped frames and lost the sound. So next time I won’t mix clips of different frame rates.
  • With four cameras, each having its own idea of what a neutral colour setting is, made life very hard during editing. This wasn’t helped by the fact that the 8 bit 4.2.0 files didn’t like being pushed too much in post as they would quickly fall apart. It would have been nice to have had a more video orientated camera with a flatter profile and more robust codec.
  • I did the slow motion in post, it would have been nice to have shot at 60fps or higher to get nicer slo-mo.
  • I should have shot more B-roll and tried to interview on camera some of the participants.

As a learning experience this was a very good exercise and I enjoyed the whole process immensely. If money were no object I’d get a more video orientated camera and a video field monitor and recorder, but being as I am fiscally challenged I’ll have to settle for some more memory cards and batteries.


The Black Hole Of Babakin

Plus One by Paul Amyes on 500px.com
Plus One – a winter spider orchid (Caladenia drummondii) and its visitor. Sorenson’s Reserve, Western Australia. Canon EOS 6d with Canon EF 100mm f2.8 IS L macro lens. Exposure: 1/250 sec, f11, at ISO 400.


Yesterday I decided to go on a little road trip to Babakin in search of the winter spider orchid. You’ve got to be mad to do a round trip of 320Km in the hope of finding one very small flower. It was a good day for it, the weather was cloudy and overcast, perfect for this type of photography, and I had nothing else scheduled. So packed my camera gear into the car, made sure the mobile was loaded with music and set off to the teeming Wheatbelt metropolis of Babakin. Now Babakin is in the local government area of Bruce Rock, which according to the Australian Bureau of Statistics covers an area of 2,727 square kilometres (1,053 sq mi) and has a population as of 2015 of 939 people. Babakin itself has a population of 25 – it is safe to assume that the local canine population out numbers the people – so there’s not a lot out there except wheat fields.


The drive was great, a lot of it on dirt track so plenty of red dust, and the time and distance just flew by thanks to the music. The shuffle play threw up some golden oldies – the best being Crazy On You by American group Heart. Put that one on full-bore. I wasn’t exactly head banging but lets say that the bouncing around of the car wasn’t entirely due to the road surface.  Oh that took me back to the Chichester RocSoc at the New Park Road Community Centre.

Now these days we rely an awful lot on technology, I’m no exception,  I was using my mobile phone for music and navigation. As I got close to my destination the phone just cut out – no more navigation,  no more music. No mobile network coverage could explain the first but not the later. I switch to my TomTom SatNav and that packed up – couldn’t get a signal. OOOOeeeeeerrrrrr! Luckily I was nearly there. When I got to the nature reserve I did what I normally do and that is switch on my handheld GPS and mark the position of the car. These reserves have no facilities of any kind, not even paths or tracks, so I do this so I can just wander around in the bush and then when I’ve had enough I just follow the GPS to get me back. So off I walk. After an hour and a half I eventually find a single tiny specimen and proceed to photograph it. I use off camera flash fired by radio triggers to light my pictures of orchids. I set everything up as usual took a shot and noticed the flash didn’t go off. Tried again – nothing. Checked everything was firmly in place – nothing. Changed the batteries in the transmitter and receiver – still nothing. Bugger! Had a rummage around in my camera bag and found an old TTL cable so that got me out of the fix. Eventually I packed up and started walking to the car.  I looked at the GPS screen and saw that it was blank. Bugger! I replaced the batteries – nothing. Another set of batteries and still NOTHING!!! Buggeration with bloody great knobs! A rising tide of panic starts to wash over me. Wash? No it was more like a tsunami. After a little pep talk I heard a truck go past. Now remember how I said earlier that this was a sparsely populated area? Yes? Well I can tell you I have never been so glad to hear a truck. I walked off in that direction battling through the scrub and eventually hit the road about 300 metres from the car. Phew!

The drive home was quiet – no phone, no SatNav, no music. When I got there after an hour and a half I carried everything into my office and started my usual post shoot ritual of zeroing all the camera settings, downloading the images and checking batteries prior to packing everything away. I almost jumped out of my skin when my phone beeped and started to play music. I checked the SatNav and it was picking up a signal, as was the handheld GPS. I tentatively got the flash triggers out and checked them and they were working just fine. WEIRD! Perhaps there’s just something about Babakin.

I can’t go without putting a YouTube video up for Heart’s Crazy On You. It’s a cracking track and this time I’ll put up a live recording from 1978 and from 2013 so you can see how the band has fared over time. All I can say is that Anne and Nancy Wilson can still strut their stuff in their sixties. Respect!


M To N


The Sony NEX mount was made for sad old gits like me. “Hold on Paul…” I can hear you say “do you mean that Sony engineered a whole camera line specifically for you?”. No! There was a happy accident that had some unforeseen benefits. I’ll explain. This is going to be a bit beardy and nerdy.

The first commercial 35m film camera was produced – the Tourist Multiple. made by Herbert & Huesgen of New York

Just over 100 years ago, or to be precise in 1909, the film (or movie depending upon where you are from) industry standardised on a film format of 1.37 inches in width with four perforations per frame. The decision was economic, it meant that cinemas didn’t have to have different sized film projectors. In 1913 the first commercial 35m film camera was produced – the Tourist Multiple. made by Herbert & Huesgen of New York. Unfortunately this achievement is largely forgotten because the story of Oskar Barnack inventing 35mm film for stills and the Leica camera has become the accepted history, but that is FAKE NEWS as a certain orange haired buffoon is apt to say. Not long after these small format cameras as they were then known took two distinct evolutionary paths the rangefinder (which was the first) as pioneered by Leica and the Single Lens Reflex as pioneered by K. Nüchterlein’s when the Kine Exakta launched in 1936.

The first Single Lens Reflex was the Kine Exakta launched in 1936.


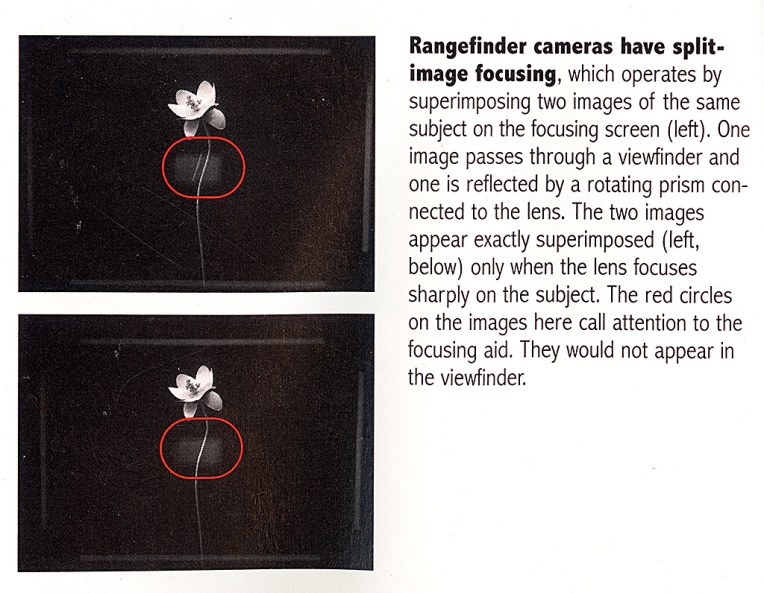
Looking through a rangefinder viewfinder. Illustration p.31 London, B et al Photography, 7th Edition, Prentice Hall, New Jersey, 2002.
How range finder focusing works. Illustration from p.31 London, B et al Photography, 7th Edition, Prentice Hall, New Jersey, 2002.

Rangefinder cameras initially were very popular. The technology was available and relatively simple and the cameras and lenses were very compact. The photographer looks through a window on the camera and sees an image with a fainter duplicate from a rotating prism over laid. The photographer adjusts the rangefinder until the two images match up exactly, then the image is in focus. This system was called the split image rangefinder and had been developed to sight artillery pieces and was well understood at the time. The disadvantage is of course that the photographer is not seeing what the lens sees, only an approximation which can lead to inaccurate framing due to parallax errors. Interchangeable lenses were facilitated by having a screw mount and Leica adopted as their standard the L39 or LTM (Leica Thread Mount) which is 39mm in diameter with a Whitworth thread of 0.977 pitch and a flange distance of 28.8mm. Other manufacturers made variations on a theme i.e. the Canon M39 (aka J Mount) and the FED 39 which all share the same diameter but the thread pitch and flange distances are different. By the 1950’s photographers were looking for a faster way of changing lenses and so short throw bayonet mounts were developed. In 1954 Leica introduced the M mount and this is characterised by it having an external diameter of 44mm, a bayonet consisting of four claws and a flange distance of 27.8mm.

With the advent of digital imaging camera designers were suddenly allowed to consider alternative designs where there were no moving parts. It was hoped that eliminating the mirror and using an Electronic Viewfinder (EVF) and taking a direct readout off of the sensor would allow cheaper and easier manufacture. The autofocus system would be more accurate because the readings could be taken directly off of the sensor and the use of electronics allowed more accuracy than mechanical linkages. With no flappy mirror to interfere with things the flange distance could be reduced along with it’s radius. So the Sony NEX mount has a flange distance of 18mm and a diameter 41.6mm which means that just about any lens can be mounted to a NEX body via an adapter and as long as it has an imaging circle big enough so that an image can be projected on the sensor. The NEX mount covers both so-called full frame format (35 x 24mm) and the APSC format (24 x 16mm). This is the happy accident because I’m sure that when Sony adopted this standard they didn’t realise that it would allow legions of photographers all over the world to mount legacy lenses (lenses made for cameras that are no longer produced) to be mounted to the new Sony mirrorless cameras. Now I am the first to admit dear reader that as a photographer I have been promiscuous. I have not stayed faithful to one brand or lens mount which means that I have a fair few lenses sitting in a shoe box that I no longer have camera bodies for. Now I’ve already talked about mounting my old Olympus OM Zuiko lenses on my Sony A7r here. This and a few subsequent posts are going to be about using L39 and M mount lenses.

The Fotodiox DLX Stretch is a clever M mount to NEX adapter that has a built in adjustable extension tube to allow a degree of close focusing with any M Mount lens.

“So who in their right mind would want to do this?” Well you’re probably right to want to do this would be a sign of mental infirmity to some, but for many people (myself included) auto everything cameras are a bit boring and modern lenses while being technically very good can be a bit characterless. While Leica lenses are wallet puckeringly expensive there are plenty of more affordable alternatives made by Minolta (now absorbed by Sony), Konica (initially taken over by Minolta and then swallowed up by Sony), Ricoh, Voigtländer, Rollei (both of these as part of Cosina’s licensing of their names) Zeiss and those produced in Russia such as Zorki and Fed. These lenses are beautifully made with metal barrels and mounts, buttery smooth focusing, and exquisite clicking aperture rings. I’ve got a Canon L macro lens, and while it produces wonderful images the plastic body is somewhat underwhelming considering the price Canon charge for it and it’s not something I’d pick up for the tactile experience and as for the whole joy of ownership – well let’s not talk about it. These older lenses just feel so satisfying in the hand that makes you want to do some serious lens fondling. They just engender a joy of ownership that plastic can’t. I told you there are mental health issues with this.

SLRs have a big flippy flappy mirror between the lens and the film/sensor. Illustration p.38 Parish, S; Photograph Australia With Steve Parish, Steve Parish Publishing, Brisbane, 2003.

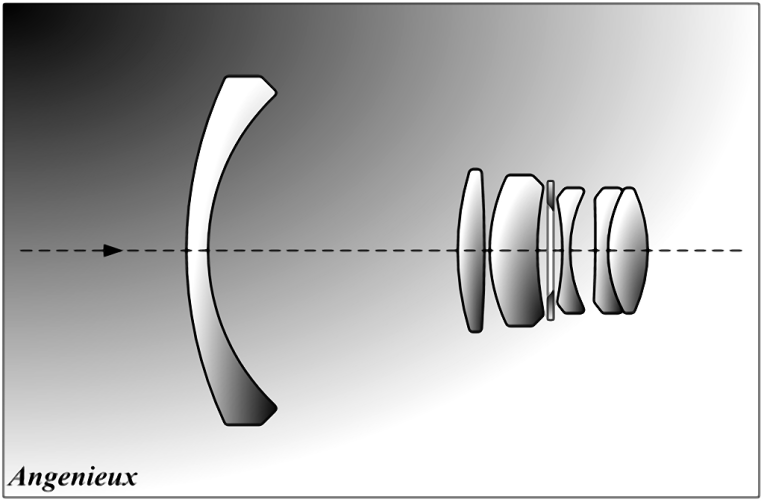
Another reason why rangefinder lenses are attractive is that there are fewer optical design compromises. SLRs have a big flippy flappy mirror between the lens and the film/sensor. This meant making wide-angle lenses next to impossible because the rear lens element would foul the mirror. In 1950 Pierre Angénieux invented the retrofocus lens which is a kind of “reverse” telephoto design where the lens elements closest to the film plane have a negative effect making the image smaller. The downsides are more glass elements means more air to glass surfaces which means more refraction which means more potential chromatic aberration and distortion. More glass means more weight. Here’s an interesting fact – a cubic centimetre of glass is heavier than a cubic centimetre of concrete. Range finders are mirrorless cameras so there isn’t a restrictive mirror flapping about, this has the net effect that your 28mm lens can be a true 28mm lens without a whole bunch of extra glass causing problems. It also means that rangefinder lenses are much smaller than their SLR counterparts.

The retro focus lens design invented by Pierre Angenieux.

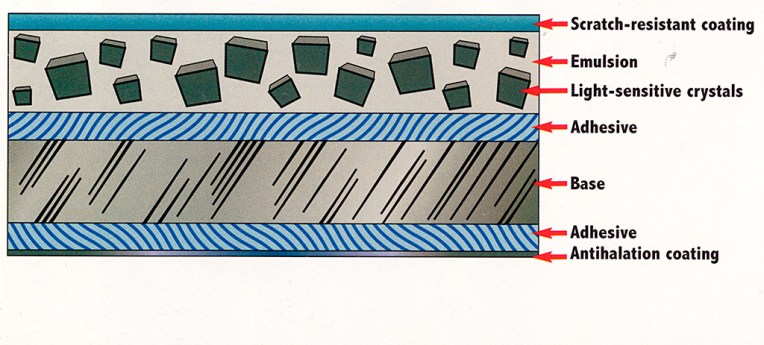
However, it is not all unicorns at the bottom of the garden. Rangefinder lenses were designed for use with film and the silver halide crystals in the film emulsion did not care at what angle lights hits them to provide the necessary reaction to form the latent image. But with a digital sensor it is a whole different ball game because the sensor is no longer just a gelatine substrate coated with an emulsion containing silver halide crystals it is a complex sandwich of filters, lenses and electronic componentry as the schematic from whatdigitalcamera shows. For best performance the light needs to enter micro lenses at 90º, when the incidence of the light is severely off perpendicular then not all of it reaches the pixel at the bottom of its well this can cause vignetting, smearing with loss of detail, and severe colour fringing. This is what stopped Leica initially developing a digital range finder. Kodak developed a special sensor with offset micro lenses for Leica M8 to help overcome this along with in camera software correction the digital M became a reality.

The many layers that make up film emulsion. The silver halide crystals respond to light hitting them at any angle. Illustration from London, B et al; Photography, 7th Edition, Prentice Hall, New Jersey, 2002.


Anatomy of a sensor. A – Colour filter array
. B – Low-pass filter / Anti-aliasing filter
. C – Infrared filter (hot mirror). D – Circuitry
. E – Pixel
. F – Microlenses. G – Black pixels

. For light to hit the pixel in its well it needs to travel as near to perpendicular to the sensor plane as possible. Illustration from http://www.whatdigitalcamera.com/technical-guides/technology-guides/sensors-explained-11457


Why not buy a digital M and be done with it? There is no way I could afford a digital Leica as I’m not a “Trustafarian”, and also and perhaps more importantly, my lenses are not made by Leica they are the much cheaper Voigtländers so I’m not going to drop nearly $10K AUD just to use them again. But as I had a Sony A7r for experimenting with my collection of Olympus OM Zuiko lenses I thought I’d just buy a M to N adapter. Because the Sony NEX mount is a much shorter flange distance than a conventional DSLR its sensor does have micro lenses to cope with the native wide angles. However, the fly in the ointment is that just having them alone does not fix the problems with M mount lenses because there is no in camera correction via firmware. So straight away the situation is more complex than using old SLR lenses. The answer is obviously to fix the problems in post. Users of Lightroom can rejoice as there are profiles for Voigtländers lenses in the developing module. They are easy to use but given that they are somewhat generic they sometimes don’t fix the problem entirely requiring a little extra fiddling about. If you are really keen then you can build your own profiles using Cornerfix.

The Voigtlander M to Nex adapter allows users of M mount lenses from Leica, Zeiss and Voigtlander to mount their lenses on Mirrorless cameras from Sony

Well now we’ve got that out of the way lets talk about adapters. At their most basic an adapter is just a tube with a male bayonet mount at one end and a female at the other. For the sake of brevity I’ll limit this to just dumb adapters i.e. you’re not trying to get auto focus and stabilisation to work. There are a huge range of prices for essentially the same thing. I’ve paid as little as $15 including postage from China to as much as $200. So what do you get for your money? Not a lot. I got a Voigtländers VM II Adapter – Leica M Lenses to Sony E Mount for $200 AUD from an Australian seller. It looked nicely made but it had a serious flaw, there was no spring in the lens release button which means that your lens could fall off as it wasn’t secured. I don’t know if that is typical but I had no luck with trying to exchange it with the seller so I was kind off put off spending a lot of money. The next adapter I bought was from a Chinese seller on eBay and it cost a grand total of $15 AUD and it worked fine. A little agrarian in the looks department but it did the job nicely. Then I noticed that Voigtländer made a close focus adapter which took my fancy. Generally rangefinder lenses only focus down to 1 metre and I like to use wide angles closer than that for dramatic effect and it also meant that my 75mm was suitable for tight portraits. So my interest was definitely piqued, but my wallet was a little bit shy about coughing up $389 AUD after my experience with the other one. Then I discovered the Fotodiox DLX Stretch for $170 AUD from B&H Photo and for half the price of the Voigtländer coupled with B&H’s excellent customer service I was in like Flynn.

The Fotodiox DLX Stretch is a clever M mount to NEX adapter that has a built in adjustable extension tube to allow a degree of close focusing with any M Mount lens.

When the DLX Stretch arrived in its plain brown wrapper I quickly reassured the significant other that it wasn’t anything X rated (“No luv I said photographic accessory not pornographic accessory!”) and got down to playing with it. Basically what it is is an adapter with its own built in variable extension ring. The extension is achieved via a helicoid with a long throw. The amount of extension is not great about 2-3mm but that is enough to reduce the minimum focusing on my Voigtländer 35mm f2.5 Color Skopar from 70cm to 30cm. As my Voigtländer 15mm f4.5 Super-Wide Heliar and Voigtländer 75mm f2.5 Color Heliar are both L39 screw fitting I promptly ordered two L39 to Leica M adapters so I could use them with the Fotodiox DLX Stretch and the results were just as impressive. For the 75mm the minimum focus is 100cm and is then reduced to 65cm, and for the 15mm the minimum focus was reduced from 30cm to 12cm.

The Voigtlander 15mm f4.5 Super Wide Heliar normally has a minimum focusing distance of 30cm but when used with the Fotodiox DLX Stretch at full extension the minimum focusing distance becomes 12cm.

In terms of construction the DLX Stretch is reassuringly weighty (unlike the cheap Chinese adapters which feel so light that they may be made from a lacquered toilet roll tube). Both the male and female mounts are chrome plated brass. The aluminium body is anodised a natty orange colour that matches the orange lens mount trim on Sony A7 series cameras. The ring that moves the helicoid is knurled and has a prominent finger tab and has a nice smooth action although saying that it is difficult to use while videoing without creating camera shake. There is no wiggle or play with the extension and the unit attaches to cameras and lens snuggly with evidence of any play or light leaks. To further install confidence in the product Fotodiox warranty the adapter for 24 months.

The Cosina Voigtländer 35mm f2.5 Color Skopar mounted to a Sony A7r via a Fotodiox DLX Stretch M to E lens adapter.


A photo of bowl of curry laksa taken with the Voigtlander 35mm f2.5 Color Skopar lens on a Sony A7r at the lenses normal minimum focusing distance of 70 cm.


The same bowl of Laksa with the same camera and lens but this time the Fotodiox DLX Stretch is extended to give a minimum focusing distance of 30 cm.

Overall I can see some photographers scoffing at the concept saying they have no need. Myself I like it very much and am using it a lot especially with the Voigtländer 15mm f4.5 Super-Wide Heliar.

Three Lenses

This post came about as a response to post on a Google+ group I belong to. The post contained a link to an article at the website Olympus Passion by Chris Corradino (whom I don’t know) called “Full Frame vs Micro 4-3 Revisited with Pro Olympus Lens” where a canon EOS 6d with 17-40mm f4 L lens was compared with an Olympus OMD EM10 with 12-40mm f2.8 Pro lens. Nothing wrong with that, it serves as a potentially useful comparison of two popular cameras and lenses. In the article he posts two pictures of the same scene taken around a year apart, one used a polarizing filter one didn’t and the Canon 17-40L is not the best lens in the line up, and comparing a wide-angle zoom to a standard zoom doesn’t really tell anything. Also Olympus uses in camera software correction of its lenses to the RAW files whereas the Canon doesn’t and one has to manually apply correction when processing in Lightroom or ACR. So I thought about it and decided to do my own test. Now before I start I’d like to say that testing zoom lenses is fraught with difficulty and the reason why is very ably demonstrated by Roger Cicala’s excellent article “Painting Zoom Lenses with a Broad Brush – Roger’s Law of Wide Zoom Relativity” which is enough to make any sane person throw up their hands in horror at the enormity of it all.


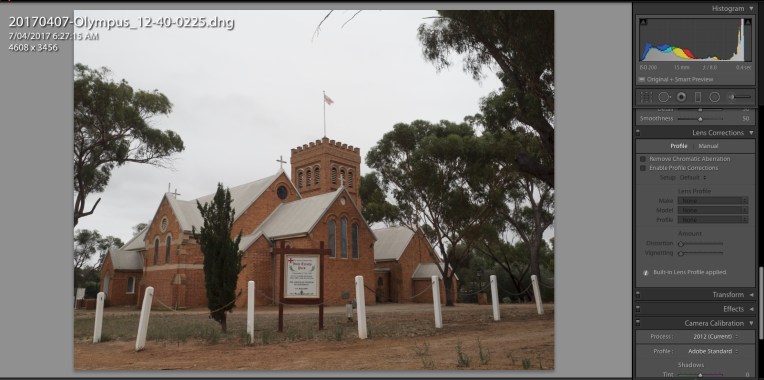
The file from the EM1 with the Olympus 12-40mm f2.8 opened in Lightroom.


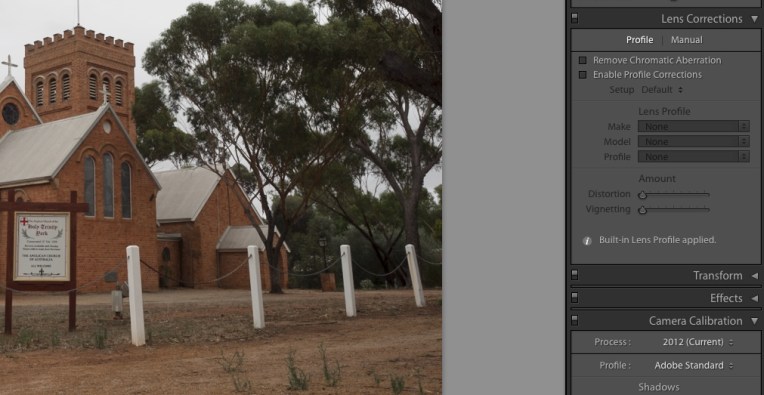
If we look at the lens correction box it shows that a built in lens profile has been applied.


I’m not really the scientific type, but I know that to make any form of comparison you have to compare like with like and remove all variables. The cameras and lenses tested were as follows:

  • Olympus OMD EM1 mki with Olympus m.Zuiko 12-40mm f2.8 pro
  • Canon EOS6d with Canon EF 24-70mm f4 IS L
  • Sony A7r with Sony FE 28-70 f3.5-5.6 OSS

Why three cameras and three lenses, well mainly a case of why not, but also I wanted to see how a budget kit lens performed against the two “pro” lenses, and I was using it as a control as I had previously looked at it. Each lens was shot at the wide end and the long end, with the wide end an architectural shot to look at how the lens behaved at infinity and close-ups at the long end.


Holy Trinity York provided the wide-angle subject.


Typically standard zooms behave best at the wide end and the performance deteriorates as you zoom into the long end. All the lenses were tested at an aperture of f8 for the two shots previously mentioned and wide open to test for vignetting. For each shot the camera was mounted to a tripod, there were no filters on the lenses, any image stabilisation was turned off and the shutter was tripped via the self timer. All metering was done using a handheld incident light meter – Minolta Auto Meter V f. Because the base ISO of the EM1 is 200 all the images on all cameras were shot at value. The only DSLR in the group was used in live view mode to avoid mirror slap. The images were all shot as RAW files and then converted to 8 bit jpgs using RawTherapee (version 4.2.1) which allows you to switch off any embedded lens correction. There was no sharpening, noise reduction or correction for chromatic aberration. Ok that’s the methodology lets look at what happened. Click on the images to see them at full size.

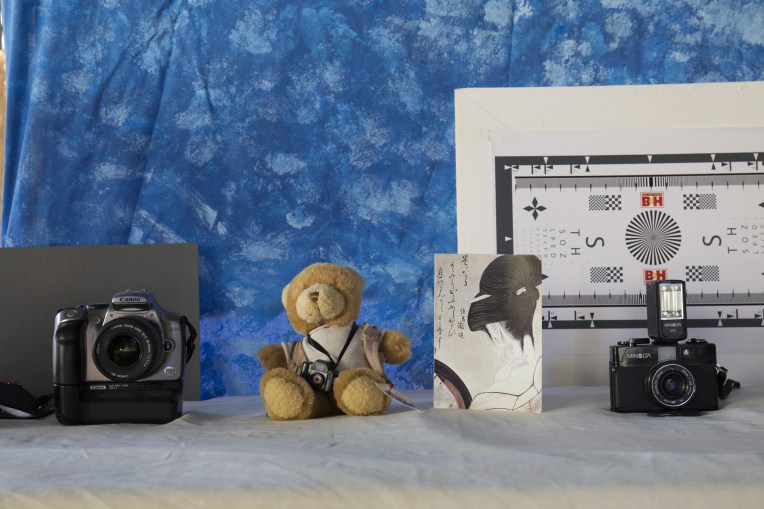
Phillip the photographic bear provided the tele test subject


Olympus OMD EM1 mki with Olympus m.Zuiko 12-40mm f2.8 Pro lens

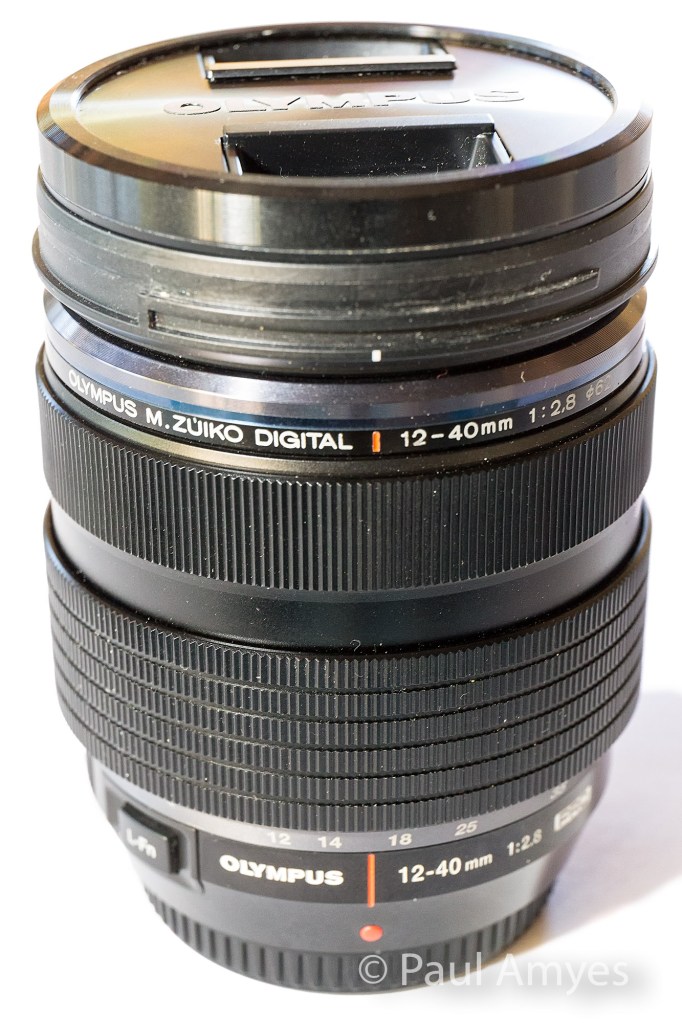
The Olympus m.Zuiko 12-40mm f2.8 Pro lens was announced as Olympus’ high end standard zoom in 2013 to accompany their then flagship camera the OMD EM1.


Built for the micro four thirds system this lens is equivalent to a 24-80 mm lens and that’s all the talk of equivalency you’ll get out of me, if you want more see this. The lens was launched at the same time as the EM1 in 2013 and it heralded a new line of “Pro” lenses. Of the three lenses here it is the only one with a metal outer construction and it has a splash proof and dust proof design. Its vital statistics are 84mm in length, a diameter of 69.9mm, has a filter thread of 62mm and weighs in at 382g. Not that it counts for much, but it feels nice in the hand and the manual focus clutch (reminiscent of the ones found on Pentax’s 645 range of lenses, is a very nice touch. Optically there are 14 elements in 9 groups – there are 1 aspherical element, 1 dual-sided aspherical element, 2 ED glass elements, 2 HR glass elements, 1 EDA glass element, 1 HD glass element. It is the most optically complex lens of the group. For bokeh aficionados there are 7 rounded aperture blades. The minimum focusing distance is 0.2m.


At the wide end the centre of the image is what you’d expect from a modern zoom, it is sharp and contrasty. At the edges the image is still sharp but the contrast has fallen off a little giving the appearance of softness. The chromatic aberration (CA) is very apparent. At the long end in the centre the image is still sharp but the contrast is lower than what we found on the wide end. The edges exhibit a little softness. The CA virtually non-existent. The results from the long end caused me a little consternation as it was the first time I’d seen images without any in camera correction applied so I repeated them just be sure and got exactly the same result.

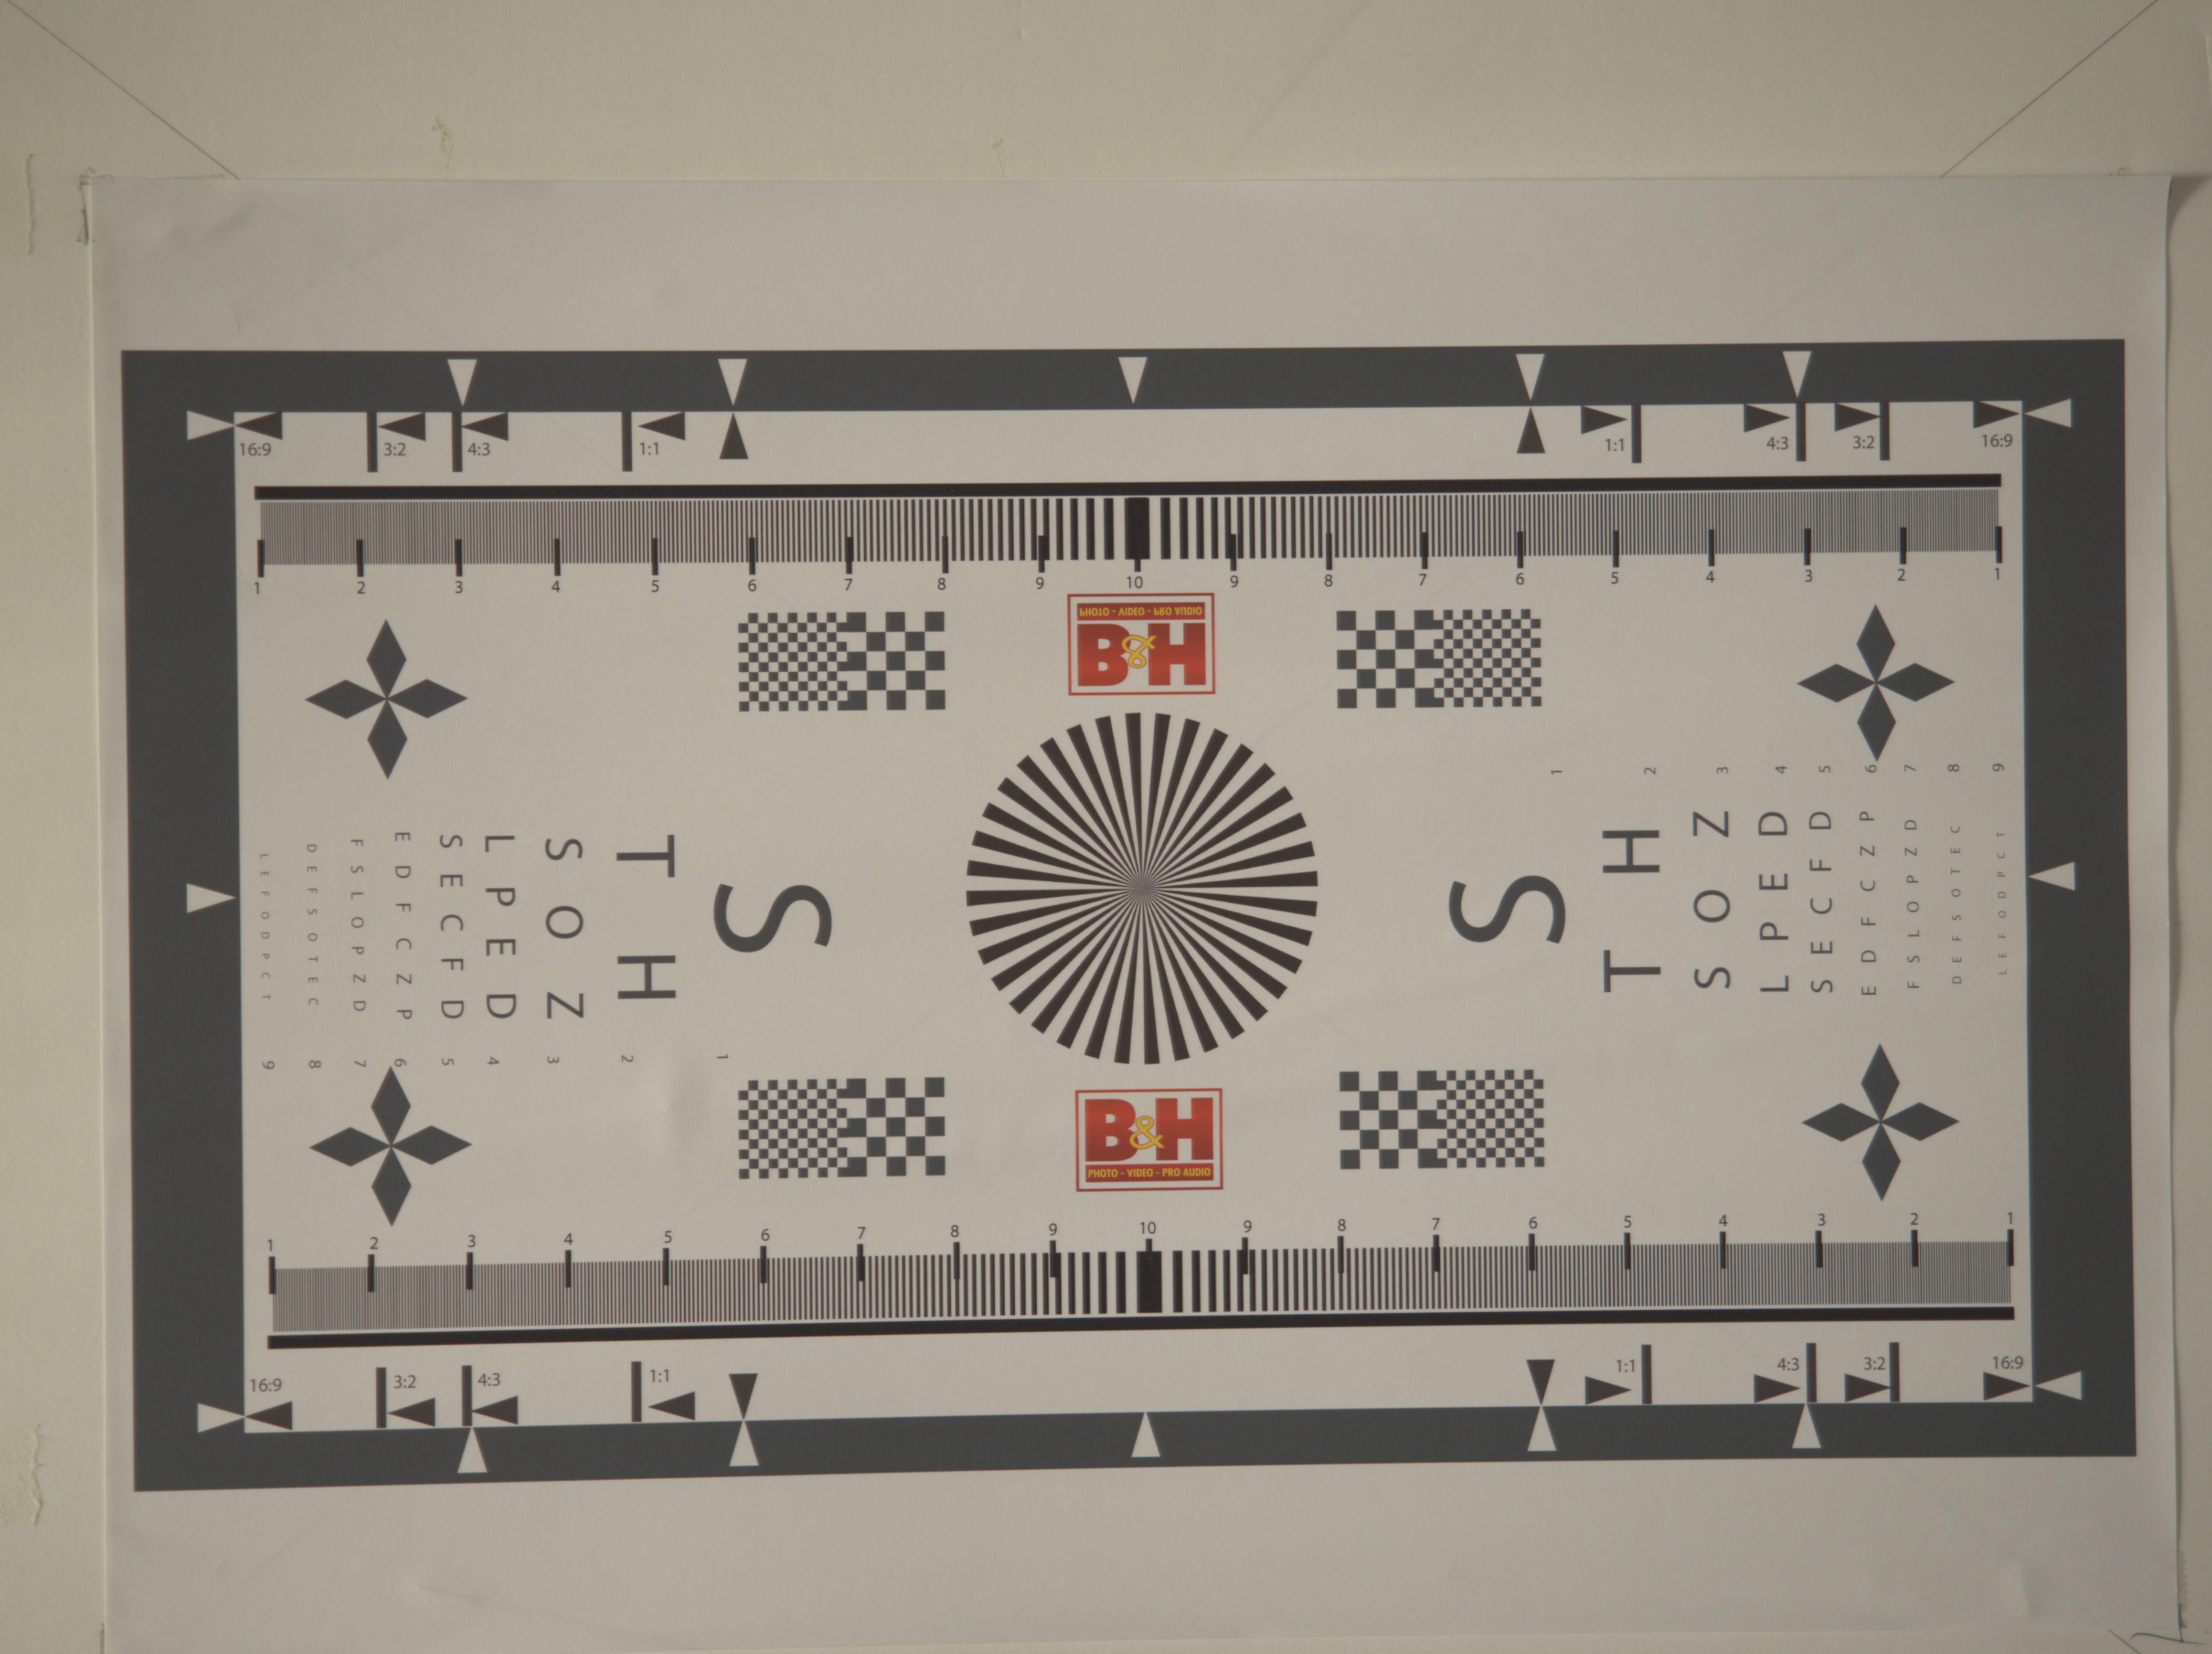
The lens resolution chart shot at 12mm wide open to show any vignetting or lens distortion.


Testing for vignetting and distortion I found that the lens exhibited marked vignetting and barrel distortion at the wide end at f2.8. The vignetting had disappeared on stopping down to f5.6.


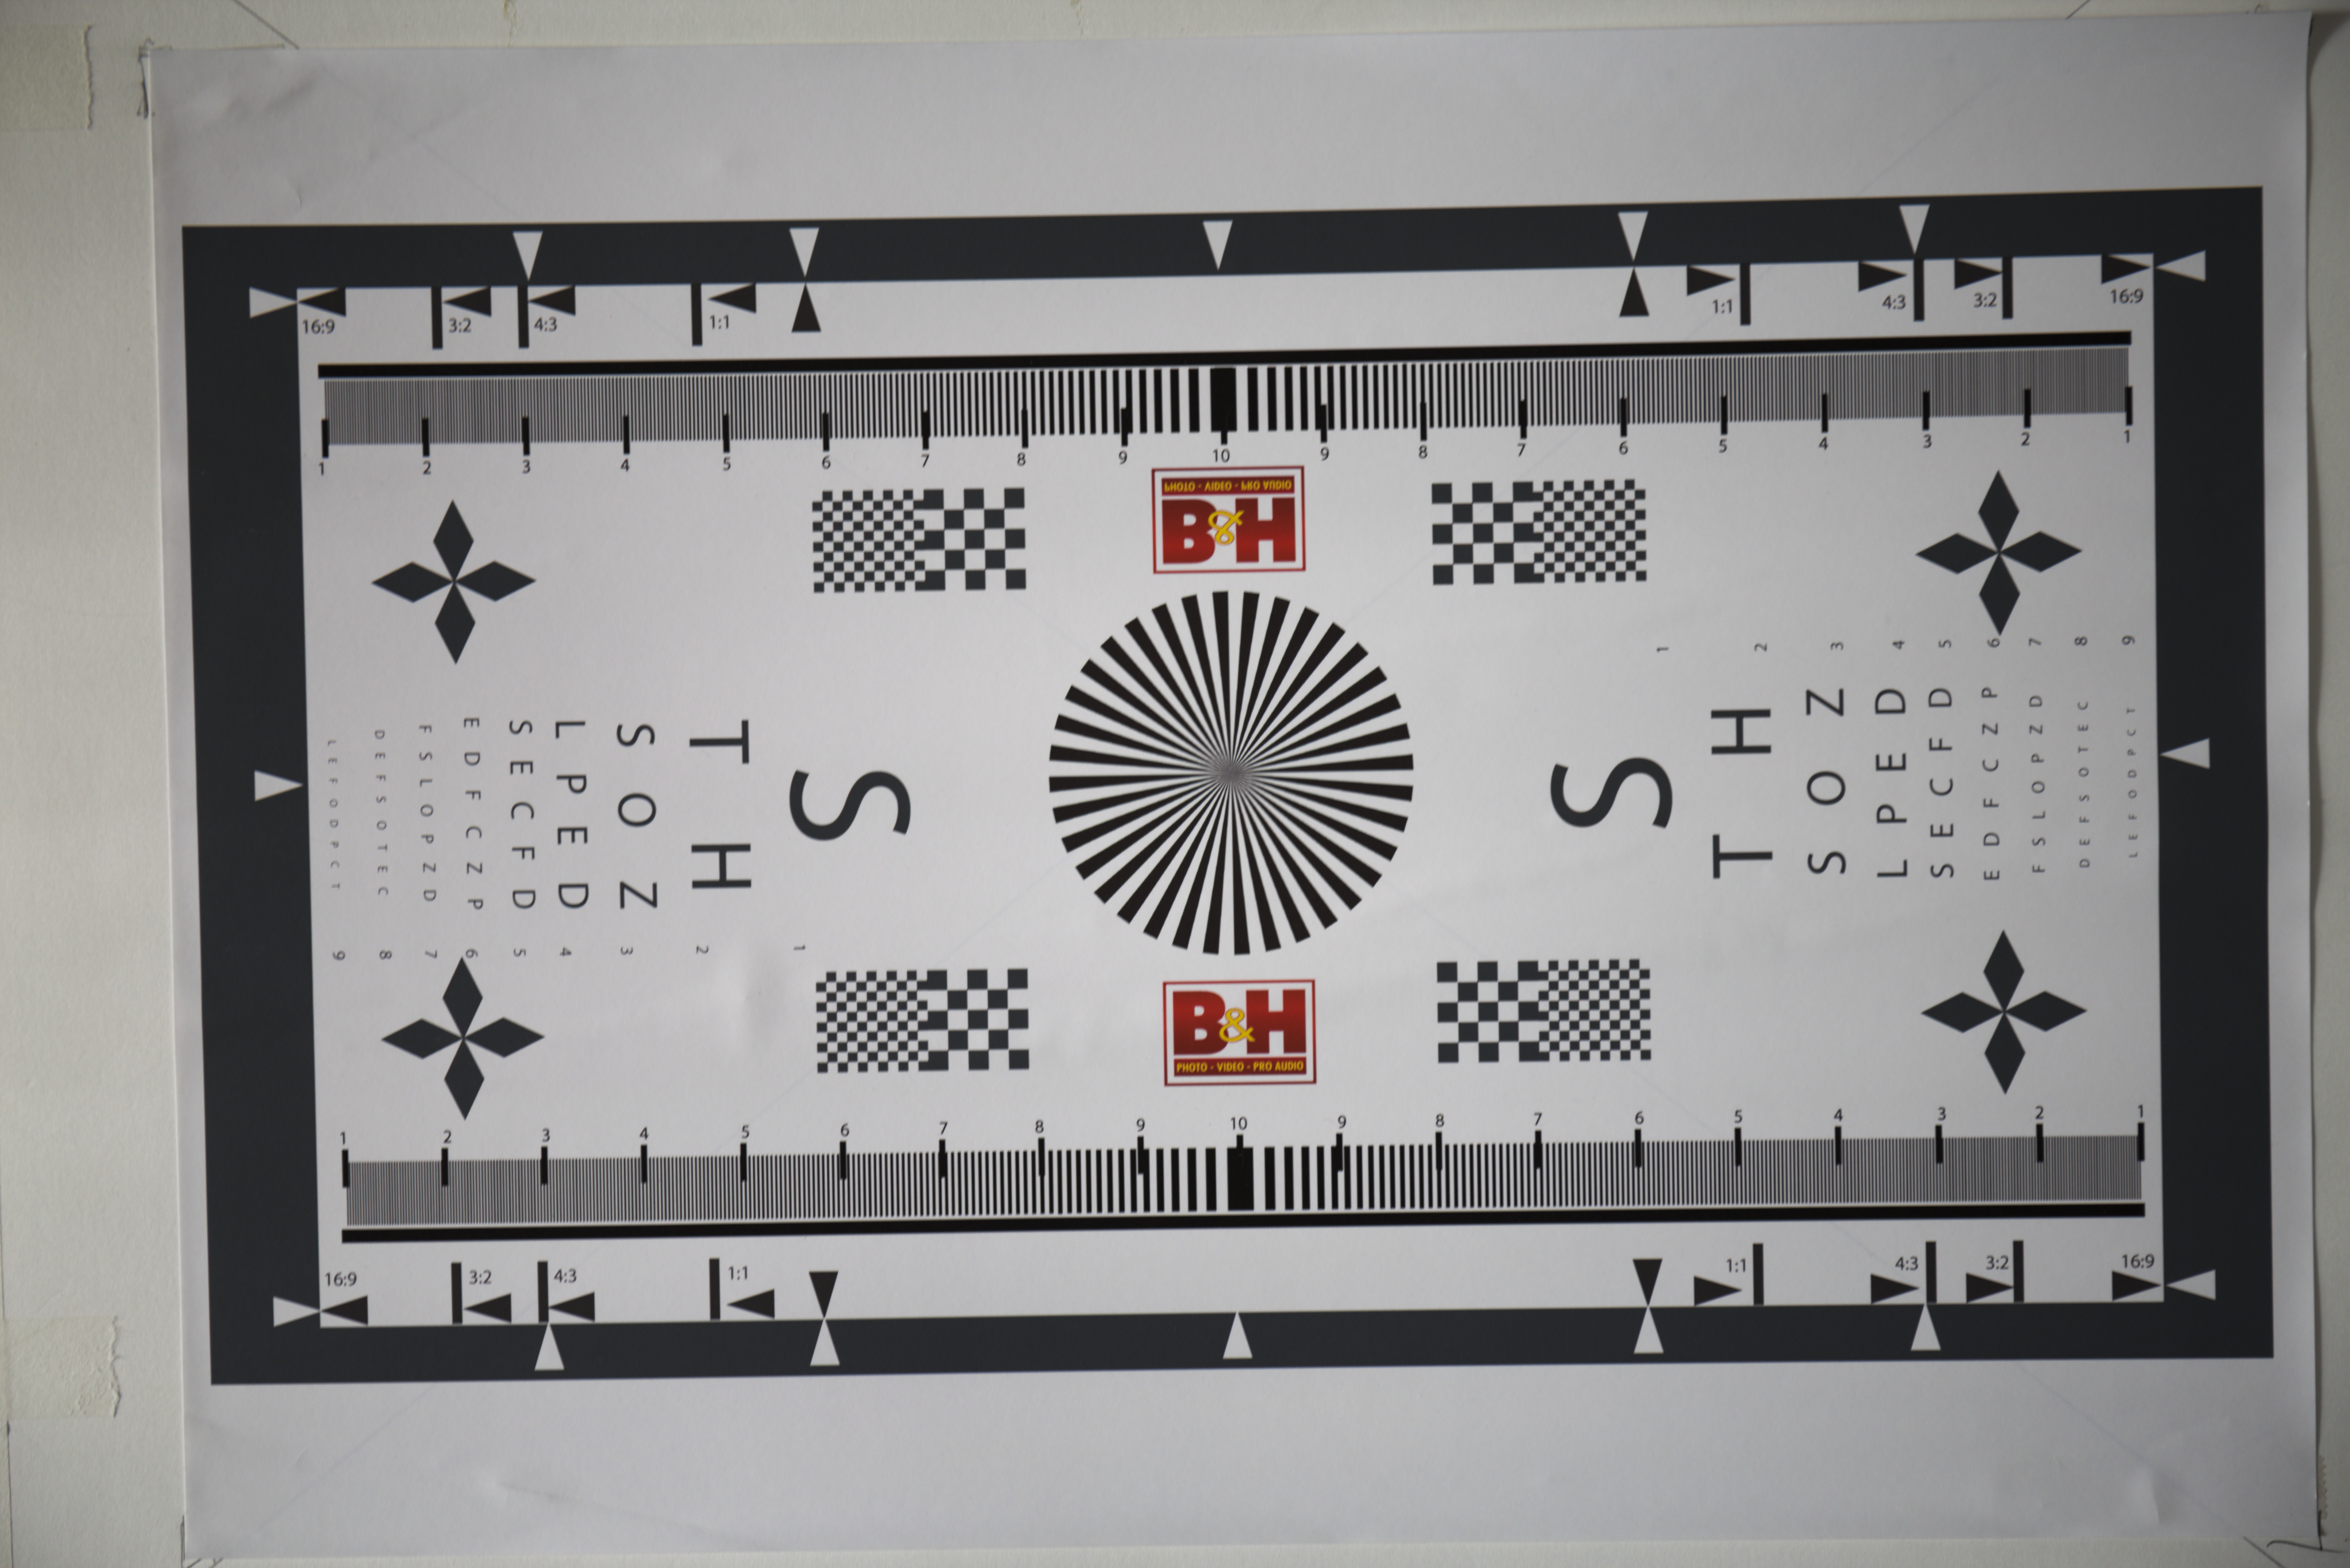
This time at 40mm wide open.

At the long end there is only slight vignetting and very mild pincushion distortion. What is interesting is that there is significant variation in the exposure, remember these were metered using a handheld incident meter. The long end is nearly a whole stop darker than the wide end. This shouldn’t happen with a constant aperture zoom.


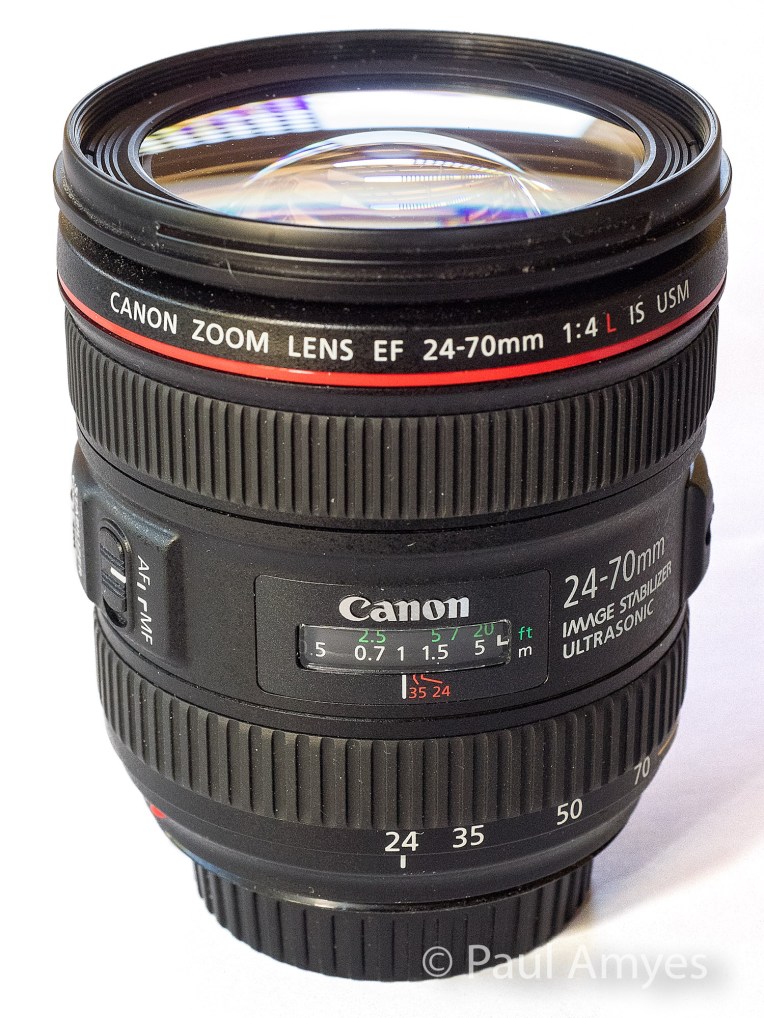
Canon EOS6d with Canon EF 24-70mm f4 IS L lens

The Canon EF 24-70mm f4 IS L lens was introduced in 2012 as Canon’s budget (if that term can be used at this price) L series standard zoom lens.


This is the most expensive lens in the group with a retail price of around $1200 AUD. It is also worth pointing out that this is the budget standard zoom in Canon’s L range. This lens was introduced in 2012 and was intended to be a kit lens for then newly announced Canon EOS6d. The body is made of some variant of ABS plastic which is somewhat disappointing considering the price, but with a weight of 600g it has a satisfying heft. The optical construction is 15 lens elements in twelve groups with 2 aspherical and 2 UD elements. The aperture diaphragm is comprised of 9 rounded blades. Unsurprising it is the biggest lens of the trio being 93mm long, 83.4mm in diameter and has a 77mm filter thread. Image stabilisation is built into the lens and is good for four stops. The minimum focus distance is 0.38m, but the lens has a rather nifty macro feature where you press a button and turn the zoom ring and that takes it down to 0.2m and a maximum magnification of 0.7x.

At 24mm the centre of image is extremely sharp and contrasty and the edges are the same. At the tele end it is a repeat. Chromatic aberration is non-existent at both extremes.

The Canon EF 24-70 f4 IS L at 24mm wide open


Shooting wide open at 24mm vignetting is very apparent, I would say that there’s probably 2 stops difference between the corner and the centre. The barrel distortion is not excessive but is noticeable. At 70mm a small amount of vignetting can be seen and there is some mild pincushion distortion.


The Canon EF 24-70mm f4 IS L at 70mm wide open.

Sony A7r with Sony FE 28-70mm f3.5-5.6 OSS


The Sony 28-70mm f3.5-5.6 OSS was introduced in 2013 as the budget kit zoom to accompany the Sony A7 mirrorless camera.


The joker in the pack and the cheapest on test at just under $350 AUD, and boy when you pick this one up it certainly feels like it. When I originally wrote about it on 3rd July 2016 I was very skeptical of its durability, well nothing adverse has happened to mine, but, Kirk Tuck wrote today that his met a tragic end courtesy of a dog’s tail and a hard floor. Well what do get for your $350? Well unsurprisingly at this price point this is largely made of plastic – the cheap kind – and is very light coming in at 295g. There’s not a lot of glass either just 9 elements in 8 groups made up 1 extra low dispersion and 3 aspherical elements. The simpler optical design and low price makes this the only variable aperture lens in the test group. The aperture diaphragm is made up of 7 blades. Size wise it is a compact 83mm long, has a diameter of 72.5mm and has a filter thread of 55mm. The plus points are that it is dust and moisture resistant, has built in image stabilisation, has a respectable minimum focusing distance of 0.4m and comes with a lens hood. As an aside I believe that every lens should come with a hood.


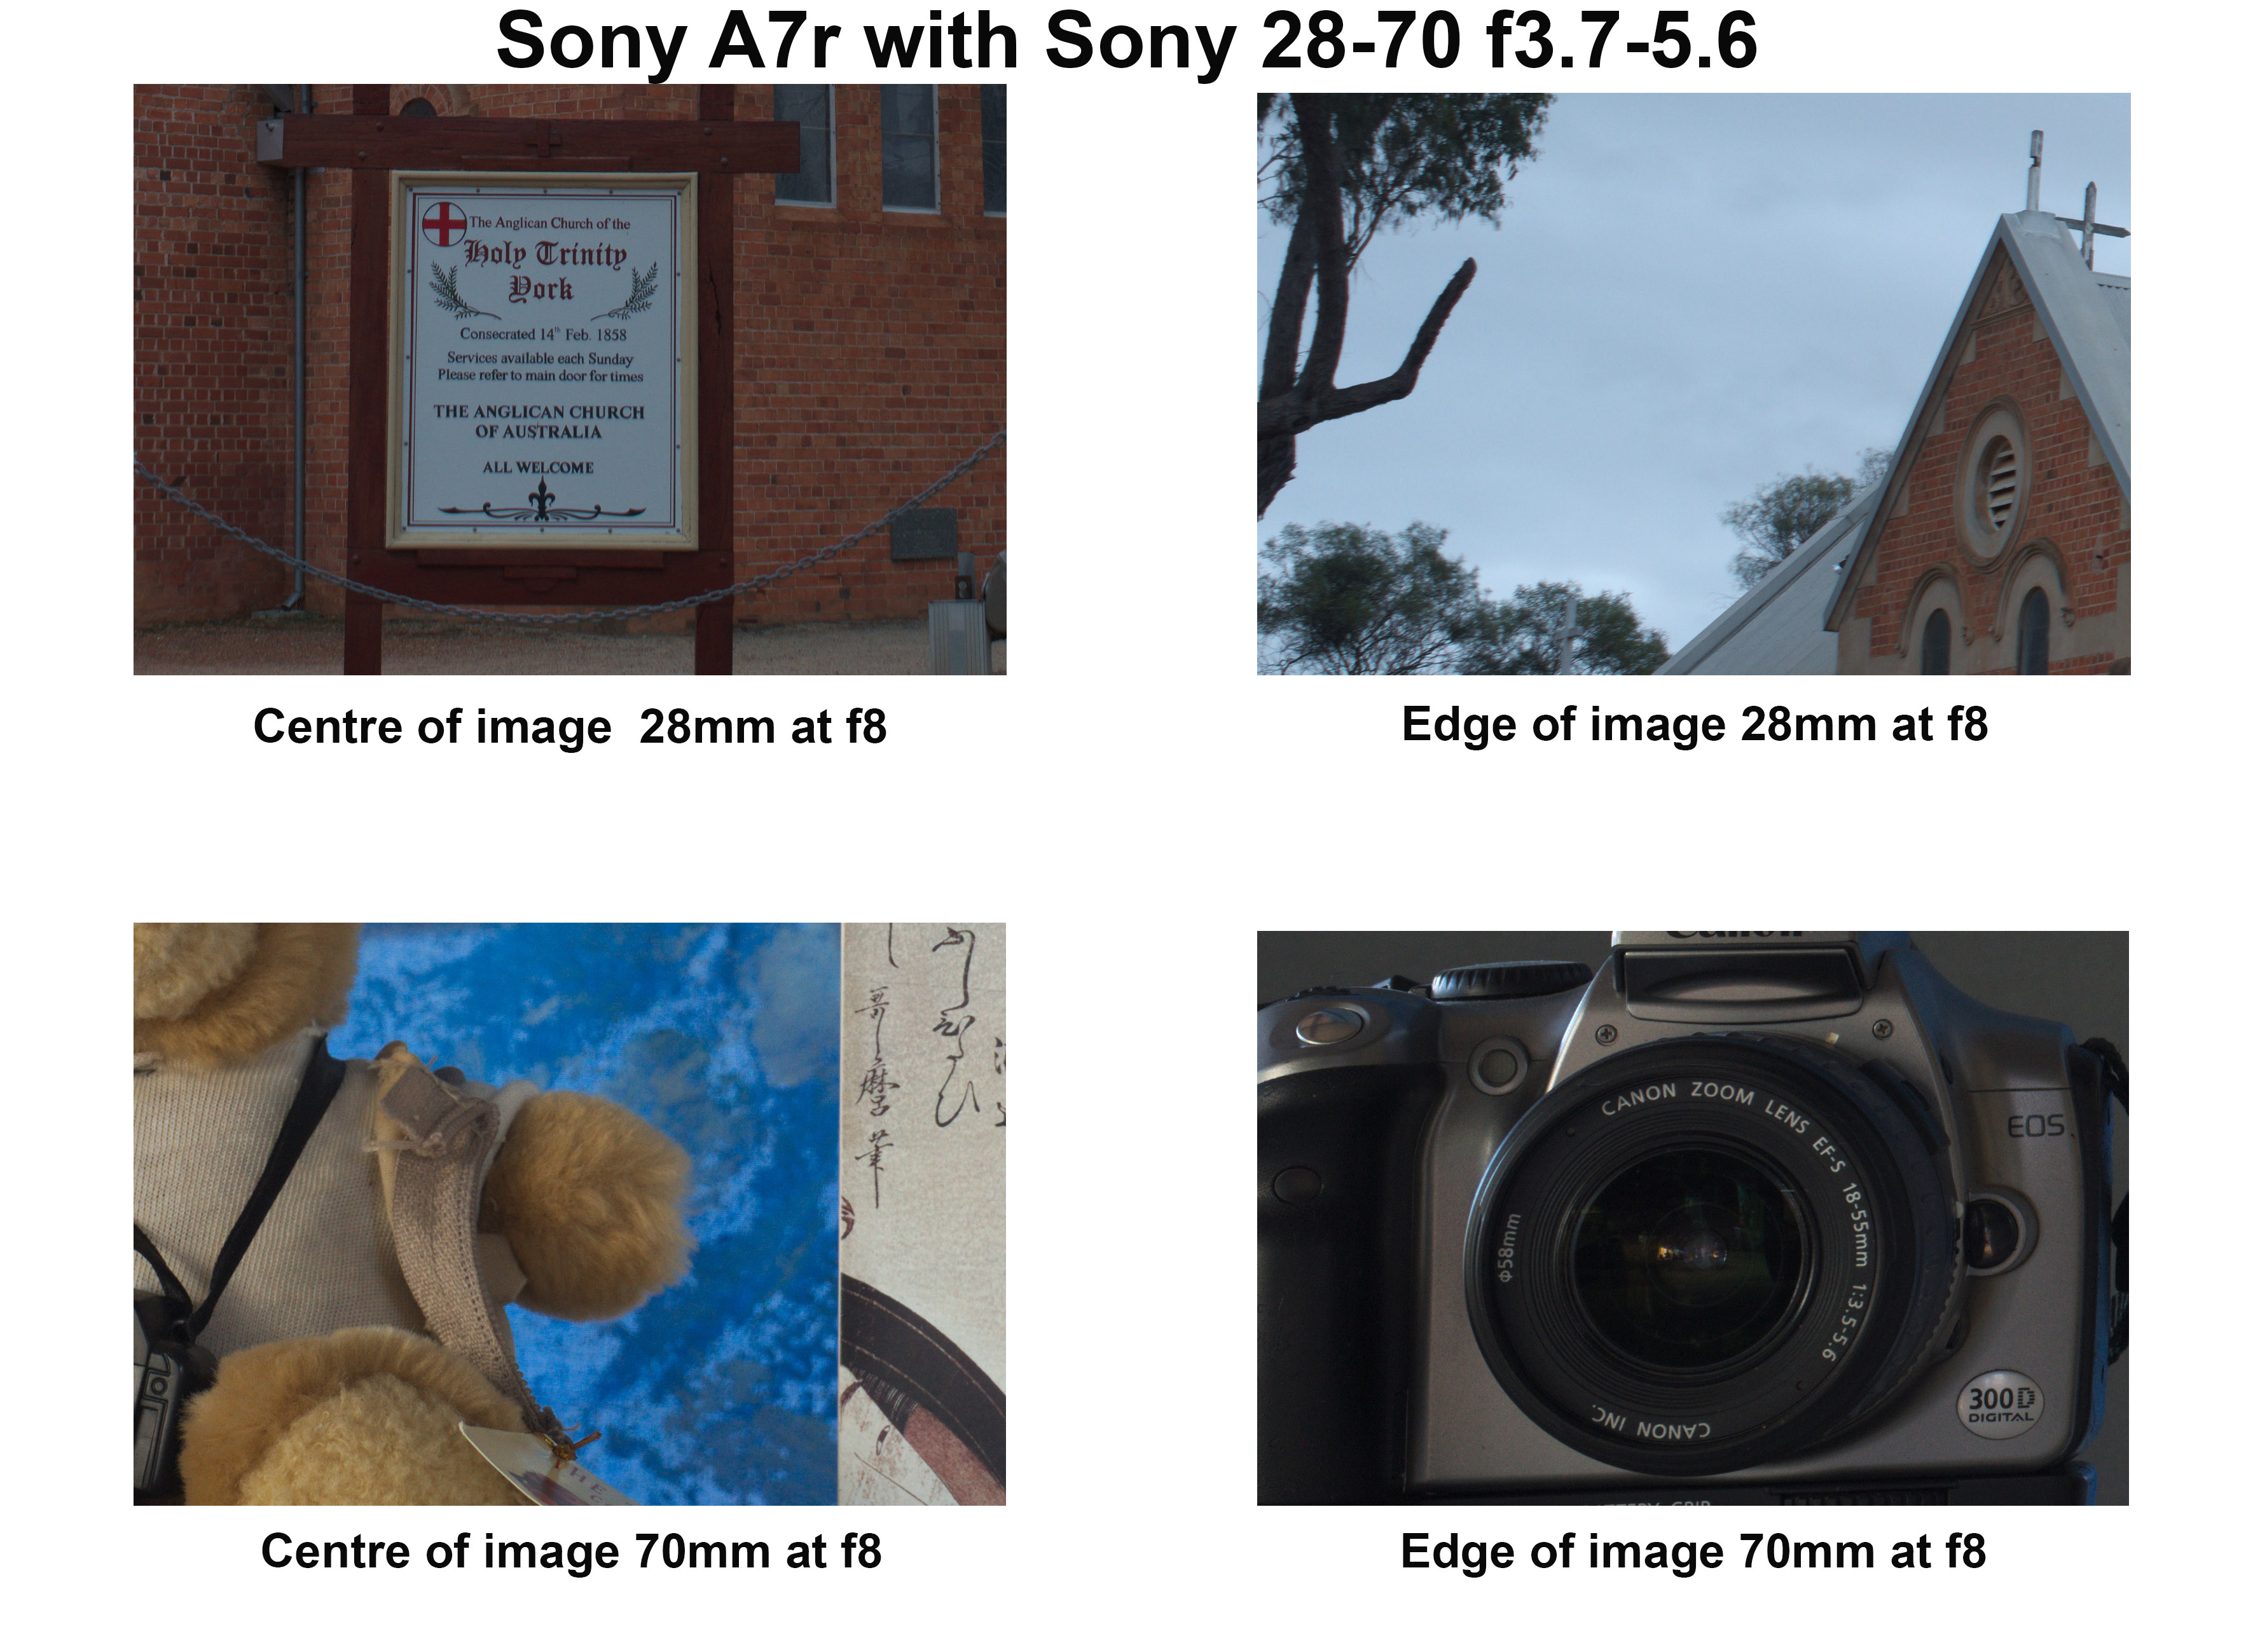
At 28mm the lens is again just like any other modern lens – sharp and contrasty. At the edges there is a drop off in contrast but they remain sharp. Chromatic aberration is very well controlled and easily fixed in Lightroom. The slow variable aperture means that vignetting is not a problem and there is only slight barrel distortion. At 70mm the centre is sharp and has good levels of contrast, the edges are sharp with a slightly lower contrast. There was also some evidence of coma. Again very little vignetting and a slight trace of pin cushion distortion.

The Sony 28-70mm f3.5-5.6 OSS lens at 28mm wide open.


The Sony 28-70mm f3.5-5.6 OSS lens at 70mm wide open.


Conclusion

So is the Olympus 12-40 the Canon killer that Chris Corroding says? Well without in camera software correction it is only just a bit better than the Sony which is half the price. It is the correction that elevates this lens to very good. Having said that the Canon 24-70 f4 is probably one of their very best zoom lenses and produces very good images straight out of the camera. Apply the Lightroom lens profile and it is even better. Is that surprising? No considering its cost I would hope it be optically very good. This is the rub – for $350 AUD you get a surprisingly good lens with the Sony and most people would be very happy with it. The Olympus at $870 AUD sees some significant improvement. The Canon at $1200 AUD sees only incremental improvement over the Olympus. The law of diminishing returns is very clearly at work here.

When it comes down to sensor performance the Sony A7r rips the head off of the EM1 and EOS6d and spits down the stump. I have been amazed by how well it performs – the dynamic range is very, very good, the lack of an anti-aliasing filter means that with good lenses insane amounts of detail can be rendered, and the high ISO performance is also very good. The Canon EOS6d’s sensor is capable of very nice colour rendition, especially skin tones, but it is not the best when it comes to dynamic range. It is what I’d call workman like. For the Olympus EM1, well the dynamic range is very good, high ISO performance not so. The lack of anti-aliasing filter helps you get the best out of the lenses. I really like my m4/3 Olympus cameras and lenses, I use them more than anything else, but I really feel that the sensors are holding them back. I’ve yet to get any long-term usage out of the new 20Mp sensor that is found in the EM1 Mkii, but I do think that if they got access to the latest BSI sensors from Sony and reduced the base ISO to 100 that there would be quite a sizeable performance boost. But all this is moot as all three are capable of excellent results if I do my part.

It is important to remember that I only have access to one of each lens so I have no idea of what the sample variation is for any of them. What does this all mean in terms of real world usage? Well I’ve used my Olympus 12-40 far more than the Canon 24-70 and I am more than happy with how it performs. I hardly ever use the Sony 28-70 as I only really use the A7r with legacy lenses.