Willian Shakespeare. A Midsummer Night’s Dream (Act 2, Scene 2)
“Run Harry! Run!”
I must say at the outset that I don’t like spiders very much. The bloody great hairy jobs in the Hobbit, Lord of The Rings and Harry Potter movies didn’t help much either. Coming to Australia has meant that the chances of coming into contact with some horrible large spider with a venomous bite have increased. However, of late that maybe changing. That could be because I’ve seen some rather cute jumping spiders and the rather spectacular looking Jewel Spiders. It maybe that I’ve just become desensitised by seeing so many, referred to as “flooding” in psychotherapy. Nah! Got to be honest the large hairy ones still give me the heebie-jeebies.
Shaggy Red-headed House Hopper (Hypoblemum villosum) sitting on the flex of our iron in the laundry. They grow between 4-8mm long.
A different view of the Shaggy Red-headed House Hopper (Hypoblemum villosum). They grow between 4-8mm long.
A male jumping spider (Sandalodes superbus), another species of Jumping Spider, found in the garden. I like the way they look up at you.
I think it was the jumping spiders that made me more comfortable about spiders as they are sort of cute with that turret head and the way that they look at you. I was particularly enamoured with the Shaggy Red-headed House Hopper (Hypoblemum villosum) I found in the laundry. He was tiny, no bigger than 5mm. Since then I’ve seen other varieties around the garden – they’re a bit bigger but I can tolerate them.
Jewel spiders (Austracantha minax) are often called Christmas spiders as they are commonly found during December and January. Oyster Bay, Western Australia.
Christmas spiders or jewel spiders (Austracantha minax) can be readily found in the usndergrowth surrounding Thomsons lake in Western Australia.
The Christmas Spider or jewel spider (Austracantha minax) is associated with the comming of Christmas in Western Australia.
The jewel spiders are also quite attractive to look at. They come out around Christmas time, hence their more common name of Christmas Spider. What they and the jumping spider have in common is that they are not large nor are they poisonous.
The Golden orb weaving spider, Nephila edulis., is so called because of its web that takes on a golden sheen. York Western Australia.
A female Golden Orb-weaving Spider (Nephila edulis) in our front garden. That messy tangled bit hanging down is the larder.
Male Nephila edulis or Golden Orb Web Spider. He’s only 6mm in length while his mate can be up to 4cm. Let’s hope he doesn’t end up in the larder after the deed is done. Oswaild Sargent Reserve, York, Western Australia.
The next spider I’ve become reasonably tolerant to is the Golden Orb Weaver (Nephila edulis). Now these are big – well the females are at 4cm in body length, the males don’t get much bigger than 6mm. Thankfully they are very reluctant to bite and when they do according to the Australian Museum “Symptoms are usually negligible or mild local pain, numbness and swelling. Occasionally nausea and dizziness can occur after a bite. Seek medical attention if symptoms persist.”. Re-reading that I now don’t feel reassured. The webs are what attracts me to them. They are magnificent creations at over 1 metre in diameter and the golden silk that they are made from shimmers spectacularly in the early morning light. I can’t walk past one without stopping to take a photo. So it’s very convenient that I’ve got one just outside the front door.
The huntsman spider (Delena cancerides) can grow to the size of the palm of your hand and is often found in peoples homes. You don’t need a macro lens to photograph these. As far as I’m concerned a long telephoto helps keep the distance between me and it.
So far it sounds like I’m fairly tolerant to spiders. Well let me tell you there is one species that can induce a full on panic reaction that is the Huntsman Spider. It’s not that they are big – they are flippin’ big and have a leg span of 15cm and a large hairy body to boot. It’s the way they move and the speed of them as they run across the walls and disappear behind the sofa. They are the stuff of scary movies. If you should try and swat one with a rolled up newspaper or magazine they’re just as likely to snatch it off you and give you a good walloping. I don’t care how beneficial they are to have in the garden or that they are relatively harmless. “Relatively harmless” – who decides these things? That’s like saying Donald Trump is relatively harmless unless you live in the Middle East. Sorry I’ve gone off piste. Huntsman Spiders – well I don’t like having them in the house. They make me do the spider dance – it’s where you manically hop from leg to leg while swating the imaginary spiders on your body and screaming like an adolescent girl in a slasher B movie. Thankfully we have our resident house geckos and spider wasps to keep them away.
My saviour! Bibdjool or Marbled Gecko, aka house gecko (Christinus marmoratus) on our back window at a previous house. York, Western Australia.
It’s Christmas Eve and I’m looking back photographically on the last 12 months. I started the year with all these ideas and intentions, and to be honest they quickly evaporated. It’s been a year where I have had a great deal of difficulty being motivated to take photos. Nevertheless I plodded on regardless and although I didn’t make any great photos I made some that I enjoyed. They’re not technically perfect, but the actual process was enjoyable and I think that is important. If it is not enjoyable then why do it?
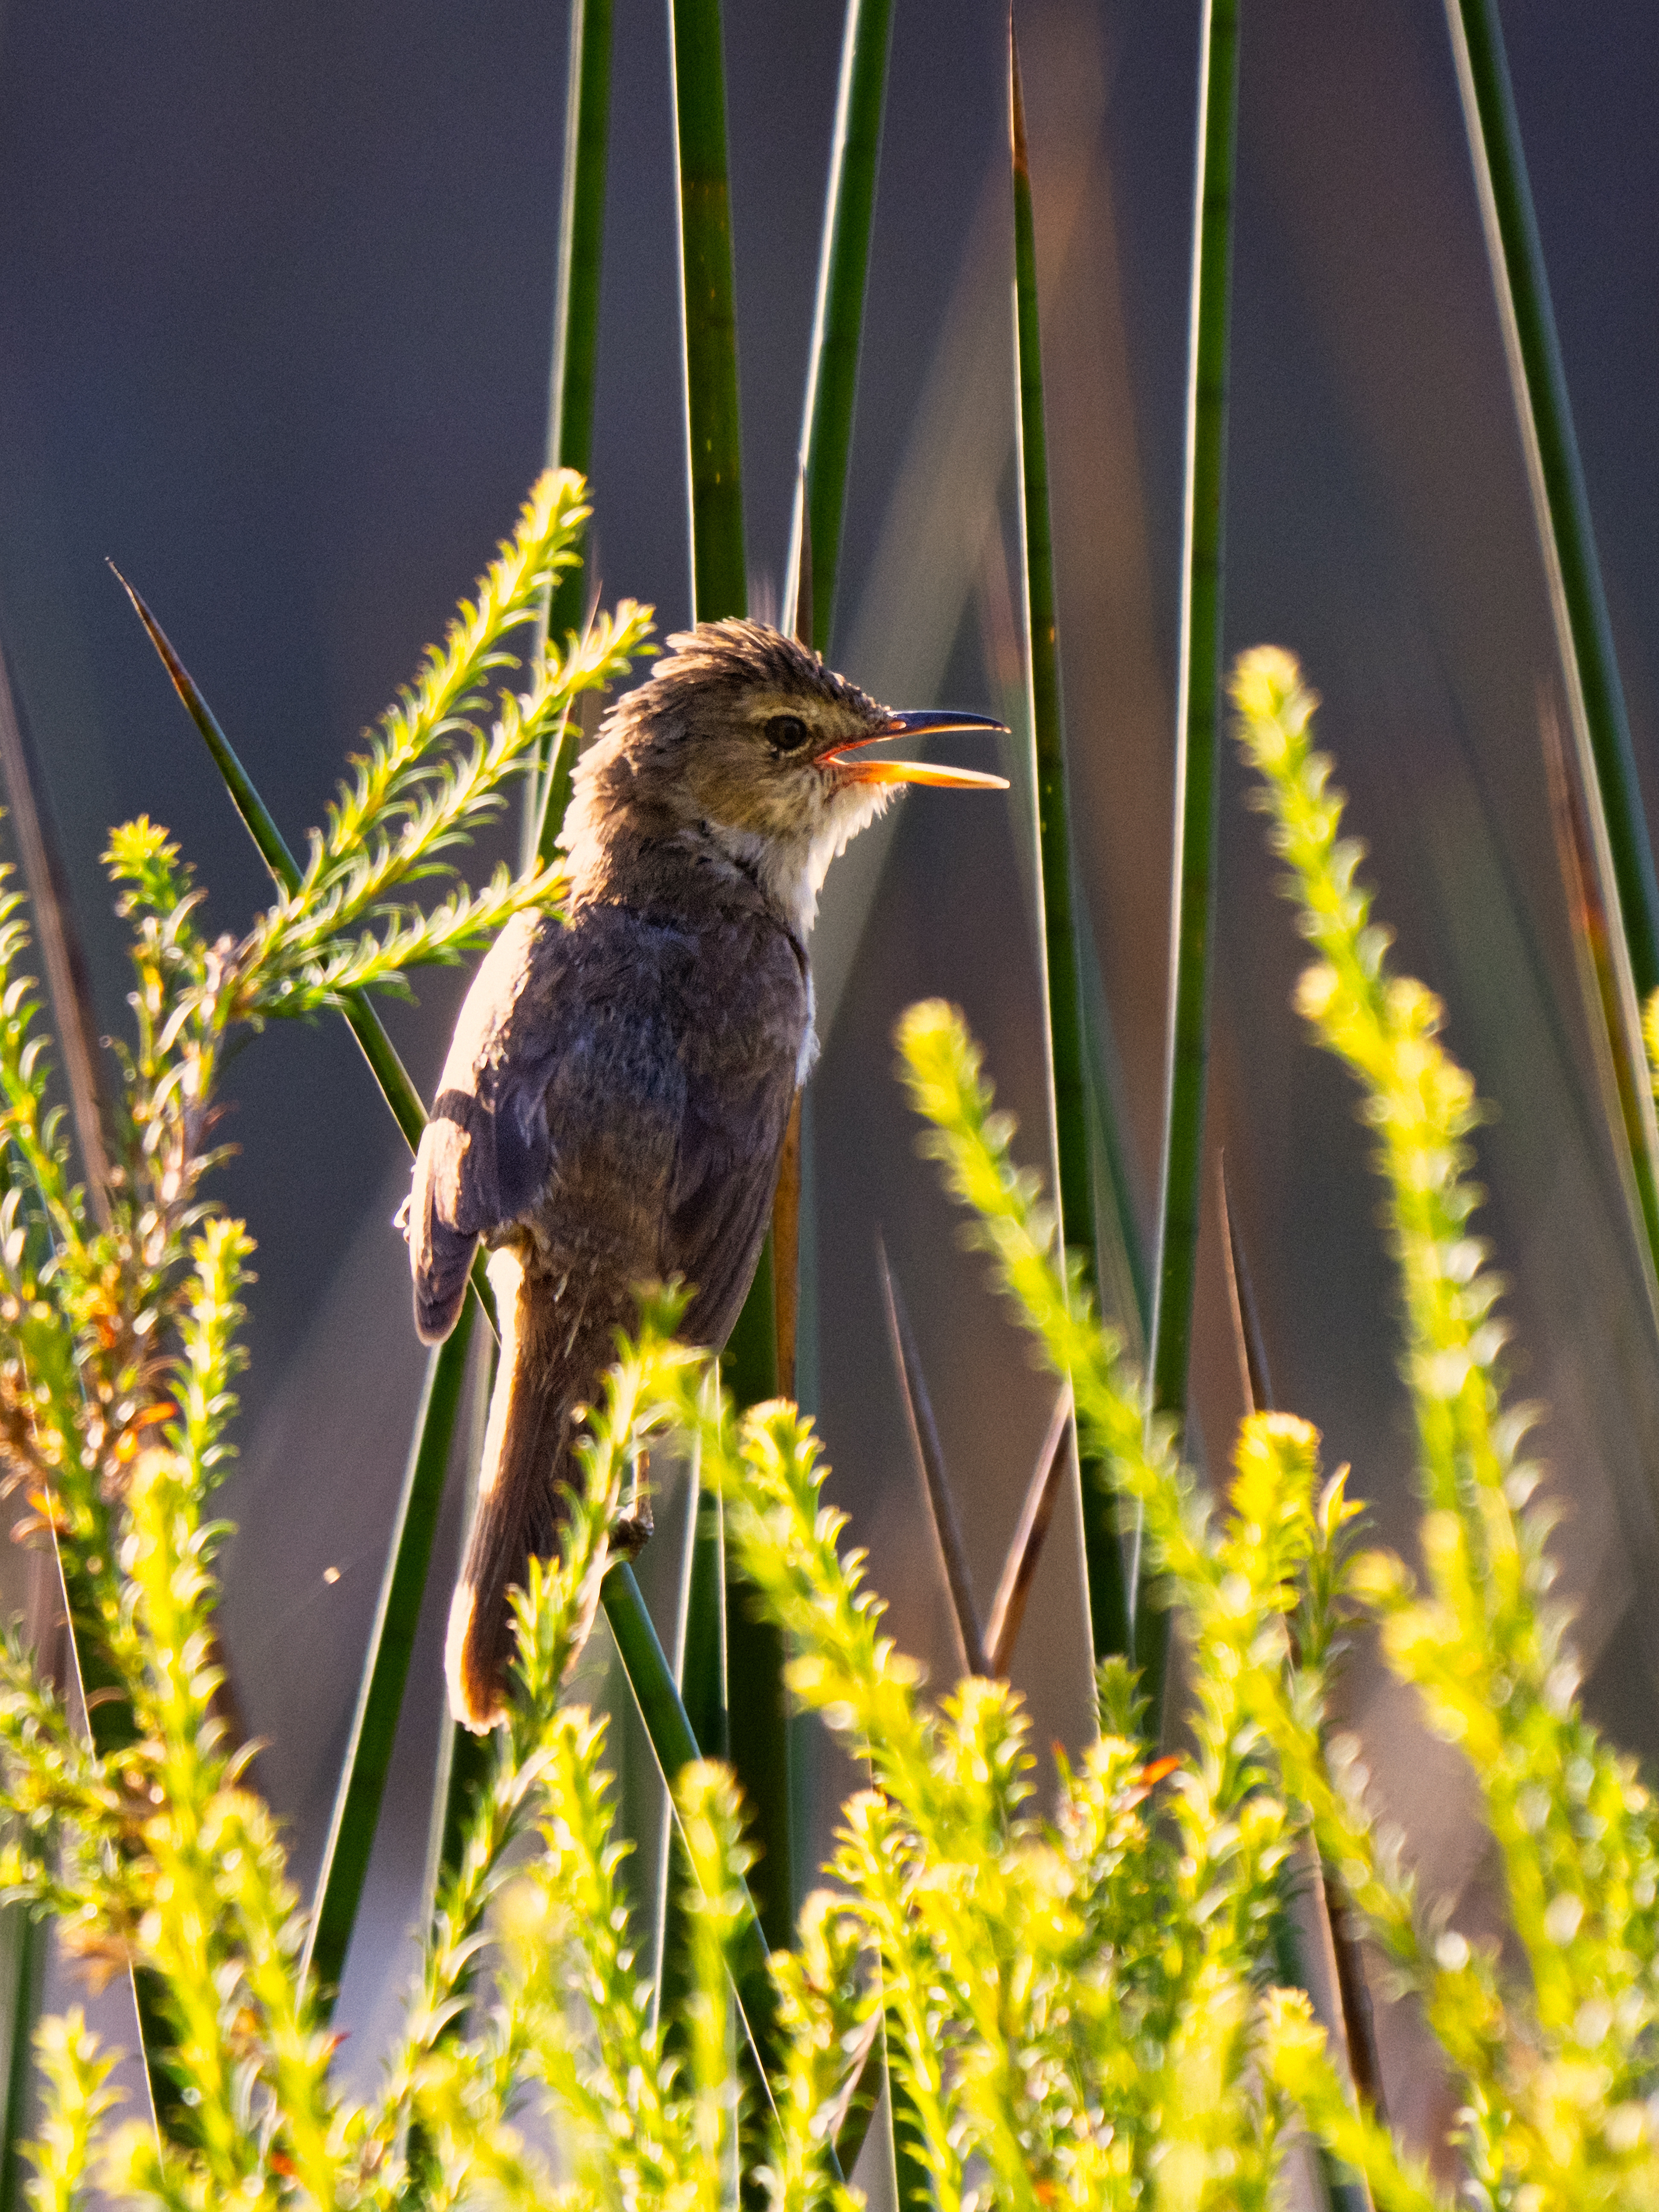
Koordji-koordji or Australian Reed Warbler (Acrocephalus australis subspecies gouldi). Lake Leschenaultia, Western Australia.
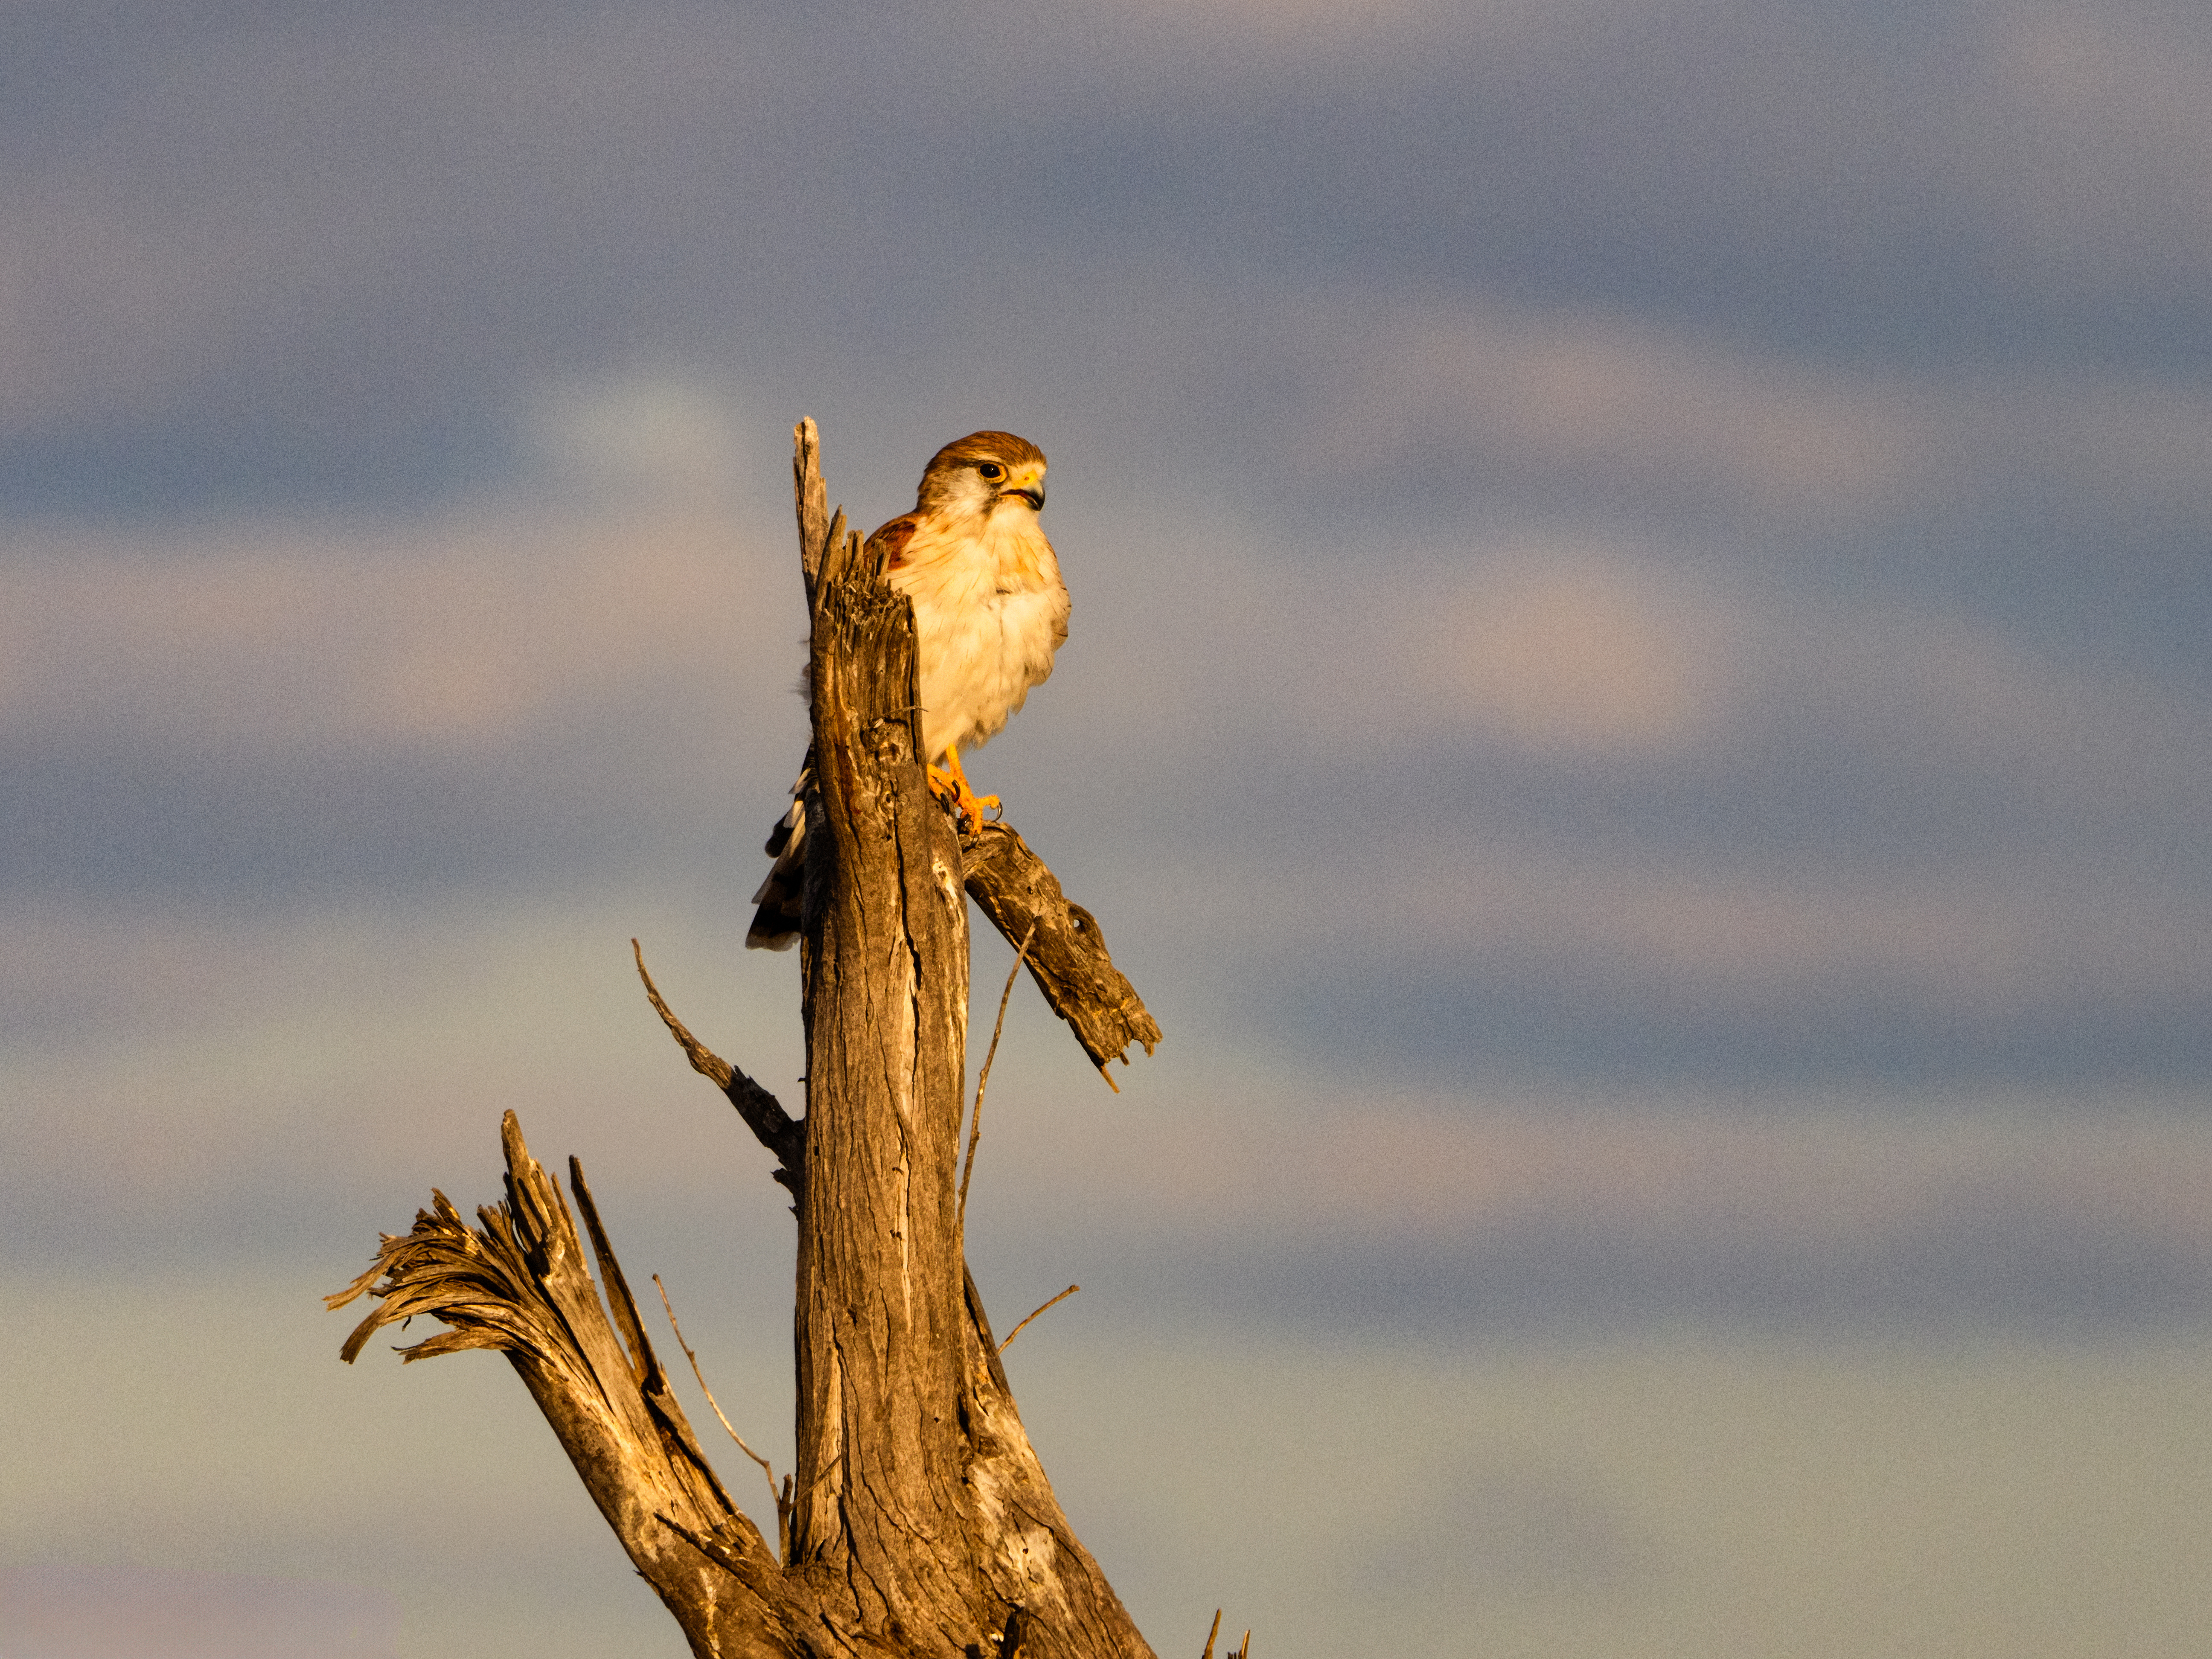
Mardiyet or Nankeen Kestrel (Falco cenchroides). Woodman Point, Western Australia.
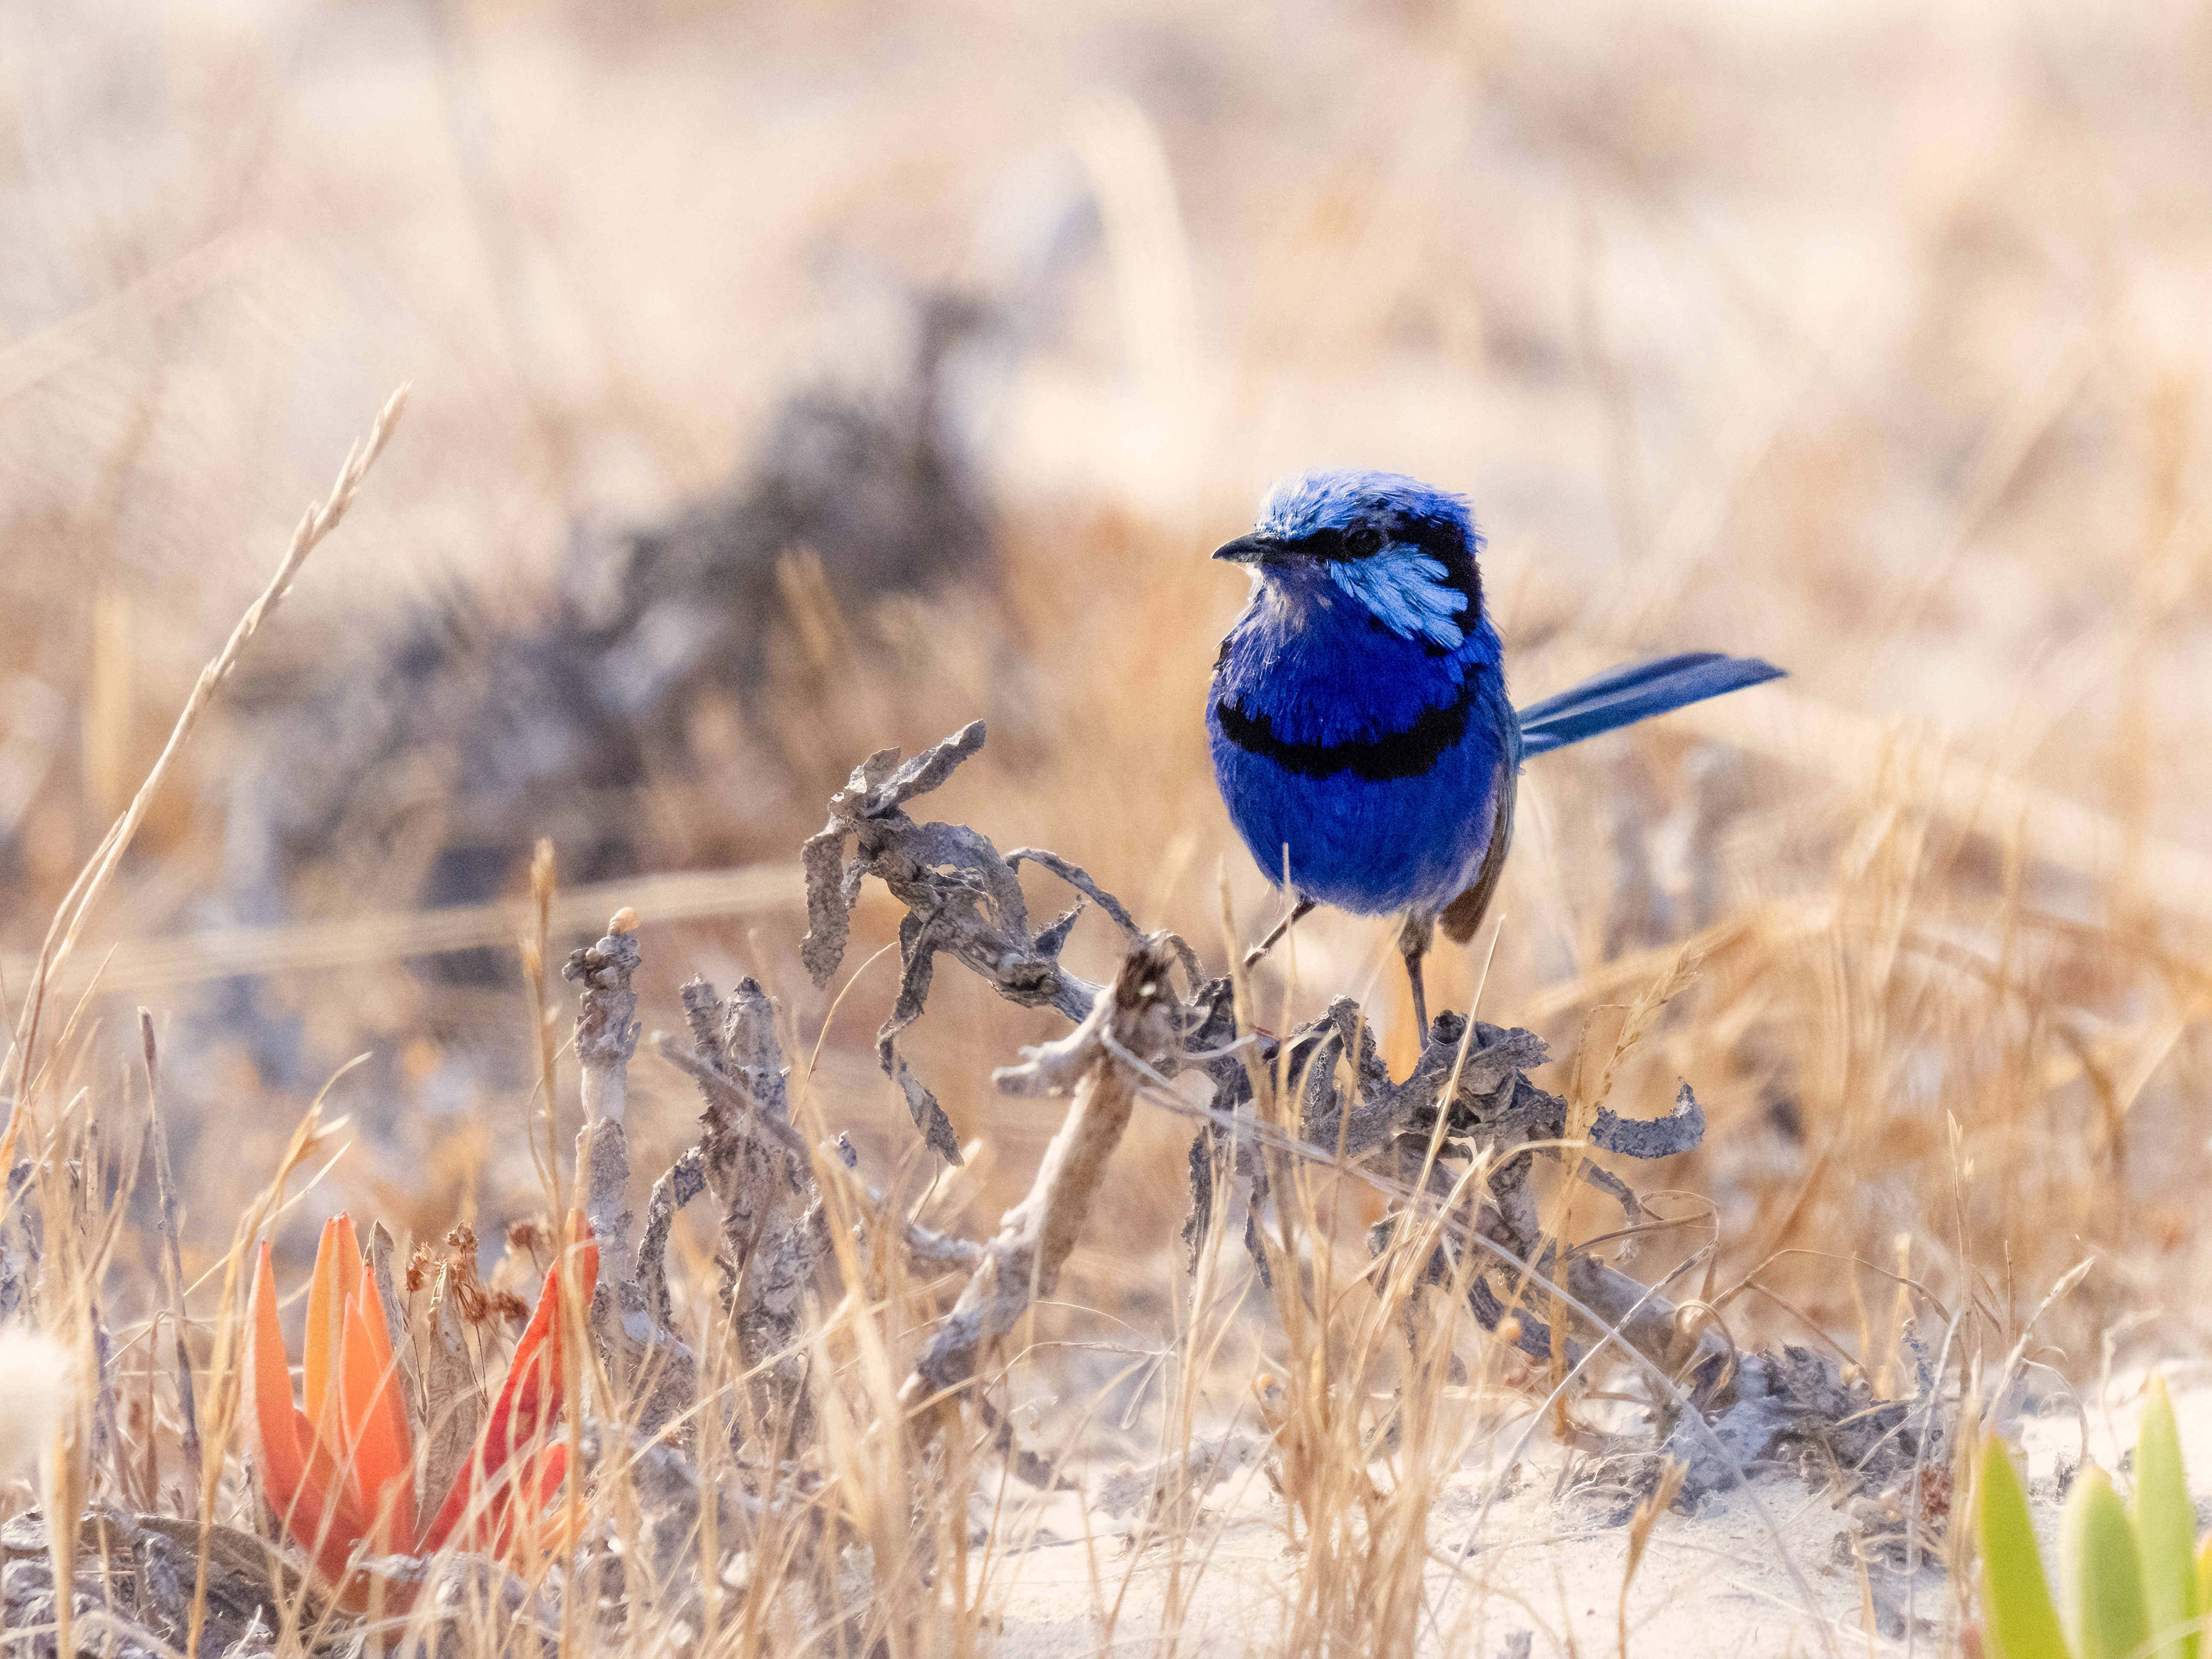
Djer-djer or Splendid Fairy-wren (Malarus splendens subs splendens). Woodman Point, Western Australia.
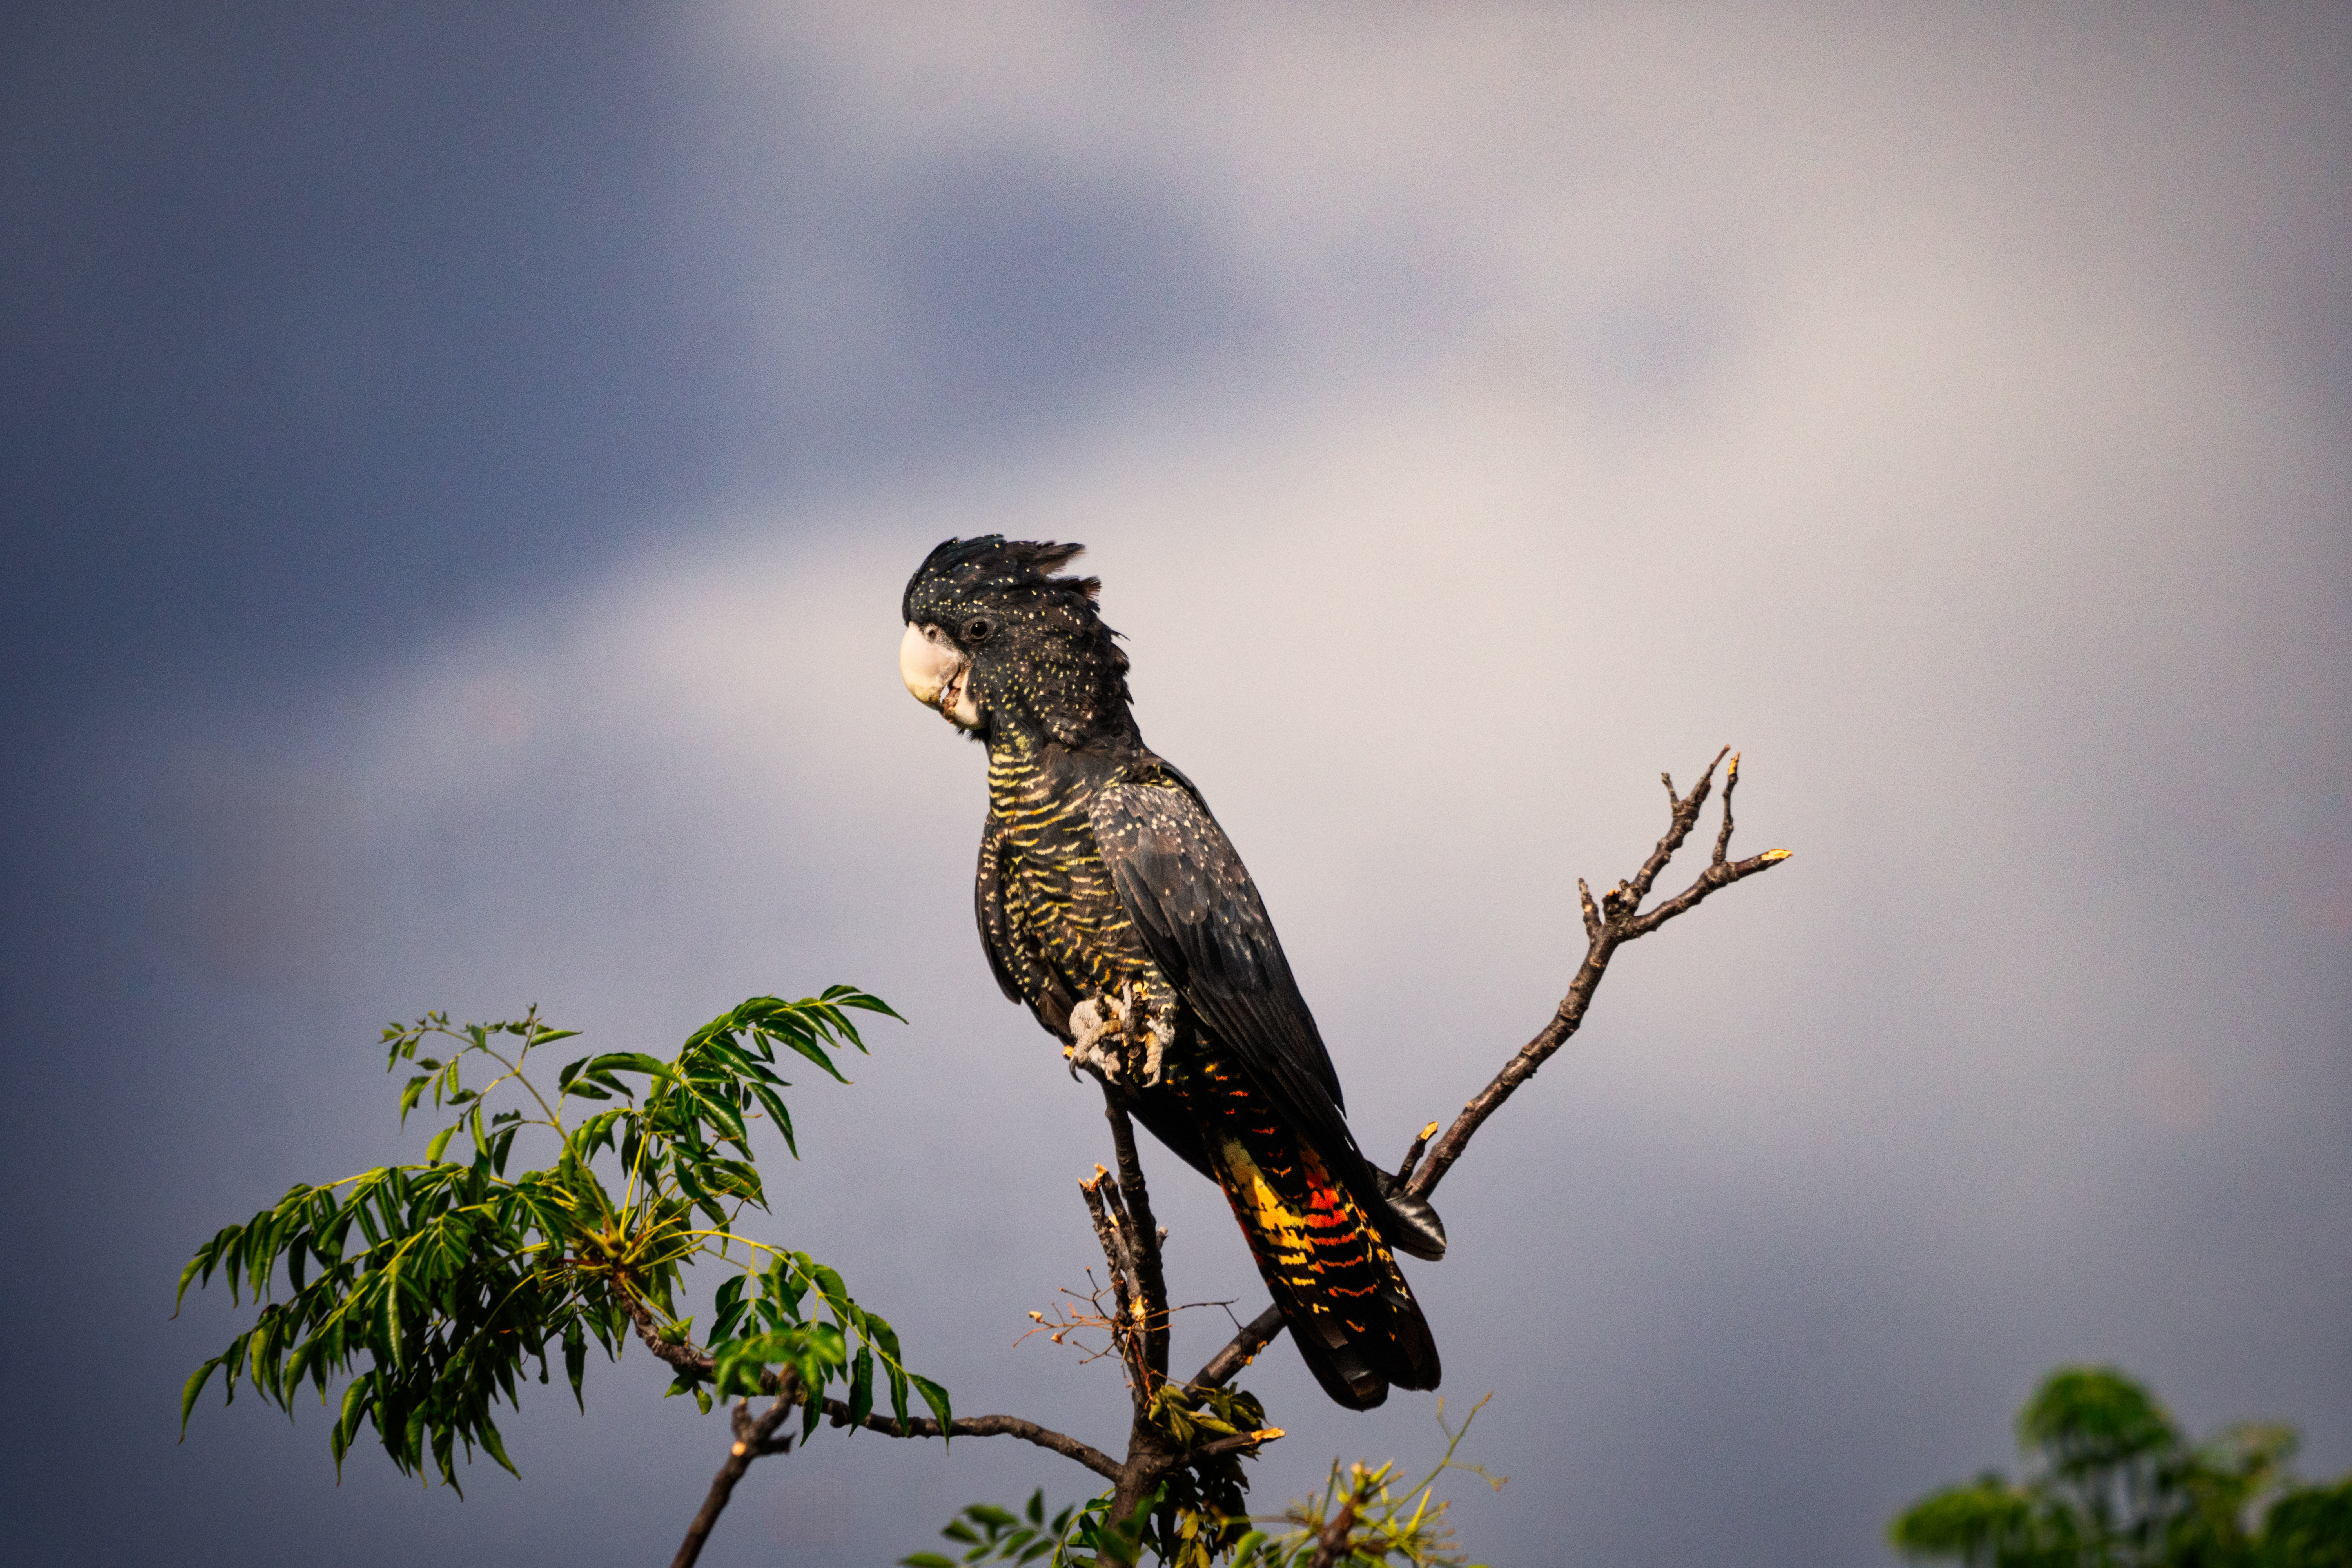
Karak or Red-tailed Black Cockatoo (Calyptorhynchus banksii subs samueli) feeding on Cape Lilac AKA White Cedar (Melia azedarch). York, Western Australia.
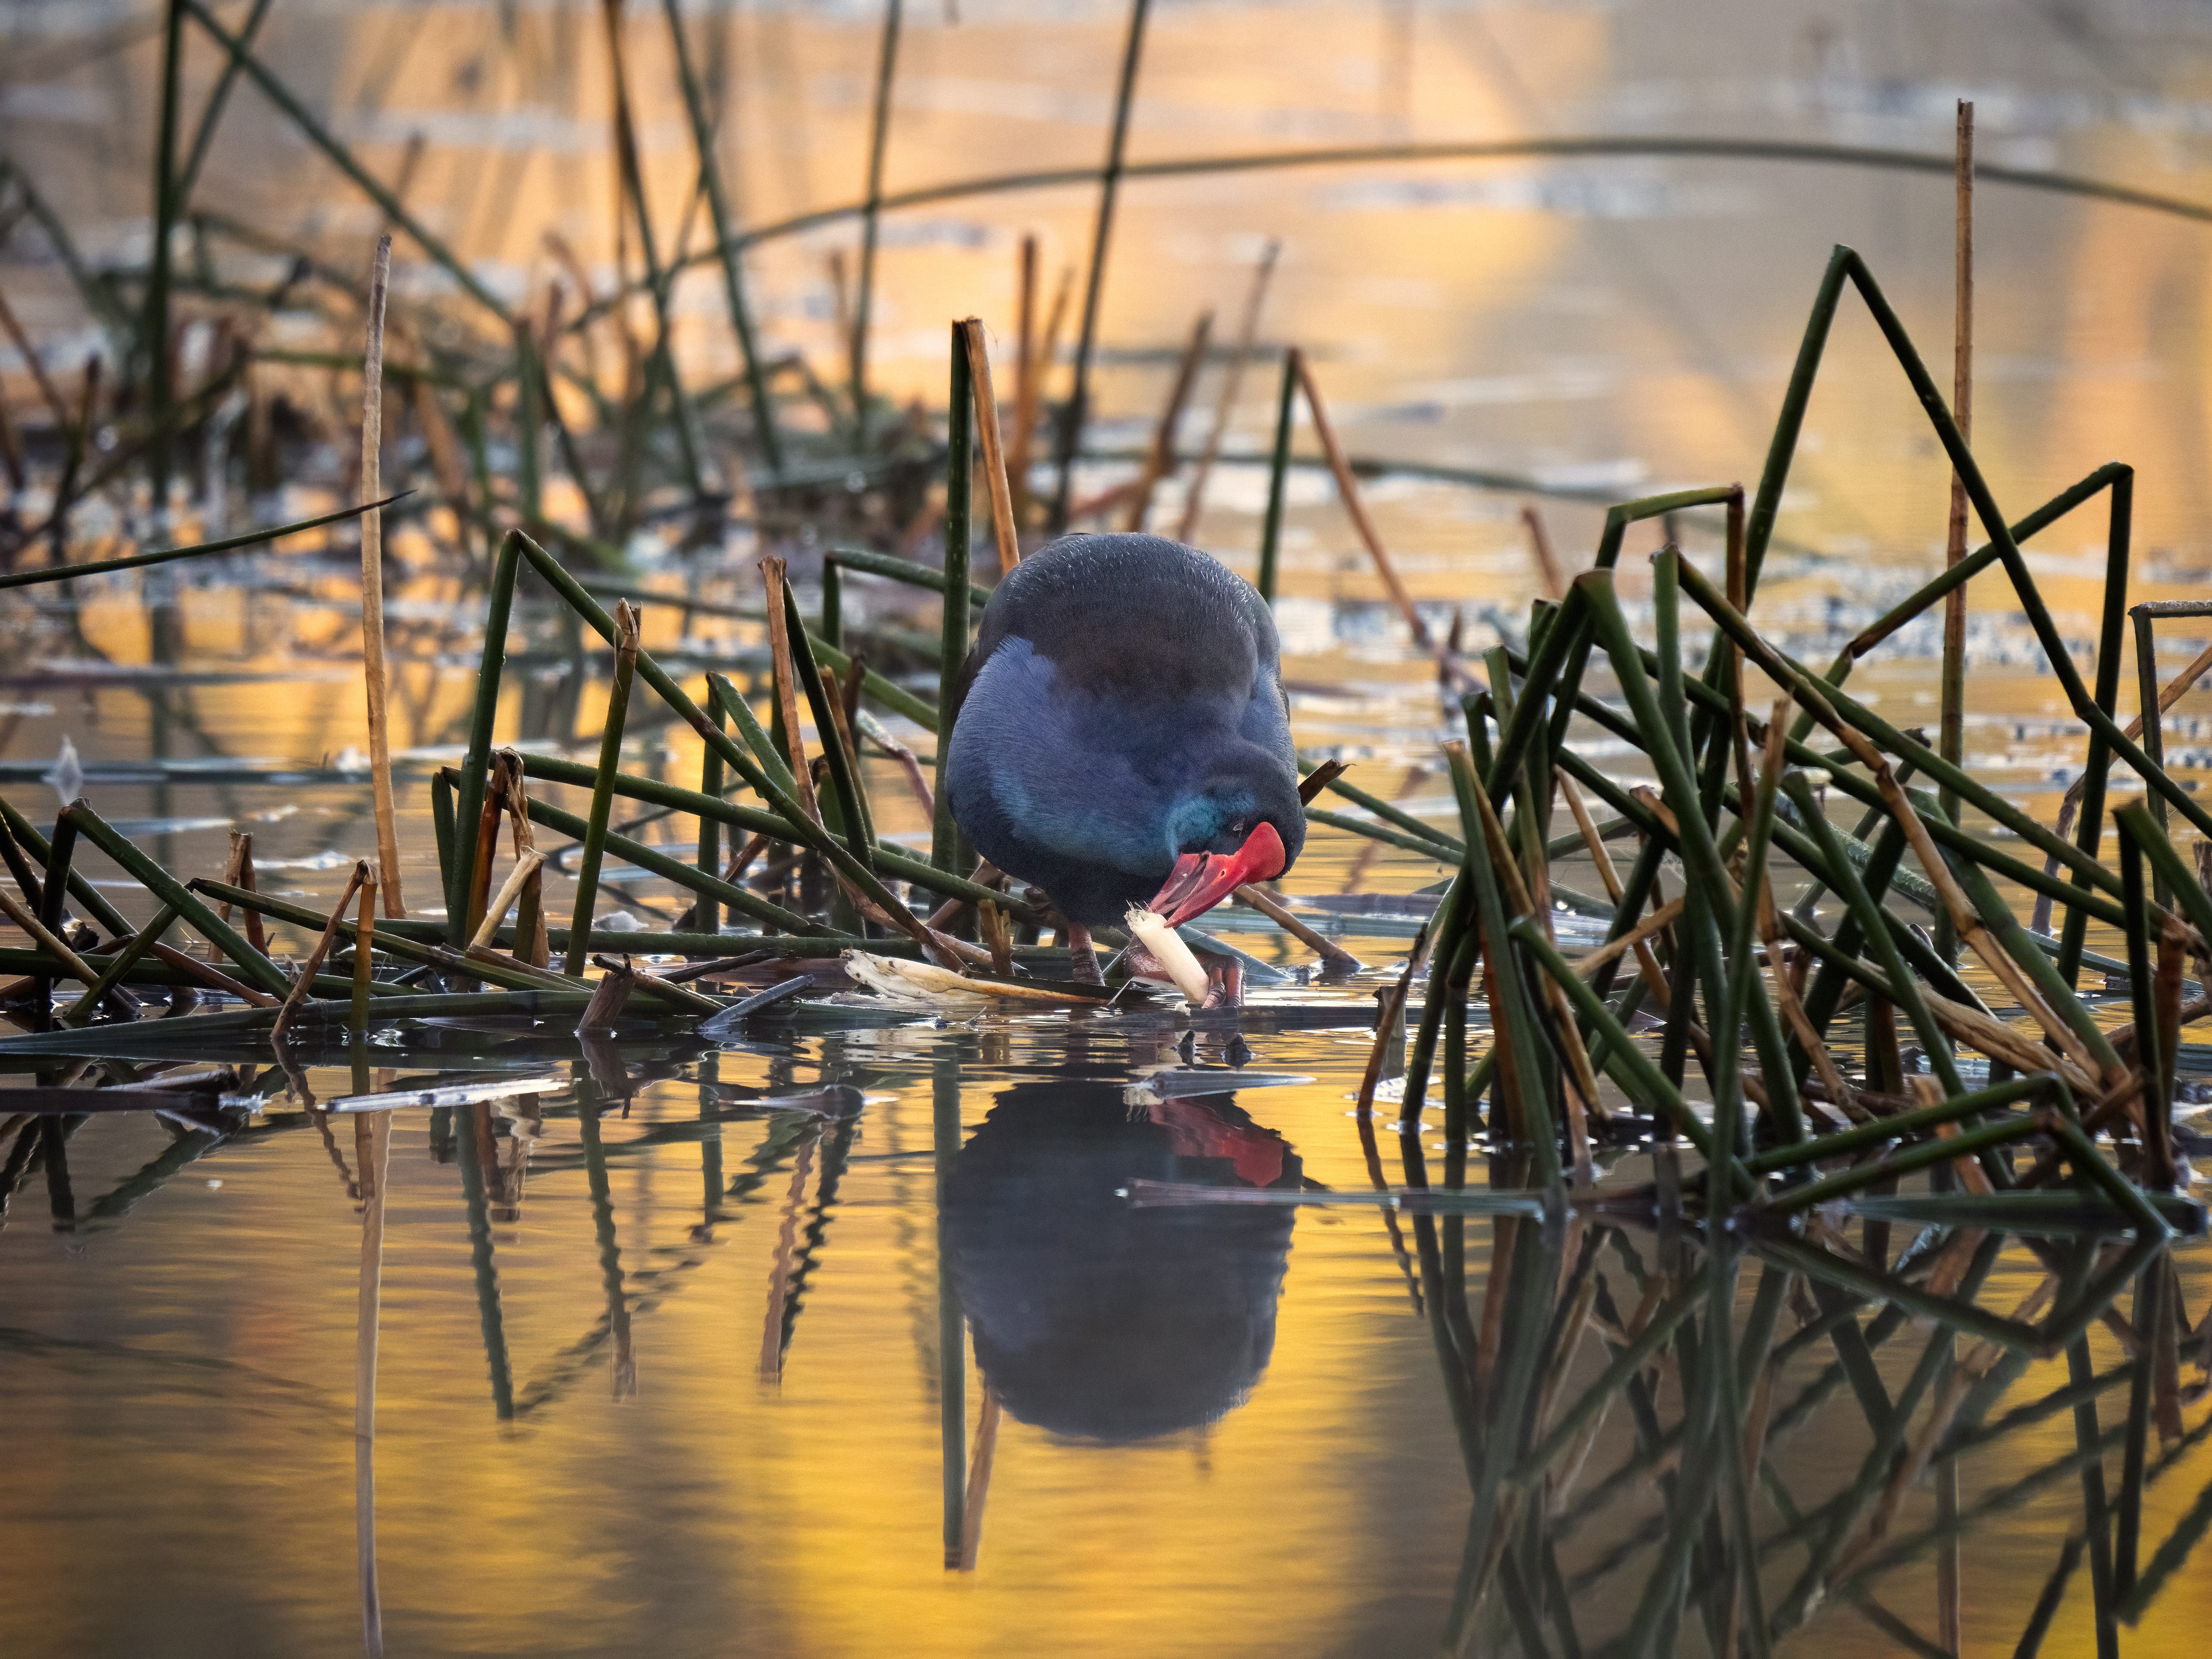
Kwirlam or Purple Swamp Hen (Porphyrio porphyrio). Lake Leschenaultia, Western Australia.
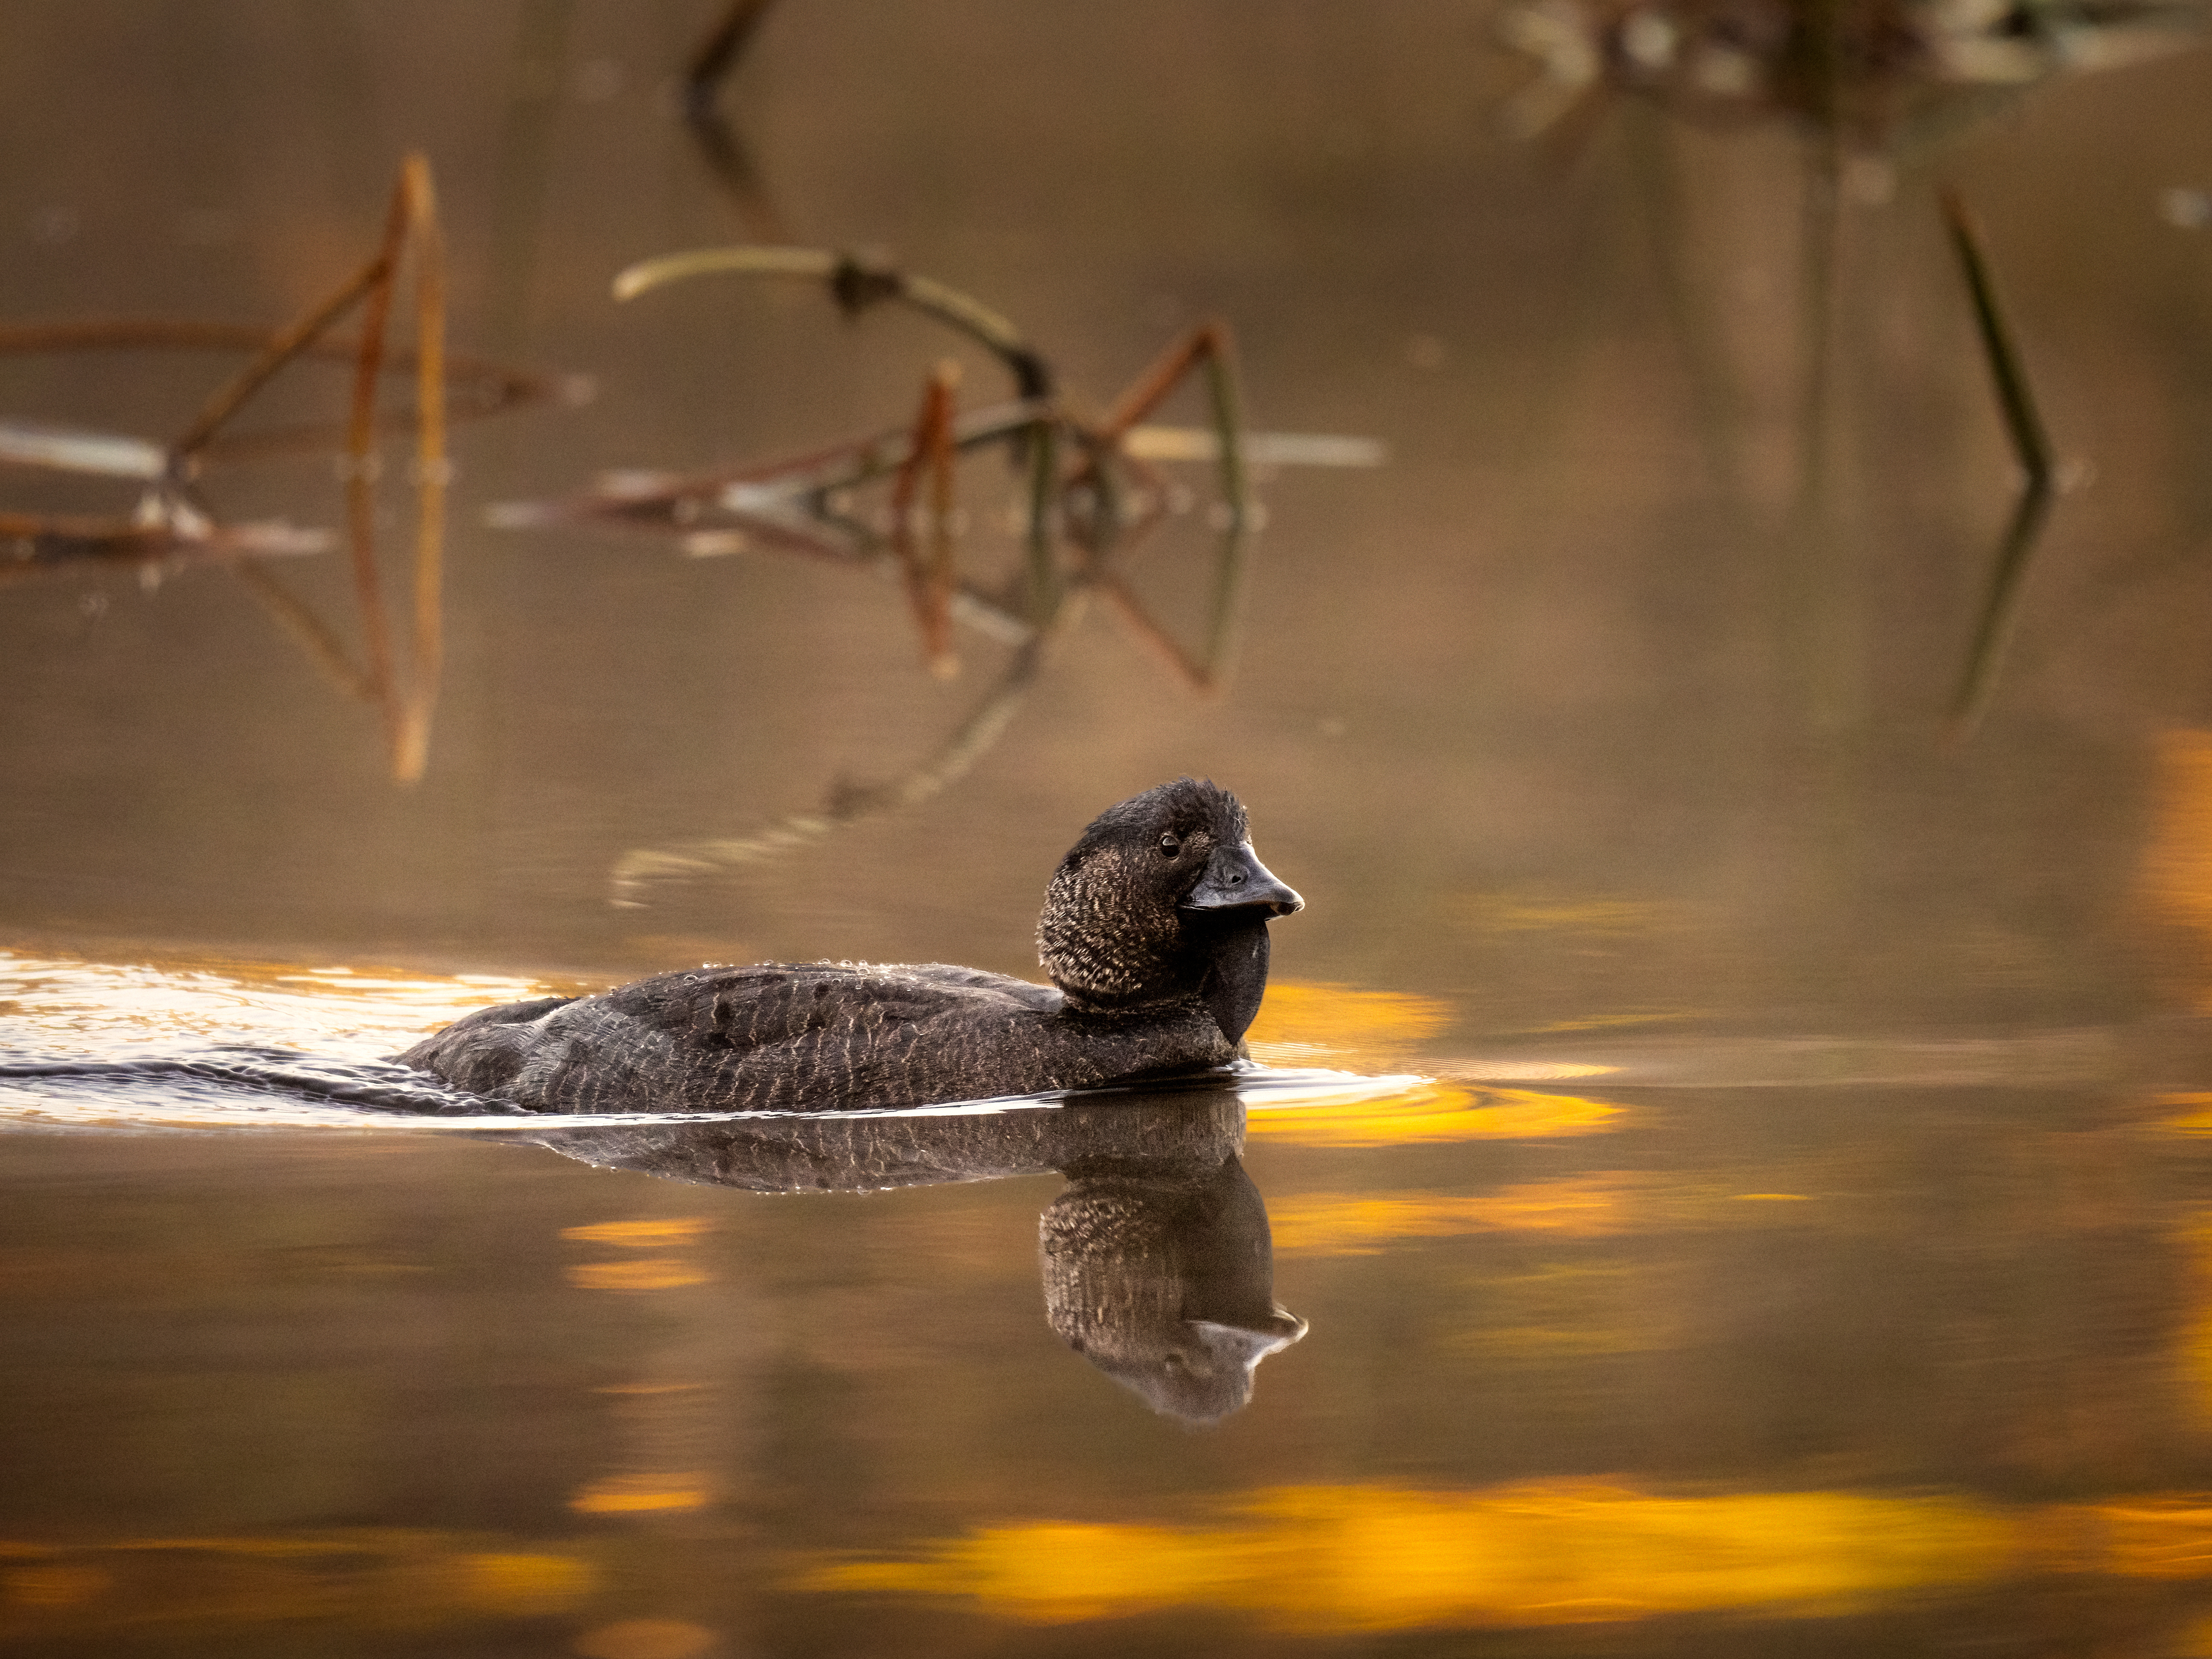
Kadar, Musk Duck (Biziura lobata). Lake Leschenaultia, Western Australia.
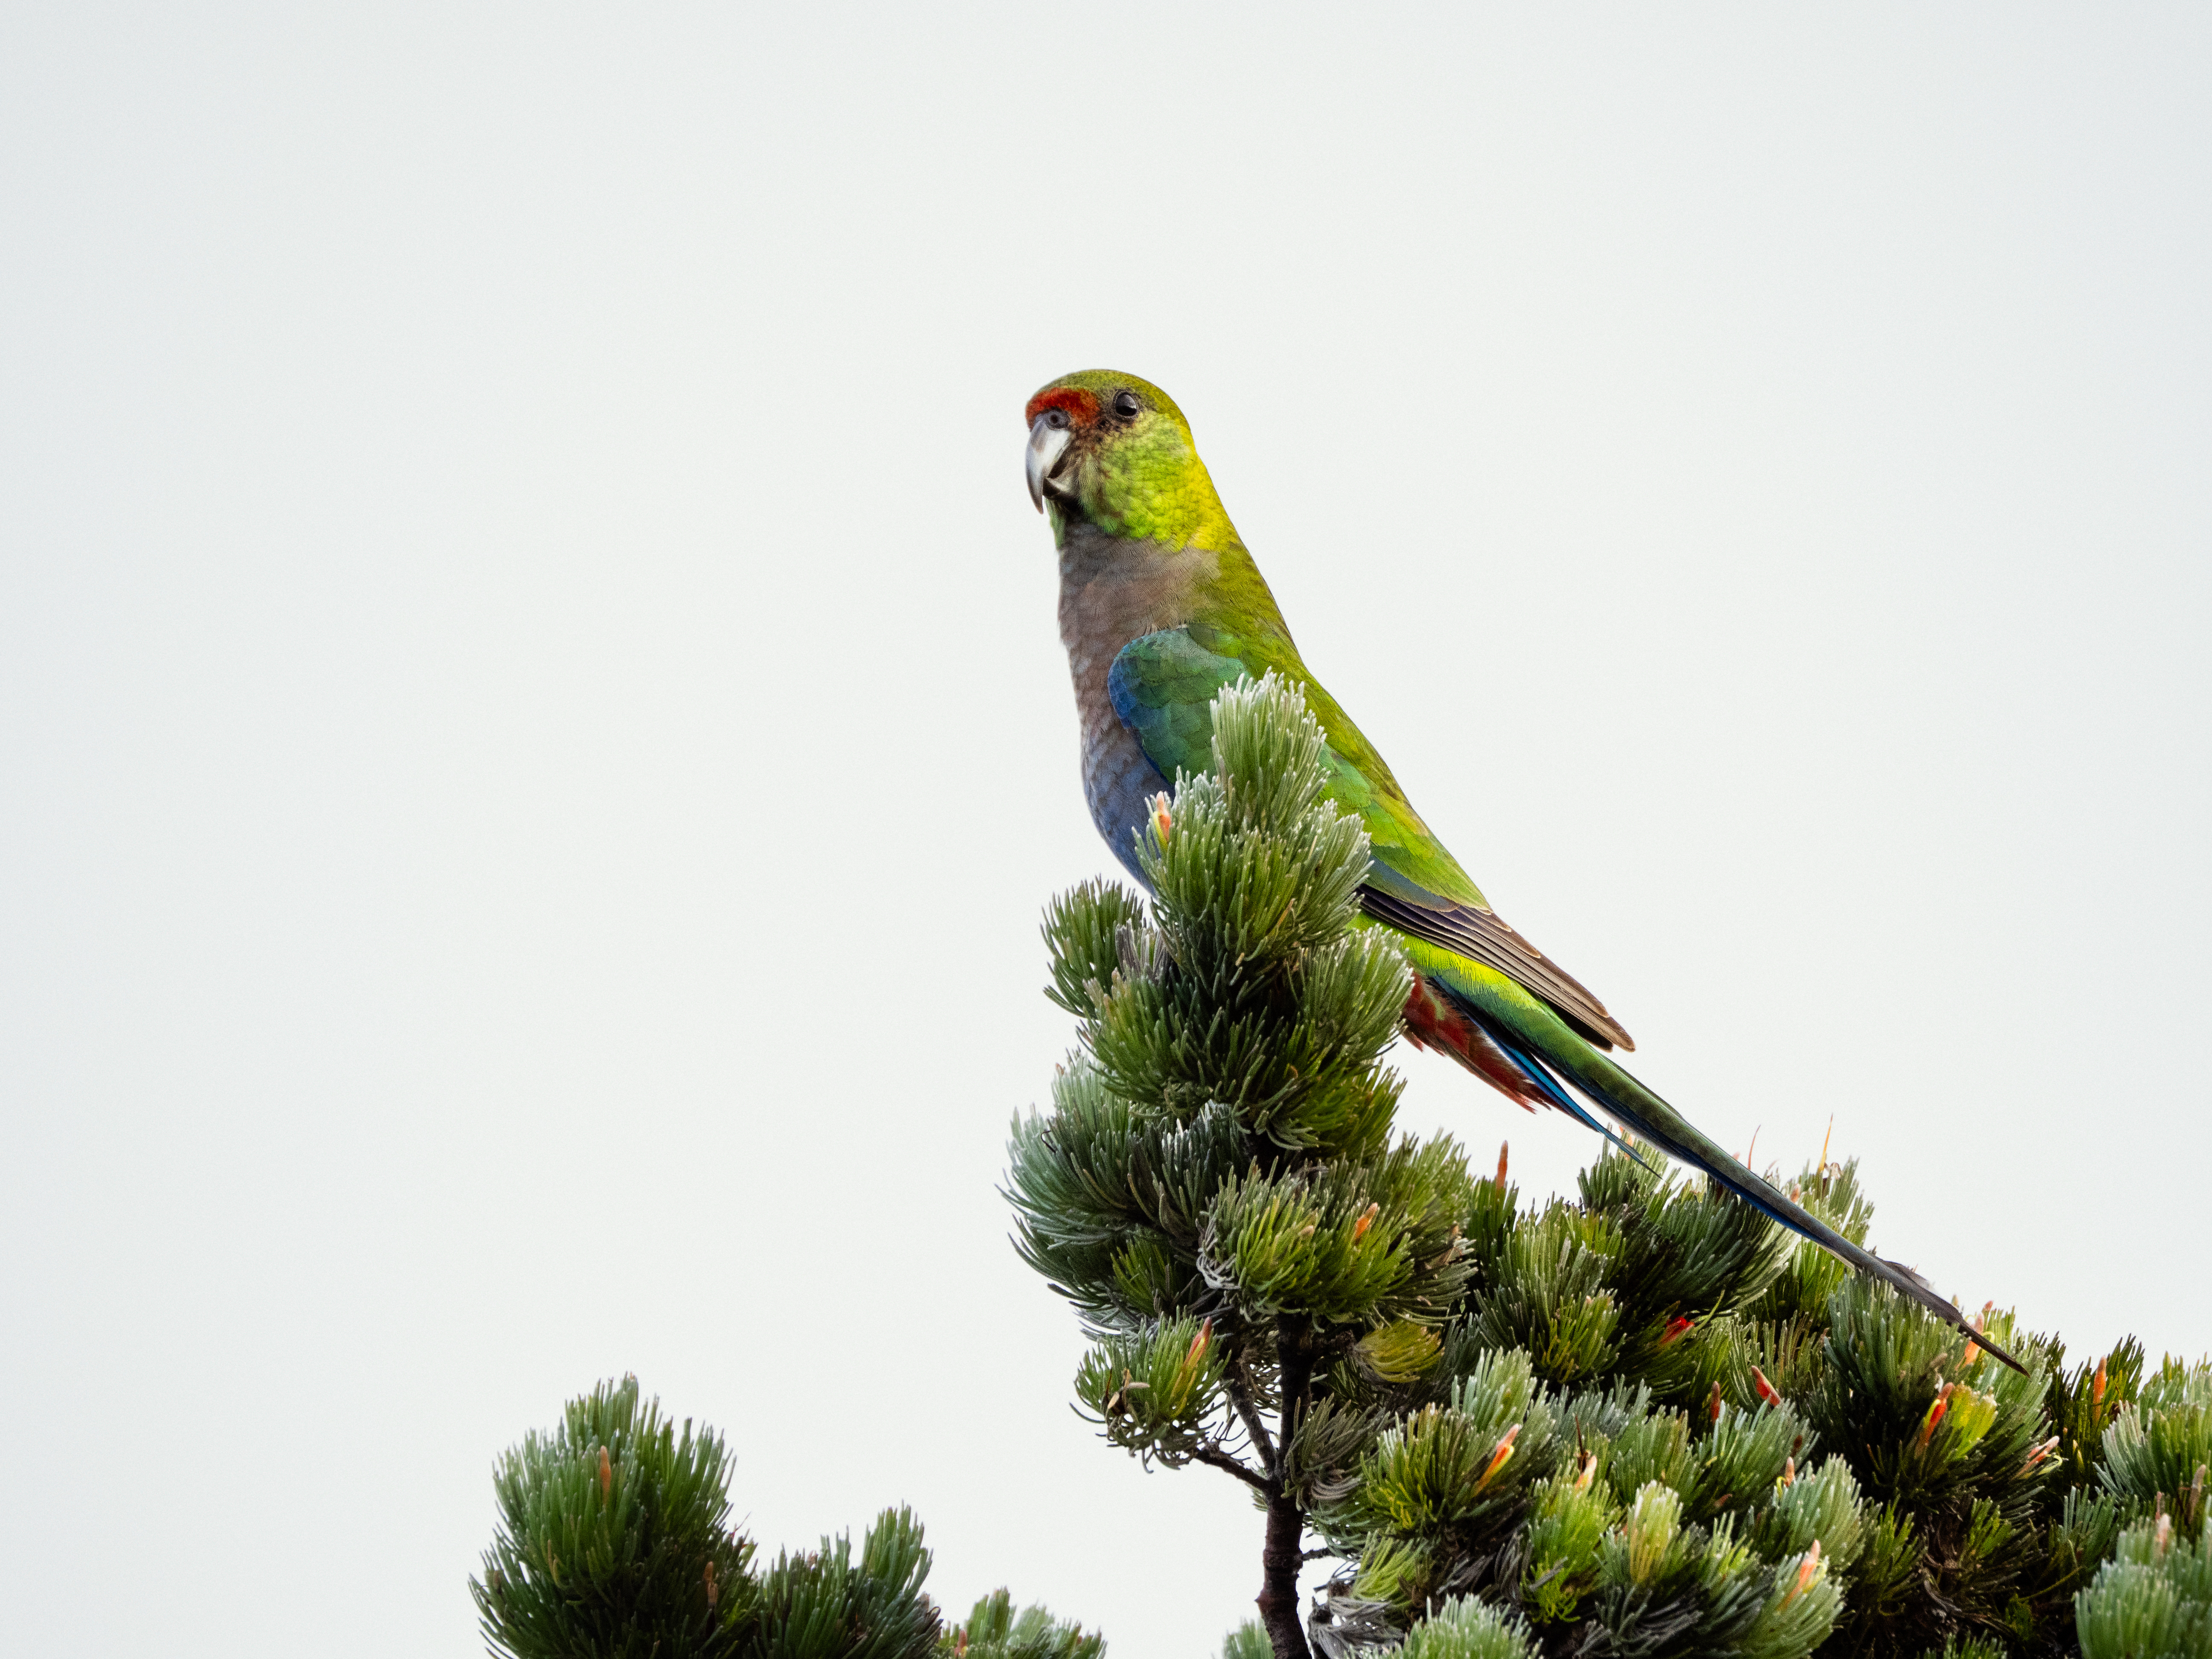
Juvenile Delyip or Red-capped Parrot (Platycercus spurius). Albany Windfarm.
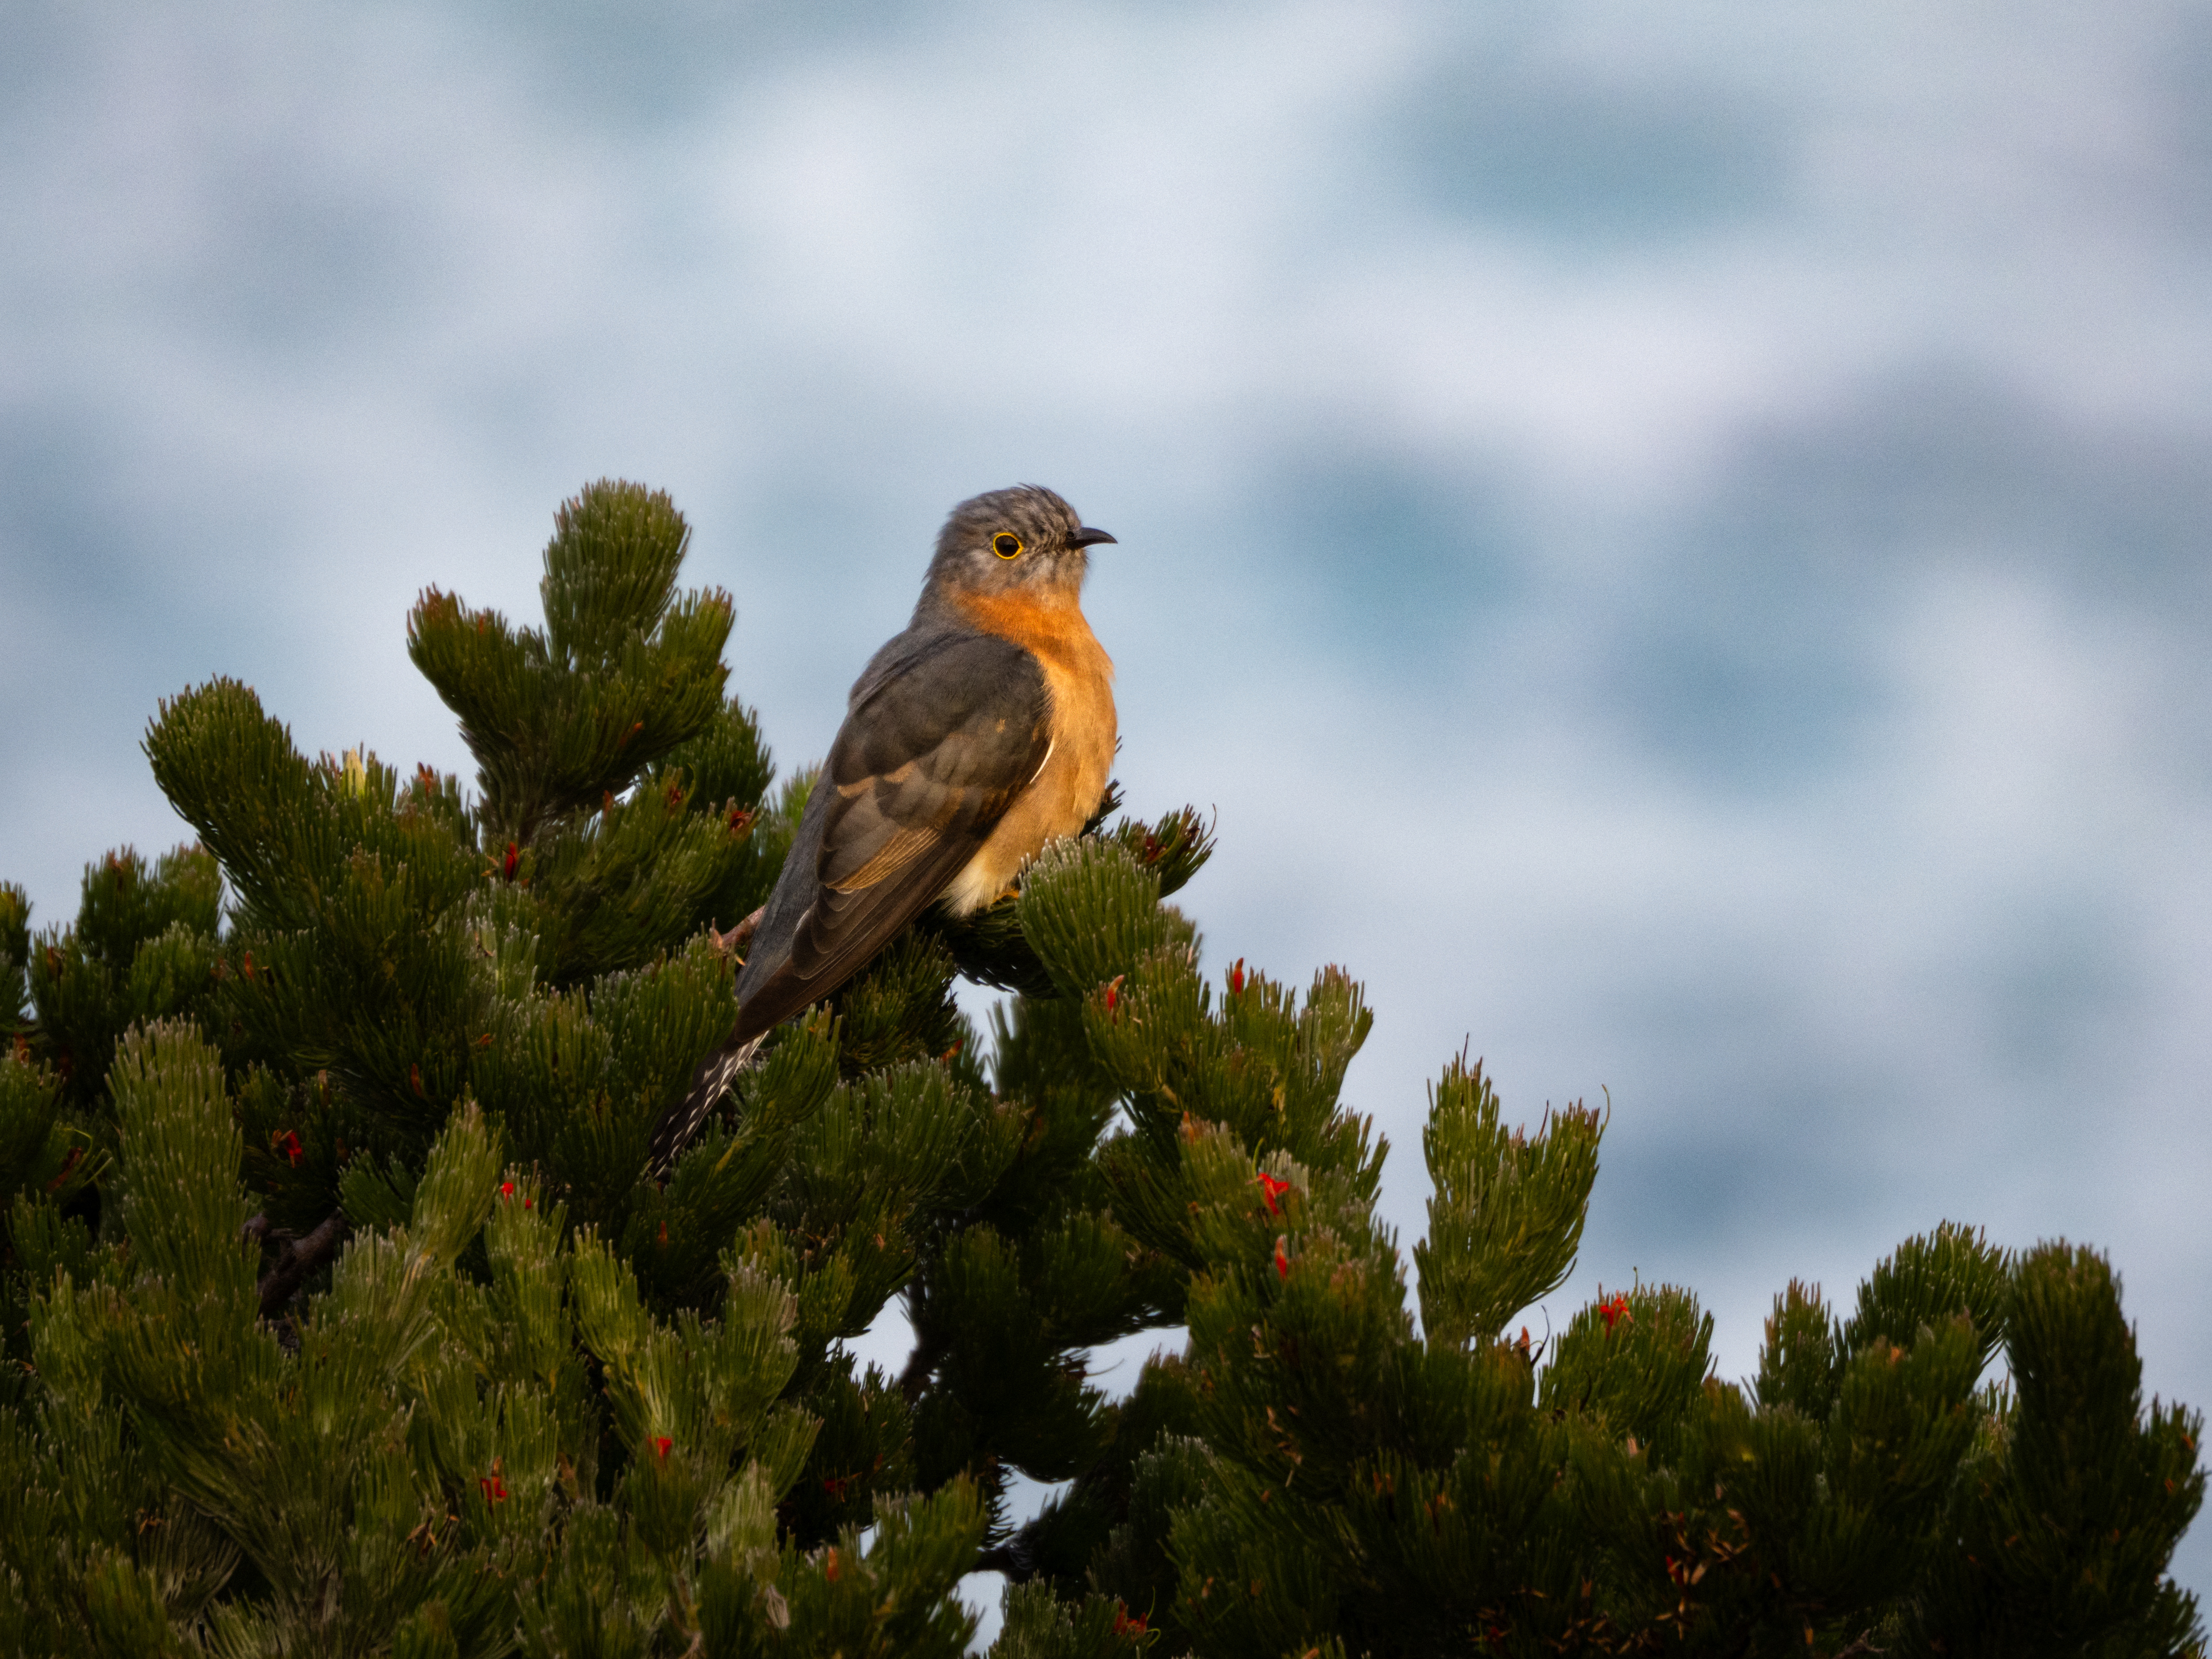
Djoolar or Fan-tailed Cuckoo (Cacomantis flabelliformis). Albany Windfarm.
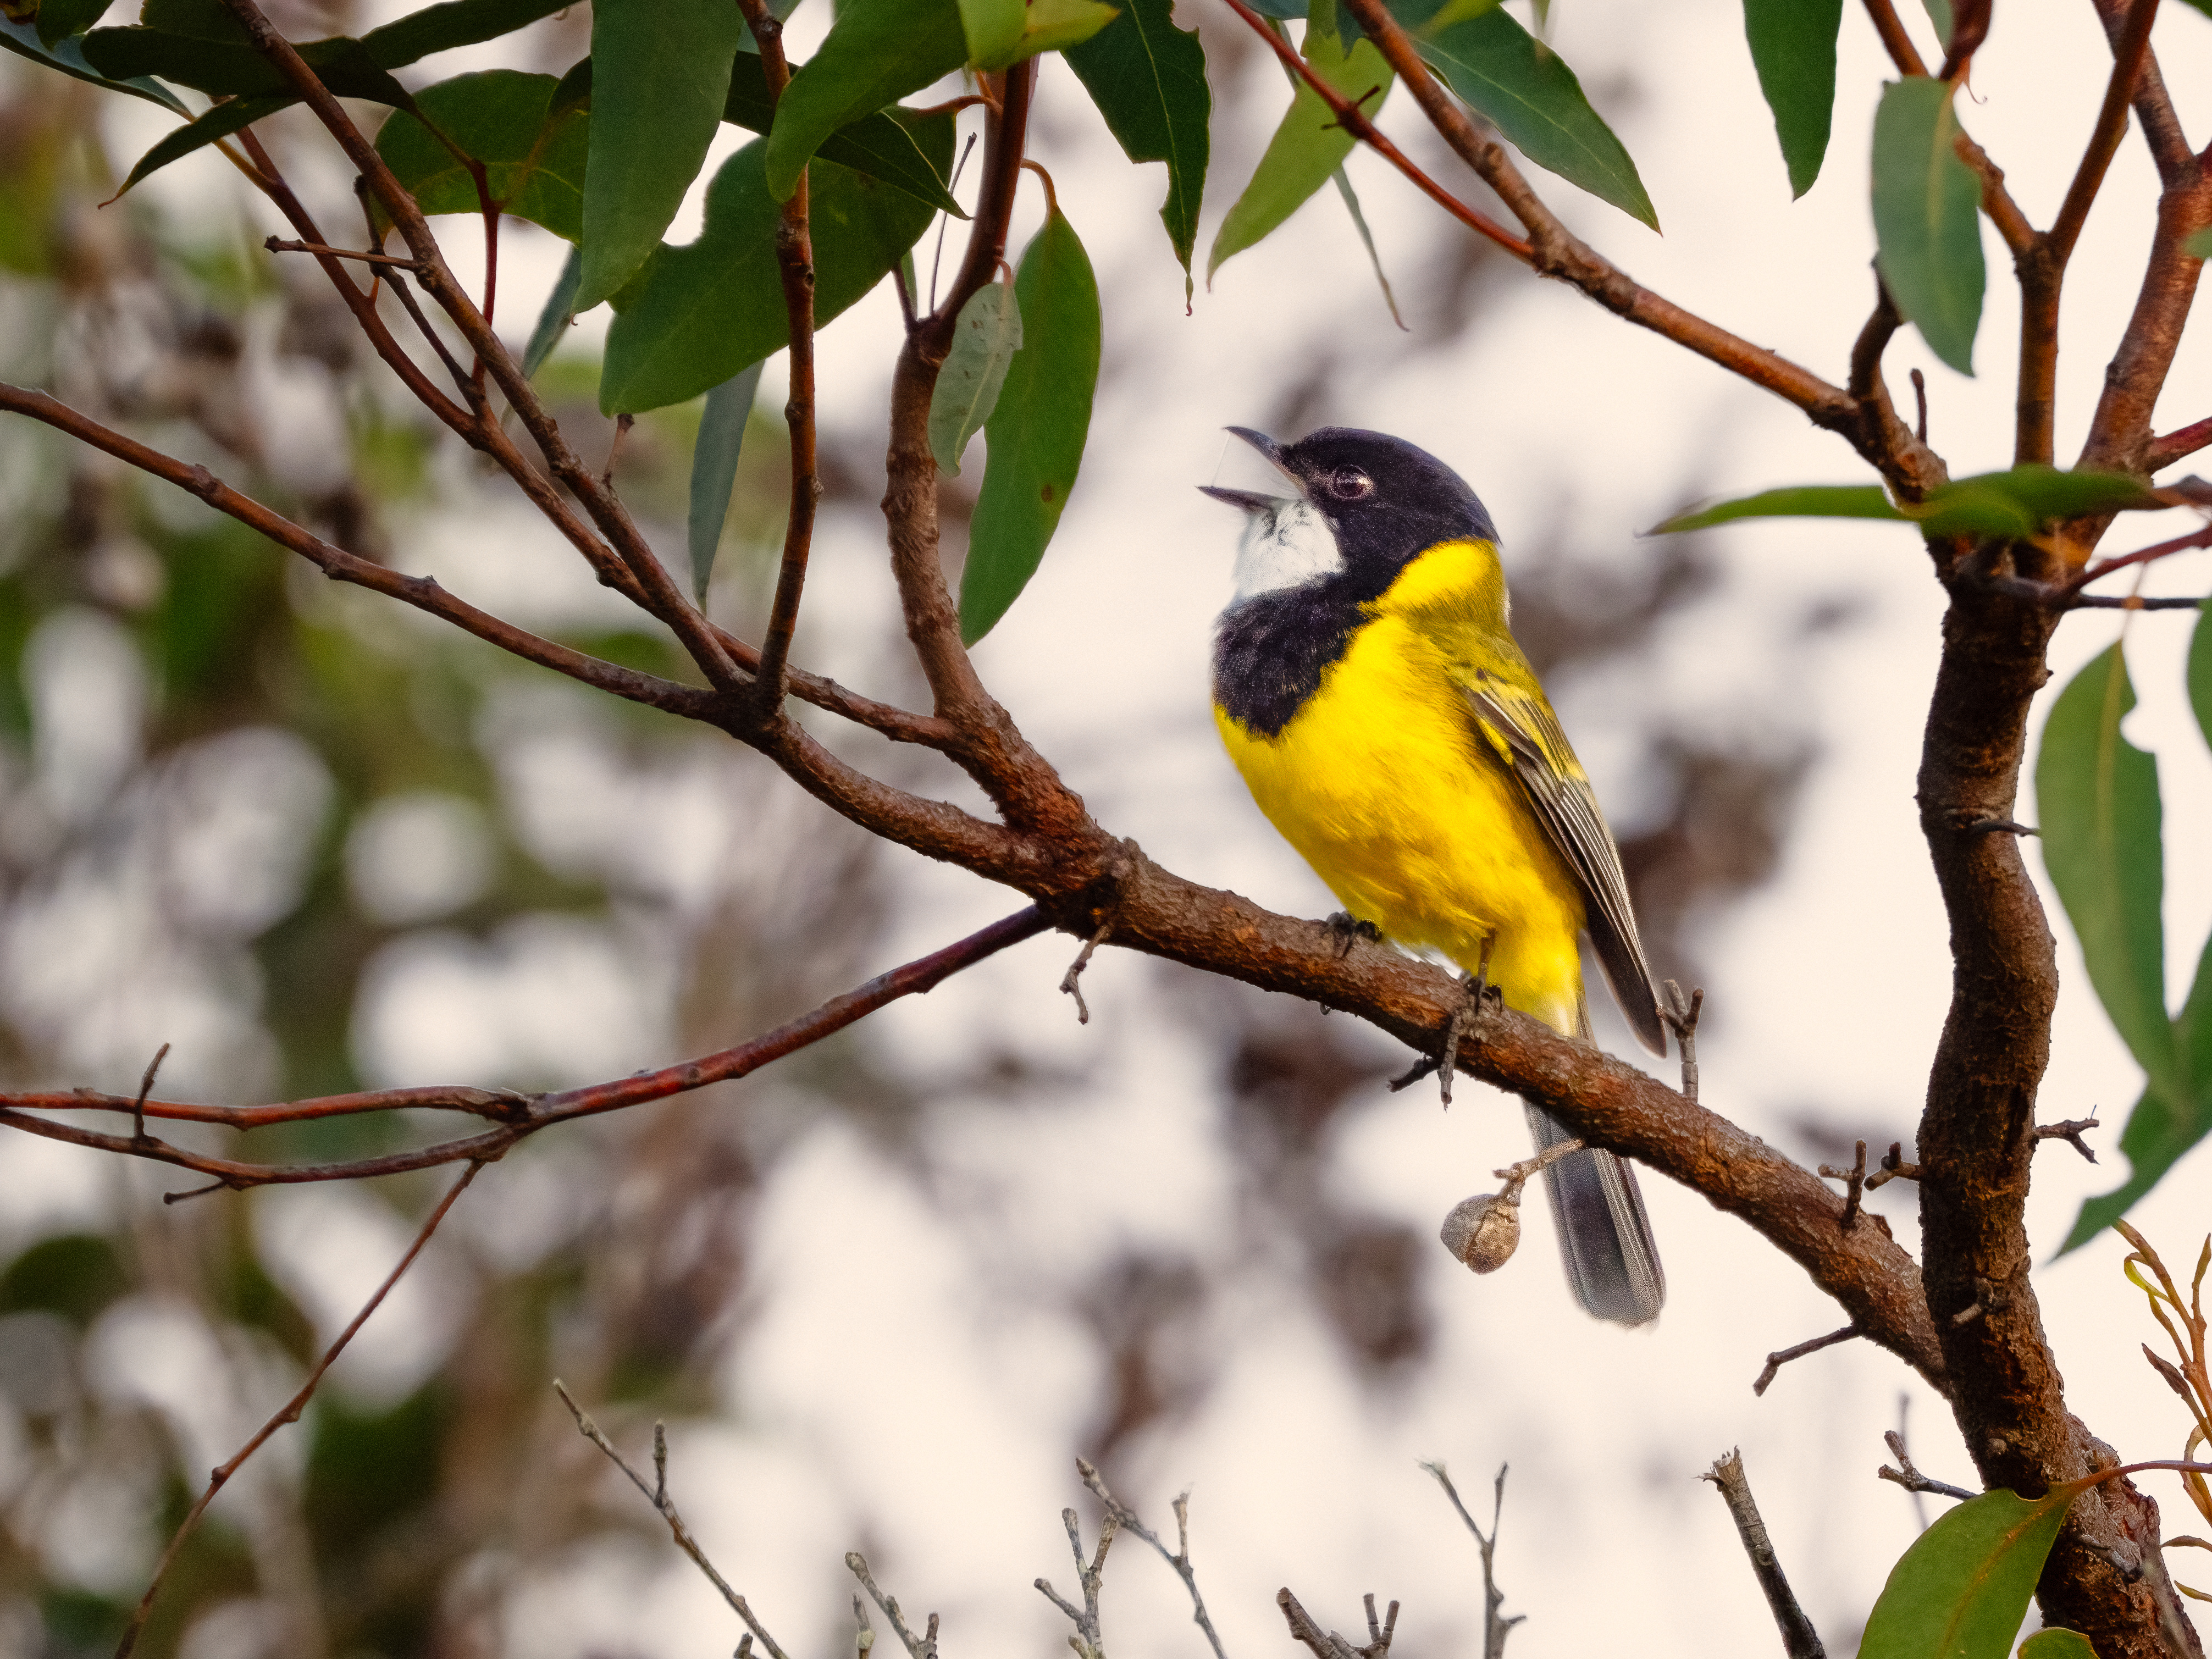
Bidilmidang or Golden Whistler (Pachycephala pectoralis). Torbay.
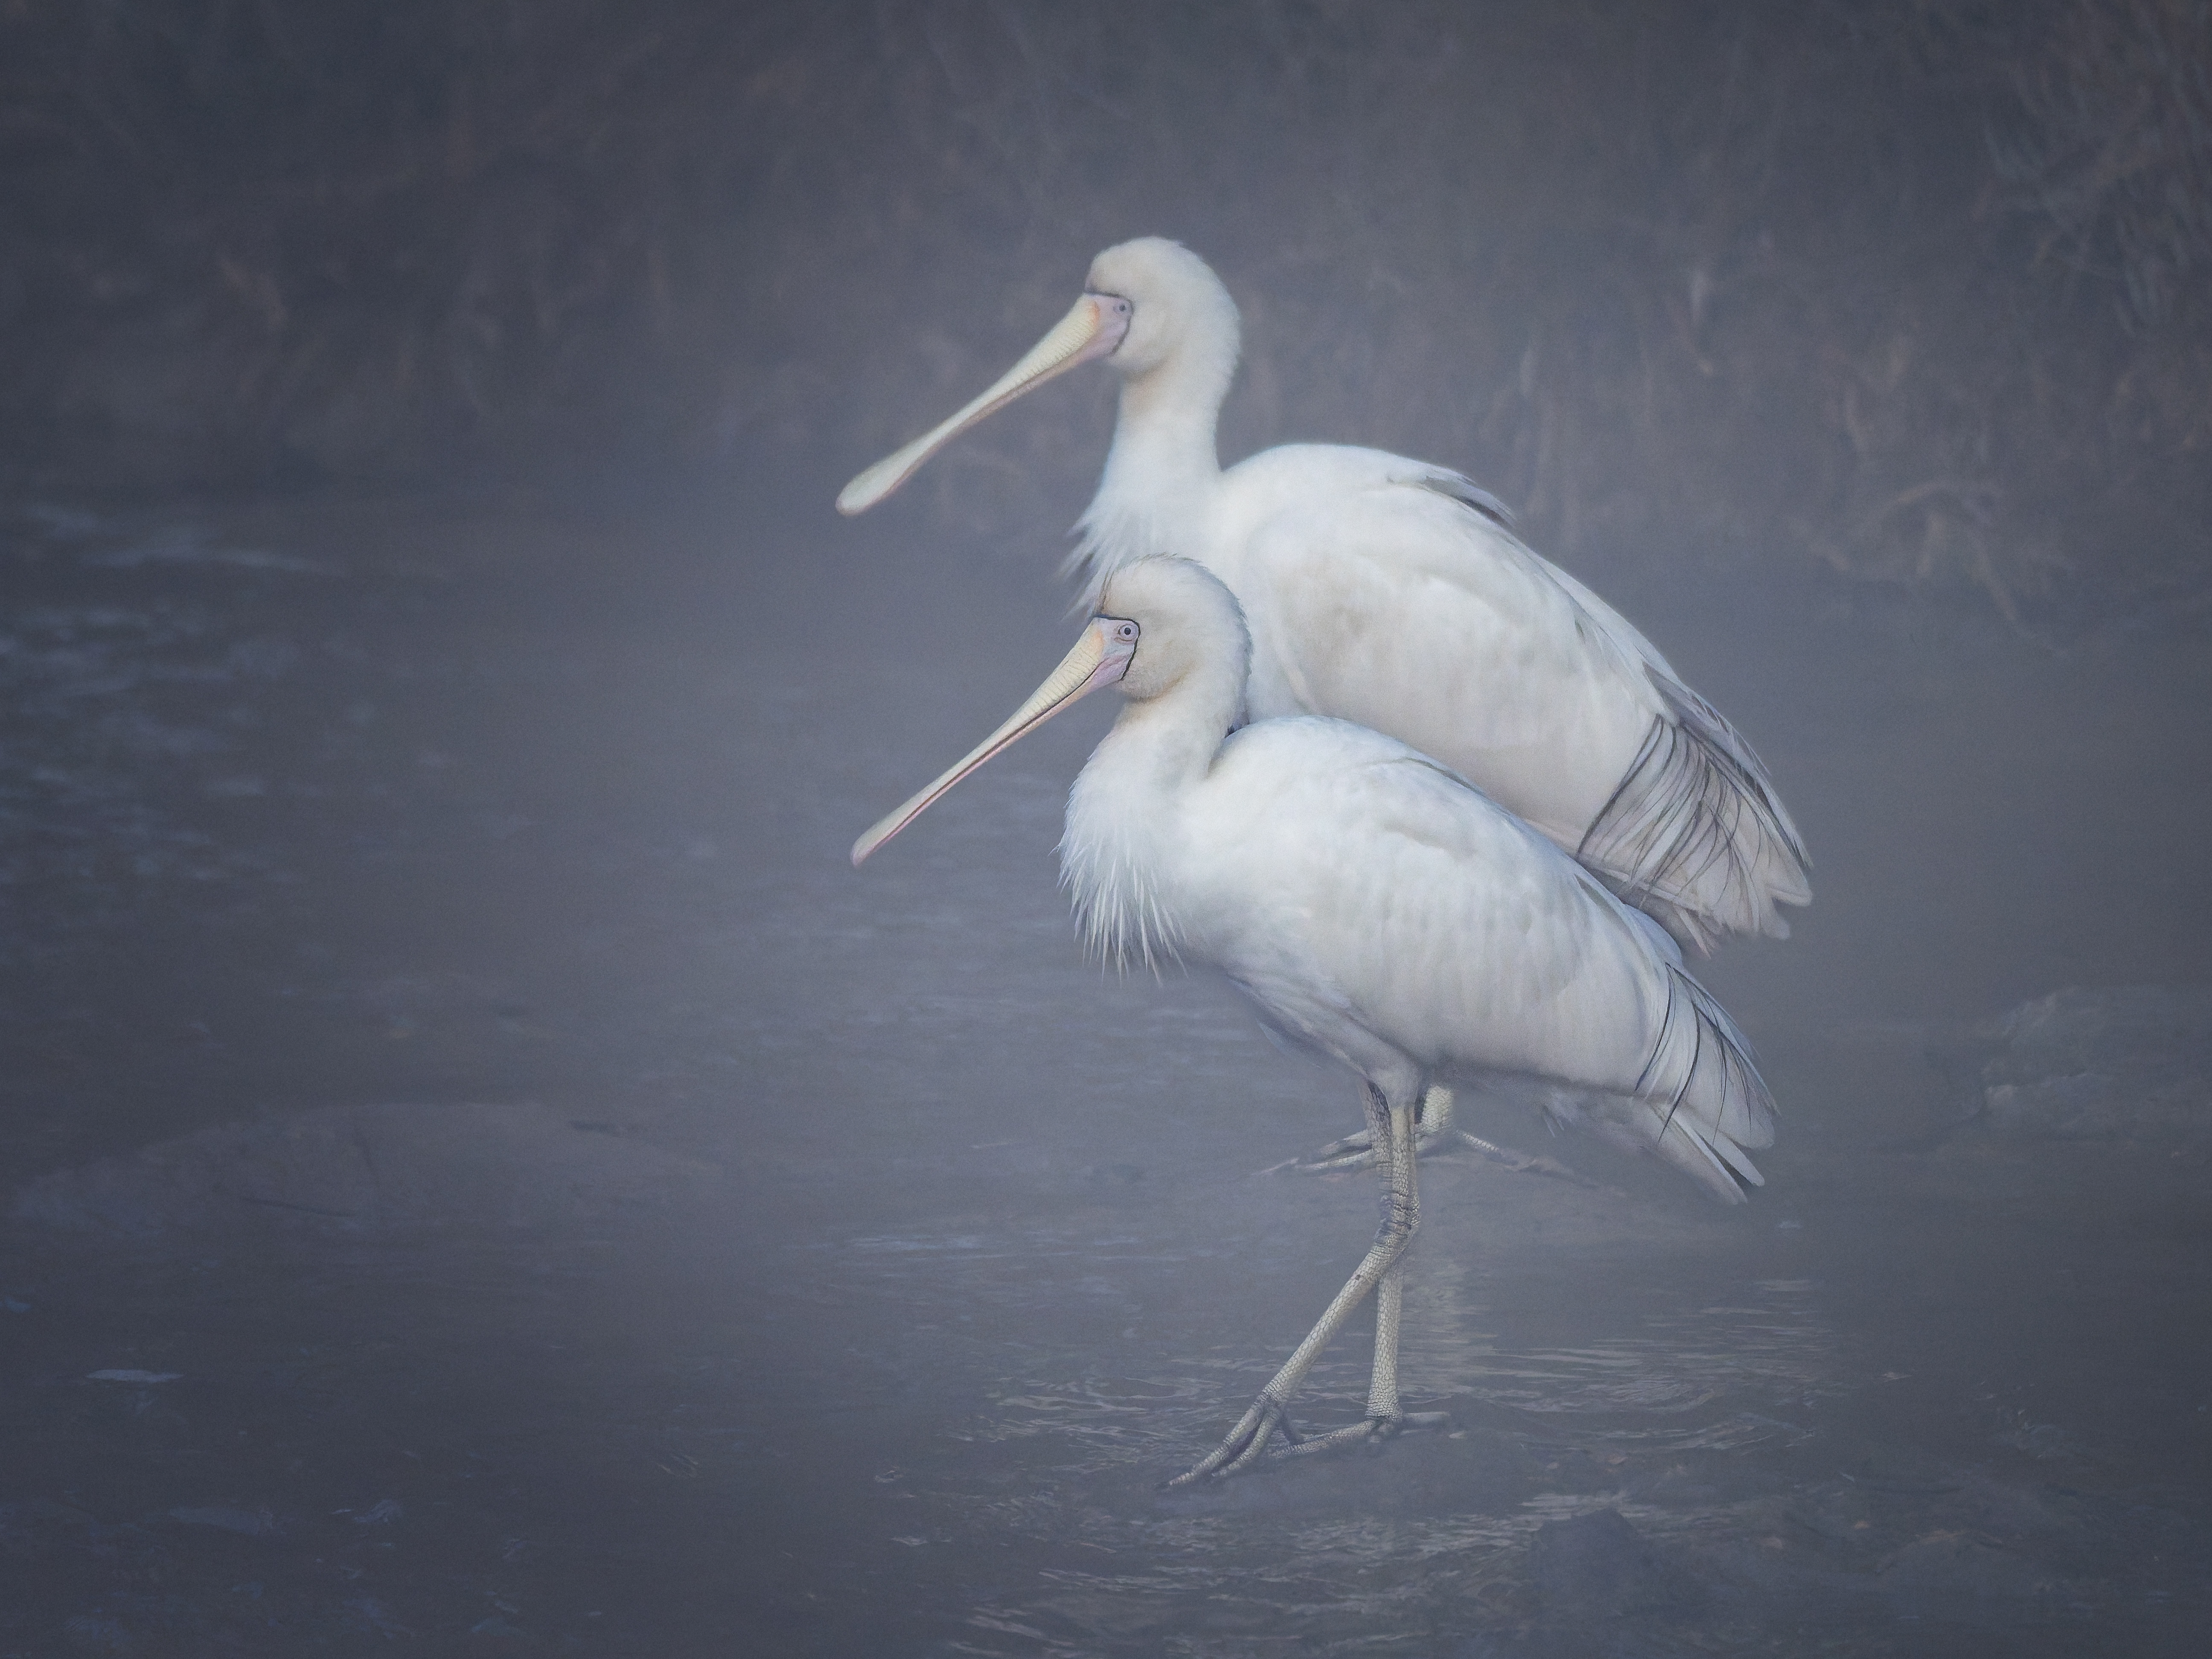
Kaaka-baaka or Yellow-billed Spoonbill (Platalea flavipes).
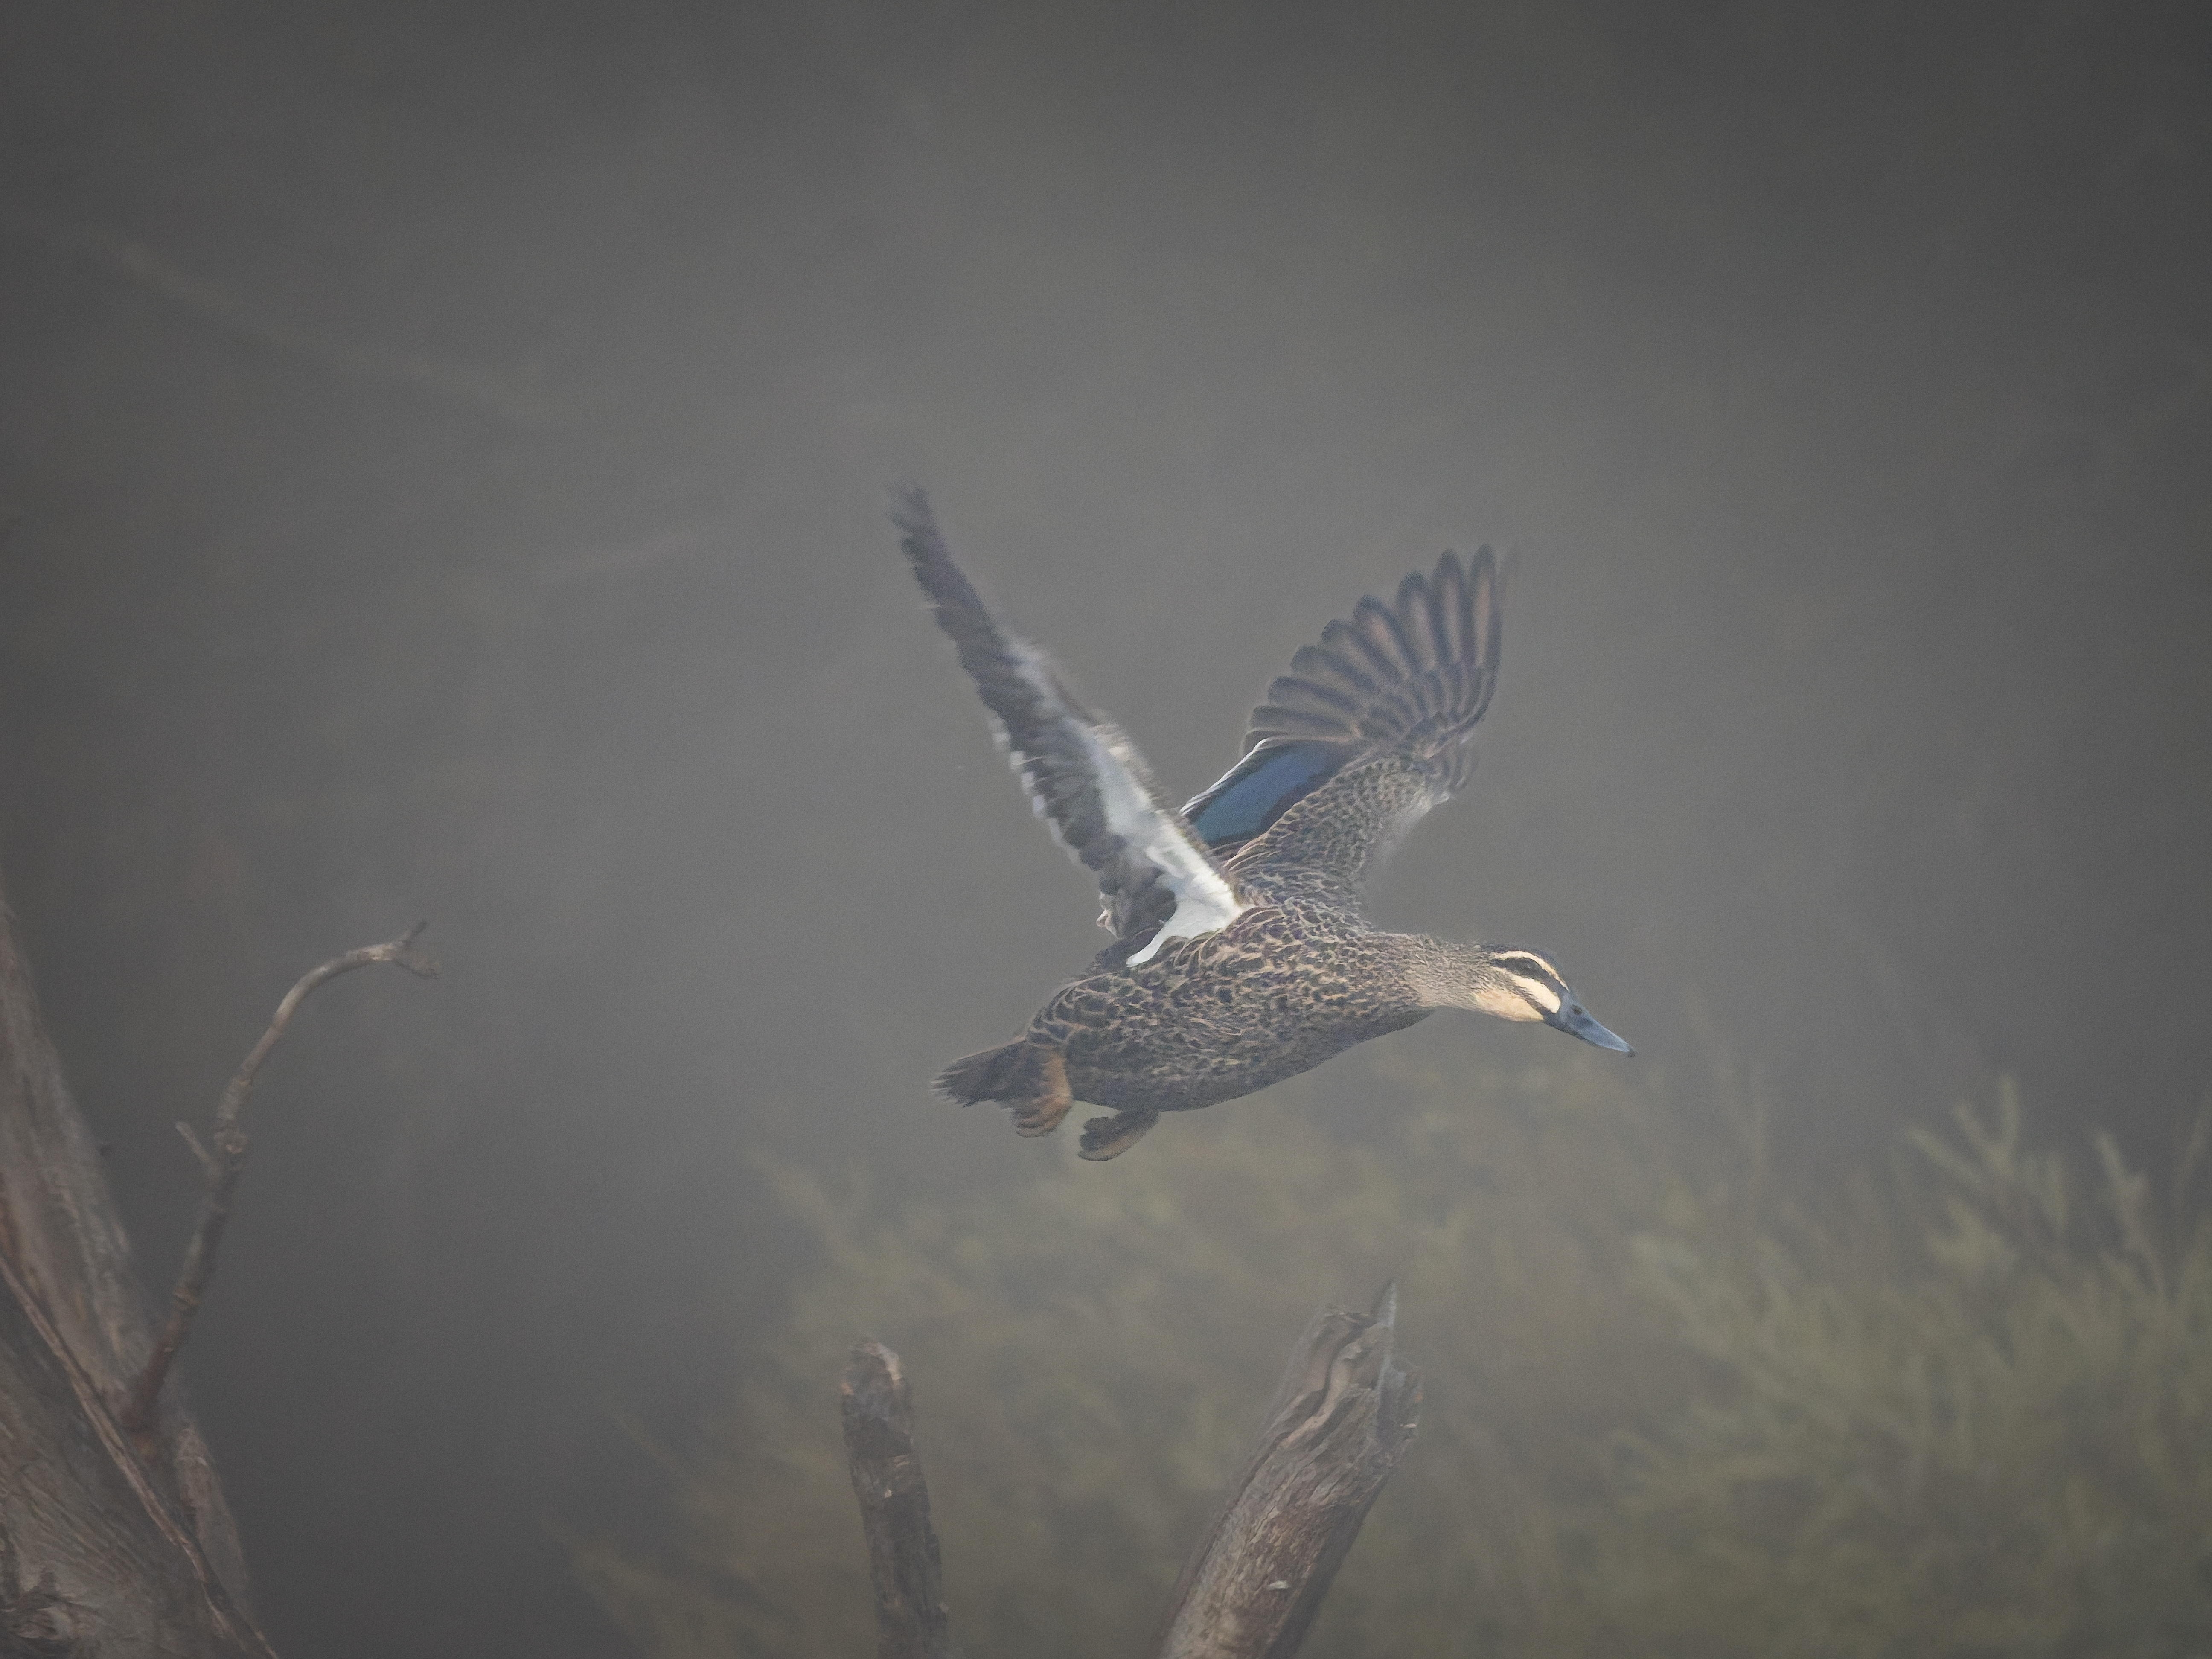
Ngowonan or Pacific Black Duck (Anas superciliosa).
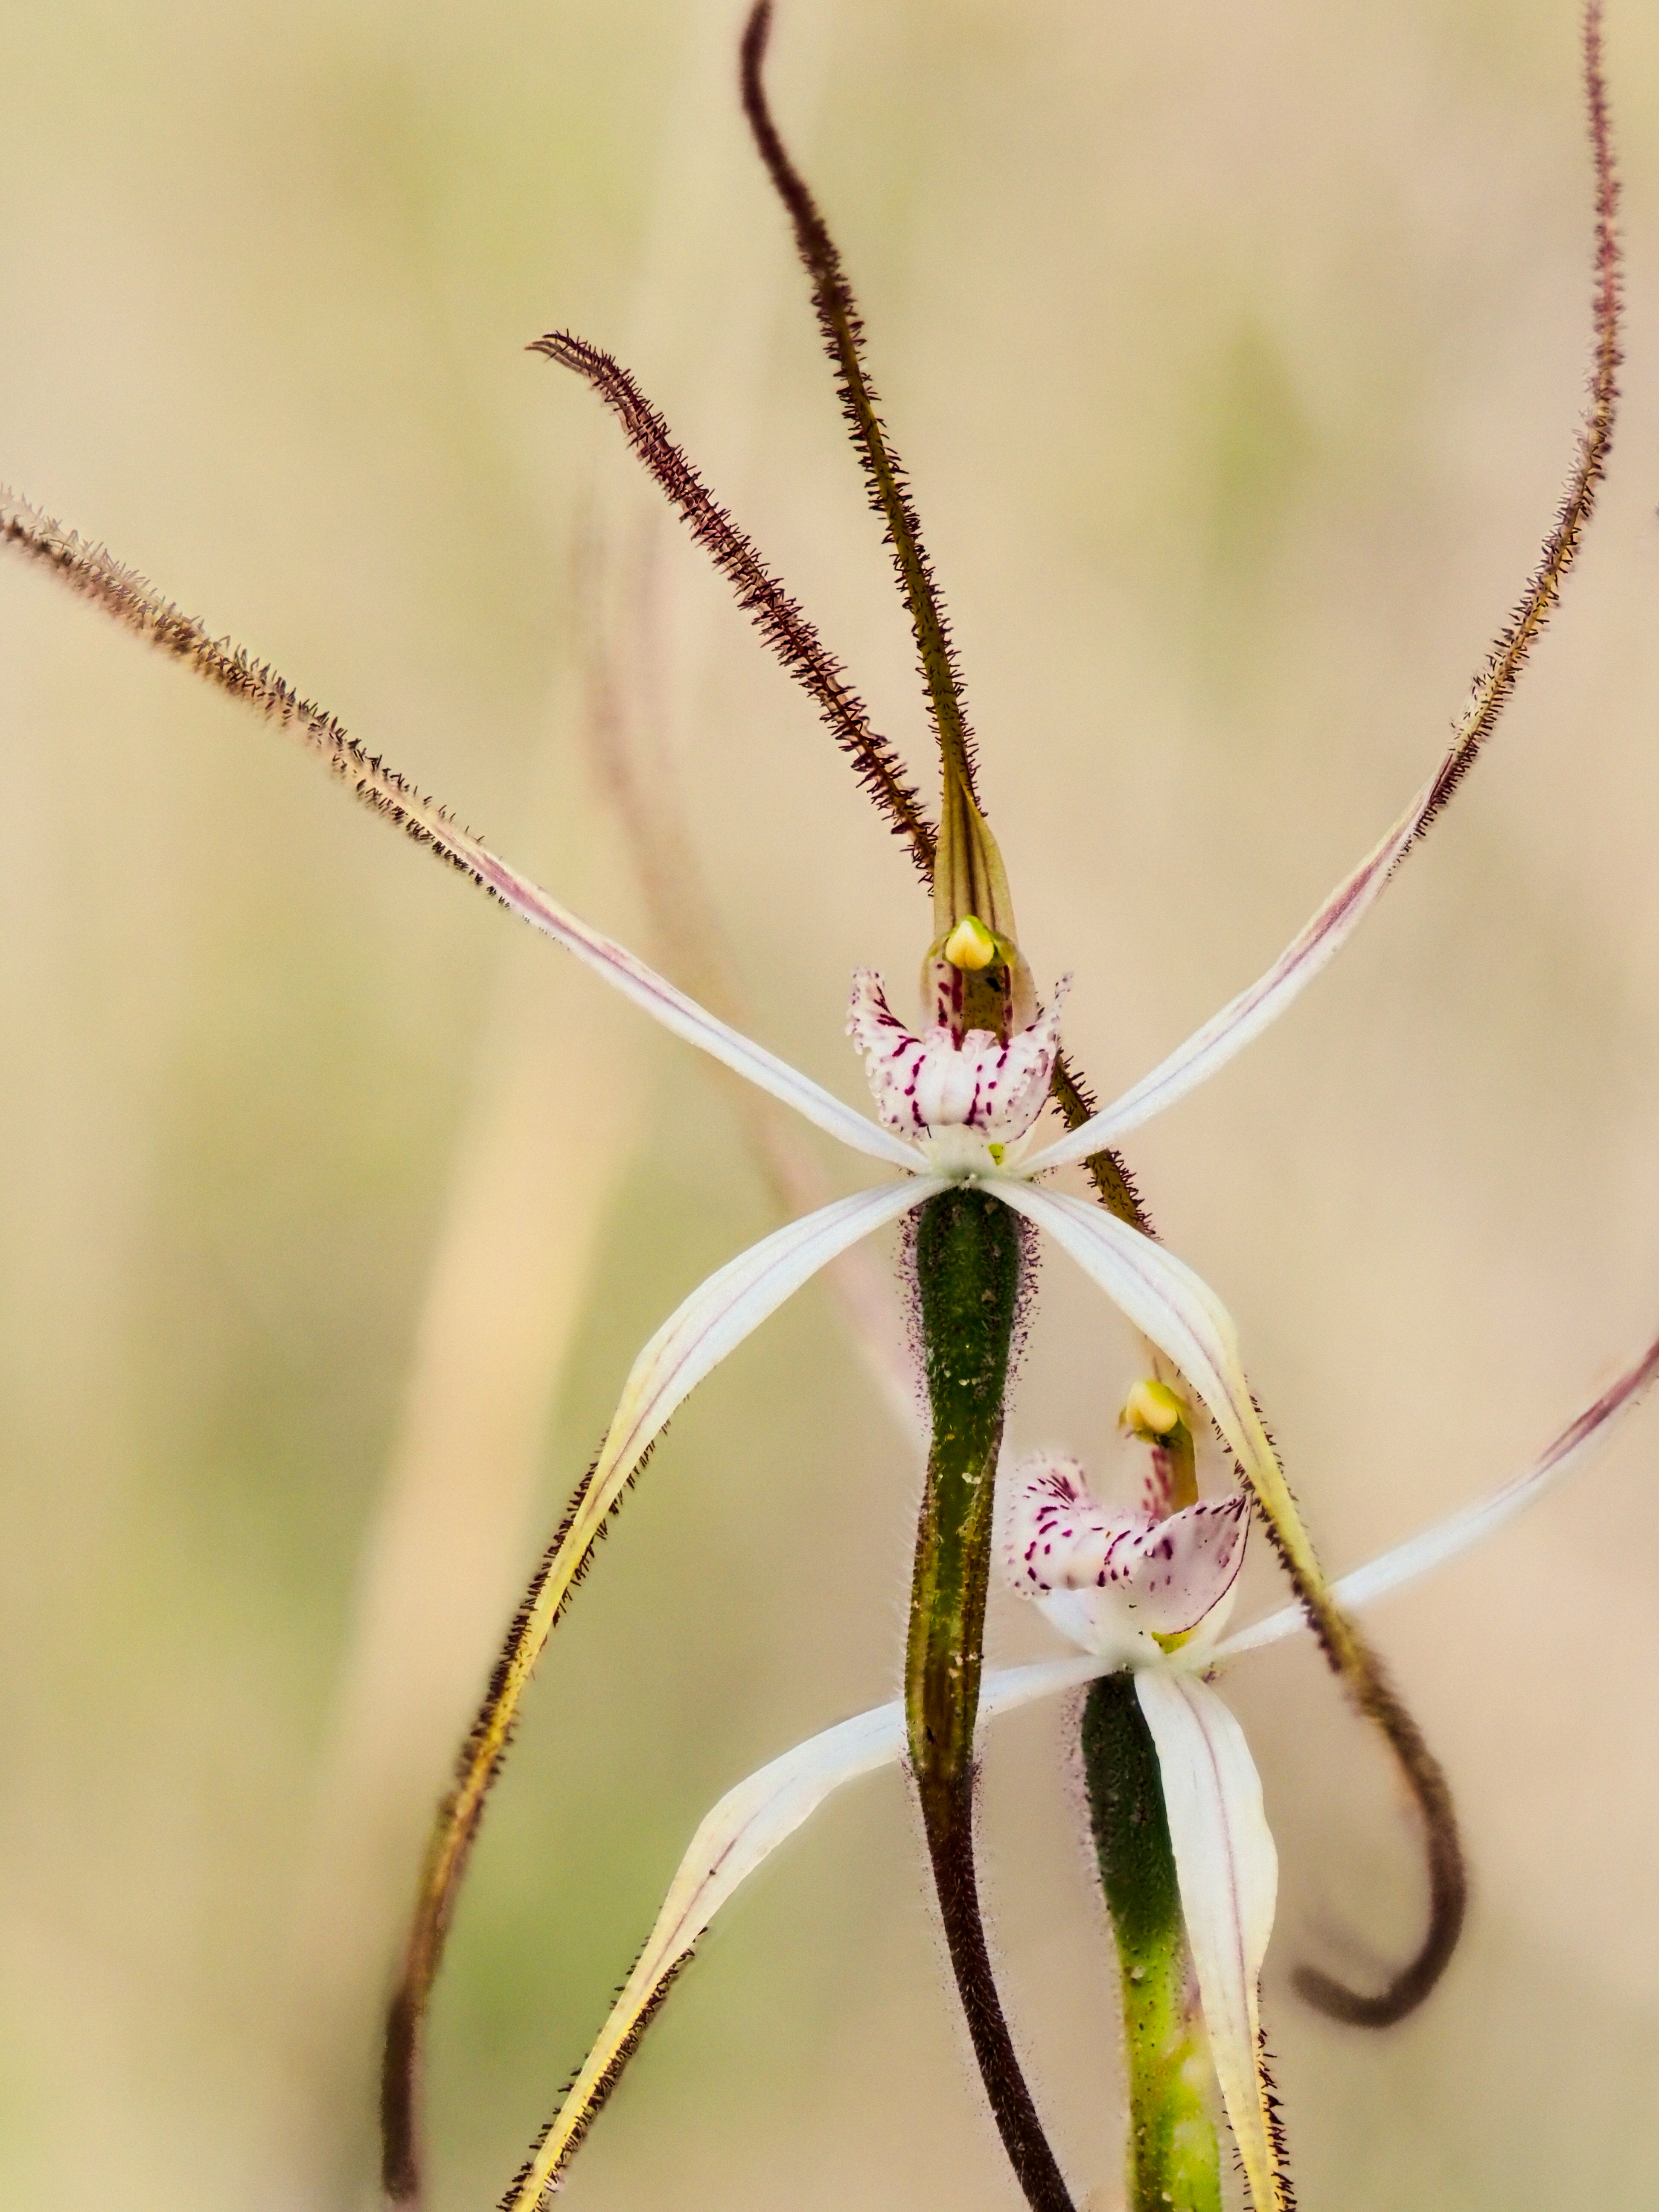
Talbot’s Spider Orchid, Caladenia pendens subsp talbotii. Kweda, Western Australia.
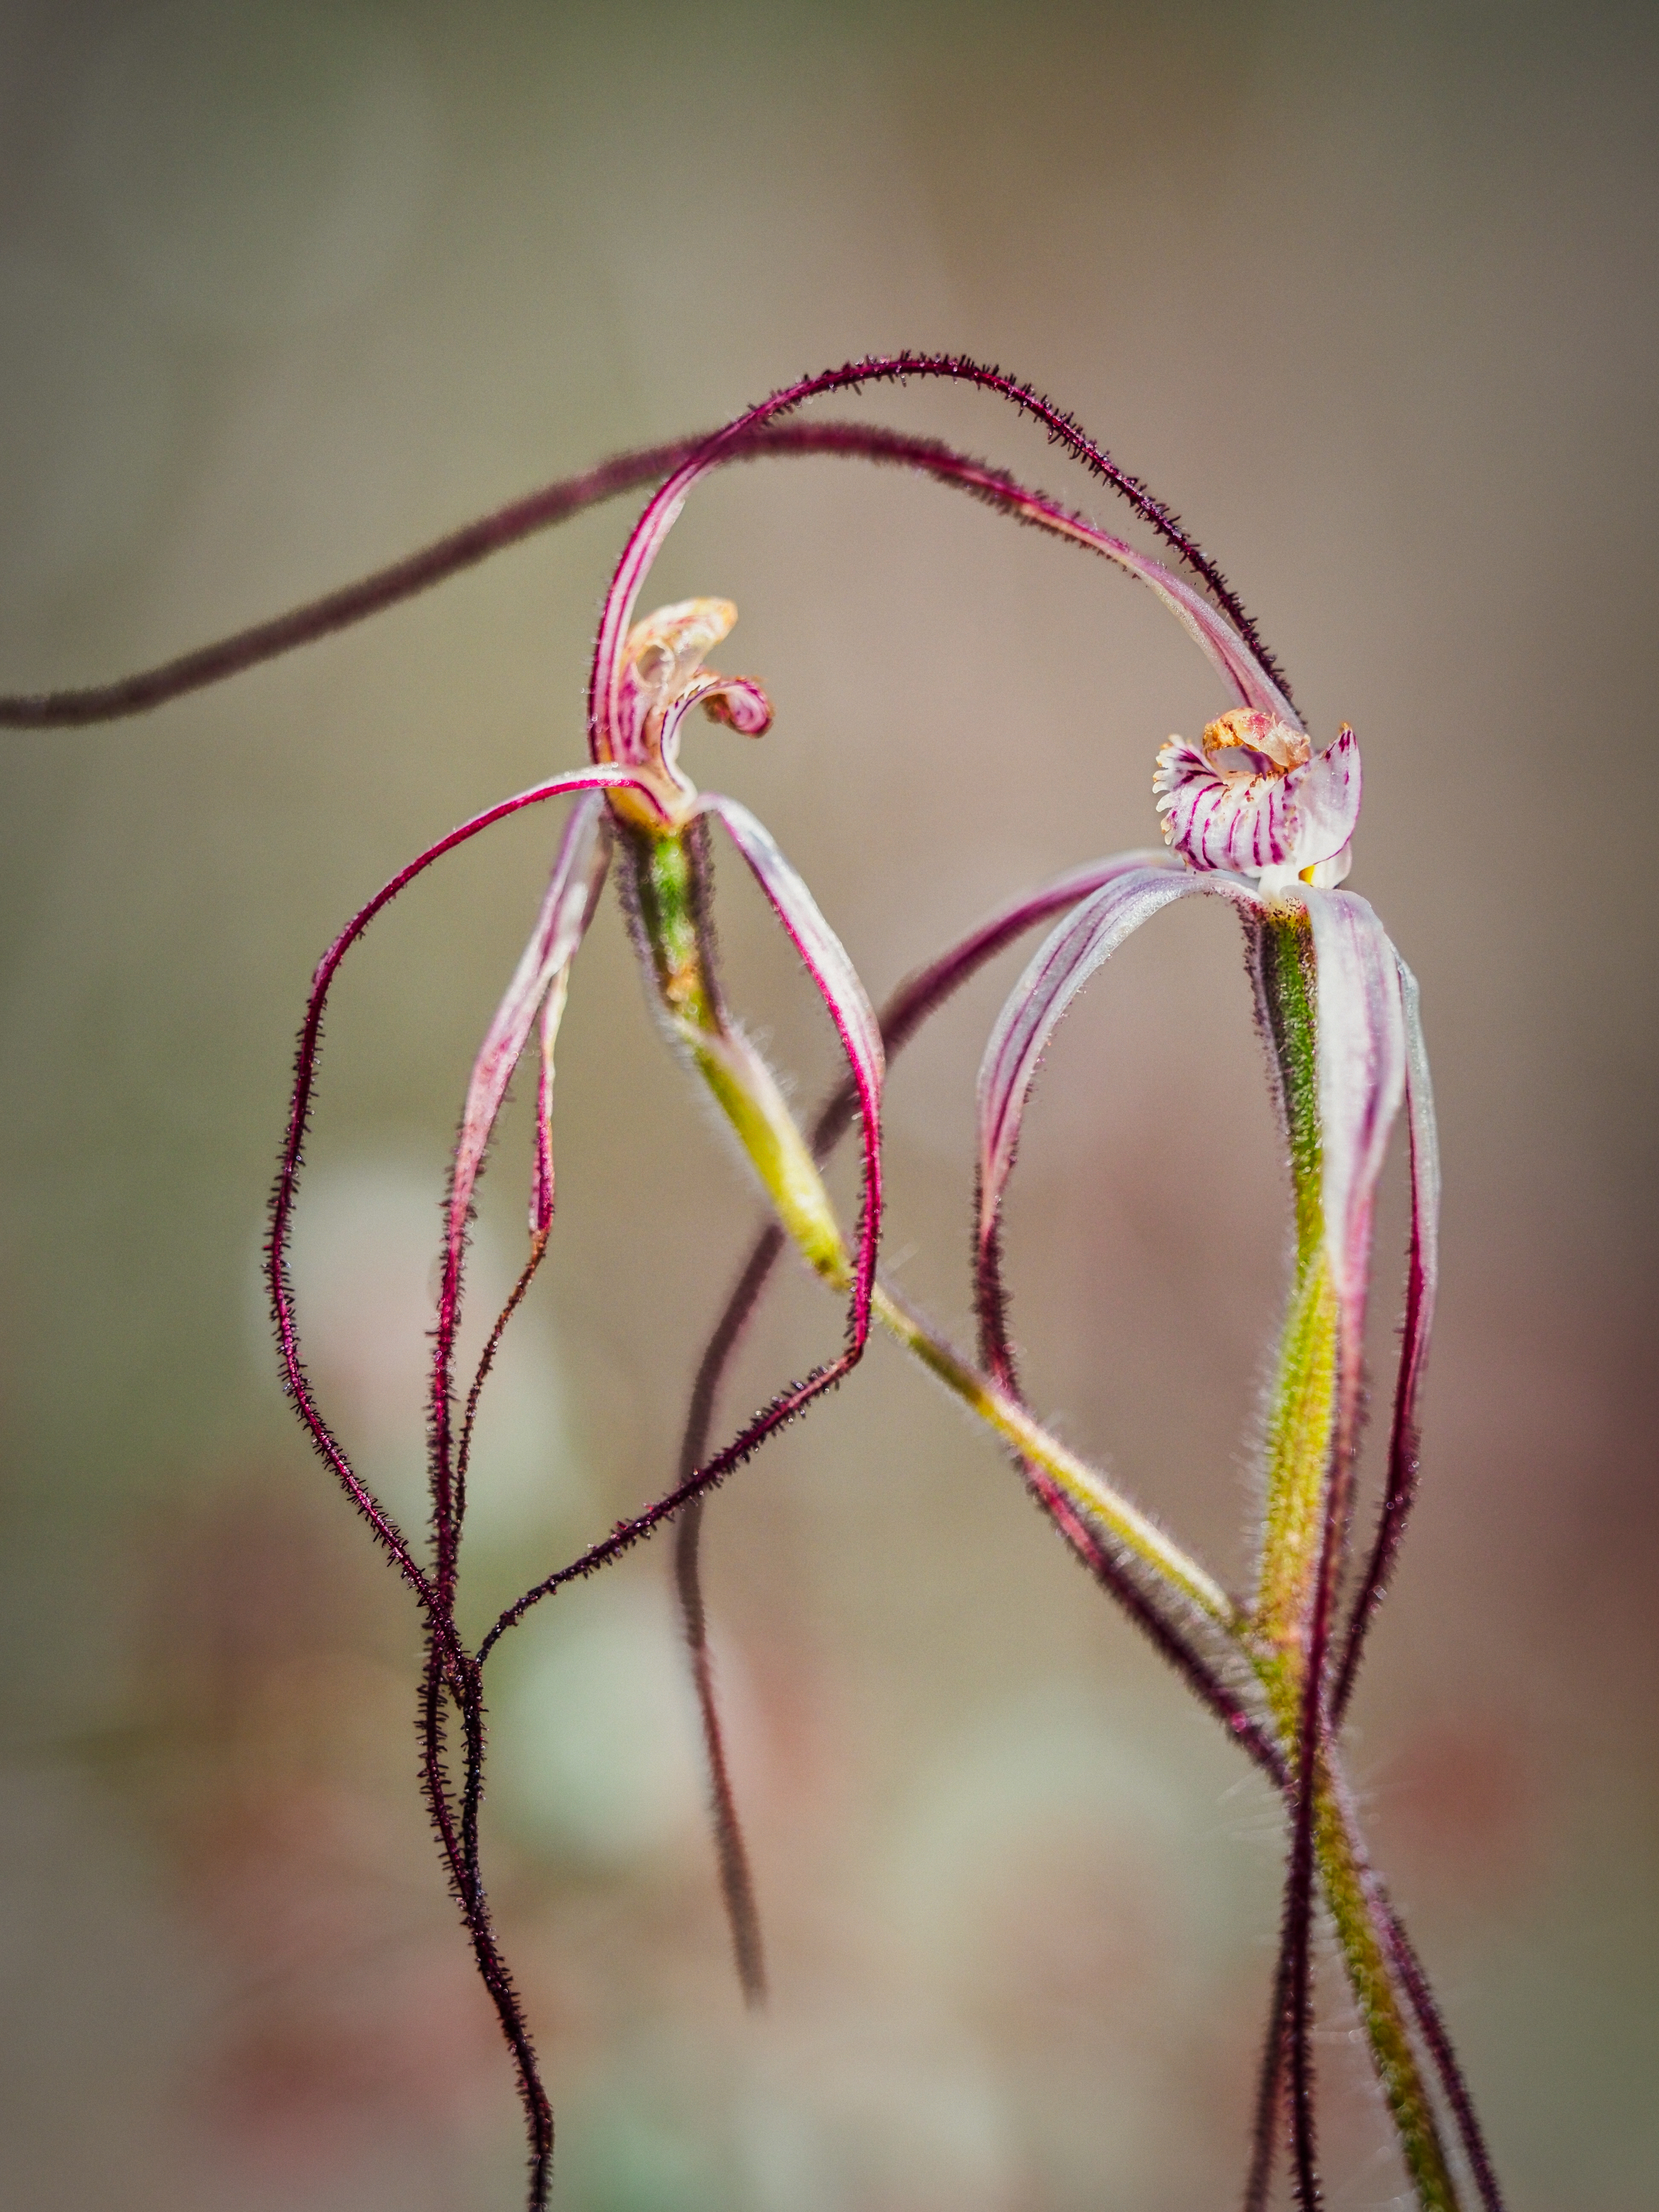
Early Wheatbelt Spider Orchid, Caladenia sp. ‘early wheatbelt’. Kweda, Western Australia.
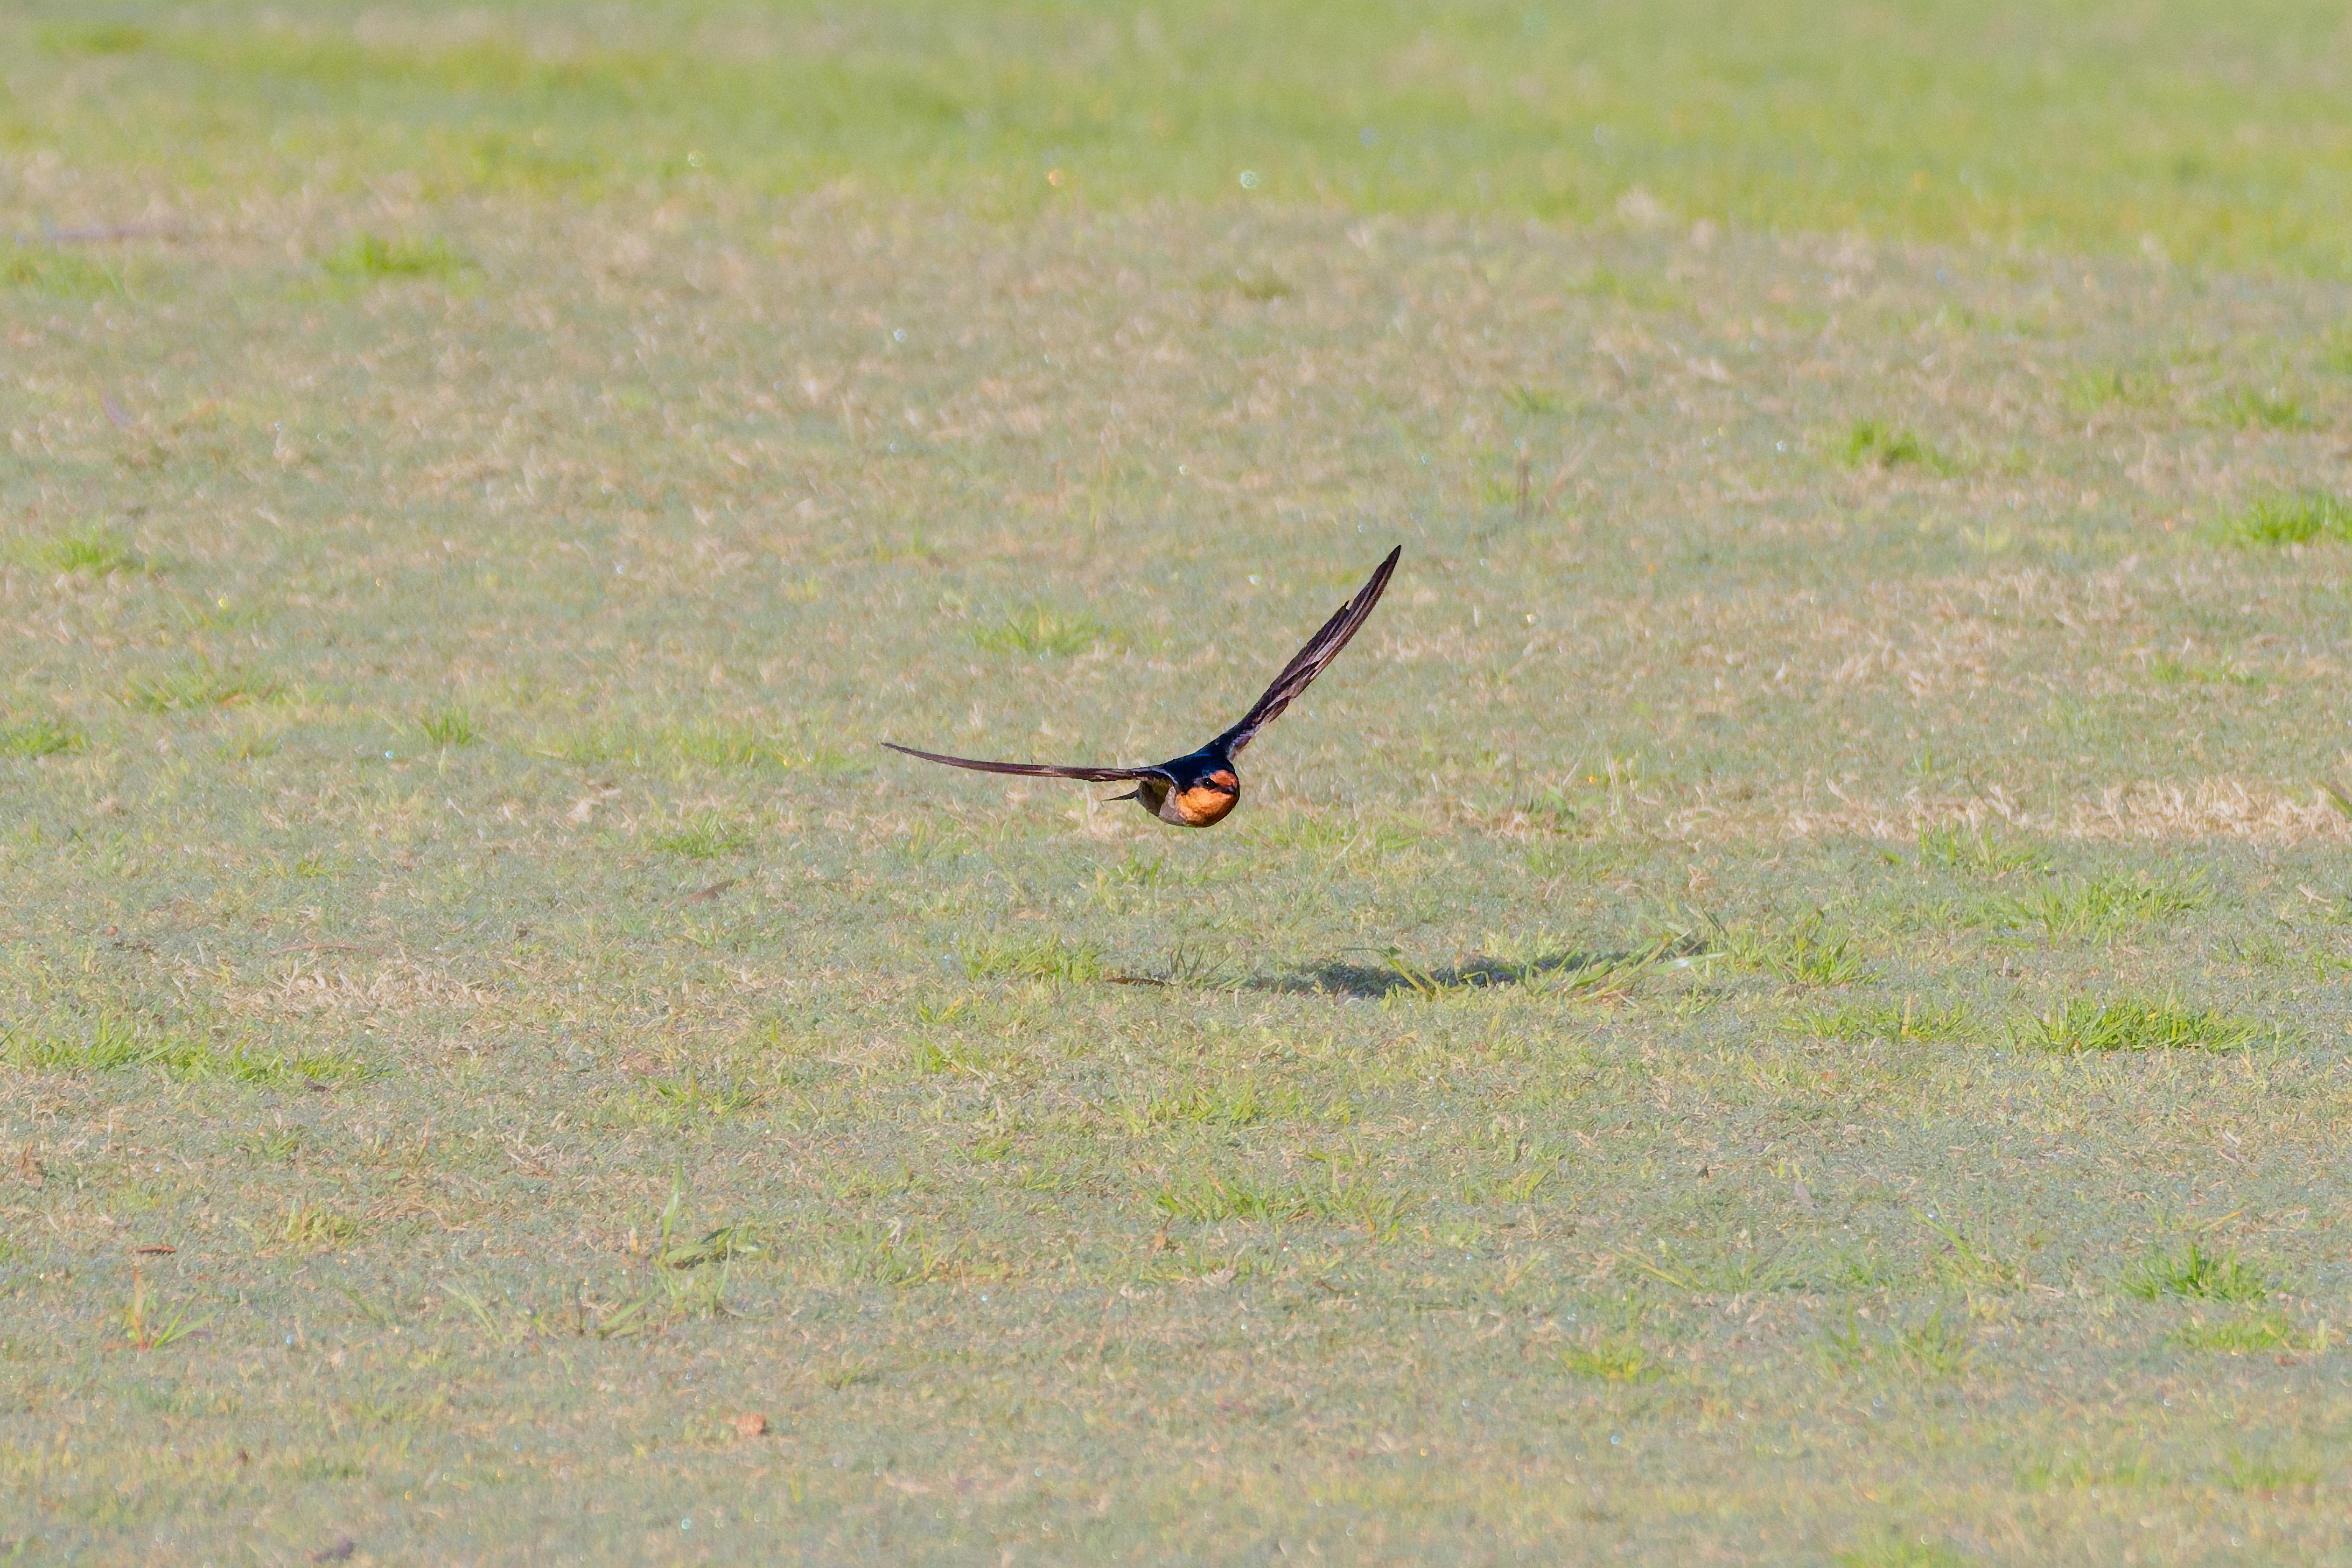
Kanamit or Welcome Swallow (Hirundo neoxxena). York, Western Australia.
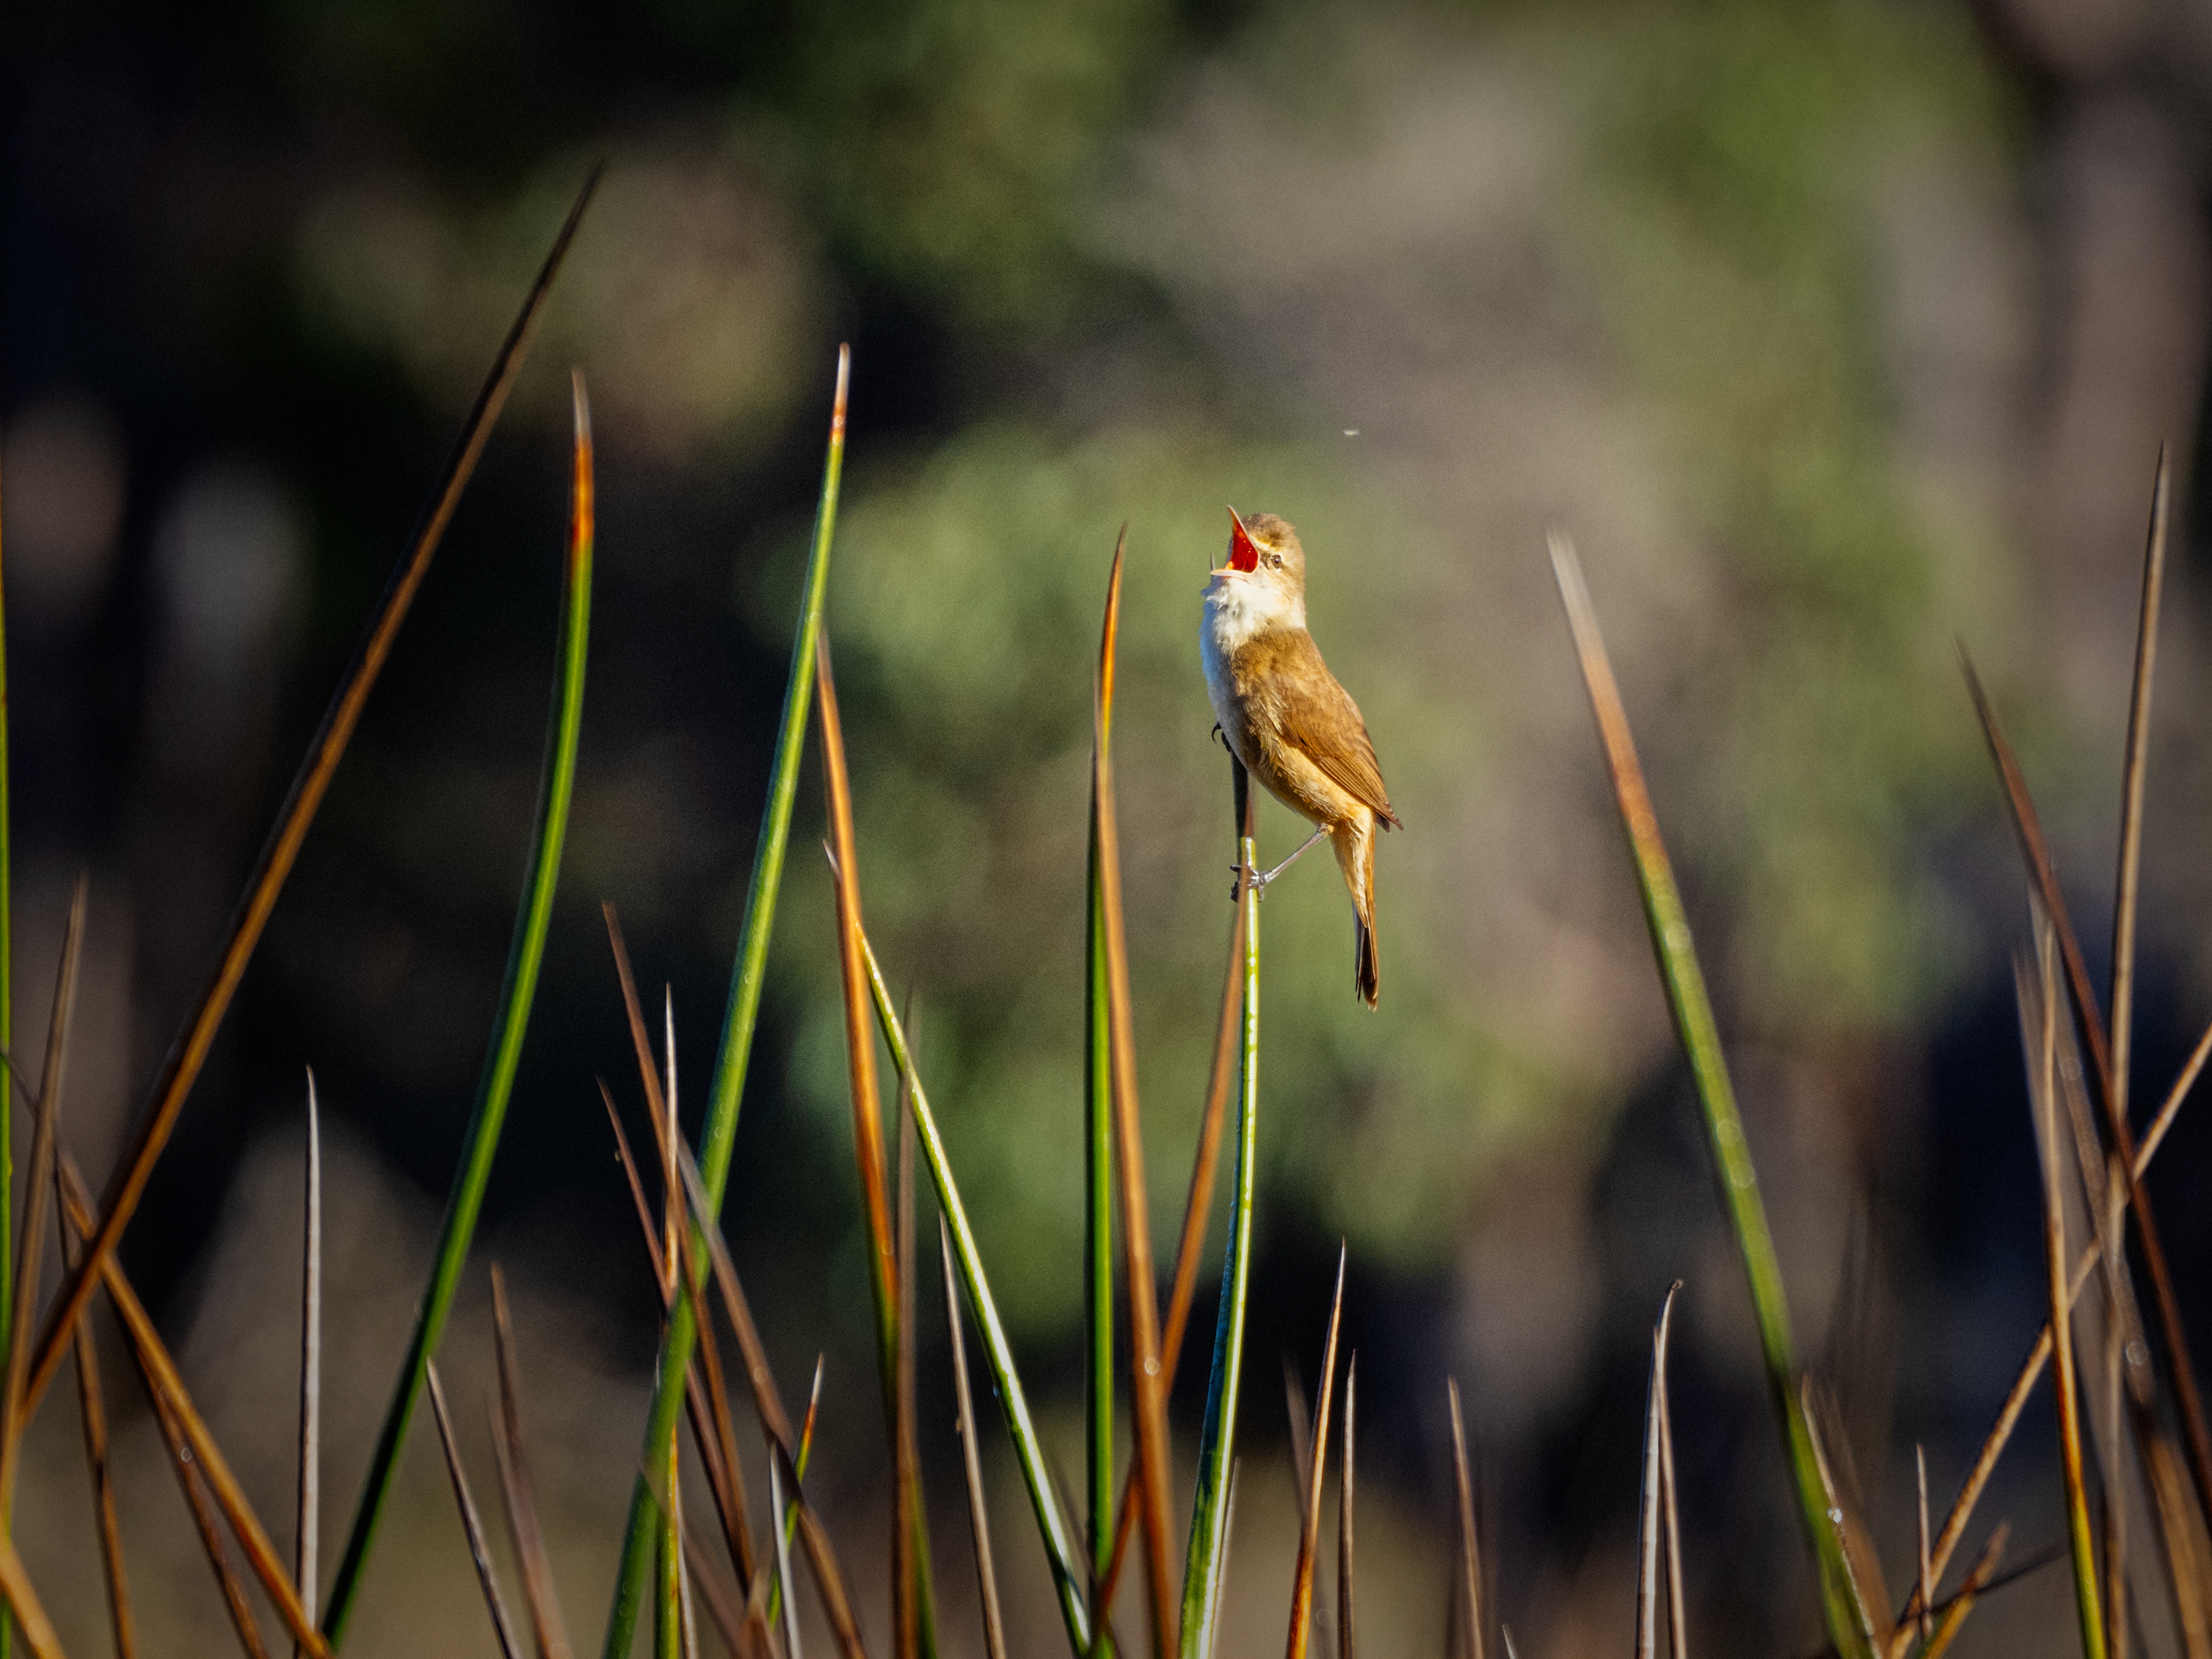
Koordji-koordji or Australian Reed Warbler (Acrocephalus australis subspecies gouldi). Lake Leschenaultia, Western Australia.
Juvenile Djindjokoor or Brown Honeyeater (Lichmera indistincta). York, Western Australia.
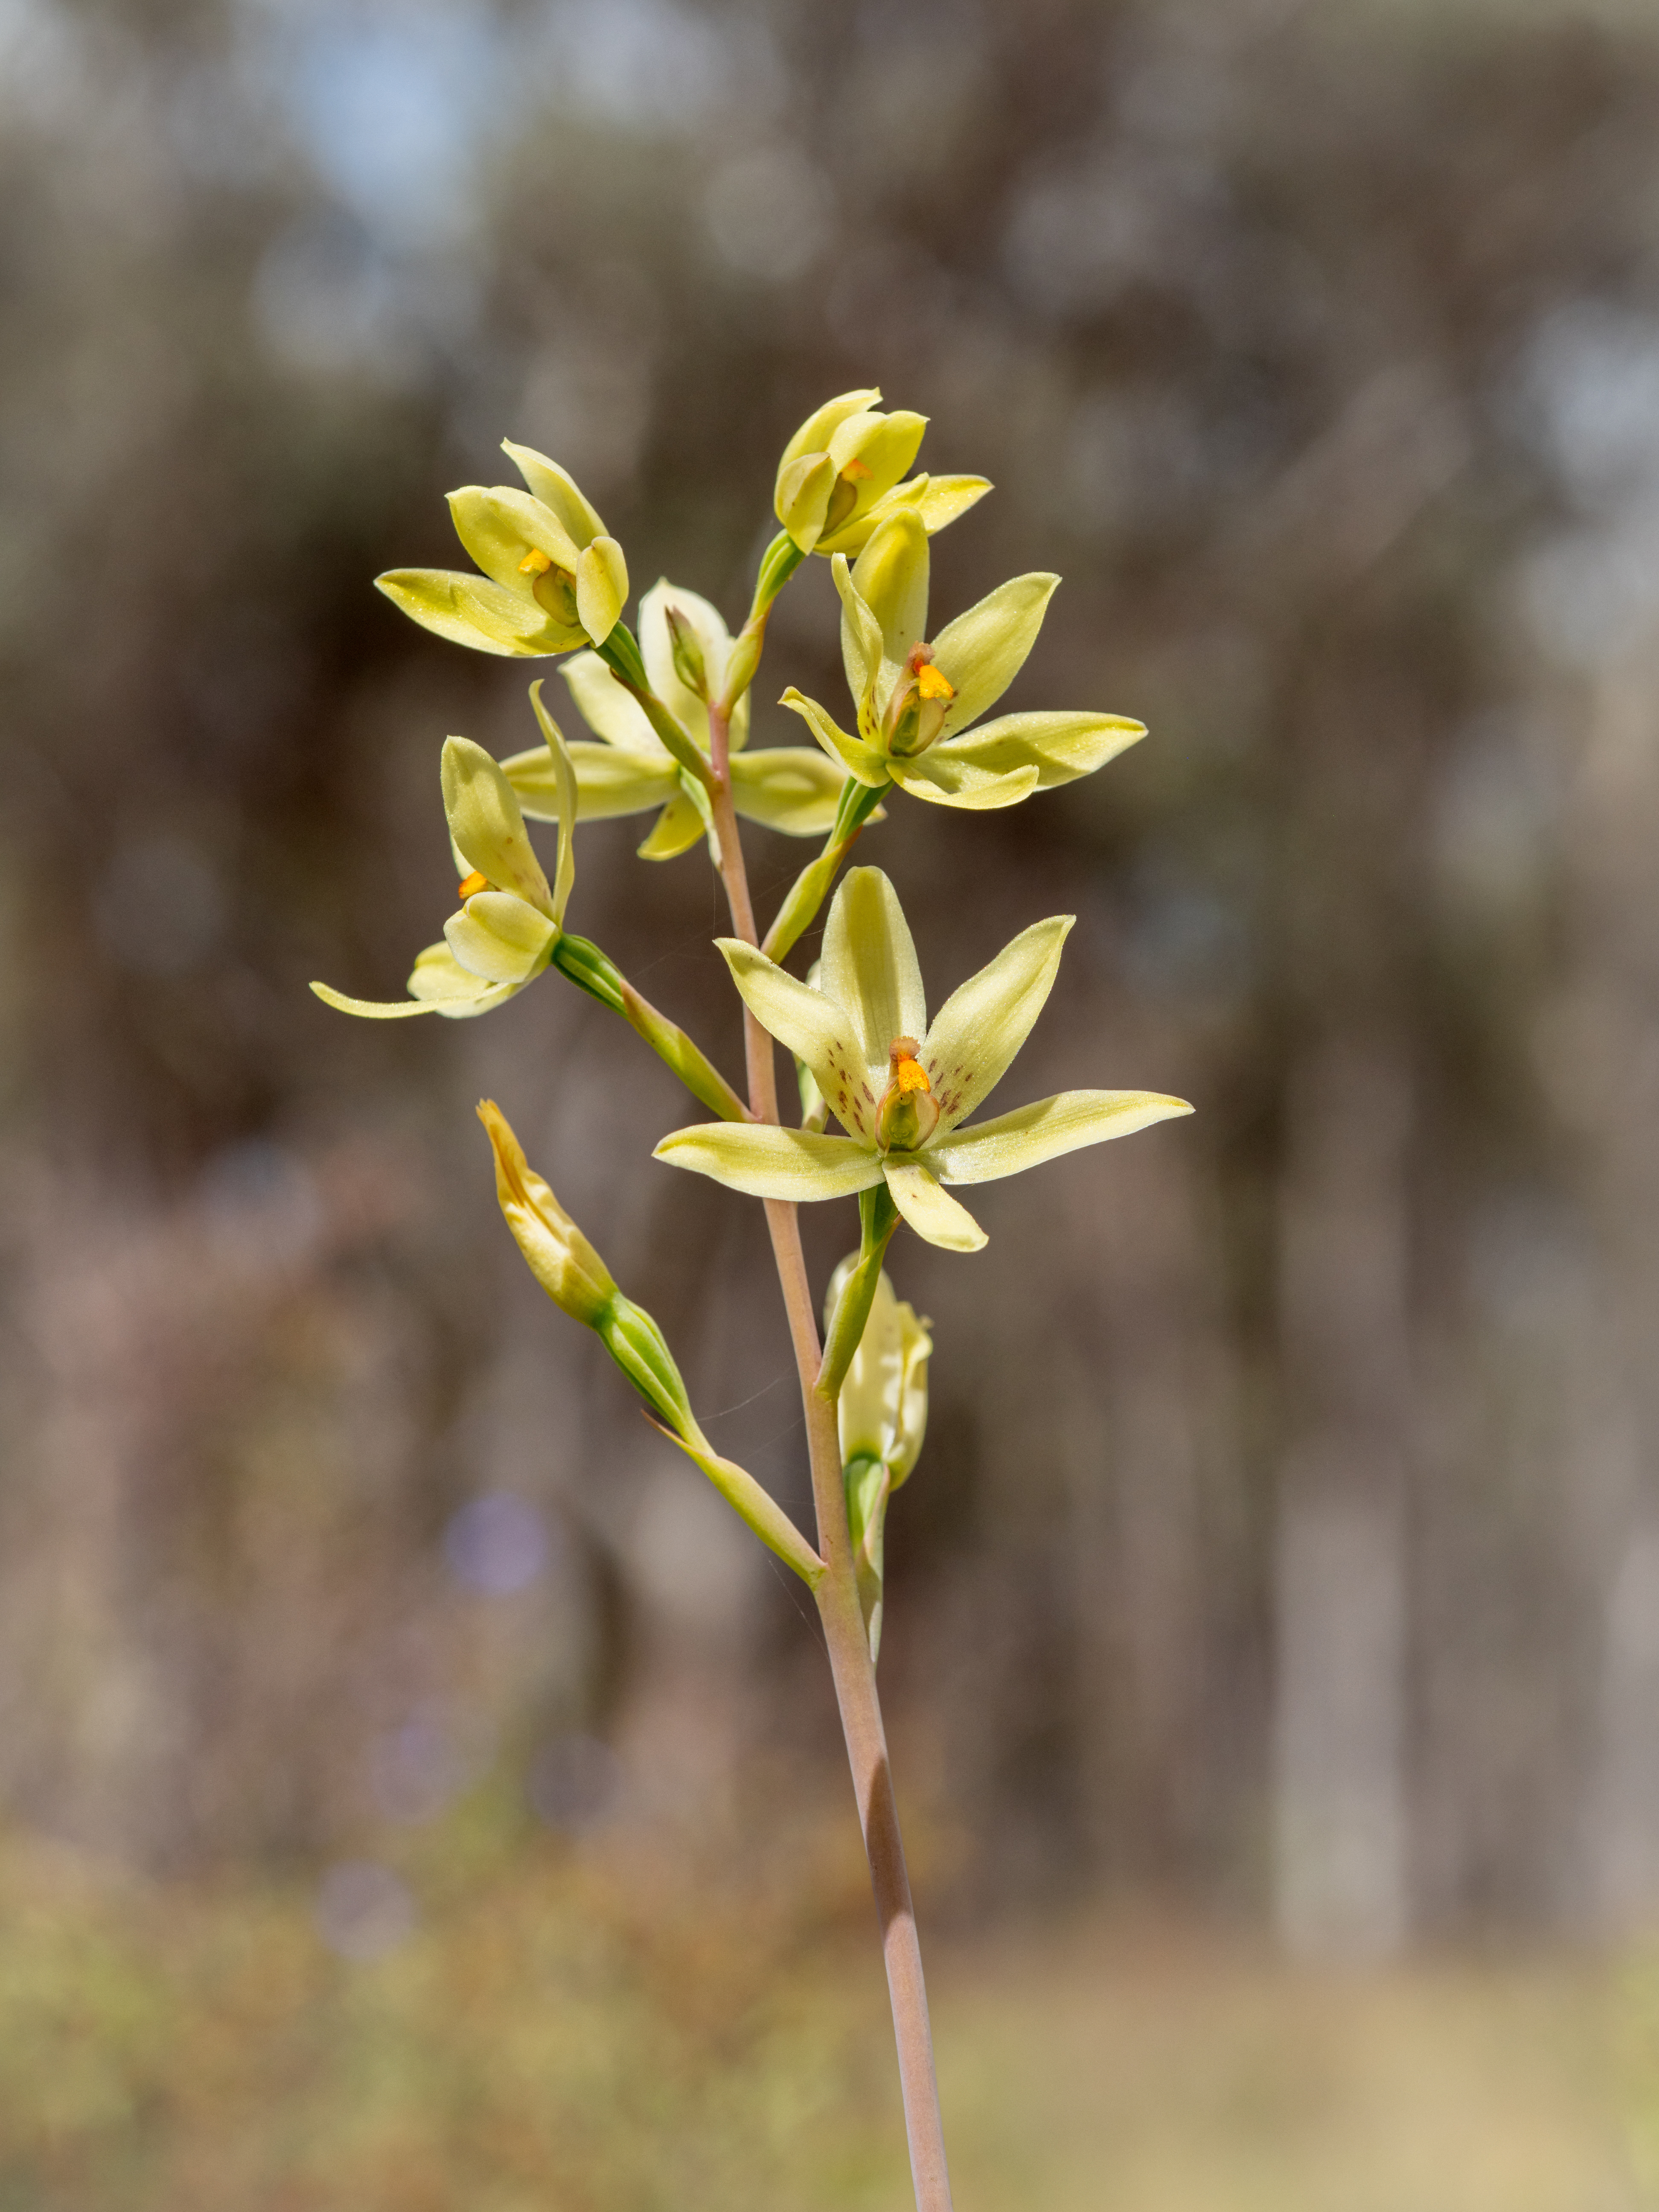
Custard Orchid, Thelymitra villosa. Wandoo National Park, Western Australia.
Kanyinak or Azure Kingfisher (Todiramphus sanctus). Northam, Western Australia.
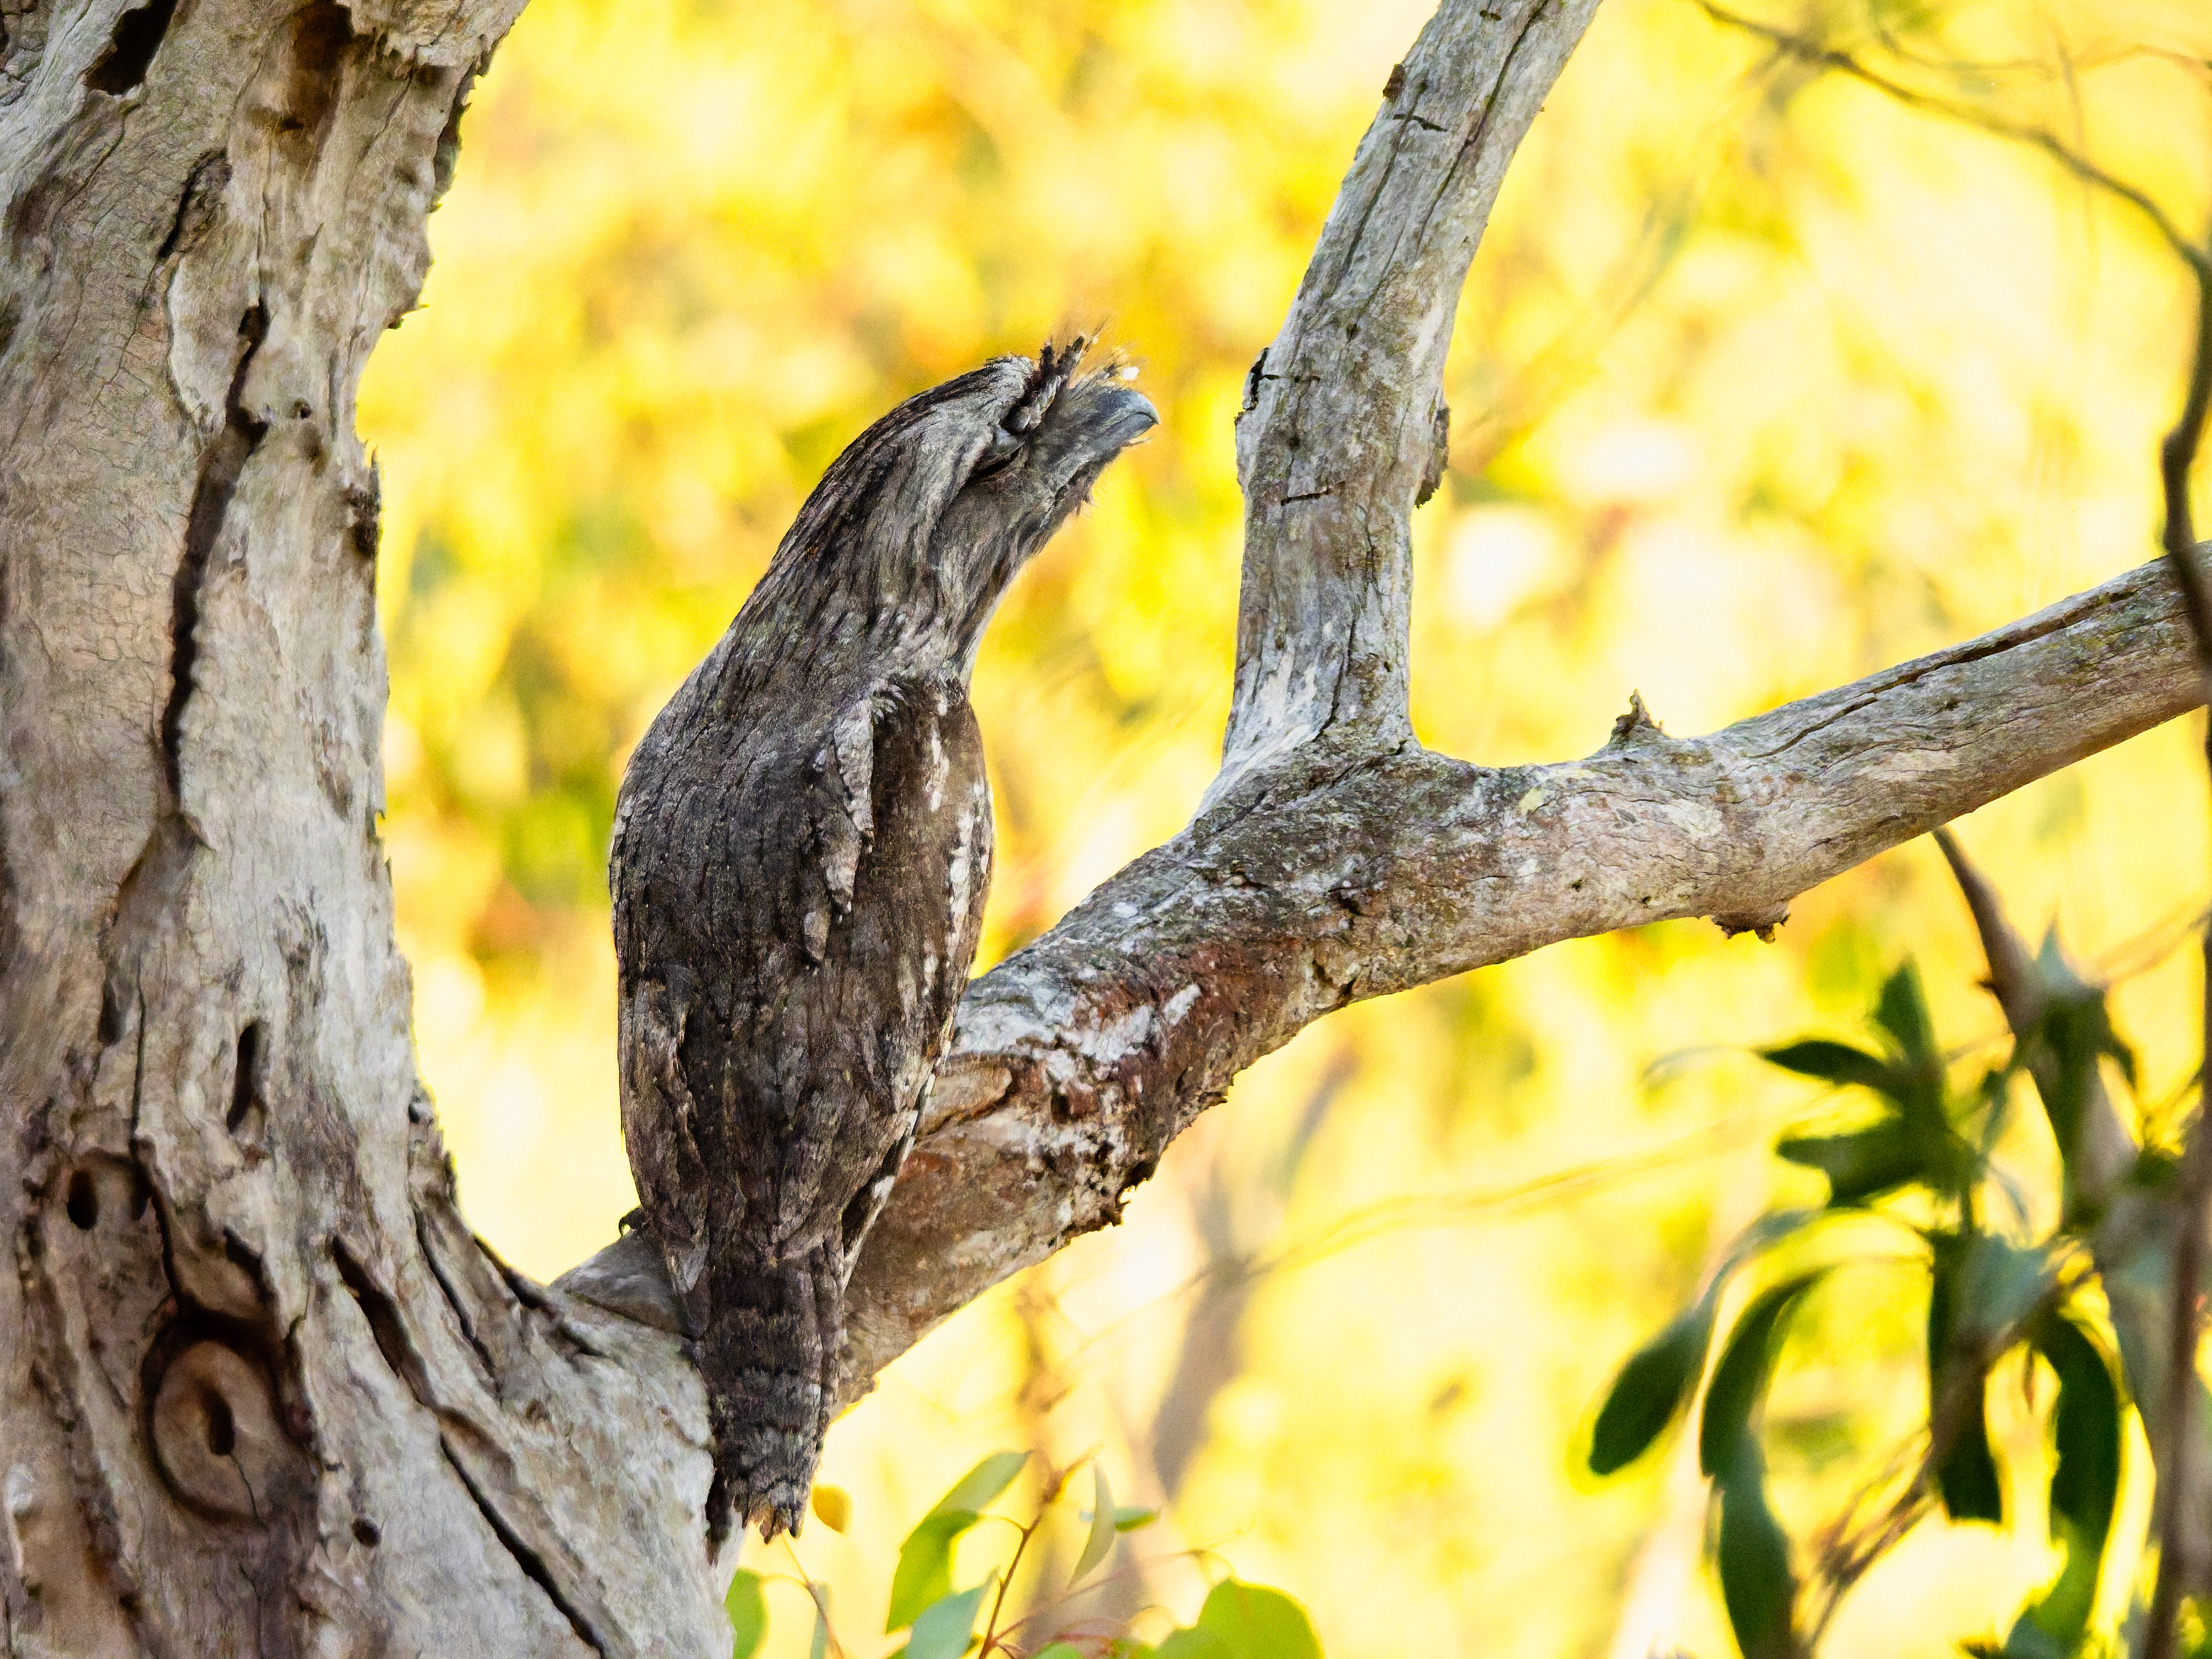
Djoowi or Tawny Frogmouth (Podargus strigoides). Narrogin Railway Dam, Western Australia.
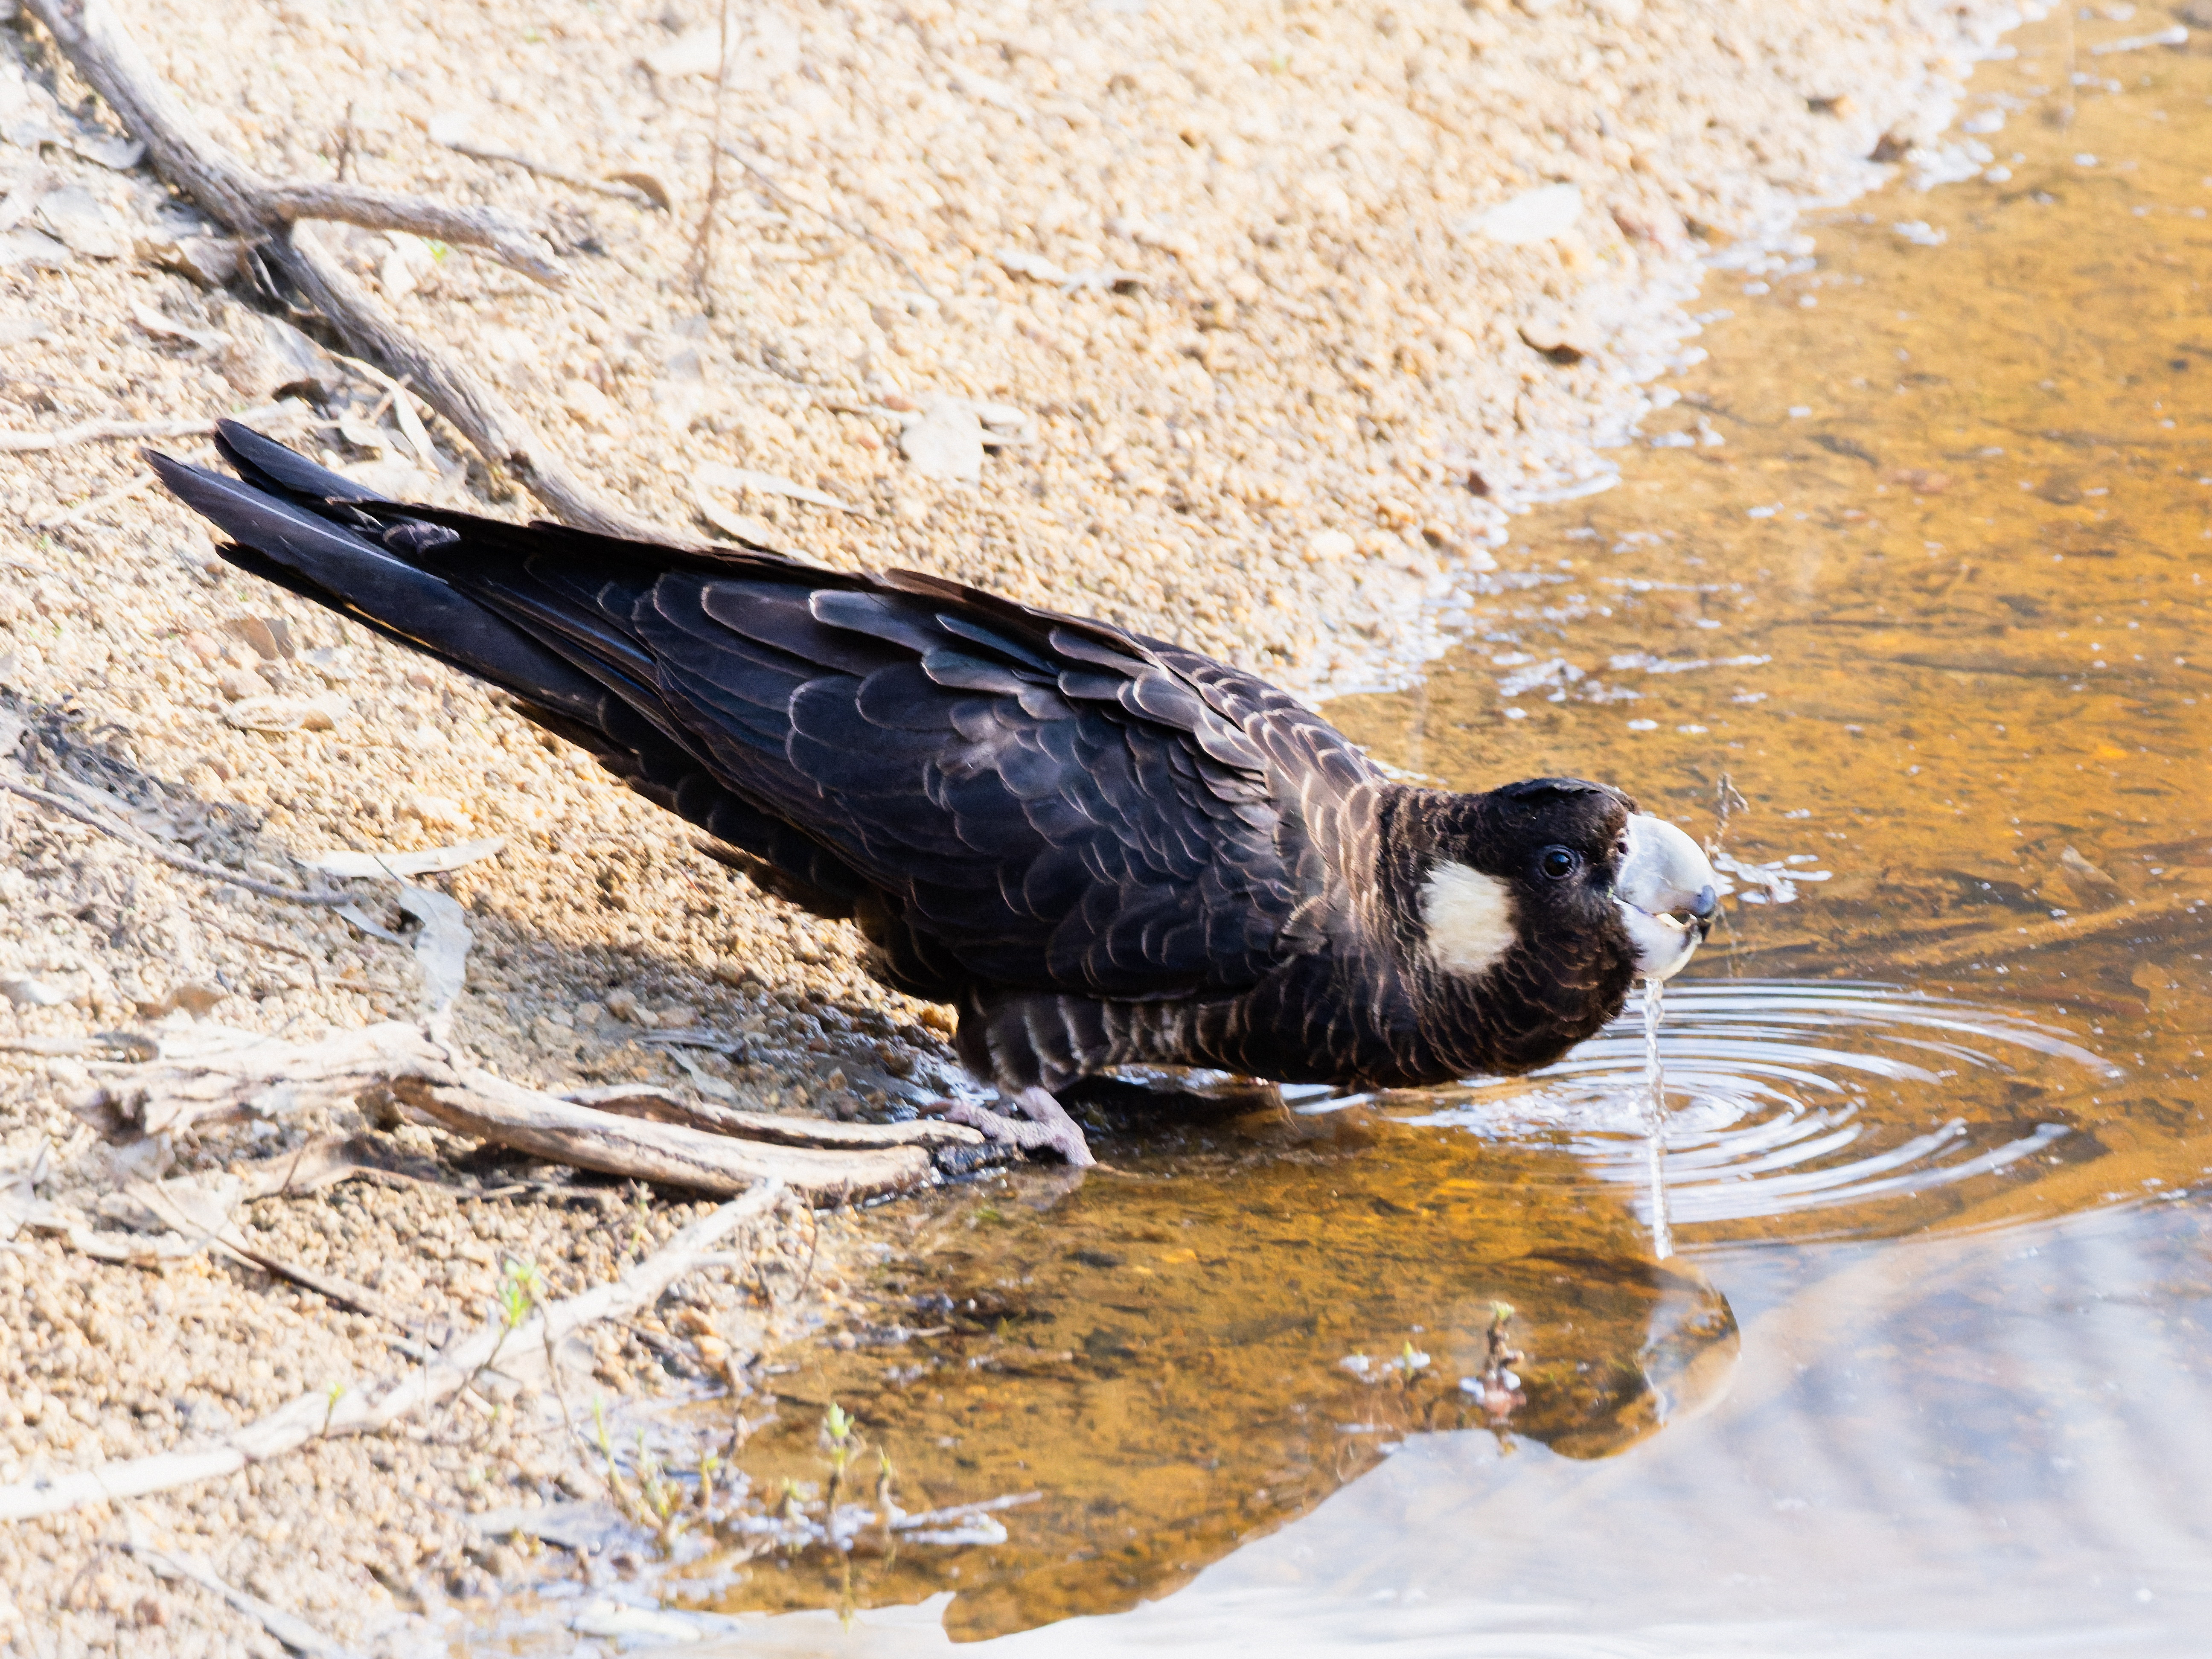
Ngoolyak or Carnaby’s Black-cockatoo (Calyptorhynchus latirostris). Old Mill Dam, Dryandra.
Camera nerdy bit. The most used camera was the Olympus EM1x. Only two of the photos were taken with a sensor bigger than Micro Four Thirds.
I hope all of you had a good 2025 and that 2026 brings happiness and health to you all. Happy New Year.
Events at home over the last few weeks have meant that I haven’t had the opportunity to do very much photography. Most of the blog entries are written a few weeks before they are published because of the vagaries of finding wildlife so that backlog came in handy for when I couldn’t get out and about. But now the well has run dry.
Crusader bug (Mictis profana) instar nymph.
What little photography I have done recently has been in our back garden. Thankfully we have quite a lot of wildlife visit that I can point a camera at. Most of it has been of the usual suspects, the more common species that can be found in gardens in this part of the world, but there have been a couple of unexpected visitors which was very nice. For the best part of a year we had a problem with stray cats killing a lot of the birds and reptiles. But one of our neighbours has taken the main culprit in and the wildlife numbers are climbing back to what they were.
Wall Skink or Fence Skink (Cryptoblepharus buchananii) cooling off in the bird bath.
Yoorn or Bobtailed Lizard (Tiliqua rugosa)
Kanyinak orSacred Kingfisher (Todiramphus sanctus) on our TV aerial with a freshly caught Bombay Runner (Periplaneta americana).
Bambon or Rufous Whistler (Pachycephala rufiventris). It is a joy to hear this bird sing every morning.
Nye-nye or Zebra Finch (Taeniopygia guttata) looking for food on the back lawn
Djida or Yellow-rumped Thornbill (Acanthiza chrysorrhoa).
Cabbage White Butterfly, Pieris rapae.
Giant grasshopper or hedge grasshopper (Valanga irregularis) resting on the garden fence.
The garden provided a great deal of solace over a difficult time and it always amazes me how restorative being in nature can be. Hopefully, over the coming weeks we’ll be able to get out and about more.
…of sorts. I wrote recently about my attempt to abandon my Olympus cameras and move to Sony and how it was an unhappy experience. Well last weekend I went out orchid hunting in Wandoo National Park and I took my Olympus kit with me and it made for a far happier experience.
Pink Enamel Orchid, Elythranthera emarginata. Wandoo National Park, Western Australia.
Close up of a pink enamel orchid.
The main reason was weight. Looking for orchids in the Wandoo National Park is a matter of walking lots. It is a big park – 463.68 square Km – and while you can drive in on numerous gravel roads and 4WD tracks it only gets you so far and then you have to walk over quite varied terrain to find anything. Humping heavy photographic equipment, water, food, extra layers, first aid kit etc gets old really fast. So anything that can reduce the load is most welcome.
Little Laughing Leek Orchid, Prasophyllum gracile. Wandoo National Park, Western Australia.
Pouched Leek Orchid, Prasophyllum cyphochilum. Wandoo National Park, Western Australia.
The second reason was the rear LCD panel. Having one I could actually see in bright sunlight again was in a word fantastic. Add to that it was of the flippy flappy variety which meant I could twist it to see it irrespective of the camera position meant that I didn’t have to contort myself into impossible positions. It’s amazing how such small things can make life so much easier and more pleasurable.
Custard Orchid, Thelymitra villosa. Wandoo National Park, Western Australia.
Close up of a custard orchid.
The orchids were scarce this year. Where there would be literally a carpet of custard orchids there were just one or two specimens. But, although the numbers were down there were plenty of different species to look at and photograph. I went primarily to photograph leopard orchids and I only found them after about 5 hours of looking. It was like the day’s grande finale.
Leopard Orchid, Thelymitra benthamiana. Wandoo National Park, Western Australia.
All in all I was a very happy boy when I got home.
Purple Enamel Orchid, Elythranthera brunonis. Wandoo National Park, Western Australia.
From my last visit to Harrismith in 20212. It all looks a bit apocolyptic.
Harrismith is a very small town (population 52)260km east of Perth in the Wheatbelt. Now we went there some thirteen years ago looking for orchids and we didn’t find any as it was too late. I did get the photo of the animal skull on pig face on a dried lake. So this year I’ve been looking for the Western Wispy Spider Orchid (Caladenia microchila) and the Yellow Granite Donkey Orchid and that search took me Harrismith as my last chance.
When I got there it was very apparent I wasn’t going to find much – the bush was very, very dry. Walking through it sounded like walking over Cornflakes – it was so crisp. What I did find was really on it’s last legs. There had been a substantial wildflower display, but it was basically all over. I’d have been better off going at least two weeks earlier. Still it was an enjoyable walk, there was plenty of bird activity and I left feeling I’d of got better photos if I’d taken my bird kit.
Sugar Orchid, Ericksonella saccharata. Harrismith, Western Australia.
There’s always a Green Spider Orchid (Caladenia falcata).
Purple Enamel Orchid, Elythranthera brunonis.
Yellow Granite Donkey Orchid, Diuris hazeliae.
The Western Wispy continues to evade me. I’ll have to wait to early next spring to resume the search.
Earlier this month I wrote about my first orchid expedition of the season and I ended it with saying how I really liked the combination of my Olympus 40-150mm f2.8 and the 1.4 teleconverter. Well I’ve just reset the focus stacking mode on my Olympus EM1 mk ii and I went up to the nearbyOswald Sargent Reserve to see whether it worked. I took both my 60mm f2.8 macro and the afore mentioned 40-150mm + teleconverter.
It was a beautiful morning and there were hundreds of orchids out – it was quite a stunning display. There were so many flowers that I could afford to be very fussy pick specimens that had good backgrounds and in good light. It doesn’t always go as well as this.
Getting home and processing the photos I have to say that I much prefer the results from the 40-150mm combination. It’s not the sharpness of the lens, both lenses are very sharp. It is the way the lens renders the image. The way the tones in the out of focus areas merge smoothly and don’t draw attention away from the subject. When combined with focus stacking the effect is fantastic.
Oswald Sargent was a very interesting character. While being a pharmacist here in York he was also an eminent amateur botanist and his family were pioneering photographers. His son left a large archive of photos documenting life in the town.
Mid August. Get the orchid books out. Find the maps. Load the coordinates into the GPS. Dust off the macro lens. Kweda here I come!!!
It was a hair raising journey. After our heavy winter rains the dirt roads resembled cold lumpy gritty porridge and for the last 10km the car fish tailed along the road the tyres struggling to get a grip at times. It was a relief to stop and park up by the mobile phone tower which was the only bit of hard ground. Considering the conditions I was amazed that there were any orchids out as most species don’t like getting their feet wet at all.
Fringed Mantis Orchid or Green Spider Orchid (Caladenia falcata). Kweda, Western Australia.
Talbot's Spider Orchid, Caladenia pendens subsp talbotii. Kweda, Western Australia.
Winter Donkey Orchid, Diuris brumalis. Kweda, Western Australia.
Blue Fairy Orchid or Blue Beard (Pheladenia deformis). Kweda, Western Australia.
Early Wheatbelt Spider Orchid, Caladenia sp.’early wheatbelt’. Kweda, Western Australia.
I must say I’m really, really liking using the Olympus m.Zuiko 40-150mm f2.8 with the Olympus 1.4 Teleconverter MC-14 for focus stacking. It is a beautiful lens, probably the best one I’ve got.
Our recent trip to Woodman Point wasn’t all walks along the shoreline. The coastal heathland behind the beach is also home to lots of great wildlife.
Mardiyet or Nankeen Kestrel (Falco cenchroides). Woodman Point, Western Australia.
This Nankeen Kestrel was very chilled, it let me approach and take loads of photos and it was still sat there when I walked away.
This was a very busy little Djer-djer or Splendid Fairy-wren (Malarus splendens subs splendens). I ended up with a lot of empty frames as he bounced around looking for insects.
His mate wasn’t nearly so active and was easy to photograph.
One last look of the Nankeen Kestrel before I walk back to the car.
The setting sun at Woodman Point.
As I walked into the car park I noticed this sign. There were a lot people living rough at the reserve whether in cars or or tents hidden in the dunes and woodland. There was an incredible amount of litter.
This last twelve months I have started using 35mm film again. Initially I had the lab where I got my film developed scan the negatives. The results were absolutely diabolical – and this was from one of what is considered the better labs in Western Australia. So I needed a scanner. The market had changed considerably since I bought my last one in 2005. Canon and Nikon have exited the market and Epson has only the V850 flatbed (only $1600 AUD “cough”!) available in Australia. What is available at more reasonable prices are the Plustek range, which seem to be largely differentiated by the software bundled with them. While the price is attractive they are somewhat under specified. The advertised maximum resolution of 7200 dpi is somewhat optimistic as it really doesn’t resolve more that 3200 dpi in real terms. The density measurement of 3.6 D is pretty mediocre and they are incredibly slow in in use. I then figured the second hand market was the place to look. Back in the day the undisputed market leader for consumer dedicated 35mm film scanners was Nikon. Now Nikon stopped production in 2009 so I thought a late model with USB connection would be the way to go and the Nikon Coolscan 5000 seemed to fit the bill with a true resolution of 4000 dpi, autofocus lens, adapters available for scanning whole rolls of film, and a density measurement of 4.8 D (anything over 4 is the mutts nuts). Unfortunately the current film resurgence has meant that these are selling for $1800-2100 AUD for a working model.
I had an ask around and was quickly informed that camera scanning was very popular. I watched a load of YouTube videos on the subject and saw everything from DIY Frankenscanners to very swish $6500 setups. I dipped my toe into the pool by making a negative holder from a scrap of matt board, an LED light diffused by tracing paper as the light source and set up a camera with a macro lens on a tripod. With a lot of trial and error (mostly error) I got some reasonable results – better than those I got from the lab. This was encouraging and it gave some idea of what I was looking for. I didn’t want to have to set up a camera on a tripod and then align the negative so it was parallel to the camera sensor plane and centred on the axis of the lens. It had to be compact and quick to set up and breakdown. Most importantly it had to work with one of the camera and lens combinations I already owned. Perusing the inter webs I found two set ups that fit the bill:
The Valoi Easy 35 at $380 AUD for a complete scanning solution
In crudest terms both are just a tube that attaches to your lens and at the other end is a film holder and an LED light source. Both offer a wide range of compatibility with different cameras and lenses. The Valoi looked very slick and well designed, the JJC looked a little more rudimentary. I plumped for the JJC as I wasn’t sure at that stage how much use it would get.
JJC Film Digitising Adapter And LED Light Set
The kit comprises of several short threaded tubes and step down rings.
In the box you get a series of short threaded tubes, several step down rings, a negative holder, a holder for mounted slides, a holder for the negative and slide holders, an LED light, a diffusion panel and a USB power cable with switch. There is a comprehensive instruction sheet and a sheet detailing the necessary combination of parts needed for each camera and lens combination. It was all very straightforward and I was up and running in a couple of minutes.
The LED light is powered via USB. It has no battery.
The build quality is OK. It’s made out of plastic, but it fits together quite well. The negative holder does a good job of holding the film flat. The only thing I don’t particularly like is that the step down rings bind very tightly to the filter threads of my lenses and it can be a bit of a struggle to remove them.
All assembled and mounted on a camera.
Before we get to results we must deal with the elephant in the room – lens compatibility. JJC list a total of 15 compatible macro lenses from Canon, Nikon, Sony, Olympus and Laowa covering micro four thirds, APSC, and full frame. Initially I used the lenses from the list – my Canon EF 100mm f2.8 IS L on my Canon 6d, and my Olympus 60mm f2.8 and EM1 mk ii. Both camera have a 20 Mp sensor and both worked very well. What I really wanted to use was my Sony A7r2 and Sigma 105mm f2.8, but the lens is not officially supported. I tried various combinations of the tubes until I found one that worked – a combination of large tubes listed for the Canon EF 100mm f2.8 L macro with the step down ring for the Nikkor Z MC 105mm macro. It delivered excellent results. So if your lens is not listed then it could be worth playing around with the tubes. Do you have to use a macro lens? For best results I’d say yes. It’s not just close focusing capability that’s important. Field curvature is as well. In simple terms an ordinary lens when photographing a flat object ie a film negative cannot bring the whole subject into focus. The centre is sharp and then that sharpness falls off towards the edges of the camera sensor. Macro lenses have inbuilt correction to achieve a flat film plane ie where the image is sharp across the whole frame. Some would say stop down and the problem goes away, and to an extent that could work depending on how acute the field curvature is because if you stop down too far then the diffraction kicks in and the image softens. Having said that if you don’t have access to a macro lens then there is nothing to stop you using a 50mm lens with 2 x 25mm extension tubes to see how you get on. Personally if you’ve got a mirrorless camera I’d look on EBay for a second hand manual focus macro lens and get an adapter so you can mount it on your camera. You don’t need autofocus to scan film.
Mounted on a Sigma 105mm f2.8 DG DN macro lens for Sony E mount. The lens is not on the JJC list of supported lenses, but playing around with the tubes and step down rings I was able to find a combination that worked.
Results. Well I compared the results from my three camera and lens combinations with some images I’d scanned using my oldCanoscan 9900f. On comparing them all the camera scans were better than the flatbed scanner. There was more detail in the highlights, there was finer detail in the whole image, subtle tonal roll off, and the images weren’t over sharpened.
This is an image I shot on slide film in 1986 and scanned using a Canoscan 9950f flatbed scanner.
Now viewed at 200%
Sony A7r2 with Sigma 105mm macro lens. 42Mp. Viewed at 200%.
Canon EOS6d with Canon 100mm macro lens. 20Mp Viewed at 200%.
Olympus EM1 mk ii with 60mm f2.8 macro lens. High Res mode. Equivalent to 80 Mp. Viewed at 200%.
Olympus EM1 mk ii with 60mm f2.8 macro lens. 20 Mp. Viewed at 200%.
A section of an Ilford SFX negative scanned with the Canoscan 9950f viewed at 200%
The same negative scanned with the Sony A7rii and Sigma 105mm macro. There is more fine detail and a much gentler roll off of tones with greater dynamic range.
This is a section of an Ilford FP4 negative scanned by the Canoscan 9950f and viewed at 200%.
The same negative at 200% shot with the Sony A7rii and Sigma 105. Again note the finer detail and tonal range of the image. The camera is able to extract more information out of a negative.
Now you’ve got a memory card full of digitised film what happens next. Well I’m using Adobe Lightroom so I ingest the images into the Lightroom catalogue. What happens next depends upon the film stock. With black and white or slide film no special software is required and you can process entirely in Lightroom. It’s really not difficult. With black and white just invert the tonal curve and with colour slide it’s just a case of making small scale adjustments to the colour balance, unless the slide is old and experienced a colour shift then the adjustments are bigger and you may have to do contrast masking. With colour negative things are harder due to the orange colour masking. Now it is possible to do this manually yourself, but you’ll save yourself a lot of time and frustration if you get a Lightroom plugin to do it for you. I tried once doing it myself because I once considered myself a fairly competent colour darkroom worker. I mean with with red areas appearing cyan, greens appearing magenta, and blues appearing yellow, and vice versa just how hard could it be? After an hour of chasing my tail on one negative I happily plonked down the money for Negative Lab Pro. It’s easy to use and the money is well spent as it preserves sanity.
Conclusion
Ilford XP1 scanned with the Olympus EM1 mk ii and 60mm macro at the native 20Mp of the camera.
Six months and a couple of dozen films in how do I feel about camera scanning? Well to be honest if I could get a modern version of the Nikon Coolscan 5000 with up to date software, drivers and a USB C interface I’d buy it in a heartbeat (Nikon are you listening?). The reality is that there isn’t and it is unlikely to happen. So I guess I’m a camera scanner with reservations. With a good macro lens and good post processing skills it is a viable alternative to the dedicated film scanner and is streets ahead of what flatbed scanners can achieve.
Ilford XP2 scanned with the Olympus EM1 mk ii and 60mm lens at 20Mp.
As to JJC Film Digitising Adapter And LED Light Set I think it is good as a low cost entry to camera scanning.
Pros
Cheap – $130 AUD from Amazon
Quick to set up and quick to scan
Easy to use
Adapts well to a range of lenses and cameras
Better results than a flatbed scanner when using a camera with around 24Mp
Good documentation making it easy to get started
Cons
It can only scan 35mm film
On paper it is only compatible with a limited number of lenses
Black and white negatives and slide film can be processed with no special software, but colour negative will require a plugin such as Negative Lab Pro
Expensive if you don’t own a digital camera and macro lens
The negative and slide holders are sloppy as is the holder insertion slot on the LED. They wobble and rotate as you feed the film through. Also the locating notches on the holders are not accurate so it is not a quick or smooth process when you put the film through and it requires fiddling with to ensure accurate framing
For the time being I’ll continue using it and work around some of the quirks as the price was right. Let’s put it another way. My lab charges $11 to scan a roll of film. Scan 12 rolls of film and the scanner has paid for itself.
Ilford Delta 400 scanned with a Canon 6d and Canon EF 100mm macro lens.








You must be logged in to post a comment.