The “blood moon” or the red lunar eclipse brought out the apocalyptic in me.
According to Wikipedia…”A lunar eclipse occurs when the Moon passes directly behind the Earth into its umbra (shadow). This can occur only when the Sun, Earth, and Moon are aligned exactly, or very closely so, with the Earth in the middle. Hence, a lunar eclipse can only occur the night of a full moon… the red colouring arises because sunlight reaching the Moon must pass through a long and dense layer of the Earth’s atmosphere, where it is scattered…Several cultures allude to the lunar eclipse as being a good or bad omen. For example, in some Chinese cultures, people would ring bells to remove wild animals that bit the moon. During the Zhou Dynasty in the Book of Songs, the sight of a red moon engulfed in darkness led them to believe the sign as a foreshadowing of famine or disease.” SPOOKY!
Thankfully we all woke up happy and well the next morning.
The weather conspired against me. I had planned my shoot using The Photographer’s Ephemeris, got my angles and location sorted out and then just half an hour before heading out I stuck my head outside and we have thick cloud cover. Bugger! What to do? I didn’t want to drive out to my location, walk to the point and stand in cold wind coming straight off of the Antarctic for nearly 3 hours with the chance of getting nothing. So I decided to set up my cameras on my deck and only start filming when there was a break in the cloud cover. So out of 3 hours and 20 minutes of potential eclipse action I got in total about 30 minutes. Ah well I shall wait until the next one on the 04/04/2015.
Filmed using the time-lapse movie function on the Olympus OMd EM-10 with a 75mm f2.5 Color-Heliar and a Zuiko 40-150mm f4-5.6 lens. Additional footage filmed on a Canon 550d with 70-200mm f2.8 L IS lens
A laptop with DVD burner, two external hard drives and a card reader is all a photographer needs to build a reliable workflow.
Talk to any photographers long enough and the subject of workflow comes up. Most will have horror stories of cards dying, hard drives failing and loosing photos by the score. Others will say how expensive and time-consuming all the back-end of photography is and why can’t be simpler and cheaper. Well it can.
Most people take a haphazard approach to workflow and that is fine until one of a couple of things happen. The first is that you start shooting so many images that processing and archiving takes forever. Or there is a catastrophic failure and hours of time and precious images are lost. But really all it takes is a small outlay of cash and some good habits and you have cracked the issue.
The foundations of a good workflow practice are:
a colour calibrated monitor
two external hard drives
a card reader
DVD burner
parametric editing software with digital asset management functions
Hold on I hear you cry. The first four are understandable and speak for themselves, but what the blinking flip is a parametric thingy ma bob? It’s a fancy pants and non-committal way of saying Lightroom or Aperture which allow you to edit photos without changing the original photo file. The digital asset management is a powerful filing system that allows you to organise your files and manage them. Putting the two functions into one package means that for most photographers 95% of the work can be done within that one program.
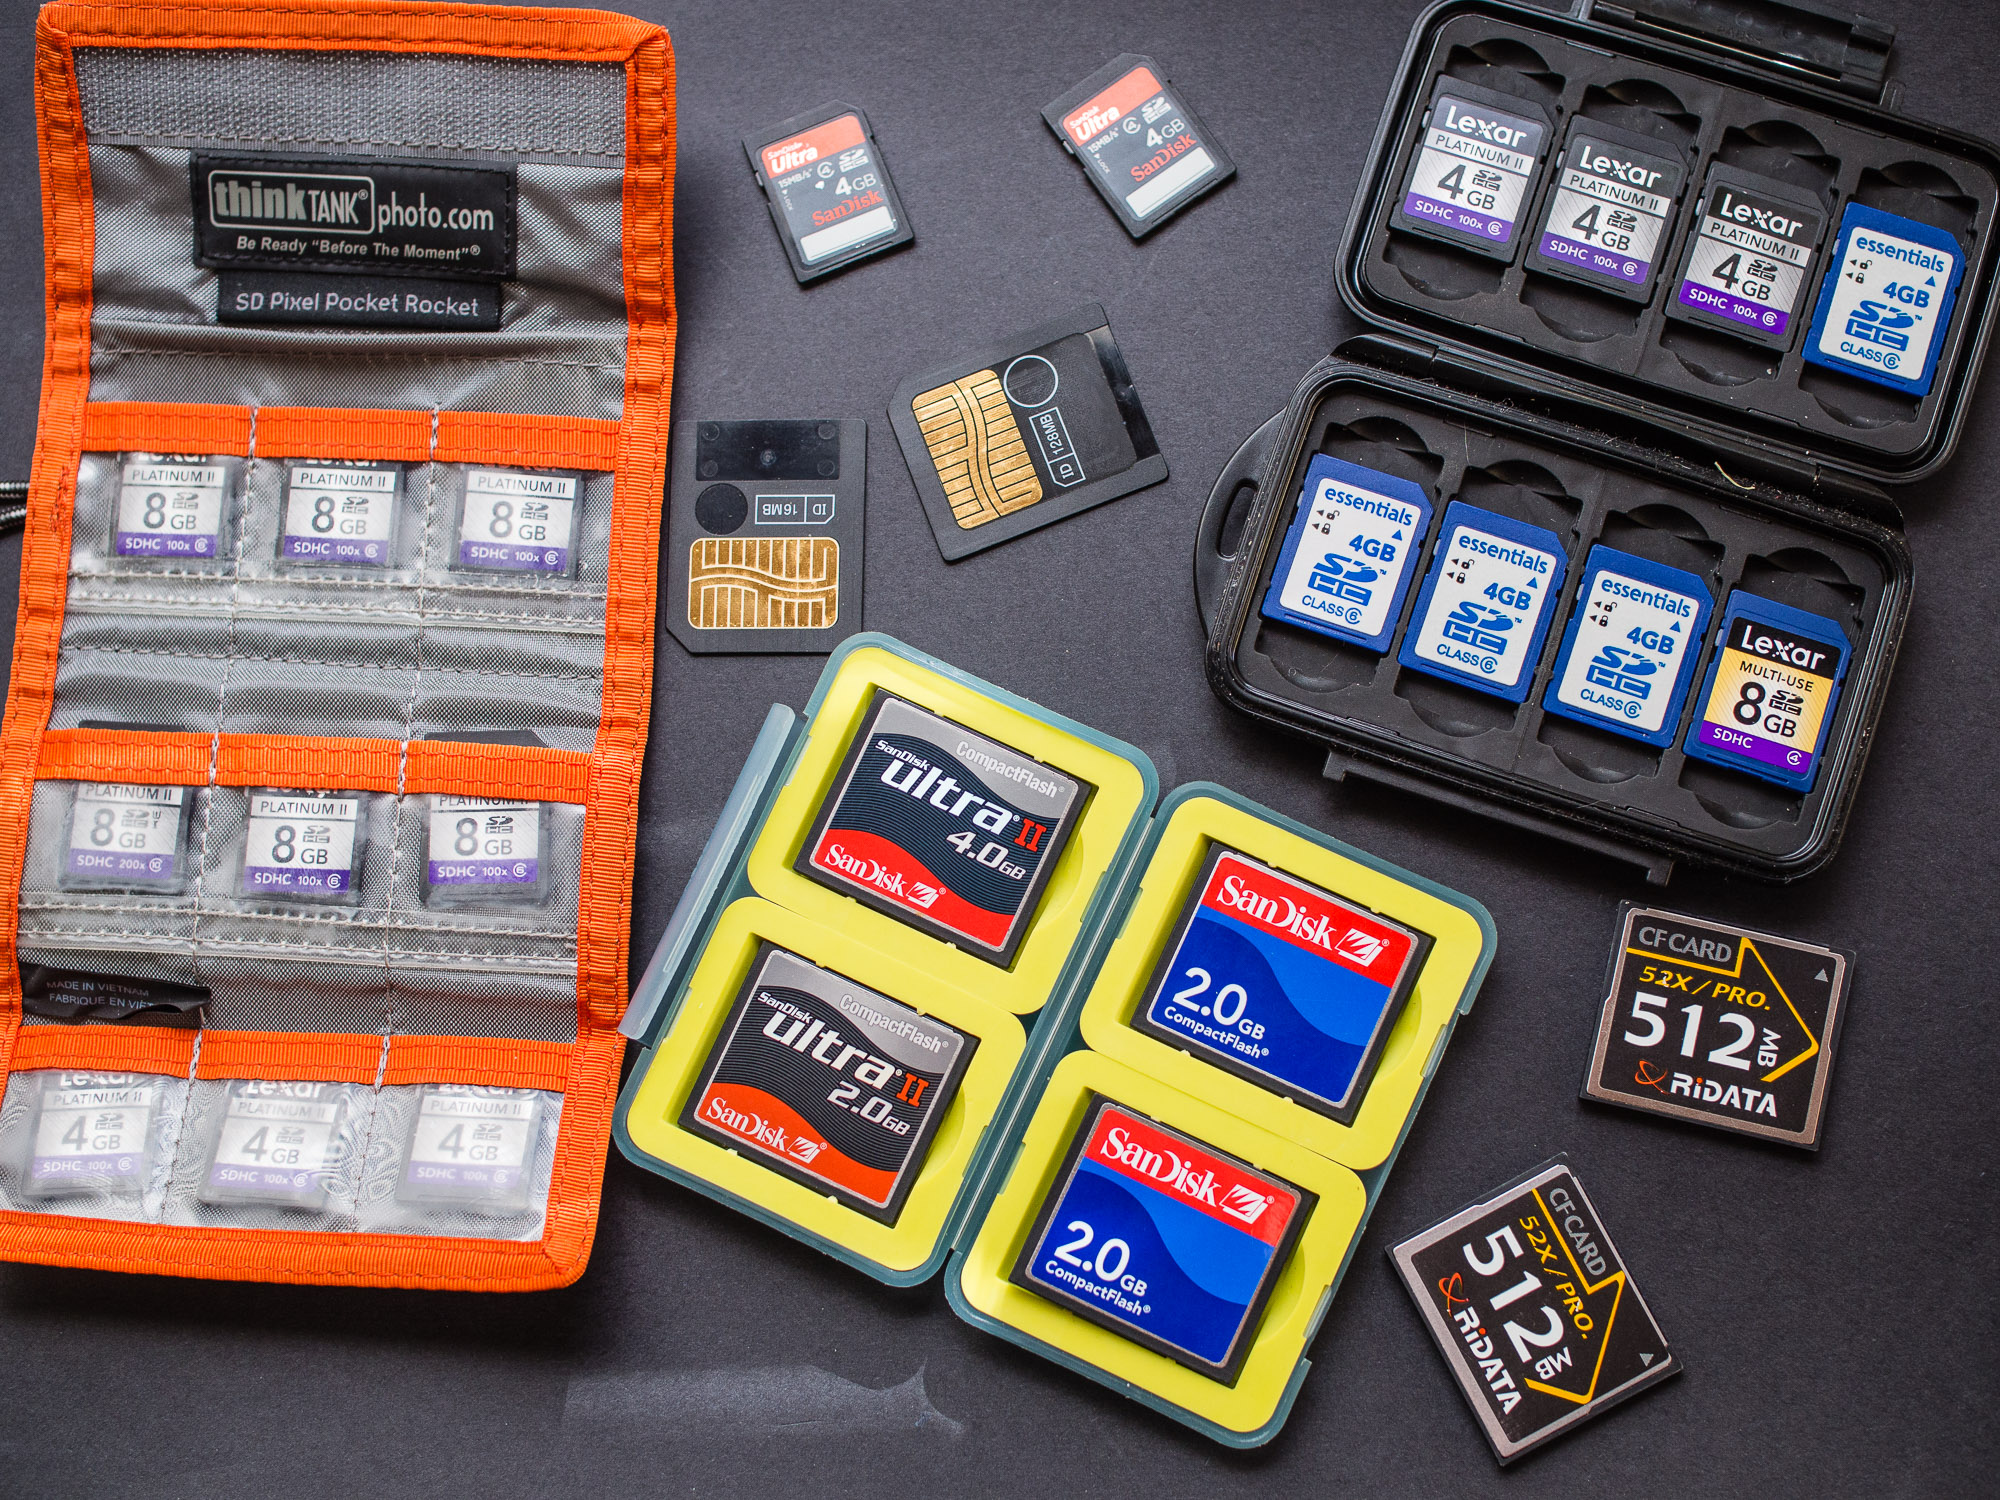
Memory cards are now very cheap. Develop a strategy for keeping them safe while working in the field.
The start of good workflow is in the field when you’re shooting. A little bit of attention here can save literally hours later. Shoot with a large colour space – Adobe RGB. Ensure that your exposures are good and your white balance is correct. When I was teaching so many of my students said that they’d fix things like this in Photoshop. Ok you can fix somethings in post, especially if you shoot RAW, but the question is that when you’ve come back from a wedding, an event, or even a holiday and you’ve potentially got a thousand images would you want to go through every single image making corrections when you could have done it at the taking stage. If I use multiple memory cards I have a system that means that the full card is put away safely and in a way that it can’t be muddled up with empty cards. The next choices all depend upon whether you are shooting something that will generate a large number of images that will require little to no post processing, or you are shooting and image that is going to be optimised and processed intensively for high quality out put. These are called respectively “batch-processed workflow” and an “optimised workflow”. By batch processed, we mean image files that have been collected and processed all at the same time.
The characteristics of a batch-processed workflow are:
– Often used for sports, news, and event photography
– Often will be a high volume of images
– Will often be all, or a substantial portion, of all the images from the shoot
– Often involves a quick turn-around time
– May involve JPEG or raw capture, but is mostly based on JPEG capture
– May be JPEGs or raw files that have received a round of parametric image edits in Lightroom or Aperture and then processed out to JPEG or TIFF
– May be camera JPEGs that have had metadata added and possibly been batched renamed but are otherwise as processed by the camera
– May be camera JPEGs that have had metadata added and possibly been batch renamed and then processed through Photoshop with an action or set of actions or in Lightroom with presets that applies the same tone or colour enhancement to all the image files.
An optimised workflow takes digital capture beyond the batch processed file. In the optimised workflow, the photographer continues to exercise creative control after the shoot (also referred to as “post production”), which may involve image compositing, retouching, stitching, high dynamic range tone mapping and other techniques, to produce a finished piece. An optimised workflow involves more work and has more steps, sometimes many more steps than a batch workflow. Although turn-around times can be quick when deadlines make that necessary, there is usually more time built into an optimised workflow. In an optimised workflow, the photographer will tend to gather more information about the final uses. This often extends to researching the type of press and paper that will be used for printed output. Photographers that operate at the highest level in the industry practice an optimised workflow. They are usually known for their post-production skills and style, which they use to complement their pre-production conceptualization and capture techniques.
Characteristics of an optimised workflow are:
– Often used for advertising, corporate, high-end editorial, and portrait photography
– The optimised workflow should always start with raw capture.
– If the final desired result is a stitched or High Dynamic Range (HDR) image, the captured images need to reflect the panoramic sweep or the exposure range optimally.
– The optimised image files will usually be a small portion of the shoot’s post production.
– Optimised files will often be selected for optimisation from a batch process of the edited and proofed shoot.
– Optimised files will go through a series of steps involving optimisation in Lightroom or Aperture and may involve additional optimisation in a pixel editing application, usually Photoshop.
– Optimised files are ideally saved as master-files, which are usually high bit TIFF or PSD files normally saved in Adobe RGB (1998) or ProPhoto colour space. However, they may also be raw files that have been optimised in Lightroom or Aperture or even saved as Adobe DNG. Master-files may have capture sharpening applied, but should never have output sharpening applied.
– Optimised master-files are the source files for all other derivative files which may include files further optimised for print, printing (CMYK), or screen (Web, projection, etc.)
The workflow process can be divided up into its key components.
Capture the image to the card.
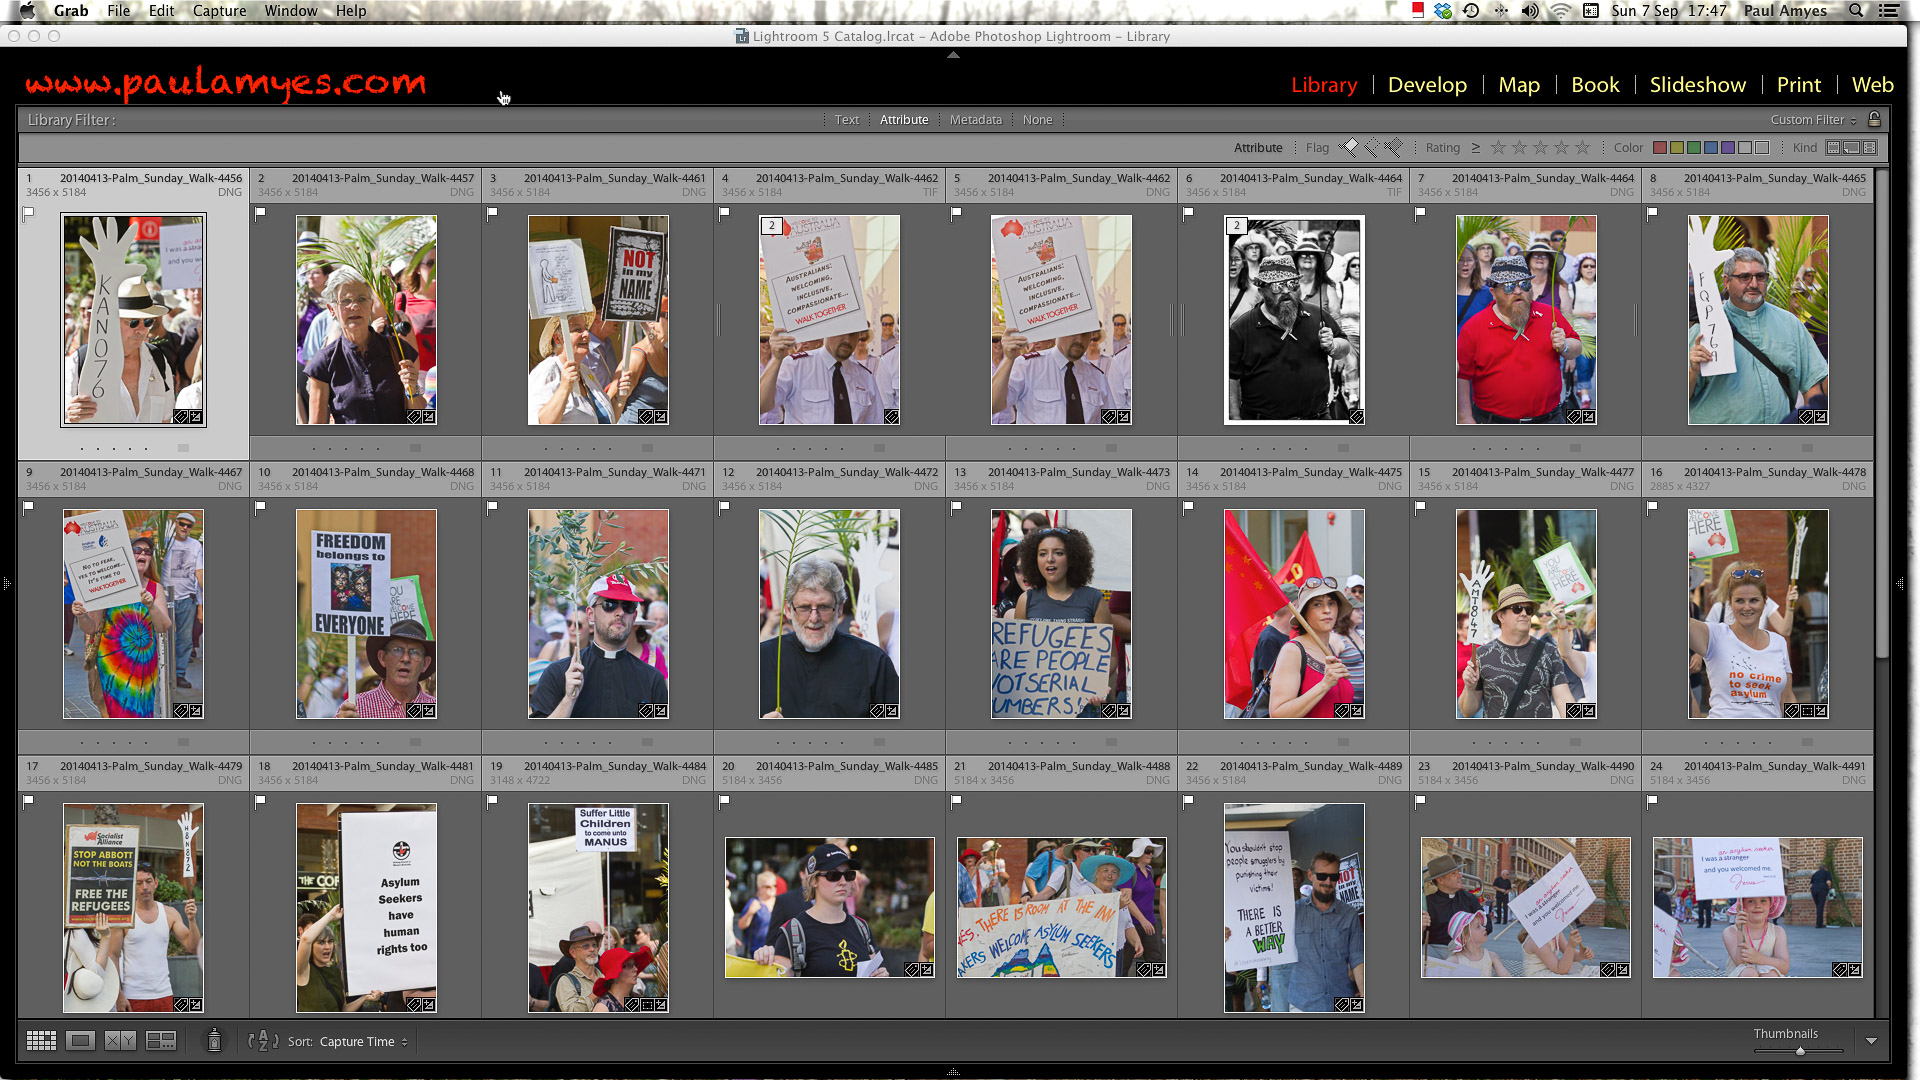
I select the photos I want to copy to my library and then I add a basic generic tags.
I rename the files so they the date, name (place, person event) and then the image number.
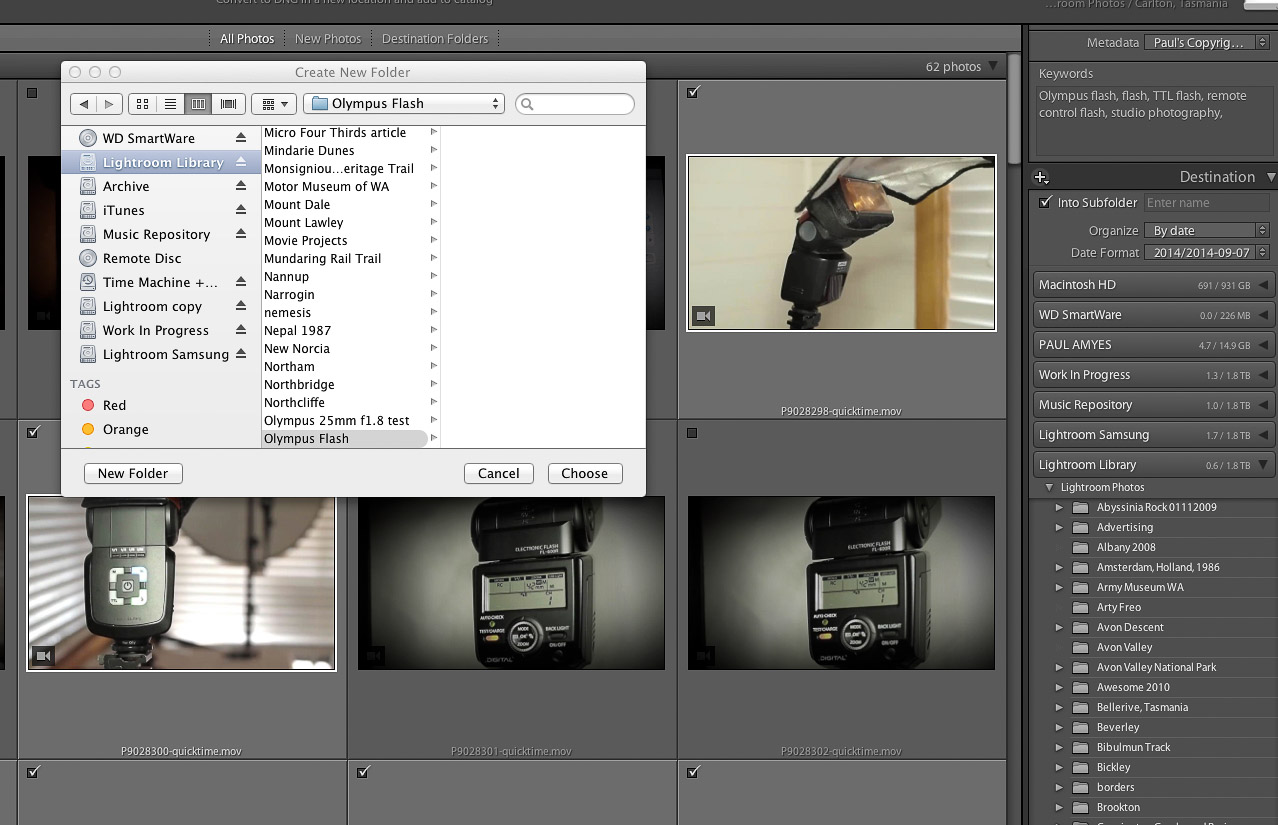
The images are then placed into a new folder with the name of that event, place or person or if part of an ongoing project the folder for that.
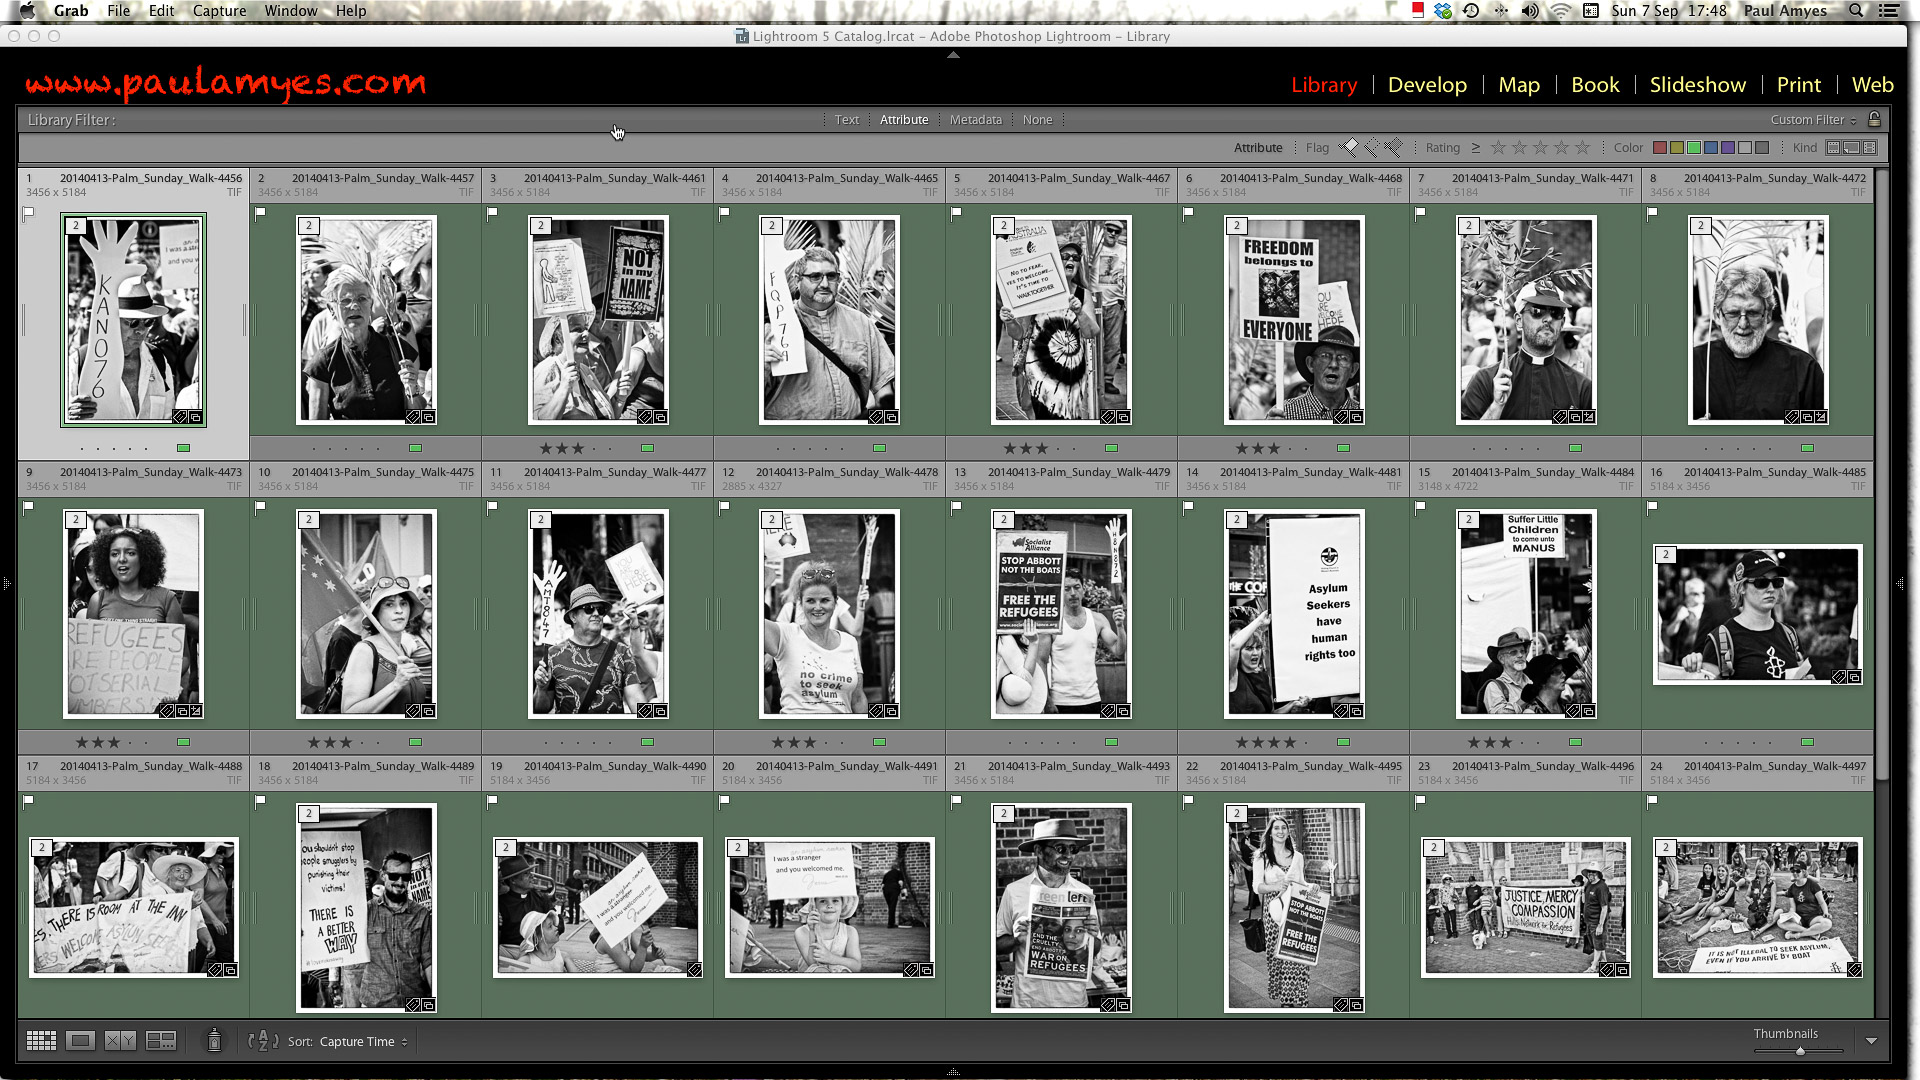
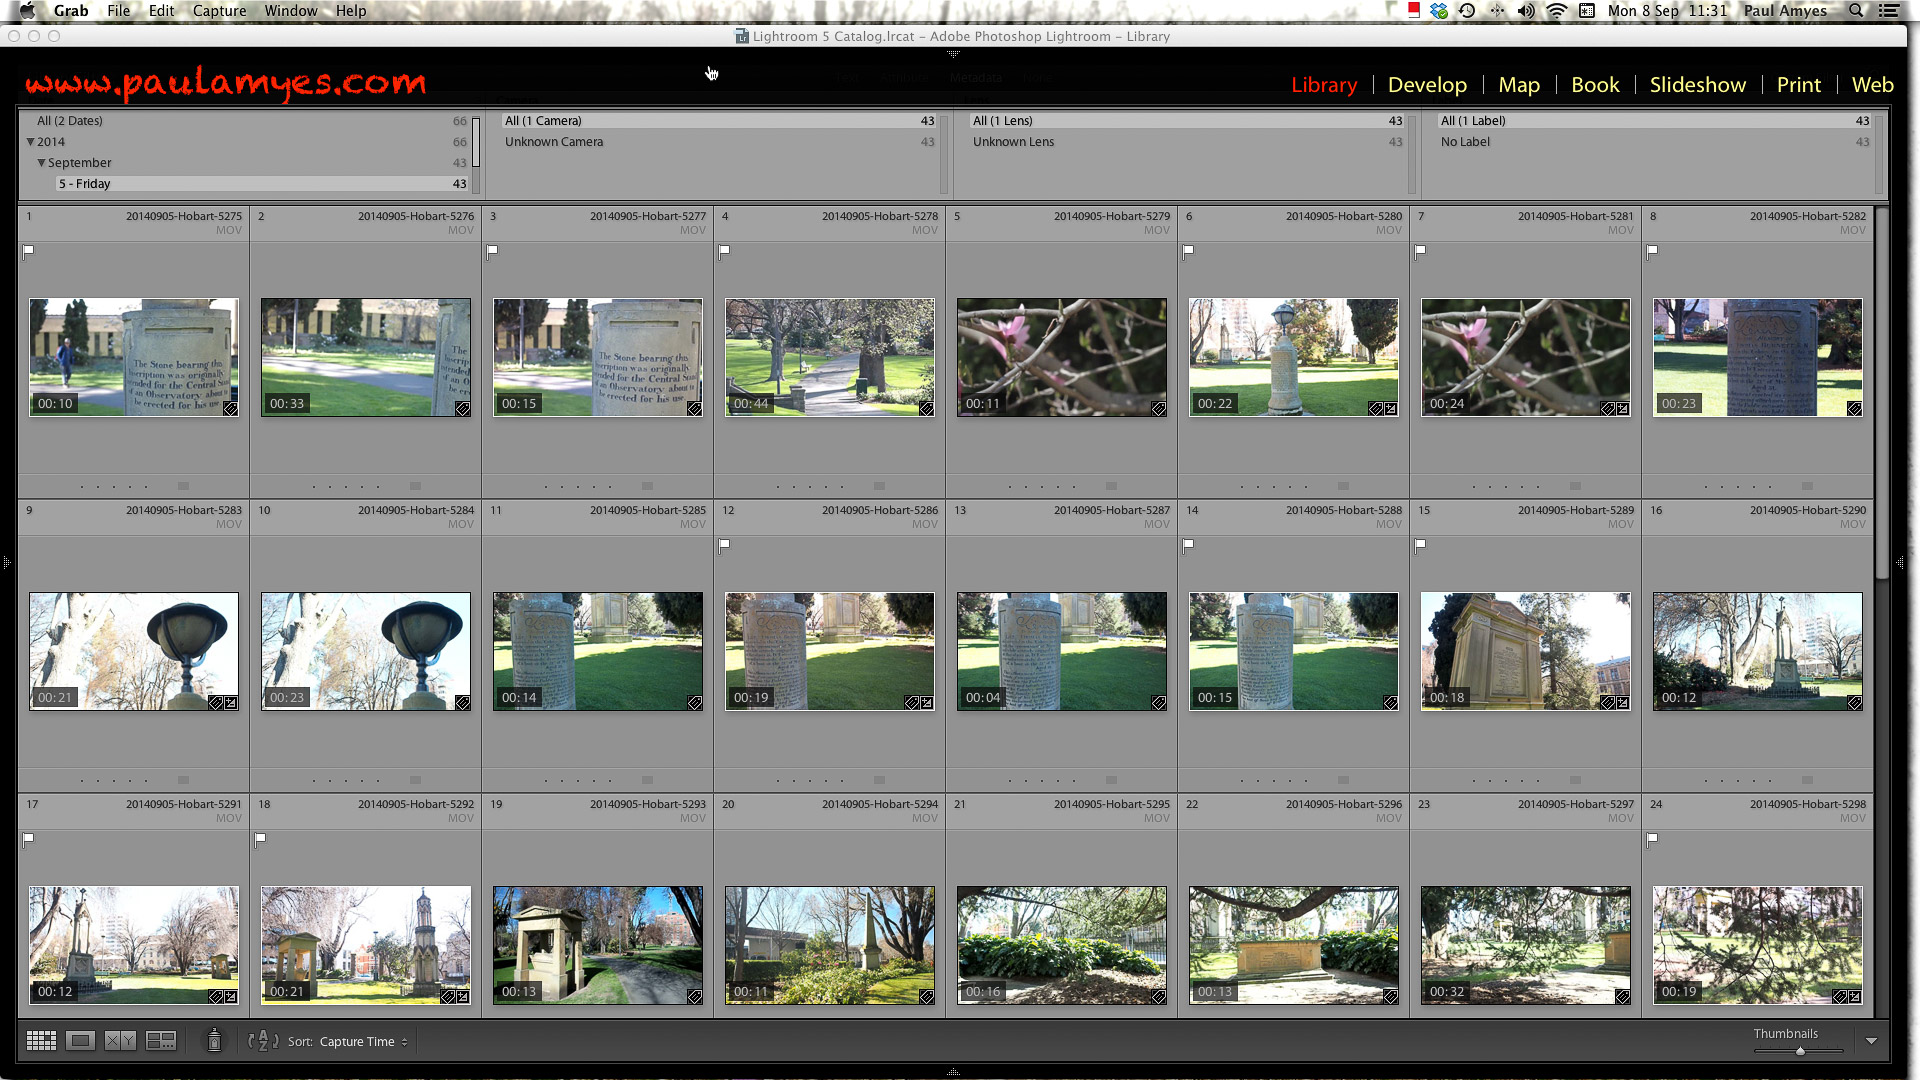
Ingestion. The images are downloaded from card to computer. When I get back home from a shoot. The first thing I do is create a folder on my desktop which is titled with the place or name and the date. All the image files are copied over to that folder. The cards are then put aside in a safe place. I then copy the folder onto DVD. This means that I now have 3 copies of each file. I then open Lightroom and look to import the images. At this stage I perform the first edit and choose only correctly exposed and sharp images. The files are renamed with the name and date and a 4 digit number. I also add basic tagging with places and names and my copyright details. Depending on the nature of the job the images will be put either into their own specific folder within the Lightroom catalogue, or if it is part of an ongoing project into an existing folder. When that is done I synchronise my Lightroom catalogue and back up the hard drive onto another drive using a program called Get Backup. At this stage I can now put the cards back into circulation as I’ve the folder on my desktop, the drive with my Lightroom library and the copy of that drive.
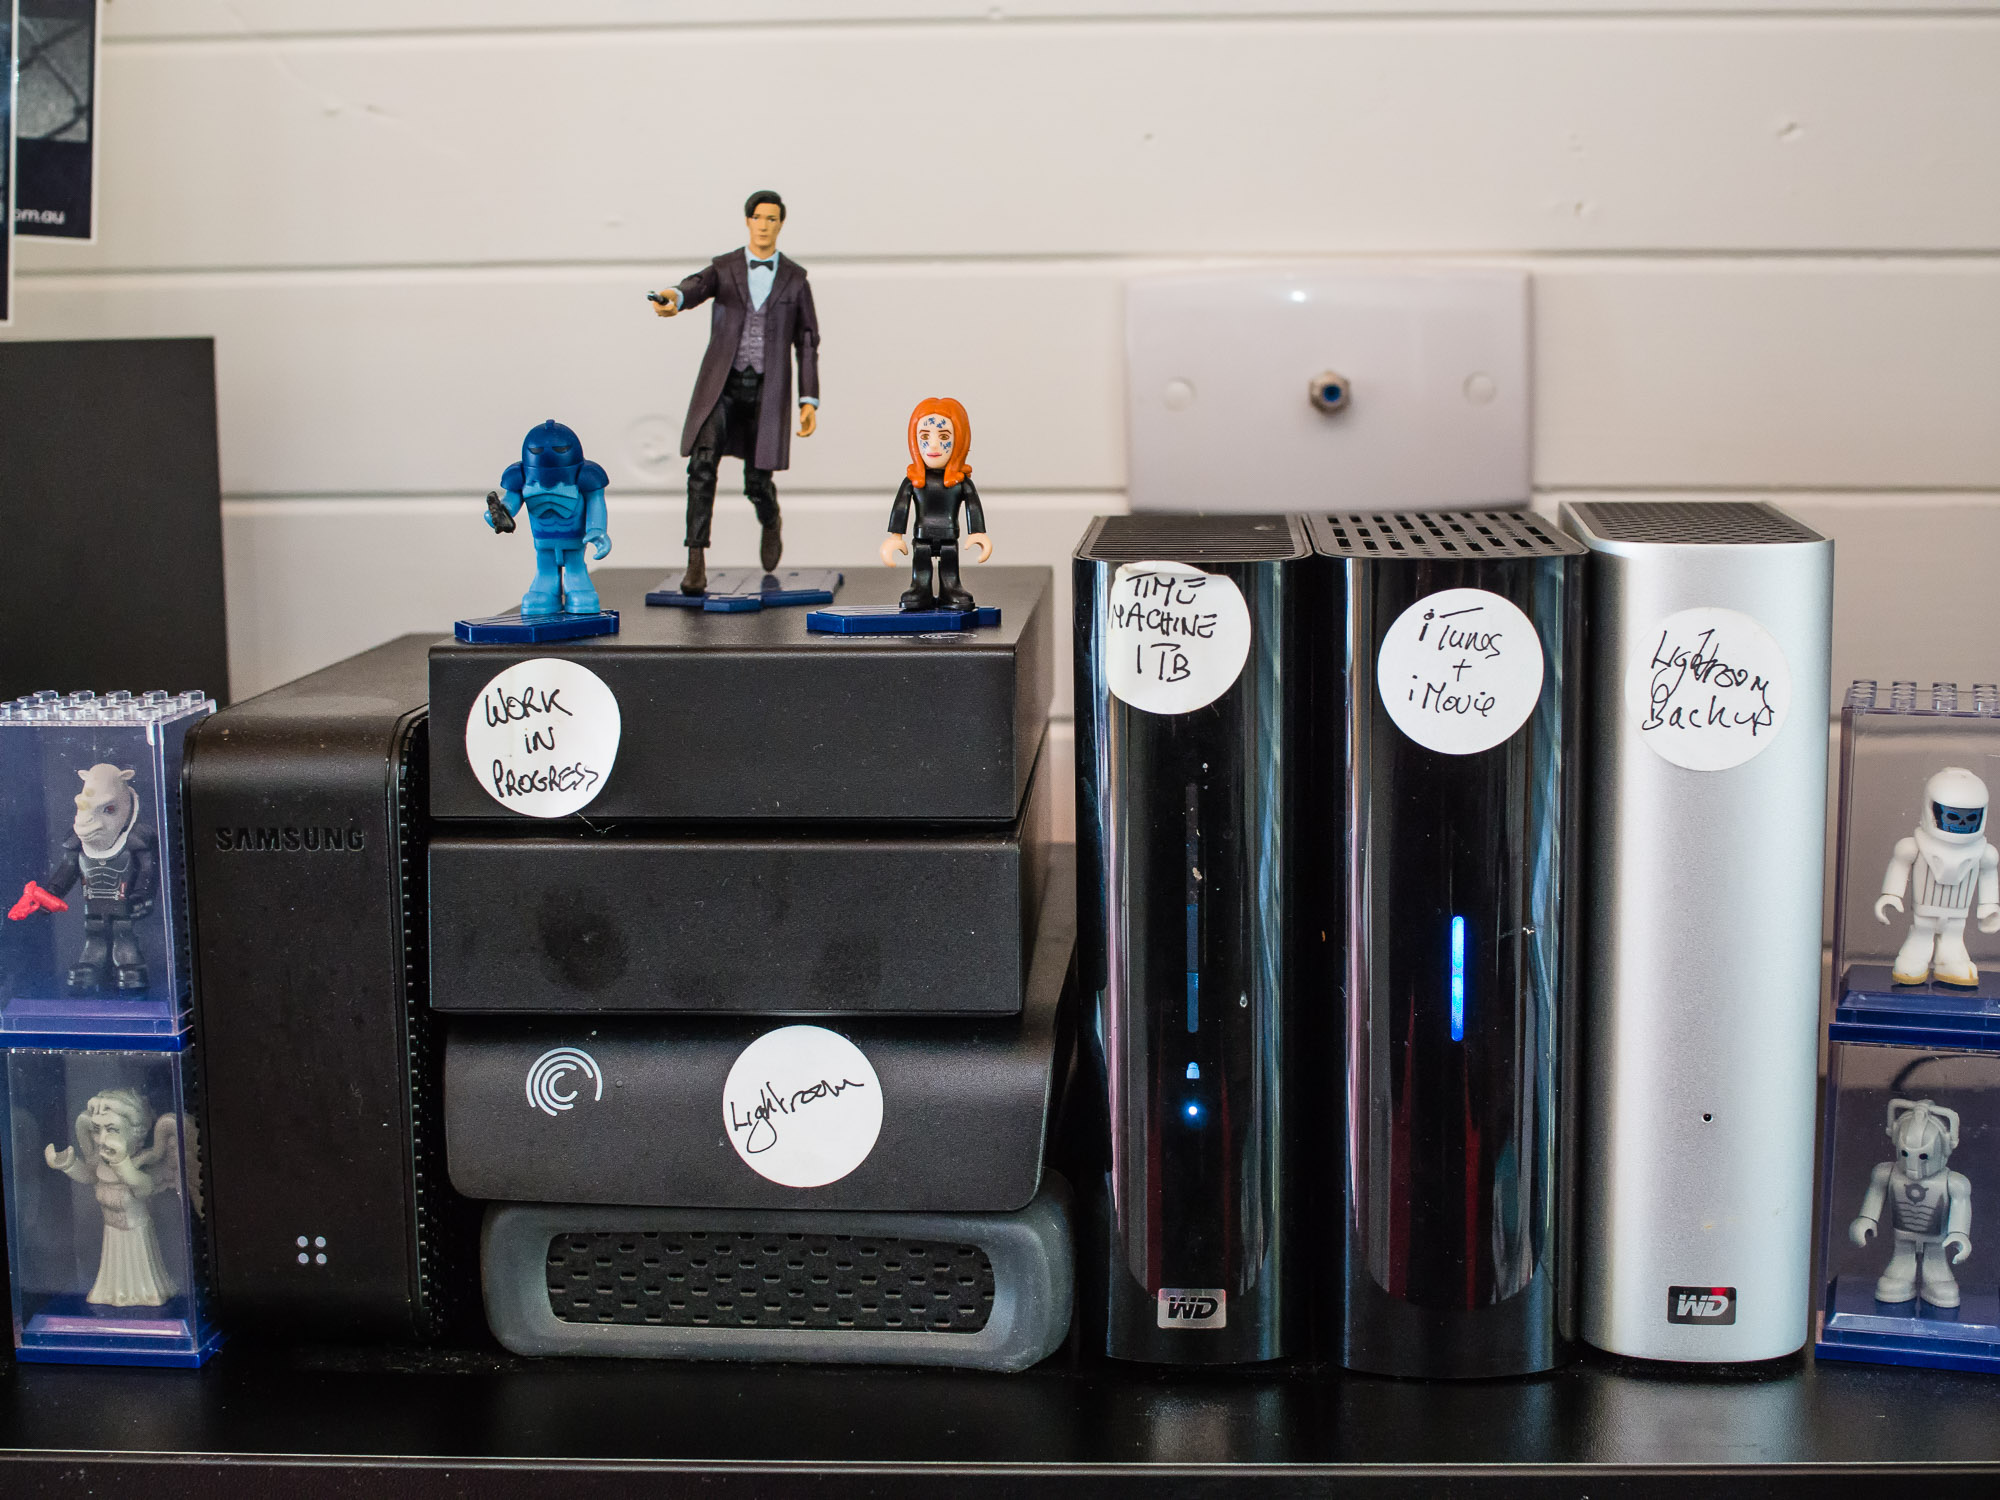
I use Get Backup to synchronise my two hard drives so that I have a working copy of my Lightroom library and then an identical backup. If the main drive fails I can switch to the identical copy, get a new drive and clone the library to it.
I flag the pictures that I want to work on and then carry out basic adjustments in the develop module.
Second edit. Each file image is assessed and if it passes it is flagged Basic adjustments are carried out, and this done on an individual basis, or using presets. If this a batch-processed workflow then the images are captioned and given tagged with image specific terms. A final edit is made and I give the final selection a green colour label. and I move onto the output stage. If this a job that requires optimised output I then rate the images on a scale of 1 to 5 and label each accordingly. Once that is done anything higher than 4 will have extra post processing done using either Photoshop and or various plugins. The editing in Photoshop is done in a non-destructive manner using layers and saved as either TIFFs or PSD.
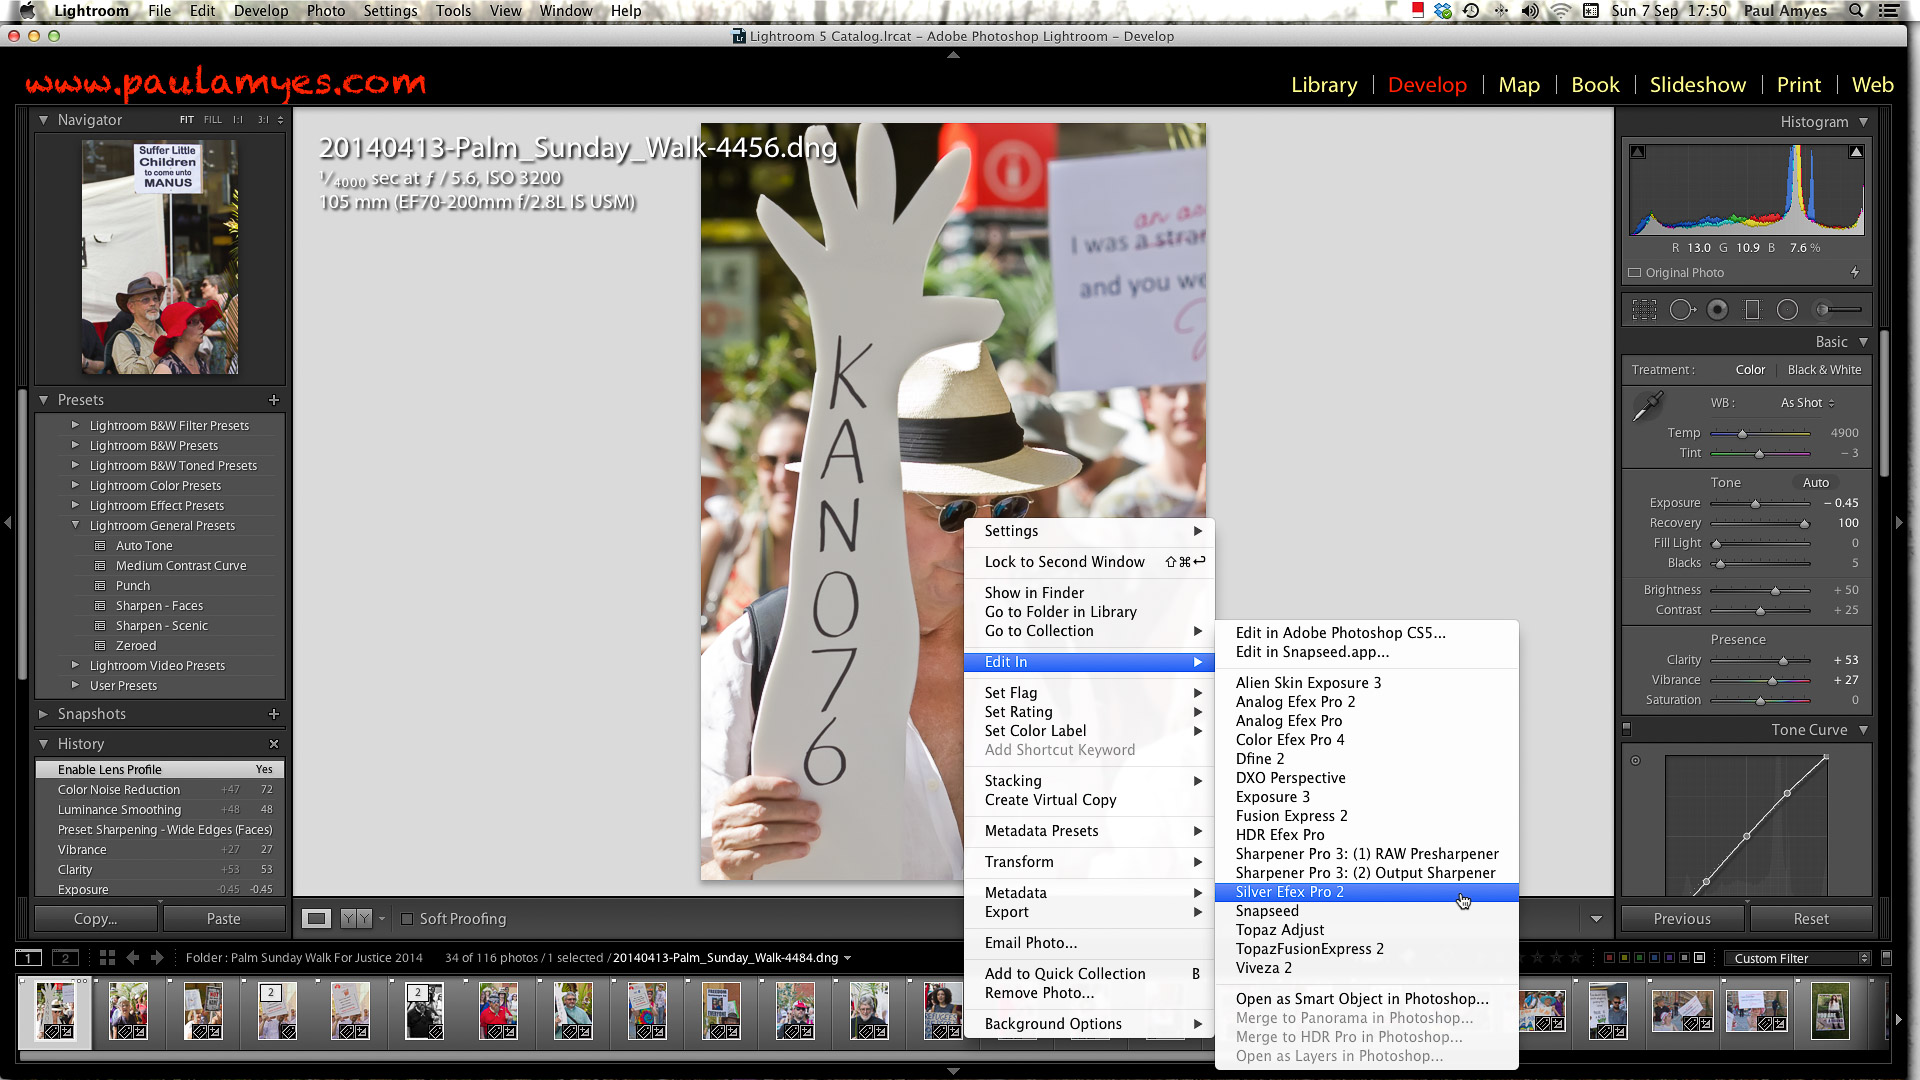
If I think the image requires further work or the nature of the project demands that then I choose to edit in an external application – in this case Silver Efex Pro2 a Lightroom plugin.
Once I’m happy with the images I re-assess them and those that I think should be used, or sent to a client are then colour coded green.
Batch output and delivery. The images are out put according to their usage – basically web or print. It is at this stage final sharpening takes place, if the image goes to the web it is converted to sRGB and saved as a jpg at the appropriate size at 75%. If the images are to go to print, then they are sharpened and flattened and saved as Adobe RGB either as TIFFs if they are being sent to the client on disc, or saved as jpg at 85% if for sending via FTP or Dropbox. If I were to print the images myself then I would do that at this stage using the Lightroom print module. Same with self publishing I would do that through Lightroom and output the finished book to Blurb. With slideshows I prefer to use iMovie so I output the images as jpgs at 2000 pixels on the longest side and export them to iPhoto so they are ready for use in iMovie.
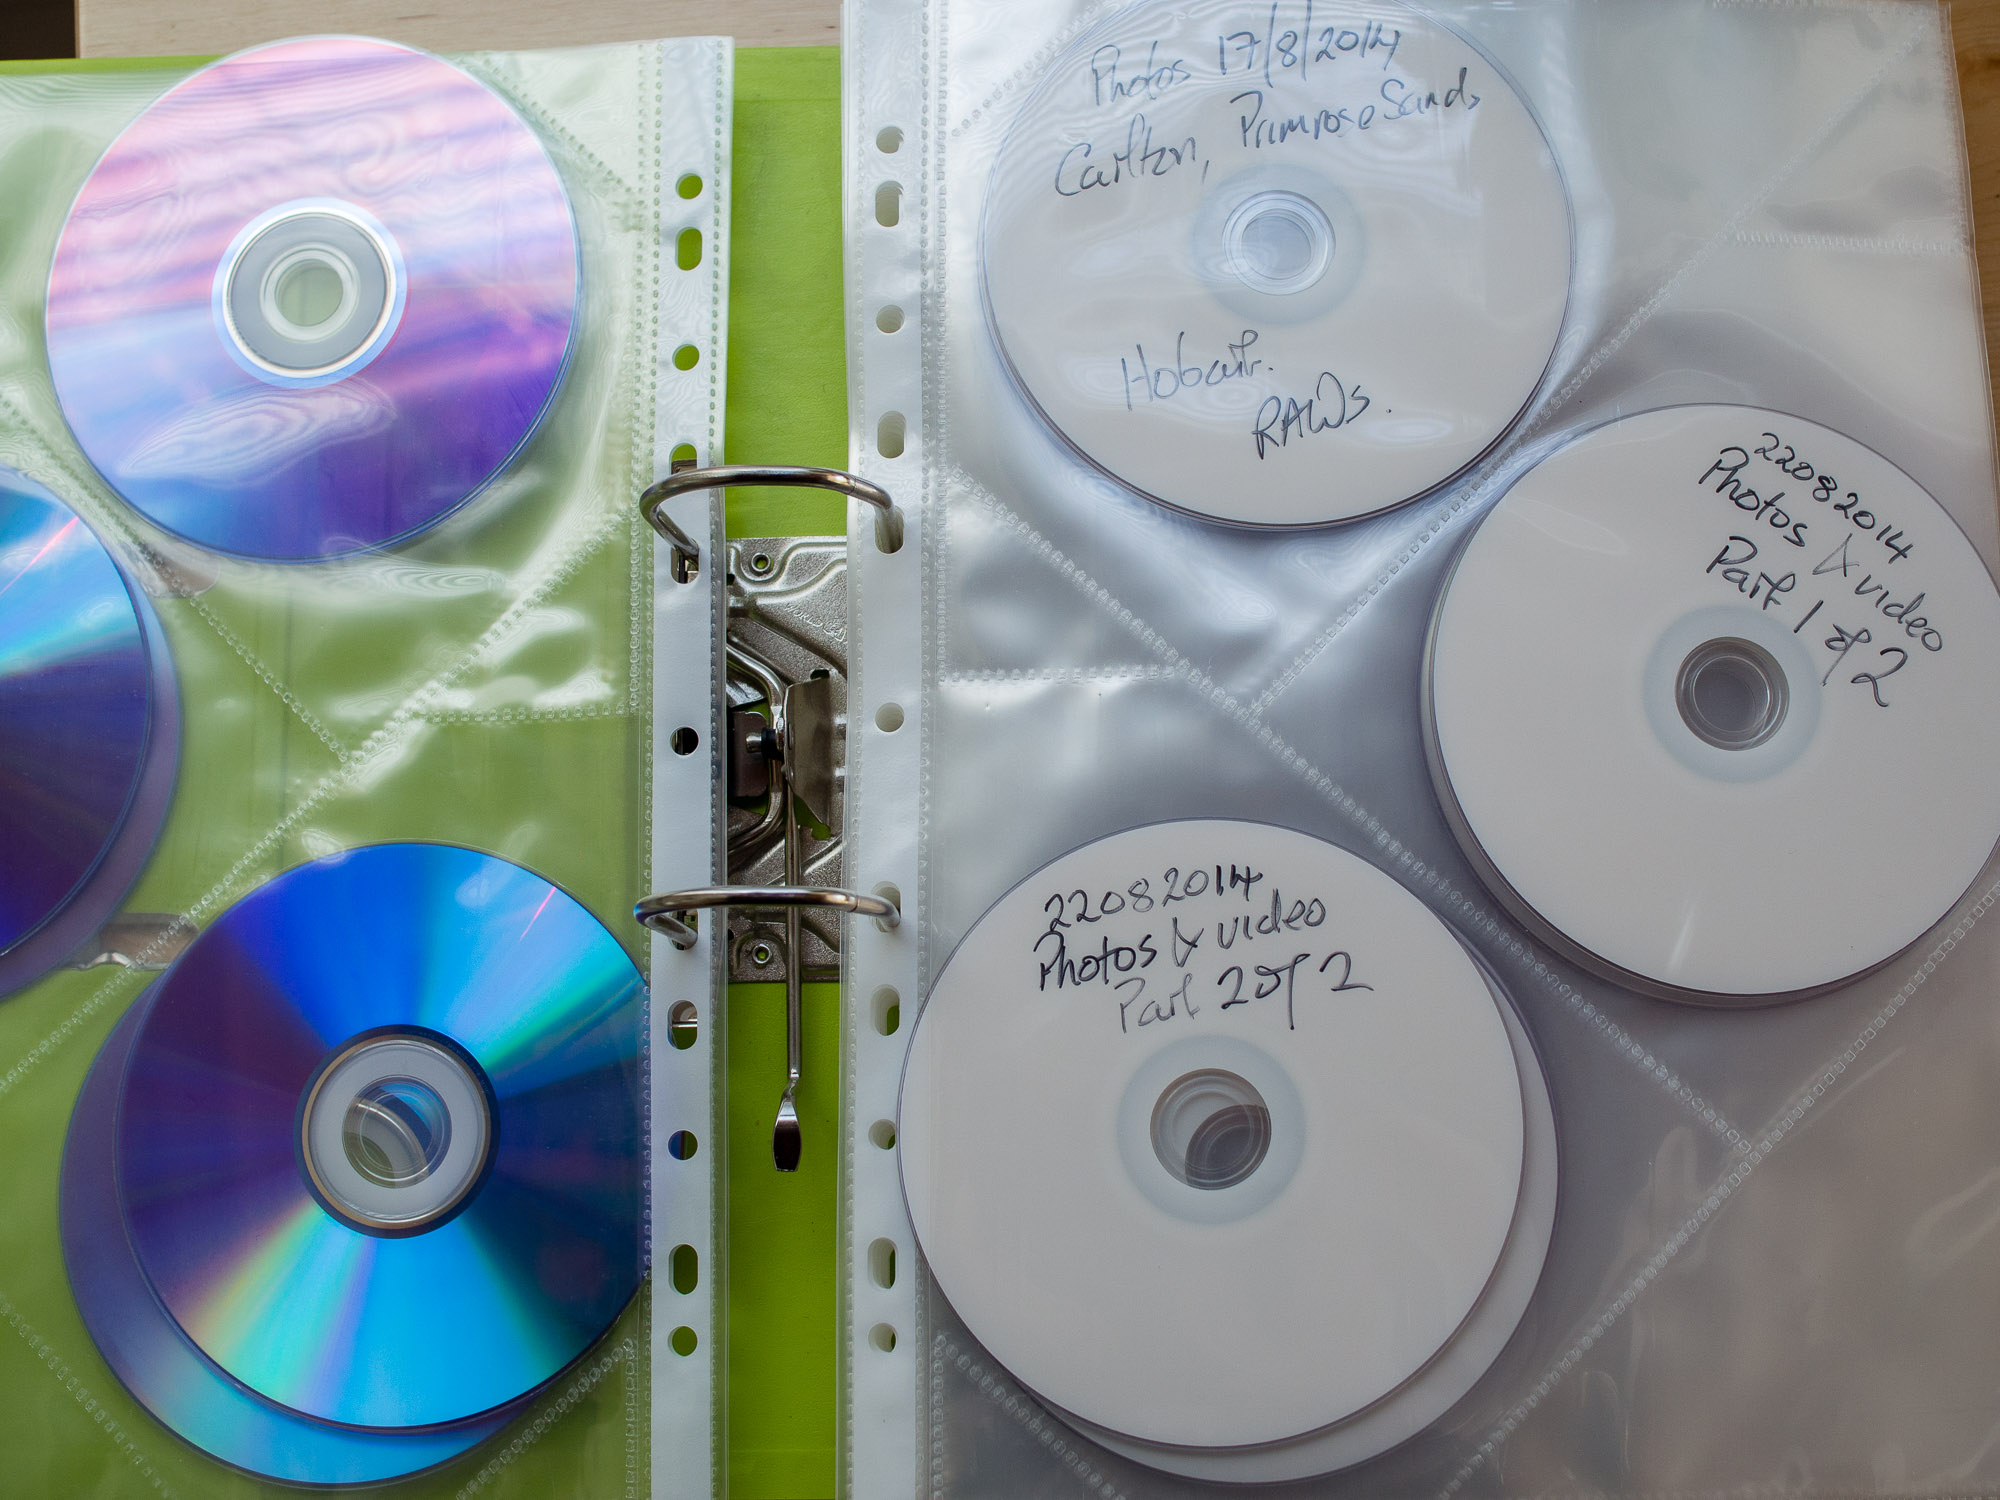
DVDs provide a cheap and effective backup strategy.
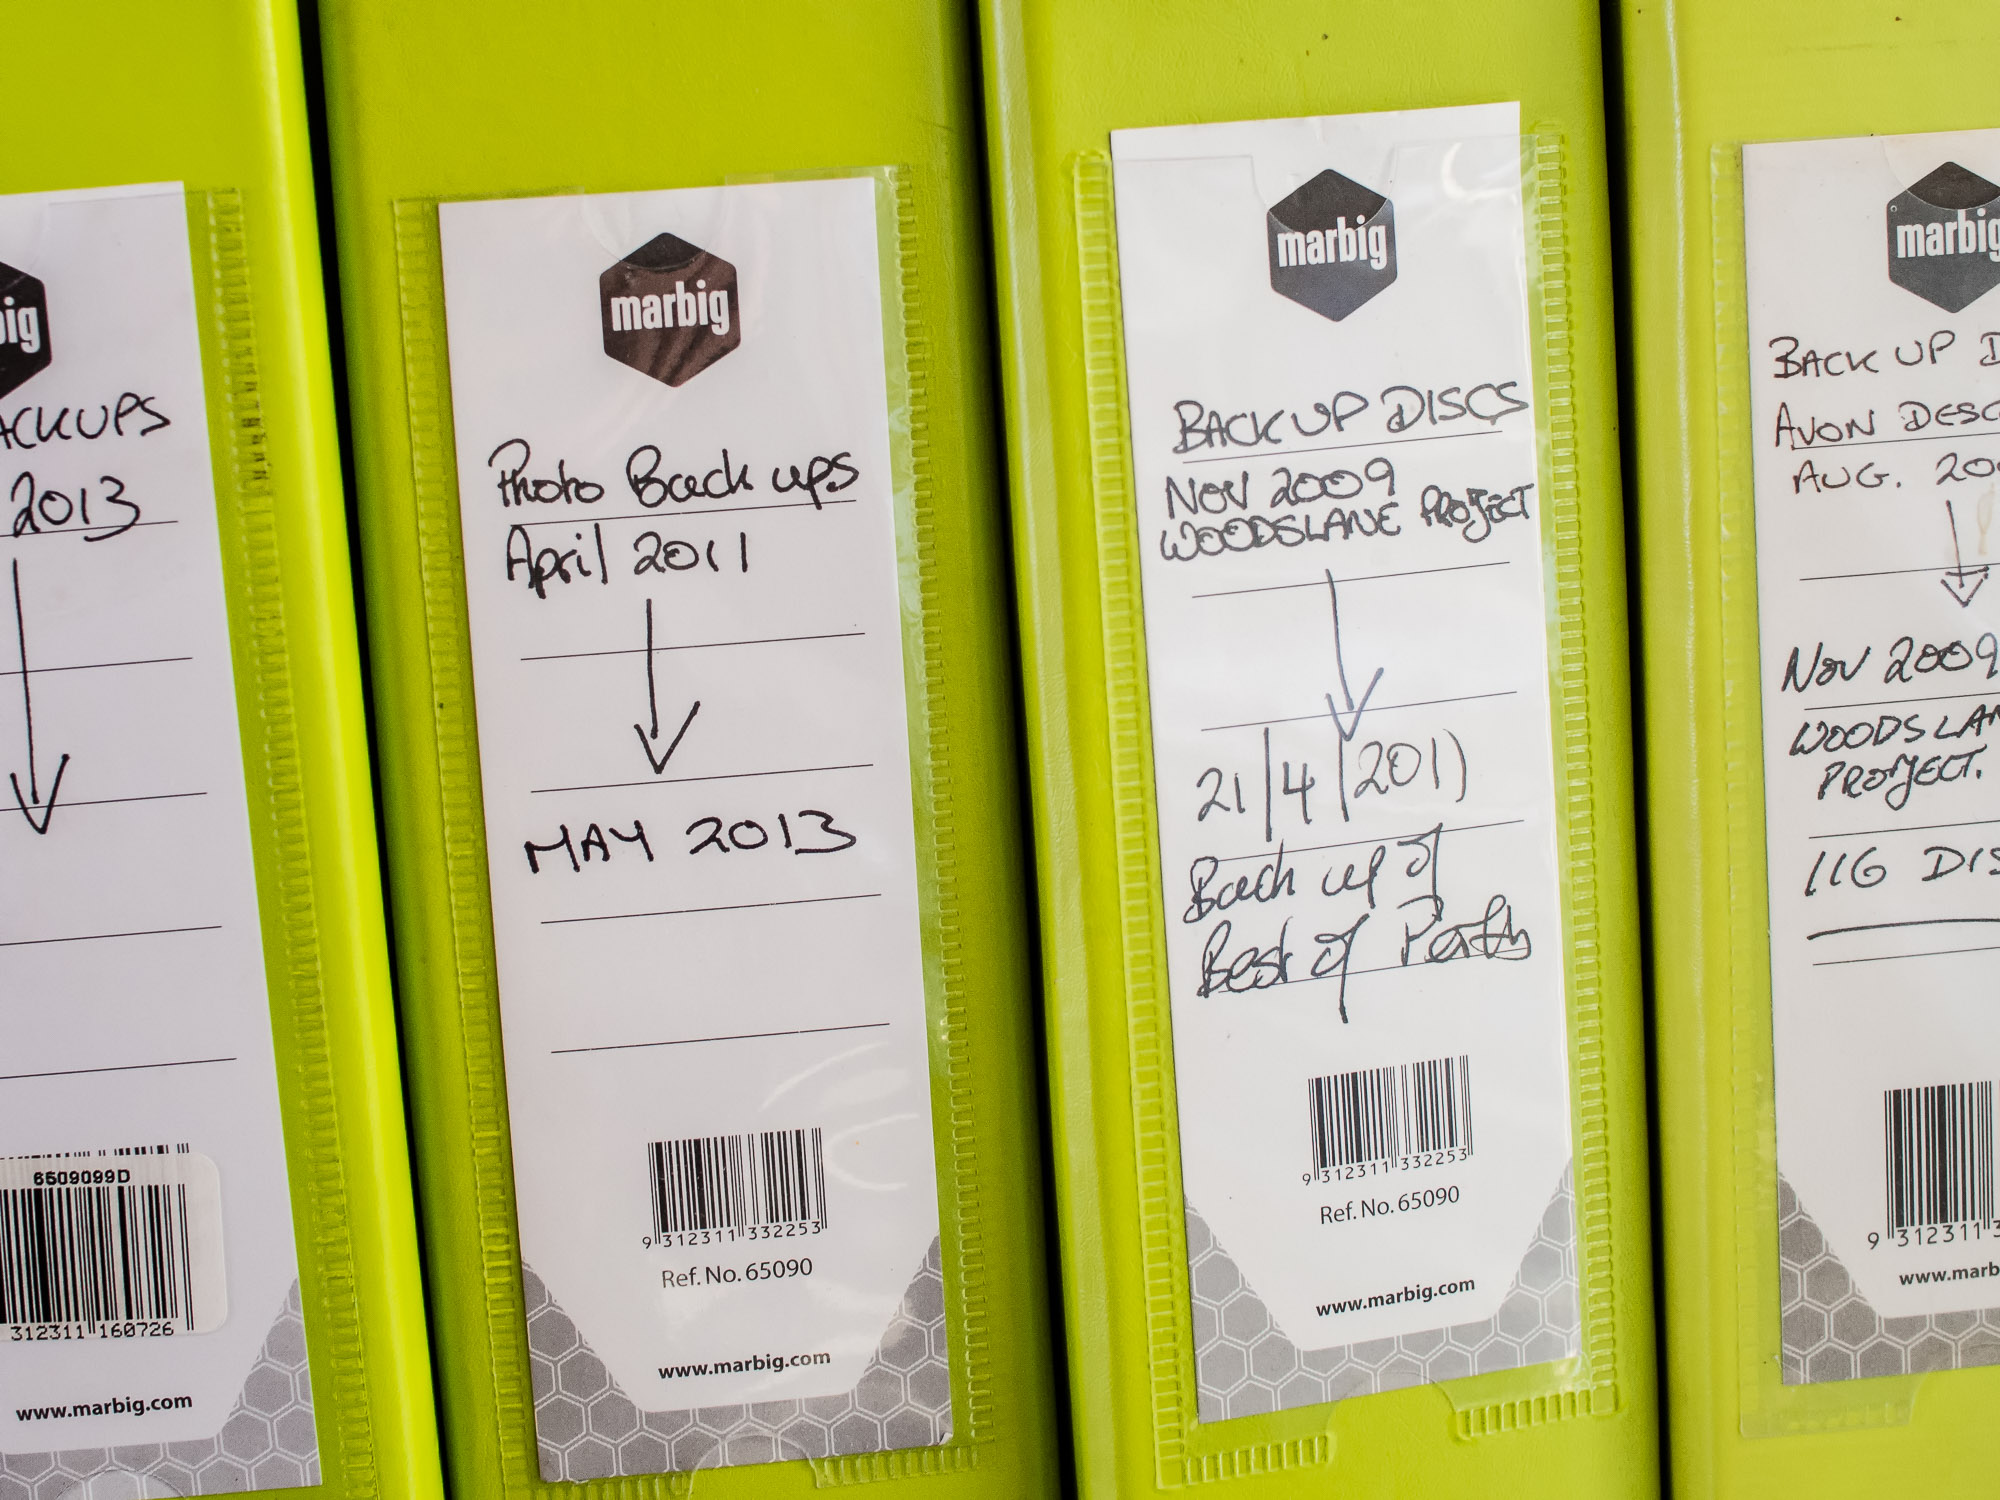
Keep your DVD backups organised and easy to find.
Archive. I make a DVD of the selected images saving them as TIFFs and then using Get Backup I back up my Lightroom library again. The selected images are then also uploaded to 500px and Flickr accounts as jpgs as a form of cloud storage. Flickr gives you 1 terabyte free and you can purchase more and my 500px Plus account gives me unlimited uploads for $25 USD per year. Both allow me download the images again. I have Get Backup scheduled to back up my library everyday so that if anything should happen to my Lightroom library I would lose at most just 24 hours of work and I can use the DVDs to reload the RAW files.
External hard drives are cheap and provide ample room for storage of digital images and video files.
Now we’re all multi-media artists and shooting video and recording audio there a couple of extra things to do. I have a separate drive for video projects and I also have a duplicate of it that is synchronised via Get Backup. So the workflow is as follows:
Video files are imported into Lightroom the same way as stills. They re-named, tagged and placed into a folder. After that each clip is viewed and those that are selected are then flagged.
– Transfer the files to a folder on the desk top and then copy them to a DVD or Blue Ray disc. Import them into Lightroom and make your selection for the clips you want to use. Back up the Lightroom catalogue and synchronise the disk with its copy.
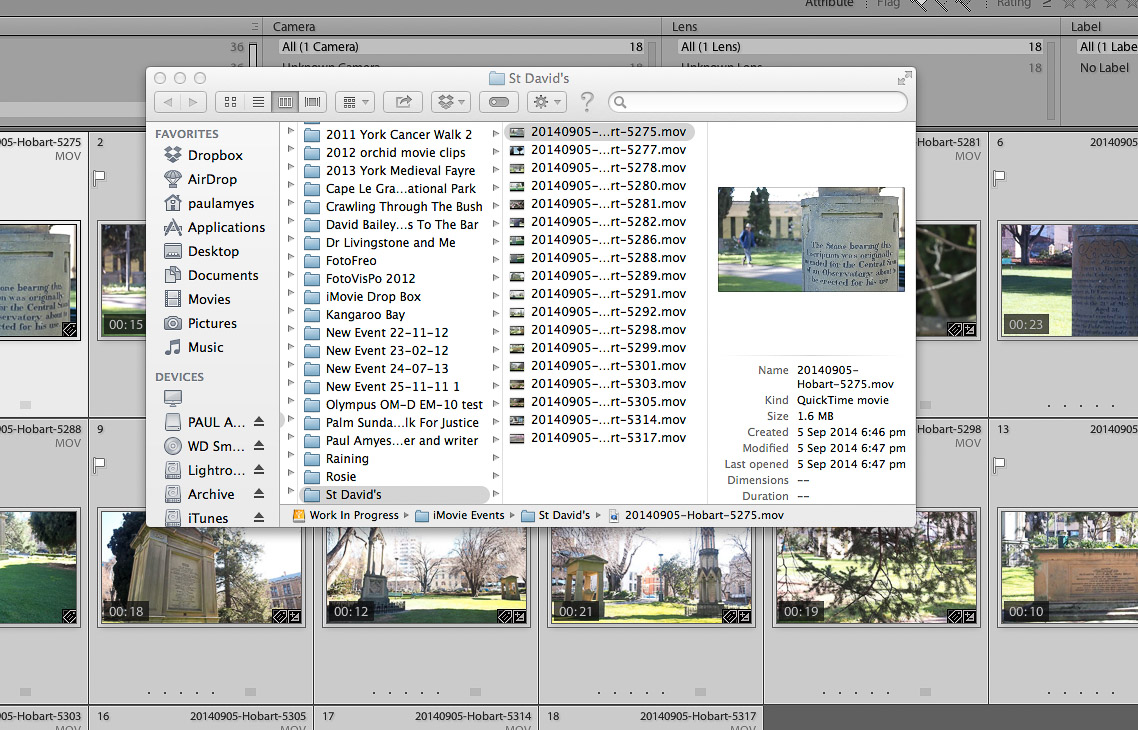
The selected clips are then copied over to an iMovie Event Folder made for the video project.
– When done open iMovie create a new project for your. video. I create a new event and call it the same name as my project, it helps me organise things so I don’t lose them. Import the movie files and I also add any audio files. Then the project should show in your time line and the footage in your event library.
Import the video clips into iMovie by going to File > Import > Movies and open up the folder where you copied the clips to from Lightroom.
– It is then just a matter of dragging and dropping the clips onto the time line. I work by dragging the clips into roughly the order I want. I then trim them so they’re not too long and boring.
Then just drop the clips onto your timeline in the order you want them.
Edit the clips for length, stabilisation, rolling shutter, colour correct and adjust the attached audio.
Just as I did in Lightroom, if I want a certain look to my images I’ll use an external editor or plugin. Here I’m using Film Convert.
I add my titles and my credits back in iMovie.
– Then I edit the clips sorting out camera stabilisation, rolling shutter, and tweak the exposure as needed.. Then I sort out the audio making sure everything is at the same level so there are no sudden bursts of loud noise to scare the unsuspecting viewer, or there are no quiet spots where no one can hear anything. I then put a title page on the front and an credits page at the end.
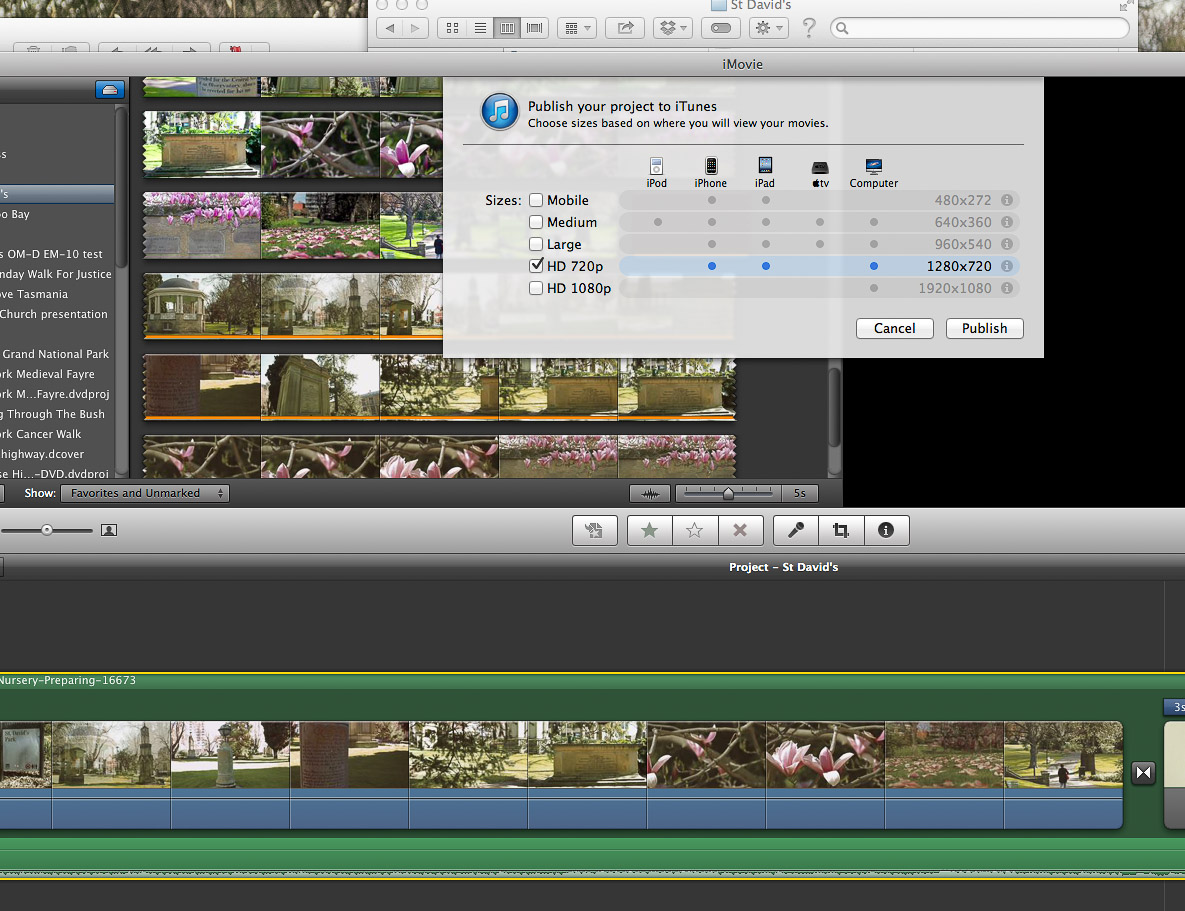
Publishing to iTunes
Uploading to You Tube. I add a description and tags so people can find it and know what it is about.
– Last but not least, this when I drop the music sound track onto the project if I’m using one. Check it all to see it’s what I want then I export to iTunes and upload to YouTube or Vimeo. If I’m making a movie for family I send it to iDVD to make a DVD that will play on a standard DVD player. This is of course at standard definition rather than HD.
Make a DVD or Blue Ray copy.
The finished uploaded movie.
In Summary
1) Hardware
– Get the best monitor you can afford, and keep it regularly calibrated and profiled in an appropriately illuminated environment.
– Acquire abundant hard drive storage capacity.
– Maintain your computer and operating system properly.
2) Capture
– Shoot raw if possible. This provides the highest image quality and the most flexibility for image correction and interpretation.
3) Colour
– Always embed and preserve the appropriate color profile in image files
– Use a large color space for image editing, such as Adobe RGB (8 and 16-bit) or ProPhotoRGB (16-bit)
– For best possible results, you may want to profile your camera or printer
– When delivering image files, make sure both sides understand color profile requirements.
4) Image Editing
– Use parametric image editing tools for as much image editing as possible.
– In order to enable non-destructive image editing in Photoshop, use and save layers, adjustment layers and smart objects to master files.
5) File Management
– Assign unique file names to images in order to distinguish one file from another and to prevent overwriting of files.
– Create a naming convention that is easy to use and remember and that can be automated.
– Use folders to organise and store files.
– Use metadata and cataloging software to manage the content of your image collection and to streamline image searches.
4)Metadata
– Embed credit, contact and copyright information in all image files.
– Add bulk metadata to describe the shoot and add keywords as necessary.
– Use the appropriate metadata field for more specific tags such as location.
– Be aware of programs and workflow steps that may strip metadata.
5) Backup
– Use a 3-2-1 backup (3 copies, 2 different media, 1 stored offsite) whenever possible.
– Clearly distinguish the primary and backup copies of your digital image files.
– Schedule system backups to occur at appropriate places in the workflow and image life cycle.
– Clone your system periodically to avoid lost time and lost data in the event of system drive failure.
6) Preservation Management Practices
– Archive capture files as soon as possible in the workflow to protect your images.
– Archive layered master files to ensure projects can be re-created in their entirety.
– Migrate to new media periodically, to prevent loss due to media failure and to increase the speed of access.
– Migrate to new file formats as necessary to stay current technologically and to avoid obsolescence.
– DNG offers a secure openly documented and forward compatible format for image archiving.
The Olympus 25mm f1.8 standard lens. Small but beautifully formed. Olympus even give you a lenshood!
The other day I was sitting at my desk just idly surfing the net when a courier van pulls up and leaves a small box. Once unwrapped it revealed an even smaller box containing the Olympus m.Zuiko Digital 25mm f1.8 lens. Now for a long time I’ve always believed that every photographer should own a fastish standard lens. In fact I also believe that if should ever find yourself in the photographic doldrums then just committing to use a standard lens for a period of 12 months will see your photography improve no end. I had one for my OM film system (and still have and use it) and I have one for my Canon EOS digital kit, but a little while back I had a dalliance with film range finder cameras and I eschewed the fast 50mm in favour of a pancake 35mm moderate wide-angle. In fact I was so smitten with the focal length that when I adopted the m4/3 system the Olympus 17mm f2.8 pancake was a must have, and if I look through my Lightroom catalogue over half the picture I’ve taken with my Pen and OMD have been with that lens. So now I’m in possession of a fast standard again.
No obvious lens distortion.
My initial impressions are that although it has a plastic body it is well made, although not as well made as say the 60mm f2.8 macro. It continues with the clean modern lines that Olympus adopted with the launch of the EM-5 and it feels well-balanced on both my EP-2 and EM-10. The other small thing that makes feel very positive about the lens is that Olympus have finally stopped being tight and are including lens hoods. The hood is hard plastic and bayonets securely on to the lens after the front cosmetic rim of the lens has been removed. Nice – a good lens should have a lens hood to get the best out of it. After a couple of days of shooting stills out and about I found that the focal length took a little adjusting to, it is a bit narrow for my tastes, but I quickly adapted and started looking for subjects that would play into its strengths.
DOF comparison 1 Olympus Zuiko 25mm f1.8 lens wide open at f1.8DOF comparison 2 Olympus Zuiko 25mm f1.8 lens at f8DOF comparison 3 Olympus Zuiko 25mm f1.8 lens at f22
So optically how did it fare? Very well. There is no distortion worth talking about and although shooting wide open there is some slight chromatic aberration but this disappears very quickly and by f4 it is gone. Sharpness is good with the centre of the lens performing very well wide open with some softening towards the corners again things improve quickly as you stop down, but get down past f11 and things start to soften up again as diffraction rears its ugly head. Diffraction isn’t a fault of the lens it is a problem with the size of the sensor, and all sensor and film sizes suffer from it. The lens isn’t what I would call “clinically” sharp in the way a lot of modern lenses are, it renders nicely and has a nice fall off from sharp edges to the out of focus areas. I’m not by any means a bokeh slut but this lens does render out of focus specular highlights in a very pleasing way. It made me want to go out and look for images that would give me those velvety smooth transitions.
Decentering test on the Olympus 25mm f1.8 at f1.8.Decentering test on the Olympus 25mm f1.8 at f5.6.Beachside Bully Run. The autofocus is quick and accurate and was able to track my dog running erratically on the beach.
The lens focuses insanely quickly on the EM-10, which is as it should be on the latest generation of m4/3 cameras and is no slouch on my first generation EP-2. The worrier of DPReview now obsess over centring and on the micro four thirds forum the hysteria regarding the Olympus 25mm is something to behold. A few people there are expecting lens perfection from this lens and unfortunately no lens is perfect. Does the lens suffer excessively from being de-centred – well according my exhaustive testing of just one sample lens the answer is no. The lens is well within acceptable and I have seen much worse on lenses that cost ten times the amount this one does. My advice is that if you spend all day shooting pictures of brick walls and sheets of newspaper right way up and upside down then blow the resulting shots up to 3 or 400 % and then worry continually that you have a bad copy, or your rate of return rate of “faulty” products is so high that the customer service people know who is on the line just from the sound of your voice then you need a new hobby, therapy or both. Life is short, hobbies are supposed to bring enjoyment and fulfilment not create endless gear angst.
White flowers with bokeh balls. Dodges Ferry, Tasmania.Tea StrainersBanoffee pie Banjo’s Bakery, Hobart, Tasmania.Liberal Party Hobart, Tasmania.Coffee Lovers Hobart, Tasmania.On location filming at the Bellerive Yacht Club with the Olympus EM-10 and 25mm f1.8 lens.
For video the lens is a very good choice. I shot the video clip below to test the lens’ resistance to flare, how it coped with continuous focus in video, close focusing and bokeh rendition.
Now there are some lenses which are so good that people buy into the system just to have a copy of that lens. Is the Olympus 25mm one of those? The short answer is no, but that is a disservice to this lens. It is a very capable performer and I think it should be given serious consideration by anyone who is already invested in the micro four thirds system. I really must say I was pleasantly surprised at how well the 25mm performed. It’s not the fastest lens, it’s not the most expensive, nor is it the cheapest. There are other m4/3 lens that are optically superlative and there are those whose performance is less than stellar to put it mildly. The Olympus m.Zuiko Digital 25mm f1.8 lens is a “Goldilocks” lens – just right.
Ouch! Don’t headbutt the buildings – it hurts.Blowing in the Wind Bellerive Yacht Club, Tasmania.The SS Kosciusko part of the facade of the Waterfront Hotel in Bellerive.Looking out over the marina at Bellerive Yacht Club.Stool Samples Hobart, Tasmania.
On the last weekend of our trip to Tasmania we got the weekend paper and saw they were running a video competition on the theme “Why I Love Tasmania”. Bugger! If I’d known I would have taken a lot more kit, recorded in 1080, used an external recorder with better microphones and written a proper story board and script. Why didn’t I find out about this at the beginning of the trip. Ah well I thought you’ve got to be in it to win it and I put together a short video with what I had shot on my Olympus EP-2 with the SEMA-1 mic which is only marginally better than the built in camera mic, and the four lenses that I always carry when on holiday – the Olympus 17mm f2.8, the 12-50mm f3.5-6.3, the 40-150mm f4-5.6 and the 60mm f2.8 macro. This trip was the first trip I’d taken my tripod, thankfully with a fluid head, and my video monopod (which I happen to think is one of the best accessories I have bought for doing run and gun video). In my wildest dreams I don’t expect to do well in the competition let alone win it, but it was a bit of a larff doing it and it was good experience to work to a deadline on a project.
The EM-10 fitted with the Olympus m4/3 Zuiko 12-50 f3.5-6.3 lens. A good walk around combination for stills and video.
It has been a very exciting two weeks here at Paul Amyes Photography Towers. A little note from the Fed-Ex man turned up in the mail box saying he wanted to deliver me something. To say I was perplexed was an understatement as I hadn’t been bashing the plastic in an orgy of online shopping. So I dutifully walked up to the depot (its only 500m) up the road, and collected it. On getting it home I found inside a was a shiny new Olympus OM-D EM-10 (which shall just be referred to as the EM-10 henceforth) and an offer to have for long-term testing and evaluation. Woooohooo! A new toy to play with.
The EM-10 is smaller than the EP-2 with the VF2 viewfinder attached.
So two weeks later I’m siting down and trying to marshal my thoughts about the experience thus far. I think that I should give a little background. My first 35mm camera was an Olympus XA2 and since then I have owned OM1, 2, 4, 20, and 40’s, an XA4, an AF10, a C720 UZ and more recently an EP-2. I was shooting weddings professionally with my OM4 up until 2005 when one sad day it broke down and the repairman said there were no more parts to fix it. I then had an expensive dalliance with Canon, which no matter how hard I tried I could not turn into fully fledged relationship because the spark just wasn’t there. I’ve used other cameras and I really enjoyed them – Voigtlander Bessas, Pentax 645, Panaonic LX-5 all spring to mind, but I have to confess that the EM-10 is the first camera I’ve ever used that has made me want to hurl it across the room and then jump up and down on the pieces in sheer frustration. My EP-2 is my all time favourite camera to use. I accept its idiosyncrasies and can work round them because the whole process is so enjoyable. I use it as my travel camera and for multimedia projects. The EM-10 I thought would be an ideal replacement.
The pop up flash can also act as a remote control for off camera speedlites.
Well lets talk about the good stuff. The camera looks drop dead gorgeous and it feels just right in the hands. My father always used to say that I had hands like bunches of bananas yet this small camera feels just right. In fact it such a tactile experience I’ve found that I often just pick it up to fondle and just hold. I know, I know it just sounds so wrong, but for me a camera has to actually feel good in the hand. I like cameras that become transparent and don’t get in the way of taking photos.
Portrait of my bully, Frida, using m4/3 Olympus 17mm f2.8 on the Olympus EM-10. Exposure 1/100 sec, f2.8 ISO 1600.
Olympus when they introduced the 16Mp sensor with the EM-5 were onto a sure-fire winner. Its origins were, and still are hotly debated on internet forums and while most accept that it is from Sony a few diehards are like the Birthers in the US arguing that it comes from Panasonic. Personally I don’t care where it comes from, all I know is that the latest iteration in the EM-10 is very good. The dynamic range and the pixel amount are just about perfect for my needs. If you want more details then DXO or DPReview can shed more light on the technical aspects.
Using the built in pop up flash as in RC mode to controll a Metz 44AF1 speedlite.
I very much like the EVF. When I bought the C720 UZ in 2002 I was convinced that EVFs were the future. The EVF in the EM-10 is not the same as the one in the flagship EM-1 or in the VF4, but it is better than the VF2 and the one in the EM-5. It is crisp, has a good refresh rate, and I find that I can focus manually quite accurately which is better than I can say for the viewfinders on many dSLRs. Where my EP-2 used to frustrate me was that I could not use the viewfinder and a flash, it had to be either or. I like having the EVF built in to the camera. Speaking of flash the EM-10 is the first in the series to have a pop up flash. I can’t see myself using it as a flash, but it can be used as a remote control for off camera flashguns and in that mode it works excellently and I can see myself using the function a lot when I start photographing orchids in spring. The rear screen is nice, it is the first tilt and touch screen that I’ve used and I like both features. The aspect ratio of the screen is 3:2 rather than 4:3 so you have black bars at the edges when shooting in the native 4:3 format. In the strong Aussie sun the screen is hard to see, I think this to do with it being a LCD rather than an OLED as in the other OMDs.
The 3 axis IBIS is a down grade from the previous models 5, but it works very well and the video below demonstrates that. With my 17mm f2.8 I’m able to get sharp images at 1 second which I find amazing. It works very well in video mode in conjunction with digital image stabilisation and it possible to capture steady video without the need for a rig or monopod. Many have poo pooed the video quality of Olympus cameras as being not suitable for serious work because there is only 30fps and a maximum bit rate of 24Mb/s in 1080p. Well I would have to say that while I do shoot a fair bit of video it is only destined for YouTube or converting to SD for DVDs that my elderly relies can play. So for those purposes it is more than adequate. The video clips below are straight out of the camera, nothing has been done to them apart from adding subtitles and a sound track. I’ve uploaded them to YouTube in 1080 so you can see what the camera actually produces. Any artefacts you may see will be a result of the compression YouTube uses. The only thing about the video function I don’t like is that there is nowhere to plug an external mic or recorder in. Yup no accessory port under the hot shoe and no 3.5mm socket. Bad Olympus, very bad!
Ok as I have just started with a fault I’ll move on to them. I like shooting HDR panoramas. I know many will consider that as a crime against humanity, but I like doing it. The EM-10 has both HDR and panorama modes. Can they be used in conjunction? NO! Ah well back to shooting them manually. I’ve programed the function button on my 12-50mm lens to turn exposure bracketing on. Nice it means I don’t have to delve deeply through the notorious Olympus menus. Not so nice is that the bracketing is still limited to 3 frame at -1, 0, and +1 EV. Come on Olympus it is 2014, your sensor has great dynamic range lets at least have 2 stop intervals.
While the EM-10 has both a HDR mode and panoramic function they cannot be used together. This handheld panorama is made up of 12 frames put together in CS5 and HDR Efex Pro 2. The 3 axis stabilisation works very well and makes this sort of work a doddle.
Focus peaking is a very nice feature and it works very well, but as a default straight out of the box it will only work with native m4/3 lenses that have electronic contacts in the lens mount. I searched the manual and there is no mention of focus peaking with legacy glass. I searched the internet high and low and there seemed to be a great deal of confusion as to whether focus peaking could be activated with old lenses. After some fiddling around I found that if you assign a button to activate it you can use it with adapted lenses. Hoorah! But you can’t use it in video. Boo!
Nodding Jesus. Using legacy glass on the EM-10 is a breeze with the new focus peaking function. Shot wide open on an Olympus Zuiko 50mm f1.4 lens.
Speaking of the manual it deserves special mention. It should be held up as an example to all consumer manufacturers as an example of how not to write a manual. I wanted to test the new live composite function. I shoot a lot of night photos and this looked like it could really be good and save time faffing around in Photoshop with blending layers. Did the instructions tell you how to use it? No. Did Olympus Australia’s website shed any light on how to use it? No. After searching for ½ a day on the internet I found a photo forum in Singapore where one of its members had posted some shots using the function and enough information for me to work it out. Unfortunately since then the local farmers have been burning off their fields and the Avon Valley is choking to death on the smoke haze which means no clear night skies. Hopefully in the next couple of weeks I’ll be able to see the stars and photograph them.
I won’t say any more at the moment as I want to use the camera some more. However, I find the EM-10 to be a curious beast. Olympus is going after the first time DSLR buyer with this model, you know the people who buy something like a Canon Rebel or the Nikon equivalent because they want to be able take better pictures while on holiday, or photograph the kids sports day etc. Well both Canon and Nikon know that market very well and they sell their cameras by the boat load because they are relatively cheap, easy to use and can still satisfy the user as their skills grow. The EM-10 is a bit more expensive but thanks to the awful menu structure Olympus insists on continuing to use and poor instructions it is not easy to use. I have a feeling that there will be a lot of EM-10s for sale on EBay in six months time with a lot of frustrated buyers being either put off photography as a whole or buying something from Canikon. I think it is a great shame. The EM-10 could have the makings of a great camera, the sensor is terrific, it looks great, it handles well, but the user interface is absolutely appalling. I’m all for giving people the option of custom configuration, but on a camera targeted at the beginner who doesn’t know their f stops from their ISOs it is not as it just adds to confusion with such a frustrating UI. The EM-10 is like the curates egg – good in parts.
Sorry for the absence of a post last weekend – my trusty laptop had pass away and gone to Silicon Heaven. It may come as a shock to many people that there is an afterlife for electric and electronic appliances.
So I had to get myself another computer, this time I bought myself a desktop. All very swish looking with lots of brushed aluminium and shiny glass. The OS interface is all very futuristic looking in that sleek modern shiny way. Of course it wasn’t just a straight forward turn the thing on and then install my apps – no my last machine was a little on the ancient side and things had moved on and I had to search for updates, patches and firmware revisions. It’s amazing what a time sink a computer can be, I first started working with them in the mid 1980’s and we were promised a lot of things like they’d make us more efficient and we’d have a paperless office. Well thirty years on the paperless office still hasn’t arrived and anything involving a computer still takes longer than it did without one. In 1985 2013 sounded so futuristic and full of possibilities, yet now we’re here it is all a bit of an anticlimax. Whatever happened to the 3 day working week we were promised? I distinctly remember watching a TV program aired on the BBC called Tomorrow’s World which said that we’d all have flying cars. I suppose somethings did change – if you’d have told me thirty years ago I’d be taking photos with a phone I’d have thought that:
you’re nutty as squirrel pooh
I’d need a jolly long cable just get the phone out of the house
Well here I am and although it is possible to take photos with a phone I’m not actually doing it because a smart phone would be pretty pointless as there’s no 3G coverage where I live. I suppose I could get one just to take photos with, then it would become a camera with an optional phone built in.
Talking about all things “timey-whimey”, as Doctor Who might say (you can see from this post that I spend too much time watching sci-fi from the BBC) the town of York in Western Australia suffered a huge temporal disturbance and was transported back to the middle ages, and more to the point it wasn’t Medieval Australia but Medieval Europe. I walked down to the park besides the River and there were all manner of people walking about in suits of armour, there were jesters hey nony no-ing and all manner of other Olde Worlde frippery. I quickly came to my senses and realised that it wasn’t a temporal disturbance after all but the 2013 York Medieval Fayre. There was a Medieval market where you could get the latest in Long Bows, armour, heraldic devices and even toys. I avoided the stall selling Medieval German sausages as they were probably past their sell by date – I know I know that was the wurst joke ever!!! 🙂 There were the good people of the Grey Company who put on displays of historical re-enactment focusing on the Dark Ages and Medieval times. Then there was the The Free Company who’re a group of biffologists who dress up in armour and give each other a serious belting as the YouTube clip below shows.
I fear that at this point in time I must make a confession – I strayed from the micro four thirds path and returned to full frame goodness. I broke out the 5d and the 70-200 f2.8 IS L because I knew that it would be difficult to isolate subjects from crap distracting backgrounds with the smaller format but easy to do with the larger format and fast glass. Does this mean that I will stop using m4/3? No, I’m just using the appropriate tools for the job. If anyone would like to see the stills outside of the video clip they can be seen here.
Over this spring it literally feels like I have been crawling through the Western Australian bush on my hands and knees stopping only to take photographs of native orchids. So it was only fitting that I should title this short video “Crawling Through The Bush – one orchid at a time”.
A few highlights from this year’s orchid season would be firstly the albino purple enamel orchids I found quite by accident on Mount Observation when I went for a leak. Yes I know – that’s probably too much information.
Albino purple enamel orchid
Another fave would be the rabbit orchid I photographed near Kojonup.
The Rabbit Orchid (Leptoceras menziesii) only flowers after a disturbance to its environment such as a bush fire. Kojonup, Western Australia.
This next orchid had me well and truly stumped until Andrew Brown , curator of the Orchidaceae and Myoporaceae at the Western Australian Herbarium amongst many other things, kindly identified it for me.
Clubbed spider orchid, Caladenia longiclavata, Kojonup, Western Australia.
This last one I just like from a photographic point of view.
Bee orchid or Diuris laxiflora, Kojonup, Western Australia.
The video as well as showing the locations also shows some of the techniques I use for photographing the orchids. The video was shot using an Olympus Pen EP-2 micro four thirds camera and the audio was recorded directly to the footage using either a Rode Video Mic pro or the Olympus SEMA-1 microphone used as a lavalier mic. One short clip was filmed with a Panasonic Lumix LX-5.
The 2014 Orchid calendar is now available for sale, just click on the image below and you’ll be taken through to my on-line store at RedBubble.
As always if you are interested in purchasing a copy of any of the photos click on the image.
Tasmanian Tales has now been released as a movie on YouTube and as a book through Blurb.
Tasmania. Australia’s island state. It’s the little bit off of the south-eastern coast that most people forget about. So what’s it all about then? Join me as I travel the island and make written and photographic observations as I do so.









You must be logged in to post a comment.