Cataby 170Km north of Perth in Western Australia could hardly be called the epicentre of the universe. There’s a titanium mine to the north and a mineral sands operation just south. There is the Cataby Important Bird Area just 2Km outside the settlement. None of these were the reason for my visit. I was there to explore the scrubland that runs along side the Brand Highway looking for orchids, in particular the Arrowsmith Pansy – insert politically incorrect joke here. I must say that when I first pulled up I didn’t expect to find much. The low lying scrub was difficult to walk in and it was very difficult to see the smaller plants. Here’s what I found.
Arrowsmith Pansy Orchid, Diuris sp ‘Arrowsmith’. Cataby, Western Australia.
Autumn Leek Orchid, Prasophyllum parvifolium. Cataby, Western Australia.
Winter Donkey Orchid, Diuris brumalis. Cataby, Western Australia.
Hairy stemmed snail orchid,Pterostylis sp. ‘hairy’. Cataby, Western Australia.
Northern Banded Greenhood, Pterostylis sp ‘Dongara’. Cataby, Western Australia.
After all that talk the other day about street photography lets talk about a focal length that is synonymous with the street photography genre – the 35mm. In particular the Tamron 35mm f2.8 Di III lens.
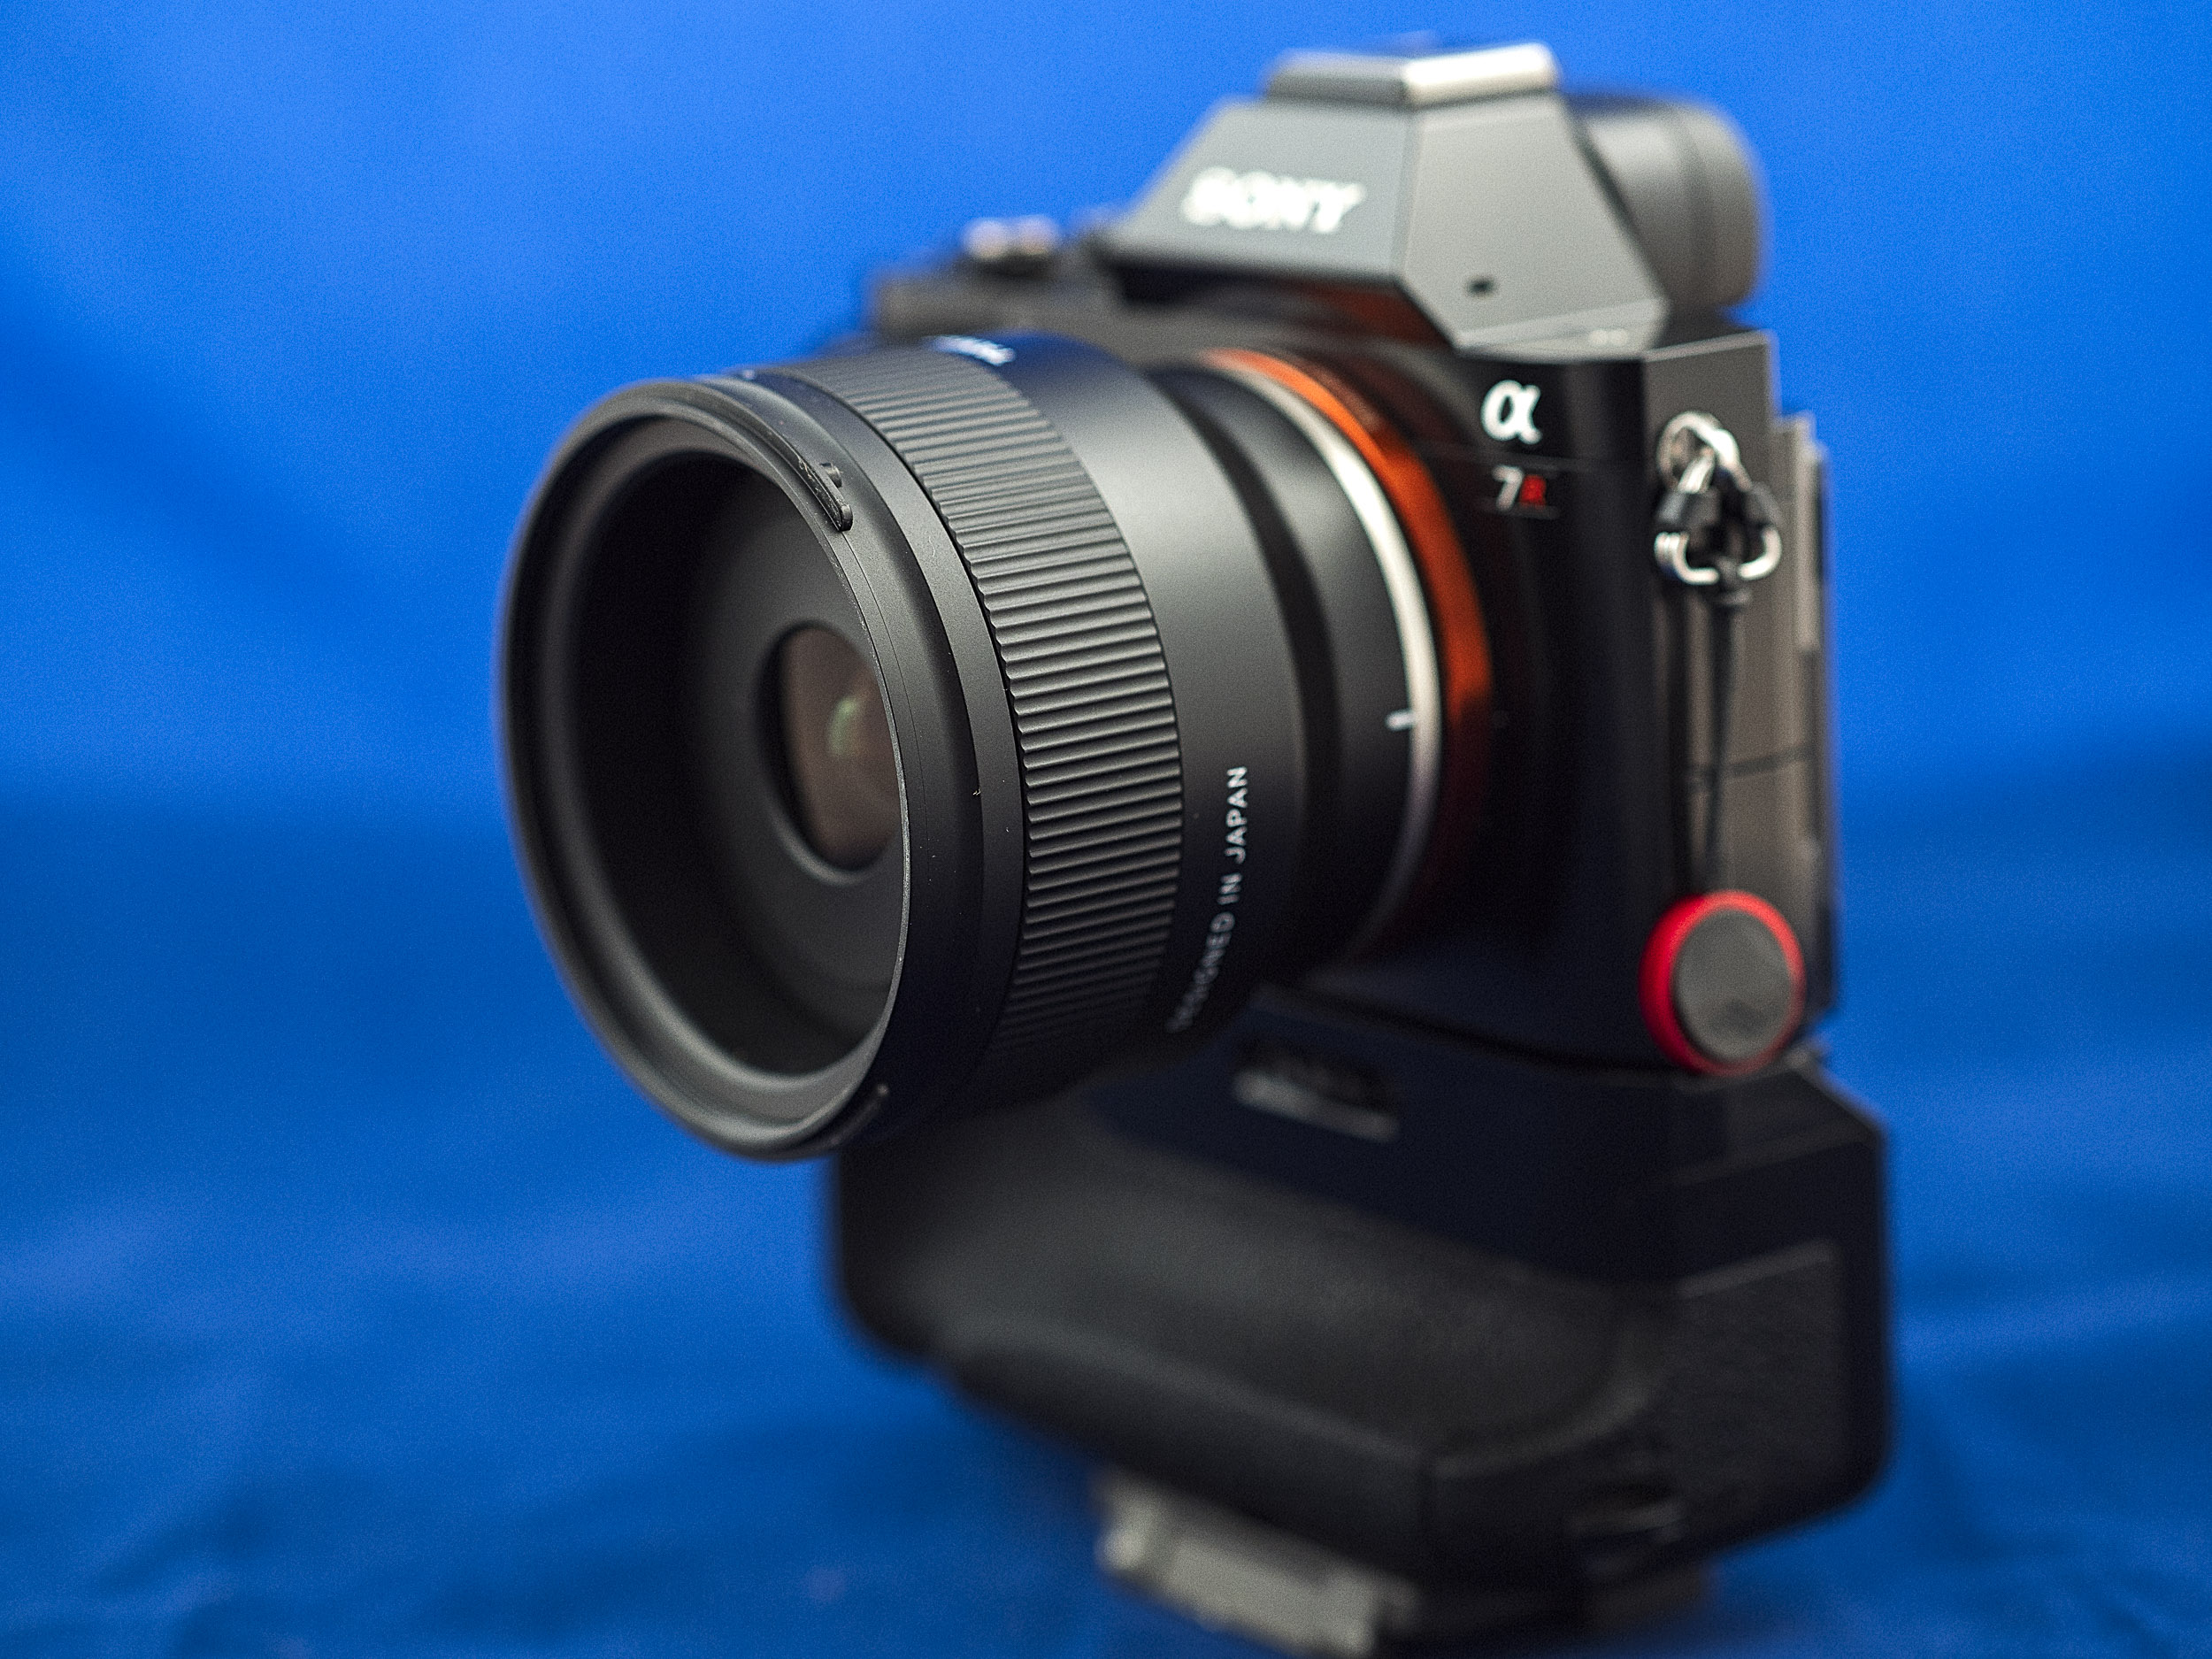
Tamron 35mm f2.8 Di III lens mounted to a Sony A7r.
TLDR
Introduction
The Tamron 35mm f2.8 lens for Sony E mount cameras was announced back in November 2019 as part of a trio of prime lenses which share the same exterior design, construction, size, filter diameter and f stop. The other lens being the 24 and 20 mm. As lenses are becoming ever faster and even larger with price tags to match it is nice to see Tamron do something significantly different. The modest apertures and price tags may put off lens snobs, but they have enabled Tamron to give good optical performance at very reasonable price of $450 AUD. To many f2.8 may be disappointing, but honestly apart from bragging rights about shallow DOF we do not honestly need ultra fast lenses as todays cameras have absolutely astounding high ISO performance. When I started photography you needed fast lenses because film speeds were slow. I regularly shot ISO 25, 50 and 64 film emulsions and I wanted to do it handheld not on a tripod. Now shooting full frame digital at ISO 6400 gives the same image quality as as shooting ISO 64 film stock.
Specifications
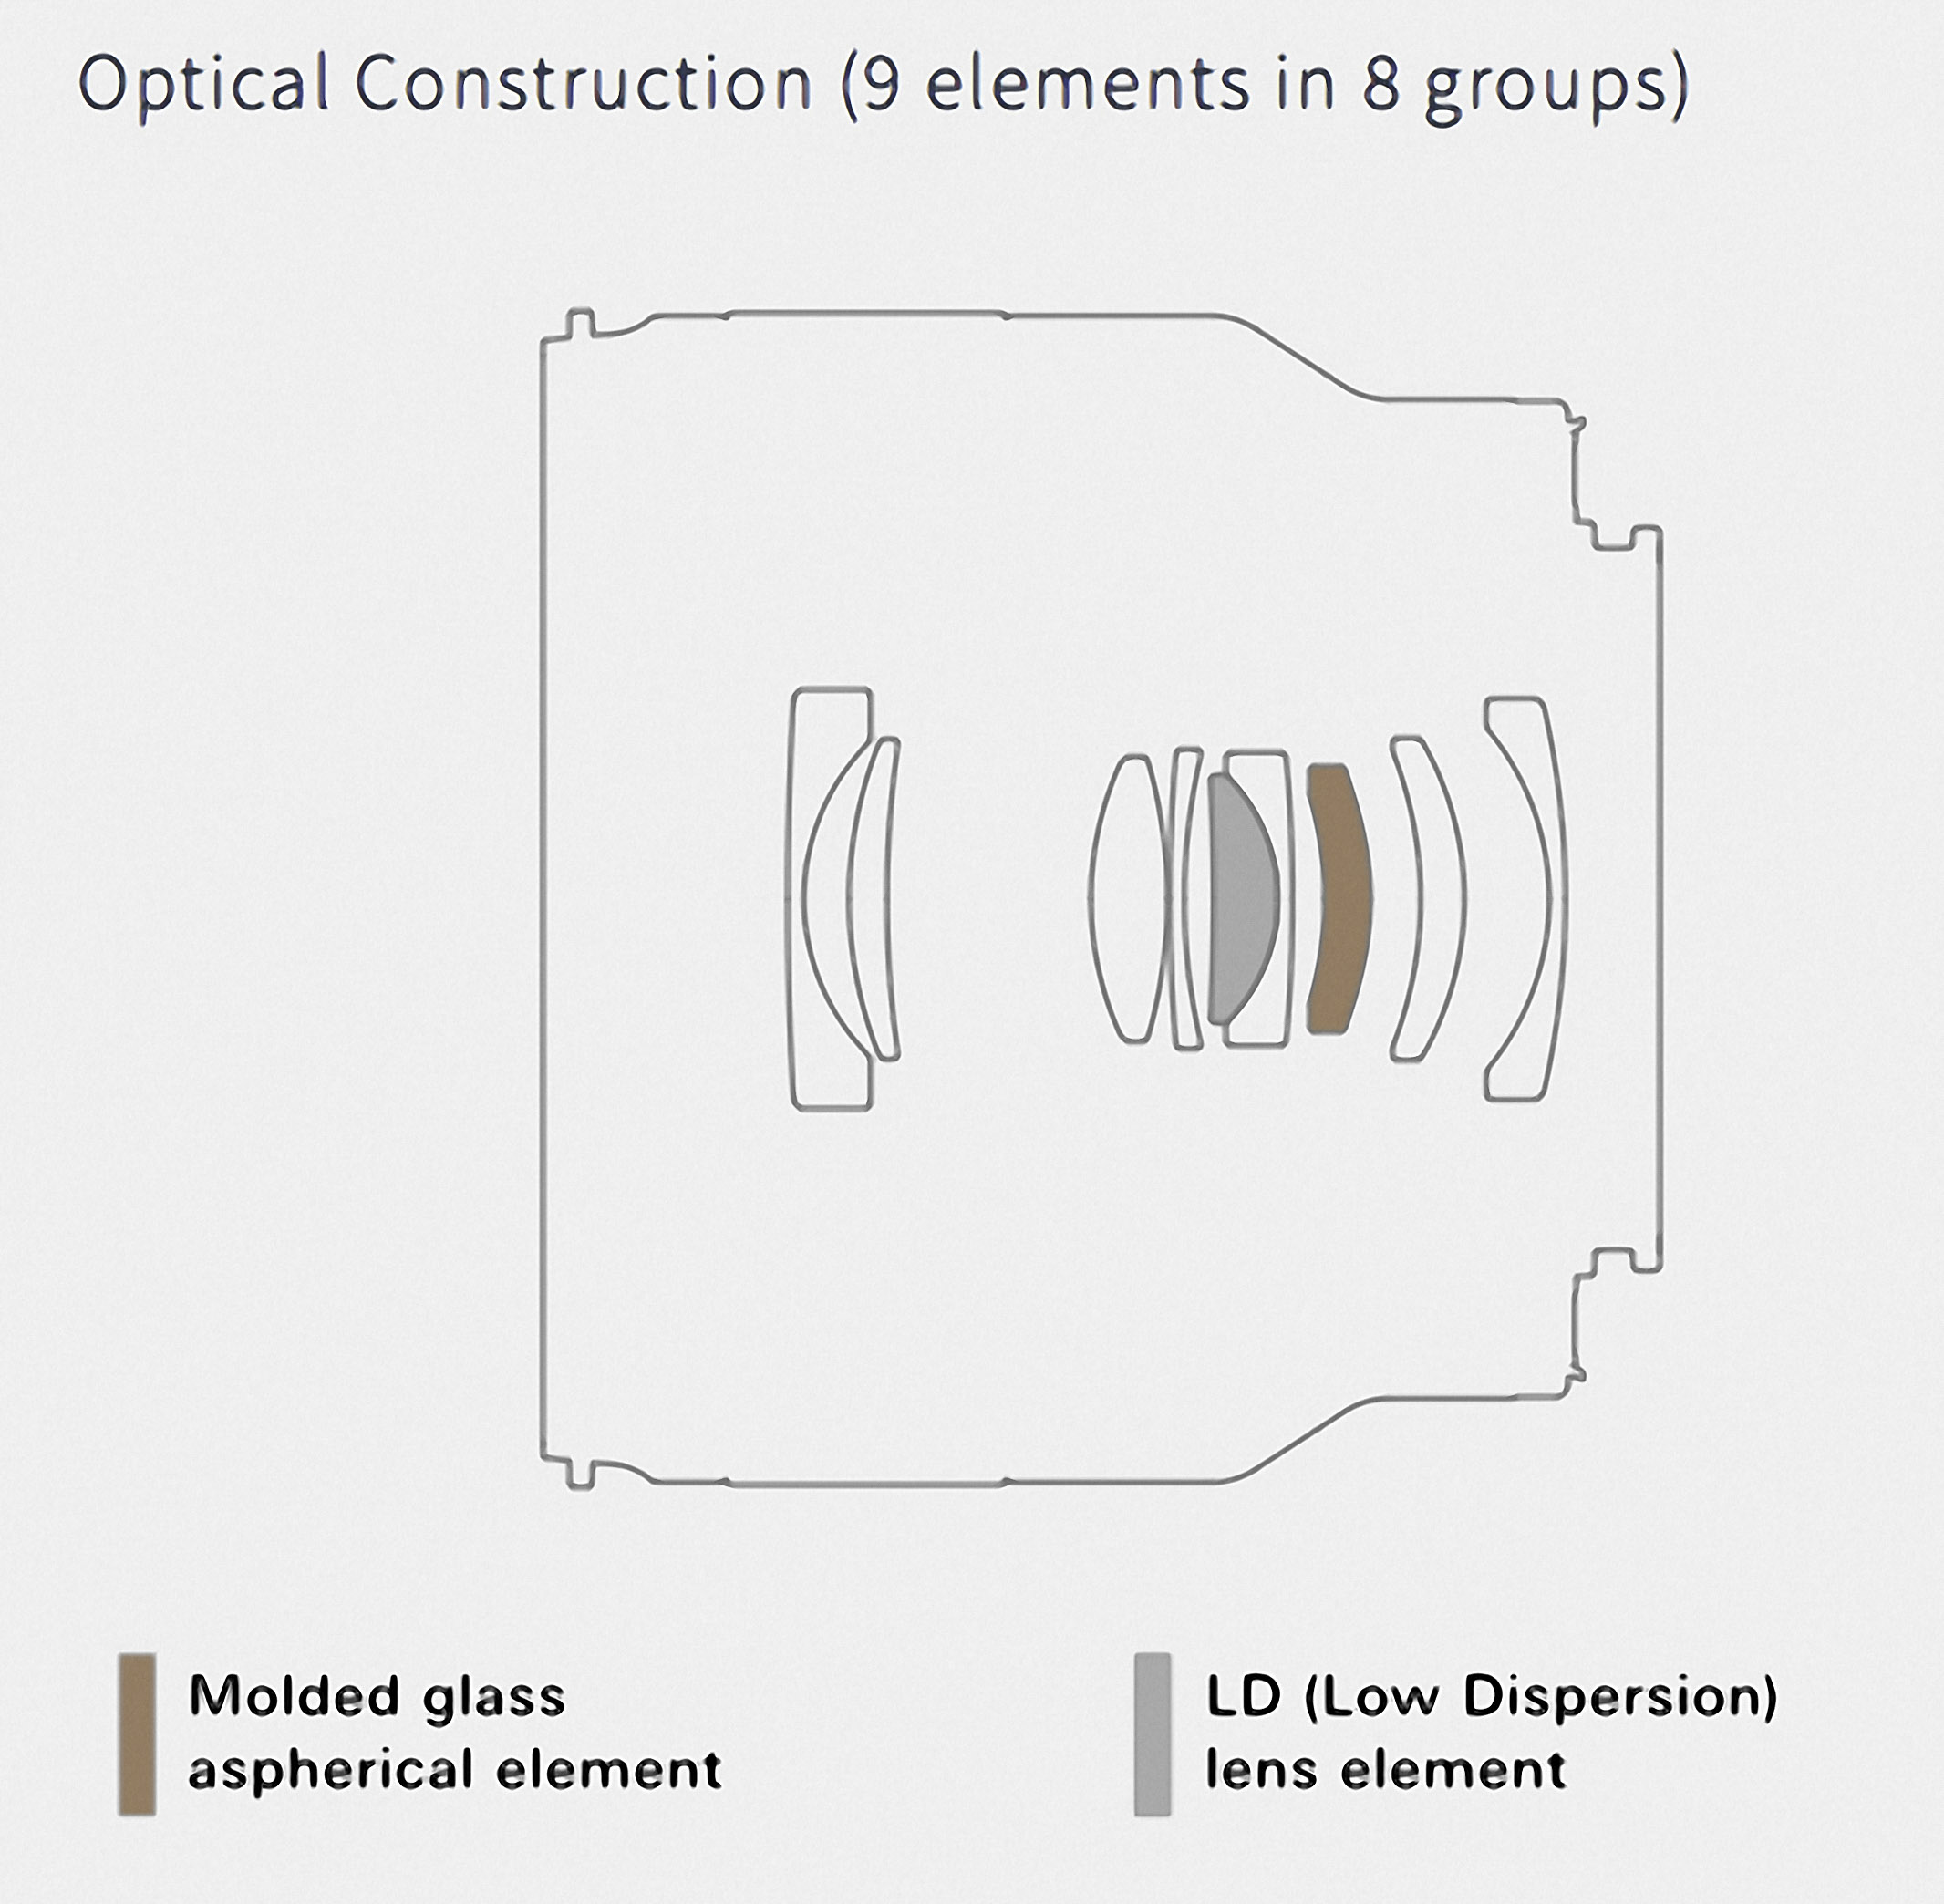
A schematic of the lens construction.
Focal Length
35mm
Maximum Aperture
F/2.8
Angle of View (diagonal)
63° 26′ (for full-frame mirrorless format)
Optical Construction
9 elements in 8 groups with 1 low dispersion element and 1 moulded glass aspherical element
Minimum Object Distance
0.15m (5.9 in)
Maximum Magnification Ratio
1:2
Filter Size
Φ67mm
Maximum Diameter
Φ73mm
Length*
64mm (2.5 in)
Weight
210g (7.4 oz)
Diaphragm Blade Number
7 (circular diaphragm) The circular diaphragm stays almost perfectly circular up to two stops down from maximum aperture.
Minimum Aperture
F/22
Standard Accessories
Flower-shaped hood, Lens caps
Compatible Mounts
Sony E-mount
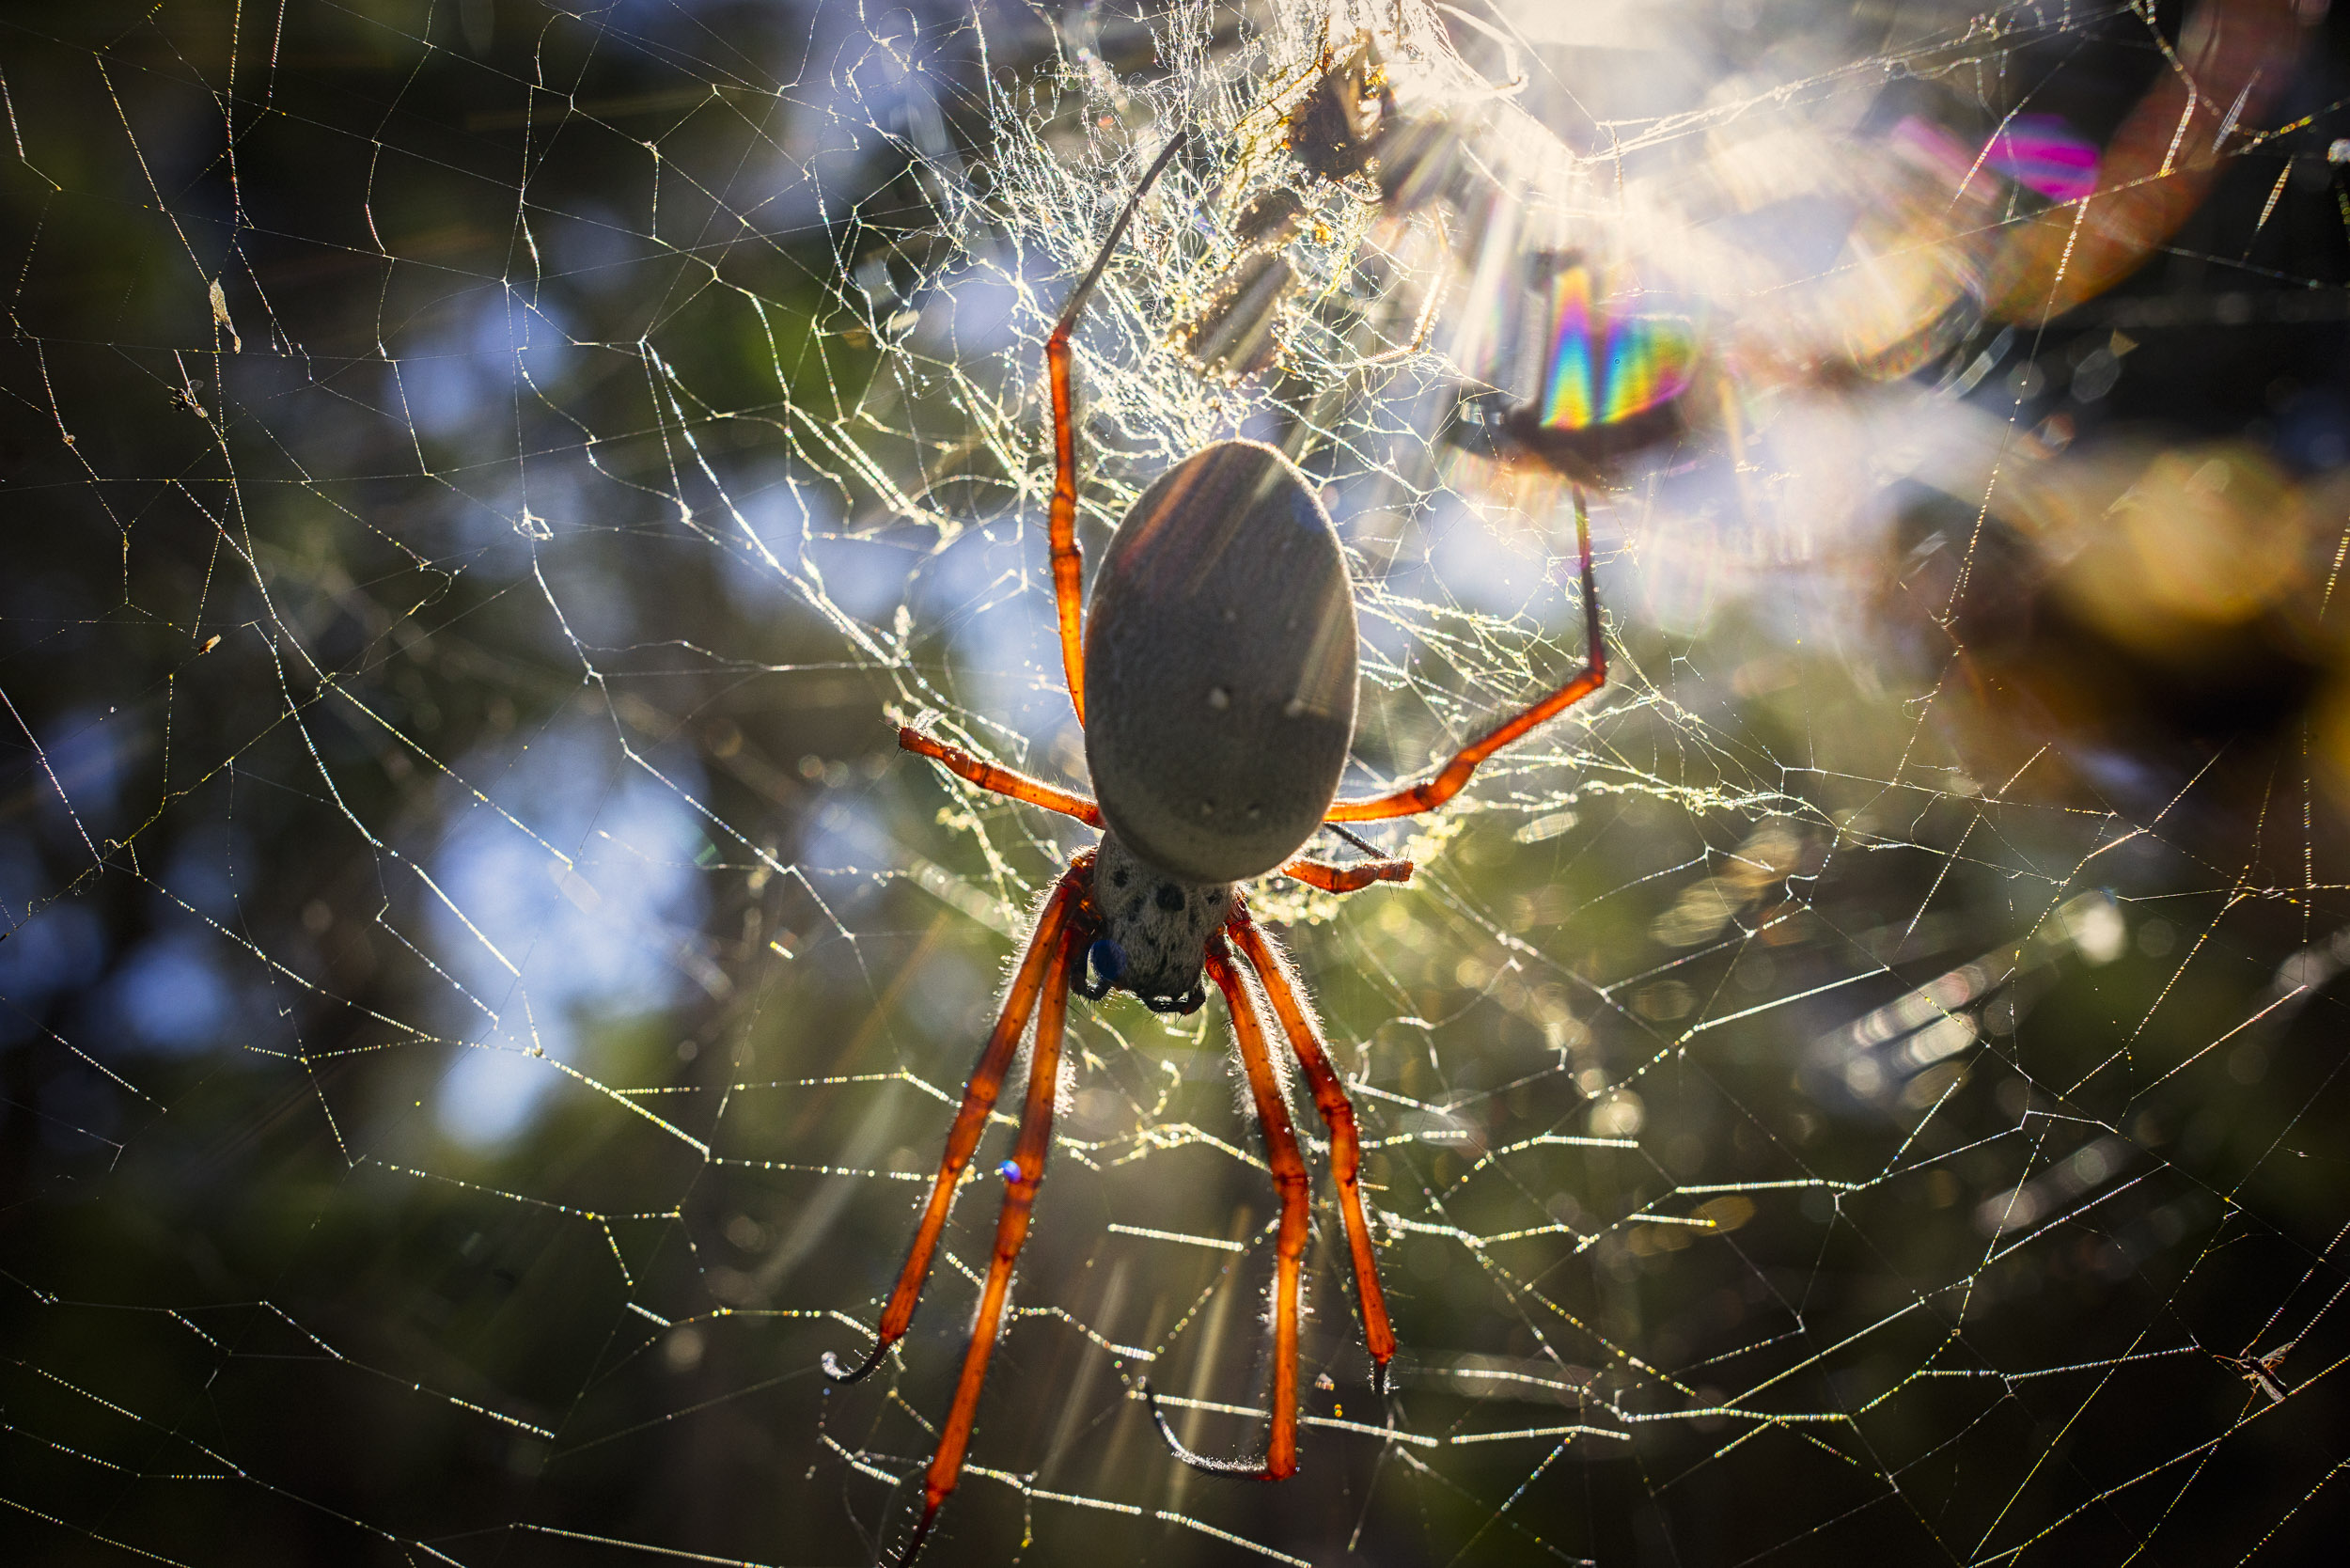
Golden Orb-Weaving Spider, Nephila edulis. Despite its size and their massive webs they are harmless to humans. Yellagonga Regional Park, Western Australia. The 1:2 magnification of the Tamron 35mm f2.8 makes this sort of photography a breeze.
For me the interesting aspect of this lens and indeed of its siblings is the cminimum focusing distance and it’s ability to shoot half life size. For me this makes them very suitable to creative macro and close up work. It’s not what you’d use to photography small critters as the lens has to be very close to the subject and will scare them off. For product shots, still life and another form of table shot photography it is a very interesting choice.
With a close focusing distance of just 15cm and a magnification ratio of 1:2 the Tamron 35mm f2.8 Di III is very suited to product photography.
Build Quality
In terms of build quality the Tamron 35mm the internet has largely been critical of it. The body is made out of some form of engineering plastic which you’d think had been manufactured by Tupperware judging by a lot of the reactions. Comparing this to recent Sigma lenses and Canon L lenses there is very little to distinguish the Tamron from the others. The only difference I can find without some sort of destructive testing is that the Tamron has a slightly more “satin” finish than the more “mat” of the Canons and Sigmas. The lens mount appears to be chrome plated brass which is nice, and there is an “o” ring which provides some semblance of sealing from the elements at the mount. There is no other weather sealing so I would say the lens isn’t really weather sealed at all despite Tamron’s claims. Tamron isn’t alone in this and I think it is high time the industry took a leaf out of Olympus’s book and actually stated to what level their products are sealed and give an IPX rating. Anything else is just weasley marketing BS as the majority of the camera and lens manufacturers state their products are weather sealed but won’t cover water water ingress under their warranties.
The metal lens mount as a gasket to provide some weather sealing.
The lens is larger than other 35mm lenses of similar specifications and feels quite light in the hand, but it doesn’t feel cheap. It feels quite sturdy and well made. On the lens barrel there is only a ribbed focusing ring which is of the focus by wire type which means there is little chance of getting repeatable focus pulls using it.A the front of the lens the front lens element is well recessed and while the lens doesn’t focus internally it extends within that recess so it does not protrude beyond the front of the lens barrel. Like all Tamron’s mirrorless range so far the 35mm f2.8 has a 67mm filter thread. Tamron thoughtfully include a lens hood with the lens. Other manufacturers please take note – if Tamron can include a lens hood with its budget lenses there no reason why you can’t. I’m looking at Olympus and Canon here. The lens hood warrants some discussion here as it is quite an interesting design. It is not the conventional bucket or petal shape. Instead it is like a plastic blank that has had a rectangular hole cut in the front and it is very effective at preventing flare and would also provide a degree of protection for the front element. The hood is threaded to take 67mm filters which means that you don’t have to remove it if you want to use a polarising filter. Somebody at Tamron has been doing some thinking. The hood bayonets into place.
The front lens element is well recessed.
Optical Performance
The Tamron 35mm f2.8 has built in lens profiles that are applied to jpgs and RAW files if so selected in the camera’s menu. I’ve opened the files in both Lightroom with the profiles switched on and then in RawTherapee with no profiles.
Click on the chart to see larger.
In terms of sharpness well at f2.8 at the centre of the image the lens is nicely sharp and contrasty. At f4 the it reaches its best performance and stays there to f11. At the edges wide open it isn’t quite as sharp as the centre, but by f5.6 the edges are as good as the centre. The old adage of stoping down two stops from wide open to achieve optimum performance certainly holds true of this lens. By f16 the image starts to soften as diffraction rears its ugly head.
In terms of optical aberrations well once the lens profile is switched off there is very slight evidence of pincushion distortion and vignetting. At f5.6 the vignetting disappears. A small amount of lateral chromatic aberration can be seen, but it is so slight I had to magnify the images to 300% to see them. Easily fixed in Lightroom. With a maximum aperture of f2.8 longitudinal chromatic aberration is not a problem. It is really fast apertures of f1.2 and f1.4 that really cause problems with this.
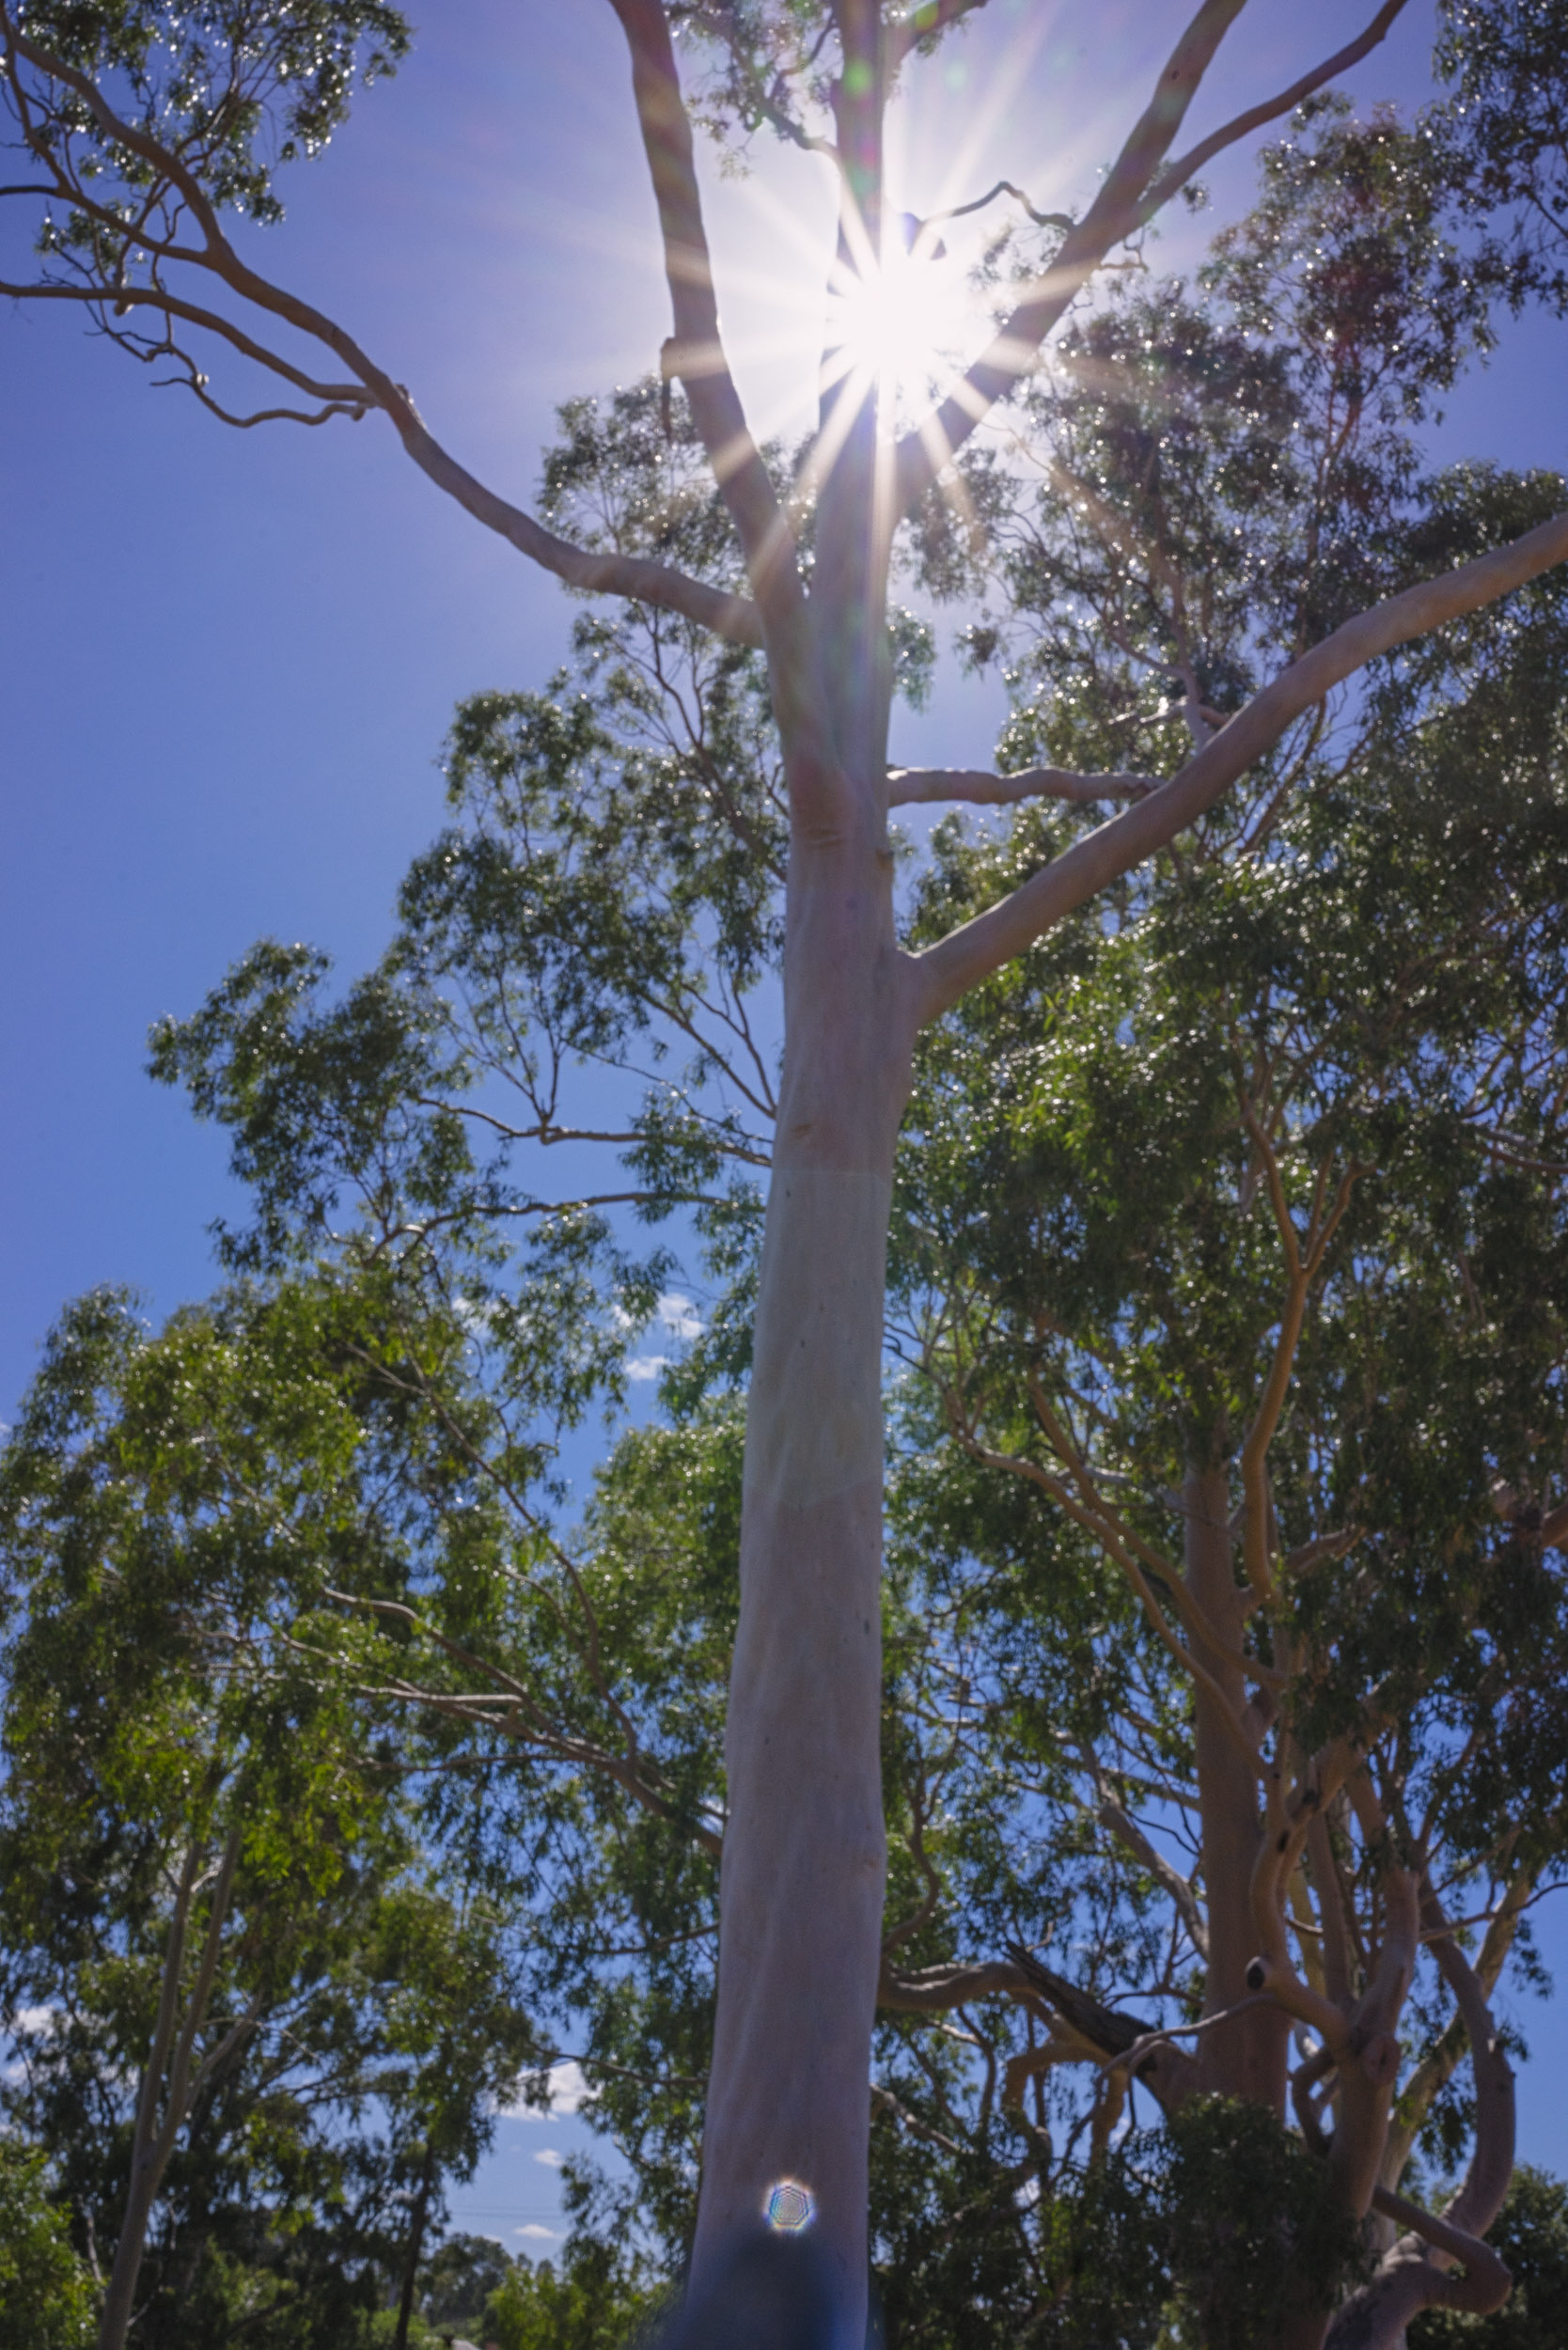
Without a lenshood the lens exhibits quite pronounced ghosting flare. Note the discolourateion on the tree trunk halfway down and the polygonal shape on the trunk at the bottom of the frame. At f22 the sunstars are pronounced, but aren’t that well defined.
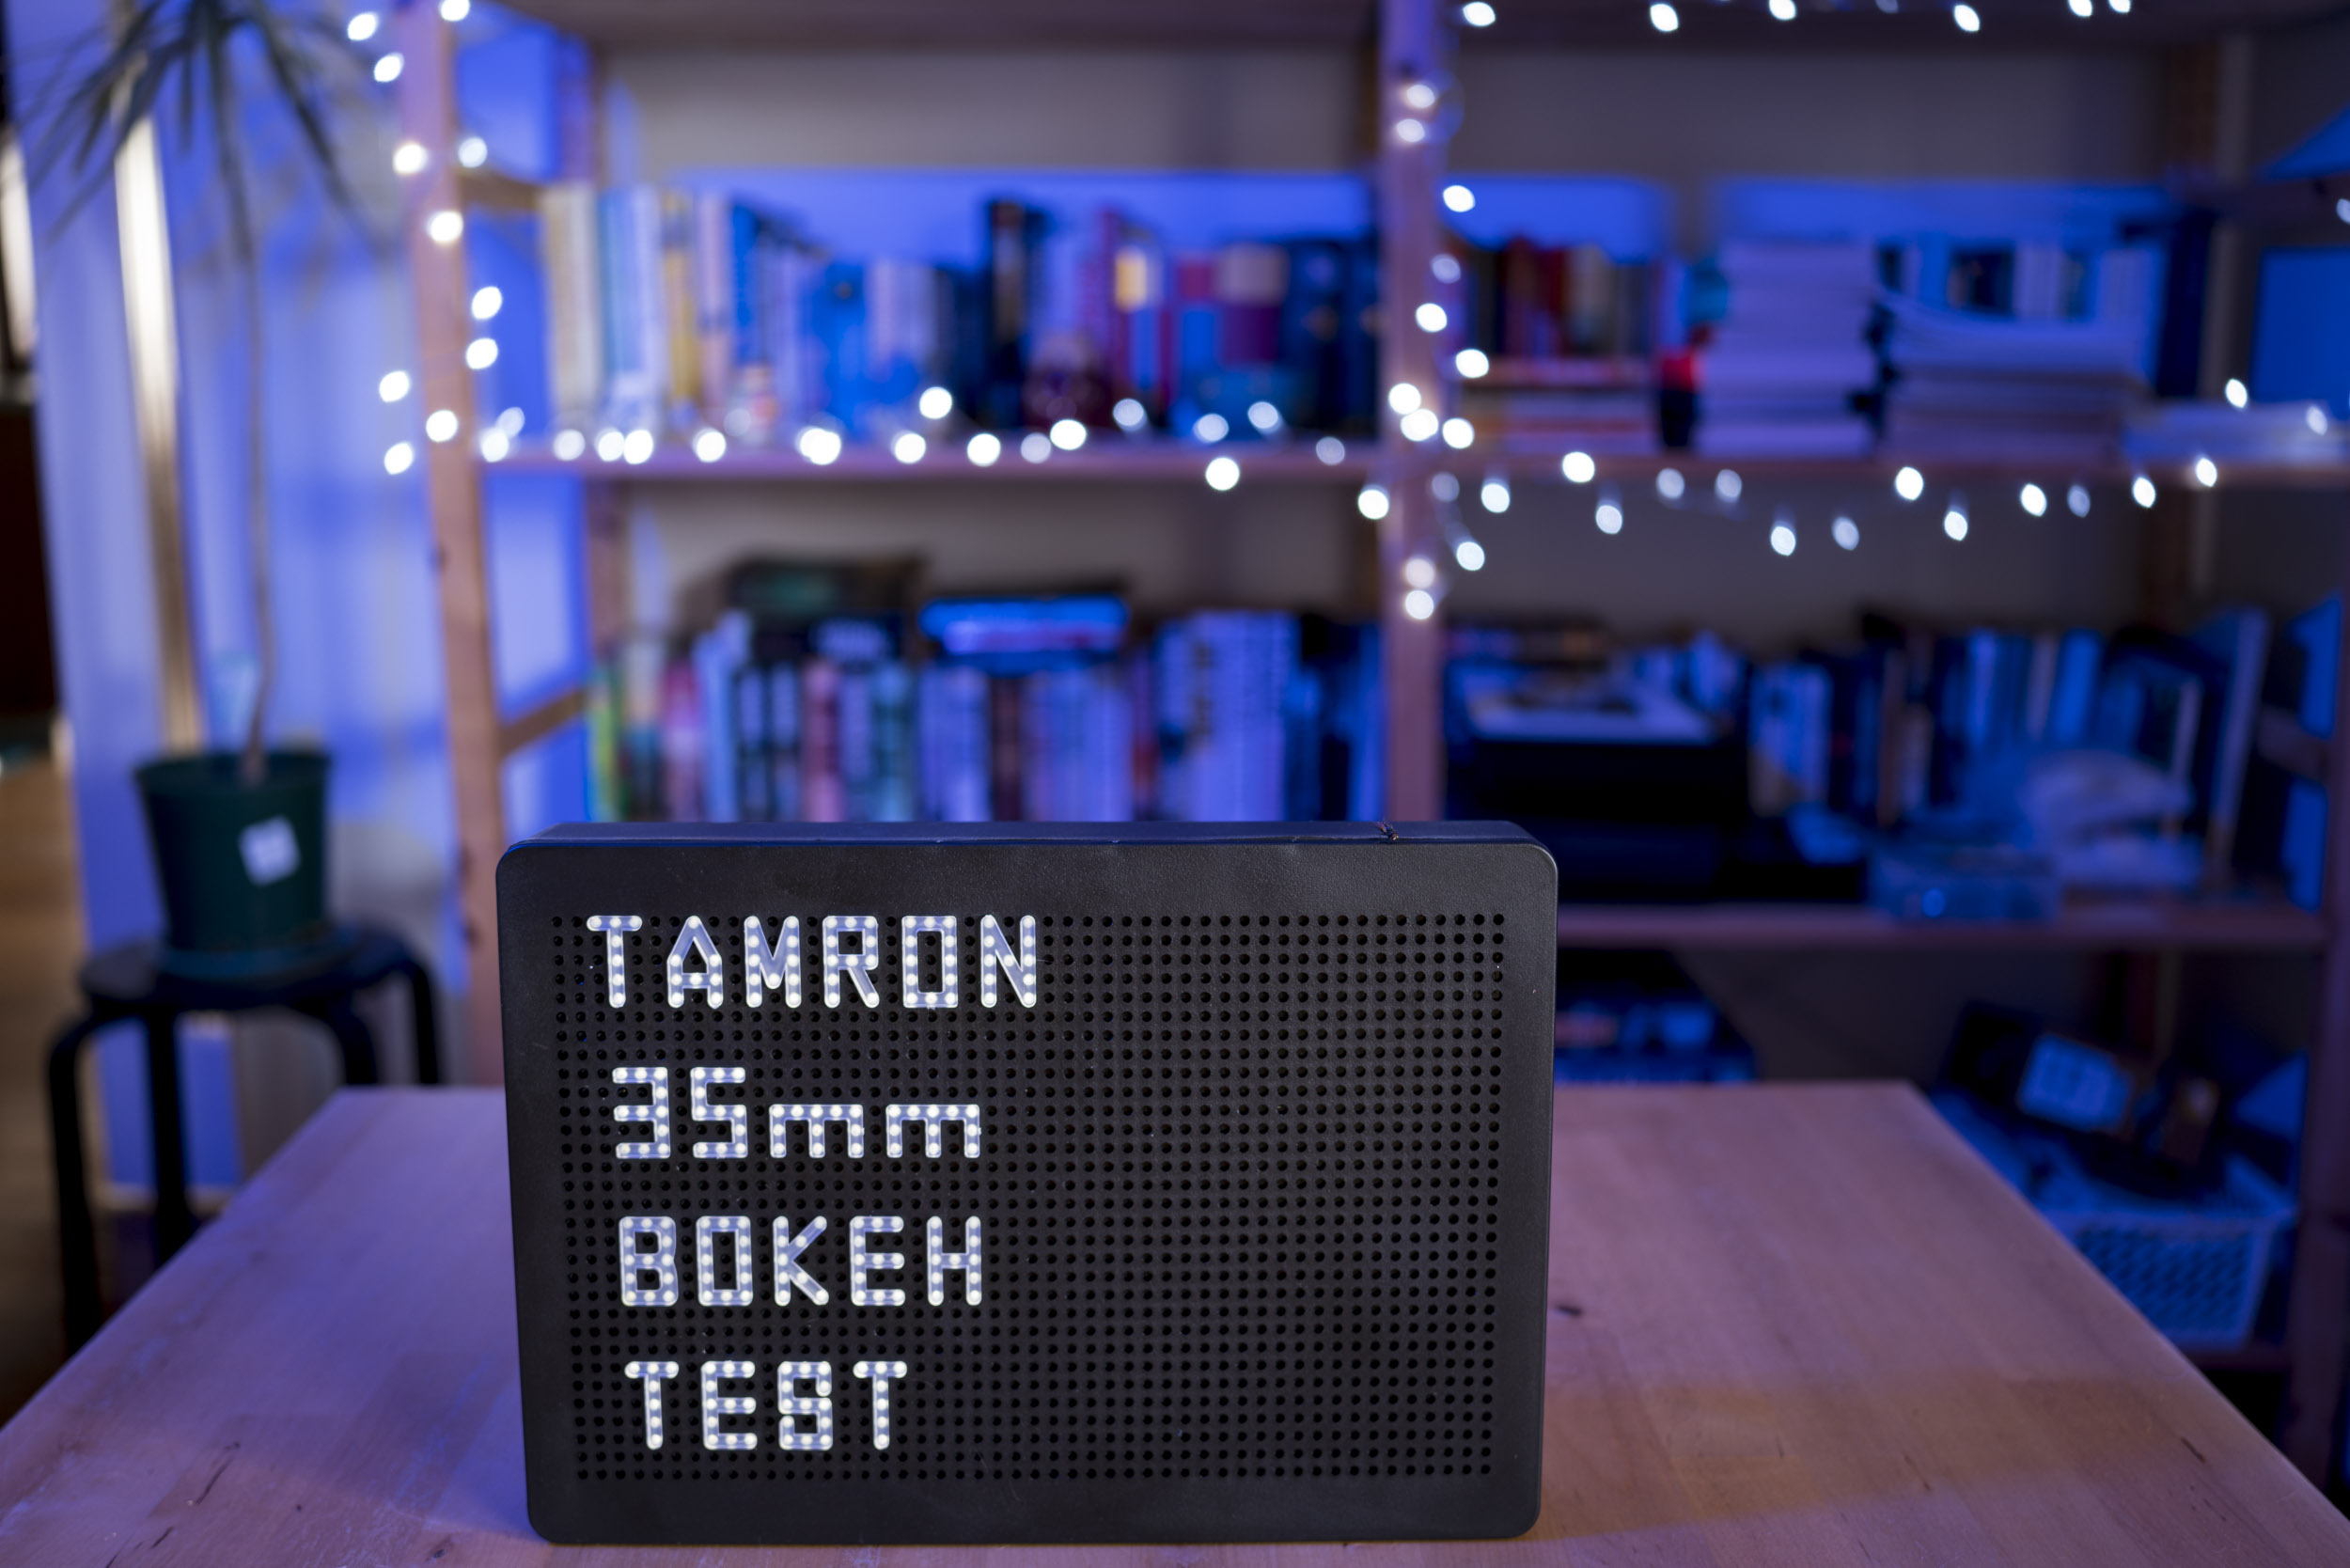
Flare resistance is a bit on the pedestrian side without the lens-hood with ghosting visible. The lens-hood is included in the box for a reason so use it. The seven bladed iris produces what to me are quite attractive sun-stars. Speaking of how the lens handles specular highlights the bokeh is not what I would call thrilling but it is not offensive either.Wide open in the centre there are round balls with faint onion rings present from moulded aspherical element. I suppose the final polishing wasn’t as smooth as that on more expensive lenses as a cost cutting measure. The edges of the balls are not smooth, they have a fuzzy appearance as the light bleeds into the darker areas which is a form of halation. At the edges of the image the bokeh balls take on that elliptical cats eye shape. By f8 the bokeh balls take on a definite polygonal shape.
In the bokeh test we can see quite nice round balls in the centre of the image wide open, but on closer inspection onion rings are present and the edges have a fuzzy appearence to them. At the edge of the frame the balls have a definite cats eye shape. As the lens stops down the bokeh balls take on a polygonal shape which is really apparent from f8 and beyond.
Click on the image to see larger.
Comparison
The Olympus OM Zuiko 35mm f2 mounted on a Sony A7r.
Is a cheap auto focusing lens worth getting over a classic manual focusing version? Well to find out I’m comparing the Tamron 35mm f2.8 lens to the Olympus OM Zuiko 35mm f2 lens. Forty five years separate the two optical designs and a lot has changed. There are several different version of the Olympus lens. It had a long production run from 1974 to 2002. I’m using a later multi-coated version. This MC version is 43mm in length, 240g in weight and has a filter thread of 55mm. It has an optical construction of eight lens elements in 7 groups and a minimum focusing distance of 0.3m. When it’s performance is studied we can see there is slight barrel distortion evident in the test image. CA is present when wide open and clears up on stopping down Wide open the lens is quite soft and lacking in contrast both in the centre and at the edges. Both sharpness and contrast improve in the centre when stopped down to f8. The edges show some signs of improvement but not as much as the centre.
Our test subject for the comparison.
Comparing the two lenses in an actual real world shooting scenario we can see that with both lenses set to an aperture of f2.8 in the centre of the frame there is virtually no difference between them and I’d say they they are equal. In the corners, however, it is a very different story. The Tamron has a good level of sharpness while the Olympus is very soft. Stopping down to their respective minimum apertures – f22 for the Tamron and f16 for the Olympus -we see again in the centre that there is just a very marginal difference. In the corner the Tamron is better by a gnat’s whisker. Just remember that the Olympus was given an advantage. The Tamron shot wide open at f2.8 while the Olympus was stopped down at to f2.8 allowing an improvement in optical performance. At f16 the Olympus didn’t suffer the amount of diffraction the Tamron did at f22.
A comparison between the Tamron 35mm and the Olympus 35mm at f2.8. Click on the image to see it larger.
The same again but at f22.
Conclusion
When Sony launched the original A7 and A7r in 2014 critics poured scorn over the nascent system by saying there were no lenses. Early adopters divided into the system and tried their hand at adapting lenses they did have to fill the gaps in the line up. Fast forward to 2021 and Sony have done a tremendous job at fleshing out their line up. But the most significant thing is that Sony allowed third parties to access the lens mount protocols and this has meant that are lenses that range in price from decidedly wallet friendly all the way to those that would make a trust fund baby wince. At the time of testing the Tamron lens is selling for $350 AUD (which is the equivalent of being given away with a McDonalds Happy Meal in the USA). Looking on EBay the Olympus is selling for between $300 to $700 AUD depending upon condition and version. The version I have would count as a mint late model which would place it in the upper range. So the question is whether having a new autofocuslens is worth more to you than having a potentially more expensive 20-40 year old lens. Well I had the Olympus lens left over from OM film days (along with quite a few others) and I actually got a secondhand Sony A7r camera so I could use the Olympus lenses. I was very happy with that arrangement. The Tamron registered on my radar because of its macro capabilities.
So you want to go full frame mirrorless with a 35mm prime lensbut don’t want f1.2 lenses or can’t afford them then buy the Tamron. Don’t want want to carry around a lens that is capable of blocking the Suez Canal buy the Tamron. It is nowhere near a perfect lens. It is a modest lens, with a modest price and with a better than modest performance. So with what it costs and with what it can do it is a great buy.
As usual there is a video for those that prefer or the full written piece is below.
The Olympus m.Zuiko 45mm f1.2 PRO lens mounted on an EM1 mk ii.
The Olympus m.Zuiko 45mm f1.2 Pro Lens was announced in by Olympus back in October 2017 as one of their trio of f1.2 lenses. The others being the 17mm and 25mm. According to Olympus they were designed to “have beautiful defocusing effects” and “beautiful feathered bokeh to make your image stand out” (https://shop.olympus.com.au/m-zuiko-ed-45mm-f1-2-pro). In the case of the 45mm (and I suspect the other two) the lens is designed so that spherical aberration is not fully corrected. This means that as light rays enter the lens only those that pass through the centre of the lens are made to come together at the focus point. The rays at the edges focus slightly in front of that point and this causes the bokeh to have a gentle roll off – the so-called “feathered bokeh”. Olympus themselves claim this matches “classic” older lens designs. At this point it should be noted that spherical aberration and chromatic aberration are different. Spherical aberration occurs when a single wavelength of light or colour cannot be focused whereas chromatic aberration occurs when a lens cannot focus the red, green, and blue wavelengths on a single point. Although Olympus claims to match the performance of older classic lenses they have chosen a lens design that is very different from them.
Lens Construction and Build Quality
Olympus 45mm f1.2 lens has 14 elements in 10 groups with one ED element, four HR element, and one aspherical element.
Focal Length
45mm (90mm in full frame equvalence)
Angle of view
27º
Minimum focusing distance
50cm
Maximum magnification
0.1 X
Lens construction
14 elements in 10 groups with one ED element, four HR element, and one aspherical element
Maximum aperture
F1.2
Minimum aperture
f16
Diaphragm
9 curved blades
Focusing
Auto focus – yes, MSC mechanism making fast and silent AF possible in video mode.
Manual focusing – the focusing ring can be pulled back to engage a clutch mechanism with hard stops at each end.
Filter size
62mm
Dimensions
85mm (h) x 70mm ⌀
Weight
410g
Other features
Hermetic sealing making the lens dust proof, splash proof, and freeze proof. 60529 IPX1 IP rating.
The lens mount of the Olympus 45mm f1.2 lens. The mount has an ‘o’ ring that contributes to its 60529 IPX1 IP rating.
To see how this differs from an older classic design lets compare it to Olympus OM Zuiko 50mm f1.4 which was first produced in 1971 and remained in production until 1984.
Olympus OM Zuiko MC 50mm f1.4
Focal length
50mm
Angle of view
On 35mm 43º, on micro four thirds 21º
Minimum focusing distance
45cm
Maximum magnification
0.15 X
Lens construction
7 elements in 6 groups
Maximum aperture
f1.4
Minimum aperture
f16
Diaphragm
8 curved blades
Focusing
Manual focus with a straight helicoid
Filter size
49mm
Dimensions
36mm (h) x 60mm ⌀
Weight
230g
The 45mm f1.2 dwarves the f1.8 version.
Comparing the Olympus 45mm f1.2 to the Canon EF 50mm f1.8. On their respective bodies they both offer a similar field of view.
The 45mm f1.2 mounted on an Olympus EM1 mk i compared to the Voigtänder 75mm f2.5 Color-Heliar mounted on a Sony A7r. Both a ideal focal lengths for portraiture.
Physically this is a large lens. It dwarfs my Olympus 50mm f1.4, my Canon EF 50mm f1.8 and my Sony FE 50mm f1.8. It is a smidge larger than the Olympus m.Zuiko 12-40 f2.8 Pro and 27g heavier. The 45mm f1.2 follows the look of the other lenses in the Pro line and it also has a L-Fn button which can be programmed to various functions on Olympus cameras. In the hand the lens is reassuringly solid, it has that dense feeling that quality optics have. The focusing ring is nice and large and has the same ribbing that all the other lenses have in the Pro line. Like the other Pro lenses the 45mm f1.2 enables manual focusing by pulling back the focusing ring to engage a clutch to give a nice smooth focus throw of about 110º that has hard stops at either end. Combined with focus peaking this makes for manual focusing nirvana. As to what the lens is made out of this is hard to say, the lens mount is chrome plated brass, parts of the lens barrel have a metallic feel, and other parts feel plastic. Is this a problem? I don’t think so. For certain applications metals can be a poor choice and high quality engineering plastics such as ABS make better sense. In fact Sigma makes a big deal out of the use of their Thermally Stable Composite (TSC) which is substantially stronger than conventional polycarbonates while having similar thermal expansion properties to aluminium. Bottom line the 45mm f1.2 feels nice in the hand and is easy on the eye.
Optical Performance
The Olympus m.Zuiko 45mm f1.2 PRO lens is sharp wide open.
Lens sharpness test at f1.2 and f4. Click on the image to see it larger.
Image sharpness in the centre of the frame wide open is good and reaches its best at f4. The corners wide open are less sharp than the centre, however, by f2.8 the sharpness and contrast improves considerably and the lens reaches optimum sharpness at f4. By f8 the image starts to soften due to diffraction. Vignetting is also present wide open but this disappears at f4. There is a minute amount of pincushion distortion present, but unless you are shooting very demanding architectural work then it is largely unnoticeable. Chromatic aberration is present on high contrast edges, but it is very slight and easily removed in post. Longitudinal chromatic aberration is also present, but it too is very slight and not painfully obvious which is good as it is quite difficult to get rid of in post. All this is managed using firmware corrections. I like to turn these off using RAWTherapee to see how much correction is going on beneath the hood so to speak. The amount of vignetting is greater than the corrected images but it still clears up by f4. The pincushion distortion is also more evident. All in all the firmware corrections plus topnotch lens design make a lens that performs very well.
Chromatic aberration is well controlled and what little there is is easily fixed in post.
Longitudinal Chromatic aberration.
With regard to resistance to lens flare pointing the 45mm f1.2 at a very point light source shows it is quite prone to ghosting flare – images of the lens diaphragm as colourful bright spots. This is more evident on lenses with complex constructions with lots of lens elements. The red blobs in the photo are not lens defects. They are caused by light being reflectedoff of the sensor surface back onto the rear element. As each pixel is reflected it causes a grid pattern. Unfortunately the smaller lens flange distances on mirrorless cameras means this phenomena is more apparent than on a DSLR with their great lens flange distance.
The Olympus 45mm f1.2 is quite prone to flare so it is advisable to use the included lens hood.
The Olympus 45mm f1.2 is quite prone to flare so it is advisable to use the included lens hood. At f16 the sun stars are quite pronounced.
f1.2 bokeh balls test. In the centre of the frame nice round and smooth bokeh balls with no evidence of any onion rings. At the edgeges you can see cats eye shapped balls. Click on the image to see it larger.
Olympus make great claims about the bokeh, or more importantly the feathered bokeh of this lens. Up until the announcement of this line of lenses I’d never heard the term feather bokeh before and to be honest I’m not all that sure about what it is and how that you quantify it. I guess in simple terms Olympus means that edges of the bokeh balls are not harsh and to quantify how feathered they are we’ll have to make some comparisons. At f1.2 the centre of the frame has nice round bokeh balls with no evidence of any onion rings. Onion rings occur with the use of ground aspheric lens elements. Basically the grinding process leaves a series of ridges which can be seen with a defocused point source. The biggest problem with them is that for most people they go unseen, but once seen they can’t be unseen. At the edges of the frame there is cats eye shaped bokeh – this is caused by mechanical vignetting from the lens barrel.At f5.6 I was quite surprised to see star burst effects forming around specular highlights, I was expecting them to start appearing at the f11 mark. By f16 the bokeh balls in the corners have become spherical.
So the question is what to compare the Olympus 45mm f1.2 to? The most obvious contender is the 45mm f1.8. In their advertising blurb for the f1.2 Olympus compare the lens on an Old EM1 mk ii to a full frame DSLR with 85mm lens. Interestingly having made such a bid deal about the bokeh the only comparison is made with weight so I’ve decided to make the comparison using weight and bokeh quality with the Canon EF 50mm f1.8 on a Canon EOS550d. The 50mm lens has an equivalent focal length of 80mm in full frame terms. The nearest full frame equivalent I’ve got on hand is the Cosina Voigtländer 75mm f2.5 Color-Heliar on a Sony A7r2. Finally as I’ve already talked about the Olympus OM Zuiko 50mm f1.4 I’ll add it to the list with it mounted to the Olympus EM 1 mk ii. The older Olympus and the Canon and Voigtländer are also considered classic lens designs.
Olympus OMD EM1 mk ii with Olympus 45mm f1.2 Pro lens
984g
Olympus OMD EM1 mk ii with Olympus 45mm f1.8
737g
Canon EOS550d with Canon EF 50mm f1.8 mk ii
601g
Sony A7r2 with Voigtländer 75mm f2.5 Color-Heliar
932g
Olympus OMD EM1 mk ii with Olympus OM Zuiko 50mm f1.4
980g
So the Olympus 45mm f1.2 combo is the heaviest. Lets look at the bokeh. With the three Olympus lenses I’ll just compare the lenses at widest aperture of the slowest lens. With the other two I’m going take equivalency into account so 45mm f1.2 on the Olympus is roughly equivalent to 50mm f1.8 on the APSC sensor and the Olympus’ f1.2 is equivalent to f2.5 on the full frame sensor.
Bokeh comparison between Olympus 45mm f1.2 and the Olympus 45mm f1.8. Click on the image to see it larger.
First cab off the rank is the Olympus m.Zuiko 45mm f1.8 lens. It has an optical construction of 9 elements in 8 groups, weighs in at 116g and has a 37mm filter thread. This little lens is an absolute gem and I use it a lot to do both stills and video product shots. It currently retails for $1300 AUD less than the f1.2. Wide open at f1.8 there is vey little to distinguish it from the more expensive lens at f1.8. So I would have to say unless you absolutely need an aperture of f1.2 then save your money.
Bokeh comparison between the Olympus 45mm f1.2 and the Olympus OM 50mm f1.4 at f1.4. Click on the image to see it larger.
The Olympus OM Zuiko 50mm f1.4 was introduced way back in 1972 with the original OM1. The lens used here is the revamped version with improved coatings that came out in 1984.The lens construction is very simple with 7 elements in 6 groups and no fancy glass. Wide open it is not the sharpest lens and the bokeh balls are irregularly shaped, but stop it down to f2 and the bokeh is just as good as the 45mm f1.2 at f2. It’s possible to pick this lens up for about $100 on eBay and for $150 you can get it with a film SLR such as an OM1 or 2.
Bokeh comparison between the Olympus 45mm f1.2 at f1.2 and the Canon EF 50mm f1.8 at f1.8. Click on the image to see it larger.
When you put the Canon EF 50mm f1.8 on an APS-C camera such as my EOS550d it has a focal length that is equivalent to 80mm on full frame. It has a simple double-gauss design of 6 elements in 5 groups. This model is the mk ii version which was introduced in 1991 and is sometimes called the “plastic fantastic” because of its plastic body and lens mount. At the edges and in the corners of the frame the Canon has more pronounced cats eye bokeh, but at the centre it is nice and round. Thanks to only having a diaphragm consisting of 5 blades the bokeh becomes polygonal as it is stopped down. No longer in production it can be picked up for around $60 on eBay or you could really push the boat and buy the latest version which retails for $200 AUD.
Bokeh comparison between the Olympus 45mm f1.2 at f1.2 and the Voigtländer 75mm f2.5 Color-Heliar at f2.5. Click on the image to see it larger.
The last lens is the Voigtländer 75mm f2.5 Color-Heliar mounted on a full frame body.The original Heliar design was developed in 1900 by Dr. Hans Harting as a symmetrical 5-element variant of the simple anastigmatic and well colour-corrected Cooke triplet. In 1902 the design was revised correcting astigmatism, curvature and coma better than the original design. That new design was asymmetrical six elements in five groups. In 1950 Dr. A.W. Tronnier refined the design even further to produce the Color-Heliar. When Cosina revitalised and relaunched the Voigtländer line they revived the Heliar concept with the 75mm f2.5 Color-Heliar. Cosina wanted to recreate the German optical aesthetic and engineering quality from the 1950s. The lens construction by modern standards is pretty basic with 6 elements in 5 groups and the 10 aperture blades bodes well for nice bokeh. Wide open at f2.5 it has the same depth of field characteristics as the Olympus at f1.2. It is not as sharp as the Olympus wide open but the tonal transitions are very smooth. The bokeh balls are nice and round at the centre, but at the edges and corners they take on the elliptical cats eye shape. This lens is longer in production and for a while it was possible to pick one up for around the $300 mark second hand, but the interest in adapting classic lens to mirrorless cameras has seen prices rise to almost $700.
Auto Focus Performance
the reluctant bull terrier test
Shooting stills the AF is very quick and accurate. Using the reluctant bull terrier test I shot a sequence of 25 frames using continuous autofocusat 10 frames per second with an EM1 mk i which does not have the latest iteration of Olympus’ on sensor phase detection AF. At f4 all the shots were in focus. Switching out the mk i for the mk ii with its better AF systemI shot a 71 frame sequence at f2 at 10 frames a second and only 6 frames were slightly soft.
Shooting video on the Olympus EM 1 mk ii using face tracking the camera and lens responds quickly and smoothly without hesitation. Many m4/3 users shoot video using Panasonics cameras so I put the 45mm f1.2 on my G85 and set it it use face tracking. The results were dismal. There was a lot of hunting, and if and when the camera acquired focus it would quickly drift off. Having had good success with the EM1 I can only put this down to Panasonic’s use of DFD contrast based autofocus and not the lens.
Conclusion
The fantastic little 45mm f1.8 is only $500 new and is just as sharp. The only place where it is found wanting is the maximum aperture.
There is no doubt that the Olympus m.Zuiko 45mm f1.2 PRO lens is a very good lens. It is well built and optically performs very well. The only thing that counts against it is its price when compared to other options. In the last quarter of 2020 Olympus ran a promotion in many parts of the world enabling purchasers of the EM1 to claim a free lens from the f1.2 trinity. If you were one of those and chose the 45mm then you got a great lens and I hope that you really enjoy it. If you are a committed Micro Four Thirds user and were wanting to purchase this lens today at the street price of $1800 I would suggest that your money could be better spent. The fantasticlittle 45mm f1.8 is only $500 new and is just as sharp. The only place where it is found wanting is the maximum aperture. If you are not so wedded to the idea of 45mm but just wanted a fast short telephoto then I’d seriously consider the Sigma 56mm f1.4 which at $750 is great value and a seriously good performer.
If you are just getting into photography and want a camera and lens combo that gives enormous creative control over depth of field then you’ve got to look at full frame cameras ($1800 will get you a new one less if second hand) and pick up an 85mm f1.8 where Canon, Sony and Nikon all have offerings between $600-900 new.
For video the 45mm f1.2 is a nice option as on the right camera it can autofocus extremely well and the the provision of a manual focus clutch that gives hard stops makes it very useful for manual focus pulls. If autofocus isn’t important to you then there are a huge number of older classic f1.2 and f1.4 lenses that can be picked up very cheaply.
Example Images
Wide open the Olympus m.Zuiko 45mm f1.2 PRO lens gives a nice please rendition with gentle tonal transitions.
The close focusing capabilities of the Olympus 45mm f1.2 are impressive and couple this with pleasing bokeh it makes for a very nice lens with which to do product photography or still life.
The Olympus 45mm f1.2 also makes for a good lens for equine portraits.
Female Eurasian Coot feeding its young at Lake Leschenaultia in Western Australia.
I haven’t managed to get out and about for the last month. The recent bout of flu I’ve had just knocked the stuffing out of me for the last 4 or 5 weeks. Well this week feeling considerably better I went out to Lake Leschenaultia to photograph birds. We got there too late in the morning and there was nothing really interesting happening. So I just spent the morning watching this Eurasian Coot feeding her chicks. After being stuck at home feeling Moby it was a delightful way to spend a morning.
At the Casa del Amyes we’ve gone a bit mad for things Spanish. The Spanglish is flying thick and fast and we’re even thinking of actually going there COVID 19 permitting. What’s brought on all this exuberant celebration of all things Iberian? Well a little while ago I posted about a Spanish inheritance. Well we’ve not inherited anything yet despite it going on for two years now. It’s what you get when your father-in-law played Monopoly in a small Spanish village with real houses and who developed the local aversion to all things to do with property titles, land taxes and capital gains taxes. Throw into the mix a convoluted legal system, dodgy Spanish lawyers weird inter family dynamics and we’ll probably not get our hands on anything for a few decades yet.
Catedral de la Encarnación de Almería.
We’ve been to Spain before. I can’t say it’s my favourite country to visit, but that’s probably due to the fact on my first visit a member of the Spanish Guardia Civil (the ones who wear Micky Mouse ears) was under the misapprehension that I was an English football hooligan and decided to introduce me to his truncheon – repeatedly – when I was really an innocent British InterRail tourist who was having a kip on a bench. I digress. So as I practically go everywhere with a camera I’ve started looking at my Spanish photos. A lot were taken on film (black and white, colour slide, and colour print) and then as technology advanced digitally. Now as the last time we visited was 2004, which was back in the Stone Age as far as digital photography is concerned, a lot has changed especially when it comes to software used to edit photos. So I’ve been re-interpreting those old 6 Mp (which was pretty bloody cutting edge back in 2004) with the latest iterations of Adobe Lightroom, AlienSkin’s Exposure and Topaz DeNoise AI.
Reading in the gardens outside the Charles V Palace – Alhambra, Granada.
The Convento de San Francisco in the gardens of the Alhambra in Granada.
A tourist pauses to study the guidebook in La torre de Comares at the Alhambra. It’s amazing how using up to date applications such as Lightroom can recover highlight and shadow detail.
Tourists and a film crew visit the Court of the Myrtles in the grounds of the Alhambra.
Sitting on the fountain at the Pilar de Carlos V at the Alhambra in Spain.
All the above photos were taken using a Canon EOS 300d which had by today’s standard poor dynamic range and poor high ISO performance. The difference is quite marked. So I’d honestly say it is worth revisiting your picture archive to see the quality you can wring out of those files using modern software.
Todays title is of course from the 1974 hit song Y Viva España, performed in English by Sylvia Vrethammar which was a cover of the Dutch song Eviva España by Belgian singer Samantha (Christiane Bervoets). It became a staple of drunken British tourists on the Costa Del Sol.
The last 2 1/2 weeks I’ve been laid up at home with the flu. After a year of social distancing and scrupulous was of hands, the use of copious amounts of hospital grade hand sanitizer, and a flu jab I’ve gone down with the most persistent of bugs that just won’t leave me alone. Consequently I’ve been stuck at home and not up to much photographically.
Just before Christmas we managed to get away for a few days and one of those days was spent in Mandurah. It was a good place to start a trip that was to be primarily focused on bird photography. For a bit of a change I decided to leave the micro four thirds kit at home and take my Canon DSLR and relevant lenses. I did this for a number of reasons:
I fancied a change
With the collapse of Olympus and the future of the brand uncertain and Panasonic’s recent statements about concentrating predominantly on full frame cameras geared at video usage I felt that perhaps I should move away from micro four thirds and look at another system.
Curiosity as to whether the difference between the two formats is actually that apparent in real world usage. The key board warriors on the photographic forums are so specification orientated that they have lost sight of the fact that cameras are just a tool to produce photographs not endlessly obsess over minute details that make no real world difference.
I’m thinking about selling off surplus equipment and just concentrating on one system. So I was trying to decided which one was I prepared to get rid of.
Boring really for you guys, but as I’ve said I’ve been laid up at home for a couple of weeks with nothing much to think about. So without further ado here are some of the photos.
White-faced heron, Ardea novaehollandiae. Mandurah, Western Australia.
Goegrup Lake Nature Reserve in the morning light.
Australian Pelican, Pelecanus conspicillatus. Serpentine River in Mandurah, Western Australia.
Nankeen Night Heron, Nycticorax caledonicus subsp mannillenis. Mandurah, Western Australia.
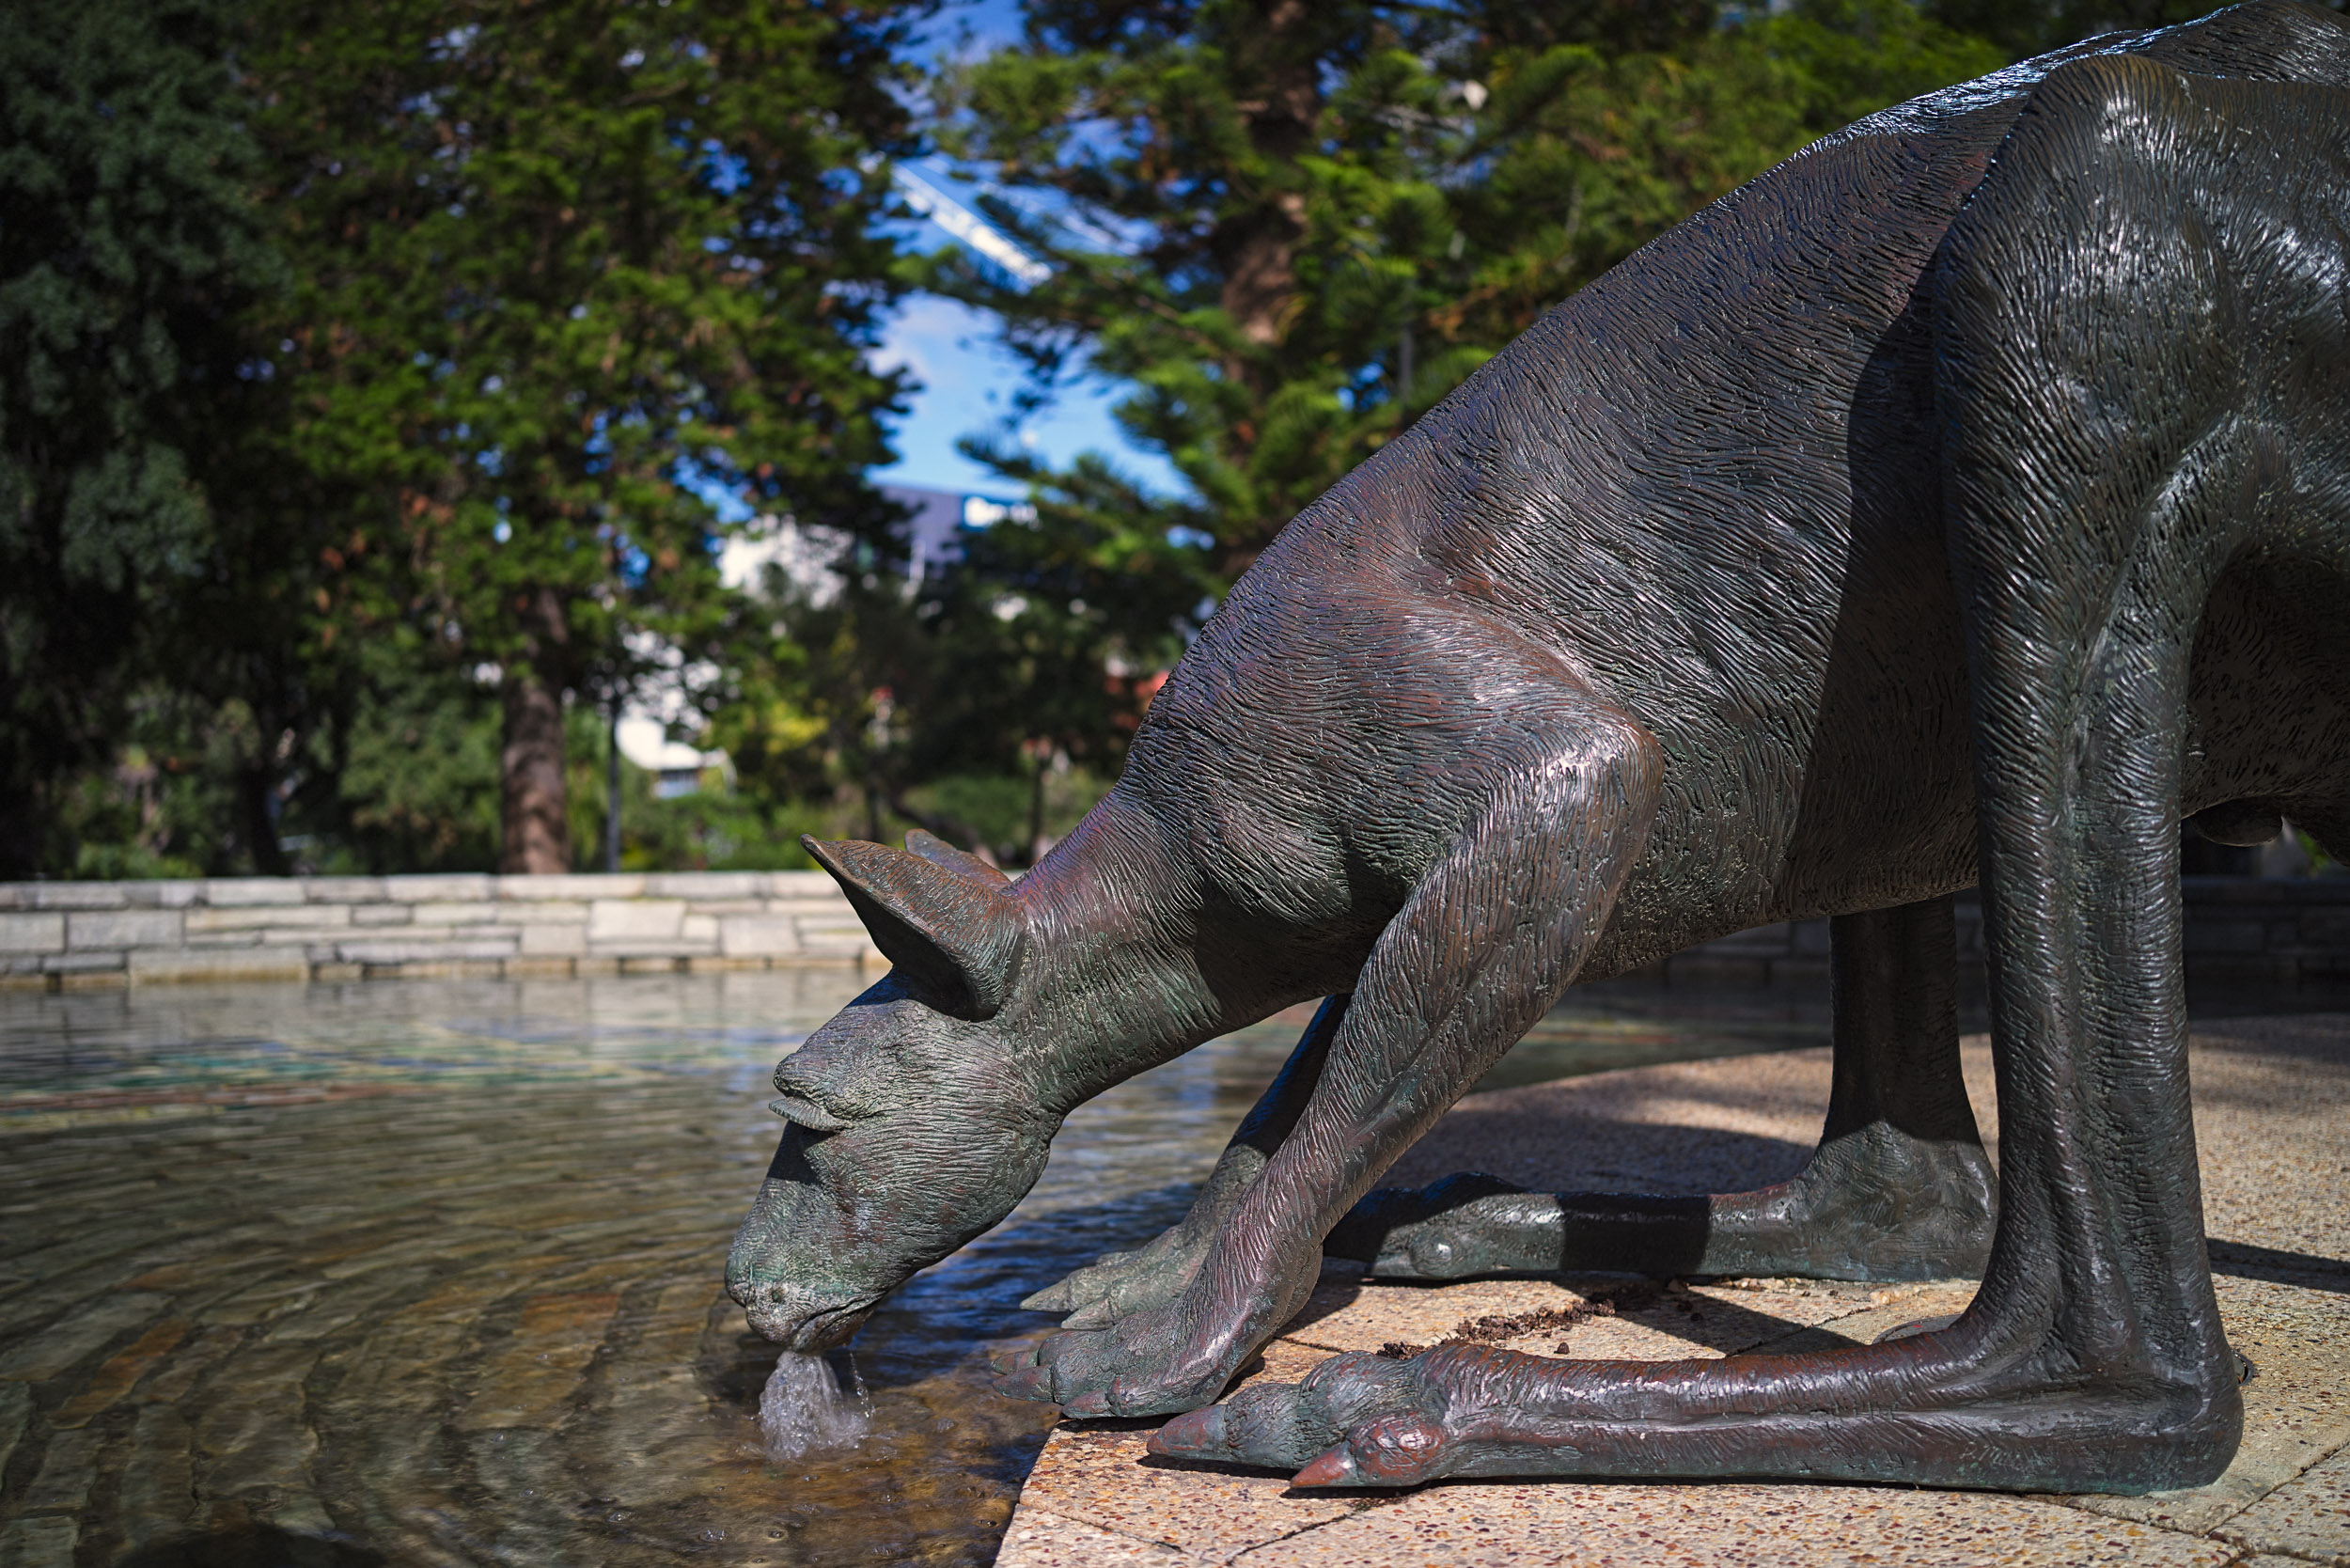
Mother and nearly fully grown joey in the Len Howard Conservation Park in Western Australia.
Inland Thornbill, Acanthiza apicalis. Len Howard Conservation Park, Western Australia.
This bob tailed lizard, Tiliqua rugosa, has a bad tick infestation. Note the engorged female tick on the shoulder – these can grow up to 2.5cm long. There is a smaller tick above and one in the ear canal behind the jaw. Older lizards or those with lower imune responses are more prone to them.
Crested Pigeon, Ocyphaps lophotes. Len Howard Conservation Park in Western Australia.
An observation platform on the southern end of Lake Geogrup just before it joins the Serpentine River. Mandurah, Western Australia,
So did I come to any conclusions? Yes – a Canon EOS 6d plus Sigma 150-600mm lens is heavy. I missed the reach of micro four thirds lenses.
The Olympus FC-WR flash controller mounted on an Olympus OMD EM1 mark 2 and the FR-WR connected to an Olympus FL-600R speedlight.
When Olympus launched their wireless radio controlled flash system there were howls of derision from the combined blogosphere and photographic forums. Mainly it went along the lines of Olympus had lost the plot in charging so much for something that others were offering so cheaply.If all you want to do is take portraits with a couple of off camera speedlights then there maybe something to this argument. Let’s make a quick comparison.
So that is quite some difference – $794 AUD is a lot of money. Then the Godox fans will tell that the system is much more flexible because if you change camera system all you have to do is change the wireless trigger to one that is dedicated to your new system and you can keep using your existing speedlights. On the face of it it this quite a compelling argument. But this really doesn’t tell the whole story as it assumes that you have no existing flash equipment and that all you want to do is shoot basic lighting set ups with either TTL or full manual control. Now a lot of people who are attracted to Olympus cameras aren’t just attracted by the small size of micro four thirds but also by the advanced features that the cameras have such as focus stacking, keystone compensation, High Res Shot Mode, Live Bulb, Live Time, Live Composite, multi exposure, art filters, picture modes, and interval shooting. Plus Godox doesn’t offer a TTL enabled flash such as the Olympus Twin Flash STF-8 for macro and close up photography.
Using the Olympus STF-8 close up flash as part of a multi flash set up controlled by the Olympus FR-WR and FC-WR.
Regular readers will know that I do a lot of wildflower photography, product shots and the occasional portrait all using flash. I realised I wanted to use more complex lighting arrangements and so I decided to put together a system based around the existing flash units I already had – an Olympus FL-600R, an Olympus STF-8, 2 Metz 44AF-1’s, and a Metz 64AF-1. To that end I bought an Olympus FC-WR wireless commander and three Olympus FR-WR Wireless Radio Flash Receivers ($285 AUD each). Still not a super cheap option, but one that gives me a lot of scope. Now when I started this because the system was not well received there were next to no reviews of it and I didn’t know if everything I had, particularly the Metz units would work. Also I wanted to know whether they would also work with my Panasonic G85. So this was a real voyage of discovery
As I progressed with this I realised that I didn’t just want to write a review, but that I’d also say how to use the equipment in various modes across both Olympus and Panasonic cameras using third party flashguns so that prospective users can find all this information out without having to take a punt like I did. As usual I’ve provided the information in both video and written formats.
So with all that preliminary guff stated (phew!!) lets dig in by looking at the Commander and Receivers themselves first.
FC-WR Commander
Specifications
Maximum communication distance
Approx. 30 m
Frequency
2.4 GHz band
Number of channels
15 (in the commander mode; with automatic channel setting function)
Number of groups
3; maximum number of flash units; unlimited
Flash control modes
TTL / MANUAL / FP TTL / FP MANUAL / Off
Flash compensation
±5 EV (Increment: 1/3 EV or 1/2 EV)
Manual flash power settings
From 1/1 to 1/128 (Increment: 1/3 EV or 1/2 EV)
Power supply
AAA alkaline dry-cell batteries x 2 / AAA NiMH batteries x 2
Continuous usage duration
Approx. 6.4 hours (when using AAA alkaline dry-cell batteries)
Operable temperature / humidity
From -10 to 40℃ (14 to 104°F) / From 30 to 90%
Dimensions
Approx. 59.5 (W) x 51.0 (H) x 67.4 (D) mm
Weight
Approx. 73 g (excluding batteries)
Firstly the WR in designation is Olympus speak for the fact that the commander has a degree of weather resistance. This is a huge positive for me as I shoot a lot of stuff outside in all weathers. Olympus doesn’t specify the degree of water resistance, but says the unit will operate in temperatures ranging from -10 to 40ºC and humidity up to 90%. I didn’t throw it in a bucket of water but I have used it out in the rain on several occasions with no functional problems, and when I opened up the battery compartment it was dry so that’s all good.
The FC-WR uses AAA batteries. This was a bit of a disappointment and I would have liked AA as it means I only have to carry one type of battery and AAs last longer. However in practice I’m still using the first set of AAAs, and I suppose the use of them keeps the size down.
Olympus FC-WR, showing the information panel and the various controls.
Physically the FC-WR is made of sturdy plastic which doesn’t creak or flex if you give it a squeeze. The door to the batter compartment is on a sprung hinge and slides to lock and open. It fits well and there is some initial resistance to moving so there won’t be any accidental opening. On the base is a locking hotshot with the standard m4/3 pins providing electrical contact. On the to is a large LCD screen which gives all the necessary info and is backlit.Underneath that are three buttons – one each for the the three groups. Then there is a mode button, a test button, a dial and rocker switch surrounding the OK button and finally the on/off button. A nice touch is that if you turn off your camera the FC-WR automatically switches off, and if you restart your camera within 10 minutes it will automatically switch back on. Any longer and you have to press the on/off button.
To use it is simplicity itself. First select the group or flashgun you want to control, press the button followed by the mode button. Select between TTL, manual or off. Use the right side rocker switch to move to the +/- ratio to select either flash compensation for TTL mode or the power levels for manual mode. Another press of the rocker switch and you can select whether you want high speed flash sync or FP mode in Olympus speak. A final press of the rocker switch lets you select the channel that you want all this to occur on.
AAA alkaline dry-cell batteries x 2 / AAA NiMH batteries x 2
Continuous usage duration
Approx. 6.4 hours (when using AAA alkaline dry-cell batteries)
Operable temperature / humidity
From -10 to 40℃ (14 to 104°F) / From 30 to 90%
Dimensions
Approx. 59.1 (W) x 46.1 (H) x 51.0 (D) mm
Weight
Approx. 75 g (excluding batteries)
Olympus FR-WR showing the controls on the rear of the unit.
In terms of construction what I said about the the commander applies here. On top of the receiver is a standard four thirds protocol hot shoe. On the base there is a locking cold shoe with 1/4 20 mount. On the left side (looking from the front) is a pc sync socket – does anyone actually use these any more? – which would allow you to tigger a studio mono block or power pack. On the other side is the battery compartment which takes two AA cells.On the back panel is a dial that enables you to select channels (1-15) and beside it another dial for selecting channels. Then there are three buttons which are from the bottom the on/off switch. The neat little touch with this is if you are using an Olympus brand flash then switching off the receiver will switch off the flash. In the middle is a button for switching the beep on and off. I leave it on as it gives me an audible indication of when everything has recharged. Finally at the top is the X-RCV button. This allows you to either control the flash from the commander unit or from the flash itself. I choose to control the flash via the commander unit as I find that more convenient.
Usage Scenarios
Standard Mode
The Radio triggers work with both Olympus and Panasonic cameras and with third party flashes. It also works with the Olympus ST-F8 as part of a multi flash set up, but you will have to cobble together something to hold the FR-WR and ST-F8 body off of the camera.
Using the Olympus STF-8 close up flash as part of a multi flash set up controlled by the Olympus FR-WR and FC-WR.
FP Mode or High Speed Sync
FP mode or high speed sync is a function of the flashgun and not the camera. So if your flash supports it it you can use it. I got it work with the Metz 64AF-1 and the Olympus FL 600-R using both Panasonic and Olympus cameras.
Focus Stacking or Bracketing
The focus stacking feature found on Olympus cameras imposes certain operating restrictions:
Uses the electronic shutter
The flash sync speed is 1/50th sec or longer
You can’t use TTL flash you have to manually adjust the power settings of the flash to get correct exposure
When you set operating parameters for focus stacking in the camera menu remember to allow a a delay between shots that allows for the flash to recycle. I’ve found four seconds to be sufficient. Having set that up switch on the FC-WR and it automatically selects manual flash mode and the camera selects the the flash sync speed. This worked with both the Olympus and Metz flashes on only the Olympus cameras. Panasonic’s focus stacking function is video based (4K capture) and not stills like that of the Olympus.
The original shot with no focus stacking.The end result of the in camera focus stacking. Twelve shots taken at a different focusing distance and then merged in camera. The camera always applies a slight crop when doing this.
High Res Mode
In many ways this is similar to the focus stacking mode mentioned previously.It requires an electronic shutter set at 1/50th sec or longer and the flash to be set manually. This worked well with both the Olympus and Metz flash guns. I didn’t test this with a Panasonic camera as my G85 doesn’t have this function.
Conclusion
The Olympus FC-WR flash controller mounted on an Olympus OMD EM1 mark 2 and the FR-WR connected to an Olympus FL-600R speedlight.
Lets get the niggly issue out of the way first. Yes the system is expensive and I wish that it was a little cheaper. Having said that you get rock solid dependability. I found that the Godox units were somewhat flaky at times – occasional misfires where the flash didn’t go off. I like dependability and I’m prepared to spend a little more to get it.
The good stuff. I like the fact that the operation of the constituent parts is seamless even when using the advanced Olympus camera features. The build quality and the weather resistance is excellent, Olympus do a really good job in making small equipment that can handle all the vagaries that life can dish out. The fact that this works with Panasonic cameras is great. Cross compatibility was another factor that brought me into the micro four thirds system. If you want full frame these should work with Panasonic’s full frame offerings as they also share the m4/3 protocols for flash. I say “should” as I’ve not tested it and cannot find anything online to confirm one way or the other. The fact that you can use it with third party speedlights is a huge bonus.
If you are a micro four thirds user and want a rock solid off camera flash solution that gives you access to multi-flash set ups even with specialist close-up equipment using the specialist in camera features such as focus stacking or high res mode then I think its worth spending the cash.
I have written and made videos about several aspects of the Olympus flash system and these are:
Grand Master Flash : using Hahnel Captur manual radio triggers on Olympus m4/3 cameras. Probably made redundant by this article, but still relevant if you want a reliable affordable system and are willing to forego TTL control.
The recent lock downs for the COVID 19 outbreak had a very strange effect. Living in York we don’t visit the coast very often, but as soon as the Western Australian government said we could leave our region all I wanted to do was go to the coast. I suppose it’s a bit like being on a diet and then spending all day obsessing over food. Well with the lockdown over we put the dog in kennels and headed down to Mandurah for a couple of days to get an oceanic fix.
Now the plan was to spend three days visiting some reserves around, but as Robert Burns once said “The best laid schemes o’ mice an’ men / Gang aft a-gley.”. The first spot we went out to was Lake McLarty, but there was no water in the lake and no birds to be seen. To cap it all the weather was grim – a storm front was closing in. So we decided to cut our losses and head in land to Pinjarra and walk along the Murray River and visit the Edenvale Heritage Tearoom. Well the tearooms were still shut because of COVID so we settled for a walk along the the river.
Eastern osprey (Pandion cristatus subs leucocephalus) at Lake McLarty Nature Reserve near Mandurah in Western Australia. Olympus OMD EM1 mk ii with Panasonic Leica 100-400mm lens. Exposure: 1/500, f7.1 ISO 320.
Nankeen Night Heron, Nycticorax caledonicus subsp mannillenis. Pinjara, Western Australia. Olympus OMD EM 1 mk ii with Panasonic Leica 100-400mm lens. Exposure: 1/500, f6.3, ISO 1600.
A male Australian darter (Anhinga melanogaster subspecies novaehollandiae) aka as the snake bird. Pinjarra, Western Australia. Olympus OMD EM 1 mk ii with Panasonic Leica 100-400mm lens. Exposure: 1/500 sec, f6.3 at ISO 3200.
Paul Amyes taking it easy from the rigours of bird watching on a concrete sofa on the banks of the Murray River in Pinjarra, Western Australia. The sofa is part of the “Take Your Seat Art Project by Fremantle Arts Centre and Alcoa.
The next day the weather was grimmer than the previous day’s. We were wearing enough clothes to make Captain Scott of the Antarctic fame look severely underdressed. The morning’s activities were to be based at the Creery Wetlands Reserve which was only a short way from where we were staying. Although wet and bitterly cold we had more success than the previous day. It is amazing how much wildlife can be packed into a small area just minutes from a city centre. If you are in the area it is well worth visiting, don’t let the fact that the entrance makes it look like an off-shore detention camp put you off. As you cross the bridge you get the feeling a couple of Border Force goons could jump out of the bushes and indefinitely detain you. Once in side you can commune with nature to your hearts content.
The entrance to Creery Wetlands Nature Reserve in Western Australia.
One of the two bird hides at Creery Wetlands Nature Reserve in Western Australia.
Helen bird watching at the Creery Wetlands Nature Reserve, Mandurah, Western Australia.
Pacific black duck, Anas superciliosa. Creery Wetlands Nature Reserve, Western Australia.
Western Gerygone, Gerygone fusca. Creery Wetland Reserve, Western Australia.
A great egret (Ardea alba modesta) flying over the Creery Wetlands Nature Reserve in Western Australia.
Inland Thornbill, Acanthiza apicalis. Creery Wetlands Nature Reserve, Western Australia.
Black swans (Cygnus atratus) feeding. Creery Wetlands Reserve, Western Australia.
An eastern osprey, Pandion cristatus subs leucocephalus, perched on a sign warning about 1080 baiting. Creery Wetalnds Nature Reserve, Mandurah, Western Australia.
Western Grey Kangaroo, Macropus fuliginosus. Creery Wetlands Nature Reserve, Western Australia.
Not the dreadful film, but the camera company. On the 24th June 2020 Olympus announced that they were in talks with Japan Industrial Partners to divest themselves of their camera business after three continuous years of losses despite numerous restructuring attempts. I’ve got no idea what all this means from a practical point of view, but from an emotional point of view it is quite a sad day. I’ve always considered myself to brand agnostic and have used over the years Praktika, Pentax, Minolta, Canon, Leica, Voigtländer, Sony, Panasonic and of course Olympus. But I’ve got to say that over the last 38 years I’ve always had at least one Olympus camera. More than just a few key moments in my life have been documented by an Olympus camera.
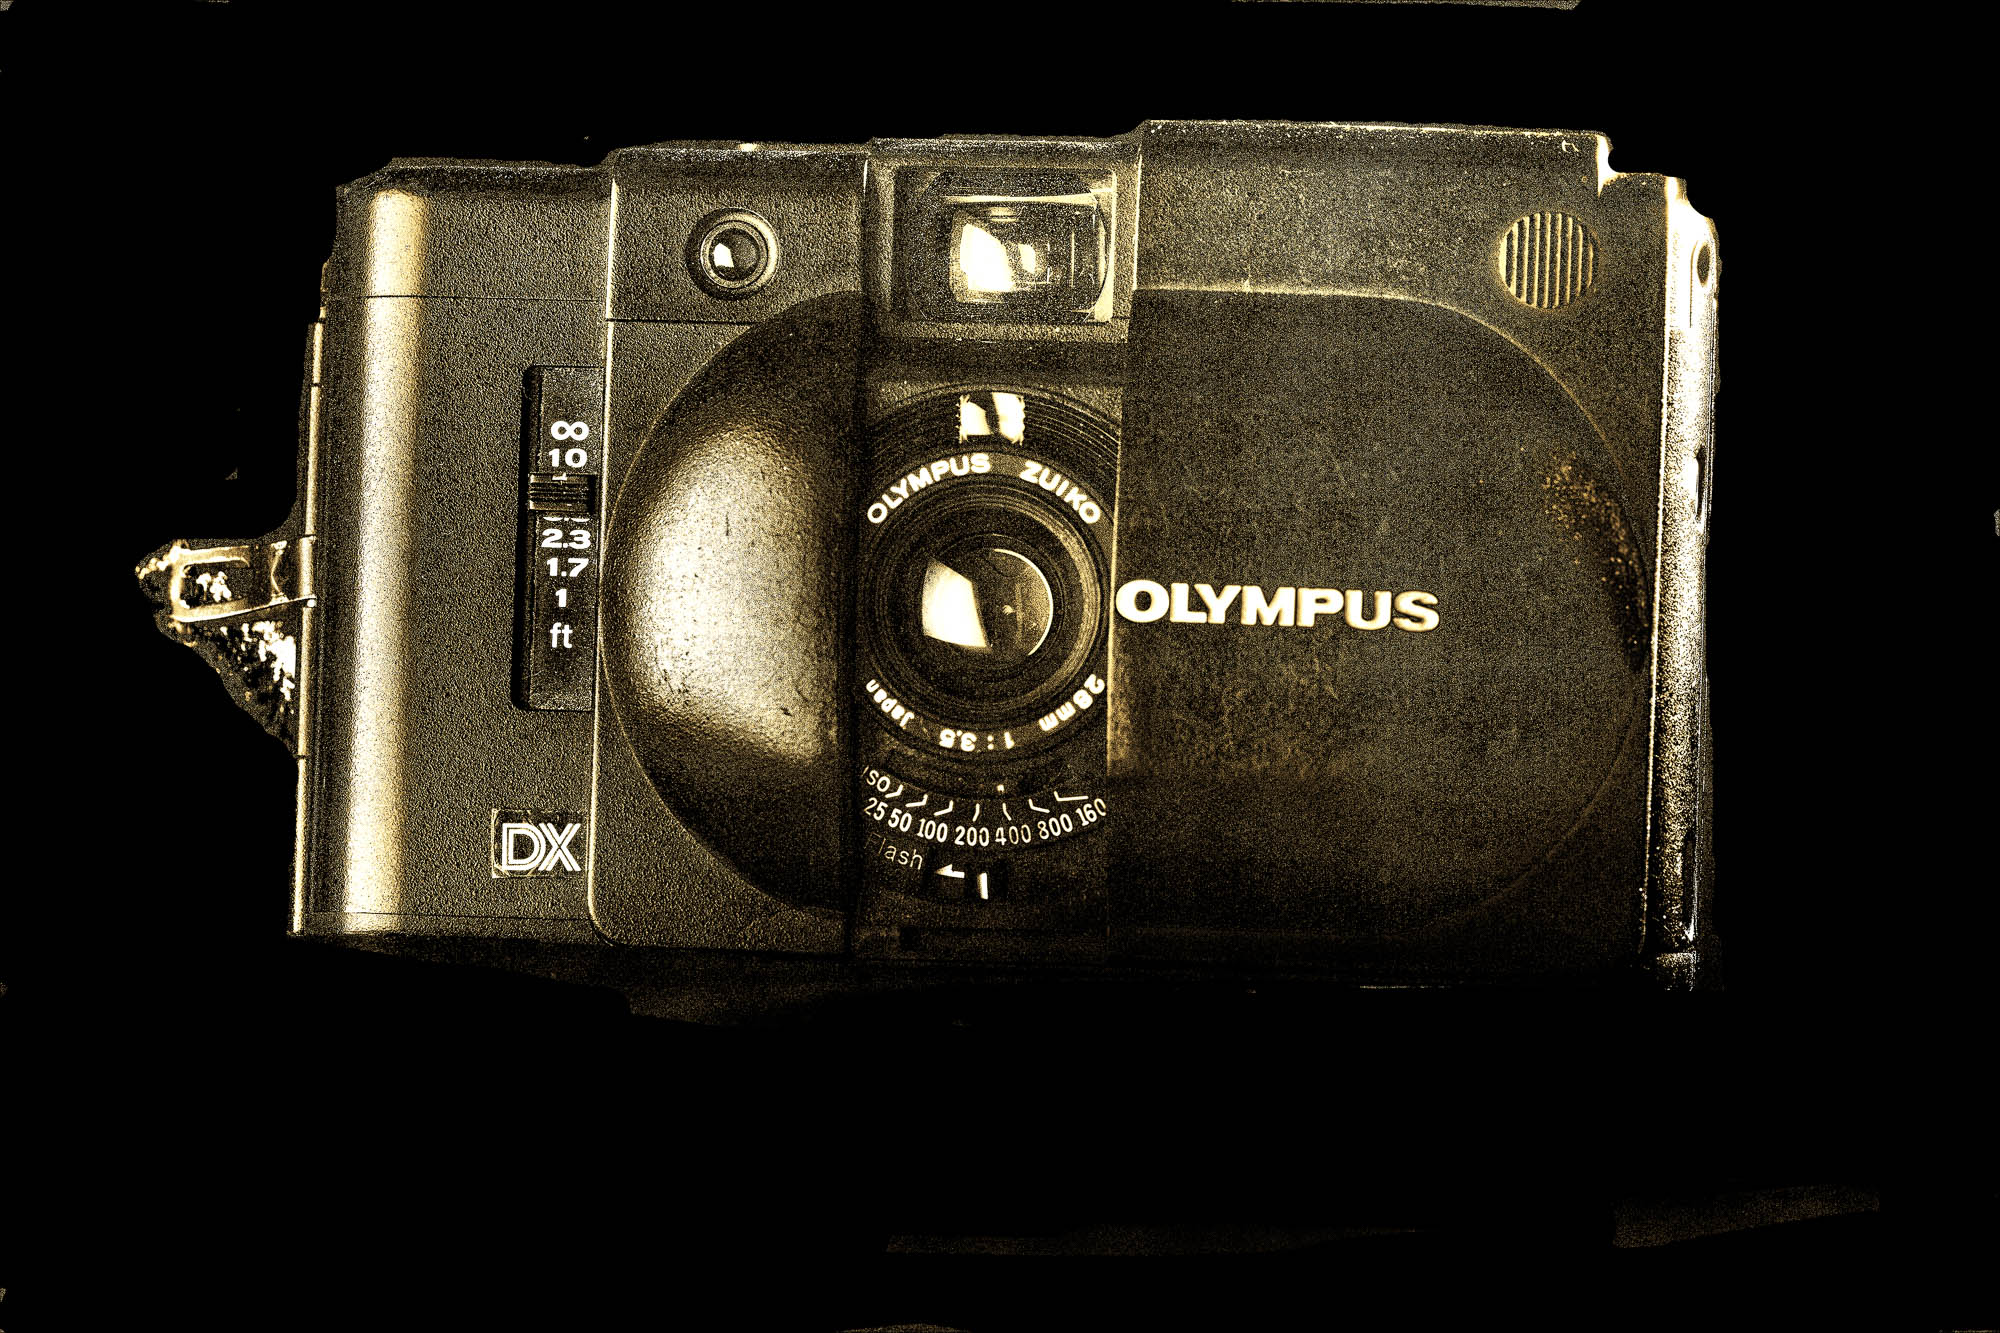
My first Olympus camera was an XA2. This is the XA4 I bought later to replace it, they look very similar, the major difference being that XA2 had a 35mm lens while the XA4 had a 28mm macro lens.
Portrait of me in Majorca taken in March 1986 by my father in law, Brooke Spencer. Probably taken with a Leica R4 with a Leica 135/2.8 Elmarit-R on Kodak colour negative film. I’m holding my OM1n with 35-105 lens.
I bought my first Olympus camera in 1982 after returning back home from an extended stay in Israel where I got into taking photos. Previously I had a Kodak 110 cartridge camera and when I got the films back from the processors I was dismayed with how crap they looked. I was determined that on the next trip I would take a much better camera. So after a trip to the newly opened Whibys camera shopping Chichester and a long and informative chat with the owner Derek Whitby I left with an Olympus XA2 – a unique 35mm clam shell compact camera. I kept going to Whitby’s until 1988 which was when I migrated to Australia. In that time Derek went on to sell me an OM20, OM1n, OM2n, OM4 and my partner an OM40. Along with those cameras was wheelbarrow load of lenses, some very specie flashguns for the time and a shed load of film. I’m glad their business is still going although Derek and his wife Jacqui no longer run it. The cameras kept marching on and were perfect for my travels being small, durable and highly featured for their time. The lenses were also compact and gave great image quality. I’ve still got most of the lenses and still use them, and I’ve written about them on this blog ( 21mm f3.5, 24mm f2.8, 35mm f2, 50mm f1.4,135mm f2.8, and 35-105mm f3.5-4.5).
Believe it or not that’s me in Red Square, Moscow in January 1987. The temperatures were -40ºC. You can just about see my camera bag slung over my shoulder. In it is an OM1n, an OM2n, a 35-105mm, a 50mm f1.4, a 200mm f4 lens a T32 flash and a T20 flash. We went to document the plight of Russians in Moscow and Leningrad (now St Petersberg for a human rights campaign that was to be launched later that year at the House of Commons in London). The cameras worked flawlessly in the cold. The photo was taken by my wife on an Olympus AF1.
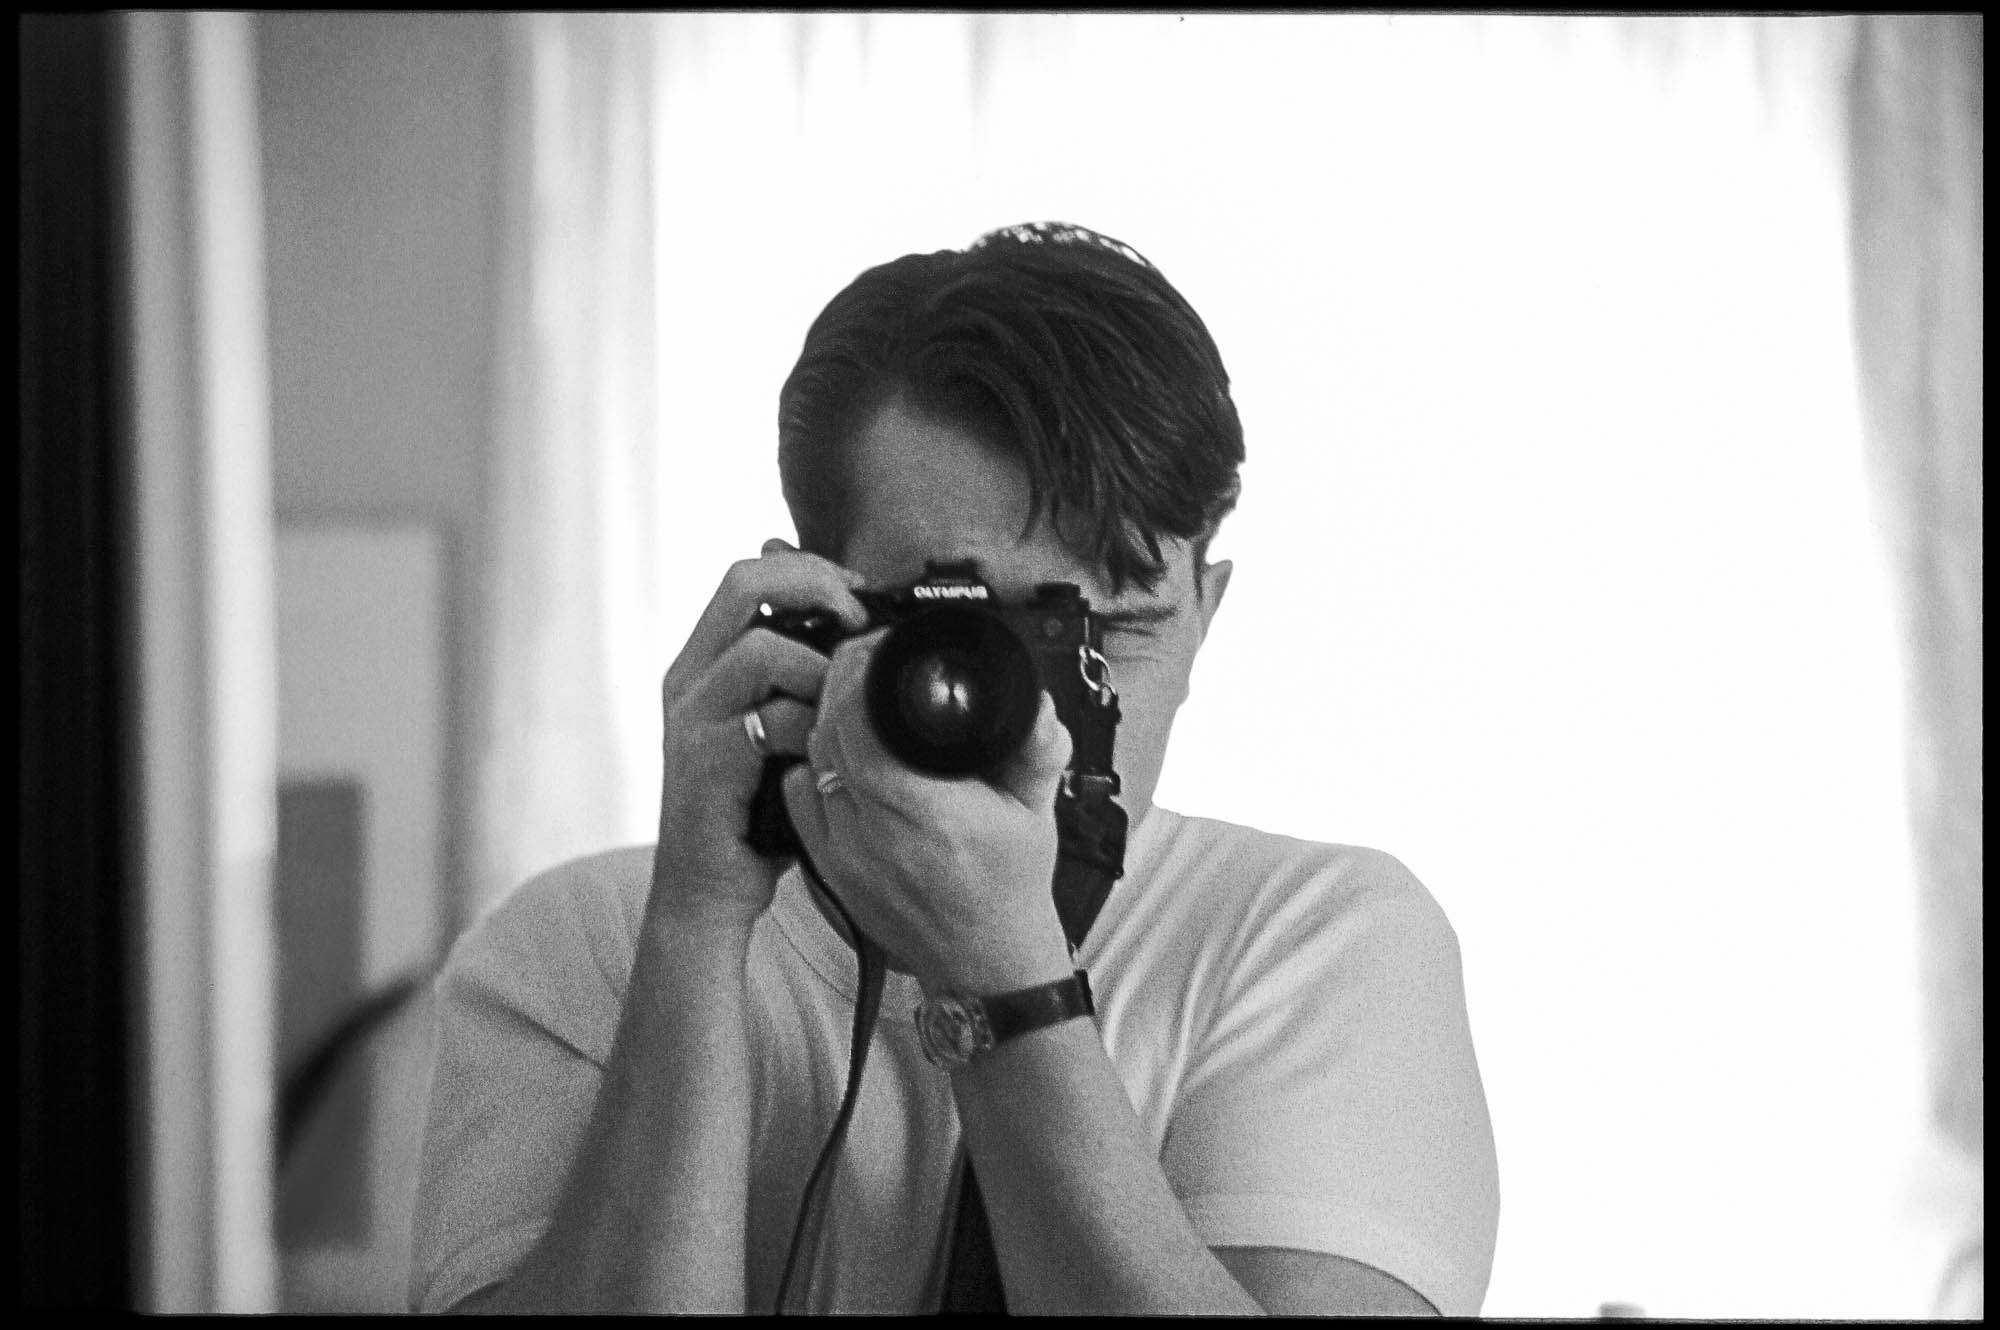
My earliest selfie – taken in September 1987 while I was staying with my in-laws just prior to departing for India and Nepal. The camera is an Olympus OM4 with an Olympus OM Zuiko 35-105mm lens. Originally shot on Ektachrome 200 but converted to black and white because of fading.
Yours truly on a house boat on Lake Dal in Srinagar, Kashmir, India. I’m wearing a Camera Care Systems pouch with my Olympus OM4 in it. Taken by my partner with her OM40 and 35-105 lens.
In 2003 I shot a couple of weddings and my OM4s developed problems, one the shutter failed and the other the film advance jammed. I took them to the local camera whisperer but he broke the bad news to me – there were no new spare parts. He said I could by up some old models and use them as donor cameras but there was no guarantee as to the condition of the parts and how long they would last. To say I was gutted would be an understatement. This came a a particularly bad time for me, I was recovering after a bad accident and was pretty broke. I had enrolled at college to study photography as a form of therapy and now I was pretty well camera less. My late father-in-law (Brooke Spencer) in an act of supreme kindness stepped into the breach. He had just bought a Canon EOS D60 digital SLR and he sent me his old EOS3 film SLR and a couple of lenses. I now had a camera to complete college with and had inadvertently changed system. I went digital with Canon but I wasn’t really happy with it. I found the Canon EOS system to be large, heavy and cumbersome. About this time I fell into writing about and photographing outdoor activities and then was commissioned to write a walking guide. Well after a year lugging a Canon 5d and three lenses on over 1000Km of walks I knew I needed something lighter.
The Canon EOS system full monty. Three bodies, seven lenses, two flashes, flash meter, filters, cables, flash triggers, and reflectors. It is a hernia inducing load.
This is the camera kit I used on my first walking guide book. Less hernia inducing than the Full Monty, but still coming in at 7Kg including filters and batteries.
When I saw the Olympus Pen EP1 in 2009 I was smitten, but it didn’t have a viewfinder so I held off buying one. Less than a year later Olympus introduced the EP2 and I got one. The next guide book was done with an outfit based around that camera and a a few lenses and I was much happier.
Coming in at under 2Kg complete with batteries, filters, microphone and assorted cables for video. This kit still gives me coverage from 24emm to 300emm with 1:1 macro and a smallish prime. All that’s missing is flash.
Here I am pausing to take a photo with EP2 while walking up Frenchman Peak in Cape Le Grand National Park, Western Australia.
Over the last ten years I’ve heard a lot reasons from keyboard warriors on various photographic forums why the micro four thirds format that Olympus and Panasonic used was inferior to full frame sensors and that you couldn’t get work published if you used it. Well after three books, two exhibitions and loads of print sales no one has ever said the image quality was not up to snuff. Unfortunately photography is an activity dominated by very conservative men who see a small camera, no matter how capable, as being an affront to their masculinity. So Olympus was sandwiched by the small minded conservatives that wanted big cameras and at the other end the onslaught of the do anything mobile phones which now have very good photo and video capabilities.
The Canon EOS6d with Sigma 150-600mm lens compared to the Panasonic G85, which uses the same sensor format and lens mount as Olympus, with the Panasonic Leica 100-400mm lens. The Panasonic has great reach, better video, the same number of megapixels, weighs less and costs less.
The Canon EOS 6d camera with 100mm f2.8 macro lens that I used to use for photographing orchids alongside the Olympus EM 1 mk ii with 60mm f2.8 macro lens that I use now. Both produce amazing images, but the Olympus is a lot nicer to carry through the bush all day.
As I said at the beginning of this piece I have no way of knowing what will happen. Maybe JIP will turn the company around and make it it profitable and innovative. Maybe they’ll just asset strip and close it down. The company does both. I hope it is the former, but if it is the later I guess that this a eulogy for Olympus. But whatever may happen my current Olympus cameras have plenty of mileage left in them and if I can get another 10 years out of them, and at this stage I don’t see why not, then I’ll be very happy.
















You must be logged in to post a comment.