A New Standard


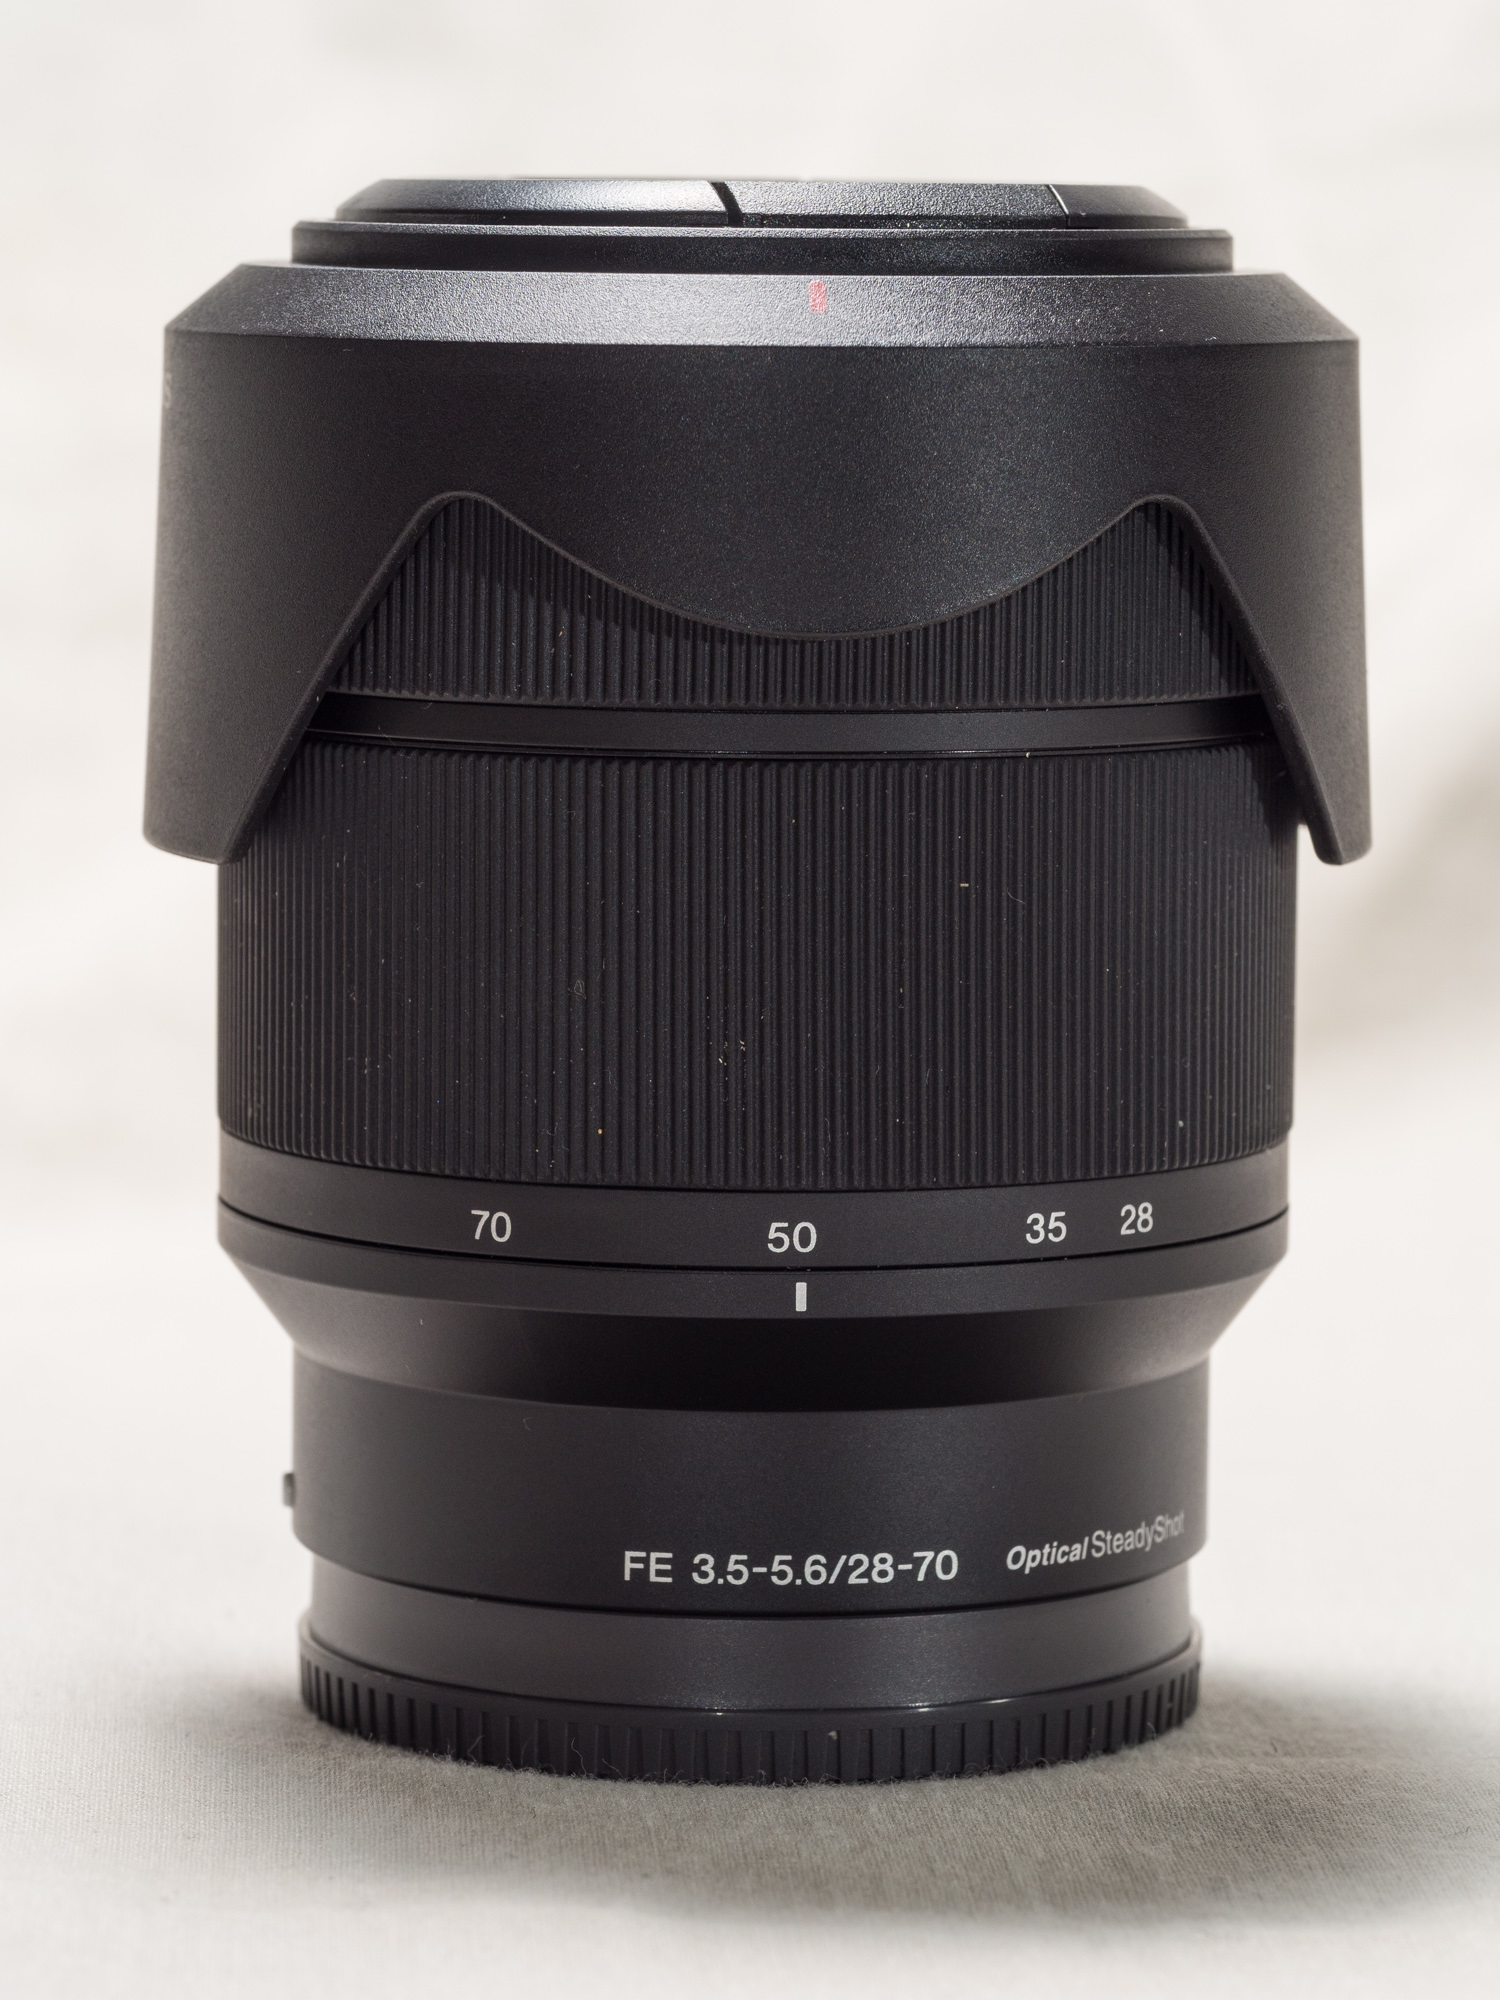
If you are a regular reader of this blog then you’ll be aware that I’m trying to transition from my full frame Canon DSLR to a full frame Sony mirrorless system without spending a fortune. Initially the idea was to buy a second hand A7r ii body and use second hand lens adapters (the Sigma MC-11 and the Metabones V Smart Adapter) to enable me to use my existing Canon EF lenses. The experience went relatively well until I tried to use the kit for covering a couple of events. It was my experience of using the Canon 24-70mm f4 IS L lens mounted via the Metabones V Smart Adapter that made me start to reconsider the whole idea of adapting Canon EF lenses to Sony FE bodies. I’d already been using a Sony 28-70mm f3.5-5.6 OSS lens and while the AF and the stabilisation were good points I wanted a brighter lens and a constant aperture as it makes life easier when doing flash photography. My options in this focal range were:

  • Sony Zeiss FE 24-70mm f/4 ZA OSS Lens
  • Sony FE 24-70mm f/2.8 G Master Lens
  • Tamron 28-75mm F/2.8 Di III VXD G2 Lens 
  • Sigma 28-70mm f2.8 DG DN Lens

The Sony Zeiss 24-70 f4 doesn’t have a very good reputation as there is a lot sample variation and it would appear that good copies are few and far between. Sony’s f2.8 GM, well at just under $3000 AUD was out of the running on price alone. With the Tamron 28-75mm well the original version is permanently out of stock here in Australia so goodness knows when the mk ii version will be available. So the Sigma won the day.

Sigma 28-70mm f2.8 DG DN Lens available in both Sony FE mount and L mount.

TLDR


Specifications 

Focal length 28-70mm
Angle of view 75.4~34.3°
Maximum aperture f2.8
Minimum aperture f22
Filter Size 67mm
Stabilisation  no
Maximun magnification  At 28mm 1: 3.3

At 70mm 1: 4.6

Minimum focusing distance Ay 28mm 19cm

At 70mm 38cm

Focusing modes AF and manual
Optical construction 12 groups, 16 elements

Including 2 FLD elements, 2 SLD elements, and 3 aspherical elements

Aperture blades 9 rounded blades
Weather sealing dust and splash-proof
Weight  470g
Dimensions φ72.2mm × 103.5mm
Mount Sony FE and L-mount Alliance

Build Quality

Sigma 28-70mm f2.8 DG DN Lens available in both Sony FE mount and L mount.

The 28-70mm DG DN is part of Sigma’s “Contemporary” line which up to recently was seen to be their line which had good optical performance while cutting costs in the materials and finish. Recent releases such as the 90mm f2.8 have muddied this somewhat as they spare no expense seemingly in their construction and performance. Anyway back to the 28-70 it has a more utilitarian approach to its design – it has a rather plain matte black appearance and is made out of Sigma’s Thermally Stable Composite which is a kind of engineering grade plastic that has similar thermal expansion properties as aluminium. The lens is compact and relatively light when compared to other standard zooms with a f2.8 constant aperture. When you pick it up it doesn’t feel cheap or flimsy, but rather it feels reassuringly dense and solid. Nothing creaks or flexes and there are no mould seams – Tamron I’m looking at you! The lens mount is chrome plated brass and there is an ‘o’ ring to prevent the ingress of moisture and dust.

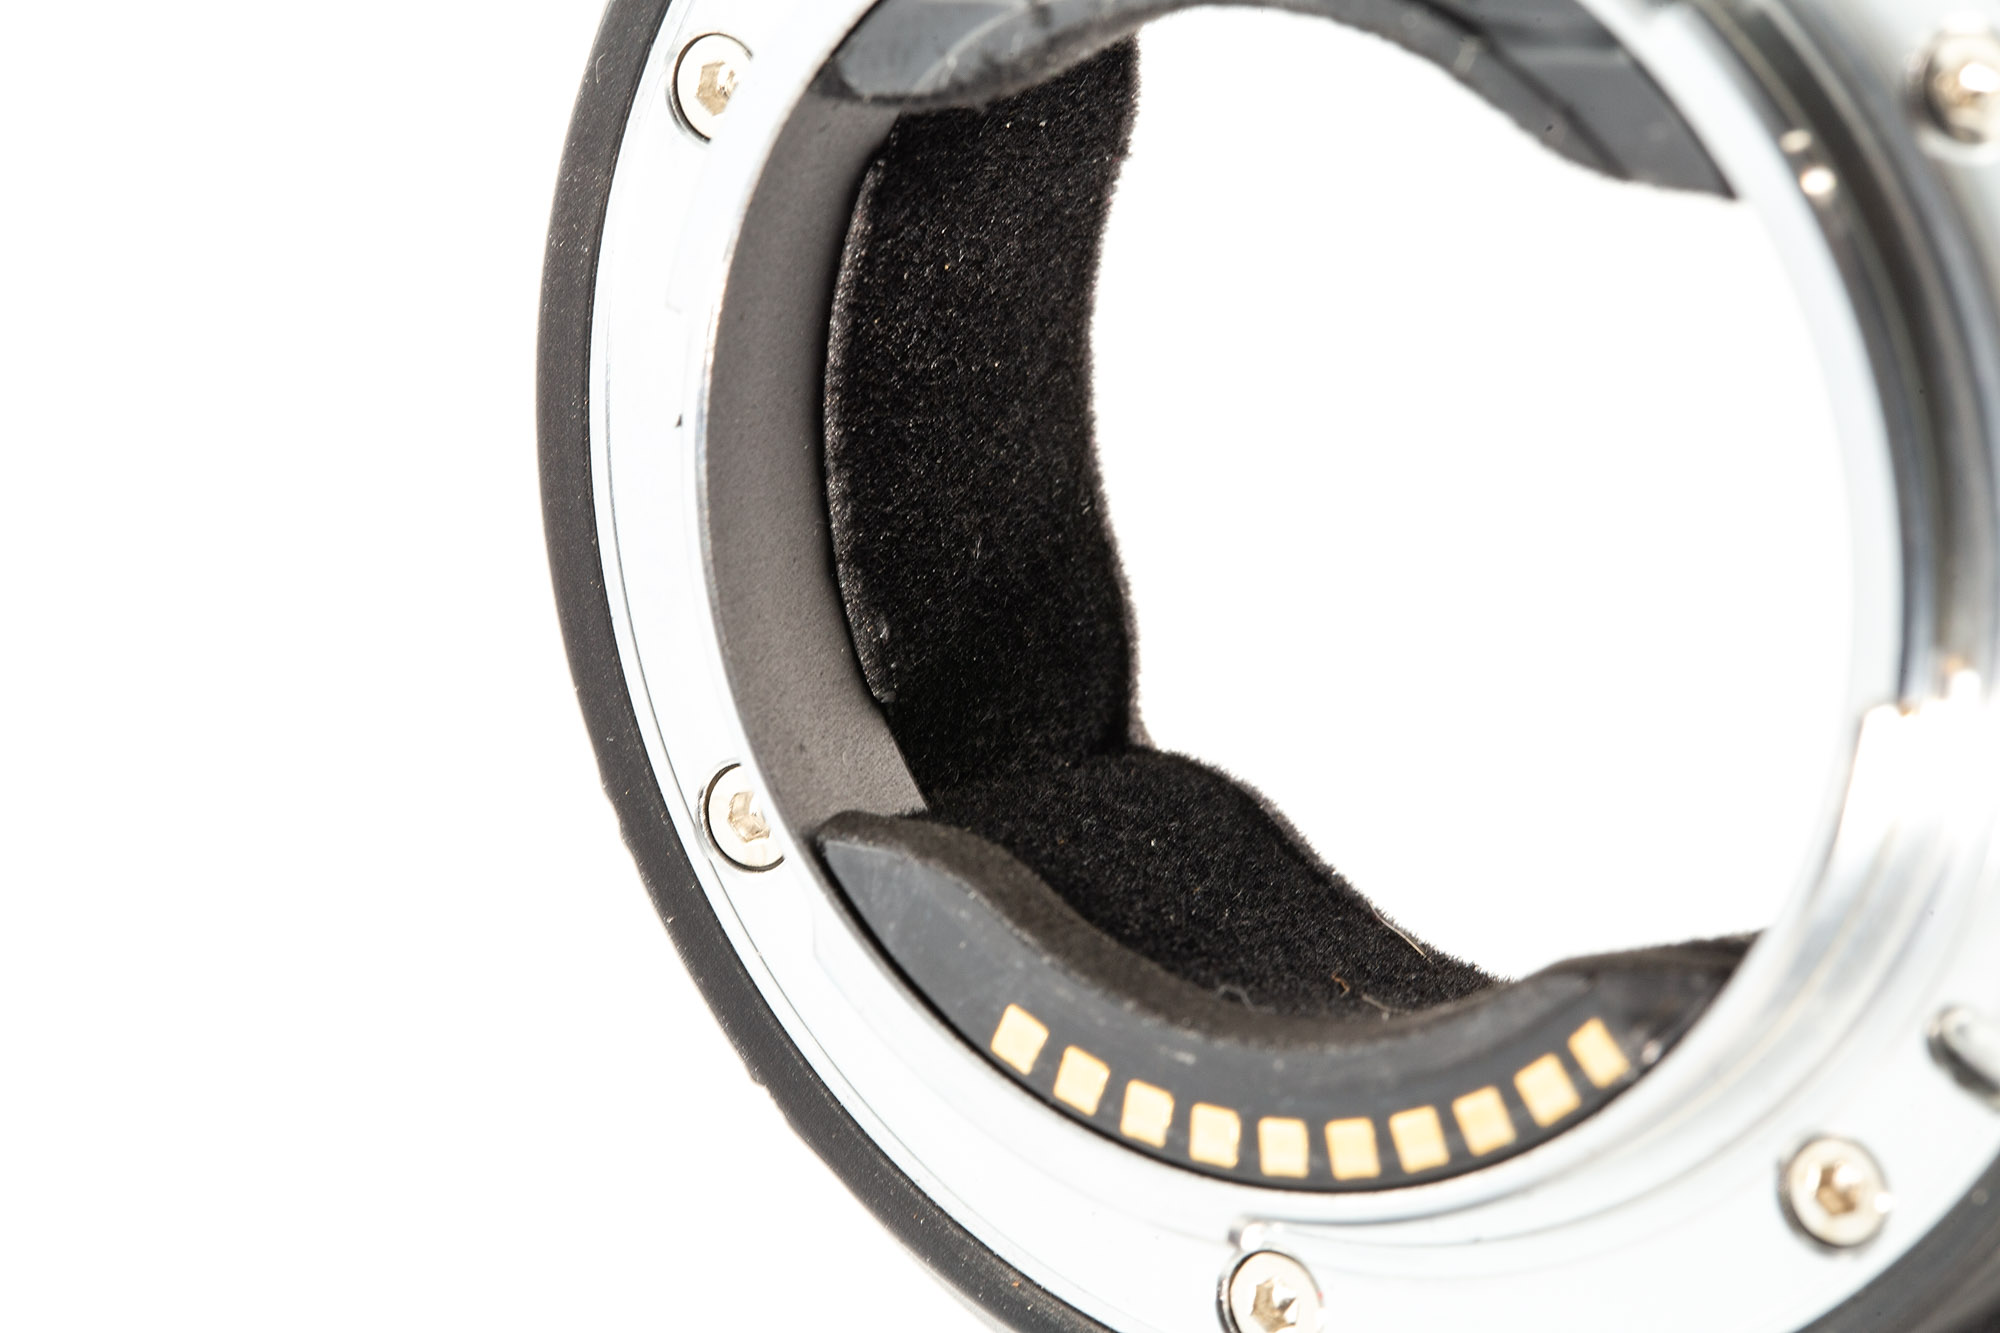
The chrome plated brass mount and the “o” ring that surrounds it.

Compared to other lenses there is a paucity of controls – just a focus ring, a zoom ring and a focus mode selector switch. Both rings have a nice ribbed rubber texture to facilitate a good grip. The zoom ring has a smooth 90º which has just the right amount of resistance – not too sloppy or too tight. The lens barrel extends as you zoom to 70mm by 27mm. The focus ring is of the fly by wire variety with no hard stops. Again it is not too loose or tight and I found it quite pleasant to use.

The controls on the lens are few and far between. A focus ring, an AF mode switch and the zoom ring.

The lens comes with a plastic lens hood that bayonets into place securely. A nice touch is that the interior is ribbed to prevent reflections. The filter size is 67mm which is a modest size and keeps the cost of filters down. The first standard zoom I got had a filter thread of 55mm. Subsequent standard lenses went increased to 77mm and then 82mm so it’s good to see sizes slipping back.

The lens barrel extends by 27mm when zoomed out to 70mm. The lens comes with a petal shaped lens hood.

In terms of size and weight, well my Sigma 16mm f1.4 and Olympus 45mm f1.2 are almost as big and as heavy as the 28-70 DG DN and they were made for the micro four thirds system. It’s a little larger than the the Sony 28-70mm f3.5-5.6 OSS lens and while the same length as the Canon 24-70mm f4 IS L the Sigma is 135g lighter.

The Sigma 28-70mm f2.8 DG DN lens is only fractionally bigger and heavier than the Sigma 16mm f1.4 and Olympus 45mm f1.2 prime lenses for the micro four thirds system.

Optical Performance

To see any of the images larger just click on them.


OK lets get down to the nitty gritty. At 28mm wide open the centre of the image is sharp and contrasty. The edges are softer and there is a very, and I mean very, small amount of green fringing. Switching off the lens correction we can see that there is vignetting and barrel distortion. At f8 the edges catch up with the centre sharpness. By f16 the effects of diffraction are noticeable.

At 70mm f2.8 the centre performance is not as good as the wide end being slightly soft and lacking contrast in the centre and with corners a little worse. Stop down to f4 and the centre improves considerably and by f8 the corners are as good as the centre. Again by f16 diffraction is apparent. Without the lens profile there is vignetting and pincushion distortion.


.

When it comes to chromatic aberration well axial (or longitudinal) CA can be observed when shooting wide open especially at the minimum focusing distance. This is easily dealt with by stopping down. It is more pronounced at 70mm than 28mm. Transverse (lateral) CA is very well controlled and images need to be forensically examined at 200% to spot it. Very impressive.

Ghosting flare, sensor flare and diffraction spikes. 28mm at f22. I you look carefully you can see a small amount of ghosting flare and some sensor flare.

Looking at the diffraction spikes (sun stars) for this lens the nine bladed diaphragm produces 18 points and stopping down to f22 produces the best effect. Diffraction blurs them a little but I quite like them.

Flare resistance is very good. There is little to no veiling flare and just a little ghosting flare. What is apparent is sensor flare aka red dot flare.  This is caused by reflections from the micro lenses on the sensor hitting the rear lens element and the being reflected back onto the sensor. Unfortunately it seems that mirrorless cameras seem more prone to this due to the shorter lens flange distance.

Looking at the bokeh at 28mm wide open at f2.8 the balls don’t have a round shape – they are a bit misshapen and have visible onion rings. The tonal transitions are smooth. By f8 the balls take on a polygonal shape. At 70mm wide open the balls in the centre of the frame are nice and round with some onion rings. At the edge of the frame they have an elliptical cats eye shape. The tonal transitions  in out of focus areas are again nice and smooth. Stopping down to f4 the balls become tighter and the onion rings not so prominent. Interestingly the bokeh balls keep their round shape all the way down to f22.


Bokeh at 70mm f2.8


Auto Focus Performance

Auto focus test for stills at 28mm.

Shooting stills wide open at 28mm the autofocus is very snappy and sticky in daylight with lots of contrast. I shot several sequences of me walking towards the camera and achieved a 100% hit rate. At 70mm f2.8 the results weren’t as impressive but I averaged out with a hit rate of 81%. The problem seemed to occur when I got very close to the camera and the lens would struggle to keep up. It would focus for a couple of frames, loose focus for a frame and then re-acquire. Using the 28-70 DG DN with my Sony A7 r ii at a grip and grin I found that the AF wasn’t as confident in the low light and contrast setting. It wasn’t terrible but I found it wasn’t as quick as I’d of liked and a couple of times I lost a spontaneous moment because the combination hadn’t acquired focus quick enough.

Auto focus test for stills at 70mm.

When shooting the video test I mounted the camera on my slider with a repeating 20cm movement and then filmed myself walking back and forth. At 28mm wide open the lens did very well with just a couple of moments where it was hesitant. Overall a very good performance. At 70mm the AF wasn’t as confident and prone to loose focus and then not quickly re-acquire. I decided to re-test but not using the slider this time and everything was a lot better at both focal lengths so from that I can assume that the movement from the slider was stressing the autofocus too much.

Checking for focus breathing I found that it was very minimal which should keep the video crowd. Normally I don’t bother checking where a lens is parfocal or not, but, as the lens had so far done so well I thought I’d give it a go. And the Sigma 28-70 f2.8 is indeed parfocal.


Conclusion

Sigma 28-70mm f2.8 DG DN Lens mounted on a Sony A7r ii.

There have been a few criticisms about the Sigma 28-70 DG DN. People moan about the distortion present when you don’t use the lens profile. I would argue that using corrections like that enables manufacturers to make compact, lightweight and affordable lenses. Other have been very vocal about the reduced performance at the 70mm end, but it is not unusual for a zoom lens to be better optically at the wide end. Better performance would again mean bigger, heavier and more expensive lenses. The main criticism is that at 28mm it’s just not wide enough and that it really should be a 24-70mm f2.8. Well Sigma does make one and its $600 AUD more expensive and it is bigger. Sony’s GM 24-70mm f2.8 is $1300 AUD more expensive, 371g heavier, 33mm longer and 14mm wider. So if you want a small compact f2.8 constant aperture standard zoom some compromise has to be made and I think Sigma has made the right choices.


The focusing and zoom rings have a nice ribbed rubber grip.


I really like standard zooms – I have one for each of my camera systems (Canon EF, M4/3, and now Sony FE). I find they fit in with my way of working with just one camera and one lens. This lens with its useful close focus ability makes it ideal for shooting small subjects, food, and products. Its constant f2.8 aperture is good for low light, flash photography and video. While 70mm at the long end makes it a bit on the short side for some types of portrait photography the focal range is great for environmental portraiture. Overall this lens is perfectly suited to being used as an everyday carry or part of a lightweight travel kit. Occasionally I wished for something a little wider, so what I ended up doing was carrying my Tamron 20mm f2.8 and then everything was just dandy.


Sigma 28-70mm f2.8 DG DN Lens available in both Sony FE mount and L mount.


I really enjoyed using this lens. While it’s not perfect by any means it is a very solid and workman like performer that lets you get on and take photos.


Sample Images

A selection of images taken with the Sigma 28-70mm f2.8 DG DN lens.

A glass of bubbles to celebrate.


York Town Hall as the sun begins to set.


The Tourist Wheel on the Esplanade Park in Fremantle.


The point that tghe Wagyl (Dreamtrime Rainbow Serpent) leaves the Swan River and swims out to sea. Fremantle, Western Australia.


Greg James Sculpture Studio Gallery at the J Shed in Fremantle.


South Metroploitain TAFE Fremantle.


The pusher/tug Svitzer Nana berthed at Fremantle Harbour.


WA Maritime Museum at Fremantle Harbour.


The cargo ship William entering Fremantle Docks.


The cranes at the dry dock that houses HMAS Ovens at the WA Maritime Museum at Fremantle Harbour.


HMAS Ovens in dry dock at the WA Maritime Museum at Fremantle Harbour.


One of the cranes at the dry dock that houses HMAS Ovens at the WA Maritime Museum at Fremantle Harbour.


Part of the HMAS Ovens display at the WA Maritime Museum at Fremantle Harbour.


That Was Then This Is Now

The Sigma 105mm f2.8 EX macro compared to its newer variant the Sigma 105mm f2.8 DG DN macro lens. Both lenses have their lens hoods attached.

Back in the annals of time, well 1999 to be precise, Sigma released the Sigma 105mm f2.8 EX Macro lens. Twenty one years later they released the Sigma 105mm f2.8 DG DN Art Macro lens. So let’s see what has changed in macro lens design.

As always click on the images to see them larger.


TLDR

.


Physical Attributes

Sigma 105mm f2.8 EX Macro

The Sigma 105mm f2.8 EX macro lens in Canon EF mount. The lens has no weather sealing.


As I said above this lens was introduced back in 1999 and it was well received by reviewers and users alike. In fact it cemented Sigma’s reputation for producing excellent macro lenses. One of my photography lecturers reckoned that this was one of the best lenses he’d used so I bought the lens new in 2003 to use with my then Canon EOS 3 and 30 and it remained in regular use until 2016. I’ve used it for macro, product shots, still life, portraits, fine art reproduction and copywork and of course close ups of flowers.

The lens was designed with film use in mind and was made available in the following mounts:

  • Canon EF
  • Minolta A
  • Nikon F
  • Pentax K
  • Sigma SA

Pick up the lens and it feels very well made. It is light by modern standards but it has a nice heft to it. The lens barrel is metal – none of your plastic composites here – and the lens mount is a chrome plated brass affair. The front lens element is recessed 25mm into the lens barrel and it is ribbed to prevent reflections and acts as shallow lens hood. Combine it with the included metal lens hood and it is virtually impossible  to induce flare. The lens hood screws firmly into place on the lens’ front filter thread and is threaded to take 77mm filters which is a neat idea as it makes it possible to quickly attach filters without having to take the lens hood off.

The finish is the peculiar matt black finish that Sigma had for all their EX range of lenses with a gold ring at the end of the focus ring and the text done in a mixture of white and gold. The focusing ring is 35mm wide and has ribbed rubber to aid grip. In autofocus mode the ring spins freely, but pull that ring back and flip the AF switch and it has a nice smooth 270º throw taking you from infinity to 31cm. The lens barrel extends as you focus closer by 50mm and there are magnification scales marked on the barrel extension for both manual and auto focusing. This means you can quickly set the lens to a desired magnification ratio. It is to my mind still one of the best implementations of manual focus on an autofocus macro lens. The lens motor makes quite a bit of noise and it can’t be called quick by any stretch of the imagination, however, macro lenses are not noted for their speed of use.


The Sigma 105mm f2.8 EX macro lens at full extension to give 1:1 magnification. Note the magnification ratios marked on the lens barrel. This makes manual setting of the lens for specific ratios a breeze.


Behind the focusing ring is a clear panel over a focusing scale in both feet and metres. There are two switches on the right side of the lens. The first is a focus limiter which speeds up auto focus by preventing the lens racking back and forth through the whole focus range. The second switch is the previously mentioned focus mode switch. Both are very positive in their action.

Sigma 105mm f2.8 DG DN Art Macro Lens

Sigma’s 105mm f2.8 DG DN macro lens attached a Sony A7Rii.


Announced in September 2020 the DG DN is available in Sony FE and Panasonic/Leica/Sigma L mounts. It is part of Sigma’s Art series and so shares the same gloss black finish with understated white graphics and lettering. No 1990’s gold bling here, just a minimalist workman like appearance. The body is a combination of metal and Sigma’s Thermally Stable Composite a kind of plastic with thermal expansion properties the same as aluminium. There are a number of ribbed panels to facilitate a secure grip. It’s great to see that Sigma has not abandoned the chrome plated brass  lens mount – it’s a proven method and lasts a long time. Pick the lens up and the first thing you notice is the weight. It is very heavy for its size. The 17 lens elements really make their presence felt when compared to the EX’s 10.


Both lenses are focused at their minimum focusing distance to give a maximum magnification ratio of 1:1. The DG DN focus internally and remains the same length while the EX’s barrel extends.


So weight and appearance aside how else does the DG DN differ from its distant ancestor the EX? Well the DG DN is 40mm longer, but it is important to remember that it is made for mirrorless cameras with a shorter lens flange distance than DSLRs. Put a Sigma MC-11 on the EX and they are virtually the same length. Another difference is that the new DG DN focuses internally – there’s no extending barrel and this will help with the weather sealing. The large ribbed focusing ring is of the fly-by-wire type, there’s no pulling it back to engage a manual focus mechanism. Consequently there are no hard stops and you get no feedback as you focus other than the image in the EVF or on the back panel. Macro photography is an area where you do use manual focus a lot and using it on the DG DN is not a very pleasant or positive experience to my mind. 


The controls on the Sigma 105mm f2.8 DG DN macro lens include an AF/MF switch, a reprogrammable focus lock button, a focus limiter switch and a switch to de-click the aperture ring.


There are a lot more controls on the newer lens:-

  • an AF MF switch
  • a focus lock button that can be reprogrammed
  • a focus limiter switch with 3 settings – 0.295 to 0.5m, 0.5m to infinity, full range.
  • a switch for de-clicking the aperture ring
  • an aperture ring
  • a locking switch for the aperture ring


The aperture ring on the Sigma 105mm f2.8 DG DN macro lens. Not only can it be de-clicked it can also be locked in the auto position for those who would prefer to chasnge aperture using camera dials.


The focus limiter switch has three settings. 0.295-0.5m macro, 0.5m to infinity normal range, and a full range option.


So let’s have a quick gander at the specs for both lenses.


Sigma 105mm f2.8 EX Macro lens Sigma 105mm f2.8 DG DN Art Macro lens
Focal length 105mm 105mm
Angle of view 24º (on full frame) 23.3º
Maximum aperture f2.8 f2.8
Miniumum aperture f45 for Canon, Sigma, and Minolta

f32 for Nikon and Pentax

f22
Filter size 58mm on the lens body

77mm on the lens hood

62mm
Stabilisation No No
Maximum magnification 1:1 1:1
Minimum focusing distance 31cm from the film plane 29.5cm (from the sensor plane)
Focusing modes Auto and manual Auto and manual
Optical construction 10 elements in 9 groups with 3 special low dispersion elements 17 elements in 12 groups with 1  special low dispersion element
Aperture blades 8 9 (rounded)
Weather sealing No “Dust and splash proof construction”
Weight 456g (Canon EF mount) 710g
Dimensions 95mm (h) x 74mm ⌀ 135.6mm (h) x 74mm ⌀

Optical Performance

Sharpness

A comparison between the 1999 Sigma 105mm f2.8 EX macro lens and the 2021 Sigma 105mm f2.8 DG DN macro lens. Aperture: f 2.8

This is where we really start to what has changed in terms of lens design over the years. Wide open at f2.8 the DGDN is sharper and more contrasty in the centre of the frame. The corners are sharp but the contrast is lower. The EX on the other hand is softer and has less contrast in the centre and the corners are not only softer but display prominent chromatic aberration and have a warm tinted vignetting. Older Sigma lenses were known for having a warmer look than other brands and it is clearly visible.


A comparison between the 1999 Sigma 105mm f2.8 EX macro lens and the 2021 Sigma 105mm f2.8 DG DN macro lens. Aperture: f 4


A comparison between the 1999 Sigma 105mm f2.8 EX macro lens and the 2021 Sigma 105mm f2.8 DG DN macro lens. Aperture: f 5.6

By f5.6 the corners of the DGDN have improved considerably and the centre is even sharper. The centre of the frame for the EX has improved but not to the same extent as that of the DGDN. The corners of the EX are still quite soft and still exhibit vignetting.


A comparison between the 1999 Sigma 105mm f2.8 EX macro lens and the 2021 Sigma 105mm f2.8 DG DN macro lens. Aperture: f 8


At f8 the DGDN really hits its stride and produces its best optical performance with both the centre and the corners having excellent sharpness and contrast. The EX has reached its best centre performance but it is still not as good as its younger sibling. The corners have improved slightly but vignetting is still present.

At the aperture of f11 the DGDN’s performance remains the same as it was at f8 in both the centre and the corners of the frame. The EX now turns in its best performance but some vignetting remains.


A comparison between the 1999 Sigma 105mm f2.8 EX macro lens and the 2021 Sigma 105mm f2.8 DG DN macro lens. Aperture: f 32

At f16 diffraction is taking effect on both lenses. Interestingly the EX will stop down to f45 but you wouldn’t want to use it as it looks like someone has smeared vaseline over the front lens element.

Chromatic Aberration 

Chromatic aberration is the failure of a lens to focus all colours at the same point and there are two types:-

  1. Axial or longitudinal chromatic aberration – this where different wave lengths of light are focused at different distances from the lens. Generally it can be reduced by stopping down thereby increasing the depth of field so that all the wavelengths fall with acceptable focus. This is very hard to remove in post processing.
  2. Transverse or lateral chromatic aberration – different wavelengths of light are focused at different positions in the focal plane. It does not occur in the centre of an image and increases as you move out to the edges. It is not effected by stopping down, but can be removed in post.

The DGDN is exceptional well controlled for both kinds of chromatic aberration and even at magnifications of 200% I could not observe any. The EX is really showing its age here as both types can be seen. The transverse chromatic aberration is very prominent.

Flare


The Sigma 105mm DGDN shows good resistance to flare. In this extreme case we can see some evidence of veiled flasre and a little reflection.


The EX despite having that recessed front element that acts as a de facto lens hood suffers badly from halation, veiling flare, and reflections when specular light sources were in the frame. The DGDN has better lens coatings which means that the halation and reflected glare is minimal and there is no halation. This means that there’s little loss of contrast.

Bokeh

Sigma 105mm f2.8 DGDN Macro lens bokeh test.


Both lenses at f2.8 have nice round bokeh balls in the centre of the frame and at the edges exhibit that elliptical cats eye effect. The tonal transitions are nice and smooth, there is no busyness or swirly effect. At f4 the EX is starting to develop polygonal balls while those of the DGDN are still nice and round. At f11 the bokeh balls in the corners of the DGDN are starting to develop into sun stars and the effect on the EX is more profound. The 9 rounded aperture blades are producing much more pleasing bokeh effects than the 8 straight ones of the EX.


Autofocus

Continuous autofocus with the Sigma 105mm f2.8 mounted on a Canon EOS 6d.


Autofocus is where there has been an enormous improvement in performance over the last 22 years. The EX when mounted on the Sony A7r ii with either the Metabones V Smart Adapter or the Sigma MC-11 just won’t autofocus. When you switch the camera on the lens racks through its entire focus range (depending on where the limiter is set) and then does nothing. So to test the AF performance I had to mount it on a Canon EOS6d which wasn’t known for its blistering AF speed. I shot several sequences with the focus limiter on at f2.8 of me walking slowly towards the camera with it set Continuous AF and obtained a nit rate of between 70-75%. Video AF was a non starter and it just would not find focus. To be fair the CAF of the 6d in video mode is pretty lacklustre. With the DGDN mounted on the Sony A7r ii the stills burst rate for AF averaged out at 94% which is pretty impressive. The DGDN handled the video AF test with aplomb, it was smooth and positive keeping up with me moving about in the frame. The AF was noisy and was picked up by the shotgun microphone mounted in the camera hot-shoe. Speaking of noise the EX was incredibly noisy.


Continuous auto focus using the Sigma 105mm f2.8 DG DN macro lens on a Sony A7rii.


Conclusion

Both lenses mounted on Sony bodies. The EX is mounted via the Sigma MC-11 lens adapter.


This should really come as no surprise, time has marched on and the advances in lens design are easily apparent.The Sigma 105mm f2.8 EX macro was considered a very good lens in its day, and even now it is remembered fondly on photographic forums. The DGDN is just at another level of performance both in terms of optics and auto focusing. The EX while being optically suited to a number of tasks its AF performance let it down when it came to anything that moved quickly or erratically. The DGDN on the other hand can be confidently used as a general purpose short telephoto with a wide variety of subjects as well as being a dedicated macro lens. The only area in which the EX is superior to the DGDN is in the handling department. The manual focusing experience and the ability to pre-set specific magnification ratios makes the lens a joy to use manually. The DGDN is clearly aimed at the autofocus only photographer. A great shame.

So if you have a Sony FE or one of the  offerings from the “L mount alliance” then the lens is worth a look at. Well it is your only option in L mount. It is also a worthy competitor to the Sony 90mm f2.8 FE macro OSS G at a cheaper price.


Sample Images


Looking through the Olympus OM Zuiko 135mm f2.8 lens at an Olympus OM 40.


Lime slice oozing juice.


Cream runs down over a strawberry.


Where there’s smoke there’s fire.


Australian one and two dollar coins.


Sigma 105mm f2.8 DG DN Macro lens auto focus test. Auto focus tracking a subject walking towards the camera while the lens is wide open at f2.8.


Darth Vader divided by the light.


Bee feeding on lavender flowers.


A bee feeding on a daisy.


A ladybird looking for aphids.


Clubbed Spider Orchid, Caladenia longiclavata. Mount Observation, Western Australia.


Custard Orchid, Thelymitra villosa. Mount Observation, Western Australia.


Known by a variety of names the dancing spider orchid (Caladenia discoidea) is also known as the antelope orchid and sometimes the bee orchid. St. Ronan’s Nature Reserve, Western Australia.

A Long Sunday Afternoon

Looking through the Olympus OM Zuiko 135mm f2.8 lens at an Olympus OM 40.


It’s 40ºC outside and in an attempt to stave off cabin fever I’ve been playing around with a lens and a camera on the dinning table. It’s kept me entertained for 30 minutes. I wonder what I can do now?

Is Bigger Better?

A visual representation of the differences in sensor size.

Since 2011 I have been primarily a micro four thirds (m43) shooter supplemented by occasional full frame usage. Until about 18 months ago I was very happy with my choice. I accepted that the benefit of a lighter more portable camera system would come at the cost of reduced megapixel count, reduced dynamic range, and high ISO performance that was less than stellar. But now I have this desire to return as it were to the full frame fold. The reason why is that I sell prints and I felt that if I had a camera with better dynamic range  and more megapixels then I would generate more sales. This belief was what was really behind my recent dalliance with the 42Mp Sony A7r ii.

Canon EOS 550D with EF75-300mm f/4-5.6 IS USM lens. Exposure: 1/100, f8 at ISO 400.


Olympus EM 1 mk ii with Panasonic Leica 100-400mm lens.


Sony A7r with Olympus OM Zuiko 135mm f2.8 lens. Exposure: 1/1000 sec, f4, at ISO 200.


Canon EOS 6d with Canon EF100mm f/2.8L Macro IS USM lens. Exposure: 1/100 s at f/11.0 at ISO 1600.

The other day I started going through my statement for print sales for this year and surprisingly I’d had a very good year which buoyed me up considerably. When I started looking closely at what images had sold and what they were taken with I made a startling discovery. Full frame made up 26%, APSC came in at 26% and m43 took 48%. In terms of Megapixels:

  • 36 Mp + 6.66%
  • 20 Mp 33.33%
  • 18 Mp 26.66%
  • 16 Mp 6.66%
  • 12 Mp 13.33%

Intrigued I decided to look at print sales going back to 2004 when I went digital and the results were as follows:-

  • Full frame 34%
  • APSC 14%
  • m43 37.5 %
  • Compact cameras 5.5%
  • Mobile phone 1.5%
  • Scanned film 7.5%

My two best selling prints of all time were taken with a Panasonic Lumix FX-01 which was introduced all the way back in 2004 had a sensor that measured 6.4mm x 4.8mm and had a whopping 6.4 Mp of resolution. It also suffered badly from noise at anything beyond 100 ISO and had a very limited dynamic range.


Panasonic Lumix FX-01


Panasonic FX-01


Dropped from use. The Panasonic FX-01 was a 6Mp camera introduced in 2004.


Moving beyond prints sales to look at PR and editorial work I’ve never once had a complaint about image quality or size. So do all these buyers of my images know something that I don’t? Well I think that they’re not looking at the images as photographers, they are looking at the subject and how it makes them feel. When photographers look at images they see all the technical deficiencies and then think they need better cameras and lenses. When we look at new gear we always see the promise of more resolution, more frames per second, more dynamic range. The manufacturers know that we’re easily seduced by bigger numbers and they play to our insecurities.

So in the light of this do I need a bigger and better camera? Need – no. Want – yes. But needs and wants are two different things. What I’ve got is perfectly adequate and so perhaps the answer to generating more sales is, therefore, taking more pictures with appealing content.

The Dark Side


I’ve not been up to much over the last few days – just doing stuff around the house. Had a bit of play today with Darth Vader and a couple of LED lights. I must say I’m quite a convert to using LEDs whether it be large panels or small ones like here. The main light is a Nanlite PavoTube II 6C in RGB mode and the fill is provided by an Aputure AL-M9 with a blue gel which combine to give a red and blue split. The camera used was a Sony A7r II with a Sigma 105mm f2.8 macro lens.

Metabones Canon EF to Sony E-mount Smart Adapter (Mark V)

This is the second part of a series of articles on upgrading camera equipment on a budget. Parts 1 and 2 can be found here and here.


Mount your Canon EF lenses to your Sony A7rii using the Metabones V Smart Adapter.

TLDR


Metabones was an early innovator in terms of lens adapters entering the market in 2013 with the Speed Booster which was an adapter. With a focal range reducer that allowed full frame SLR lenses to be used on smaller format mirrorless cameras at close to the full frame field of view. The first with autofocus capabilities was a Canon EF to Sony E. Metabones themselves described its performance as:

“Autofocus speed is very slow and inadequate for most moving subjects. The autofocus speed is unfit for professional use for sure, and it would disappoint most enthusiasts.”

By 2016 Metabones was able to offer a “Smart Adapter” that allowed Sony users to access all the AF modes when using Canon lenses. The adapter makes the lens behave like a native Sony lens. Sigma had beaten them to the punch with their MC-11, but, that had the caveat of only promising that performance with certain Sigma lenses. The Metabones Smart Adapter V EF to FE is the latest incarnation and this is the model that I’m looking at. This is not a Speed Booster – there are no optical elements in the adapter. It is designed for mounting full frame Canon EF lenses on a Sony Alpha series body. In Australia this retails for a whopping $780 AUD. A lot of money when you consider that outcomes are not guaranteed. Luckily there are plenty on the secondhand market and you can expect to pay around half the retail price.


Mount your Canon EF lenses to your Sony A7rii using the Metabones V Smart Adapter.

Build Quality

The Metabones Smart Adapter V for Canon EF to Sony FE mount comes in a smart hard plastic case. Included are two Allen Keys, one for removing the Arca Swiss tripod mount and the other for carrying out adjustments.


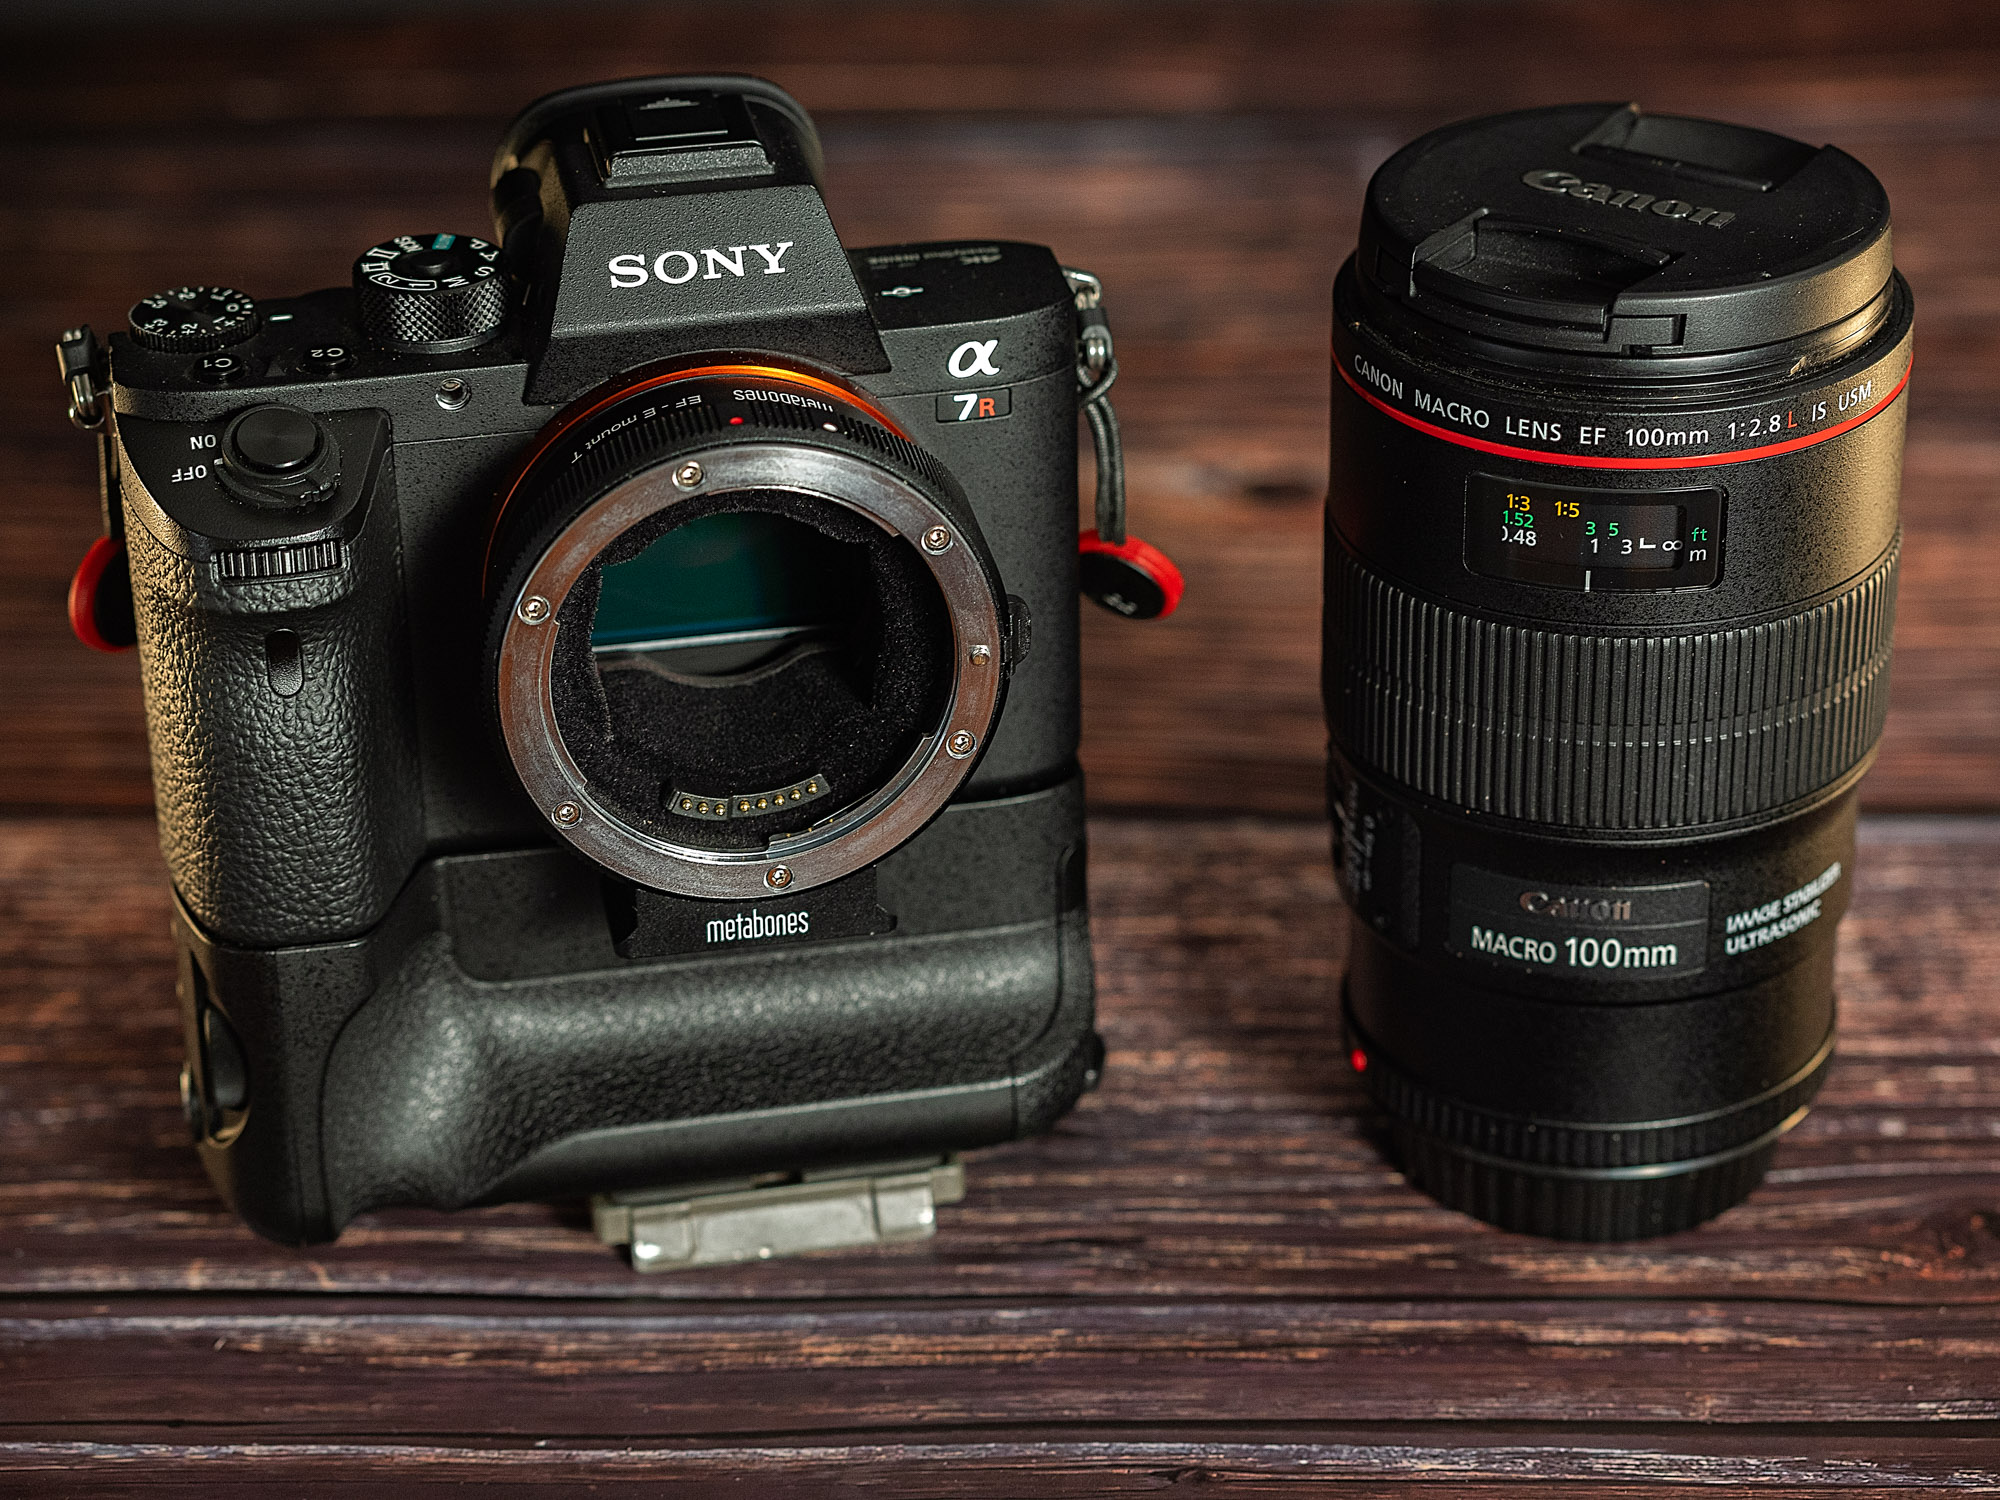
The adapter comes in a nice hard plastic case with two Allen key that are for removing the attached Arca Swiss tripod mount and carrying out adjustments. Picking it up the adapter feels well made with a metal body and both mounts are chromium plated brass for long life. There is a rubber gasket on the Sony mount side to prevent dust and moisture ingress and the adapter is lined with black flocking to prevent internal reflections. On the left hand side of the adapter is the lens release button, a USB port, an IBIS off/on switch and button you can customise its function like the ones found on the Sony G and GM lenses. There are two bad points. First is that the plug for the USB port is not of the flap variety that Sigma use that is attached to the adapter. In the six months I’ve had it the plug no longer fits snuggly and is prone to dropping out which potentially means it could be lost making the adapter susceptible to damage. I’ve taken to taping over it with a bit of gaffer tape but it is not what I would expect from an item costing so much especially when Sigma at half the price have a better approach. Second is the black flock used inside the adapter is a dust and hair magnet and it inevitably finds its way on to the camera sensor. I seem to be forever cleaning the adapter, the sensor and having to spot my photos. 


Metabones line the adapter with black flocking to prevent internal reflections.


On the left hand side of the adapter is the lens release button, a USB port, an IBIS off/on switch and a customisable button.


A crucial part of whether the adapter will work is the ability to download and install firmware updates. Sigma enable you to both update the adapter and the lens firmware. With the Metabones you can only update the adapter firmware and this is a bit of a dogs dinner. You download the updater app  for Mac and Windows from their website. This and opening the app is the easy bit. When prompted you connect the adapter to your computer via USB cable. I primarily run a MacBook Pro running OSX Big Sur version 11.6 with Thunderbolt 3 and no matter what adapter for USB A to USB C I used the app would not run. I then tried my 2012 iMac running Mojave thinking the native USB 3 will be the solution. Nope. At the back of the cupboard in my office I found 2009 MacBook running El Capitan and having USB 2 ports. Did this work? Did it heck. The app recognised the adapter and advised that there was a firmware update available but when I went to install it the app just froze. So as a last ditch attempt I pulled out of a box in the shed a Sony Vaio from 2003 running Windows XP. I downloaded the Windows version of the app and it worked! It took an hour to download the update but it got there. This is important because the app just doesn’t up date the adapter firmware but allows you access various functions. 

The Smart Adapter V has two modes: 

  • Green Mode or basic mode
  • Advanced Mode

There is no instruction leaflet with the adapter so you will need to access the support page for it. How these two modes operate will depend upon your Sony camera. As I’m using it on a Sony A7r2 I’ll concentrate on that.

Green Mode

Auto focus – uses phase detection autofocus and is compatible with, according to Metabones, “virtually all AF lenses” but there is no eye-AF, poor video AF which is contrast-detect and requires half-pressing shutter release button to activate if at all, doesn’t work well with telephoto lenses and requires good light and high contrast to work. Most of the Sony native AF functions are not available. The lens only stops down when you press the shutter button. On the plus side it has low power consumption.

Advanced Mode

The autofocus uses a hybrid of contrast based and phase detect autofocus which makes it fast and accurate. It is not compatible with as many lenses as green mode. Eye-AF is supported. In video you get continuous phase detect AF. The AF works better with long lenses. The aperture stops down as you turn the aperture dial on the camera causing a lot of clicking noise and higher power consumption.

To tell which mode your adapter is in there is a small LED on the top. For Green Mode the LED shines blue and for Advanced Mode it is red. In an ideal world you’d want to be able to switch back and forth between modes. There are two ways of doing this. The first is via the Metabones App which as we’ve already found out is less than ideal. The second can be done in the field and it involves pushing buttons mounting the lens switching on and off etc. It is fiddly. Don’t try to follow the instructions just watch the YouTube video by Alex & Nadia Fediakov. After a short while of using Green Mode and not having a lot of success I just switched to Advanced mode and have left it there ever since.


Performance

I’ve used the adapter with 3 lenses:-

  • Canon EF 24-70mm f4 IS L
  • Canon EF 70-200mm f2.8 IS L mk i
  • Canon EF 100mm f2.8 macro IS L

Besides running tests I also used the camera and lenses in my normal day to day photography – nature, landscapes, events and grip and grin. Right from the beginning I’ll say what you get and don’t get in general terms and then go on to describe how things went with each lens.

  • There is no correction for vignetting or colour fringing. You have to manually select lens profiles in your editing program of choice.
  • The adapter enables EXIF data recording for focal length, aperture and make and model ID.
  • The adapter has no optics so there is no effect on lens performance. Any possible degradation in optical performance will come from the fact that Canon lenses are designed to work with the sensor stack of Canon cameras not Sony. With the three lenses I used there was no problem.
  • The auto focus generally works very well allowing access to all the AF modes on the camera. However, how well is specific to the lens. Focal length and the motor technology in the lens play a part in how well the adapter works.
  • Using the adapter in Green Mode in body image stabilisation is favoured while in Advance Mode both IBIS and optical image stabilisation are used.
  • In Green Mode the power consumption is low. In the Advanced Mode because the lens aperture is constantly opening and closing and both forms of image stabilisation are used the power consumption is high.


Tests


The Sony 28-70mm f3.5-5.6 OSS was introduced in in 2013 as the budget kit zoom to accompany the Sony A7 mirrorless camera.


The reluctant running bull terrier test with the Sony A7r2 andSony FE 28-70mm f/3.5-5.6 OSS lens.


To help me get some sense of what I was seeing I needed a point of reference and for that I used the Sony FE 28-70mm F3.5-5.6 OSS kit lens which can be picked up second hand for about $200 AUD. I wasn’t looking at optical quality but autofocus performance. Each of the Canon lenses had to equal or better the AF performance of that cheap kit lit lens. When shooting sequence of a moving subject (my reluctant Bull Terrier Frida) the Sony 28-70 was achieving a 90% hit rate which I thought was impressive.

Canon EF 24-70mm f4 IS L lens

The Canon 24-70mm f4 IS L mounted to a Sony A7r2 via a Metabones V Smart Adapter.


My initial tests were very disappointing. Using single point continuous AF with a burst of 5 frames none of the shots were in focus. So I changed the settings to lock on flexible spot with continuous AF and got a hit rate of 50%.  Shooting video things were more promising. The autofocus was quick and positive and tracked well, but it didn’t do as well as the Sony 28-70.

Canon EF70-200mm f2.8 IS L lens

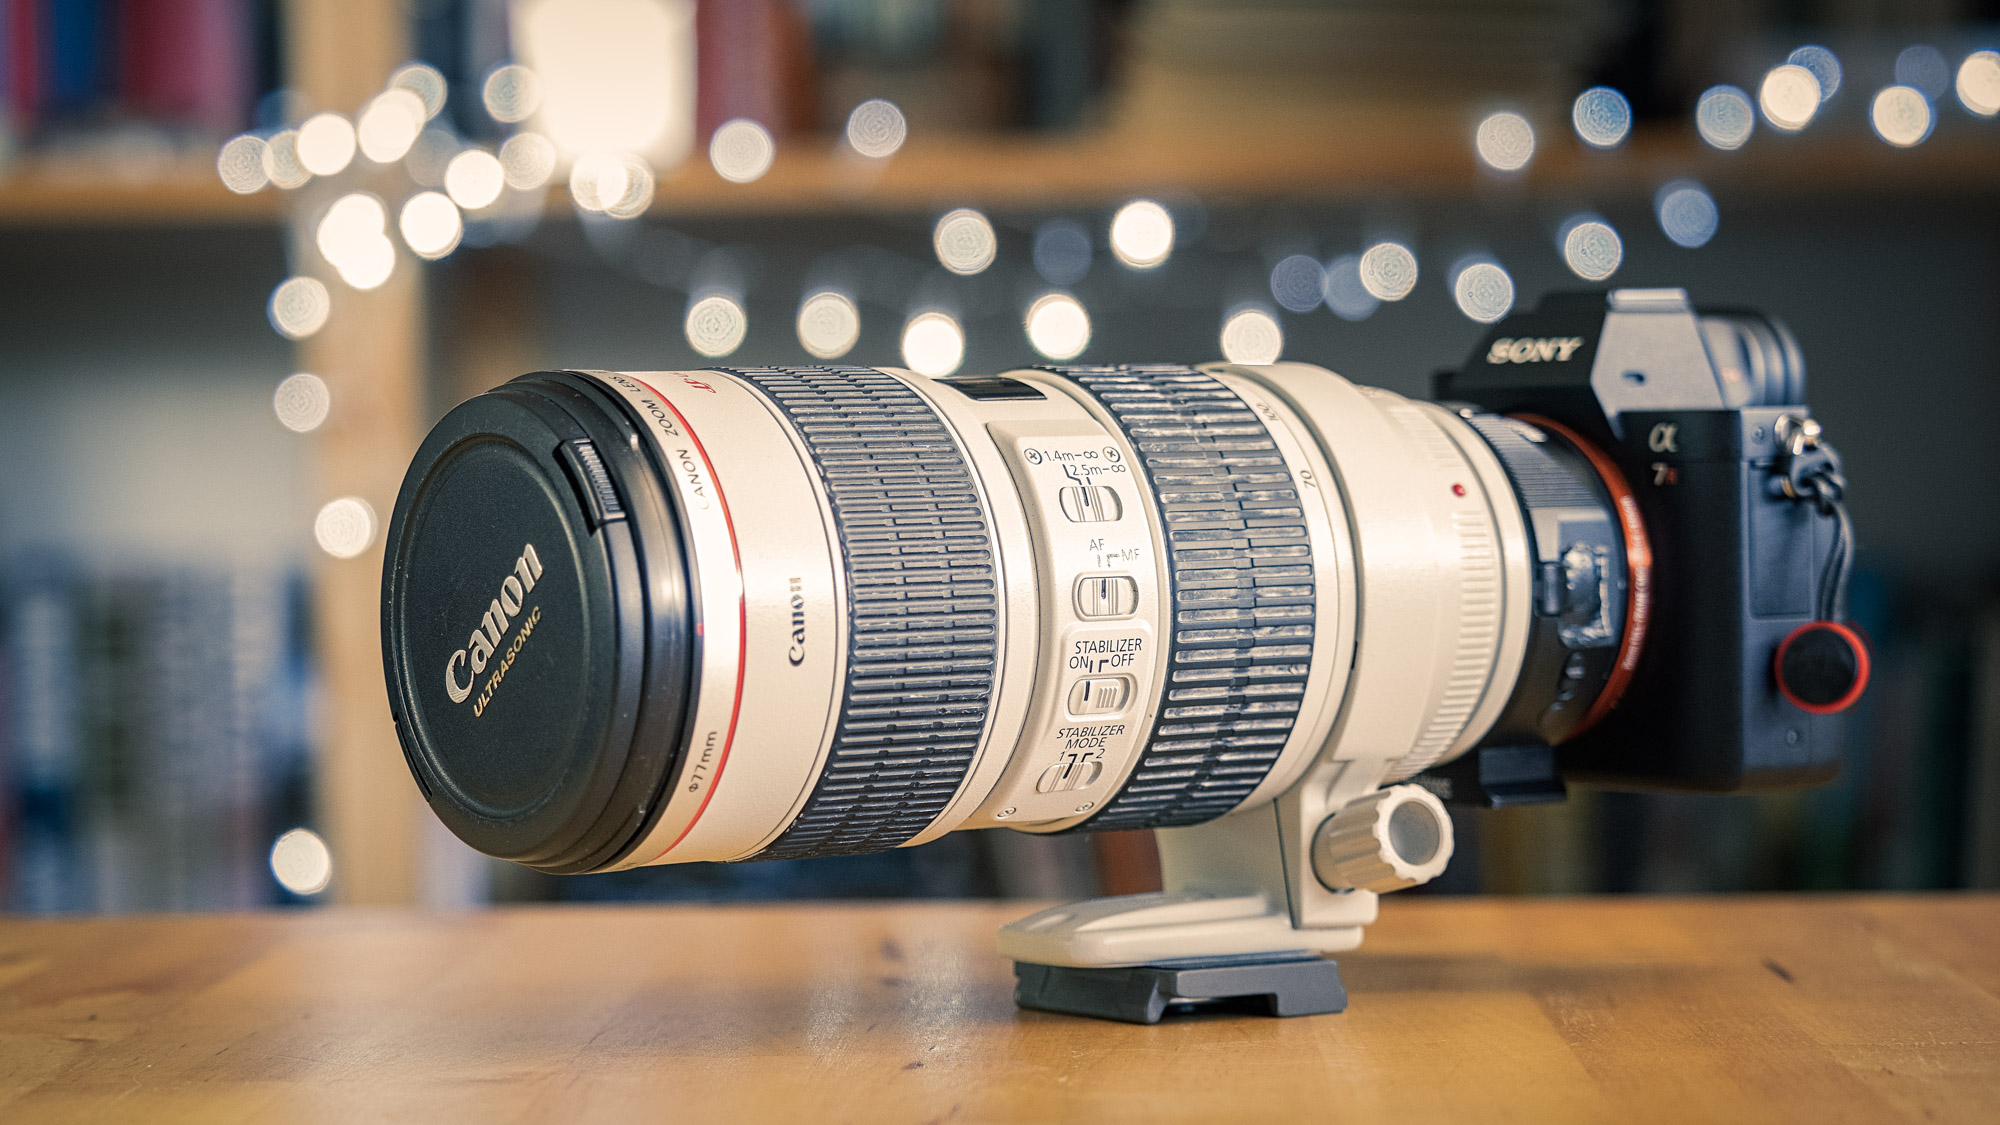
The Canon EF 70-200mm f2.8 IS L lens mounted to a Sony A7r2 via a Metabones V Smart Adapter.


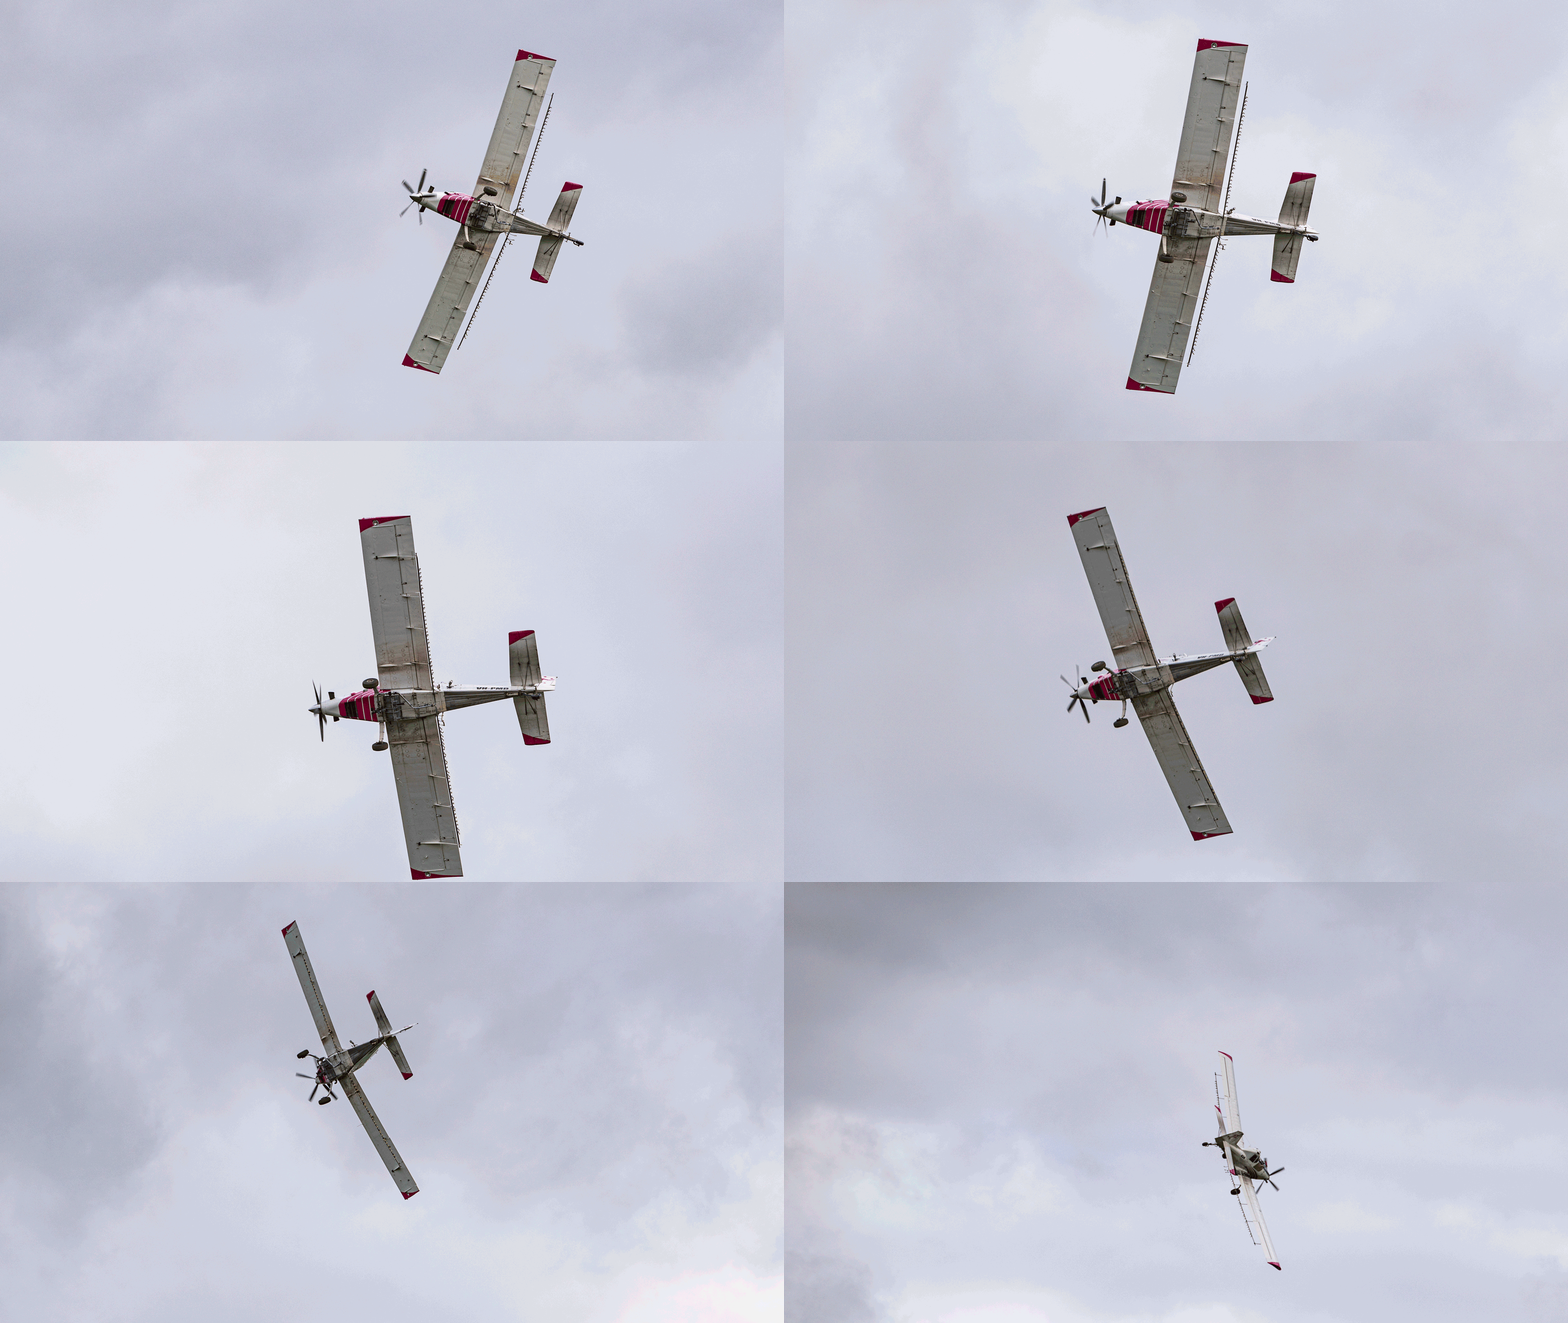
This lens did not work well in expanded flexible spot with continuous autofocus. Typically the lens racked back and forth, then would settle on the subject for a couple of seconds and then drift off out of focus. Switching to other focus modes was a very different story with the lens quick to acquire focus. I abandoned the bull terrier test in favour of a plane doing some crop dusting. Out of 5 runs I got 3 with a 100% hit rate, one with 92% and one of 61%. This averaged out at 90%.  The video performance was woeful. At the short end wide open the lens was very slow to acquire focus and when tracking it would loose the subject and be painful slow to reacquire. At the long end wide open it was incredibly slow – glaciers move faster and the AF motor made a lot of noise while the lens racked back and forth.

Canon 100mm f2.8 macro IS L lens

The Canon EF 100mm f2.8 macro IS L lens mounted to a Sony A7r2 via a Metabones V Smart Adapter.

I didn’t test this lens with moving subjects as macro lens are notoriously slow to autofocus at the best of times. The lens was slow to focus in single AF mode both at macro distance and normal distances. At normal focus ranges despite being slow it was very accurate. At macro distances it would often get confused and I found that this would increase in low light or with subjects that had low contrast. For most people macro photography isn’t a fast moving high pressure scenario so this wouldn’t be really a problem. What was a disappointment was that the OIS didn’t combine with the IBIS and I had to use OIS only.

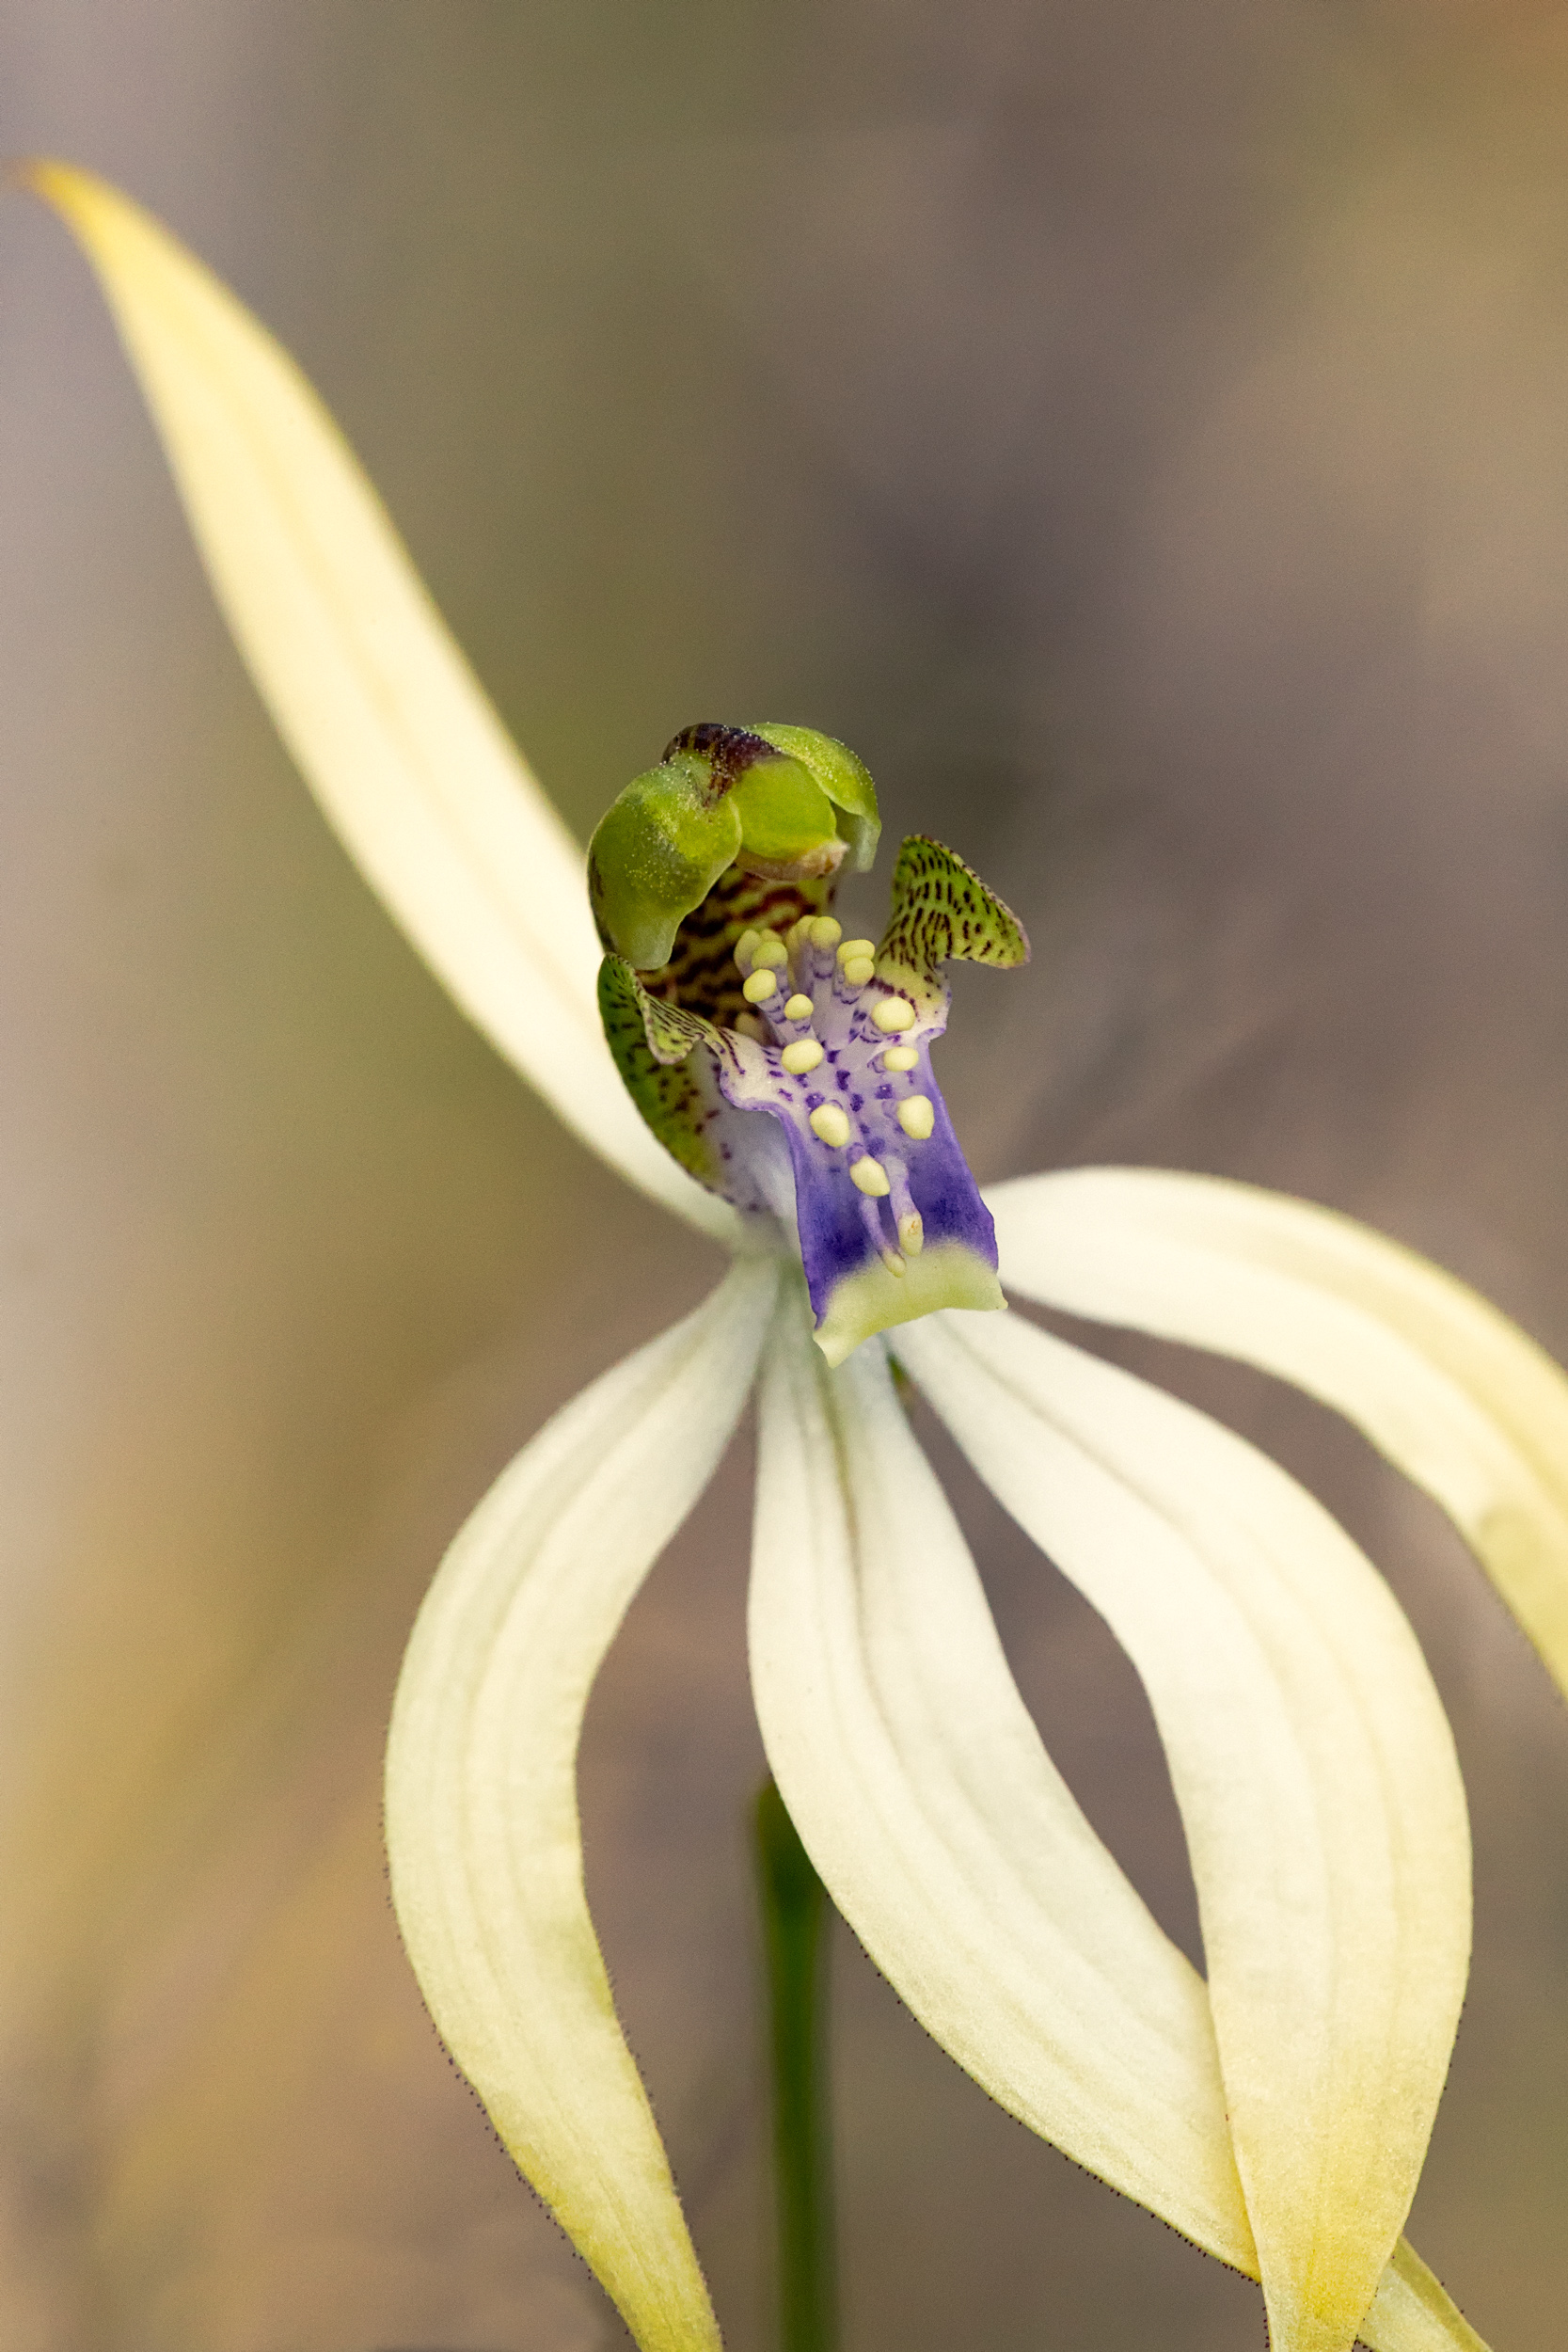
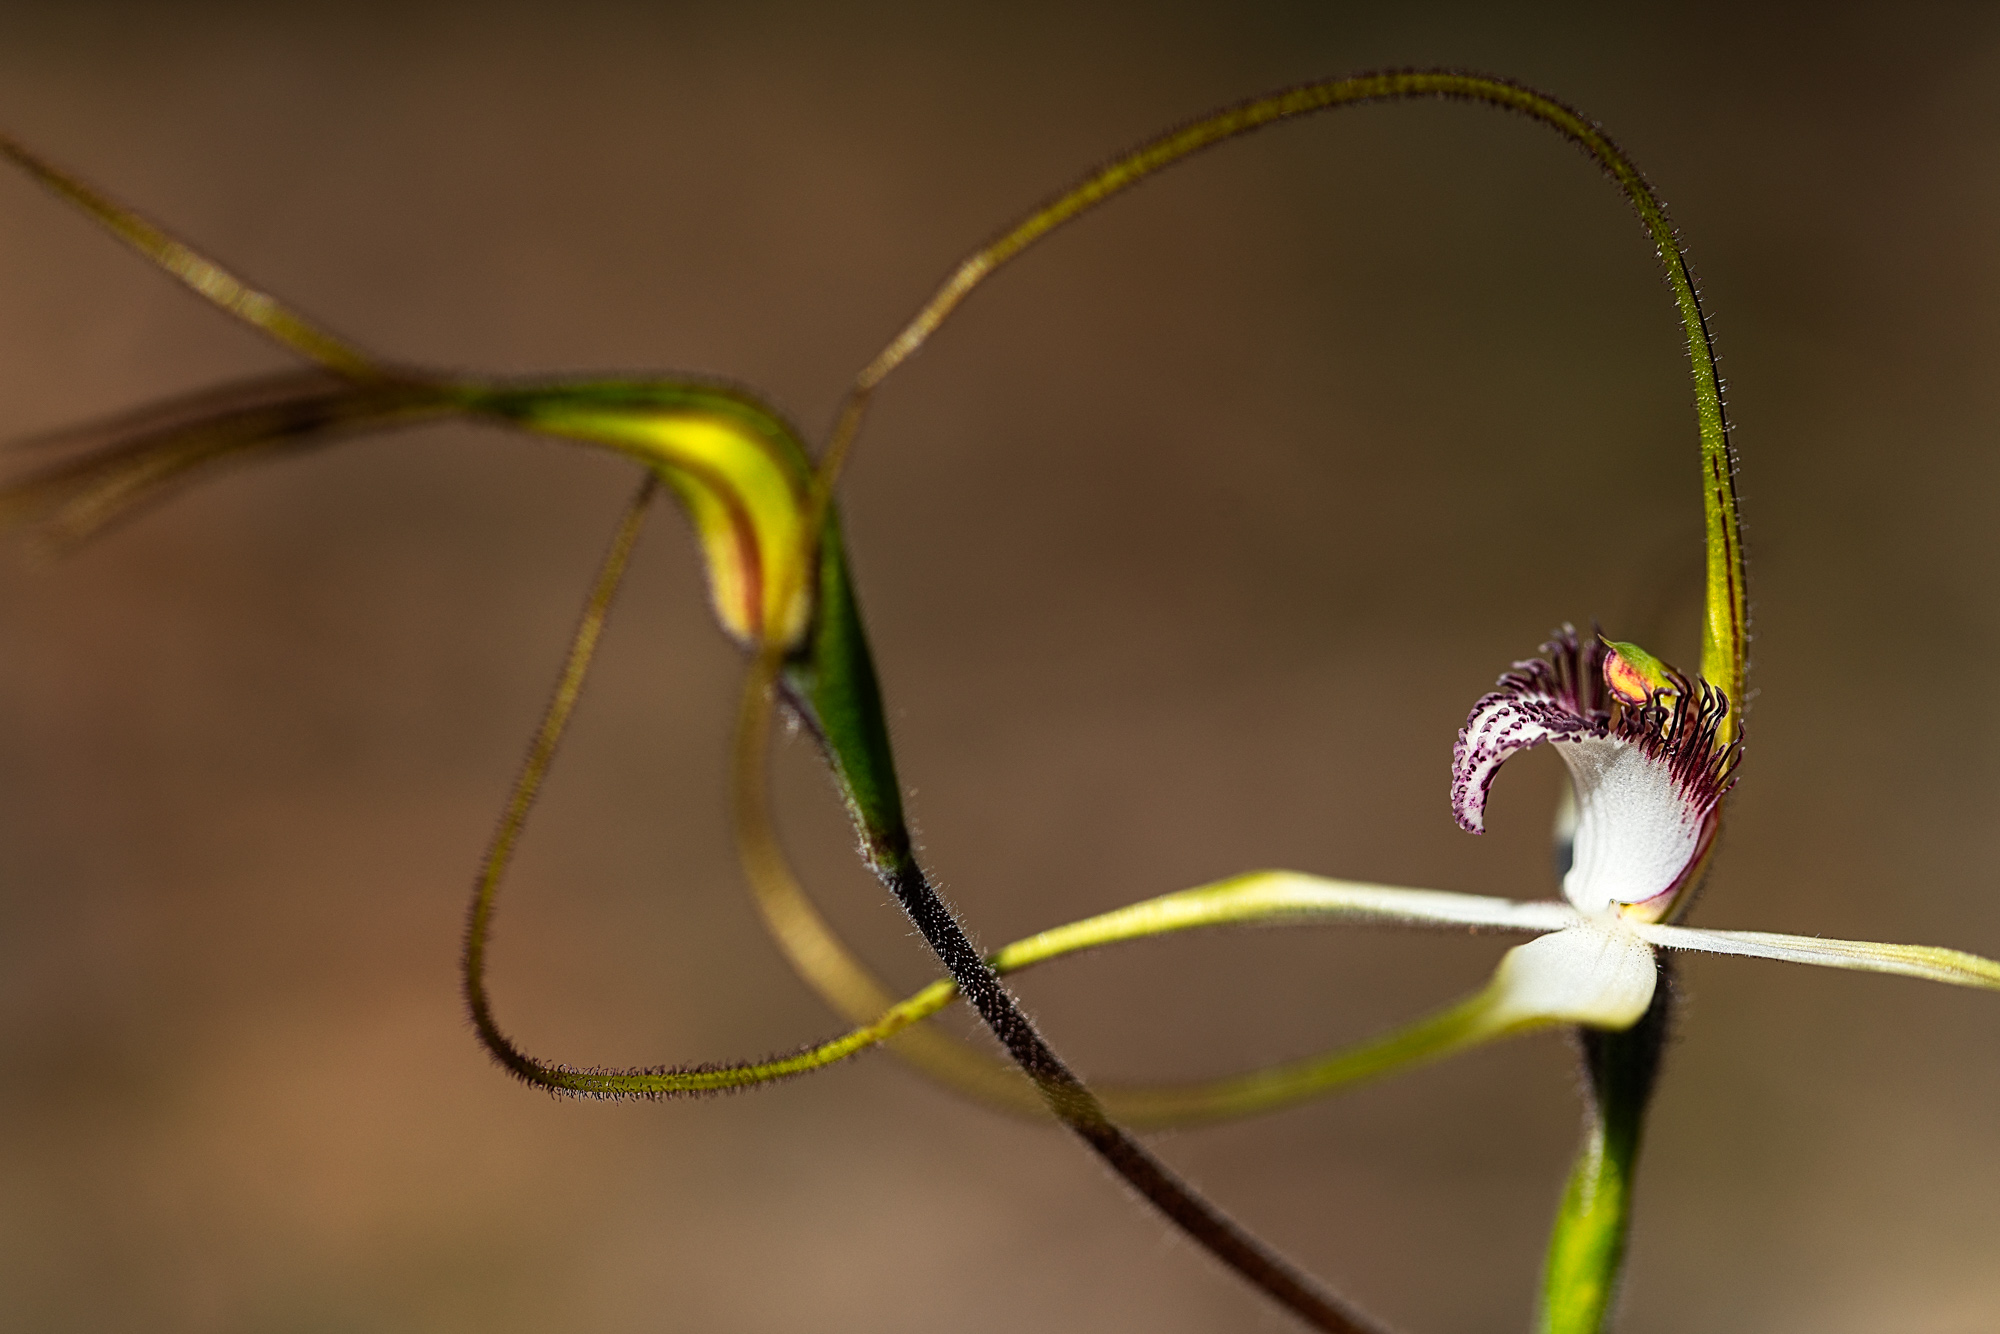
White Spider Orchid, Caladenia longicauda subsp longicauda, Wambyn, Western Australia. Sony A7r2 with Canon EF 100mm f2.8 IS lens mounted via the Metabones V Smart Adapter.


Real World Usage


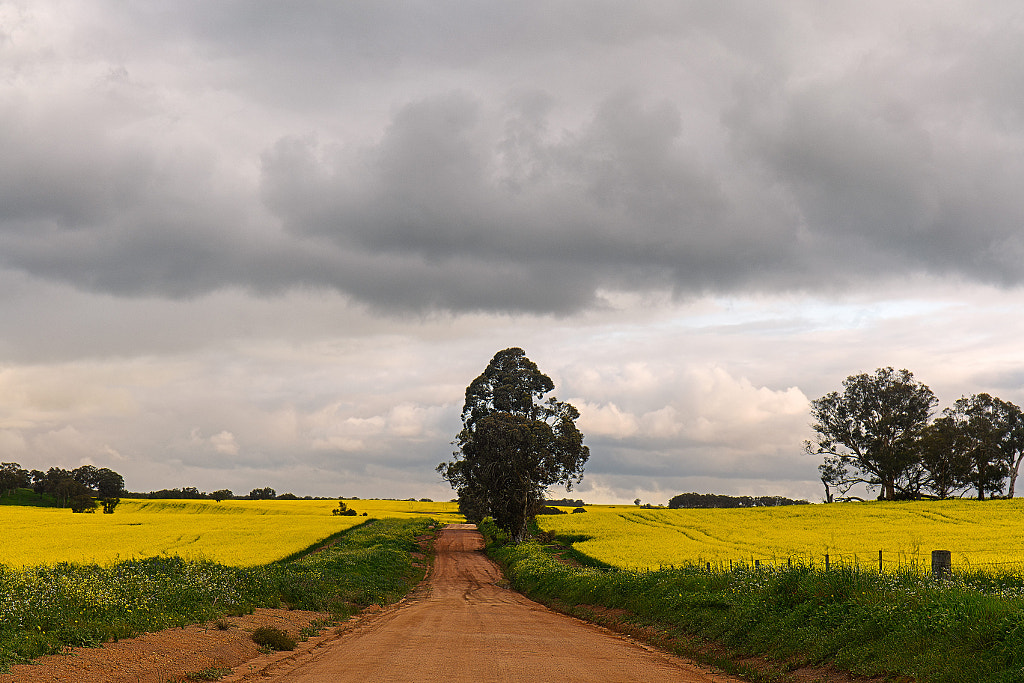
Canola fields flanking Helena Road. York, Western Australia. Sony A7r2 with the Canon EF 24-70mm f4 IS L lens.


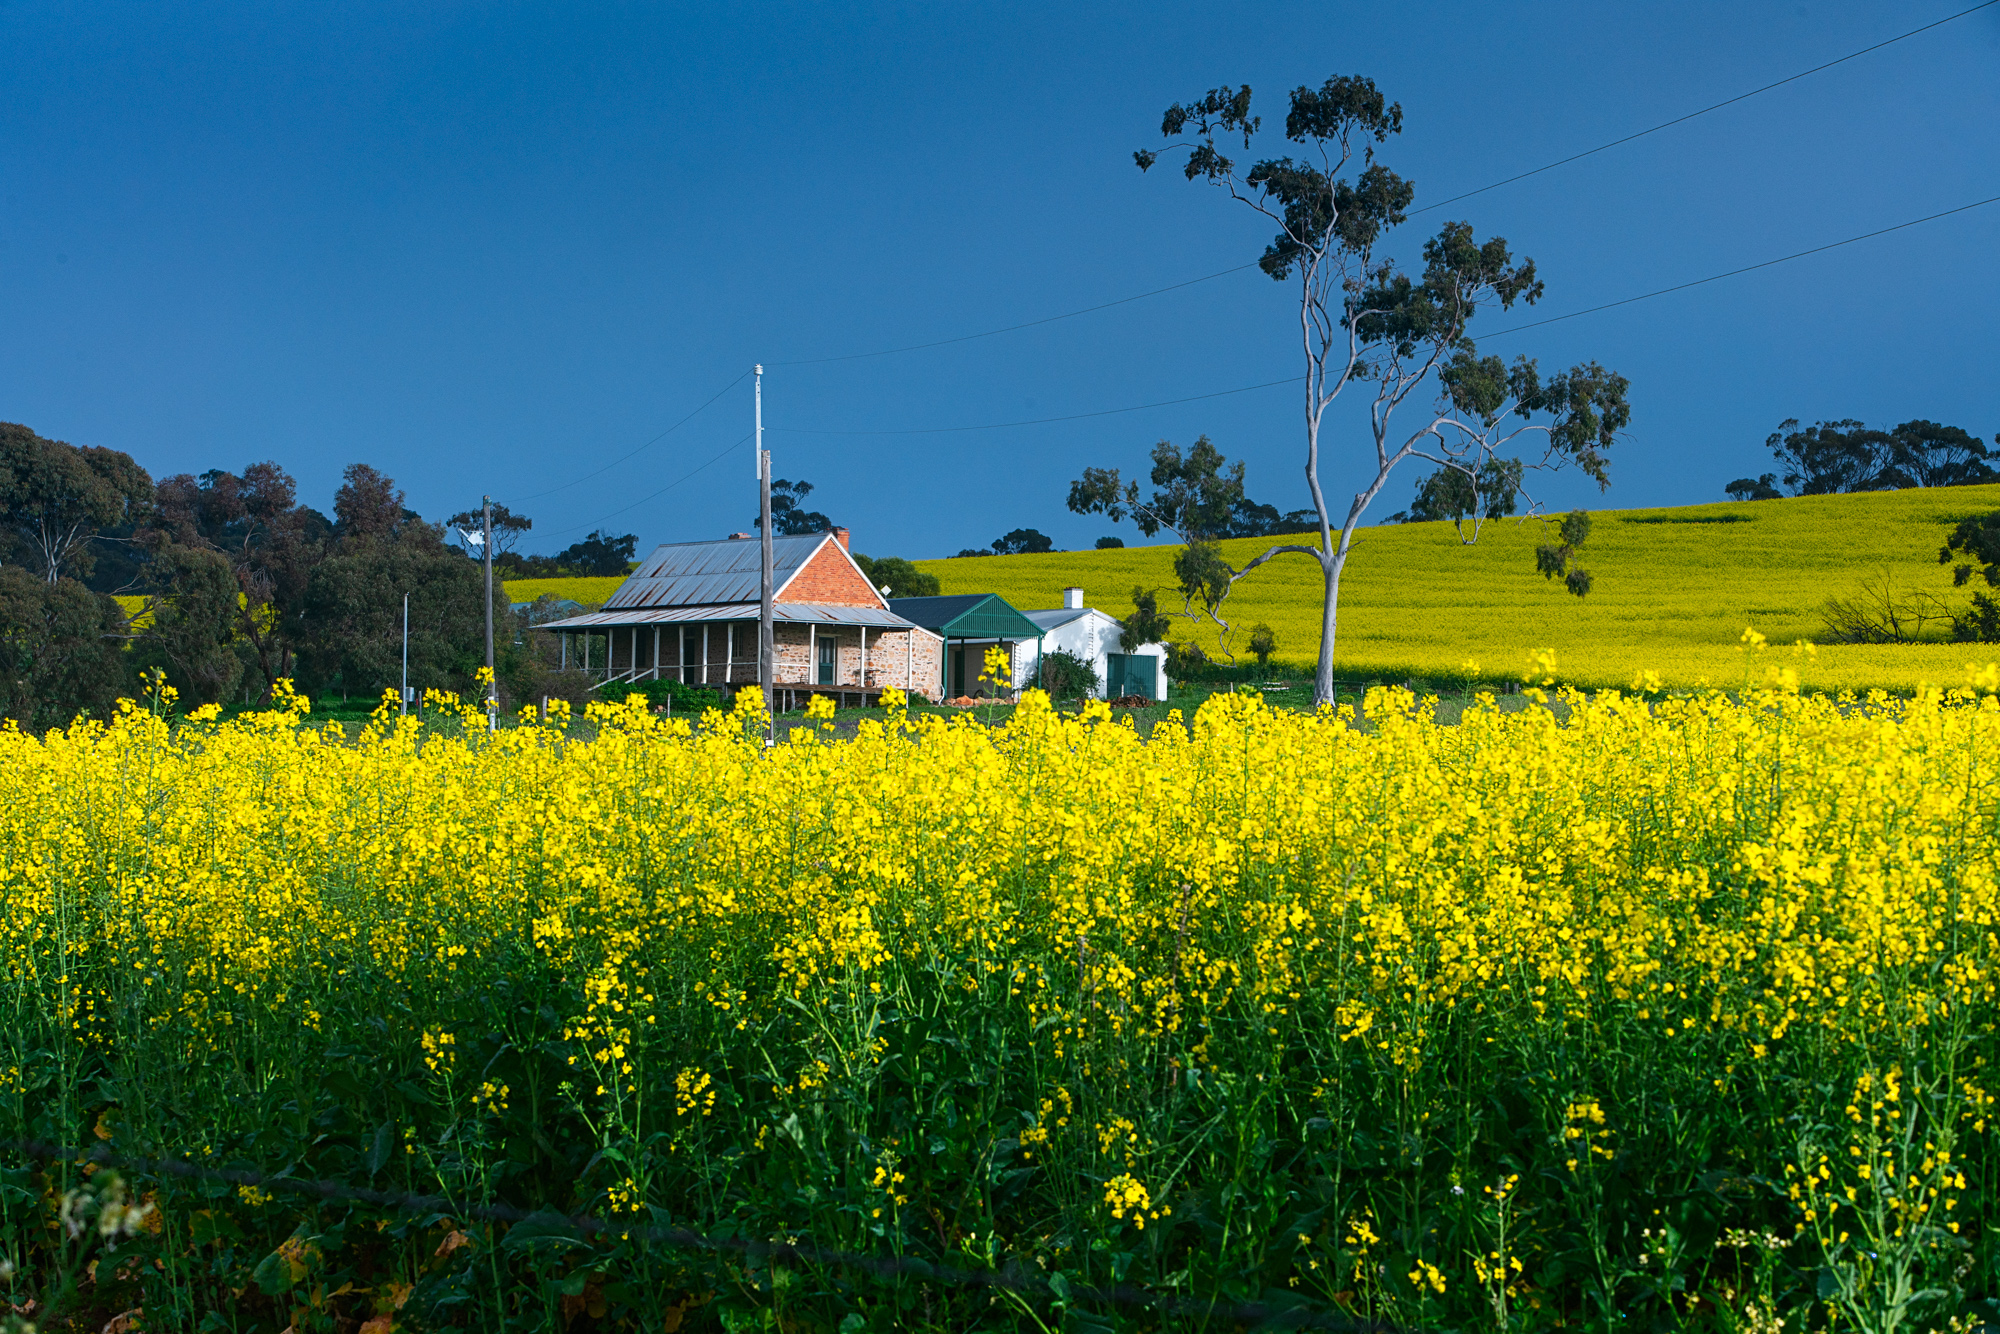
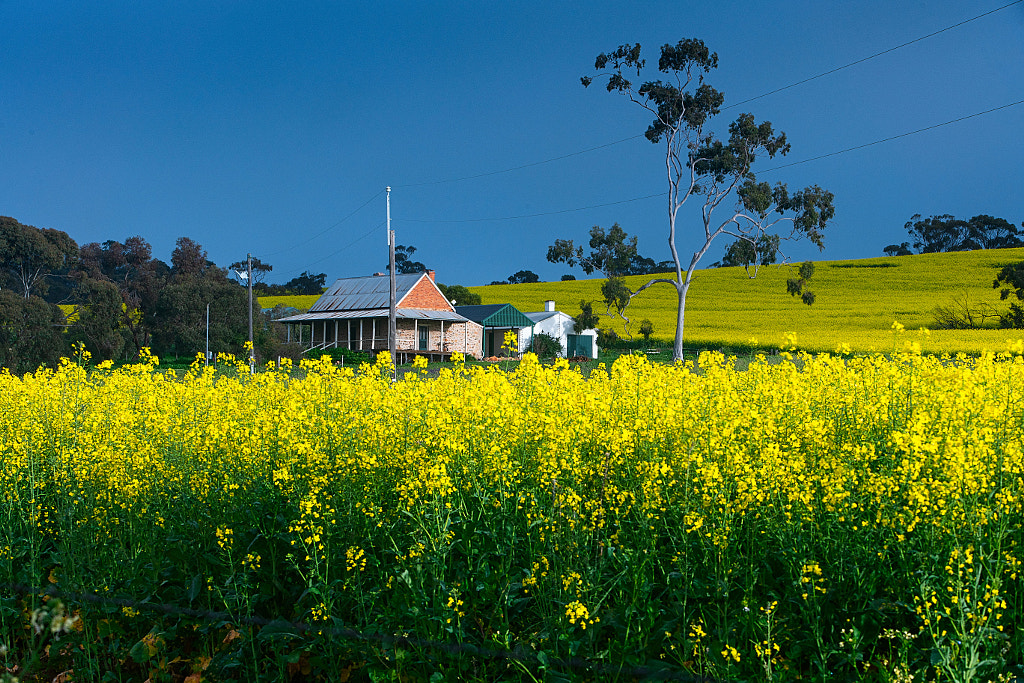
A farmhouse surrounded by canola in York, Western Australia. Sony A7r2 with Canon EF 70-200 f2.8 IS L lens.


Mounted Archery demonstration at the York Medieval Fair. Sony A7r2 with Canon EF 70-200mm f2.8 IS L lens.


Enough for the tests let’s look at real world usage. For landscape and macro work all the lenses did OK in real world usage. But for events and grip and grin work it was not all beer and skittles. The event I photographed was a medieval fair and I used both the 24-70 and the 70-200. The 70-200 did rather well with photographing mounted archers and taking candid portraits. Excellent stuff. The 24-70 didn’t do so well. I photographed a display of medieval combat and only 1 in 5 were in focus. These guys weren’t  moving fast they were just erratic and the tracking just could n’t cope. With static subjects everything was fine. I photographed an awards ceremony with the A7r ii and the 24-70. This sort of work is quick paced but straightforward photographically. I shot 220 frames with roughly a third out of focus, one third in focus but not critically sharp and the remainder were critically in focus.The experience was the AF wasn’t snappy but laboured and ponderous. Halfway through I was wishing that I’d had my micro four thirds system or my Canon DSLRs.

York Medieval Fair. Sony A7r2 with Canon EF 70-200mm f2.8 IS L lens.


York Medieval Fair. Sony A7r2 with Canon EF 24-70mm f4 IS L lens.


Conclusion

In conclusion my experience with the Metabones Smart Adapter V was quite a mixed bag. The lens that I thought would do very well, the EF 24-70 f4, didn’t do very well at all.  The lens I really wanted to work but thought wouldn’t do well because of its age was the 70-200mm f2.8 and it did surprisingly well. The 100mm macro did as I thought it would.

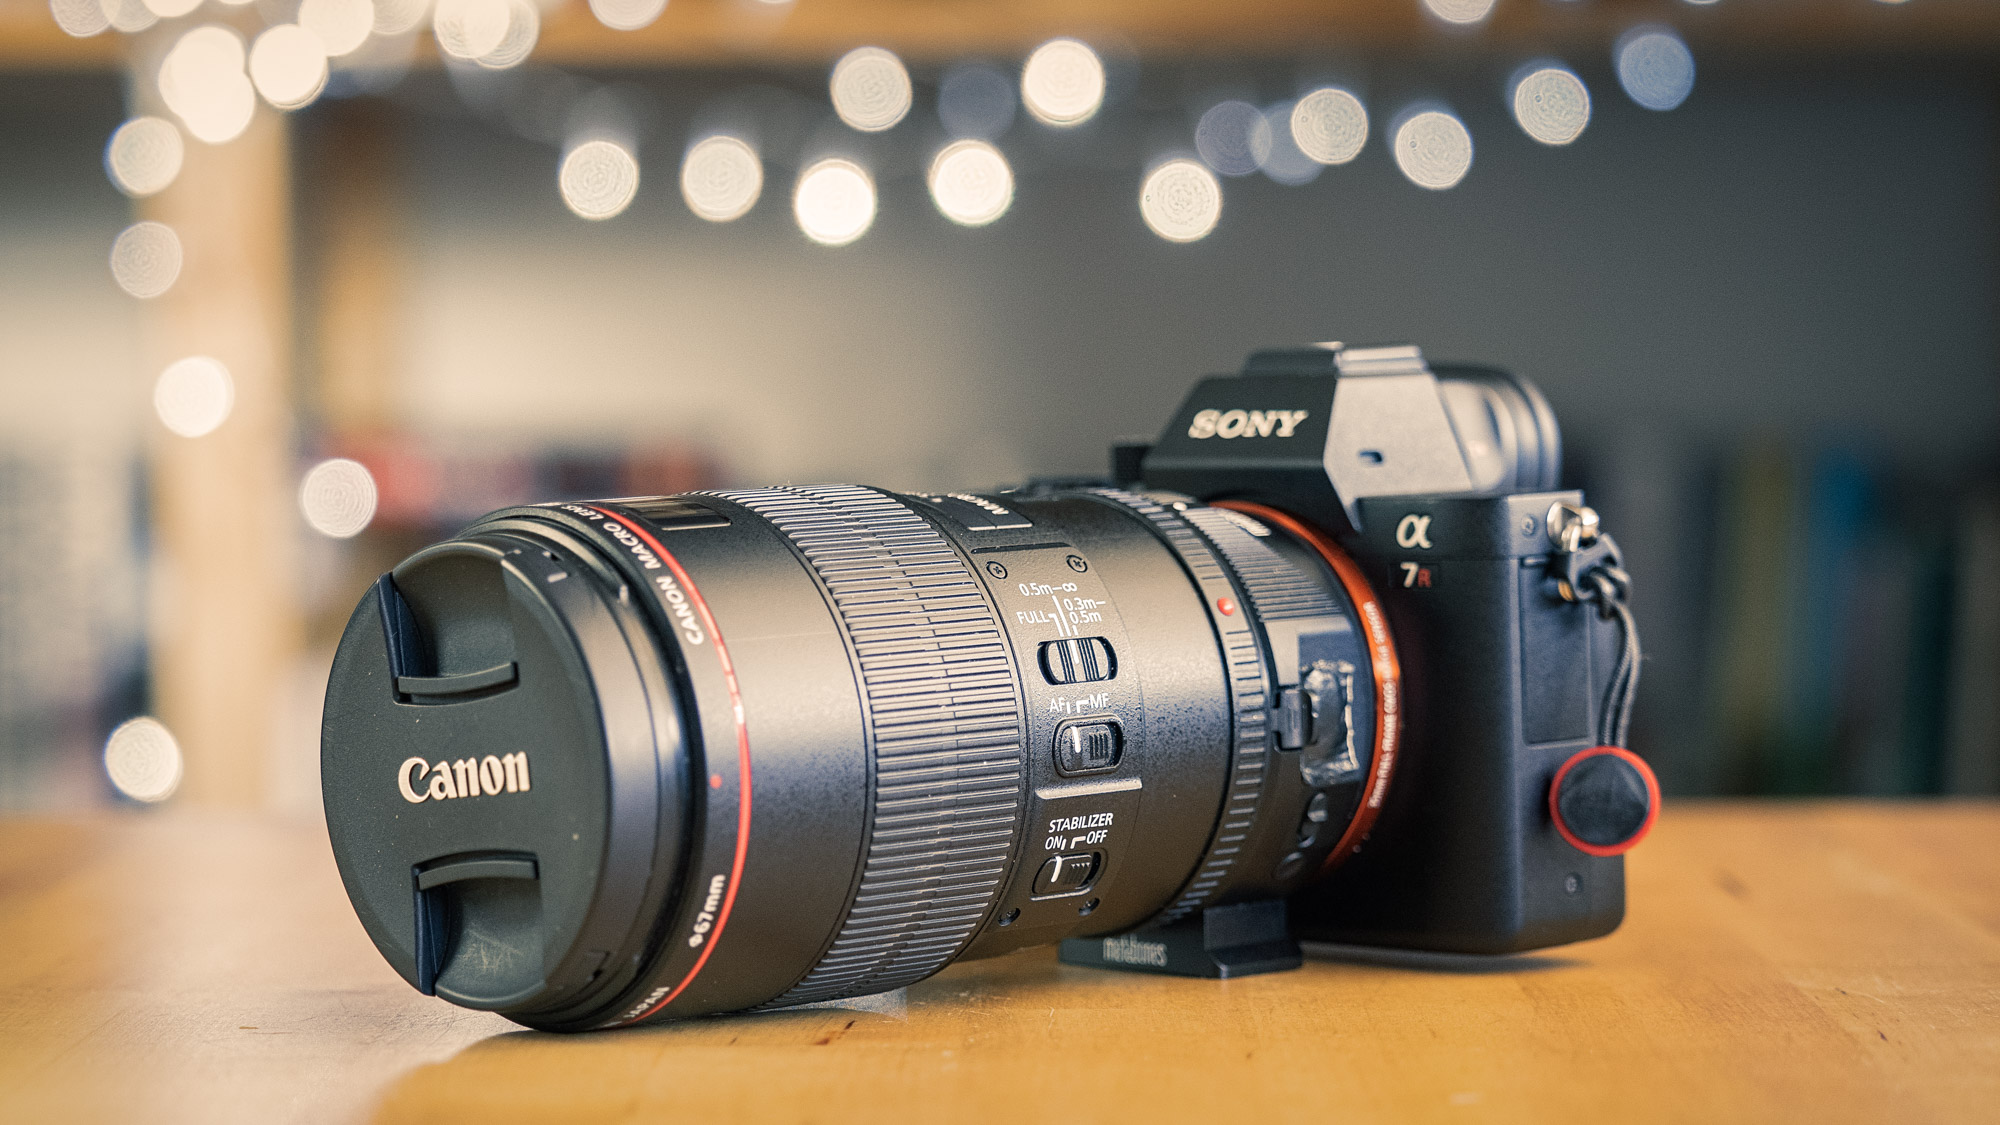
The Sony A7rii with the Metabones V Smart Adapter and the Canon 100mm f2.8 IS L lens.

Sigma MC-11 Lens Adapter

The Sigma MC-11 adapter allows certain Sigma EF lenses to be used on Sony E mount bodies while retaining autofocus and image stabilisation.

This is the second part of a series of articles on upgrading camera equipment on a budget. Part 1 can be found here.

I’ll deal with the Sigma adapter first because I got that to work with just one lens – my Sigma 150-600mm F5-6.3 DG OS HSM Lens – Contemporary lens. 


TLDR


Construction

The Sigma MC-11 comes in two different versions:

  • Sigma SA mount to Sony FE
  • Canon EF mount to Sony FE

Obviously as I own Canon EF mount lenses this is about the EF version. Sigma state that their adapter is for use with their Global Vision lenses which comprises of three lens lines:

  1. Art
  2. Contemporary 
  3. Sport

As of the time of writing there are 44 Sigma lenses that are compatible with the adapter and these allow users to access all the auto focus modes on Sony E mount cameras. This is important to me as I want to be able to use the 150-600 for bird photography.

The Sigma 150-600mm F5-6.3 DG OS HSM Contemporary lens is one of the lenses that is compatible with the Sigma MC-11 lens adapter.


The first thing you notice when you pick up the MC-11 is that it is very solid and well made. The body is of metal construction and the lens mounts are chromium plated brass. Disappointingly there are no weather seals. On the body is a USB port behind a soft plastic flap and on the opposite side is the lens release button. Just by that is a tiny LED light which is very hard to see when it is off. The purpose of the light is to inform you about how well the lens attached will work it does this through one of four states:

  1. Constant green – the lens is compatible
  2. Flashing green – you need to update the lens firmware 
  3. Flashing orange – the adapter firmware needs updating
  4. No light – the lens isn’t compatible 

The light only comes on for 2-3 seconds when you switch on the camera.

Speaking of firmware updates to do this you will need to download the Sigma Optimization Pro software from Sigma’s website. To update the adapter just needs a USB cable, for lenses you will need the Sigma Dock UD-01. I find it somewhat frustrating that you can’t update the lens firmware through the MC-11 adapter. The dock isn’t expensive to buy although in Australia the retail price varies between $80 to $120 AUD so it pays to shop around. Luckily there seem to be plenty for sale second hand on EBay for about $40. I ended up updating both the adapter and lens firmware and the whole process was very straightforward.


In Use

Before I updated the firmware I found that there was difficulty in acquiring focus when shooting in low light, backlit situations and with subjects in undergrowth. Once upgraded things worked a lot better. I experimented with the settings on the camera by setting up two custom modes. Custom mode 1 was in shutter priority with the shutter speed set at 1/500 sec, Auto ISO, Auto Focus Continuous, Lock on AF with a medium sized flexible spot and the frame rate was set to low speed continuous. Custom mode 2 was in shutter priority with the shutter speed set at 1/2000, Auto ISO, Auto Focus Continuous, lock on flexible spot large and high speed continuous drive. Both modes had the following parameters set:

  • Phase Detect Area – on
  • Pre AF – off
  • Priority set in AFC – balanced emphasis 
  • AF with shutter – on
  • AF drive speed – fast
  • AF tracking sensitivity – high

With birds in trees that weren’t moving too quickly I found that I was getting a hit rate of around 90%. With more erratic moving birds my hit rate dropped to 36% when I was using my custom mode 2. When I switched to mode 1 the hit rate improved to 85%. Photographing my dog running towards me both custom modes acquired focus very quickly, but the results from custom mode two weren’t very consistent fluctuating between 60 to 85%. In custom mode 1 I got very consistent results at 85%. When shooting birds in flight I found that I didn’t get a single shot with critical focus which was disappointing to say the least.


The video performance of the A7r II and the Sigma 150-600 was surprising. Shooting wide open at the short end AF performance is good, it is quick and confident. At the long end the AF is a bit slower but it does acquire focus and lock on. What is very apparent is the noise of the lens motor, it is quite loud and would mean that any sound would have to be recorded using an external microphone.


Conclusion


The Sigma MC-11 adapter allows certain Sigma EF lenses to be used on Sony E mount bodies while retaining autofocus and image stabilisation.

In practice it would certainly seem that shooting at higher frame rates the autofocus struggles to keep up and dropping the frame rate improves the hit rate considerably. Whether using this combination is a good idea depends very much on your expectations and what you want. If you want the performance of a Sony native lens then you are better off getting that. But if you already have the lens and want to change from a Canon DSLR to a Sony full frame mirrorless camera and you are shooting birds in trees, scrub, on the ground or on water then this works very well. For birds in flight you’ll want either a full Sony set up or a full Canon set up.


Sample Images


Menekedang called the Red-capped Robin (Petroica goodenovii) by white colonialists.


Melkullya called the Yellow-billed Spoonbill (Platalea flavipes) by white colonialists.


Menekedang called the Red-capped Robin (Petroica goodenovii) by white colonialists.


Red Wattle bird (Anthochaera carunculata subsp. woodwardi) known to the Nyoongar people as wodjalok. Yellagonga Regional Park.


Three wise corellas – hear no evil, see no evil, and sorry my mouth is full. Yellagona Regional Park, Western Australia.


Manyt or the Western Corella (Cacatua pastinator subsp. derbyi). Yellagona Regional Park, Western Australia.


Dillabirt, known to non Nyoonga people as the Magpie-lark (Grallina cyanoleuca). Yellagonga Regional Park.


Melkullya or Yellow-billed Spoonbills, Platalea flavipes, amongst the paperbarks on Lake Joondalup in Yellangonga Regional Park.


Melkullya or Yellow-billed Spoonbills, Platalea flavipes, feeding at Lake Joondalup in Yellangonga Regional Park.


The eponymous Willie Wagtail, Rhipidura leucophrys leucophrys. Yellagonga Regional Park, Western Australia.


Despite their small size the Silvereye, Zosterops lateralis, has an incredibly loud birdsong. Yellagonga Regional Park, Western Australia.


An Australian Pelican (Pelecanus conspicillatus) feeding on Lake Joondalup in Yellagonga Regional Park.


A white-faced heron looks out from its tree top perch over Horse Swamp. Whiteman Park, Western Australia.


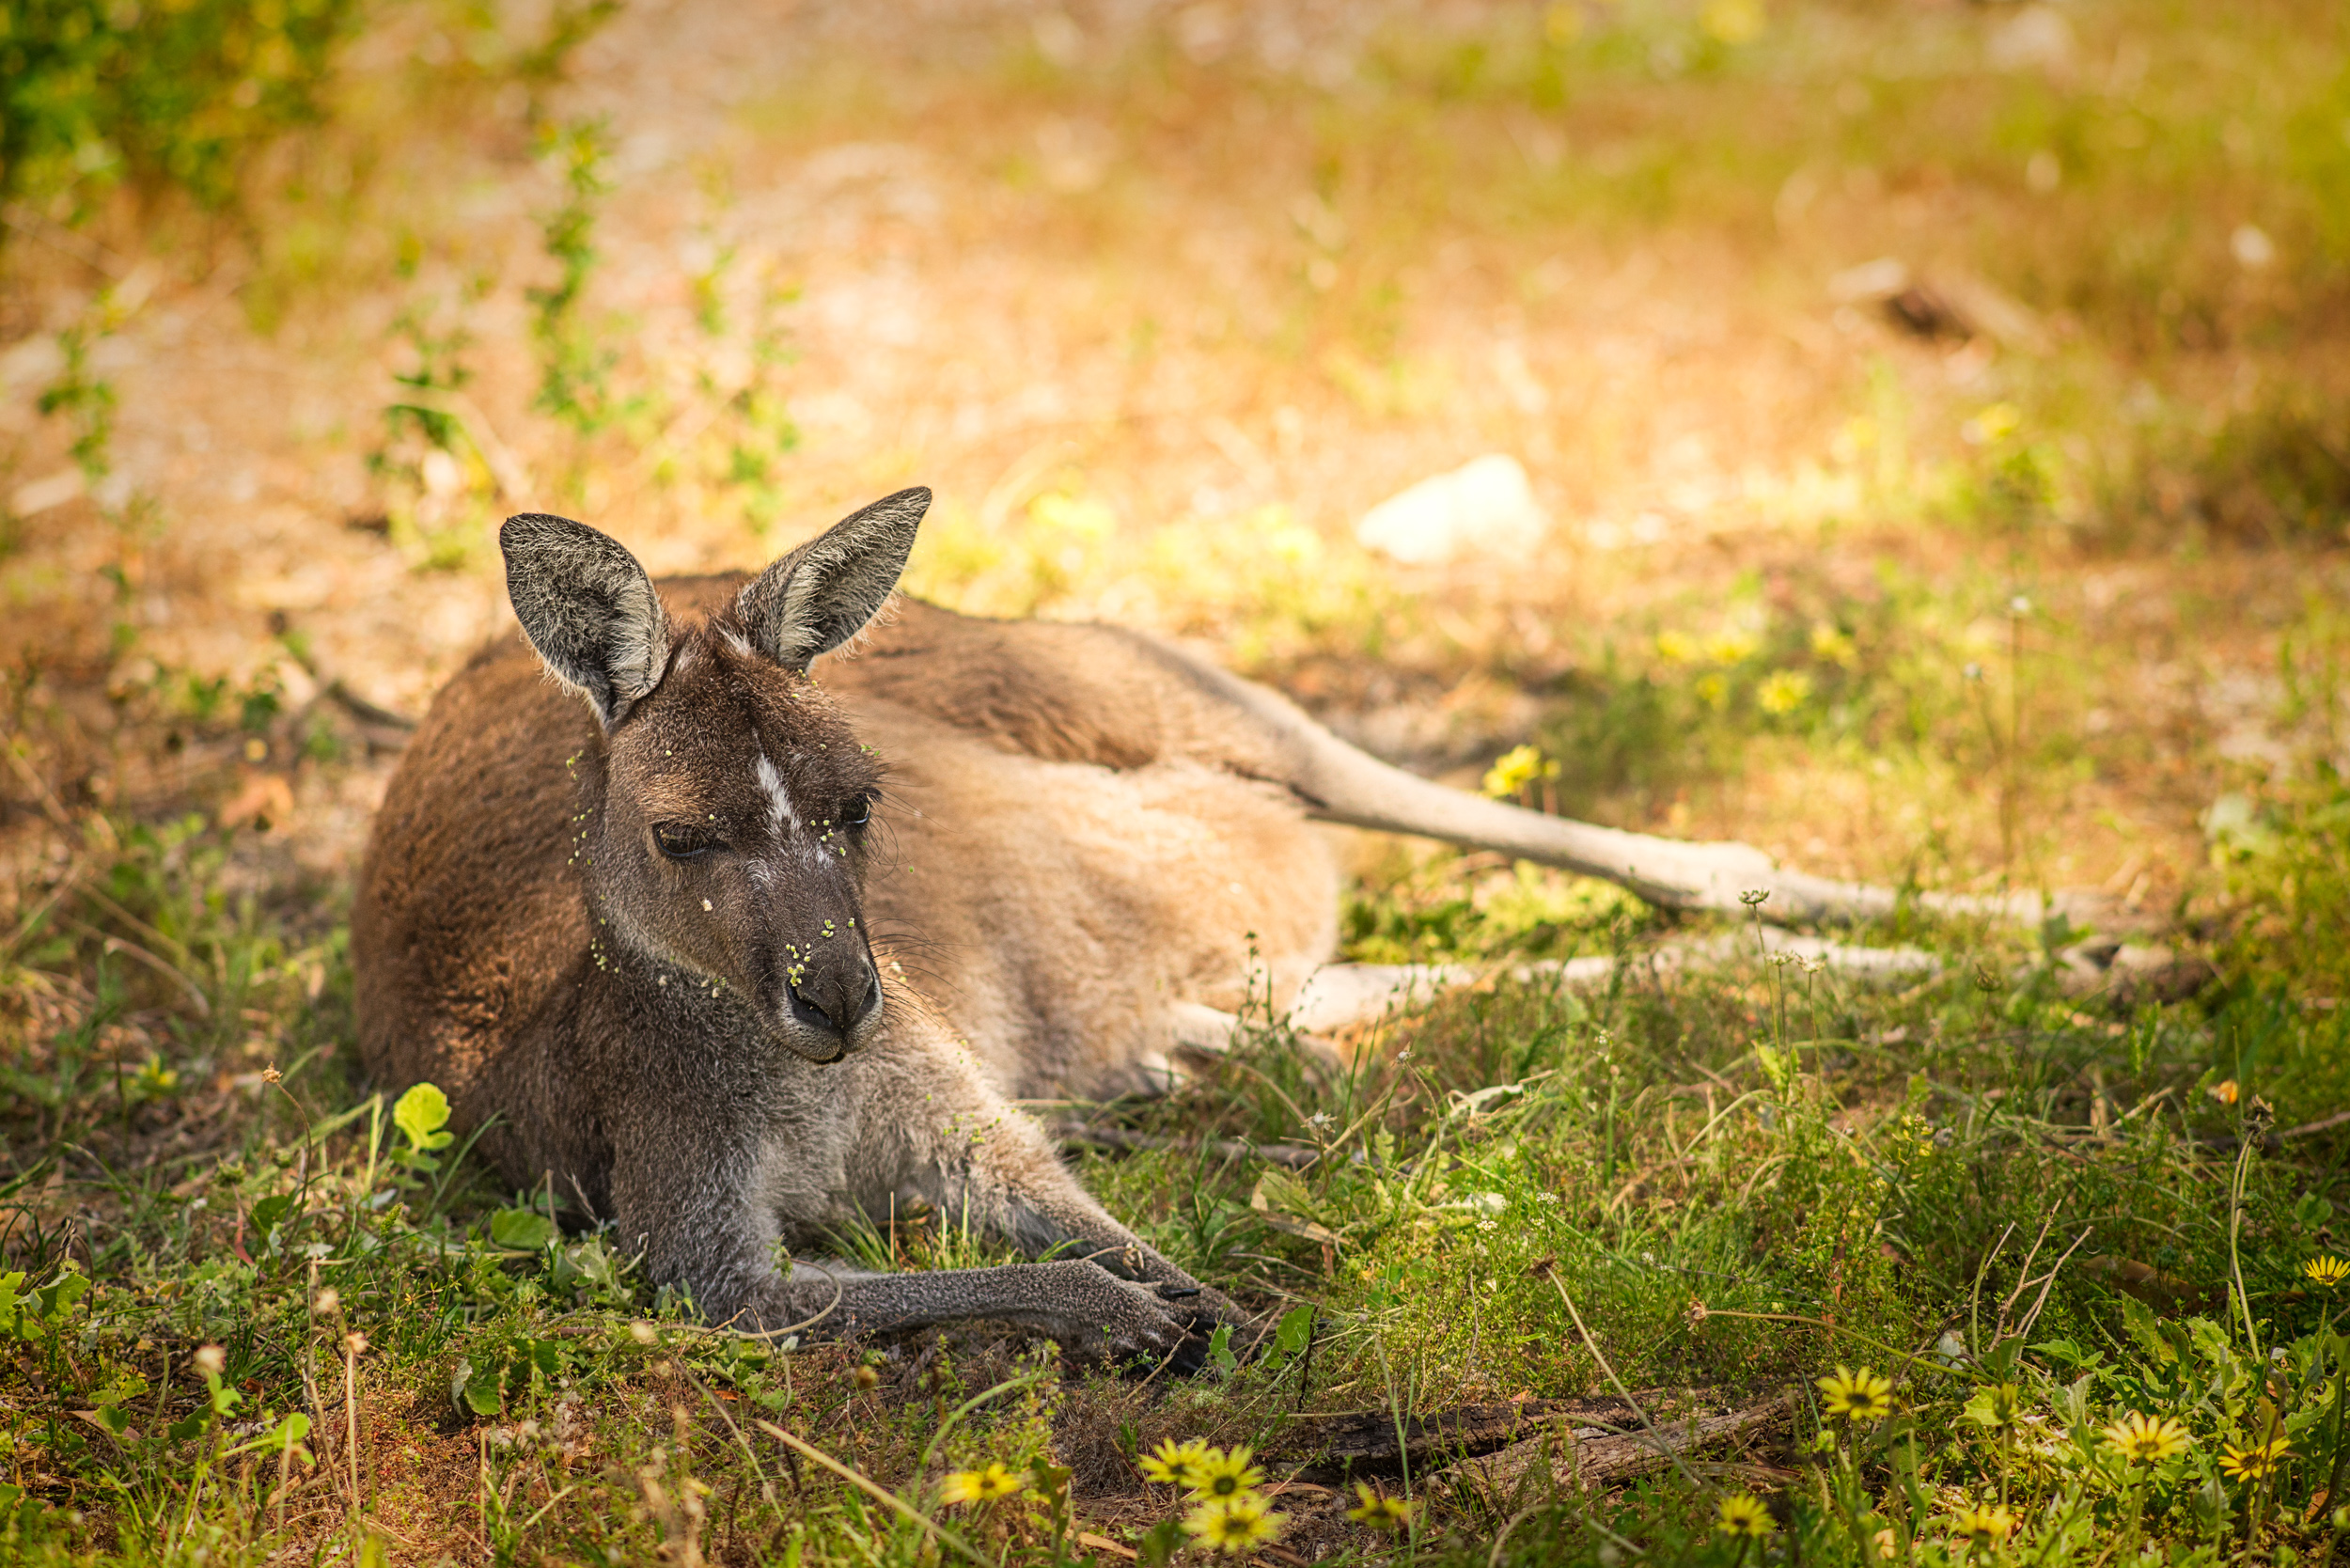
Western Grey Kangaroo, macropus fuliginosus, Whiteman Park, Western Australia.

Adapt Or…

…go with out.

Lately I’ve been reading a lot of how photography has become really expensive. Sony released the A1 at $10,000 AUD, Canon are due to release the R3 at the same amount. As for lenses well the latest fast primes are priced in the stratosphere. But here’s the news – photography is very expensive if you treat it as technological proliferation. If you insist on having the latest and greatest you are going to have to pay. But do you really need the latest and greatest? Do you honestly need 30 fps shutter speed? 8K video? 4K 10 bit 4:2:2 video at 120fps? Fifteen stop dynamic range? Only you can say what you need, but I’m guessing that like 90% of photography enthusiasts you don’t. I know I don’t. Let’s face it the greatest photos of the Twentieth Century were taken with basic equipment. The vast majority on cameras that didn’t have autofocus or built in metering.


The back bone of my professional kit has been full frame Canon DSLRs since the launch of the original Canon 5d in 2005. Here is my 6d with my lenses.


Maybe you’re a bit like me. You’ve been doing the photography thing for quite a while. You were a happy SLR user in the days of film and when the digital revolution took place you patiently waited for the affordable DSLRs to arrive on the market and you made the switch. You bought into a system, acquired some nice lenses and upgraded the camera body as needed. But now something has come along that threatens that. That something is the advent of the mirrorless camera. These new wonder cameras are technological marvels with their WYSIWYG viewfinders and their information overlays, the incredible image stabilisation systems, the convergence with video, and the list of features goes on and on. The fly in the ointment is that to achieve this the manufacturers abandoned their lens mounts and developed new ones that could take advantage of the lack of the mirror box. This is where the expense comes in because to make the switch you have to spend big on not only a new camera body but also on new lenses. When I went digital I went Canon and over the years I ended up with a modest kit based around an EOS 6d, a 24-70 f4, a 70-200 f2.8, a 100mm f2.8 macro, a 50mm f1.8, and a Sigma 150-600mm. To get the equivalent kit based around an R6 body would cost me a few dollars under $20,000. That is a phenomenal amount of money. My wallet puckers up just thinking about it. So I looked at the more wallet friendly option of the R6, a Canon EOS-R Mount Adapter to adapt my EF lenses to the new RF mount, and a Canon RF 50mm f1.8 STM as my old 50mm f1.8 wouldn’t cope with CAF needed for video. The damage would be just under $5000 which while more wallet friendly was still more than I really wanted to spend. The other problem is that the  Canon EOS-R Mount Adapter is currently back ordered here in Australia at the time of writing with no word on when stock would become available. Bugger!


The Olympus OMD EM1 mk ii with the Olympus m.Zuiko 60mm f2.8 macro lens.


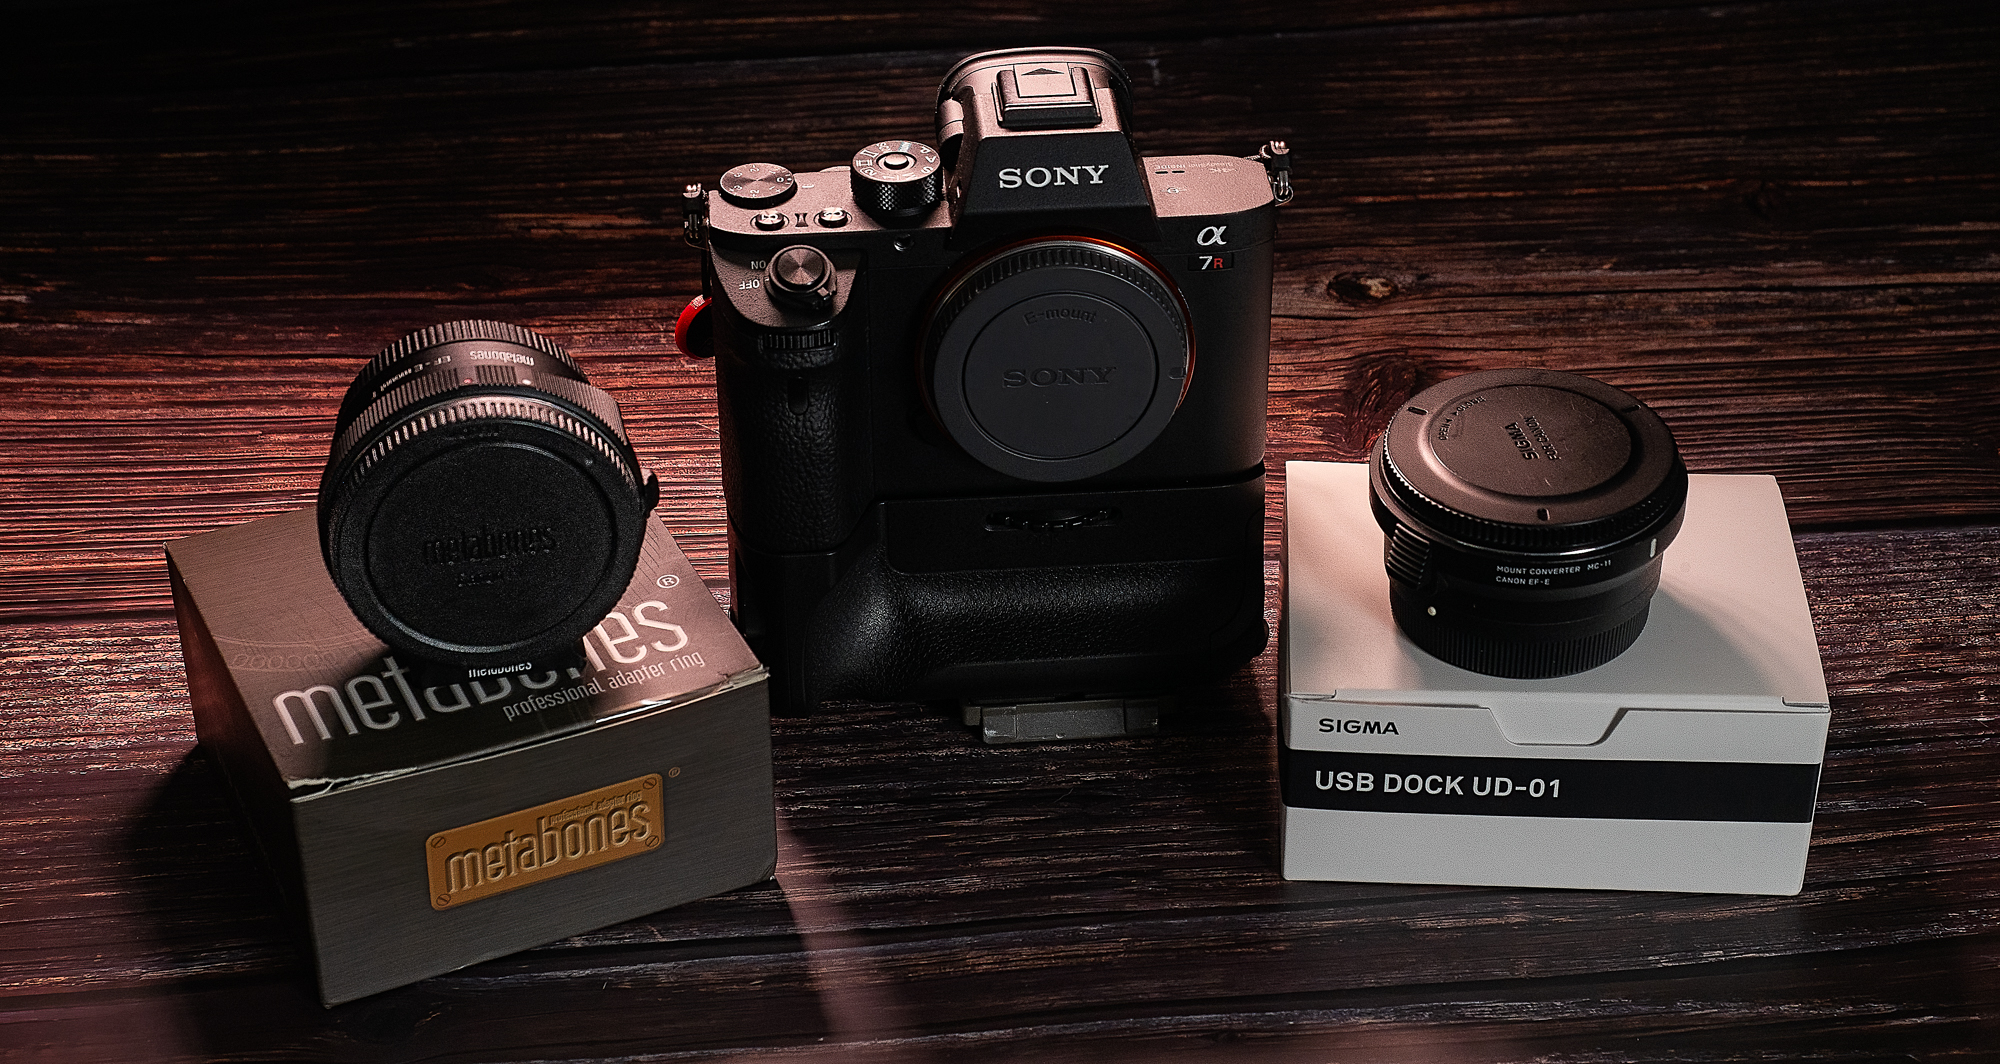
Time to reappraise the problem. As regular readers will know I went mirrorless about ten years ago with the Micro Four Thirds system and this is what does the bulk of my work. But I wanted a larger sensor and higher resolution for certain situations. A bit like when I was running Canon  35mm SLRs in conjunction with a Pentax 645n II. So m43 gives enough quality for about 80% of my needs. I wanted auto focus, 5-6 fps frame rate, in body image stabilisation, 4K video , and of course full frame. So the Canon R and RP were  immediately excluded. Then it occurred to me that if I was going to have to adapt my Canon glass to use on an R series camera why not consider adapting them to another make such as Sony. Now again regular readers will be aware that I acquired a Sony A7r with which to use my old collection of manual focus Olympus OM mount and Voigtländer M mount lenses. So perhaps going Sony was the solution. From what I read the Sony A7r was not a suitable candidate for this because of its contrast based auto focus so it was going to have to be 2nd generation cameras or later. New prices were still out of my league, but secondhand looked promising. I also found that the secondhand prices on the Metabones Canon EF to Sony E-mount T Smart Adapter (Mark V) and the Sigma MC-11  EF-Mount Lenses to Sony E mount were less than half the price of new. To keep within my $2000 AUD budget I decided to go for a Sony A7r II as I wouldn’t need to buy extra batteries as I already had loads for my A7r. So it was just a case of searching and eventually I came up trumps and found an A7r II with less than 50 shutter actuations, a Sigma and a Metabones adapter that kept me within my budget.


The Olympus OM Zuiko 35mm f2 mounted on a Sony A7r.


So did this end up a workable solution? Well I’m not going to review the A7r II as that has been done to death on the internet. But, suffice to say it gave everything I was looking for in a full frame mirrorless camera. The next two parts will look at how well the adapters worked with my lenses and the A7r II.


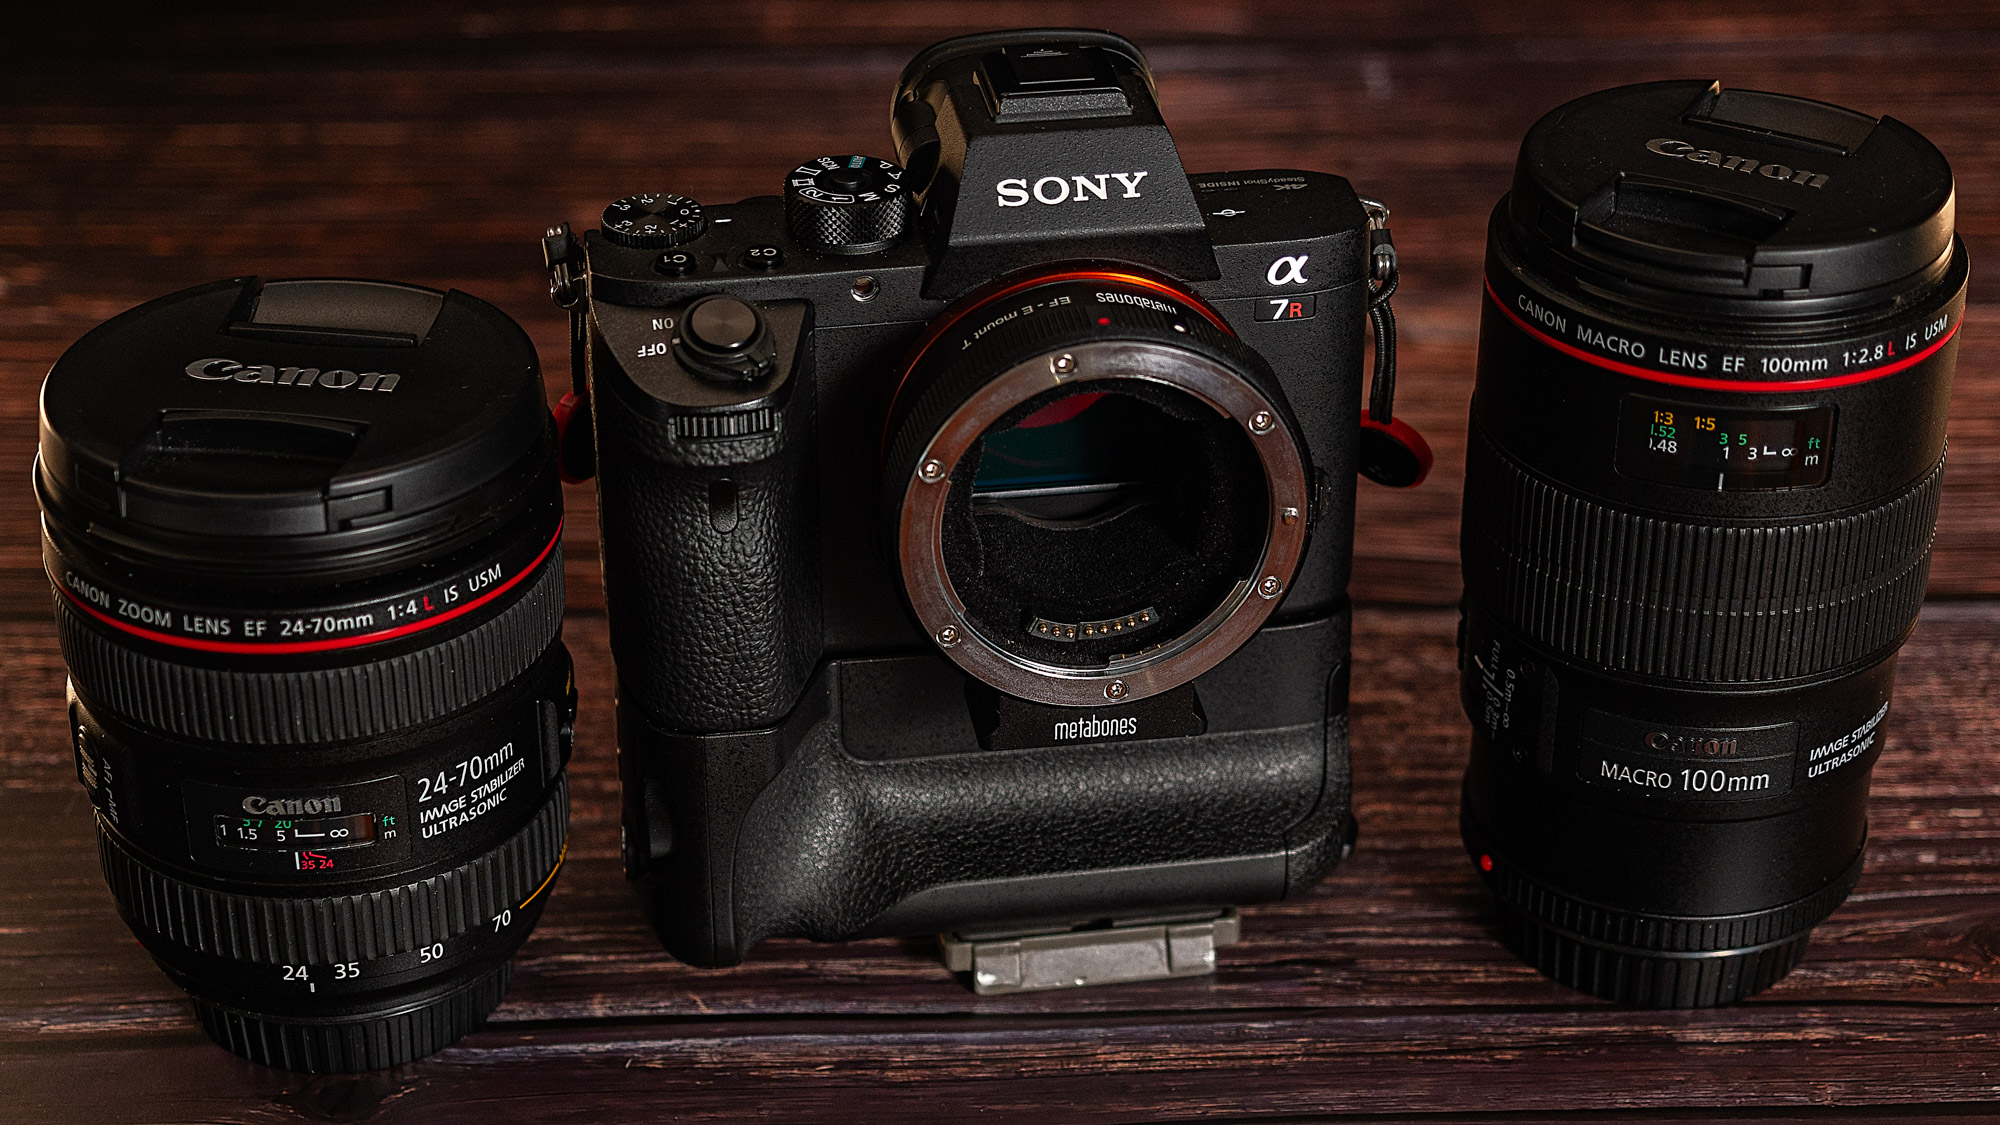
The Sony A7rii with the Sigma MC-11 and Metabobes V EF to FE lens adapters.


Mount your Canon EF lenses to your Sony A7rii using the Metabones V Smart Adapter.


Will the Sony A7rii work well with my Canon lenses? Is it time to say “Adios EOS”?

Fifty Shades of …

… Yellow

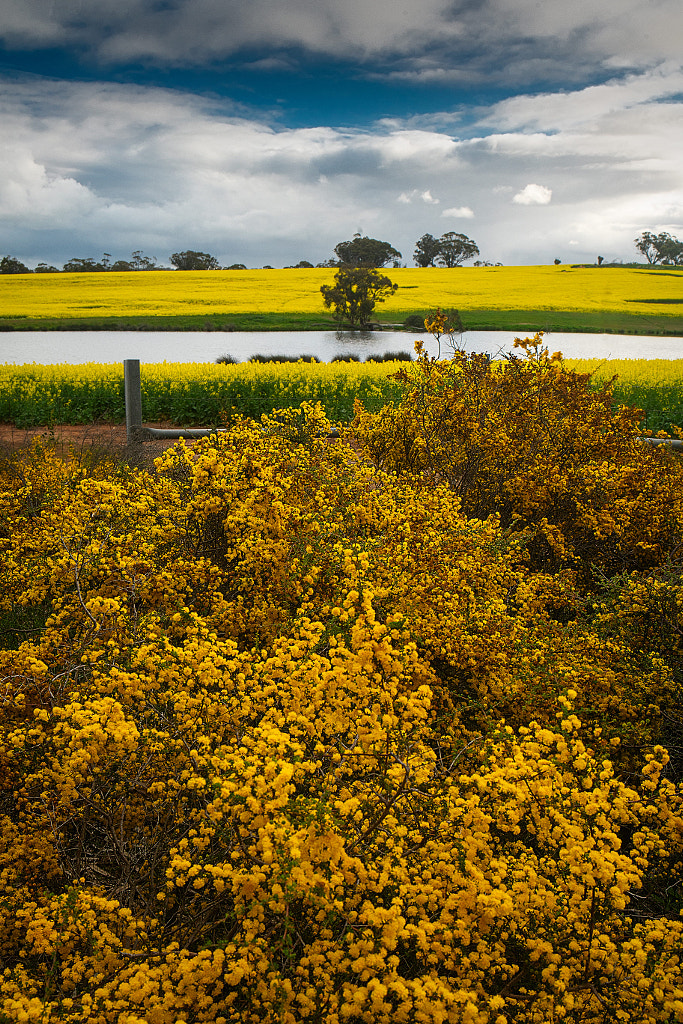
No this isn’t a new trilogy of mummy porn it’s because everything round here has turned a shade of yellow. Mostly that acid yellow that is canola, but the wattles give a nice counter point.


Helena Road by Paul Amyes on 500px.com

Canola fields flanking Helena Road. York, Western Australia. Sony A7 r ii, Metaboned V smart adapter, Canon EF 24-70mm f4 L lens. Exposure: 1/20 sec, f11, at ISO 100.


Canola by Paul Amyes on 500px.com
A farmhouse surrounded by canola in York, Western Australia. Sony A7 r ii, Metabones V Smart Adapter, Canon EF 70-200mm f2.8 IS L lens. Exposure: 1/60 sec, f16 at ISO 320.


Yellow by Paul Amyes on 500px.com

Yellow wattle and yellow canola fields. York, Western Australia. Sony A7 r ii, Metabones V Smart Adapter, Canon EF 24-70mm f4 IS L lens. Exposure: 1/30 sec, f16, ISO 500