That Was Then This Is Now

The Sigma 105mm f2.8 EX macro compared to its newer variant the Sigma 105mm f2.8 DG DN macro lens. Both lenses have their lens hoods attached.

Back in the annals of time, well 1999 to be precise, Sigma released the Sigma 105mm f2.8 EX Macro lens. Twenty one years later they released the Sigma 105mm f2.8 DG DN Art Macro lens. So let’s see what has changed in macro lens design.

As always click on the images to see them larger.


TLDR

.


Physical Attributes

Sigma 105mm f2.8 EX Macro

The Sigma 105mm f2.8 EX macro lens in Canon EF mount. The lens has no weather sealing.


As I said above this lens was introduced back in 1999 and it was well received by reviewers and users alike. In fact it cemented Sigma’s reputation for producing excellent macro lenses. One of my photography lecturers reckoned that this was one of the best lenses he’d used so I bought the lens new in 2003 to use with my then Canon EOS 3 and 30 and it remained in regular use until 2016. I’ve used it for macro, product shots, still life, portraits, fine art reproduction and copywork and of course close ups of flowers.

The lens was designed with film use in mind and was made available in the following mounts:

  • Canon EF
  • Minolta A
  • Nikon F
  • Pentax K
  • Sigma SA

Pick up the lens and it feels very well made. It is light by modern standards but it has a nice heft to it. The lens barrel is metal – none of your plastic composites here – and the lens mount is a chrome plated brass affair. The front lens element is recessed 25mm into the lens barrel and it is ribbed to prevent reflections and acts as shallow lens hood. Combine it with the included metal lens hood and it is virtually impossible  to induce flare. The lens hood screws firmly into place on the lens’ front filter thread and is threaded to take 77mm filters which is a neat idea as it makes it possible to quickly attach filters without having to take the lens hood off.

The finish is the peculiar matt black finish that Sigma had for all their EX range of lenses with a gold ring at the end of the focus ring and the text done in a mixture of white and gold. The focusing ring is 35mm wide and has ribbed rubber to aid grip. In autofocus mode the ring spins freely, but pull that ring back and flip the AF switch and it has a nice smooth 270º throw taking you from infinity to 31cm. The lens barrel extends as you focus closer by 50mm and there are magnification scales marked on the barrel extension for both manual and auto focusing. This means you can quickly set the lens to a desired magnification ratio. It is to my mind still one of the best implementations of manual focus on an autofocus macro lens. The lens motor makes quite a bit of noise and it can’t be called quick by any stretch of the imagination, however, macro lenses are not noted for their speed of use.


The Sigma 105mm f2.8 EX macro lens at full extension to give 1:1 magnification. Note the magnification ratios marked on the lens barrel. This makes manual setting of the lens for specific ratios a breeze.


Behind the focusing ring is a clear panel over a focusing scale in both feet and metres. There are two switches on the right side of the lens. The first is a focus limiter which speeds up auto focus by preventing the lens racking back and forth through the whole focus range. The second switch is the previously mentioned focus mode switch. Both are very positive in their action.

Sigma 105mm f2.8 DG DN Art Macro Lens

Sigma’s 105mm f2.8 DG DN macro lens attached a Sony A7Rii.


Announced in September 2020 the DG DN is available in Sony FE and Panasonic/Leica/Sigma L mounts. It is part of Sigma’s Art series and so shares the same gloss black finish with understated white graphics and lettering. No 1990’s gold bling here, just a minimalist workman like appearance. The body is a combination of metal and Sigma’s Thermally Stable Composite a kind of plastic with thermal expansion properties the same as aluminium. There are a number of ribbed panels to facilitate a secure grip. It’s great to see that Sigma has not abandoned the chrome plated brass  lens mount – it’s a proven method and lasts a long time. Pick the lens up and the first thing you notice is the weight. It is very heavy for its size. The 17 lens elements really make their presence felt when compared to the EX’s 10.


Both lenses are focused at their minimum focusing distance to give a maximum magnification ratio of 1:1. The DG DN focus internally and remains the same length while the EX’s barrel extends.


So weight and appearance aside how else does the DG DN differ from its distant ancestor the EX? Well the DG DN is 40mm longer, but it is important to remember that it is made for mirrorless cameras with a shorter lens flange distance than DSLRs. Put a Sigma MC-11 on the EX and they are virtually the same length. Another difference is that the new DG DN focuses internally – there’s no extending barrel and this will help with the weather sealing. The large ribbed focusing ring is of the fly-by-wire type, there’s no pulling it back to engage a manual focus mechanism. Consequently there are no hard stops and you get no feedback as you focus other than the image in the EVF or on the back panel. Macro photography is an area where you do use manual focus a lot and using it on the DG DN is not a very pleasant or positive experience to my mind. 


The controls on the Sigma 105mm f2.8 DG DN macro lens include an AF/MF switch, a reprogrammable focus lock button, a focus limiter switch and a switch to de-click the aperture ring.


There are a lot more controls on the newer lens:-

  • an AF MF switch
  • a focus lock button that can be reprogrammed
  • a focus limiter switch with 3 settings – 0.295 to 0.5m, 0.5m to infinity, full range.
  • a switch for de-clicking the aperture ring
  • an aperture ring
  • a locking switch for the aperture ring


The aperture ring on the Sigma 105mm f2.8 DG DN macro lens. Not only can it be de-clicked it can also be locked in the auto position for those who would prefer to chasnge aperture using camera dials.


The focus limiter switch has three settings. 0.295-0.5m macro, 0.5m to infinity normal range, and a full range option.


So let’s have a quick gander at the specs for both lenses.


Sigma 105mm f2.8 EX Macro lens Sigma 105mm f2.8 DG DN Art Macro lens
Focal length 105mm 105mm
Angle of view 24º (on full frame) 23.3º
Maximum aperture f2.8 f2.8
Miniumum aperture f45 for Canon, Sigma, and Minolta

f32 for Nikon and Pentax

f22
Filter size 58mm on the lens body

77mm on the lens hood

62mm
Stabilisation No No
Maximum magnification 1:1 1:1
Minimum focusing distance 31cm from the film plane 29.5cm (from the sensor plane)
Focusing modes Auto and manual Auto and manual
Optical construction 10 elements in 9 groups with 3 special low dispersion elements 17 elements in 12 groups with 1  special low dispersion element
Aperture blades 8 9 (rounded)
Weather sealing No “Dust and splash proof construction”
Weight 456g (Canon EF mount) 710g
Dimensions 95mm (h) x 74mm ⌀ 135.6mm (h) x 74mm ⌀

Optical Performance

Sharpness

A comparison between the 1999 Sigma 105mm f2.8 EX macro lens and the 2021 Sigma 105mm f2.8 DG DN macro lens. Aperture: f 2.8

This is where we really start to what has changed in terms of lens design over the years. Wide open at f2.8 the DGDN is sharper and more contrasty in the centre of the frame. The corners are sharp but the contrast is lower. The EX on the other hand is softer and has less contrast in the centre and the corners are not only softer but display prominent chromatic aberration and have a warm tinted vignetting. Older Sigma lenses were known for having a warmer look than other brands and it is clearly visible.


A comparison between the 1999 Sigma 105mm f2.8 EX macro lens and the 2021 Sigma 105mm f2.8 DG DN macro lens. Aperture: f 4


A comparison between the 1999 Sigma 105mm f2.8 EX macro lens and the 2021 Sigma 105mm f2.8 DG DN macro lens. Aperture: f 5.6

By f5.6 the corners of the DGDN have improved considerably and the centre is even sharper. The centre of the frame for the EX has improved but not to the same extent as that of the DGDN. The corners of the EX are still quite soft and still exhibit vignetting.


A comparison between the 1999 Sigma 105mm f2.8 EX macro lens and the 2021 Sigma 105mm f2.8 DG DN macro lens. Aperture: f 8


At f8 the DGDN really hits its stride and produces its best optical performance with both the centre and the corners having excellent sharpness and contrast. The EX has reached its best centre performance but it is still not as good as its younger sibling. The corners have improved slightly but vignetting is still present.

At the aperture of f11 the DGDN’s performance remains the same as it was at f8 in both the centre and the corners of the frame. The EX now turns in its best performance but some vignetting remains.


A comparison between the 1999 Sigma 105mm f2.8 EX macro lens and the 2021 Sigma 105mm f2.8 DG DN macro lens. Aperture: f 32

At f16 diffraction is taking effect on both lenses. Interestingly the EX will stop down to f45 but you wouldn’t want to use it as it looks like someone has smeared vaseline over the front lens element.

Chromatic Aberration 

Chromatic aberration is the failure of a lens to focus all colours at the same point and there are two types:-

  1. Axial or longitudinal chromatic aberration – this where different wave lengths of light are focused at different distances from the lens. Generally it can be reduced by stopping down thereby increasing the depth of field so that all the wavelengths fall with acceptable focus. This is very hard to remove in post processing.
  2. Transverse or lateral chromatic aberration – different wavelengths of light are focused at different positions in the focal plane. It does not occur in the centre of an image and increases as you move out to the edges. It is not effected by stopping down, but can be removed in post.

The DGDN is exceptional well controlled for both kinds of chromatic aberration and even at magnifications of 200% I could not observe any. The EX is really showing its age here as both types can be seen. The transverse chromatic aberration is very prominent.

Flare


The Sigma 105mm DGDN shows good resistance to flare. In this extreme case we can see some evidence of veiled flasre and a little reflection.


The EX despite having that recessed front element that acts as a de facto lens hood suffers badly from halation, veiling flare, and reflections when specular light sources were in the frame. The DGDN has better lens coatings which means that the halation and reflected glare is minimal and there is no halation. This means that there’s little loss of contrast.

Bokeh

Sigma 105mm f2.8 DGDN Macro lens bokeh test.


Both lenses at f2.8 have nice round bokeh balls in the centre of the frame and at the edges exhibit that elliptical cats eye effect. The tonal transitions are nice and smooth, there is no busyness or swirly effect. At f4 the EX is starting to develop polygonal balls while those of the DGDN are still nice and round. At f11 the bokeh balls in the corners of the DGDN are starting to develop into sun stars and the effect on the EX is more profound. The 9 rounded aperture blades are producing much more pleasing bokeh effects than the 8 straight ones of the EX.


Autofocus

Continuous autofocus with the Sigma 105mm f2.8 mounted on a Canon EOS 6d.


Autofocus is where there has been an enormous improvement in performance over the last 22 years. The EX when mounted on the Sony A7r ii with either the Metabones V Smart Adapter or the Sigma MC-11 just won’t autofocus. When you switch the camera on the lens racks through its entire focus range (depending on where the limiter is set) and then does nothing. So to test the AF performance I had to mount it on a Canon EOS6d which wasn’t known for its blistering AF speed. I shot several sequences with the focus limiter on at f2.8 of me walking slowly towards the camera with it set Continuous AF and obtained a nit rate of between 70-75%. Video AF was a non starter and it just would not find focus. To be fair the CAF of the 6d in video mode is pretty lacklustre. With the DGDN mounted on the Sony A7r ii the stills burst rate for AF averaged out at 94% which is pretty impressive. The DGDN handled the video AF test with aplomb, it was smooth and positive keeping up with me moving about in the frame. The AF was noisy and was picked up by the shotgun microphone mounted in the camera hot-shoe. Speaking of noise the EX was incredibly noisy.


Continuous auto focus using the Sigma 105mm f2.8 DG DN macro lens on a Sony A7rii.


Conclusion

Both lenses mounted on Sony bodies. The EX is mounted via the Sigma MC-11 lens adapter.


This should really come as no surprise, time has marched on and the advances in lens design are easily apparent.The Sigma 105mm f2.8 EX macro was considered a very good lens in its day, and even now it is remembered fondly on photographic forums. The DGDN is just at another level of performance both in terms of optics and auto focusing. The EX while being optically suited to a number of tasks its AF performance let it down when it came to anything that moved quickly or erratically. The DGDN on the other hand can be confidently used as a general purpose short telephoto with a wide variety of subjects as well as being a dedicated macro lens. The only area in which the EX is superior to the DGDN is in the handling department. The manual focusing experience and the ability to pre-set specific magnification ratios makes the lens a joy to use manually. The DGDN is clearly aimed at the autofocus only photographer. A great shame.

So if you have a Sony FE or one of the  offerings from the “L mount alliance” then the lens is worth a look at. Well it is your only option in L mount. It is also a worthy competitor to the Sony 90mm f2.8 FE macro OSS G at a cheaper price.


Sample Images


Looking through the Olympus OM Zuiko 135mm f2.8 lens at an Olympus OM 40.


Lime slice oozing juice.


Cream runs down over a strawberry.


Where there’s smoke there’s fire.


Australian one and two dollar coins.


Sigma 105mm f2.8 DG DN Macro lens auto focus test. Auto focus tracking a subject walking towards the camera while the lens is wide open at f2.8.


Darth Vader divided by the light.


Bee feeding on lavender flowers.


A bee feeding on a daisy.


A ladybird looking for aphids.


Clubbed Spider Orchid, Caladenia longiclavata. Mount Observation, Western Australia.


Custard Orchid, Thelymitra villosa. Mount Observation, Western Australia.


Known by a variety of names the dancing spider orchid (Caladenia discoidea) is also known as the antelope orchid and sometimes the bee orchid. St. Ronan’s Nature Reserve, Western Australia.

Metabones Canon EF to Sony E-mount Smart Adapter (Mark V)

This is the second part of a series of articles on upgrading camera equipment on a budget. Parts 1 and 2 can be found here and here.


Mount your Canon EF lenses to your Sony A7rii using the Metabones V Smart Adapter.

TLDR


Metabones was an early innovator in terms of lens adapters entering the market in 2013 with the Speed Booster which was an adapter. With a focal range reducer that allowed full frame SLR lenses to be used on smaller format mirrorless cameras at close to the full frame field of view. The first with autofocus capabilities was a Canon EF to Sony E. Metabones themselves described its performance as:

“Autofocus speed is very slow and inadequate for most moving subjects. The autofocus speed is unfit for professional use for sure, and it would disappoint most enthusiasts.”

By 2016 Metabones was able to offer a “Smart Adapter” that allowed Sony users to access all the AF modes when using Canon lenses. The adapter makes the lens behave like a native Sony lens. Sigma had beaten them to the punch with their MC-11, but, that had the caveat of only promising that performance with certain Sigma lenses. The Metabones Smart Adapter V EF to FE is the latest incarnation and this is the model that I’m looking at. This is not a Speed Booster – there are no optical elements in the adapter. It is designed for mounting full frame Canon EF lenses on a Sony Alpha series body. In Australia this retails for a whopping $780 AUD. A lot of money when you consider that outcomes are not guaranteed. Luckily there are plenty on the secondhand market and you can expect to pay around half the retail price.


Mount your Canon EF lenses to your Sony A7rii using the Metabones V Smart Adapter.

Build Quality

The Metabones Smart Adapter V for Canon EF to Sony FE mount comes in a smart hard plastic case. Included are two Allen Keys, one for removing the Arca Swiss tripod mount and the other for carrying out adjustments.


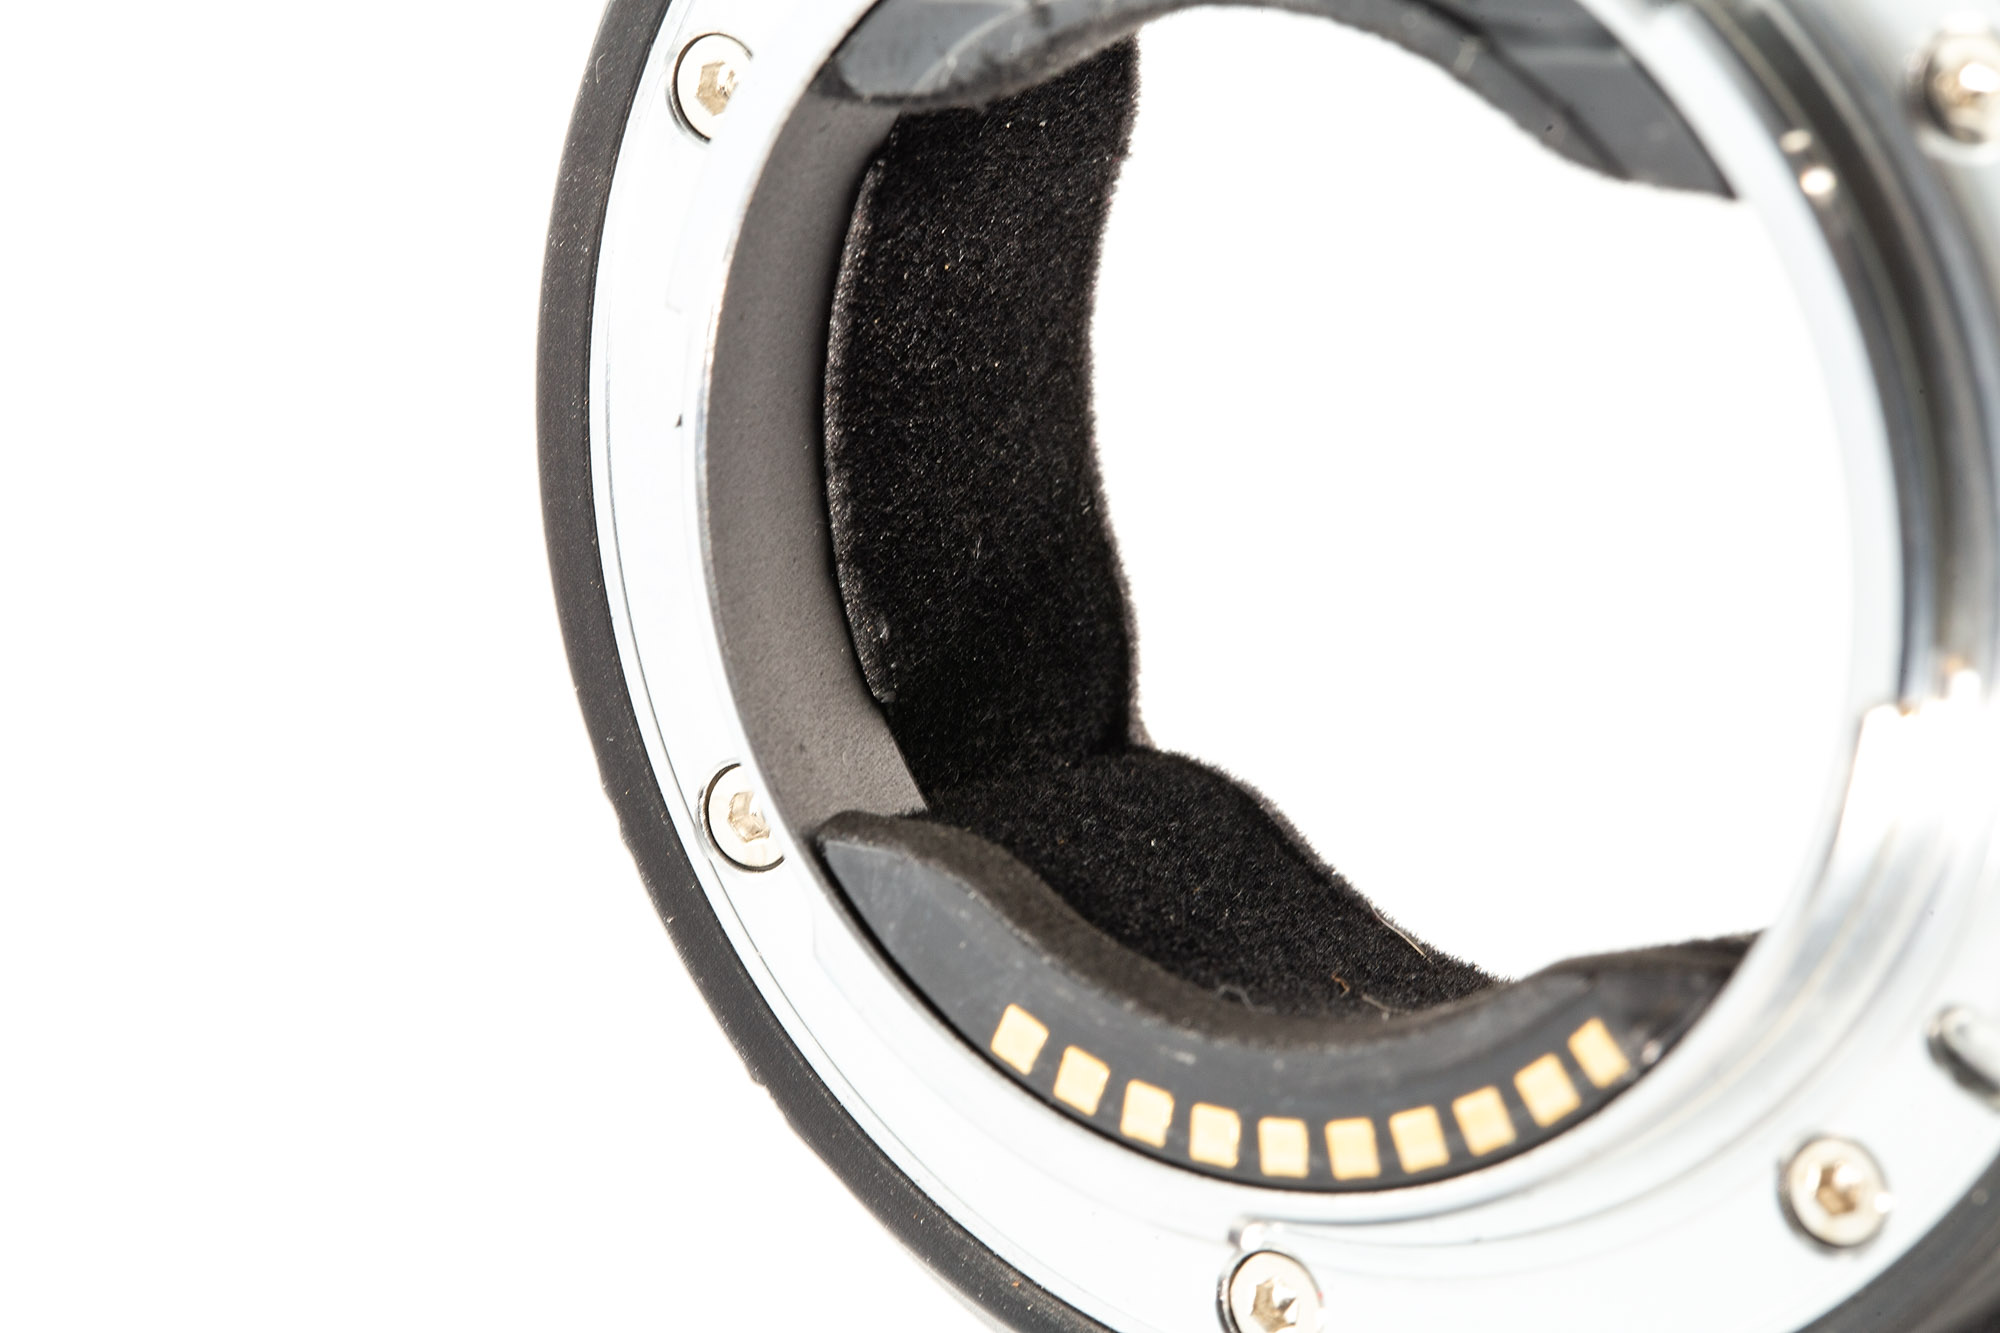
The adapter comes in a nice hard plastic case with two Allen key that are for removing the attached Arca Swiss tripod mount and carrying out adjustments. Picking it up the adapter feels well made with a metal body and both mounts are chromium plated brass for long life. There is a rubber gasket on the Sony mount side to prevent dust and moisture ingress and the adapter is lined with black flocking to prevent internal reflections. On the left hand side of the adapter is the lens release button, a USB port, an IBIS off/on switch and button you can customise its function like the ones found on the Sony G and GM lenses. There are two bad points. First is that the plug for the USB port is not of the flap variety that Sigma use that is attached to the adapter. In the six months I’ve had it the plug no longer fits snuggly and is prone to dropping out which potentially means it could be lost making the adapter susceptible to damage. I’ve taken to taping over it with a bit of gaffer tape but it is not what I would expect from an item costing so much especially when Sigma at half the price have a better approach. Second is the black flock used inside the adapter is a dust and hair magnet and it inevitably finds its way on to the camera sensor. I seem to be forever cleaning the adapter, the sensor and having to spot my photos. 


Metabones line the adapter with black flocking to prevent internal reflections.


On the left hand side of the adapter is the lens release button, a USB port, an IBIS off/on switch and a customisable button.


A crucial part of whether the adapter will work is the ability to download and install firmware updates. Sigma enable you to both update the adapter and the lens firmware. With the Metabones you can only update the adapter firmware and this is a bit of a dogs dinner. You download the updater app  for Mac and Windows from their website. This and opening the app is the easy bit. When prompted you connect the adapter to your computer via USB cable. I primarily run a MacBook Pro running OSX Big Sur version 11.6 with Thunderbolt 3 and no matter what adapter for USB A to USB C I used the app would not run. I then tried my 2012 iMac running Mojave thinking the native USB 3 will be the solution. Nope. At the back of the cupboard in my office I found 2009 MacBook running El Capitan and having USB 2 ports. Did this work? Did it heck. The app recognised the adapter and advised that there was a firmware update available but when I went to install it the app just froze. So as a last ditch attempt I pulled out of a box in the shed a Sony Vaio from 2003 running Windows XP. I downloaded the Windows version of the app and it worked! It took an hour to download the update but it got there. This is important because the app just doesn’t up date the adapter firmware but allows you access various functions. 

The Smart Adapter V has two modes: 

  • Green Mode or basic mode
  • Advanced Mode

There is no instruction leaflet with the adapter so you will need to access the support page for it. How these two modes operate will depend upon your Sony camera. As I’m using it on a Sony A7r2 I’ll concentrate on that.

Green Mode

Auto focus – uses phase detection autofocus and is compatible with, according to Metabones, “virtually all AF lenses” but there is no eye-AF, poor video AF which is contrast-detect and requires half-pressing shutter release button to activate if at all, doesn’t work well with telephoto lenses and requires good light and high contrast to work. Most of the Sony native AF functions are not available. The lens only stops down when you press the shutter button. On the plus side it has low power consumption.

Advanced Mode

The autofocus uses a hybrid of contrast based and phase detect autofocus which makes it fast and accurate. It is not compatible with as many lenses as green mode. Eye-AF is supported. In video you get continuous phase detect AF. The AF works better with long lenses. The aperture stops down as you turn the aperture dial on the camera causing a lot of clicking noise and higher power consumption.

To tell which mode your adapter is in there is a small LED on the top. For Green Mode the LED shines blue and for Advanced Mode it is red. In an ideal world you’d want to be able to switch back and forth between modes. There are two ways of doing this. The first is via the Metabones App which as we’ve already found out is less than ideal. The second can be done in the field and it involves pushing buttons mounting the lens switching on and off etc. It is fiddly. Don’t try to follow the instructions just watch the YouTube video by Alex & Nadia Fediakov. After a short while of using Green Mode and not having a lot of success I just switched to Advanced mode and have left it there ever since.


Performance

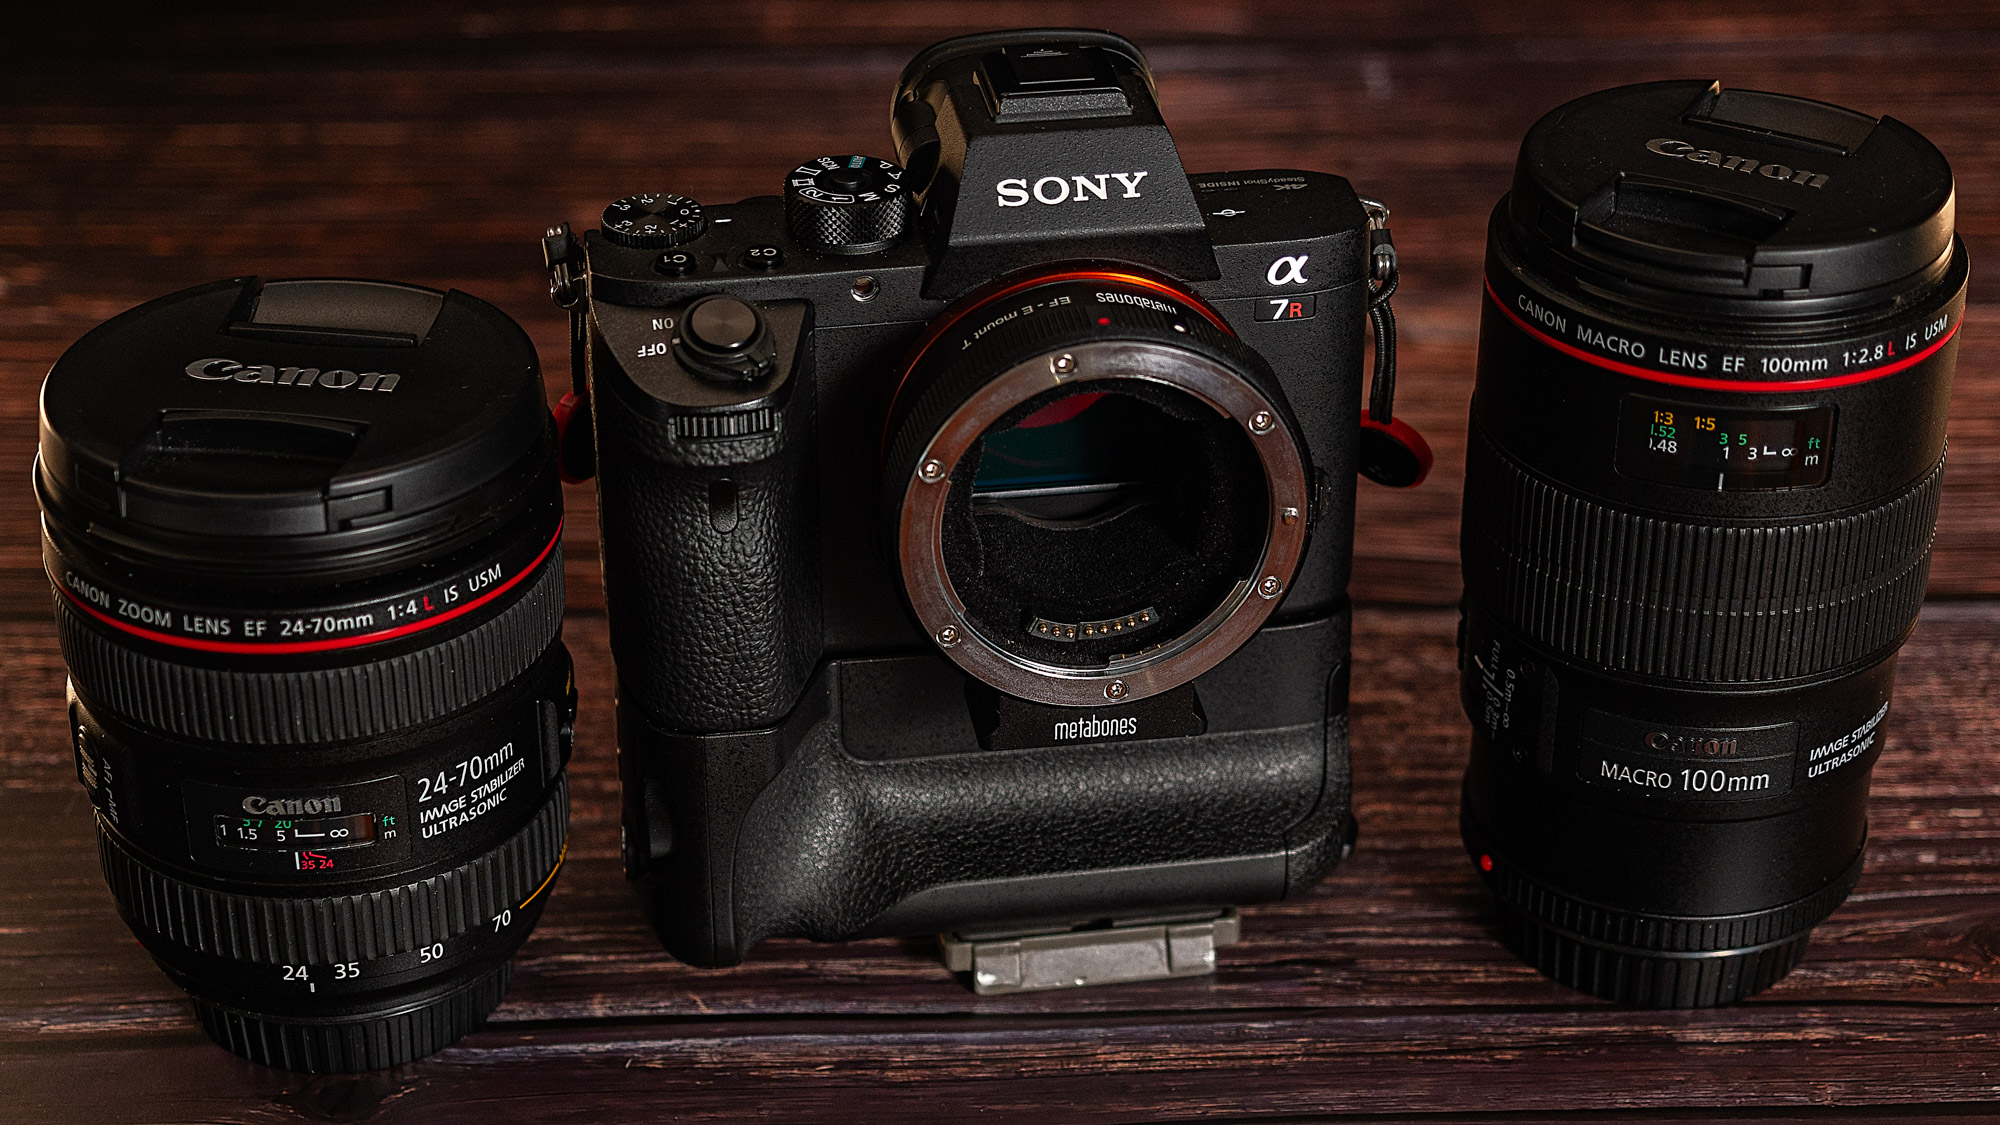
I’ve used the adapter with 3 lenses:-

  • Canon EF 24-70mm f4 IS L
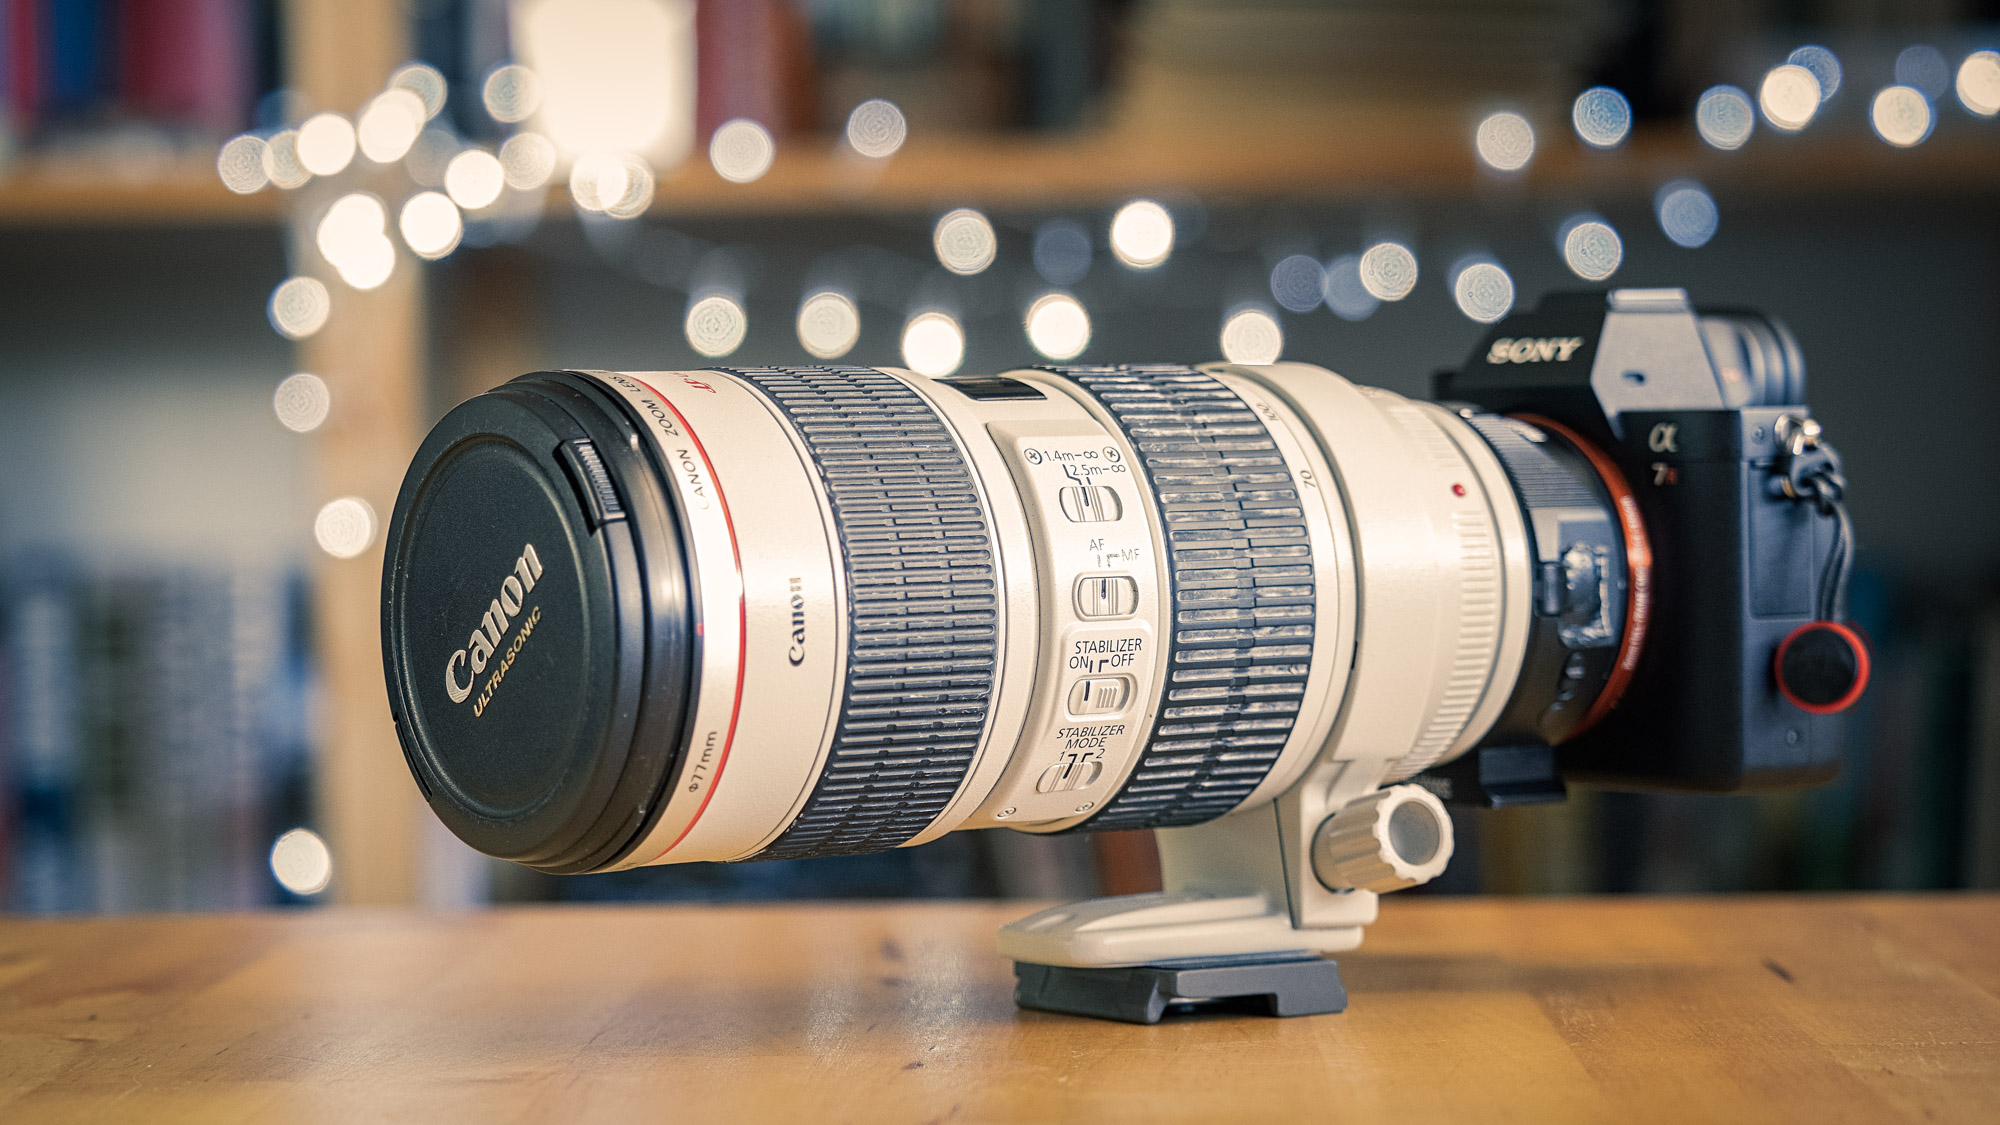
  • Canon EF 70-200mm f2.8 IS L mk i
  • Canon EF 100mm f2.8 macro IS L

Besides running tests I also used the camera and lenses in my normal day to day photography – nature, landscapes, events and grip and grin. Right from the beginning I’ll say what you get and don’t get in general terms and then go on to describe how things went with each lens.

  • There is no correction for vignetting or colour fringing. You have to manually select lens profiles in your editing program of choice.
  • The adapter enables EXIF data recording for focal length, aperture and make and model ID.
  • The adapter has no optics so there is no effect on lens performance. Any possible degradation in optical performance will come from the fact that Canon lenses are designed to work with the sensor stack of Canon cameras not Sony. With the three lenses I used there was no problem.
  • The auto focus generally works very well allowing access to all the AF modes on the camera. However, how well is specific to the lens. Focal length and the motor technology in the lens play a part in how well the adapter works.
  • Using the adapter in Green Mode in body image stabilisation is favoured while in Advance Mode both IBIS and optical image stabilisation are used.
  • In Green Mode the power consumption is low. In the Advanced Mode because the lens aperture is constantly opening and closing and both forms of image stabilisation are used the power consumption is high.


Tests


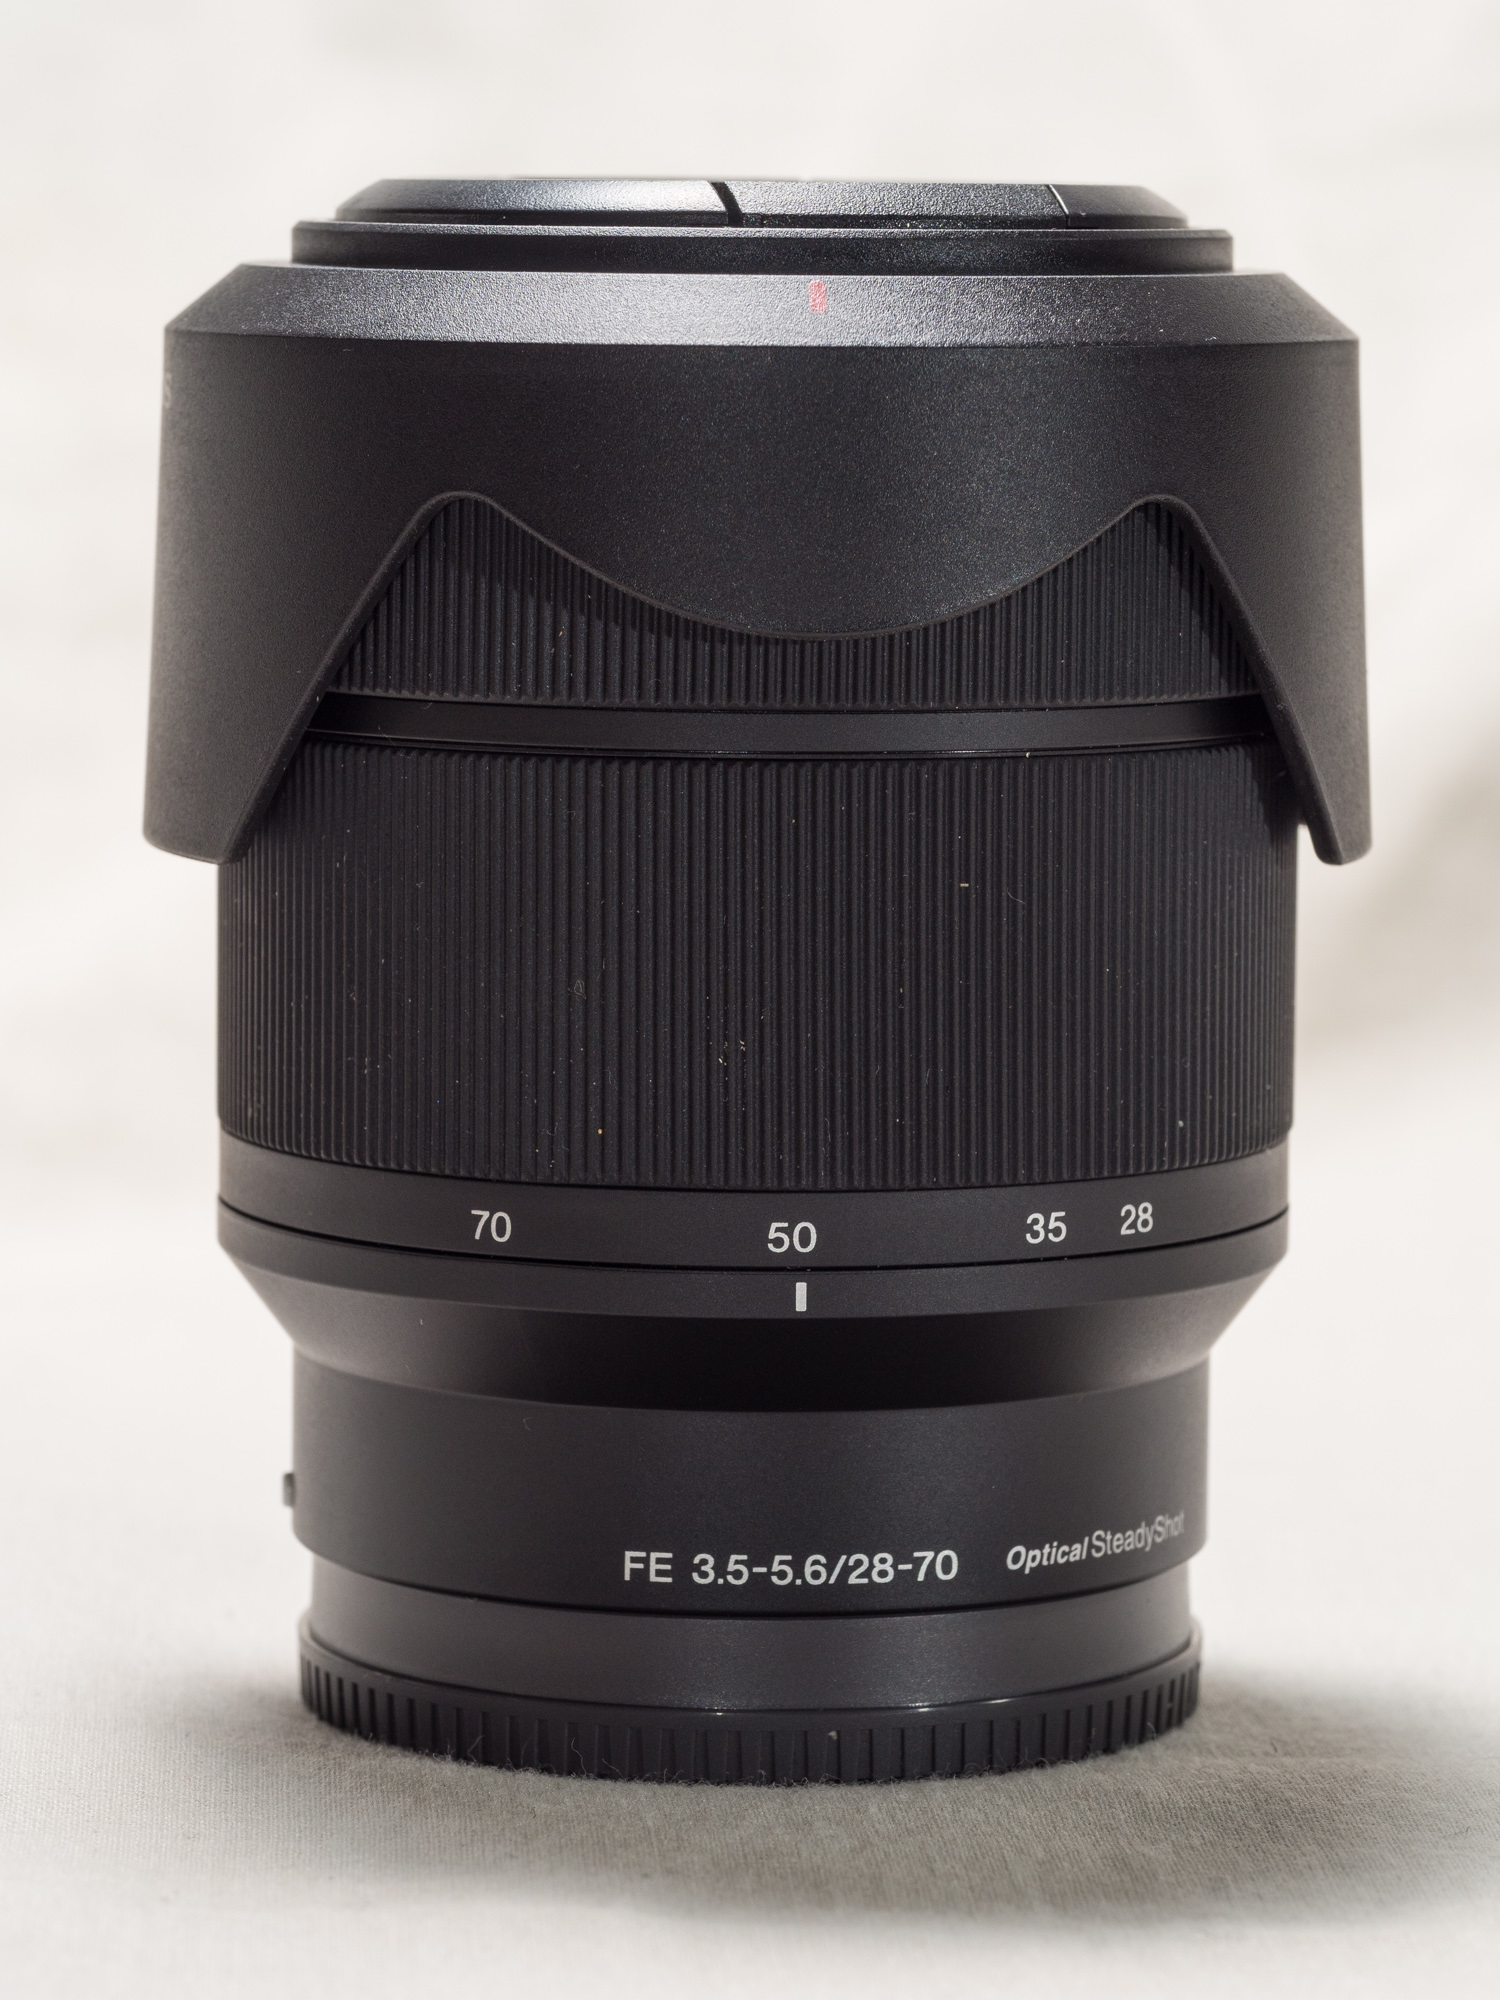
The Sony 28-70mm f3.5-5.6 OSS was introduced in in 2013 as the budget kit zoom to accompany the Sony A7 mirrorless camera.


The reluctant running bull terrier test with the Sony A7r2 andSony FE 28-70mm f/3.5-5.6 OSS lens.


To help me get some sense of what I was seeing I needed a point of reference and for that I used the Sony FE 28-70mm F3.5-5.6 OSS kit lens which can be picked up second hand for about $200 AUD. I wasn’t looking at optical quality but autofocus performance. Each of the Canon lenses had to equal or better the AF performance of that cheap kit lit lens. When shooting sequence of a moving subject (my reluctant Bull Terrier Frida) the Sony 28-70 was achieving a 90% hit rate which I thought was impressive.

Canon EF 24-70mm f4 IS L lens

The Canon 24-70mm f4 IS L mounted to a Sony A7r2 via a Metabones V Smart Adapter.


My initial tests were very disappointing. Using single point continuous AF with a burst of 5 frames none of the shots were in focus. So I changed the settings to lock on flexible spot with continuous AF and got a hit rate of 50%.  Shooting video things were more promising. The autofocus was quick and positive and tracked well, but it didn’t do as well as the Sony 28-70.

Canon EF70-200mm f2.8 IS L lens

The Canon EF 70-200mm f2.8 IS L lens mounted to a Sony A7r2 via a Metabones V Smart Adapter.


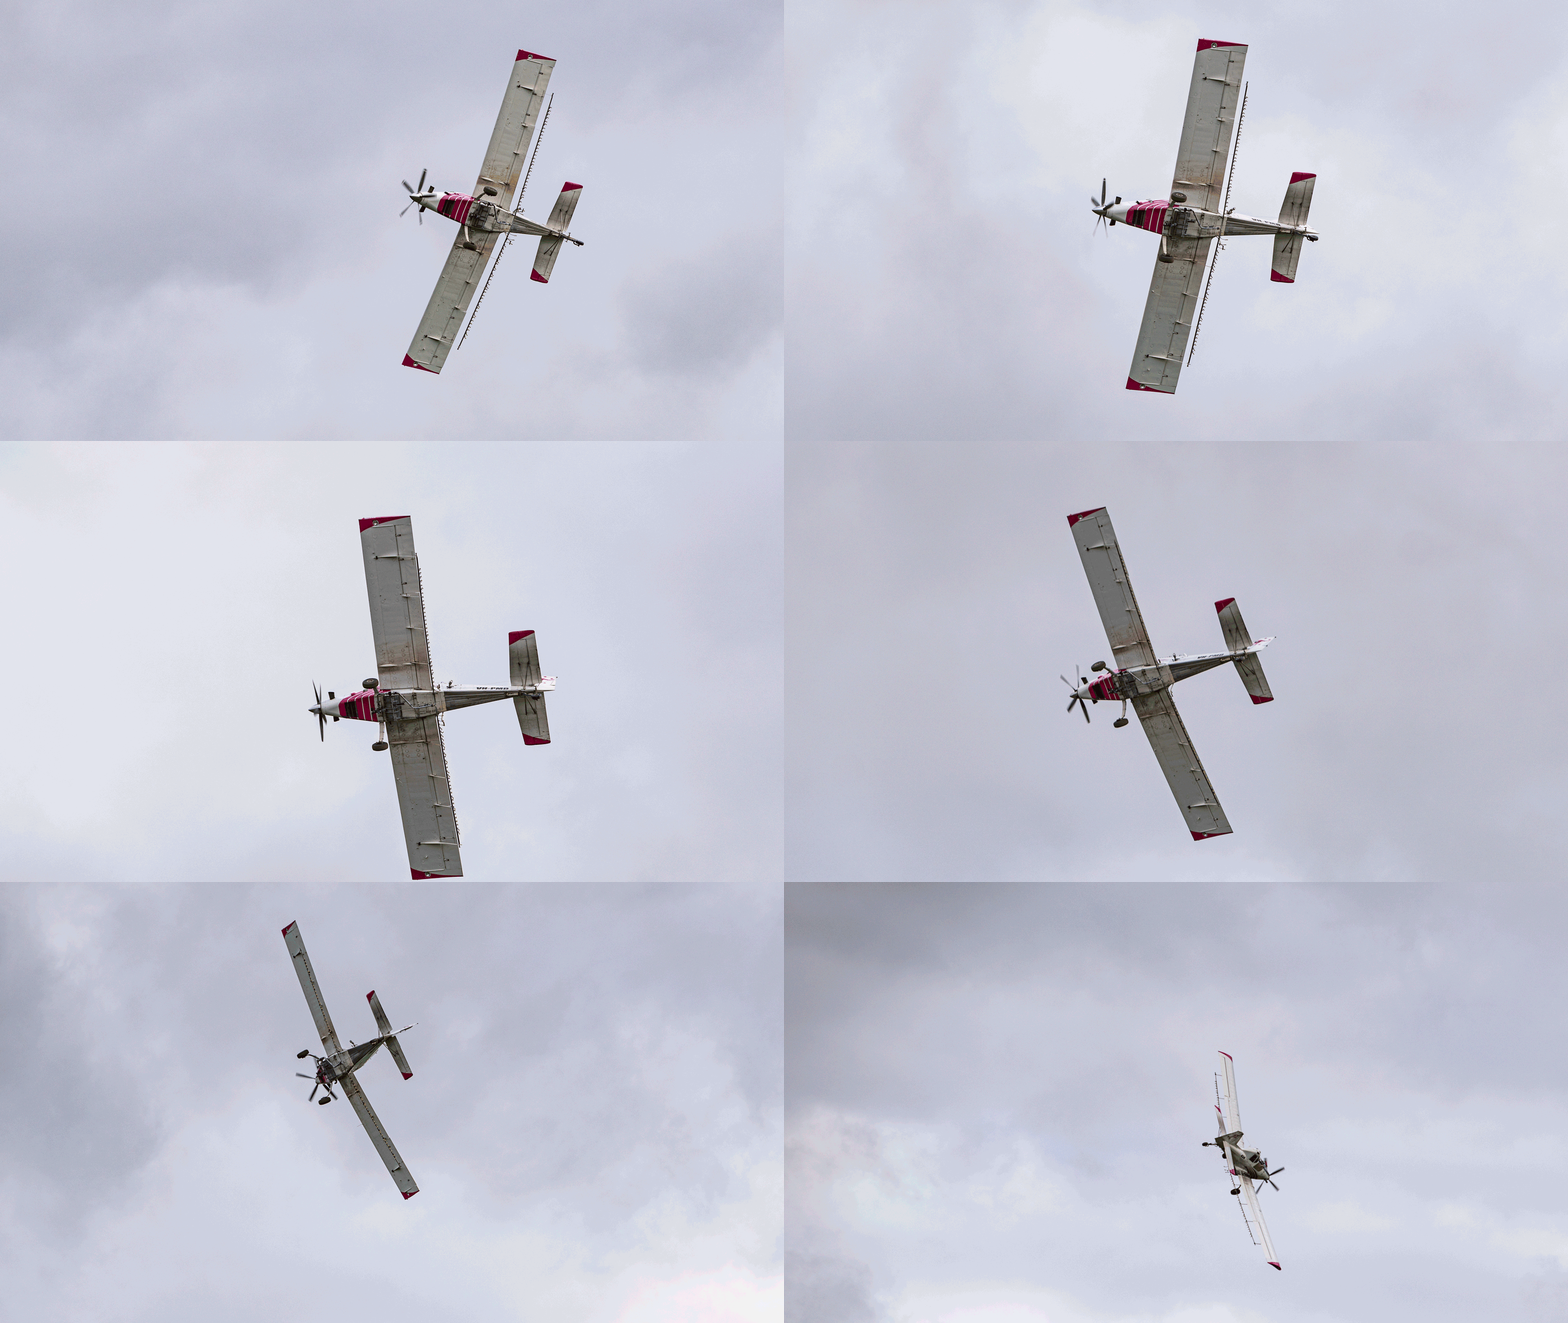
This lens did not work well in expanded flexible spot with continuous autofocus. Typically the lens racked back and forth, then would settle on the subject for a couple of seconds and then drift off out of focus. Switching to other focus modes was a very different story with the lens quick to acquire focus. I abandoned the bull terrier test in favour of a plane doing some crop dusting. Out of 5 runs I got 3 with a 100% hit rate, one with 92% and one of 61%. This averaged out at 90%.  The video performance was woeful. At the short end wide open the lens was very slow to acquire focus and when tracking it would loose the subject and be painful slow to reacquire. At the long end wide open it was incredibly slow – glaciers move faster and the AF motor made a lot of noise while the lens racked back and forth.

Canon 100mm f2.8 macro IS L lens

The Canon EF 100mm f2.8 macro IS L lens mounted to a Sony A7r2 via a Metabones V Smart Adapter.

I didn’t test this lens with moving subjects as macro lens are notoriously slow to autofocus at the best of times. The lens was slow to focus in single AF mode both at macro distance and normal distances. At normal focus ranges despite being slow it was very accurate. At macro distances it would often get confused and I found that this would increase in low light or with subjects that had low contrast. For most people macro photography isn’t a fast moving high pressure scenario so this wouldn’t be really a problem. What was a disappointment was that the OIS didn’t combine with the IBIS and I had to use OIS only.

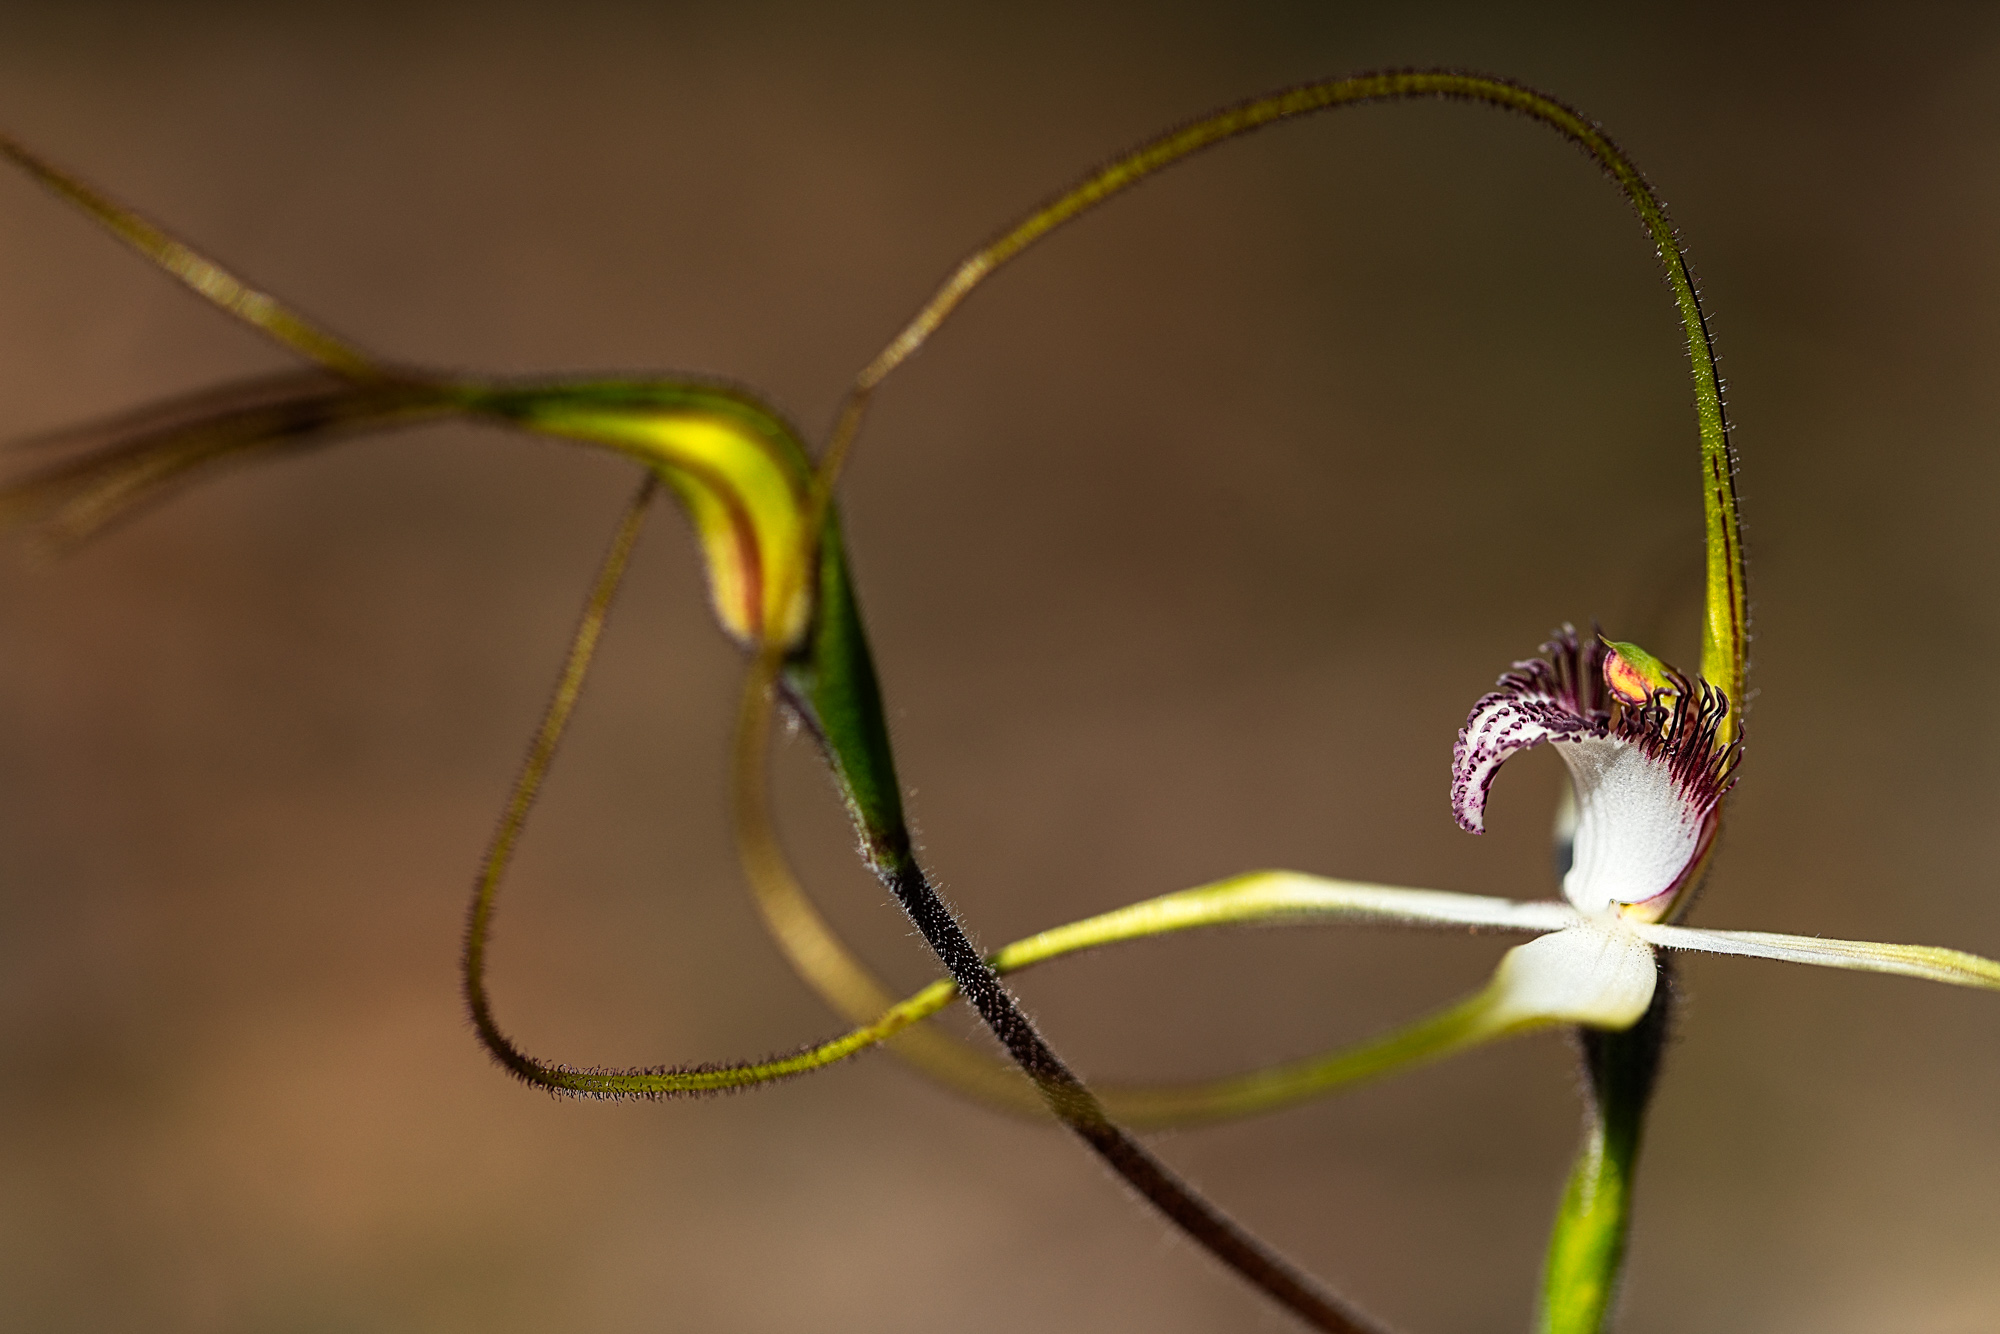
White Spider Orchid, Caladenia longicauda subsp longicauda, Wambyn, Western Australia. Sony A7r2 with Canon EF 100mm f2.8 IS lens mounted via the Metabones V Smart Adapter.


Real World Usage


Canola fields flanking Helena Road. York, Western Australia. Sony A7r2 with the Canon EF 24-70mm f4 IS L lens.


A farmhouse surrounded by canola in York, Western Australia. Sony A7r2 with Canon EF 70-200 f2.8 IS L lens.


Mounted Archery demonstration at the York Medieval Fair. Sony A7r2 with Canon EF 70-200mm f2.8 IS L lens.


Enough for the tests let’s look at real world usage. For landscape and macro work all the lenses did OK in real world usage. But for events and grip and grin work it was not all beer and skittles. The event I photographed was a medieval fair and I used both the 24-70 and the 70-200. The 70-200 did rather well with photographing mounted archers and taking candid portraits. Excellent stuff. The 24-70 didn’t do so well. I photographed a display of medieval combat and only 1 in 5 were in focus. These guys weren’t  moving fast they were just erratic and the tracking just could n’t cope. With static subjects everything was fine. I photographed an awards ceremony with the A7r ii and the 24-70. This sort of work is quick paced but straightforward photographically. I shot 220 frames with roughly a third out of focus, one third in focus but not critically sharp and the remainder were critically in focus.The experience was the AF wasn’t snappy but laboured and ponderous. Halfway through I was wishing that I’d had my micro four thirds system or my Canon DSLRs.

York Medieval Fair. Sony A7r2 with Canon EF 70-200mm f2.8 IS L lens.


York Medieval Fair. Sony A7r2 with Canon EF 24-70mm f4 IS L lens.


Conclusion

In conclusion my experience with the Metabones Smart Adapter V was quite a mixed bag. The lens that I thought would do very well, the EF 24-70 f4, didn’t do very well at all.  The lens I really wanted to work but thought wouldn’t do well because of its age was the 70-200mm f2.8 and it did surprisingly well. The 100mm macro did as I thought it would.

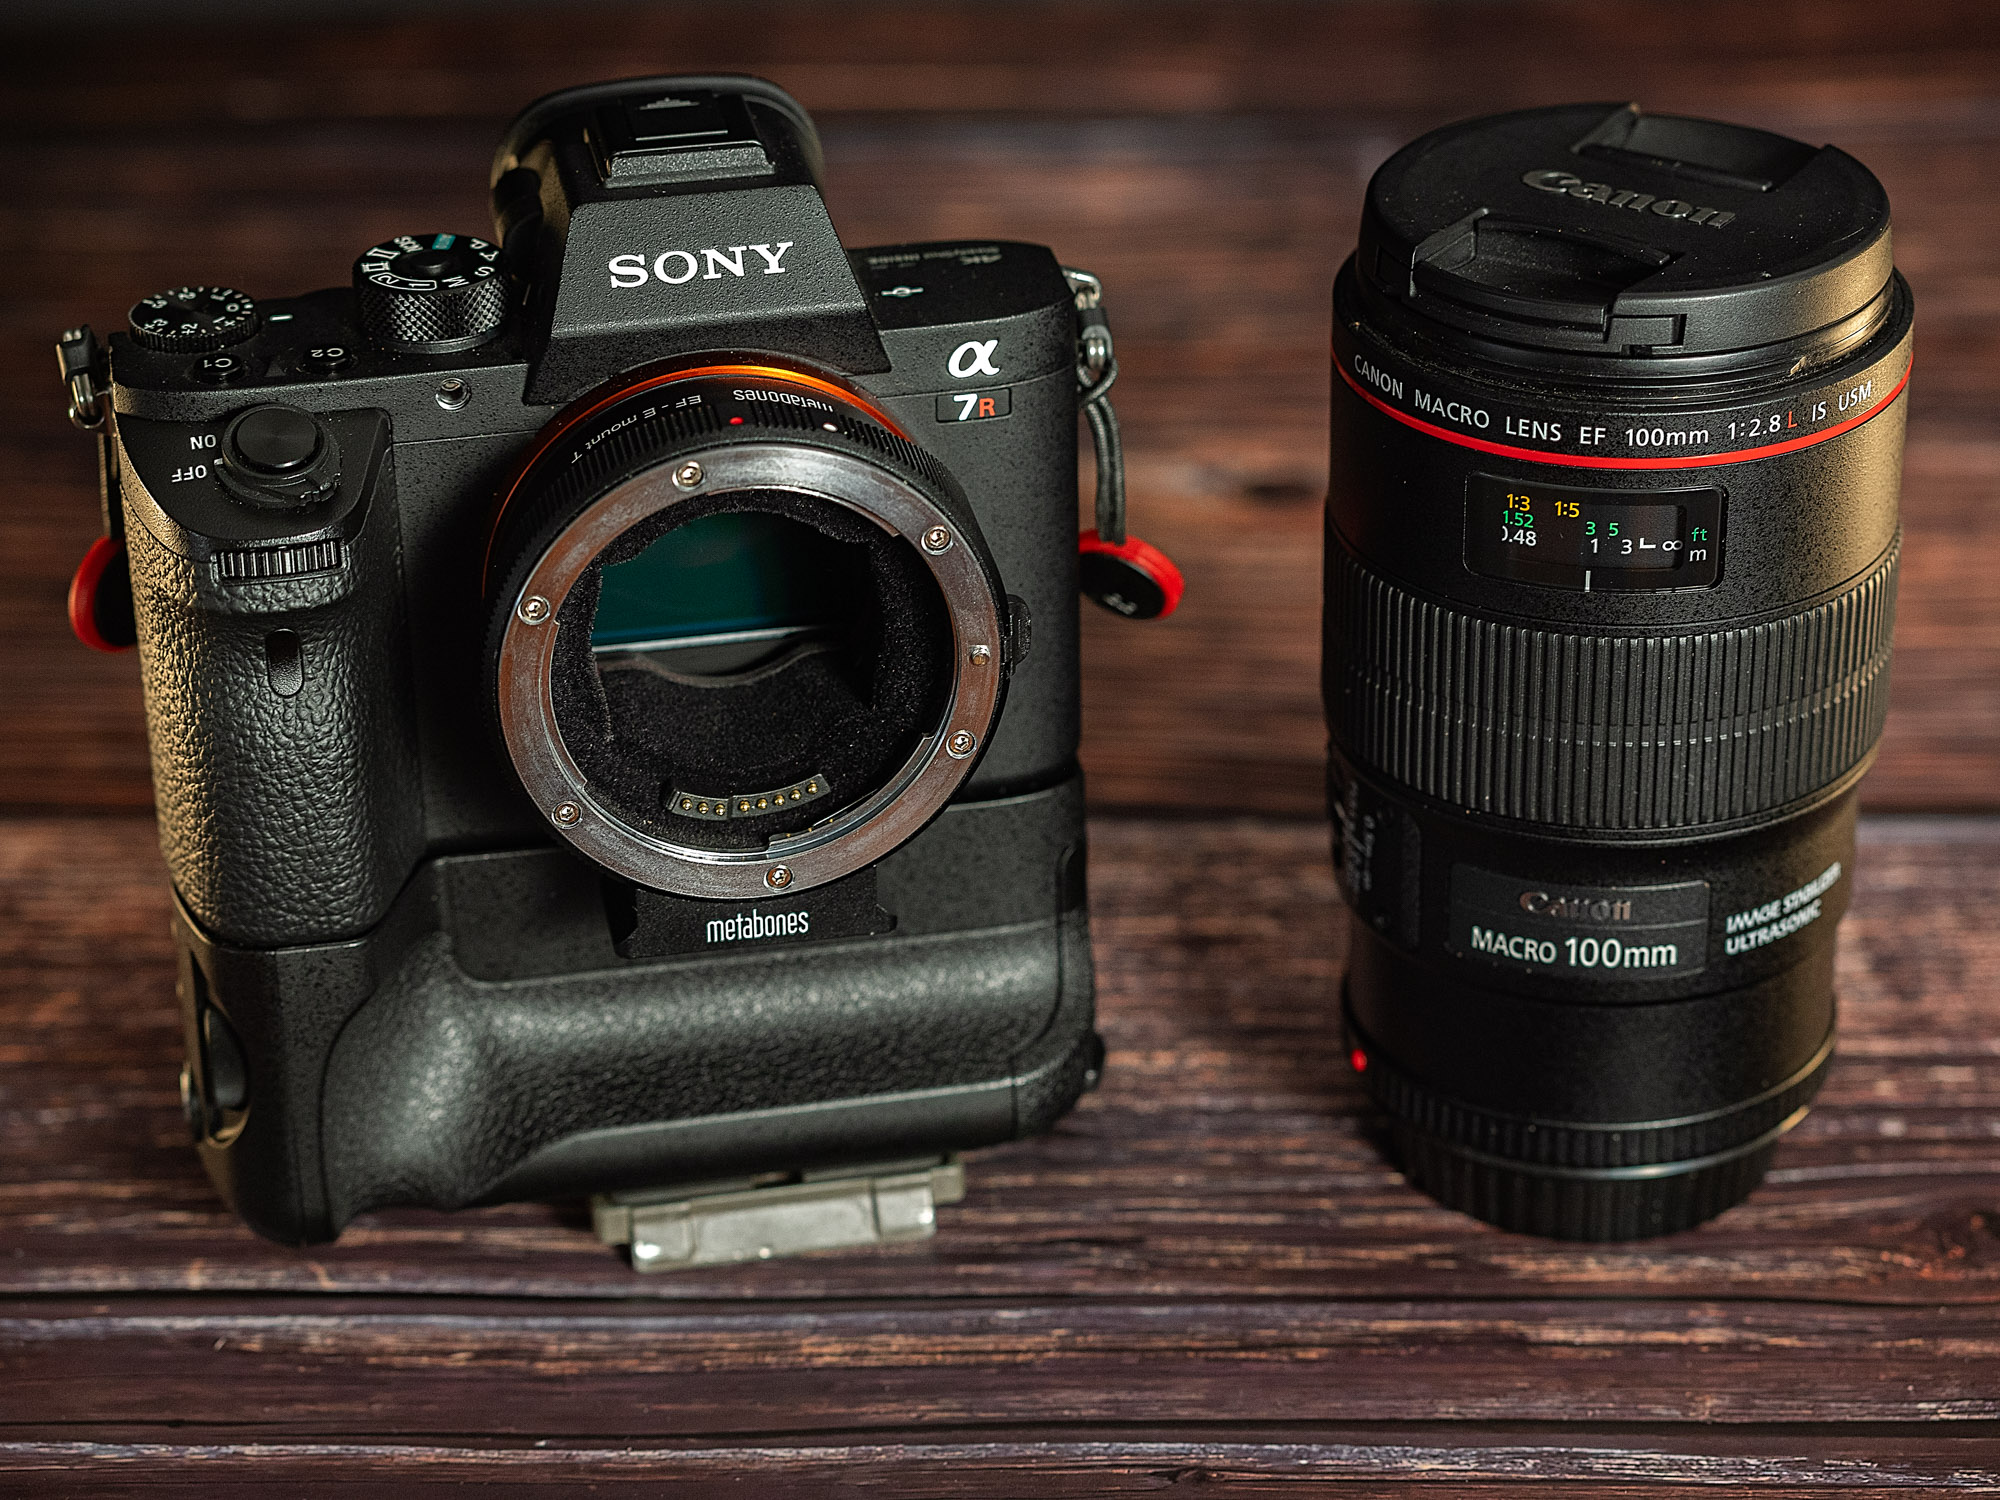
The Sony A7rii with the Metabones V Smart Adapter and the Canon 100mm f2.8 IS L lens.

Sigma MC-11 Lens Adapter

The Sigma MC-11 adapter allows certain Sigma EF lenses to be used on Sony E mount bodies while retaining autofocus and image stabilisation.

This is the second part of a series of articles on upgrading camera equipment on a budget. Part 1 can be found here.

I’ll deal with the Sigma adapter first because I got that to work with just one lens – my Sigma 150-600mm F5-6.3 DG OS HSM Lens – Contemporary lens. 


TLDR


Construction

The Sigma MC-11 comes in two different versions:

  • Sigma SA mount to Sony FE
  • Canon EF mount to Sony FE

Obviously as I own Canon EF mount lenses this is about the EF version. Sigma state that their adapter is for use with their Global Vision lenses which comprises of three lens lines:

  1. Art
  2. Contemporary 
  3. Sport

As of the time of writing there are 44 Sigma lenses that are compatible with the adapter and these allow users to access all the auto focus modes on Sony E mount cameras. This is important to me as I want to be able to use the 150-600 for bird photography.

The Sigma 150-600mm F5-6.3 DG OS HSM Contemporary lens is one of the lenses that is compatible with the Sigma MC-11 lens adapter.


The first thing you notice when you pick up the MC-11 is that it is very solid and well made. The body is of metal construction and the lens mounts are chromium plated brass. Disappointingly there are no weather seals. On the body is a USB port behind a soft plastic flap and on the opposite side is the lens release button. Just by that is a tiny LED light which is very hard to see when it is off. The purpose of the light is to inform you about how well the lens attached will work it does this through one of four states:

  1. Constant green – the lens is compatible
  2. Flashing green – you need to update the lens firmware 
  3. Flashing orange – the adapter firmware needs updating
  4. No light – the lens isn’t compatible 

The light only comes on for 2-3 seconds when you switch on the camera.

Speaking of firmware updates to do this you will need to download the Sigma Optimization Pro software from Sigma’s website. To update the adapter just needs a USB cable, for lenses you will need the Sigma Dock UD-01. I find it somewhat frustrating that you can’t update the lens firmware through the MC-11 adapter. The dock isn’t expensive to buy although in Australia the retail price varies between $80 to $120 AUD so it pays to shop around. Luckily there seem to be plenty for sale second hand on EBay for about $40. I ended up updating both the adapter and lens firmware and the whole process was very straightforward.


In Use

Before I updated the firmware I found that there was difficulty in acquiring focus when shooting in low light, backlit situations and with subjects in undergrowth. Once upgraded things worked a lot better. I experimented with the settings on the camera by setting up two custom modes. Custom mode 1 was in shutter priority with the shutter speed set at 1/500 sec, Auto ISO, Auto Focus Continuous, Lock on AF with a medium sized flexible spot and the frame rate was set to low speed continuous. Custom mode 2 was in shutter priority with the shutter speed set at 1/2000, Auto ISO, Auto Focus Continuous, lock on flexible spot large and high speed continuous drive. Both modes had the following parameters set:

  • Phase Detect Area – on
  • Pre AF – off
  • Priority set in AFC – balanced emphasis 
  • AF with shutter – on
  • AF drive speed – fast
  • AF tracking sensitivity – high

With birds in trees that weren’t moving too quickly I found that I was getting a hit rate of around 90%. With more erratic moving birds my hit rate dropped to 36% when I was using my custom mode 2. When I switched to mode 1 the hit rate improved to 85%. Photographing my dog running towards me both custom modes acquired focus very quickly, but the results from custom mode two weren’t very consistent fluctuating between 60 to 85%. In custom mode 1 I got very consistent results at 85%. When shooting birds in flight I found that I didn’t get a single shot with critical focus which was disappointing to say the least.


The video performance of the A7r II and the Sigma 150-600 was surprising. Shooting wide open at the short end AF performance is good, it is quick and confident. At the long end the AF is a bit slower but it does acquire focus and lock on. What is very apparent is the noise of the lens motor, it is quite loud and would mean that any sound would have to be recorded using an external microphone.


Conclusion


The Sigma MC-11 adapter allows certain Sigma EF lenses to be used on Sony E mount bodies while retaining autofocus and image stabilisation.

In practice it would certainly seem that shooting at higher frame rates the autofocus struggles to keep up and dropping the frame rate improves the hit rate considerably. Whether using this combination is a good idea depends very much on your expectations and what you want. If you want the performance of a Sony native lens then you are better off getting that. But if you already have the lens and want to change from a Canon DSLR to a Sony full frame mirrorless camera and you are shooting birds in trees, scrub, on the ground or on water then this works very well. For birds in flight you’ll want either a full Sony set up or a full Canon set up.


Sample Images
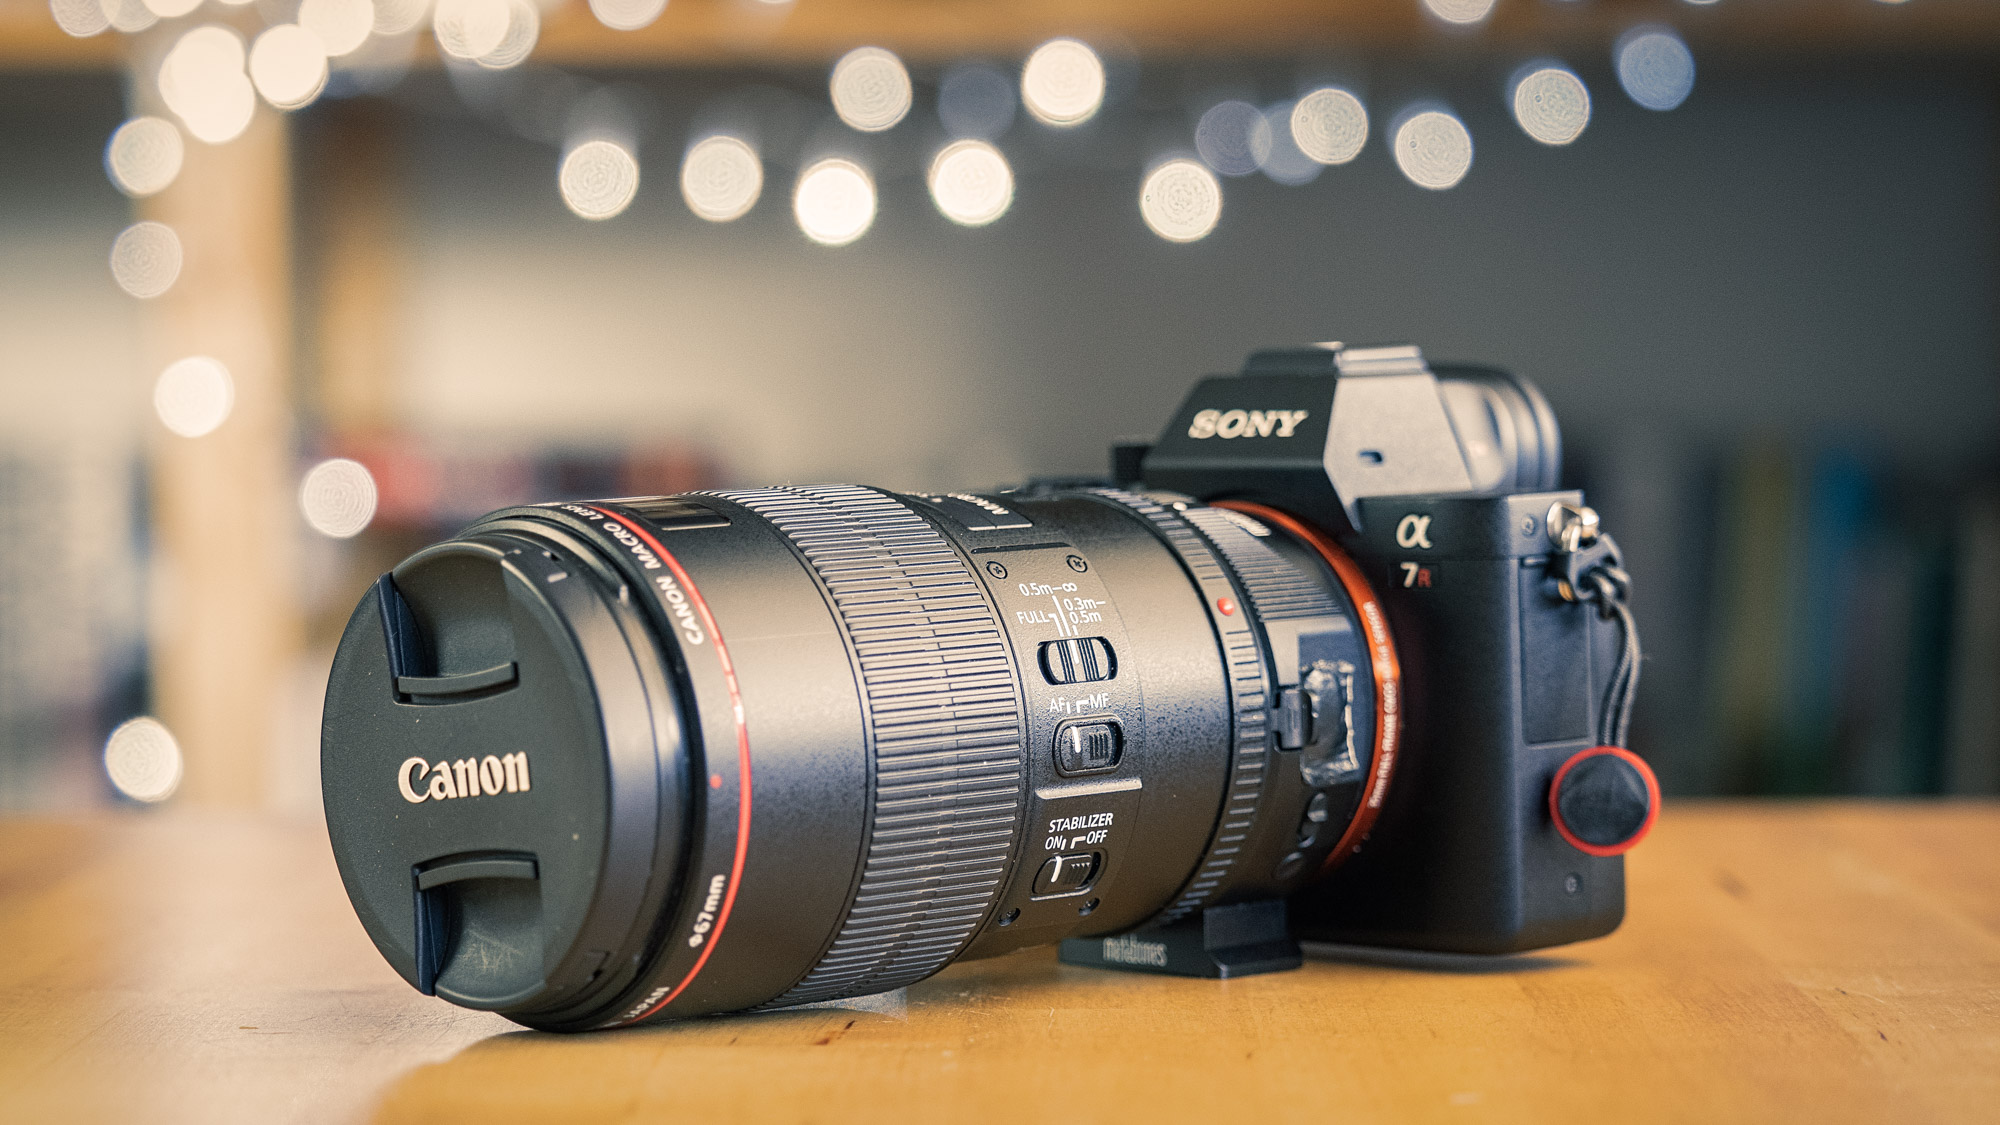


Menekedang called the Red-capped Robin (Petroica goodenovii) by white colonialists.


Melkullya called the Yellow-billed Spoonbill (Platalea flavipes) by white colonialists.


Menekedang called the Red-capped Robin (Petroica goodenovii) by white colonialists.


Red Wattle bird (Anthochaera carunculata subsp. woodwardi) known to the Nyoongar people as wodjalok. Yellagonga Regional Park.


Three wise corellas – hear no evil, see no evil, and sorry my mouth is full. Yellagona Regional Park, Western Australia.


Manyt or the Western Corella (Cacatua pastinator subsp. derbyi). Yellagona Regional Park, Western Australia.


Dillabirt, known to non Nyoonga people as the Magpie-lark (Grallina cyanoleuca). Yellagonga Regional Park.


Melkullya or Yellow-billed Spoonbills, Platalea flavipes, amongst the paperbarks on Lake Joondalup in Yellangonga Regional Park.


Melkullya or Yellow-billed Spoonbills, Platalea flavipes, feeding at Lake Joondalup in Yellangonga Regional Park.


The eponymous Willie Wagtail, Rhipidura leucophrys leucophrys. Yellagonga Regional Park, Western Australia.


Despite their small size the Silvereye, Zosterops lateralis, has an incredibly loud birdsong. Yellagonga Regional Park, Western Australia.


An Australian Pelican (Pelecanus conspicillatus) feeding on Lake Joondalup in Yellagonga Regional Park.


A white-faced heron looks out from its tree top perch over Horse Swamp. Whiteman Park, Western Australia.


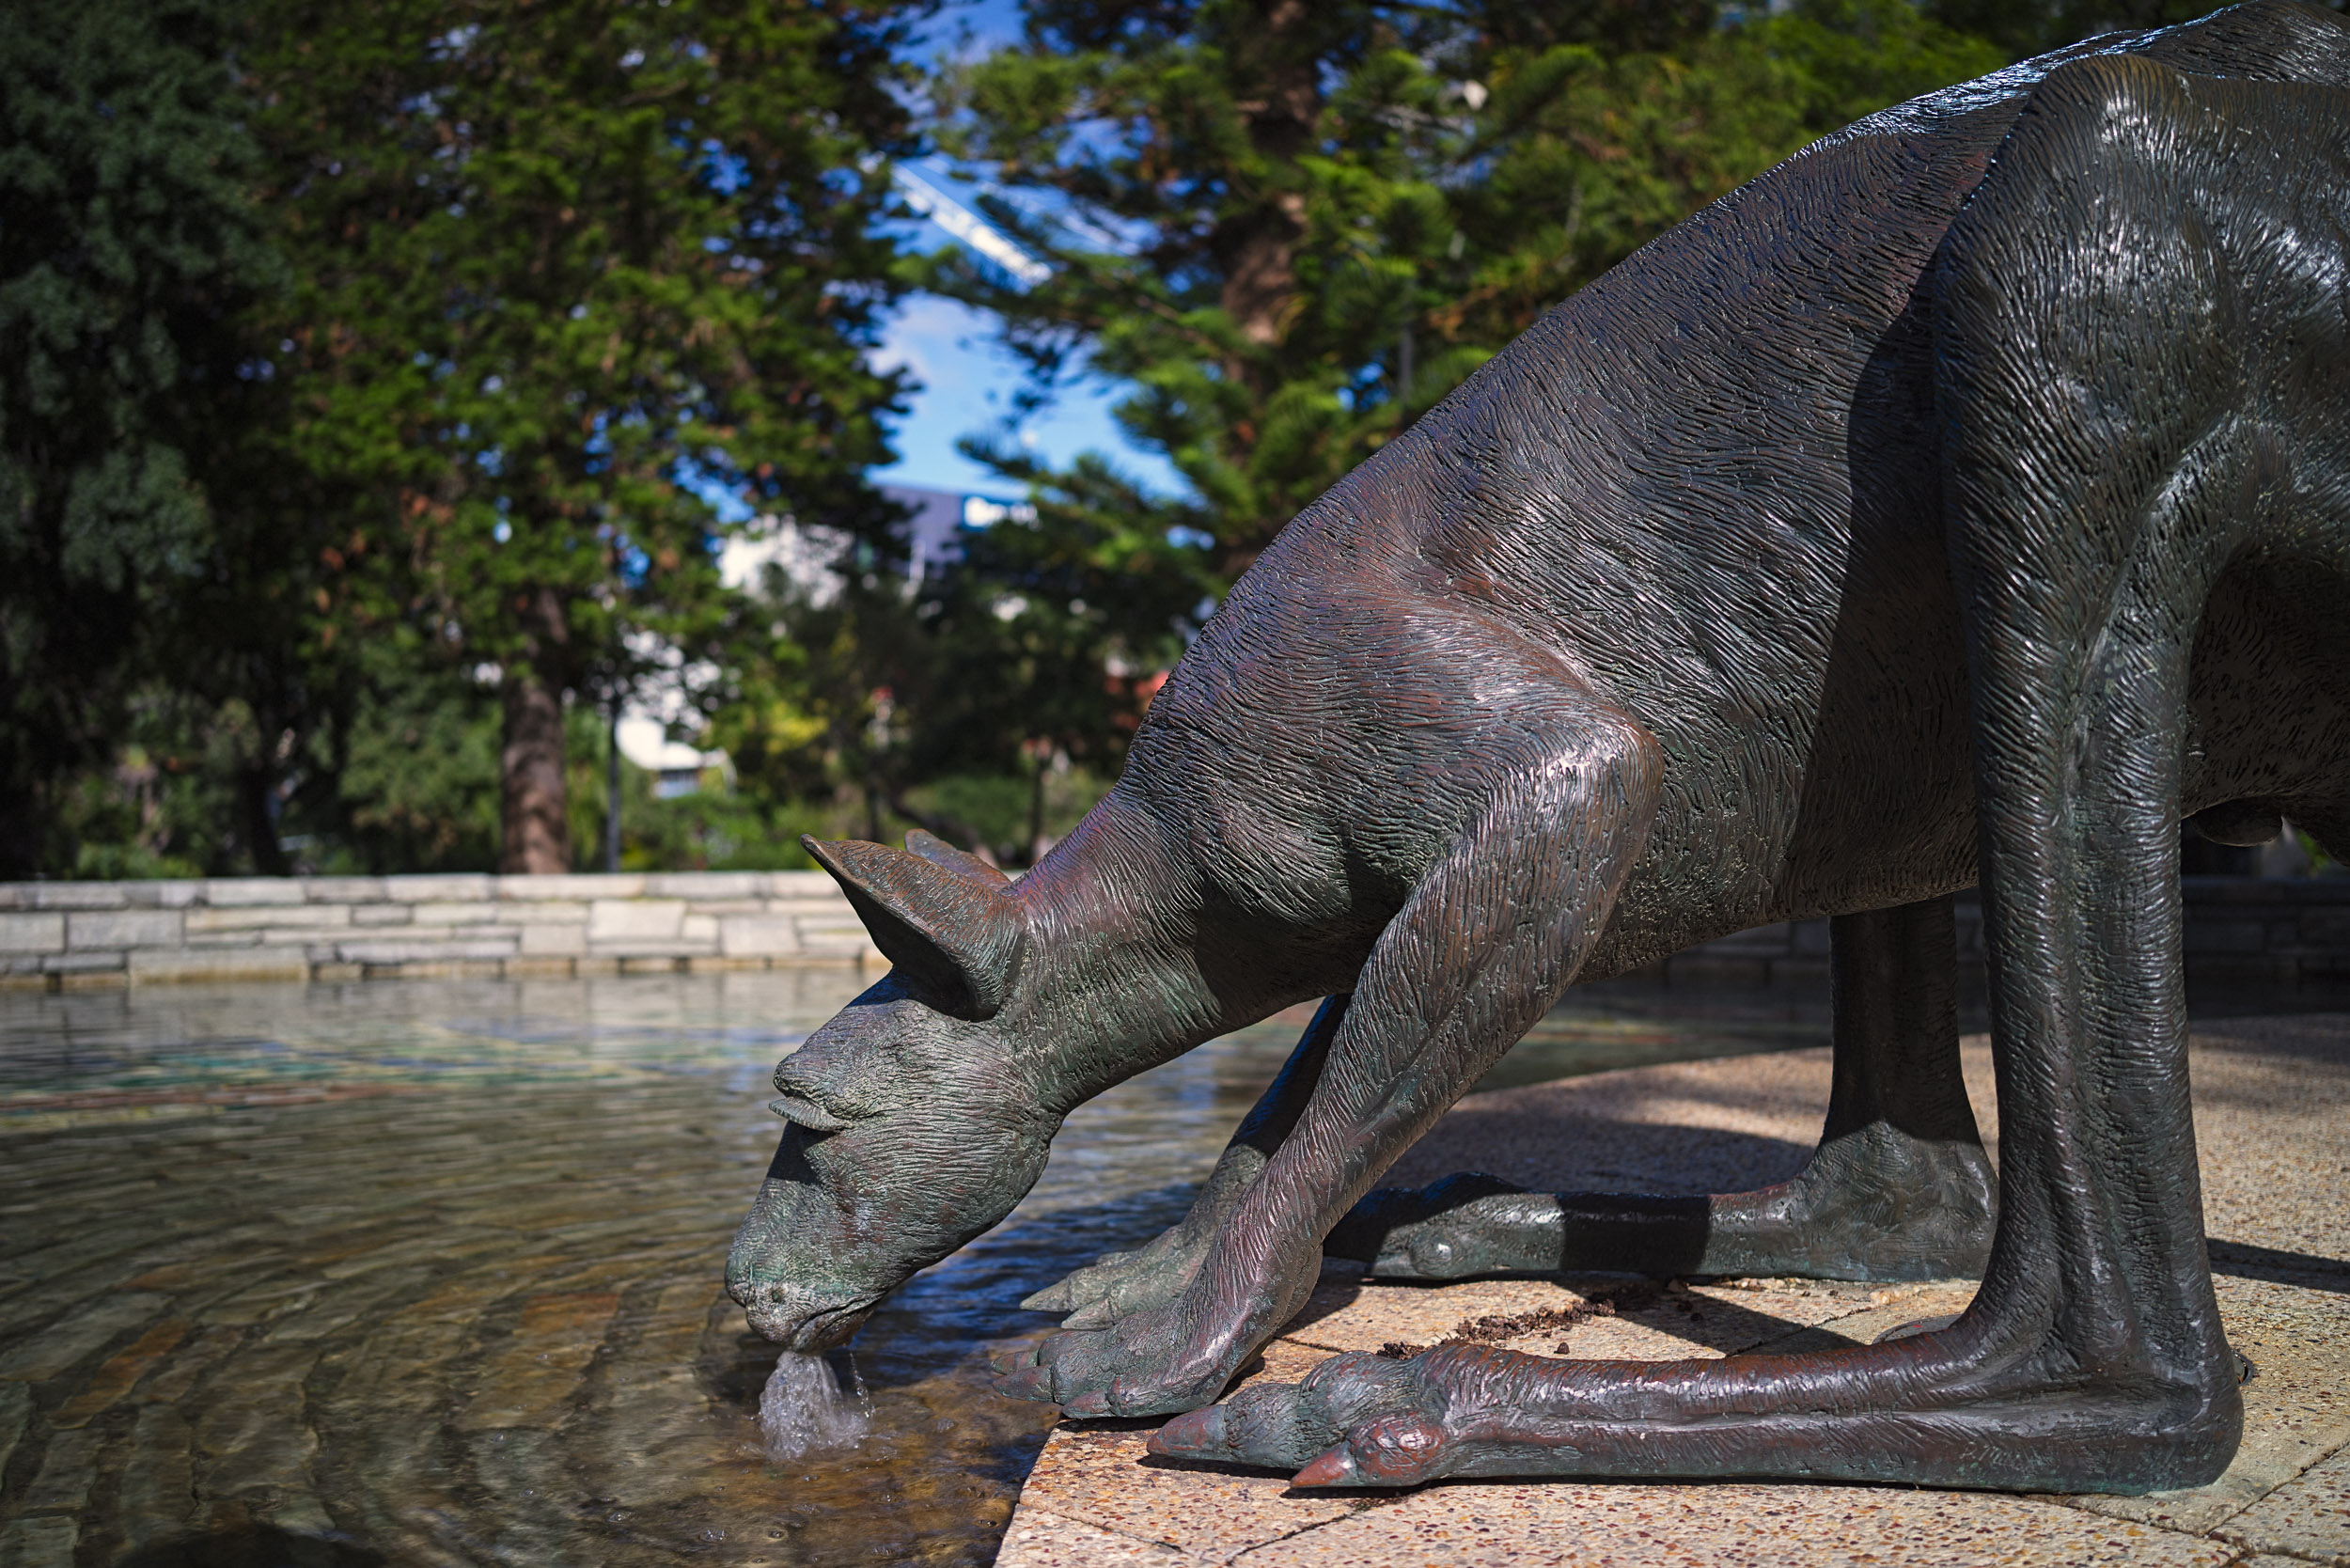
Western Grey Kangaroo, macropus fuliginosus, Whiteman Park, Western Australia.

Adapt Or…

…go with out.

Lately I’ve been reading a lot of how photography has become really expensive. Sony released the A1 at $10,000 AUD, Canon are due to release the R3 at the same amount. As for lenses well the latest fast primes are priced in the stratosphere. But here’s the news – photography is very expensive if you treat it as technological proliferation. If you insist on having the latest and greatest you are going to have to pay. But do you really need the latest and greatest? Do you honestly need 30 fps shutter speed? 8K video? 4K 10 bit 4:2:2 video at 120fps? Fifteen stop dynamic range? Only you can say what you need, but I’m guessing that like 90% of photography enthusiasts you don’t. I know I don’t. Let’s face it the greatest photos of the Twentieth Century were taken with basic equipment. The vast majority on cameras that didn’t have autofocus or built in metering.


The back bone of my professional kit has been full frame Canon DSLRs since the launch of the original Canon 5d in 2005. Here is my 6d with my lenses.


Maybe you’re a bit like me. You’ve been doing the photography thing for quite a while. You were a happy SLR user in the days of film and when the digital revolution took place you patiently waited for the affordable DSLRs to arrive on the market and you made the switch. You bought into a system, acquired some nice lenses and upgraded the camera body as needed. But now something has come along that threatens that. That something is the advent of the mirrorless camera. These new wonder cameras are technological marvels with their WYSIWYG viewfinders and their information overlays, the incredible image stabilisation systems, the convergence with video, and the list of features goes on and on. The fly in the ointment is that to achieve this the manufacturers abandoned their lens mounts and developed new ones that could take advantage of the lack of the mirror box. This is where the expense comes in because to make the switch you have to spend big on not only a new camera body but also on new lenses. When I went digital I went Canon and over the years I ended up with a modest kit based around an EOS 6d, a 24-70 f4, a 70-200 f2.8, a 100mm f2.8 macro, a 50mm f1.8, and a Sigma 150-600mm. To get the equivalent kit based around an R6 body would cost me a few dollars under $20,000. That is a phenomenal amount of money. My wallet puckers up just thinking about it. So I looked at the more wallet friendly option of the R6, a Canon EOS-R Mount Adapter to adapt my EF lenses to the new RF mount, and a Canon RF 50mm f1.8 STM as my old 50mm f1.8 wouldn’t cope with CAF needed for video. The damage would be just under $5000 which while more wallet friendly was still more than I really wanted to spend. The other problem is that the  Canon EOS-R Mount Adapter is currently back ordered here in Australia at the time of writing with no word on when stock would become available. Bugger!


The Olympus OMD EM1 mk ii with the Olympus m.Zuiko 60mm f2.8 macro lens.


Time to reappraise the problem. As regular readers will know I went mirrorless about ten years ago with the Micro Four Thirds system and this is what does the bulk of my work. But I wanted a larger sensor and higher resolution for certain situations. A bit like when I was running Canon  35mm SLRs in conjunction with a Pentax 645n II. So m43 gives enough quality for about 80% of my needs. I wanted auto focus, 5-6 fps frame rate, in body image stabilisation, 4K video , and of course full frame. So the Canon R and RP were  immediately excluded. Then it occurred to me that if I was going to have to adapt my Canon glass to use on an R series camera why not consider adapting them to another make such as Sony. Now again regular readers will be aware that I acquired a Sony A7r with which to use my old collection of manual focus Olympus OM mount and Voigtländer M mount lenses. So perhaps going Sony was the solution. From what I read the Sony A7r was not a suitable candidate for this because of its contrast based auto focus so it was going to have to be 2nd generation cameras or later. New prices were still out of my league, but secondhand looked promising. I also found that the secondhand prices on the Metabones Canon EF to Sony E-mount T Smart Adapter (Mark V) and the Sigma MC-11  EF-Mount Lenses to Sony E mount were less than half the price of new. To keep within my $2000 AUD budget I decided to go for a Sony A7r II as I wouldn’t need to buy extra batteries as I already had loads for my A7r. So it was just a case of searching and eventually I came up trumps and found an A7r II with less than 50 shutter actuations, a Sigma and a Metabones adapter that kept me within my budget.


The Olympus OM Zuiko 35mm f2 mounted on a Sony A7r.


So did this end up a workable solution? Well I’m not going to review the A7r II as that has been done to death on the internet. But, suffice to say it gave everything I was looking for in a full frame mirrorless camera. The next two parts will look at how well the adapters worked with my lenses and the A7r II.


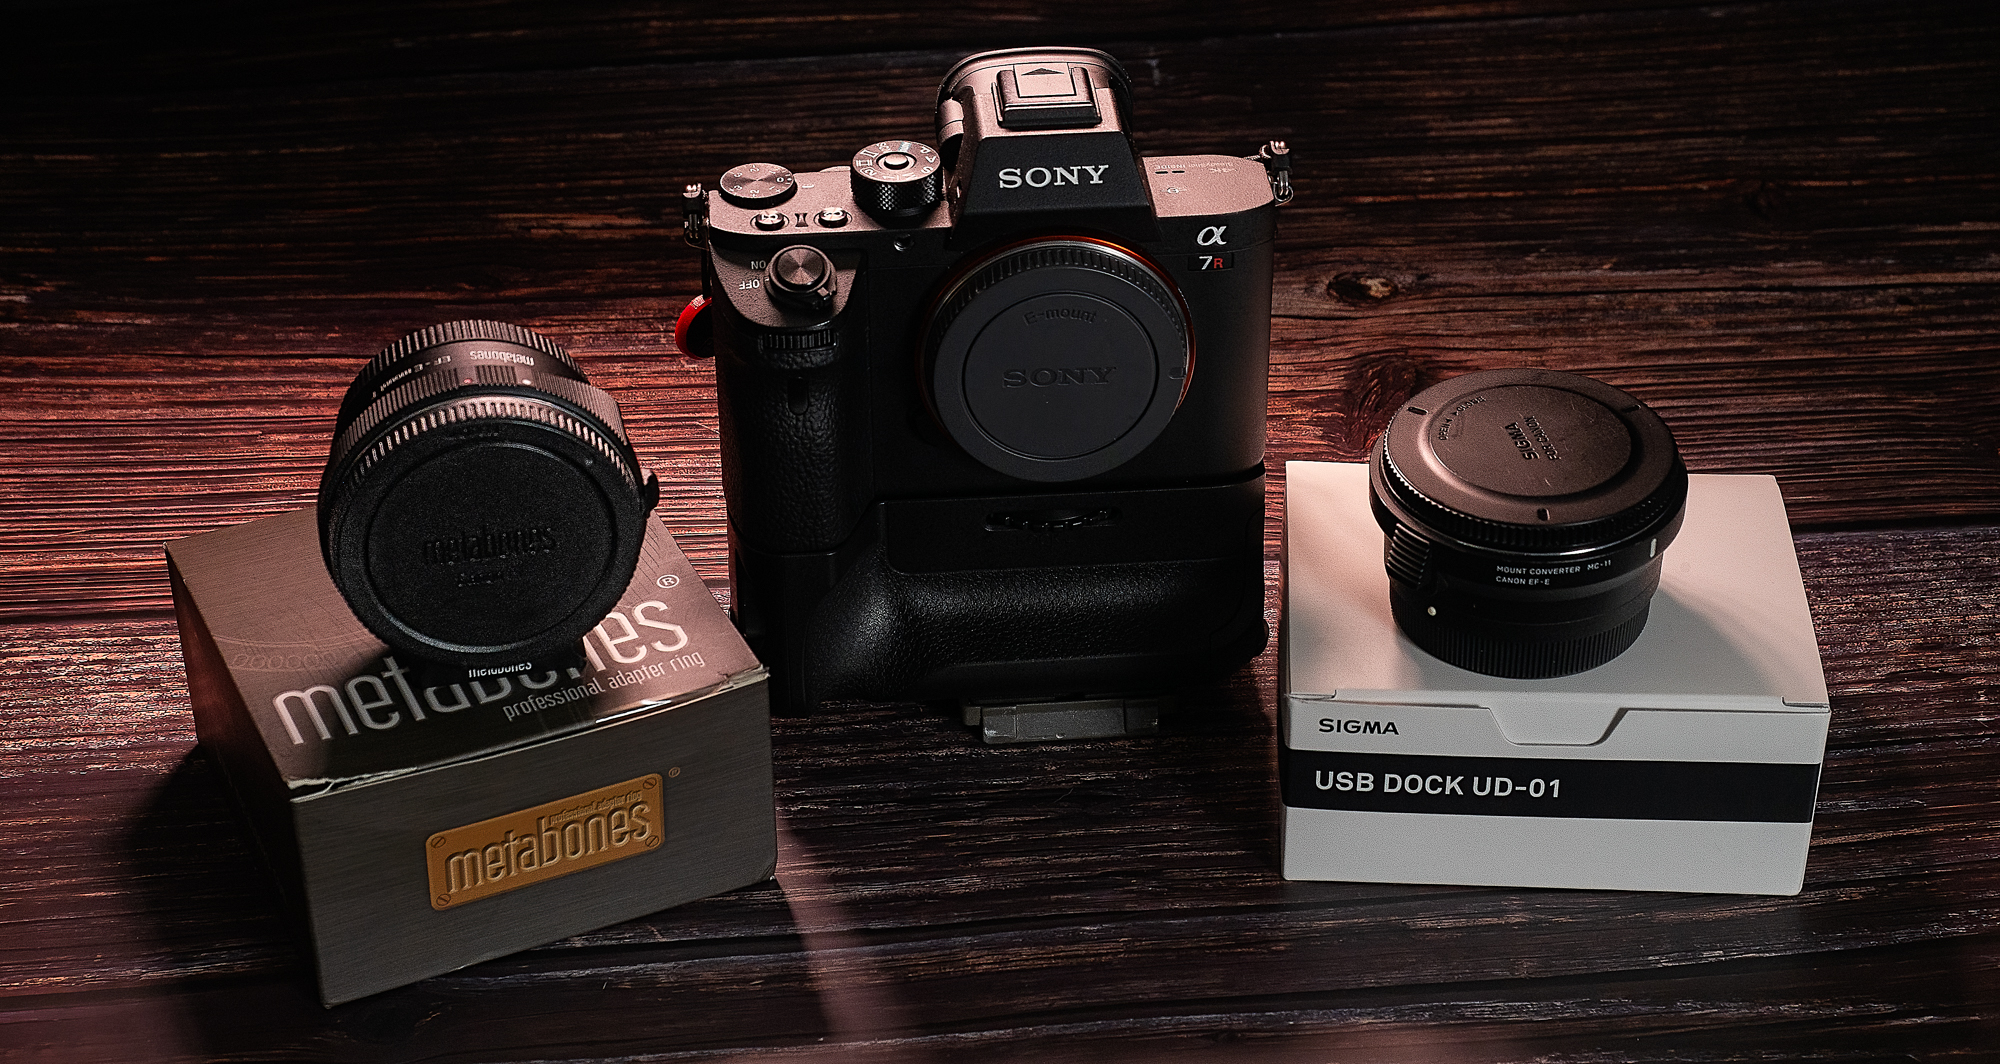
The Sony A7rii with the Sigma MC-11 and Metabobes V EF to FE lens adapters.


Mount your Canon EF lenses to your Sony A7rii using the Metabones V Smart Adapter.


Will the Sony A7rii work well with my Canon lenses? Is it time to say “Adios EOS”?

Tamron 35mm f2.8 Di III Lens

After all that talk the other day about street photography lets talk about a focal length that is synonymous with the street photography genre – the 35mm. In particular the Tamron 35mm f2.8 Di III lens.

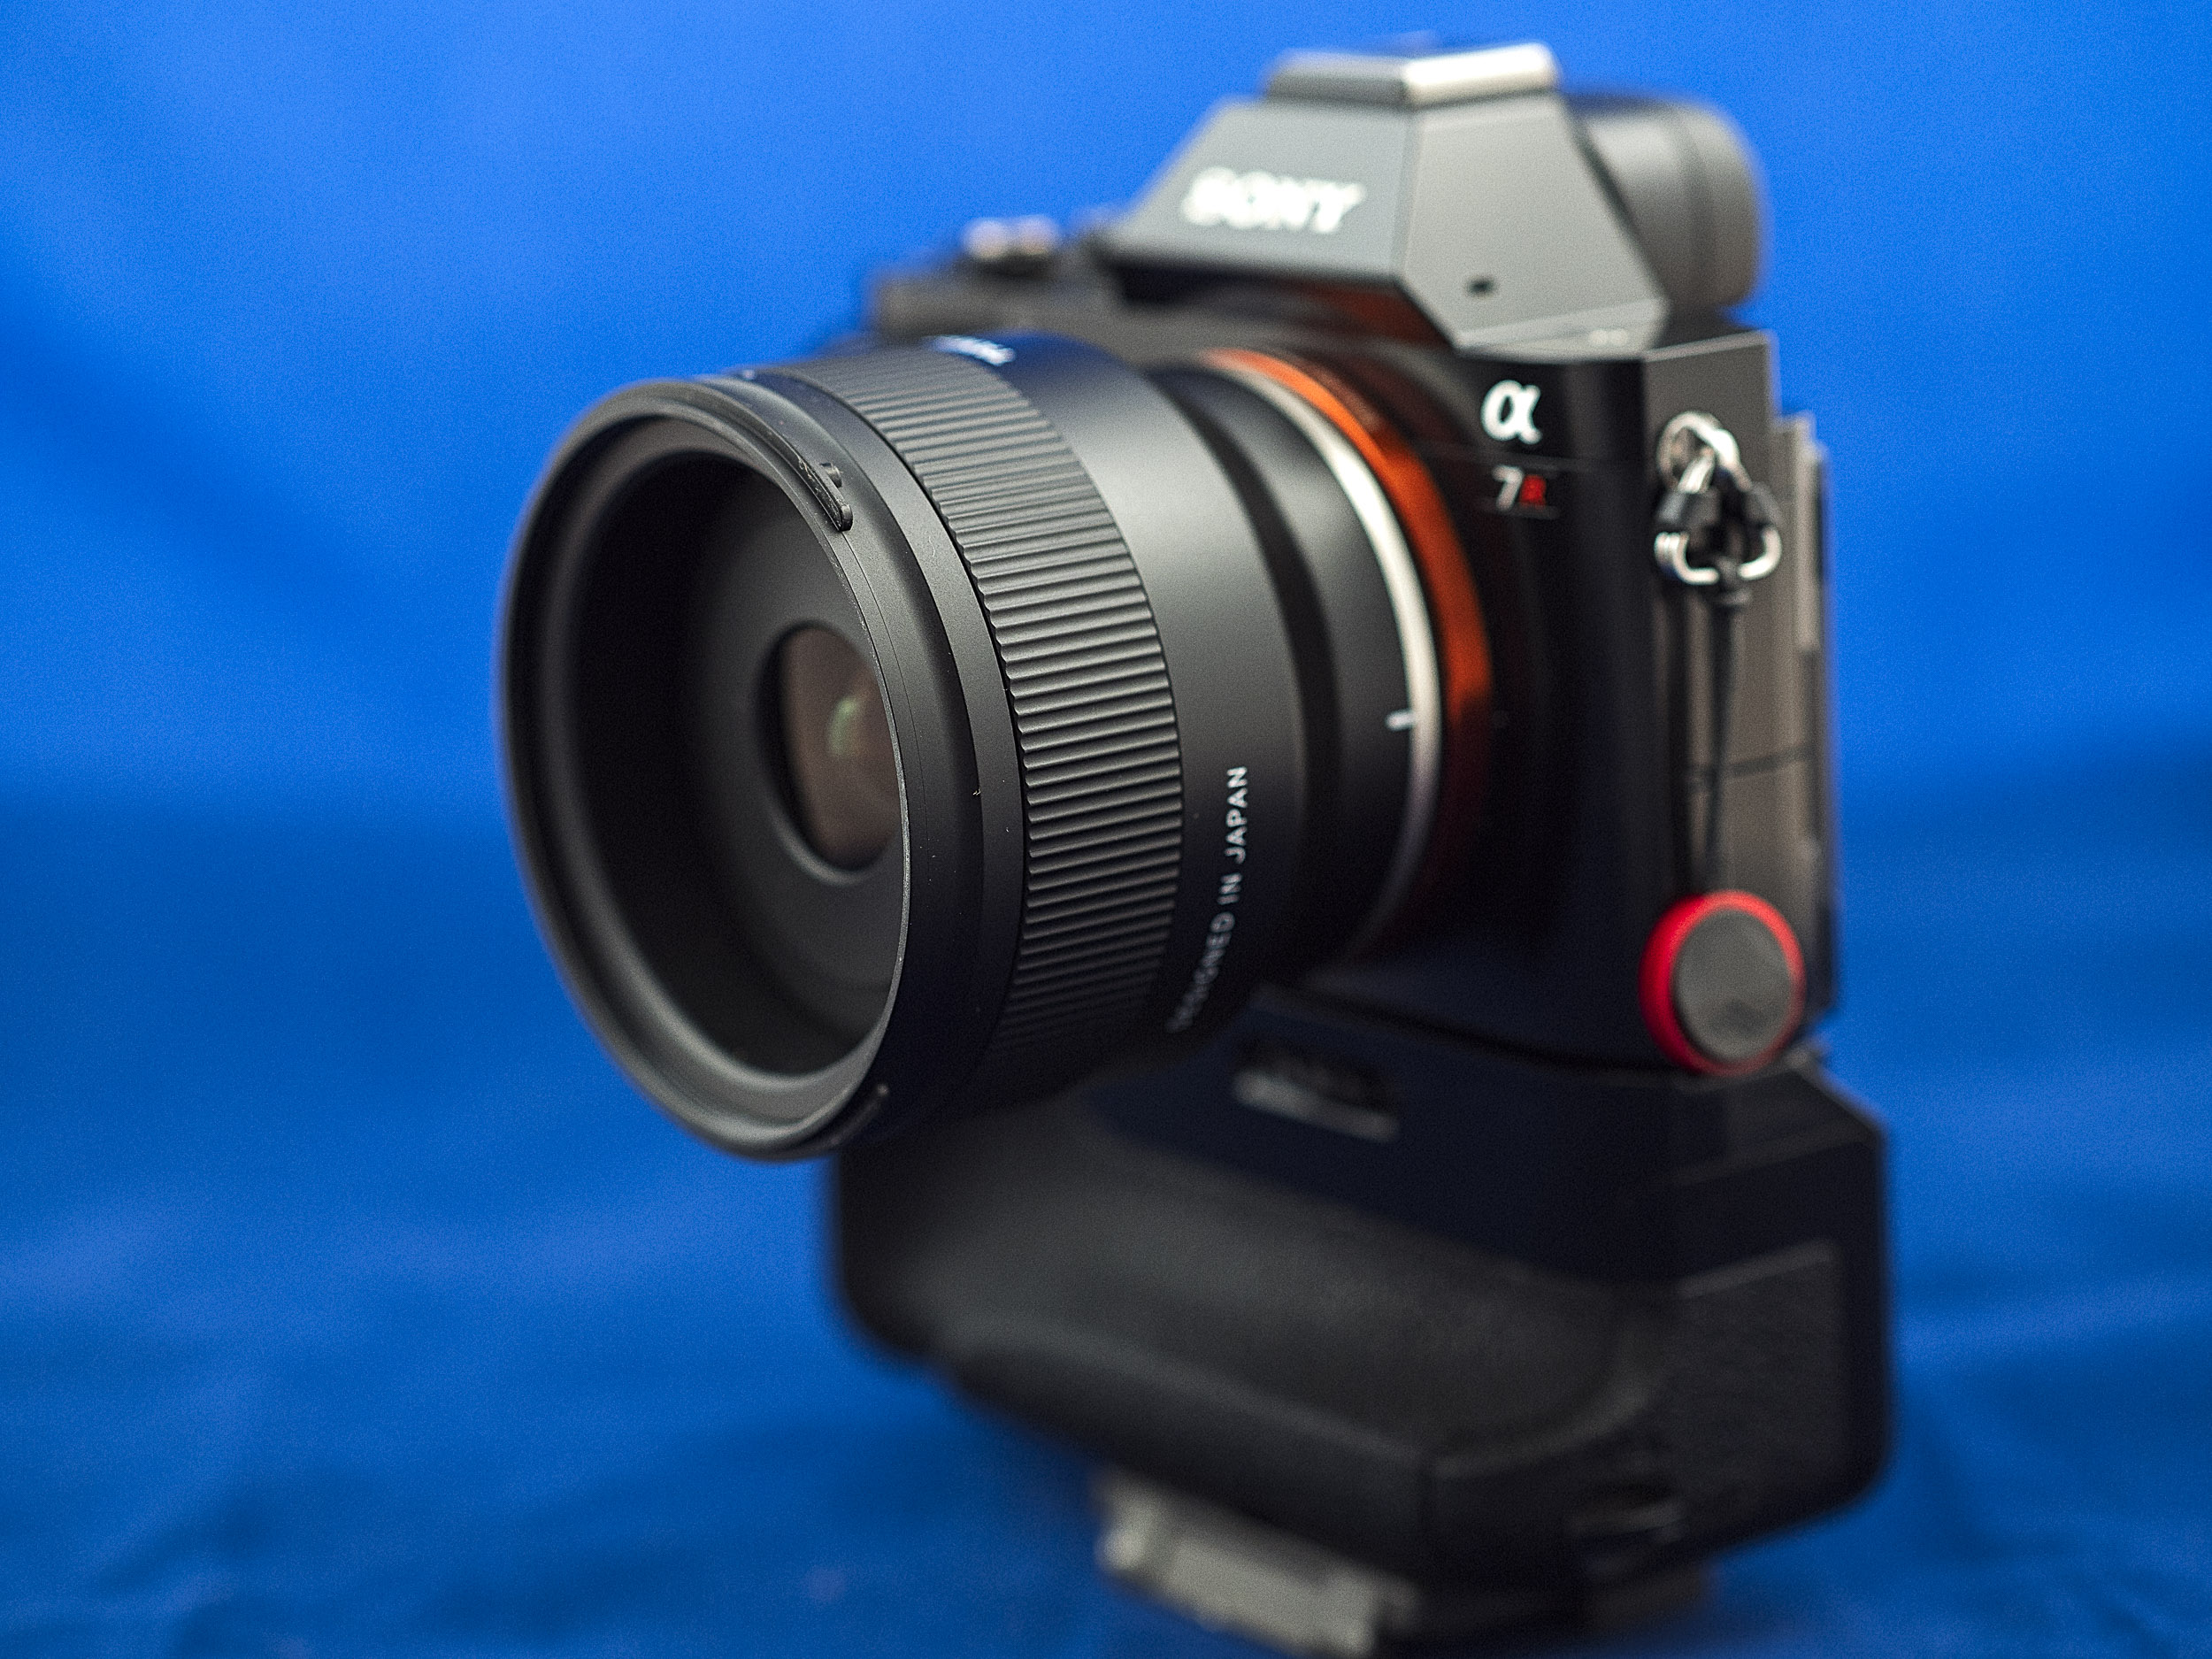
Tamron 35mm f2.8 Di III lens mounted to a Sony A7r.

TLDR


Introduction


The Tamron 35mm f2.8 lens for Sony E mount cameras was announced back in November 2019 as part of a trio of prime lenses which share the same exterior design, construction, size, filter diameter and f stop. The other lens being the 24 and 20 mm. As lenses are becoming ever faster and even larger with price tags to match it is nice to see Tamron do something significantly different. The modest apertures and price tags may put off lens snobs, but they have enabled Tamron to give good optical performance at very reasonable price of $450 AUD. To many f2.8 may be disappointing, but honestly apart from bragging rights about shallow DOF we do not honestly need ultra fast lenses as todays cameras have absolutely astounding high ISO performance. When I started photography you needed fast lenses because film speeds were slow. I regularly shot ISO 25, 50 and 64 film emulsions and I wanted to do it handheld not on a tripod. Now shooting full frame digital at ISO 6400 gives the same image quality as as shooting ISO 64 film stock.


Specifications

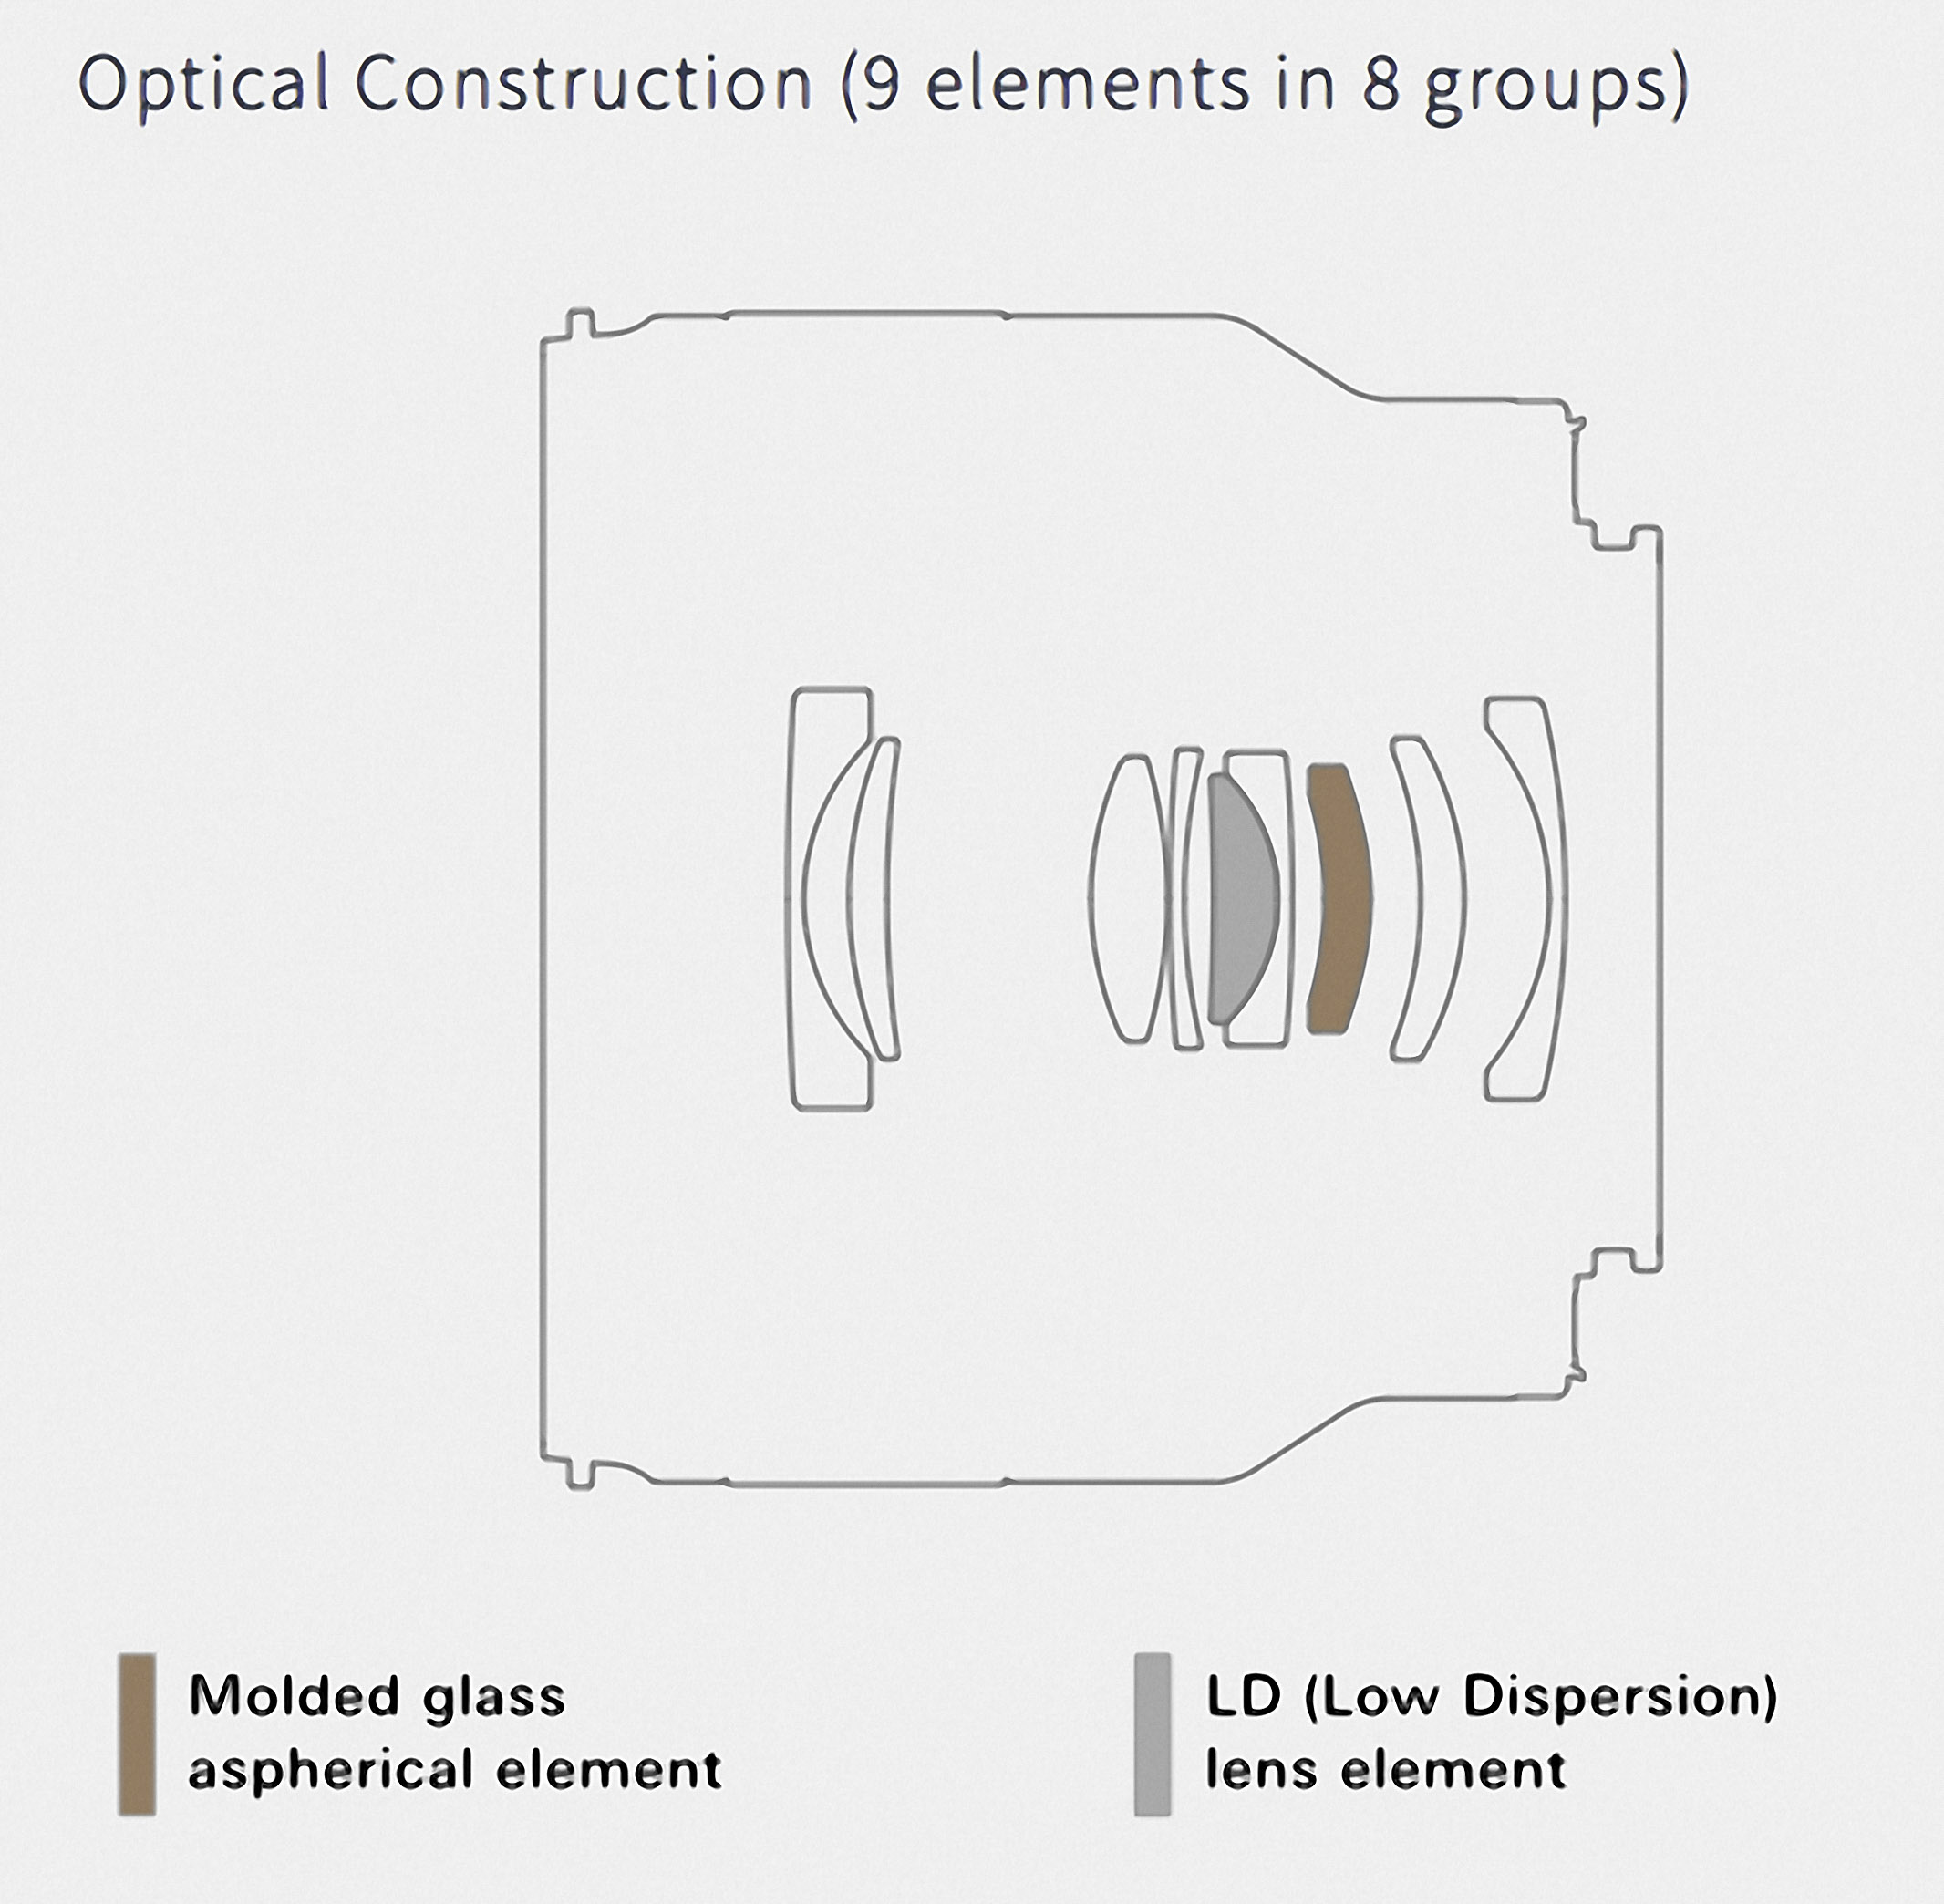
A schematic of the lens construction.


Focal Length 35mm
Maximum Aperture F/2.8
Angle of View (diagonal) 63° 26′ (for full-frame mirrorless format)
Optical Construction 9 elements in 8 groups with 1 low dispersion element and 1 moulded glass aspherical element
Minimum Object Distance 0.15m (5.9 in)
Maximum Magnification Ratio 1:2
Filter Size Φ67mm
Maximum Diameter Φ73mm
Length* 64mm (2.5 in)
Weight 210g (7.4 oz)
Diaphragm Blade Number 7 (circular diaphragm) The circular diaphragm stays almost perfectly circular up to two stops down from maximum aperture.
Minimum Aperture F/22
Standard Accessories Flower-shaped hood, Lens caps
Compatible Mounts Sony E-mount


Golden Orb-Weaving Spider, Nephila edulis. Despite its size and their massive webs they are harmless to humans. Yellagonga Regional Park, Western Australia. The 1:2 magnification of the Tamron 35mm f2.8 makes this sort of photography a breeze.


For me the interesting aspect of this lens and indeed of its siblings is the cminimum focusing distance and it’s ability to shoot half life size. For me this makes them very suitable to creative macro and close up work. It’s not what you’d use to photography small critters as the lens has to be very close to the subject and will scare them off. For product shots, still life and another form of table shot photography it is a very interesting choice.

With a close focusing distance of just 15cm and a magnification ratio of 1:2 the Tamron 35mm f2.8 Di III is very suited to product photography.

Build Quality

In terms of build quality the Tamron 35mm the internet has largely been critical of it. The body is made out of some form of engineering plastic which you’d think had been manufactured by Tupperware judging by a lot of the reactions. Comparing this to recent Sigma lenses and Canon L lenses there is very little to distinguish the Tamron from the others. The only difference I can find without some sort of destructive testing is that the Tamron has a slightly more “satin” finish than the more “mat” of the Canons and Sigmas. The lens mount appears to be chrome plated brass which is nice, and there is an “o” ring which provides some semblance of sealing from the elements at the mount. There is no other weather sealing so I would say the lens isn’t really weather sealed at all despite Tamron’s claims. Tamron isn’t alone in this and I think it is high time the industry took a leaf out of Olympus’s book and actually stated to what level their products are sealed and give an IPX rating. Anything else is just weasley marketing BS as the majority of the camera and lens manufacturers state their products are weather sealed but won’t cover water water ingress under their warranties.  

The metal lens mount as a gasket to provide some weather sealing.

The lens is larger than other 35mm lenses of similar specifications and feels quite light in the hand, but it doesn’t feel cheap. It feels quite sturdy and well made. On the lens barrel there is only a ribbed focusing ring which is of the focus by wire type which means there is little chance of getting repeatable focus pulls using it.A the front of the lens the front lens element is well recessed and while the lens doesn’t focus internally it extends within that recess so it does not protrude beyond the front of the lens barrel. Like all Tamron’s mirrorless range so far the 35mm f2.8 has a 67mm filter thread. Tamron thoughtfully include a lens hood with the lens. Other manufacturers please take note – if Tamron can include a lens hood with its budget lenses there no reason why you can’t. I’m looking at Olympus and Canon here. The lens hood warrants some discussion here as it is quite an interesting design. It is not the conventional bucket or petal shape. Instead it is like a plastic blank that has had a rectangular hole cut in the front and it is very effective at preventing flare and would also provide a degree of protection for the front element. The hood is threaded to take 67mm filters which means that you don’t have to remove it if you want to use a polarising filter. Somebody at Tamron has been doing some thinking. The hood bayonets into place.

The front lens element is well recessed.

Optical Performance

The Tamron 35mm f2.8 has built in lens profiles that are applied to jpgs and RAW files if so selected in the camera’s menu. I’ve opened the files in both Lightroom with the profiles switched on and then in RawTherapee with no profiles. 

Click on the chart to see larger.

In terms of sharpness well at f2.8 at the centre of the image the lens is nicely sharp and contrasty. At f4 the it reaches its best performance and stays there to f11. At the edges wide open it isn’t quite as sharp as the centre, but by f5.6 the edges are as good as the centre. The old adage of stoping down two stops from wide open to achieve optimum performance certainly holds true of this lens. By f16 the image starts to soften as diffraction rears its ugly head.

In terms of optical aberrations well once the lens profile is switched off there is very slight evidence of pincushion distortion and vignetting. At f5.6 the vignetting disappears. A small amount of lateral chromatic aberration can be seen, but it is so slight I had to magnify the images to 300% to see them. Easily fixed in Lightroom. With a maximum aperture of f2.8 longitudinal chromatic aberration is not a problem. It is really fast apertures of f1.2 and f1.4 that really cause problems with this.

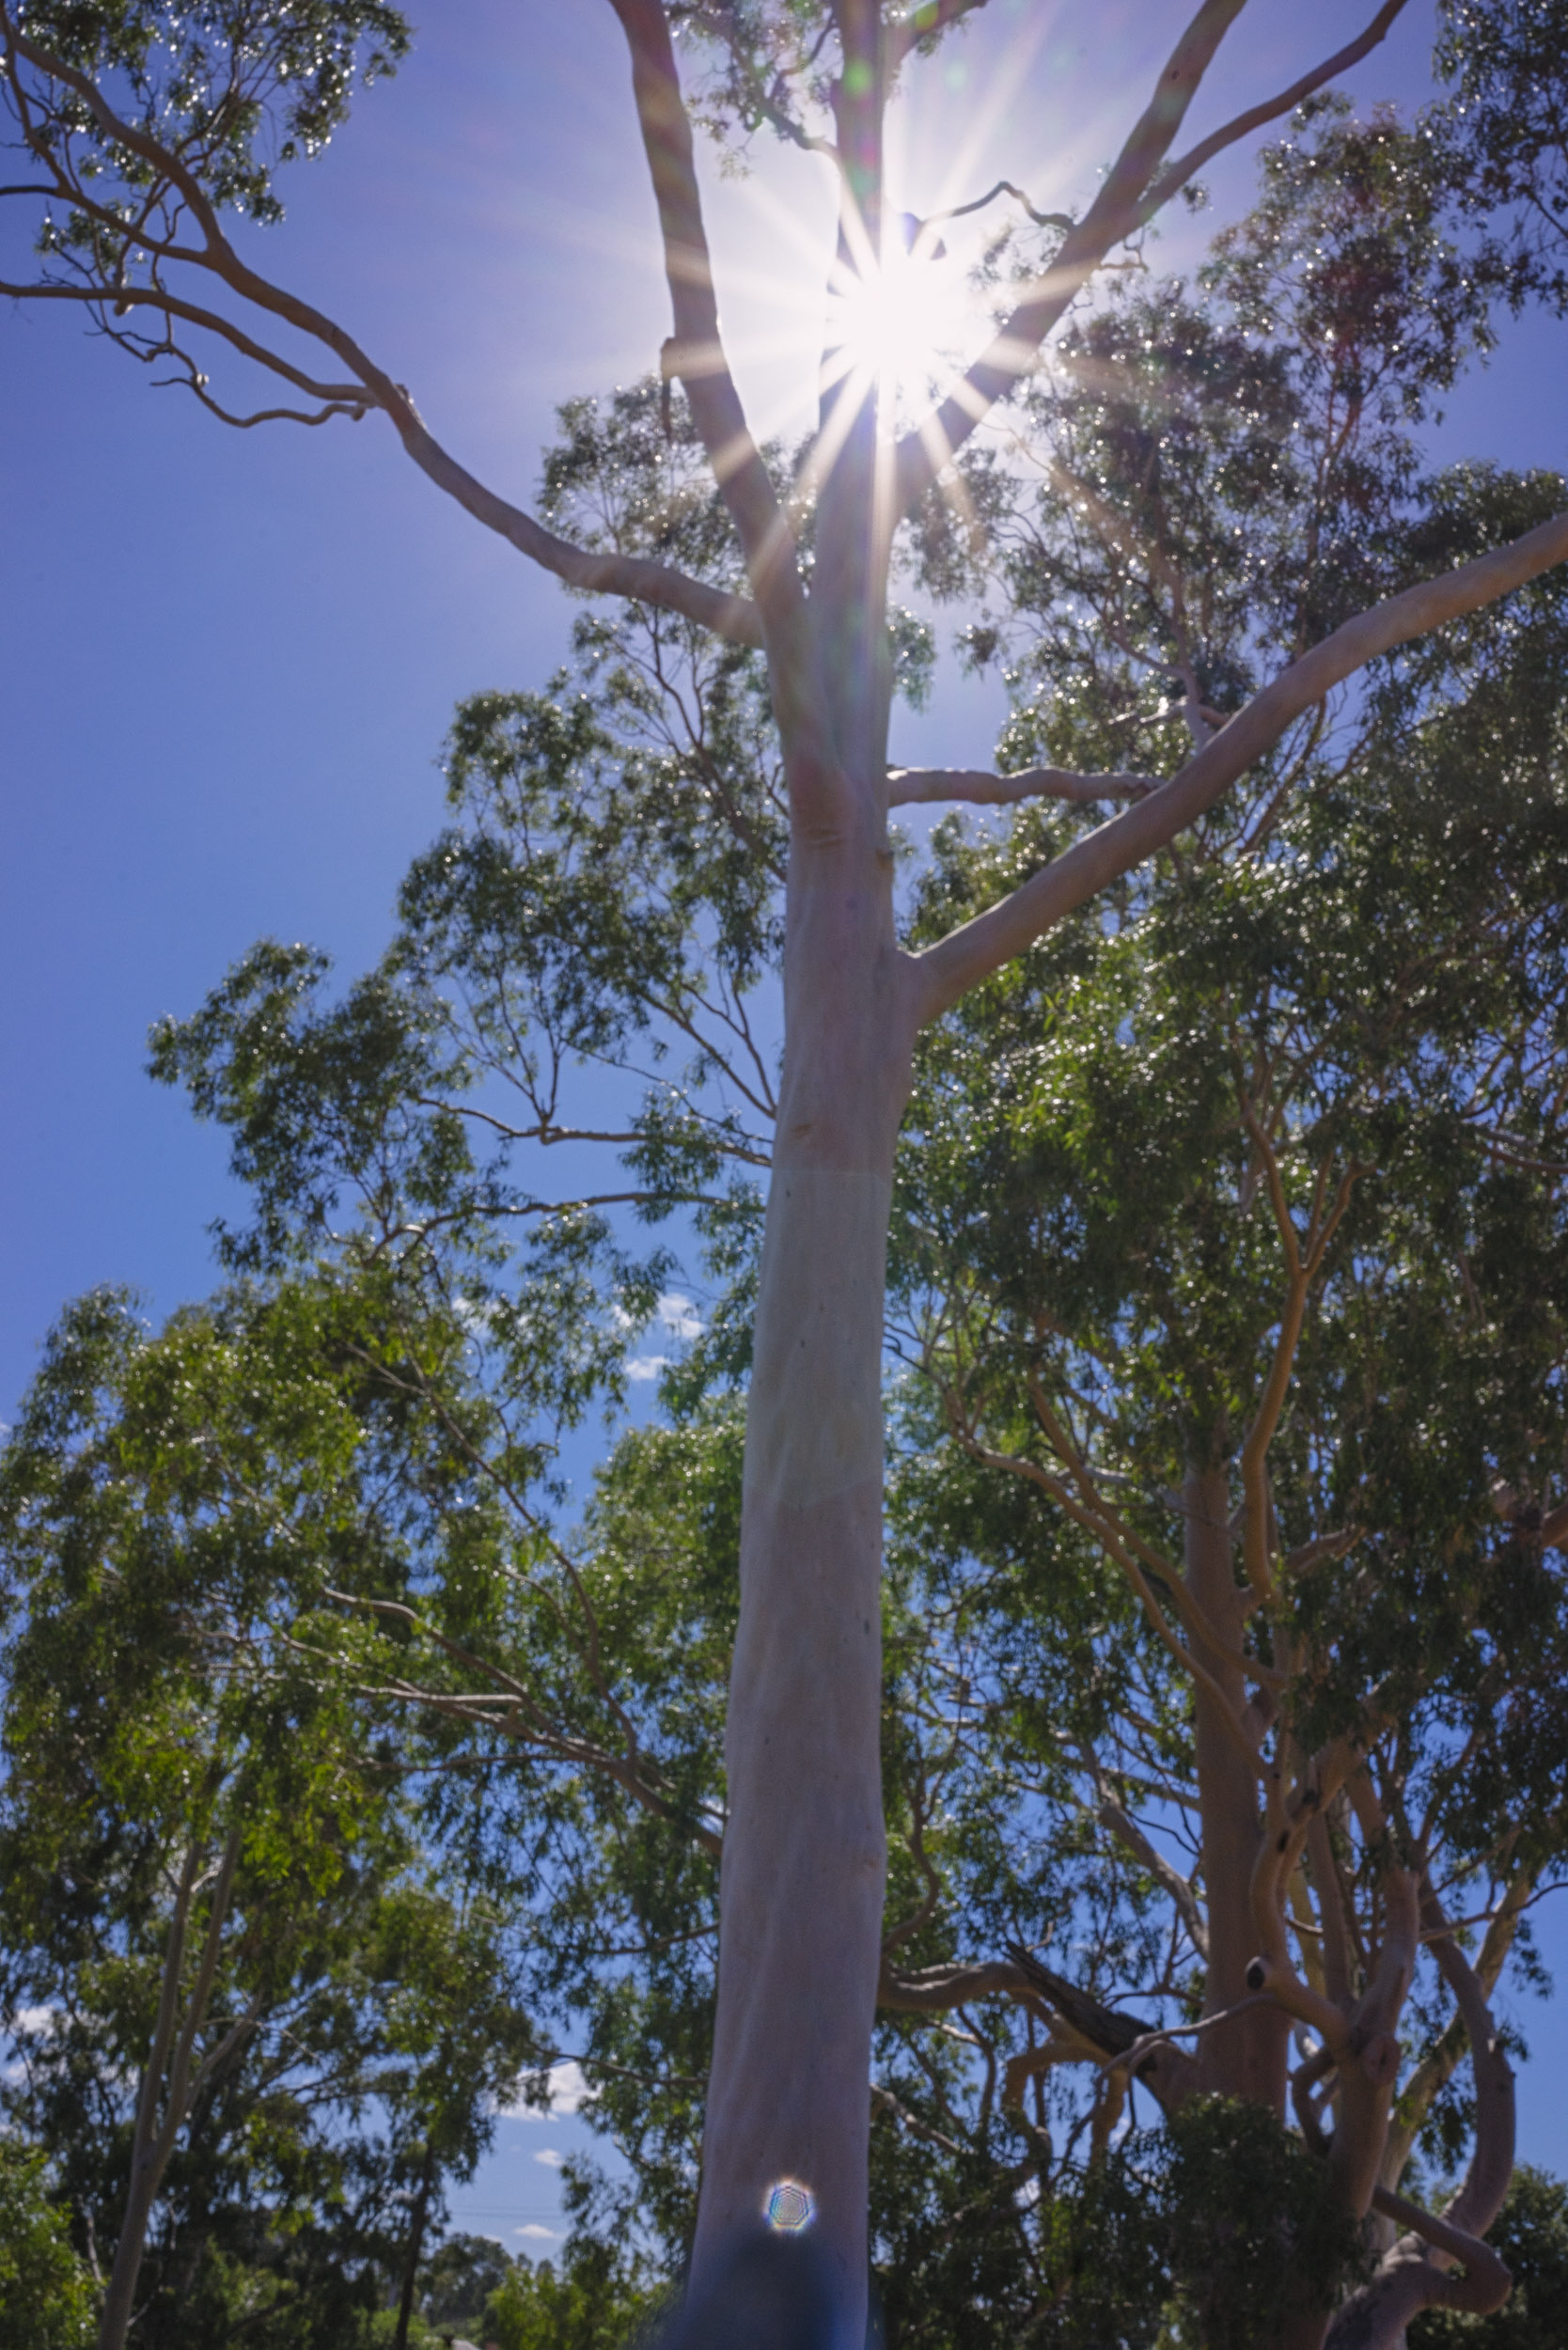
Without a lenshood the lens exhibits quite pronounced ghosting flare. Note the discolourateion on the tree trunk halfway down and the polygonal shape on the trunk at the bottom of the frame. At f22 the sunstars are pronounced, but aren’t that well defined.

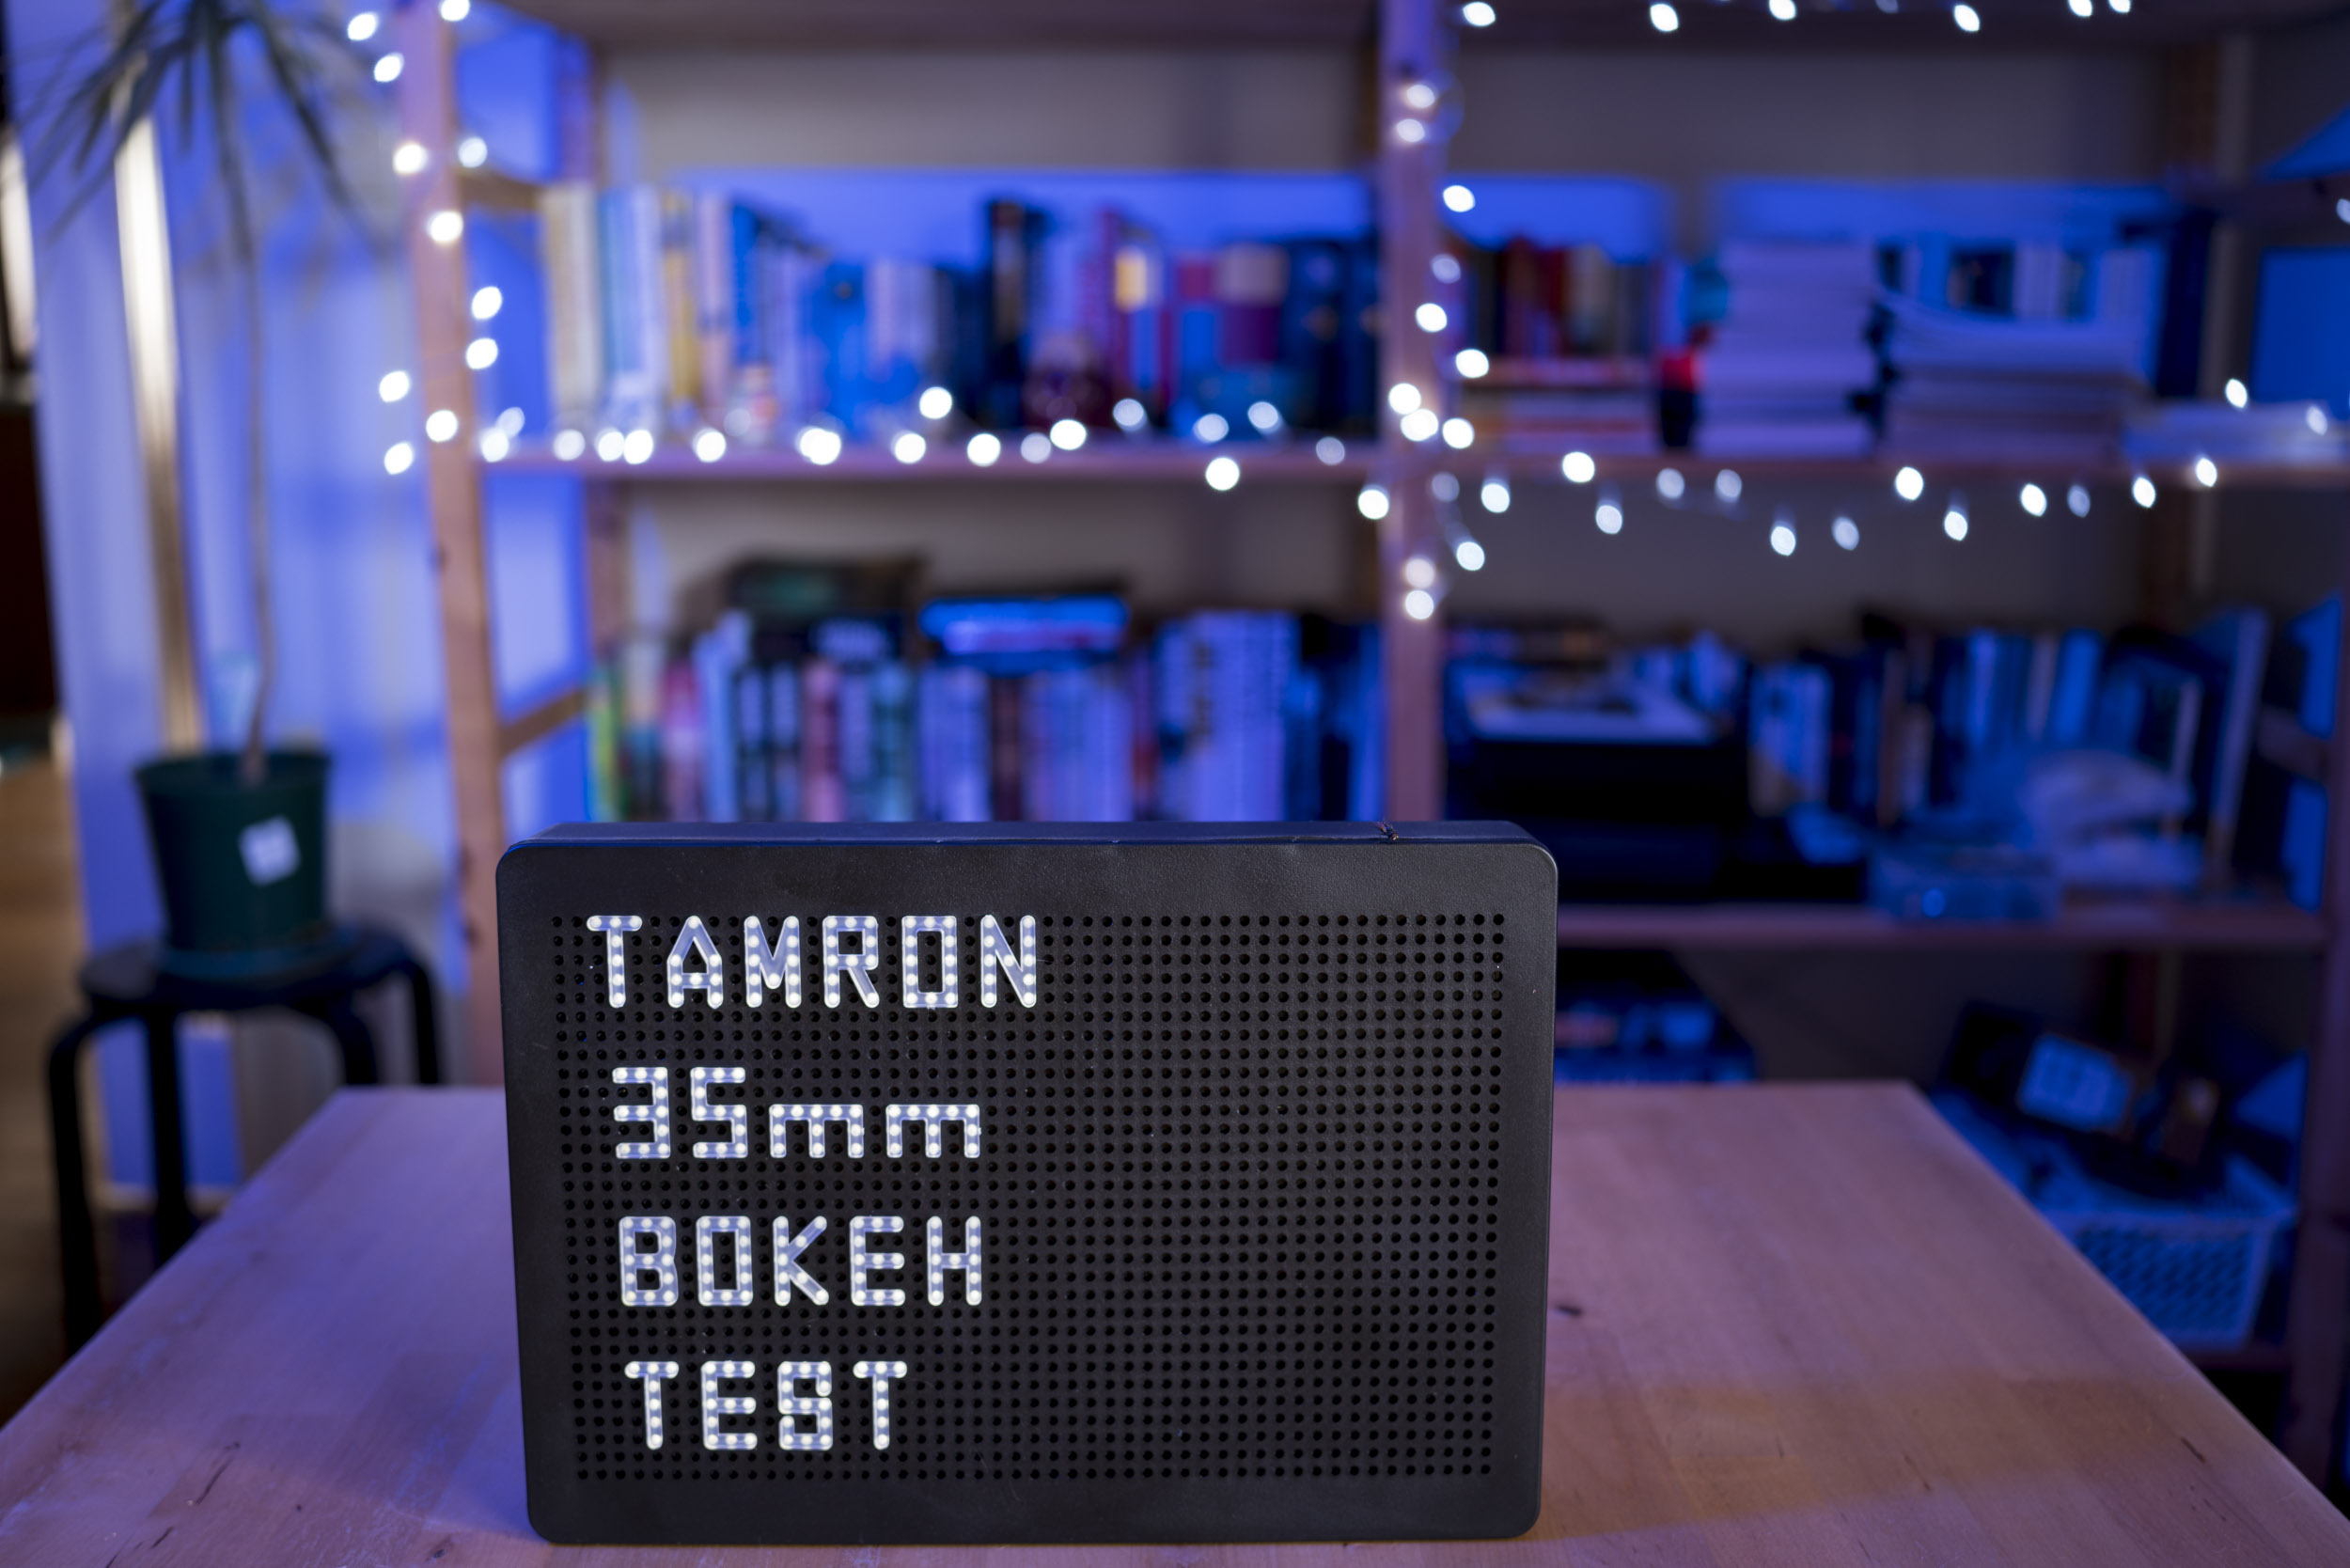
Flare resistance is a bit on the pedestrian side without the lens-hood with ghosting visible. The lens-hood is included in the box for a reason so use it. The seven bladed iris produces what to me are quite attractive sun-stars. Speaking of how the lens handles specular highlights the bokeh is not what I would call thrilling but it is not offensive either.  Wide open in the centre there are round balls with faint onion rings present from moulded aspherical element. I suppose the final polishing wasn’t as smooth as that on more expensive lenses as a cost cutting measure. The edges of the balls are not smooth, they have a fuzzy appearance as the light bleeds into the darker areas which is a form of halation. At the edges of the image the bokeh balls take on that elliptical cats eye shape. By f8 the bokeh balls take on a definite polygonal shape.

In the bokeh test we can see quite nice round balls in the centre of the image wide open, but on closer inspection onion rings are present and the edges have a fuzzy appearence to them. At the edge of the frame the balls have a definite cats eye shape. As the lens stops down the bokeh balls take on a polygonal shape which is really apparent from f8 and beyond.


Click on the image to see larger.

Comparison 

The Olympus OM Zuiko 35mm f2 mounted on a Sony A7r.

Is a cheap auto focusing lens worth getting over a classic manual focusing version? Well to find out I’m comparing the Tamron 35mm f2.8 lens to the Olympus OM Zuiko 35mm f2 lens. Forty five years separate the two optical designs and a lot has changed. There are several different version of the Olympus lens. It had a long production run from 1974 to 2002. I’m using a later multi-coated version. This MC version is 43mm in length, 240g in weight and has a filter thread of 55mm. It has an optical construction of eight lens elements in 7 groups and a minimum focusing distance of 0.3m. When it’s performance is studied we can see there is slight barrel distortion evident in the test image. CA is present when wide open and clears up on stopping down Wide open the lens is quite soft and lacking in contrast both in the centre and at the edges. Both sharpness and contrast improve in the centre when stopped down to f8. The edges show some signs of improvement but not as much as the centre. 

Our test subject for the comparison.

Comparing the two lenses in an actual real world shooting scenario we can see that with both lenses set to an aperture of f2.8 in the centre of the frame there is virtually no difference between them and I’d say they they are equal. In the corners, however, it is a very different story. The Tamron has a good level of sharpness while the Olympus is very soft. Stopping down to their respective minimum apertures – f22 for the Tamron and f16 for the Olympus -we see again in the centre that there is just a very marginal difference. In the corner the Tamron is better by a gnat’s whisker. Just remember that the Olympus was given an advantage. The Tamron shot wide open at f2.8 while the Olympus was stopped down at to f2.8 allowing an improvement in optical performance. At f16 the Olympus didn’t suffer the amount of diffraction the Tamron did at f22.

A comparison between the Tamron 35mm and the Olympus 35mm at f2.8. Click on the image to see it larger.


The same again but at f22.

Conclusion

When Sony launched the original A7 and A7r in 2014 critics poured scorn over the nascent system by saying there were no lenses. Early adopters divided into the system and tried their hand at adapting lenses they did have to fill the gaps in the line up. Fast forward to 2021 and Sony have done a tremendous job at fleshing out their line up. But the most significant thing is that Sony allowed third parties to access the lens mount protocols and this has meant that are lenses that range in price from decidedly wallet friendly all the way to those that would make a trust fund baby wince. At the time of testing the Tamron lens is selling for $350 AUD (which is the equivalent of being given away with a McDonalds Happy Meal in the USA). Looking on EBay the Olympus is selling for between $300 to $700 AUD depending upon condition and version. The version I have would count as a mint late model which would place it in the upper range. So the question is whether having a new autofocus  lens is worth more to you than having a potentially more expensive 20-40 year old lens. Well I had the Olympus lens left over from OM film days (along with quite a few others) and I actually got a secondhand Sony A7r camera so I could use the Olympus lenses. I was very happy with that arrangement. The Tamron registered on my radar because of its macro capabilities.

So you want to go full frame mirrorless with a 35mm prime lens  but don’t want f1.2 lenses or can’t afford them then buy the Tamron. Don’t want want to carry around a lens that is capable of blocking the Suez Canal buy the Tamron. It is nowhere near a perfect lens. It is a modest lens, with a modest price and with a better than modest performance. So with what it costs and with what it can do it is a great buy.

Olympus m.Zuiko 45mm f1.2 Pro Lens


As usual there is a video for those that prefer or the full written piece is below.


The Olympus m.Zuiko 45mm f1.2 PRO lens mounted on an EM1 mk ii.

The Olympus m.Zuiko 45mm f1.2 Pro Lens was announced in by Olympus back in October 2017 as one of their trio of f1.2 lenses. The others being the 17mm and 25mm. According to Olympus they were designed to “have beautiful defocusing effects” and “beautiful feathered bokeh to make your image stand out” (https://shop.olympus.com.au/m-zuiko-ed-45mm-f1-2-pro). In the case of the 45mm (and I suspect the other two) the lens is designed so that spherical aberration is not fully corrected. This means that as light rays enter the lens only those that pass through the centre of the lens are made to come together at the focus point. The rays at the edges focus slightly in front of that point and this causes the bokeh to have a gentle roll off – the so-called “feathered bokeh”. Olympus themselves claim this matches “classic” older lens designs. At this point it should be noted that spherical aberration and chromatic aberration are different. Spherical aberration occurs when a single wavelength of light or colour cannot be focused whereas chromatic aberration occurs when a lens cannot focus the red, green, and blue wavelengths on a single point. Although Olympus claims to match the performance of older classic lenses they have chosen a lens design that is very different from them.


Lens Construction and Build Quality

Olympus 45mm f1.2 lens has 14 elements in 10 groups with one ED element, four HR element, and one aspherical element.


Focal Length 45mm (90mm in full frame equvalence)
Angle of view 27º
Minimum focusing distance 50cm
Maximum magnification 0.1 X
Lens construction 14 elements in 10 groups with one ED element, four HR element, and one aspherical element
Maximum aperture F1.2
Minimum aperture f16
Diaphragm 9 curved blades
Focusing Auto focus – yes, MSC mechanism making fast and silent AF possible in video mode.

Manual focusing – the focusing ring can be pulled back to engage a clutch mechanism with hard stops at each end.

Filter size 62mm
Dimensions 85mm (h) x 70mm ⌀
Weight 410g
Other features Hermetic sealing making the lens dust proof, splash proof, and freeze proof. 60529 IPX1 IP rating.


The lens mount of the Olympus 45mm f1.2 lens. The mount has an ‘o’ ring that contributes to its 60529 IPX1 IP rating.


To see how this differs from an older classic design lets compare it to Olympus OM Zuiko 50mm f1.4 which was first produced in 1971 and remained in production until 1984. 


Olympus OM Zuiko MC 50mm f1.4


Focal length 50mm 
Angle of view On 35mm 43º, on micro four thirds 21º
Minimum focusing distance 45cm
Maximum magnification 0.15 X
Lens construction 7 elements in 6 groups
Maximum aperture f1.4
Minimum aperture f16
Diaphragm 8 curved blades
Focusing Manual focus with a straight helicoid
Filter size 49mm
Dimensions 36mm (h) x 60mm ⌀
Weight 230g


The 45mm f1.2 dwarves the f1.8 version.


Comparing the Olympus 45mm f1.2 to the Canon EF 50mm f1.8. On their respective bodies they both offer a similar field of view.


The 45mm f1.2 mounted on an Olympus EM1 mk i compared to the Voigtänder 75mm f2.5 Color-Heliar mounted on a Sony A7r. Both a ideal focal lengths for portraiture.

Physically this is a large lens. It dwarfs my Olympus 50mm f1.4, my Canon EF 50mm f1.8 and my Sony FE 50mm f1.8. It is a smidge larger than the Olympus m.Zuiko 12-40 f2.8 Pro and 27g heavier. The 45mm f1.2 follows the look of the other lenses in the Pro line and it also has a L-Fn button which can be programmed to various functions on Olympus cameras. In the hand the lens is reassuringly solid, it has that dense feeling that quality optics have. The focusing ring is nice and large and has the same ribbing that all the other lenses have in the Pro line. Like the other Pro lenses the 45mm f1.2 enables manual focusing by pulling back the focusing ring to engage a clutch to give a nice smooth focus throw of about 110º that has hard stops at either end. Combined with focus peaking this makes for manual focusing nirvana. As to what the lens is made out of this is hard to say, the lens mount is chrome plated brass, parts of the lens barrel have a metallic feel, and other parts feel plastic. Is this a problem? I don’t think so. For certain applications metals can be a poor choice and high quality engineering plastics such as ABS make better sense. In fact Sigma makes a big deal out of the use of their Thermally Stable Composite (TSC) which is substantially stronger than conventional polycarbonates while having similar thermal expansion properties to aluminium. Bottom line the 45mm f1.2 feels nice in the hand and is easy on the eye.


Optical Performance


The Olympus m.Zuiko 45mm f1.2 PRO lens is sharp wide open.


Lens sharpness test at f1.2 and f4. Click on the image to see it larger.

Image sharpness in the centre of the frame wide open is good and reaches its best at f4. The corners wide open are less sharp than the centre, however, by f2.8 the sharpness and contrast improves considerably and the lens reaches optimum sharpness at f4. By f8 the image starts to soften due to diffraction. Vignetting is also present wide open but this disappears at f4. There is a minute amount of pincushion distortion present, but unless you are shooting very demanding architectural work then it is largely unnoticeable. Chromatic aberration is present on high contrast edges, but it is very slight and easily removed in post. Longitudinal chromatic aberration is also present, but it too is very slight and not painfully obvious which is good as it is quite difficult to get rid of in post. All this is managed using firmware corrections. I like to turn these off using RAWTherapee to see how much correction is going on beneath the hood so to speak. The amount of vignetting is greater than the corrected images but it still clears up by f4. The pincushion distortion is also more evident. All in all the firmware corrections plus topnotch lens design make a lens that performs very well.


Chromatic aberration is well controlled and what little there is is easily fixed in post.


Longitudinal Chromatic aberration.


With regard to resistance to lens flare pointing the 45mm f1.2 at a very point light source shows it is quite prone to ghosting flare – images of the lens diaphragm as colourful bright spots. This is more evident on lenses with complex constructions with lots of lens elements. The red blobs in the photo are not lens defects. They are caused by light being reflected  off of the sensor surface back onto the rear element. As each pixel is reflected it causes a grid pattern. Unfortunately the smaller lens flange distances on mirrorless cameras means this phenomena is more apparent than on a DSLR with their great lens flange distance.


The Olympus 45mm f1.2 is quite prone to flare so it is advisable to use the included lens hood.


The Olympus 45mm f1.2 is quite prone to flare so it is advisable to use the included lens hood. At f16 the sun stars are quite pronounced.


f1.2 bokeh balls test. In the centre of the frame nice round and smooth bokeh balls with no evidence of any onion rings. At the edgeges you can see cats eye shapped balls. Click on the image to see it larger.

Olympus make great claims about the bokeh, or more importantly the feathered bokeh of this lens. Up until the announcement of this line of lenses I’d never heard the term feather bokeh before and to be honest I’m not all that sure about what it is and how that you quantify it. I guess in simple terms Olympus means that edges of the bokeh balls are not harsh and to quantify how feathered they are we’ll have to make some comparisons. At f1.2 the centre of the frame has nice round bokeh balls with no evidence of any onion rings. Onion rings occur with the use of ground aspheric lens elements. Basically the grinding process leaves a series of ridges which can be seen with a defocused point source. The biggest problem with them is that for most people they go unseen, but once seen they can’t be unseen. At the edges of the frame there is cats eye shaped bokeh – this is caused by mechanical vignetting from the lens barrel.  At f5.6 I was quite surprised to see star burst effects forming around specular highlights, I was expecting them to start appearing at the f11 mark. By f16 the bokeh balls in the corners have become spherical.

So the question is what to compare the Olympus 45mm f1.2 to? The most obvious contender is the 45mm f1.8. In their advertising blurb for the f1.2 Olympus compare the lens on an Old EM1 mk ii to a full frame DSLR with 85mm lens. Interestingly having made such a bid deal about the bokeh the only comparison is made with weight so I’ve decided to make the comparison using weight and bokeh quality with the Canon EF 50mm f1.8 on a Canon EOS550d. The 50mm lens has an equivalent focal length of 80mm in full frame terms. The nearest full frame equivalent I’ve got on hand is the Cosina Voigtländer 75mm f2.5 Color-Heliar on a Sony A7r2. Finally as I’ve already talked about the Olympus OM Zuiko 50mm f1.4 I’ll add it to the list with it mounted to the Olympus EM 1 mk ii. The older Olympus and the Canon and Voigtländer are also considered classic lens designs.

Olympus OMD EM1 mk ii with Olympus 45mm f1.2 Pro lens 984g
Olympus OMD EM1 mk ii with Olympus 45mm f1.8 737g
Canon EOS550d with Canon EF 50mm f1.8 mk ii 601g
Sony A7r2 with Voigtländer 75mm f2.5 Color-Heliar 932g
Olympus OMD EM1 mk ii with Olympus OM Zuiko 50mm f1.4 980g

So the Olympus 45mm f1.2 combo is the heaviest. Lets look at the bokeh. With the three Olympus lenses I’ll just compare the lenses at widest aperture of the slowest lens. With the other two I’m going take equivalency into account so 45mm f1.2 on the Olympus is roughly equivalent to 50mm f1.8 on the APSC sensor and the Olympus’ f1.2 is equivalent to f2.5 on the full frame sensor. 


Bokeh comparison between Olympus 45mm f1.2 and the Olympus 45mm f1.8. Click on the image to see it larger.


First cab off the rank is the Olympus m.Zuiko 45mm f1.8 lens. It has an optical construction of 9 elements in 8 groups, weighs in at 116g and has a 37mm filter thread. This little lens is an absolute gem and I use it a lot to do both stills and video product shots. It currently retails for $1300 AUD less than the f1.2. Wide open at f1.8 there is vey little to distinguish it from the more expensive lens at f1.8. So I would have to say unless you absolutely need an aperture of f1.2 then save your money.


Bokeh comparison between the Olympus 45mm f1.2 and the Olympus OM 50mm f1.4 at f1.4. Click on the image to see it larger.


The Olympus OM Zuiko 50mm f1.4 was introduced way back in 1972 with the original OM1. The lens used here is the revamped version with improved coatings that came out in 1984.  The lens construction is very simple with 7 elements in 6 groups and no fancy glass. Wide open it is not the sharpest lens and the bokeh balls are irregularly shaped, but stop it down to f2 and the bokeh is just as good as the 45mm f1.2 at f2. It’s possible to pick this lens up for about $100 on eBay and for $150 you can get it with a film SLR such as an OM1 or 2.


Bokeh comparison between the Olympus 45mm f1.2 at f1.2 and the Canon EF 50mm f1.8 at f1.8. Click on the image to see it larger.


When you put the Canon EF 50mm f1.8 on an APS-C camera such as my EOS550d it has a focal length that is equivalent to 80mm on full frame. It has a simple double-gauss design of 6 elements in 5 groups. This model is the mk ii version which was introduced in 1991 and is sometimes called the “plastic fantastic” because of its plastic body and lens mount. At the edges and in the corners of the frame the Canon has more pronounced cats eye bokeh, but at the centre it is nice and round. Thanks to only having a diaphragm consisting of 5 blades the bokeh becomes polygonal as it is stopped down. No longer in production it can be picked up for around $60 on eBay or you could really push the boat and buy the latest version which retails for $200 AUD. 


Bokeh comparison between the Olympus 45mm f1.2 at f1.2 and the Voigtländer 75mm f2.5 Color-Heliar at f2.5. Click on the image to see it larger.


The last lens is the Voigtländer 75mm f2.5 Color-Heliar mounted on a full frame body.The original Heliar design was developed in 1900 by Dr. Hans Harting as a symmetrical 5-element variant of the simple anastigmatic and well colour-corrected Cooke triplet. In 1902 the design was revised correcting astigmatism, curvature and coma better than the original design. That new design was asymmetrical six elements in five groups. In 1950 Dr. A.W. Tronnier refined the design even further to produce the Color-Heliar. When Cosina revitalised and relaunched the Voigtländer line they revived the Heliar concept with the 75mm f2.5 Color-Heliar. Cosina wanted to recreate the German optical aesthetic and engineering quality from the 1950s. The lens construction by modern standards is pretty basic with 6 elements in 5 groups and the 10 aperture blades bodes well for nice bokeh. Wide open at f2.5 it has the same depth of field characteristics as the Olympus at f1.2. It is not as sharp as the Olympus wide open but the tonal transitions are very smooth. The bokeh balls are nice and round at the centre, but at the edges and corners they take on the elliptical cats eye shape. This lens is longer in production and for a while it was possible to pick one up for around the $300 mark second hand, but the interest in adapting classic lens to mirrorless cameras has seen prices rise to almost $700.


Auto Focus Performance


the reluctant bull terrier test


Shooting stills the AF is very quick and accurate. Using the reluctant bull terrier test I shot a sequence of 25 frames using continuous autofocus  at 10 frames per second with an EM1 mk i which does not have the latest iteration of Olympus’ on sensor phase detection AF. At f4 all the shots were in focus. Switching out the mk i for the mk ii with its better AF systemI shot a 71 frame sequence at f2 at 10 frames a second and only 6 frames were slightly soft.

Shooting video on the Olympus EM 1 mk ii using face tracking the camera and lens responds quickly and smoothly without hesitation. Many m4/3 users shoot video using Panasonics cameras so I put the 45mm f1.2 on my G85 and set it it use face tracking. The results were dismal. There was a lot of hunting, and if and when the camera acquired focus it would quickly drift off. Having had good success with the EM1 I can only put this down to Panasonic’s use of DFD contrast based autofocus and not the lens.


Conclusion


The fantastic  little 45mm f1.8 is only $500 new and is just as sharp. The only place where it is found wanting is the maximum aperture.


There is no doubt that the Olympus m.Zuiko 45mm f1.2 PRO lens is a very good lens. It is well built and optically performs very well. The only thing that counts against it is its price when compared to other options. In the last quarter of 2020 Olympus ran a promotion in many parts of the world enabling purchasers of the EM1 to claim a free lens from the f1.2 trinity. If you were one of those and chose the 45mm then you got a great lens and I hope that you really enjoy it. If you are a committed Micro Four Thirds user and were wanting to purchase this lens today at the street price of $1800 I would suggest that your money could be better spent. The fantastic  little 45mm f1.8 is only $500 new and is just as sharp. The only place where it is found wanting is the maximum aperture. If you are not so wedded to the idea of 45mm but just wanted a fast short telephoto then I’d seriously consider the Sigma 56mm f1.4 which at $750 is great value and a seriously good performer.

If you are just getting into photography and want a camera and lens combo that gives enormous creative control over depth of field then you’ve got to look at full frame cameras ($1800 will get you a new one less if second hand) and pick up an 85mm f1.8 where Canon, Sony and Nikon all have offerings between $600-900 new. 

For video the 45mm f1.2 is a nice option as on the right camera it can autofocus extremely well and the the provision of a manual focus clutch that gives hard stops makes it very useful for manual focus pulls. If autofocus isn’t important to you then there are a huge number of older classic f1.2 and f1.4 lenses that can be picked up very cheaply.


Example Images
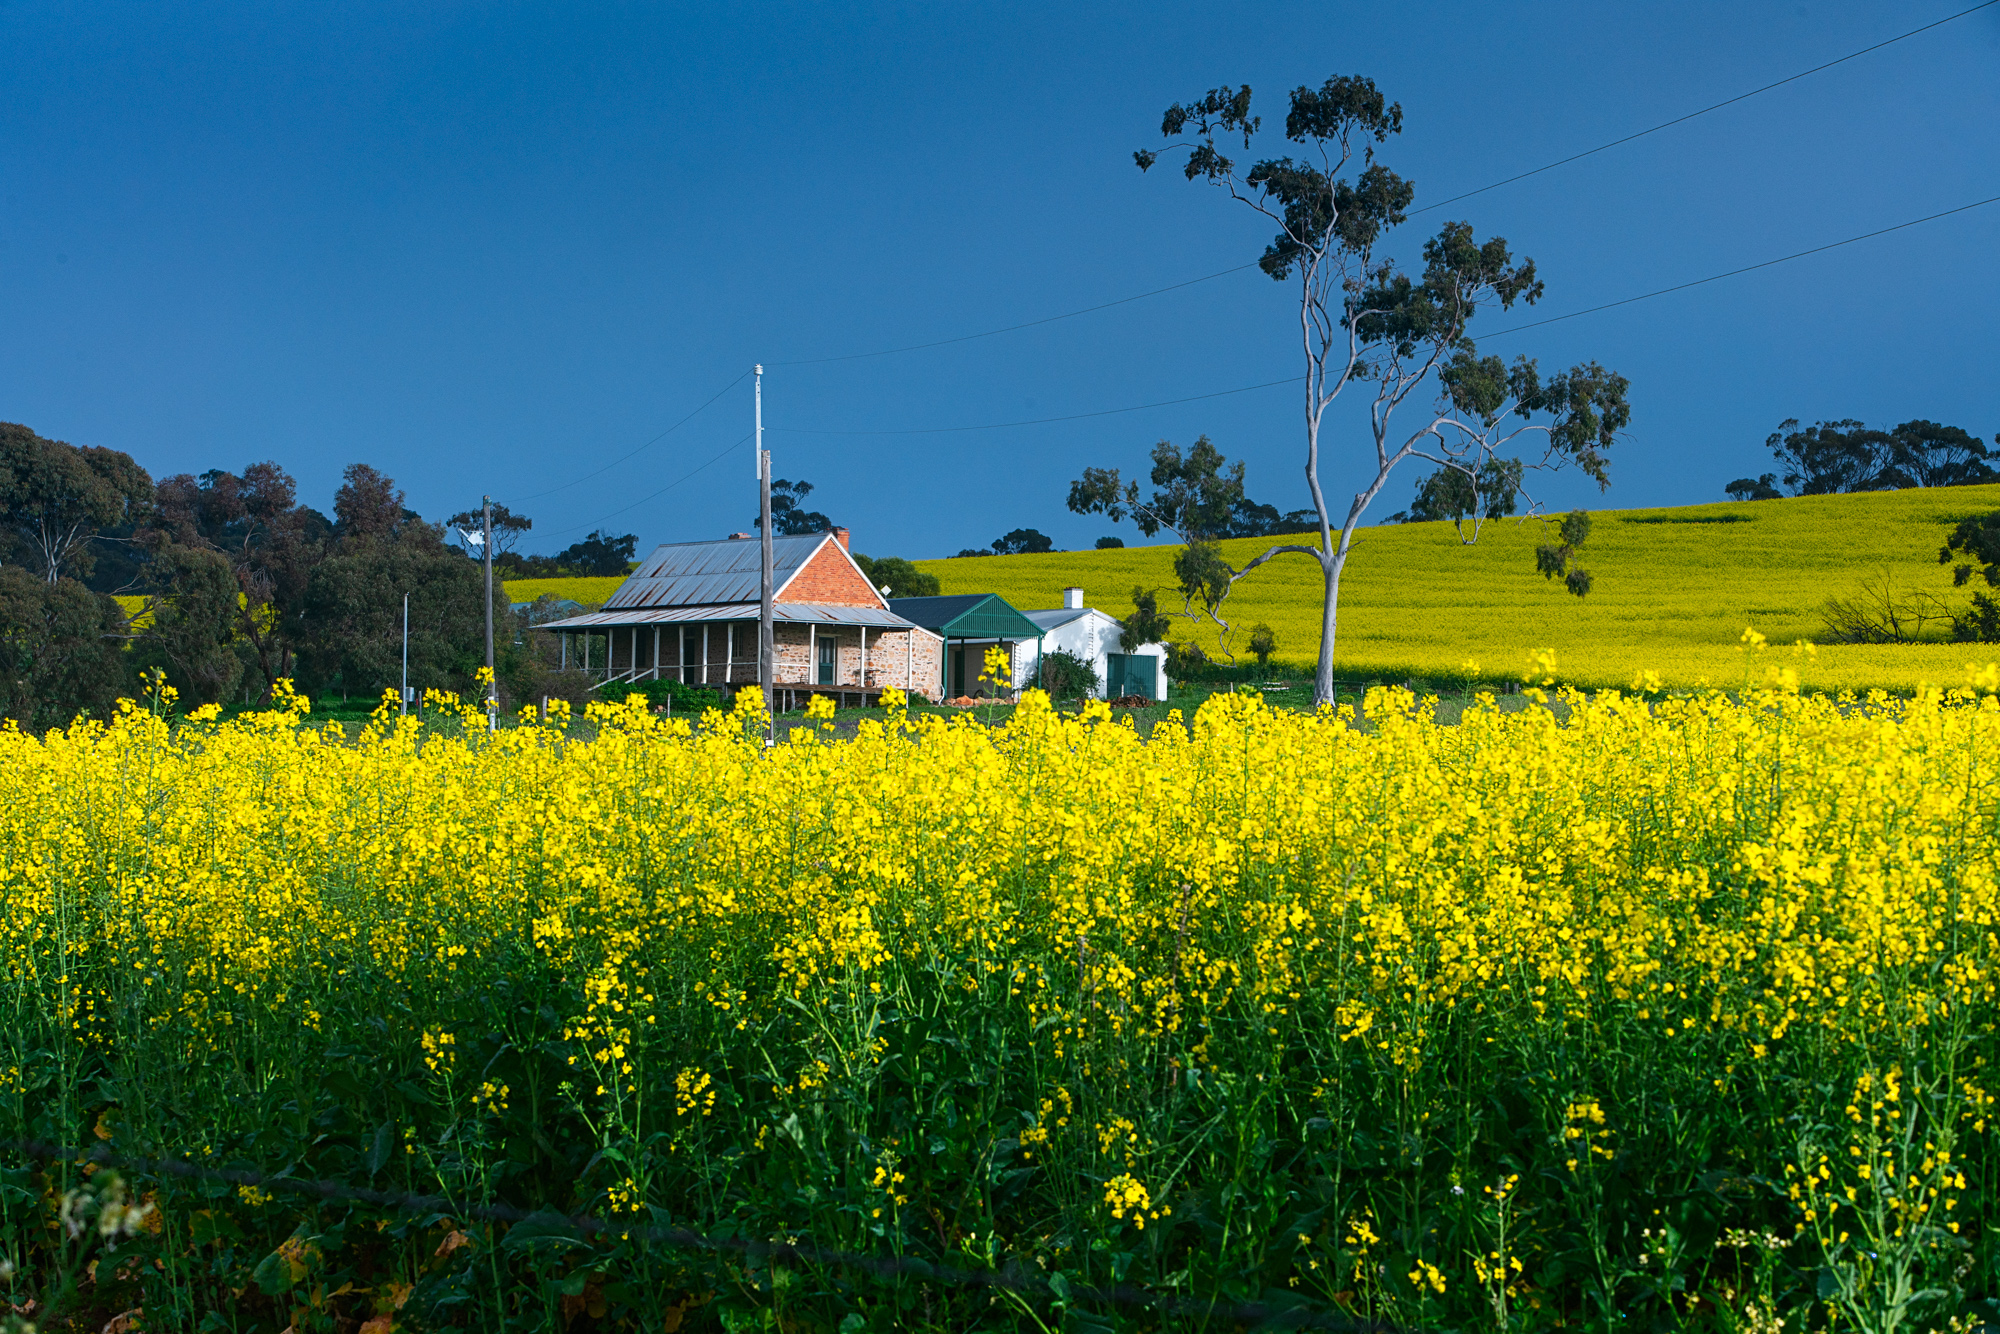
 

Wide open the Olympus m.Zuiko 45mm f1.2 PRO lens gives a nice please rendition with gentle tonal transitions.


The close focusing capabilities of the Olympus 45mm f1.2 are impressive and couple this with pleasing bokeh it makes for a very nice lens with which to do product photography or still life.


The Olympus 45mm f1.2 also makes for a good lens for equine portraits.


Frida at 45mm f1.2.


Taken at the minimum focusing distance of 50cm.

Røde Stereo VideoMic Pro


Røde Stereo VideoMic Pro.


I’ve had a Røde Stereo VideoMic Pro since December 2017. I’ve been absolutely delighted with it. This is not a microphone for interviews or blogging, no it’s forte is picking up ambient sound with “a wide stereo image with natural depth”. I use it when I’m out in the bush trying to get wildlife and scenic footage. So I was a little upset when it developed a problem and would only record sound on one channel. I decided to send it back to Røde, who are an Australian company, and see if it could be repaired. The customer service rep was straight onto the case and really helpful and because I’d registered for the ten year warranty they would take a look at it. After a few days I was sent an email saying that they’d fixed it and it was in the post. I was at this stage well impressed. But wait – more was to come. When the parcel from Røde turned up on my doorstep imagine my surprise when I opened it and found a brand new microphone. A great product backed with great service.


Røde Stereo VideoMic Pro mounted on a Panasonic Lumix G85 camera.

Optical Antithesis


A review of the Sigma 16mm f/1.4 DC DN lens for m4/3


The Sigma 16mm f1.4 shown mounted to an Oympus OMD EM1 mk 1 which is one of the larger m4/3 cameras.


I’ve said many times on this blog that my favourite focal length is 35mm (35mm equivalent) which give a diagonal angle of view of 63.4º To me it is a relaxing normal view, I find 50mm a bit too tight and 28mm a bit too “loose”. So when I migrated from so-called full frame to micro four thirds in 2010 one of the first lenses I bought was the Olympus m.Zuiko 17mm f2.8 pancake lens. Actually at the time there were only three lenses in the system the 17mm, a 14-42mm kit lens and the 40-150 telephoto kit zoom and I ended up getting them all.


Olympus m.Zuiko 17mm f2.8 shown on an EP5. The lens was the first prime introduced for the Olympus’ m4/3 system.


The 17mm was equivalent to 34mm in in full frame terms and has a diagonal angle of view of 65º, so close enough as not to make any real difference. It wasn’t a well received lens despite being what initial advocates of the micro four thirds said they wanted – pancake lenses. It’s slow maximum aperture of f2.8, slow and noisey auto focus combined with less than stellar optical performance put many people off and they went for the much more expensive Panasonic 20mm f1.7 which had the virtues of being optically better, and having a faster maximum aperture. It still wasn’t great in the AF department though. But hey these were the early days of mirrorless technology and AF systems were not very quick and accurate then. But anyways I got the Olympus in a kit with my Olympus EP2 and I actually loved it. I could slip it mounted to the EP2 in my pocket which made it a great stealth camera combination and I used it to shoot my TransPerth-Transhumance project. I still use the lens today, mainly on my EP5. The area where I felt it was absolutely hopeless was video. The AF was too slow, too noisy (think angry wasp stuck in a jar) and I wanted a bit more subject isolation than the f2.8 aperture could give.


The Sigma 16mm f1.4 compared to the Olympus 17mm f2.8, 25mm f.1.8 and the 45mm f1.9.


The Sigma 16mm f1.4 is a physically large lens. Here it is shown with the Olympus 12-40mm f2.8 and 75-300 f4-6.3 zoom lenses.


So fast forward a few years and I’m shooting more and more video and I decide to get myself a better 17mm lens. In the intervening years Olympus had produced the very favourably received 17mm f1.8 and the eye-wateringly expensive f1.2 version. Panasonic had also come to the party with their Panasonic Leica Summilux 15mm f/1.7 lens. In fact I went to my local (if you can call 110Km away local) camera dealer to buy this lens and it was always out of stock which made me want it even more. But in the end I went for an outlier in the form of the Sigma 16mm f/1.4 DC DN lens. The reasons being that f1.4 is faster than f1.9, it was cheaper than the f1.2 and the difference between f1.2 and f1.4 is slight, and my dealer had it in stock. So what makes it and outlier? Well to put it bluntly it’s bloody huge. It has a 67mm ⌀ filter thread which compares to 37mm for the Olympus 17mm f2.8. It is bigger than the Olympus 12-40mm f2.8 and the Panasonic Leica 8-18mm f2.8-4 while being only a little shorter than the Olympus 75-300mm f4.8-6.7. The 16mm focal length equates to 32mm on full frame with a diagonal angle of view 68.1º so is a bit wider, but when used with the Panasonic G85 for 4K video this isn’t much of a problem as the camera crops in slightly. So how come this lens is so lardy I hear you all ask. Well this lens wasn’t designed for micro four thirds, it was initially designed for the Sony 6000 series cameras with an APS sized sensor where it equates to being a 24mm in full frame terms. To get a wide angle lens that’s fast and a good optical performance means lots of glass and glass is heavy, and this lens is large and heavy for APS format cameras. To get some additional return on their investment Sigma decided to offer the lens in micro four thirds mount hence it seeming a funny focal length and being bigger than necessary.


Vital Statistics

Olympus 17mm f2.8

Sigma 16mm f1.4

Diagonal angle of view 65º 68.1º
Optical construction 6 elements in 4 groups 16 elements in 13 groups
Diaphragm 5 rounded blades 9 rounded blades
Minimum aperture f2.8 F1.4
Maximum aperture F22 F16
Minimum focusing distance 20cm 25cm
maximum magnification ratio 0.11x 0.07X
Filter diameter 37mm 67mm
Dimensions ⌀ 57mm x 22mm (H) ⌀ 72.2mm x 92.3mm (H)
Weight 71g 405g
Internal focusing No Yes


In the hand the Sigma 16mm feels very dense and substantial. The lens body is made out of what Sigma calls a Thermally Stable Composite (TSC) which is substantially stronger than conventional polycarbonates while having similar thermal expansion properties to aluminium. The lens mount is made of chromium plated brass which should ensure a long life. The Sigma 16mm is advertised as being dust and splash proof but on closer reading of Sigma’s spec sheet there is only one seal and that is at the lens mount. The lens comes with a bayonet mount petal lens hood which has a ribbed grip to make attaching and detaching easier. While it is good that the lens comes with a hood it’s not the best implementation and feels quite insubstantial and can be fiddly to attach as it can foul and not lock home. There is a ribbed rubber focus ring of the fly by wire type – it feels smooth and easy to use. There are no other controls or switches which means if you want to switch between AF and manual focus you will have to use the camera controls for that.


The Sigma 16mm has an optical construction of 16 elements in 13 groups with 3 FLD (“F” Low Dispersion) glass elements, which offers performance equivalent to fluorite which exhibits less chromatic aberration than those utilising a traditional flint glass. There are 2 SLD (Special Low Dispersion) glass elements which also help to minimise chromatic aberration and 2 ASPH moulded glass aspherical elements which work to reduce optical aberrations. According to Sigma’s website the ASPH elements are polished with a tolerance of under 10 nanometers or 0.000001 millimetres which according to Sigma reduces onion ring bokeh.


Performance

100 % crops showing lens performance wide open and then at the best performing aperture.


In terms of autofocus the stepping motor is fast and accurate and very smooth when shooting video. I tested the lens on the OMD EM1 mk ii which has on sensor phase detect AF and on the Panasonic G85 which uses DFD technology – a variant of contrast detect auto focus that requires the lens to provide a profile to the camera to ensure fast and accurate AF. The Sigma does not have such a profile as these are limited at present to only Panasonic’s own lenses. Despite that there were no problems and I could detect no discernible difference between the Olympus and the Panasonic. The only downside in the AF department is that I can’t use the Pro Capture Low setting which gives up to 18 fps with auto exposure and AF tracking. This is no fault of Sigma’s as the option is only available with Olympus lenses.


Optically – well straight from the get go the Sigma is impressively sharp wide open corner to corner. The performance improves slightly (and it is only visible on my 4K screen at 300%) as you stop down. Diffraction sets in at f16 and this does soften the image. In terms of chromatic aberration, well wide open in high contrast situations it is apparent albeit slight and it is easy to correct in post. The lens is reasonably resistant to flare – but if you have a specular light source in the frame you will experience some veiled flare and ghosting. If you turn off the built in lens profile you can observe a slight barrel distortion, but switch on the profile and it is not visible. The bokeh balls this lens produces are more or less round when shooting wide open even at the edges of the frame and the transitions are nice and smooth. There is some onion ring bokeh which is the result of using moulded aspherical lens.Vignetting is not a problem and is very slight in the region of 1/2 stop.


Chromatic aberration is quite apparent on this lens. It is also quite prone to flare even when using the included lens hood.


Verdict

This slideshow requires JavaScript.


Being designed to have an image circle much larger than micro four thirds requires means that you are using the best performing part of the lens and this really shows. Just for giggles I compared the Sigma with my old Olympus. The Olympus is noticeably soft in the corners at all apertures and just average in the centre. It suffers badly from chromatic aberration. Vignetting is very apparent, in excess of 1 stop in the corners with the lens profile switched on and getting on for 2 stops when switched off. Physically, optically and figuratively the Sigma stands head and shoulders above the little Olympus. The only area where the Olympus wins out is its small size and that is why I’ll continue to use it when I want something small and compact. For every other occasion I’m reaching for the Sigma. The knock on effect is that I’m seriously wondering about replacing my Olympus 45mm f1.8 with the Sigma 56mm f1.4.

In The Bag

The video is the short version of this article with a slide show of the best of this year’s orchids at the end.


It’s not for nothing that Western Australia is referred to as the “Wildflower State”. There are over 13,000 species of plant to be found, with new discoveries added every year. If we narrow it down to my particular area of interest – orchids – there are 394 species of terrestrial orchids in the South West Corner of the state. Some of these species are so specialised that are confined to very small areas and found nowhere else. Some species will not bloom unless there has been a bush fire the summer before, others if the winter rains are delayed or are insufficient will not put a show on either. This means that no two years are the same. An example of this is my favourite spot near where I live is prolific with the number of orchid species found there. When I first went I was simply amazed by the number of fringed mantis and white spider orchids that were flowering. Over the ensuing ten years I’ve seen such a display of those species since. This year there was a carpet of purple and pink enamels like I’ve never seen before. So this not knowing quite what you are going to find adds to the whole experience. On a few occasions I may be lucky enough to be able to access the flowers by car and a short walk, but most of the time I end up walking through the bush for anything up to four hours.


Pink Enamel Orchid by Paul Amyes on 500px.com
Pink enamel orchid, Elythranthera emarginata. Mokine, Western Australia. Olympus OMD EM 1 mk ii with Olympus 60mm f2.8 macro lens. Aperture priority, exposure: 1/800 sec, f5.6 at ISO 400.


Purple Enamel Orchid by Paul Amyes on 500px.com
Purple Enamel Orchid, Elythranthera brunonis. Mokine, Western Australia. Olympus OMD EM 1 mk ii with Olympus 60mm f2.8 macro lens and Metz 64AF-1 flash. Exposure: Aperture priority mode, 1/40 sec, f8 at ISO 200 with -1 stop exposure compensation.


The Canon EOS 6d camera with 100mm f2.8 macro lens that I used to use for photographing orchids alongside the Olympus EM 1 mk ii with 60mm f2.8 macro lens that I use now.


I approach photographing orchids as I would shooting a person’s portrait – using off camera flash and reflectors to fill shadows, separate from the background, bring out the shape and textures. Too many botanic studies show indistinct photos where the subject does not fill the frame and the background is intrusive. To that end I use a macro lens of around 100 -120mm (35mm equivalent). It’s not because I’m necessarily shooting at a 1:1 ratio, it’s just because I’ve found there are very few zoom lens that focus close enough and have a fast aperture to allow control of depth of field.I used to use a Canon DSLR with a Canon EF 100mm f2.8 IS L lens and carry around a Manfrotto 143 Magic Arm Kit to support the lights. I made a video about using that setup some 7 years ago and that can be seen just below. Since making that video I added a full frame 6d, the Canon macro lens, and extra light and a set of TTL wireless flash triggers and consequently found myself schlepping 10-12Kg of kit into the bush on longer and longer forays. Something had to give – and my back did! So fast forward 7 years and I’m now using an Olympus OMD EM1 mk ii with Olympus 60mm f2.8 macro lens. I’ve not given anything up in terms of image quality with this change because I’m generally working at a base ISO of 200 with lighting which means all the usual objections to m4/3 about excessive noise and poor dynamic range have been taken out of the equation. The Olympus 60mm f2.8 is easily the optical equal of Canon’s EF 100mm f2.8 IS macro L lens at less than 1/2 the price and about 1/3 of the weight. The Manfrotto Magic Arm got binned as it was very heavy at 2.7 Kg and replaced with a Manfrotto Table Top Tripod Kit 209, 492 Long which weighs 454g. As far as lighting goes I’m using a Metz 64AF – 1 and an Olympus FL-600R flash with small soft box, snoot and honeycomb grid. The only thing that I have given up is radio TTL triggers for the flash, I’m using a TTL flash sync cable at the moment. I prefer to use the Metz unit when doing a lot of high speed sync work as it is the more powerful of the two. This may change in the New Year, it may not.


Lighting diagram for my basic lighting of an orchid.


The FL-600R is a flash with a guide number of of 50 (ISO200/m). In addition, it comes with a LED lightt for use when shooting video.


Other things in the bag include an 80cm 5 in 1 reflector – I only use the white reflector as the silver is too strong, the gold too garish. Some times I use the diffuser over a plant to cut down on ambient light levels. A Vittorinox CyberTool L is there. It has a good selection of small screwdriver bits that can most screws on a camera body, a set of pliers, wood saw, metal saw and file and a host of other doodads. I once re-assembled my Voigtländer 35mm f2.5 Color-Skopar with it while in on holiday in Beijing. Water – this can be in a 1L bottle for shorter expeditions or a 3L water bladder for longer ones. Extra clothing if needed, sunscreen and insect repellent to avoid nasty encounters. Batteries for camera and flash. Wallet of memory cards. That’s it. The whole process is very simple.